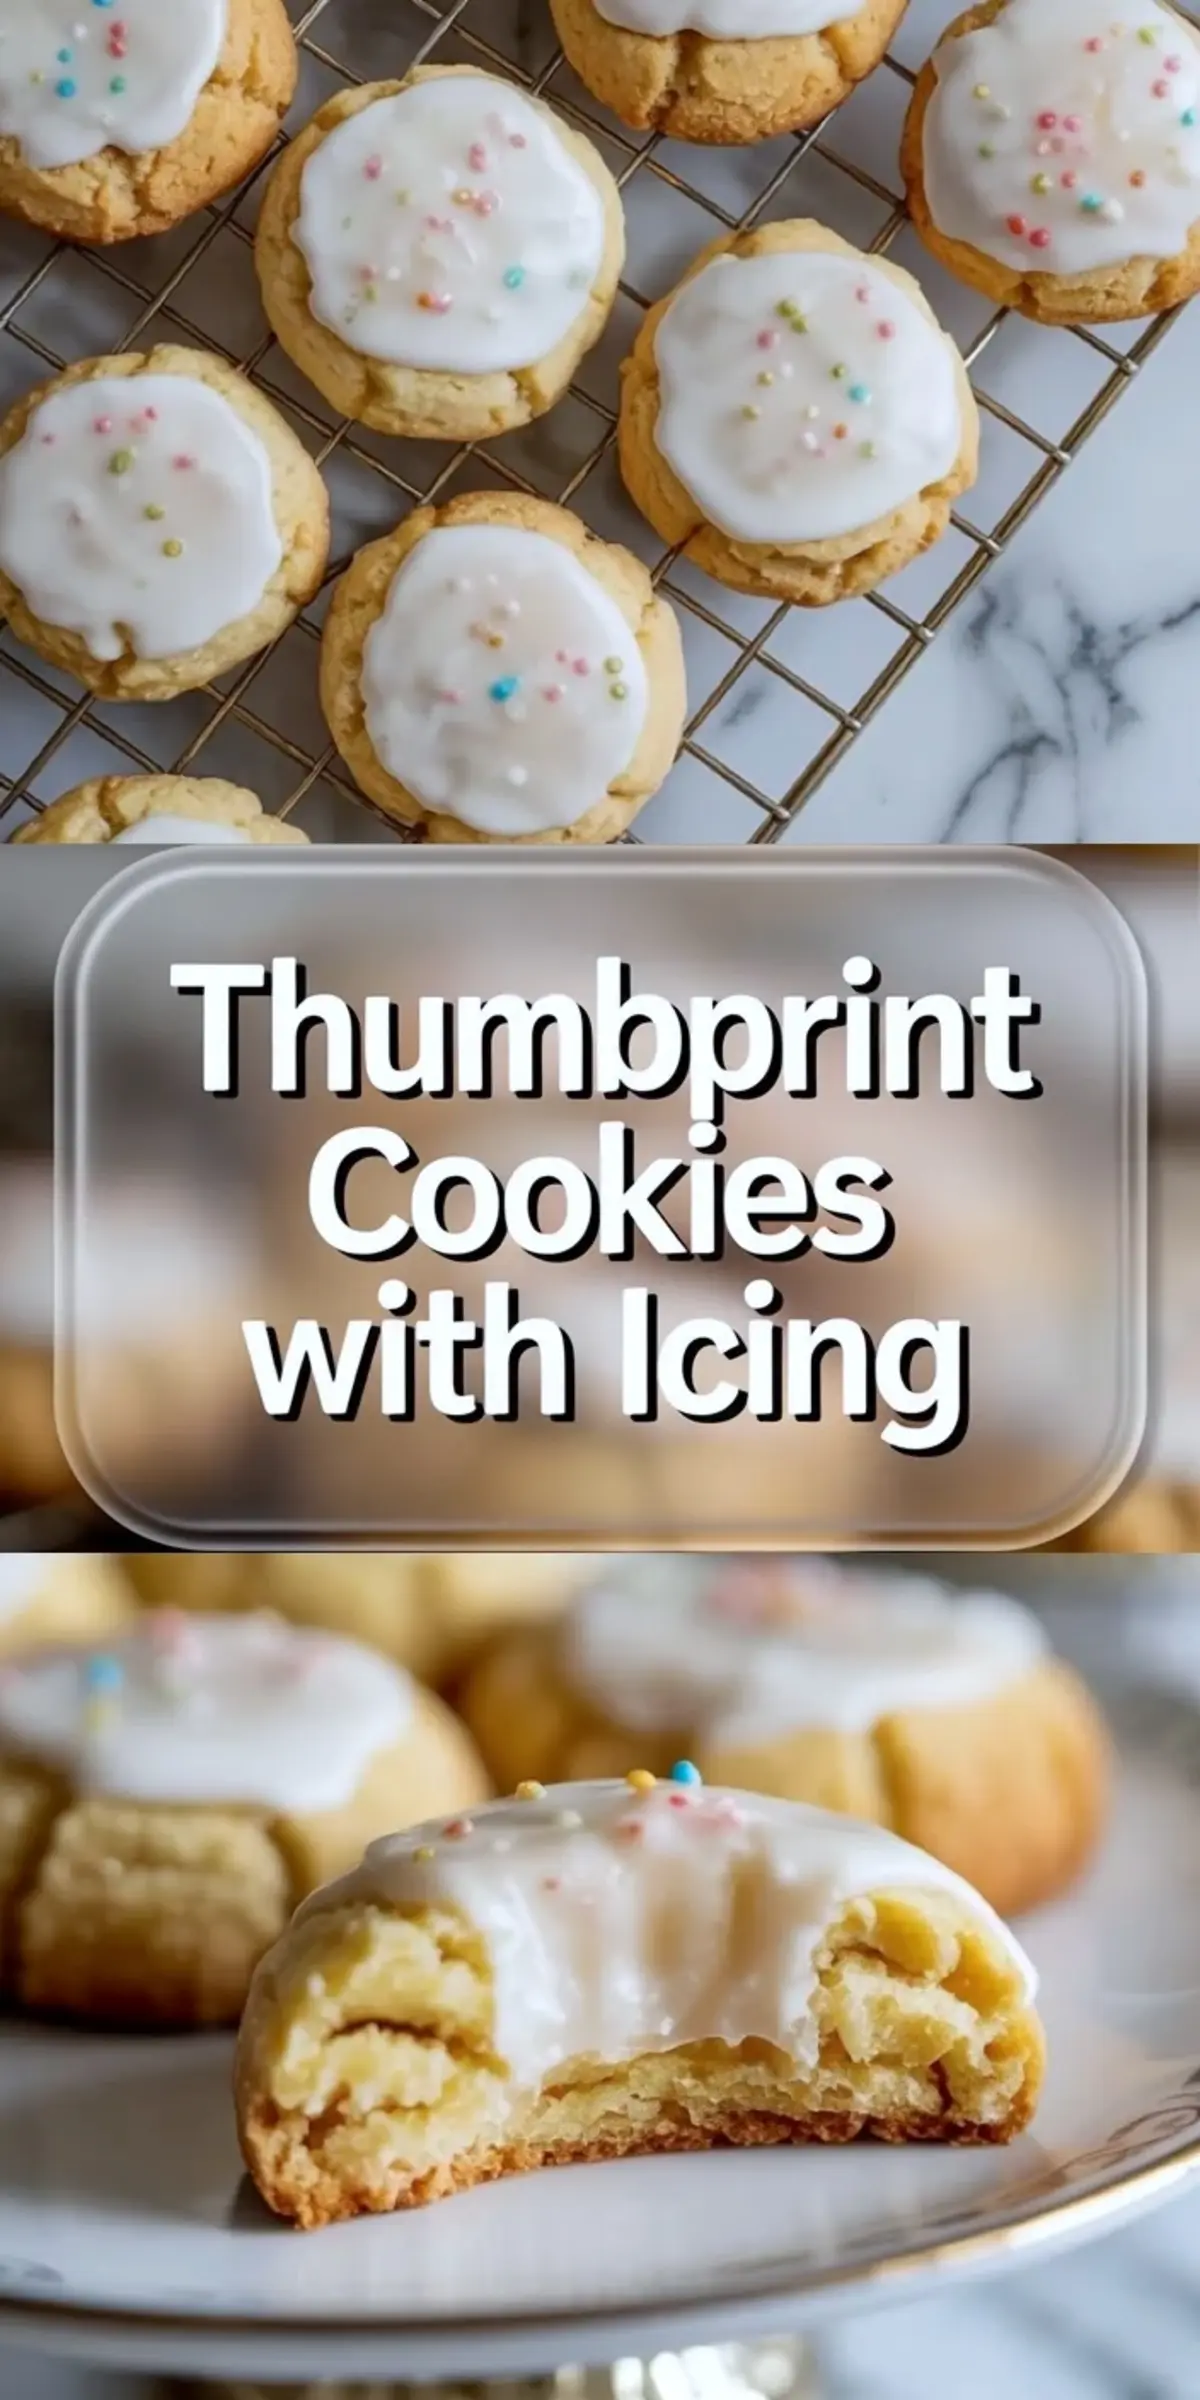
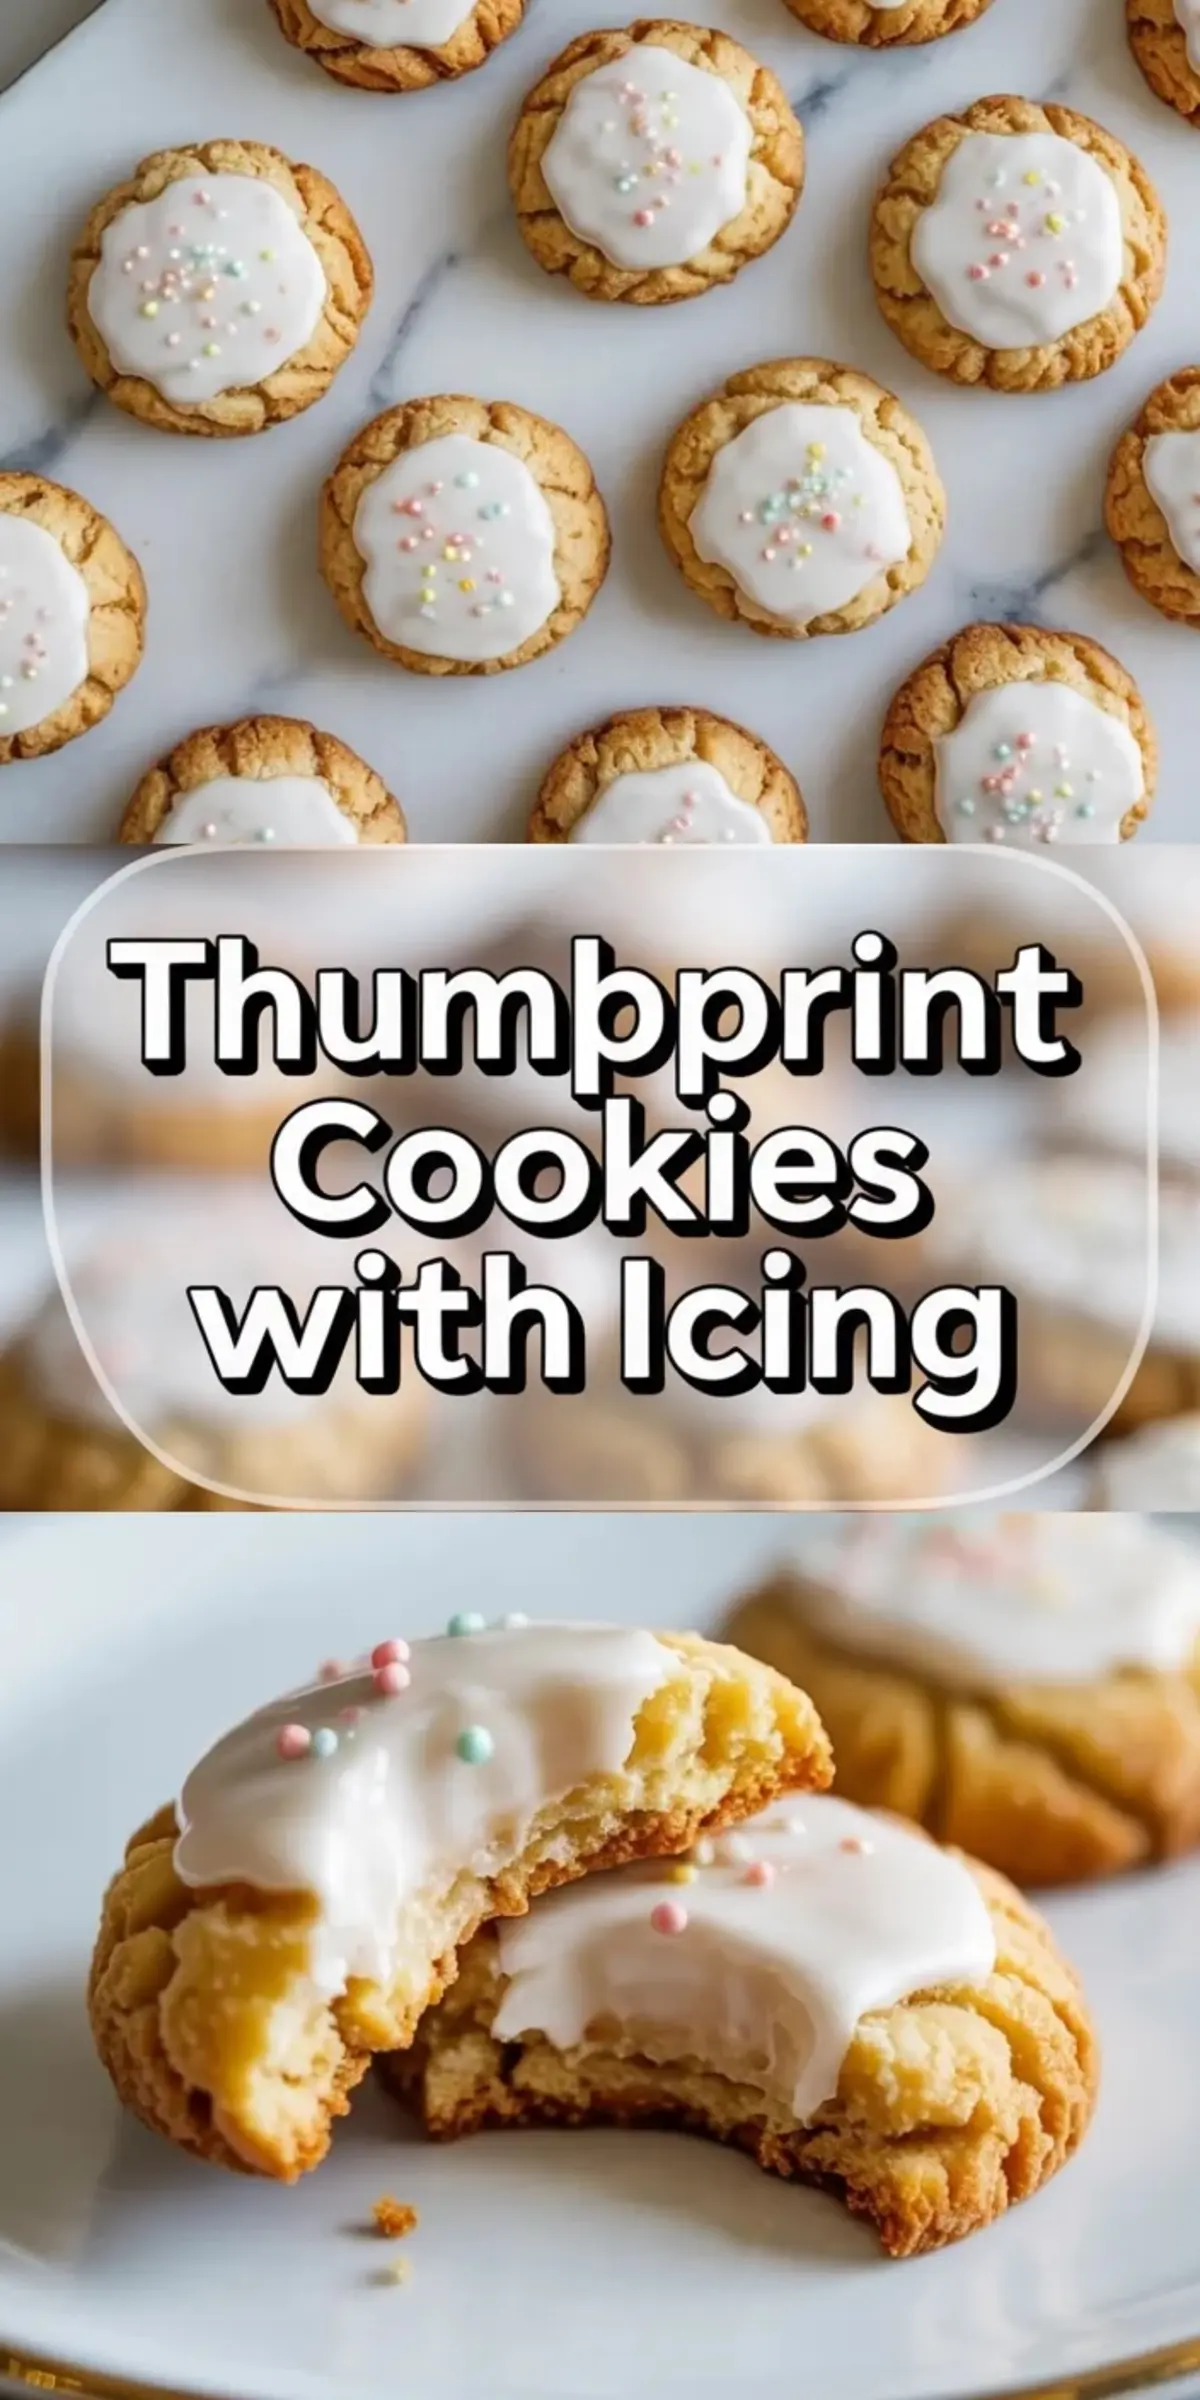
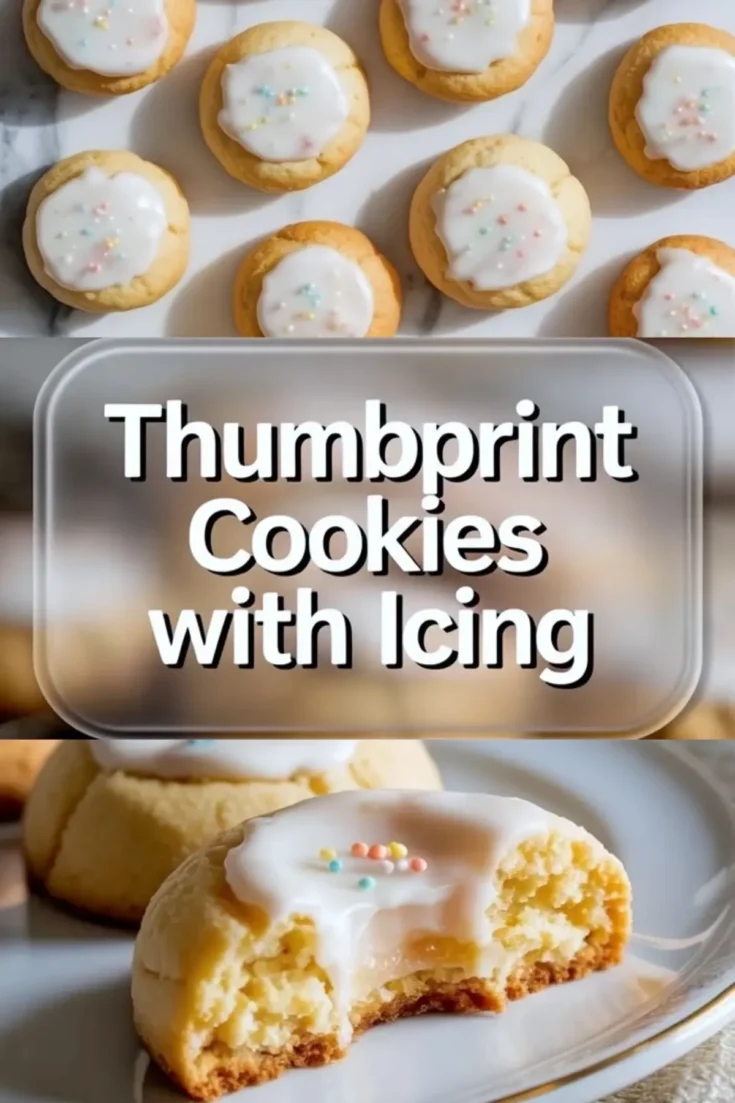
Soft Thumbprint Cookies With Icing are buttery vanilla cookies with a smooth center glaze that sets neatly and adds sweetness without overpowering the dough. This Thumbprint Cookies Recipe With Icing shows How To Make Thumbprint Cookies With Icing using pantry staples, a simple mixing method, and an Easy Thumbprint Cookie Icing that firms with a soft sheen. Readers searching for Easy Thumbprint Cookies, Best Thumbprint Cookies With Icing, or Icing For Thumbprint Cookies will find a reliable, bakery style result with tender centers and lightly golden edges.
A balanced ratio of 1 cup butter to 2 ¼ cups flour gives structure without dryness. That proportion keeps the cookies soft yet stable enough to hold icing in the center.
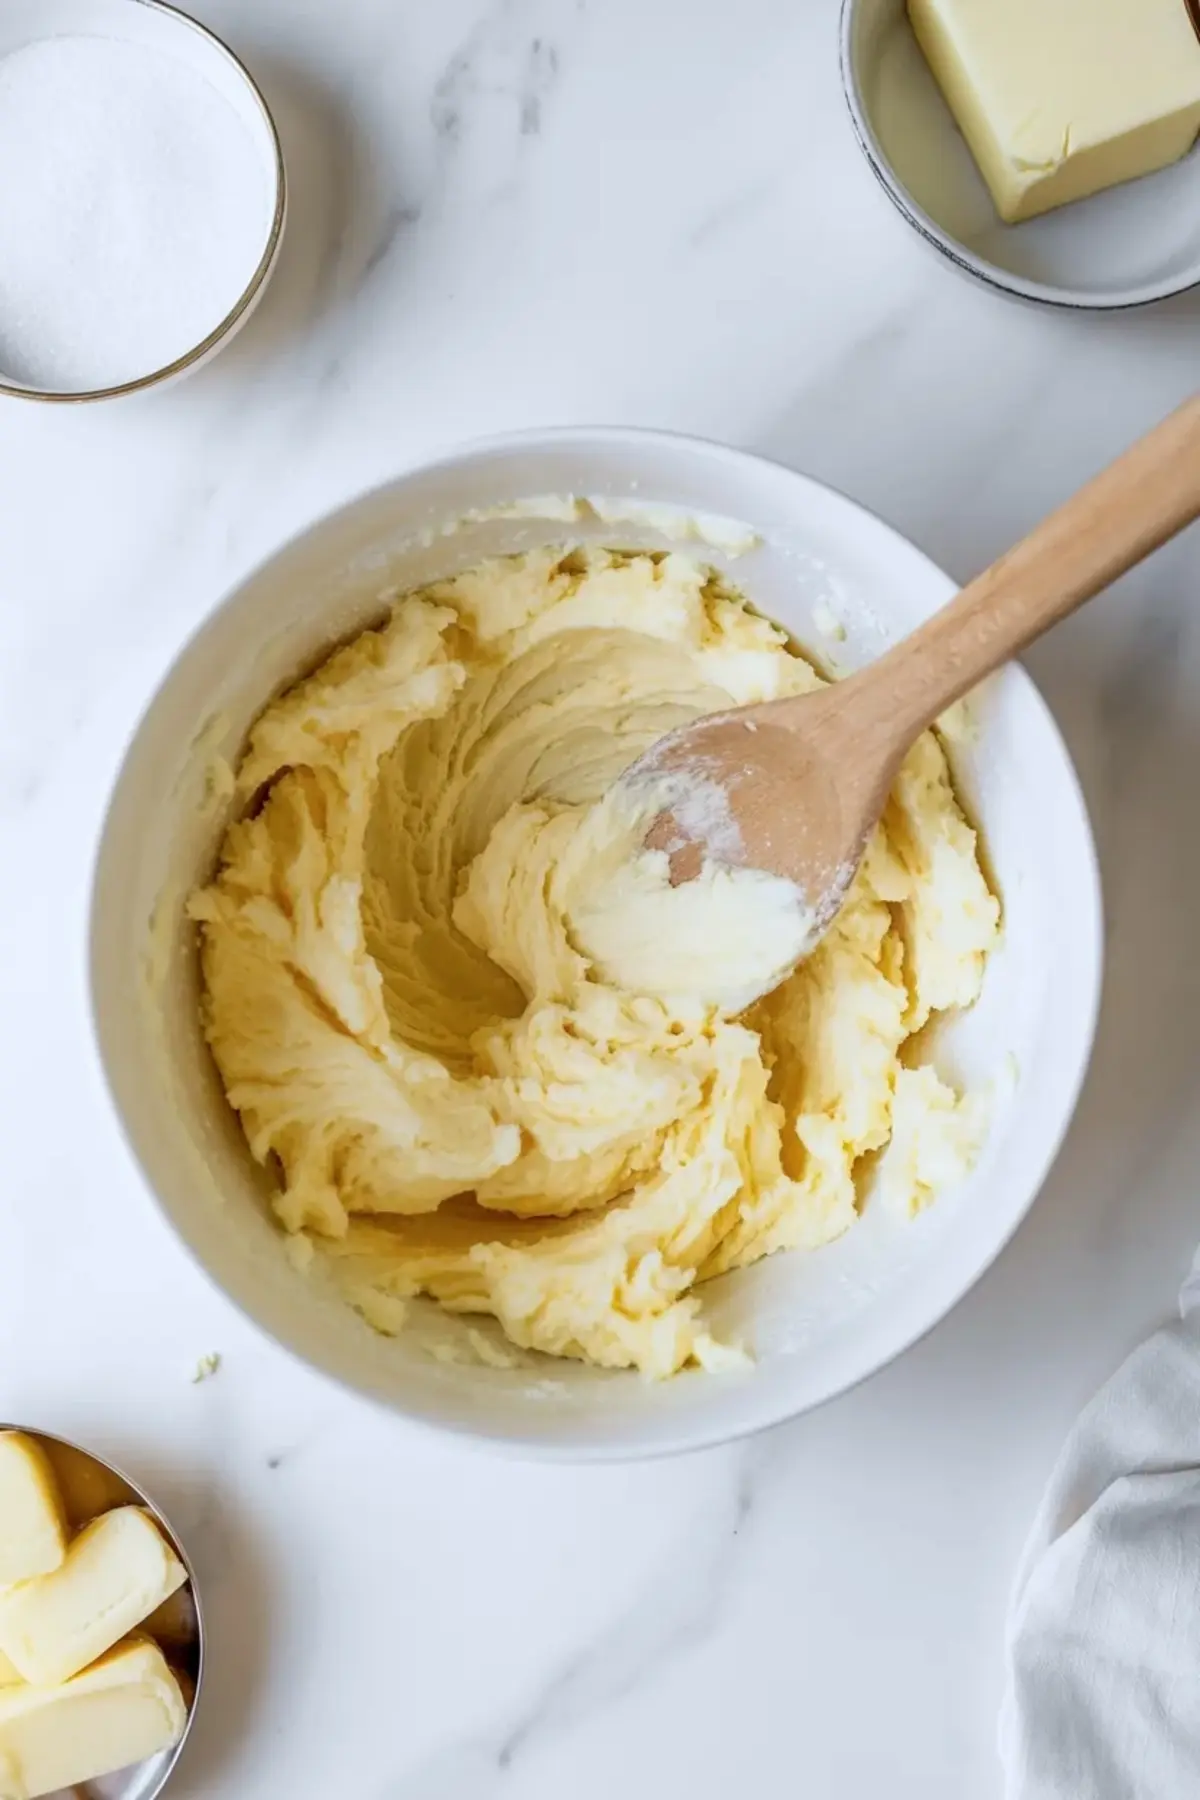
Creaming the butter and sugar for a full 2 to 3 minutes builds air into the dough. I always watch the color shift to pale and the texture turn fluffy. That change tells me the sugar has started to dissolve properly.
A moderate oven temperature of 350°F bakes the edges gently and keeps the centers soft. Ten to twelve minutes matters. A minute longer changes the texture more than people expect.
What You Need and Why It Matters
Unsalted butter brings clean flavor and allows control over salt. I use softened butter that bends under light pressure. Melted butter changes spread and texture, so I avoid it.
Granulated sugar creates light crisp edges. Powdered sugar would make the cookie too delicate here. For a chocolate variation, I often point readers to my Chocolate Hazelnut Thumbprint Cookies because that dough handles cocoa differently.
All purpose flour provides reliable structure. A protein level around 10 to 11 percent works best. Baking powder lifts the dough slightly, and salt sharpens the vanilla flavor in a subtle way.
Key Technique Spotlight: The Thumbprint Well
The indentation controls the final look and function. A shallow press holds icing neatly without cracking the cookie base.
I press gently with the back of a teaspoon for even circles. My thumb works too, though a spoon gives cleaner edges. If the dough cracks, I smooth it lightly with my fingers.
The well should sit about halfway into the dough ball. That depth keeps the icing centered and prevents overflow.
How To Make The Icing
First, cream the butter and sugar until light and fluffy. The mixture should look pale and airy. That texture tells you the base is ready.
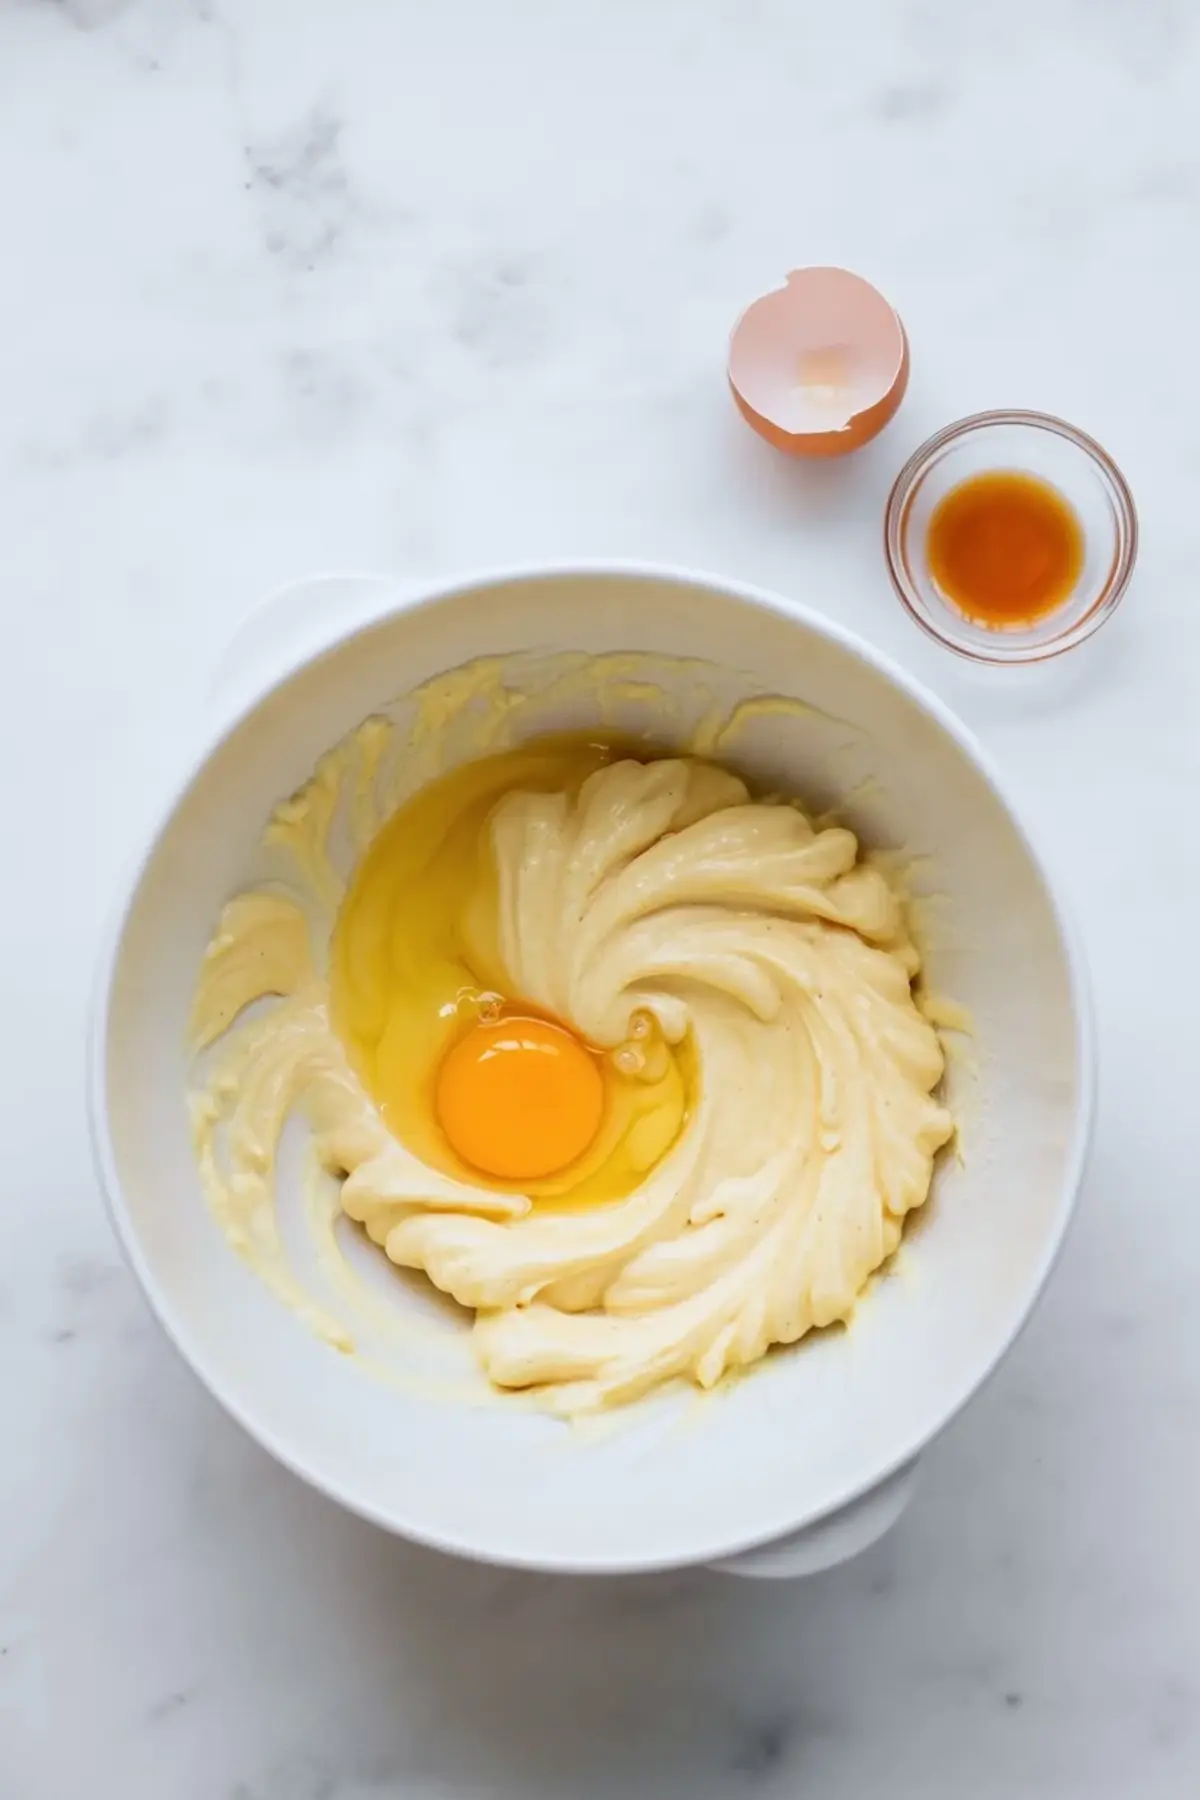
Next, mix in the egg and vanilla until smooth. The batter may look slightly separated at first, then it blends fully. I scrape the bowl once to keep the dough even.
Then, combine flour, baking powder, and salt separately before adding them gradually. Mix just until a soft dough forms. Overmixing tightens the crumb, so I stop as soon as the flour disappears.
Shape tablespoon sized balls and space them two inches apart. Press the centers gently to form wells. Bake until the edges turn lightly golden and the centers stay soft.
How To Tell They Are Done
Light golden edges signal doneness. The centers will look slightly soft but set.
The cookies firm as they cool on the tray for five minutes. If the bottoms brown deeply, the oven ran hot. I trust color over time alone.
Troubleshooting Common Issues
Flat cookies often come from overly soft butter. Chill the shaped dough for 20 minutes if your kitchen feels warm.
Cracks around the edges mean the dough dried slightly. Cover the bowl between batches. For citrus lovers, my Lemon Curd Thumbprint Cookies show how a softer filling pairs with a sturdier dough.
Icing that runs thin needs more powdered sugar. Icing that sits stiff needs drops of milk stirred slowly.
Ways To Change The Flavor
Swap vanilla icing for almond extract in the glaze for a bakery note. Use half a teaspoon only, as it carries strong aroma.
Add pastel sprinkles for holidays. My Easter Thumbprint Cookies follow a similar method with festive colors.
Roll the dough in cinnamon sugar before baking for warmth. My Snickerdoodle Thumbprint Cookies show how spice changes the entire mood of the cookie.
Storage and Practical Tips
Store the cookies in an airtight container at room temperature for up to four days. The icing sets within an hour and keeps its shape.
Refrigeration extends freshness to one week, though texture firms slightly. Freezing works best without icing. Add glaze after thawing for the freshest finish.
Use parchment for even bottoms. Rotate pans halfway through baking if your oven heats unevenly. Small details create consistent results.
How To Serve and Save
Serve these Thumbprint Cookies Easy with coffee or tea. Arrange them on a simple white plate for gatherings. Stack them in clear bags for gifting. I often keep a small tin on the counter because they disappear quickly.
Save this recipe to your Pinterest board for later and keep it close for holidays or weekend baking. Share in the comments how your Best Thumbprint Cookies turned out or ask your questions. I love hearing what you change and what you keep the same.
Soft Thumbprint Cookies with Icing
These Thumbprint Cookies With Icing are soft, buttery, and finished with a smooth glaze in the center. This Thumbprint Cookies Recipe With Icing walks you through the dough and the perfect Icing For Thumbprint Cookies step by step. If you’re looking for Easy Thumbprint Cookies, this method keeps things simple while delivering bakery-style results. Learn How To Make Thumbprint Cookies With Icing using pantry staples and a quick Easy Thumbprint Cookie Icing that sets beautifully. These Easy Thumbprint Cookies With Icing are great for holidays or everyday baking. Save this guide if you want the Best Thumbprint Cookies With Icing and reliable tips on How To Make Thumbprint Cookies perfectly every time.
Ingredients
- FOR THE COOKIES
- 1 cup (226 g) unsalted butter, softened
- ¾ cup (150 g) granulated sugar
- 1 large egg
- 1 teaspoon pure vanilla extract
- 2 ¼ cups (280 g) all-purpose flour
- ½ teaspoon baking powder
- ¼ teaspoon salt
- FOR THE ICING
- 1 ½ cups (180 g) powdered sugar
- 2–3 tablespoons milk
- ½ teaspoon vanilla extract
- Optional Topping
- Pastel sprinkles or nonpareils
Instructions
PREPARE THE OVEN AND PANS: Preheat the oven to 350°F (175°C). Line two baking sheets with parchment paper and set aside.
CREAM THE BUTTER AND SUGAR: Place the softened butter and granulated sugar in a large mixing bowl. Beat for 2–3 minutes until the mixture looks light and fluffy. Proper creaming creates a tender cookie texture.
ADD THE EGG AND VANILLA: Add the egg and vanilla extract to the butter mixture. Mix until fully combined and smooth, scraping down the sides of the bowl as needed.
MIX THE DRY INGREDIENTS: In a separate bowl, whisk together the all-purpose flour, baking powder, and salt. Gradually add the dry mixture to the wet ingredients. Mix just until a soft dough forms. Avoid overmixing to keep the cookies tender.
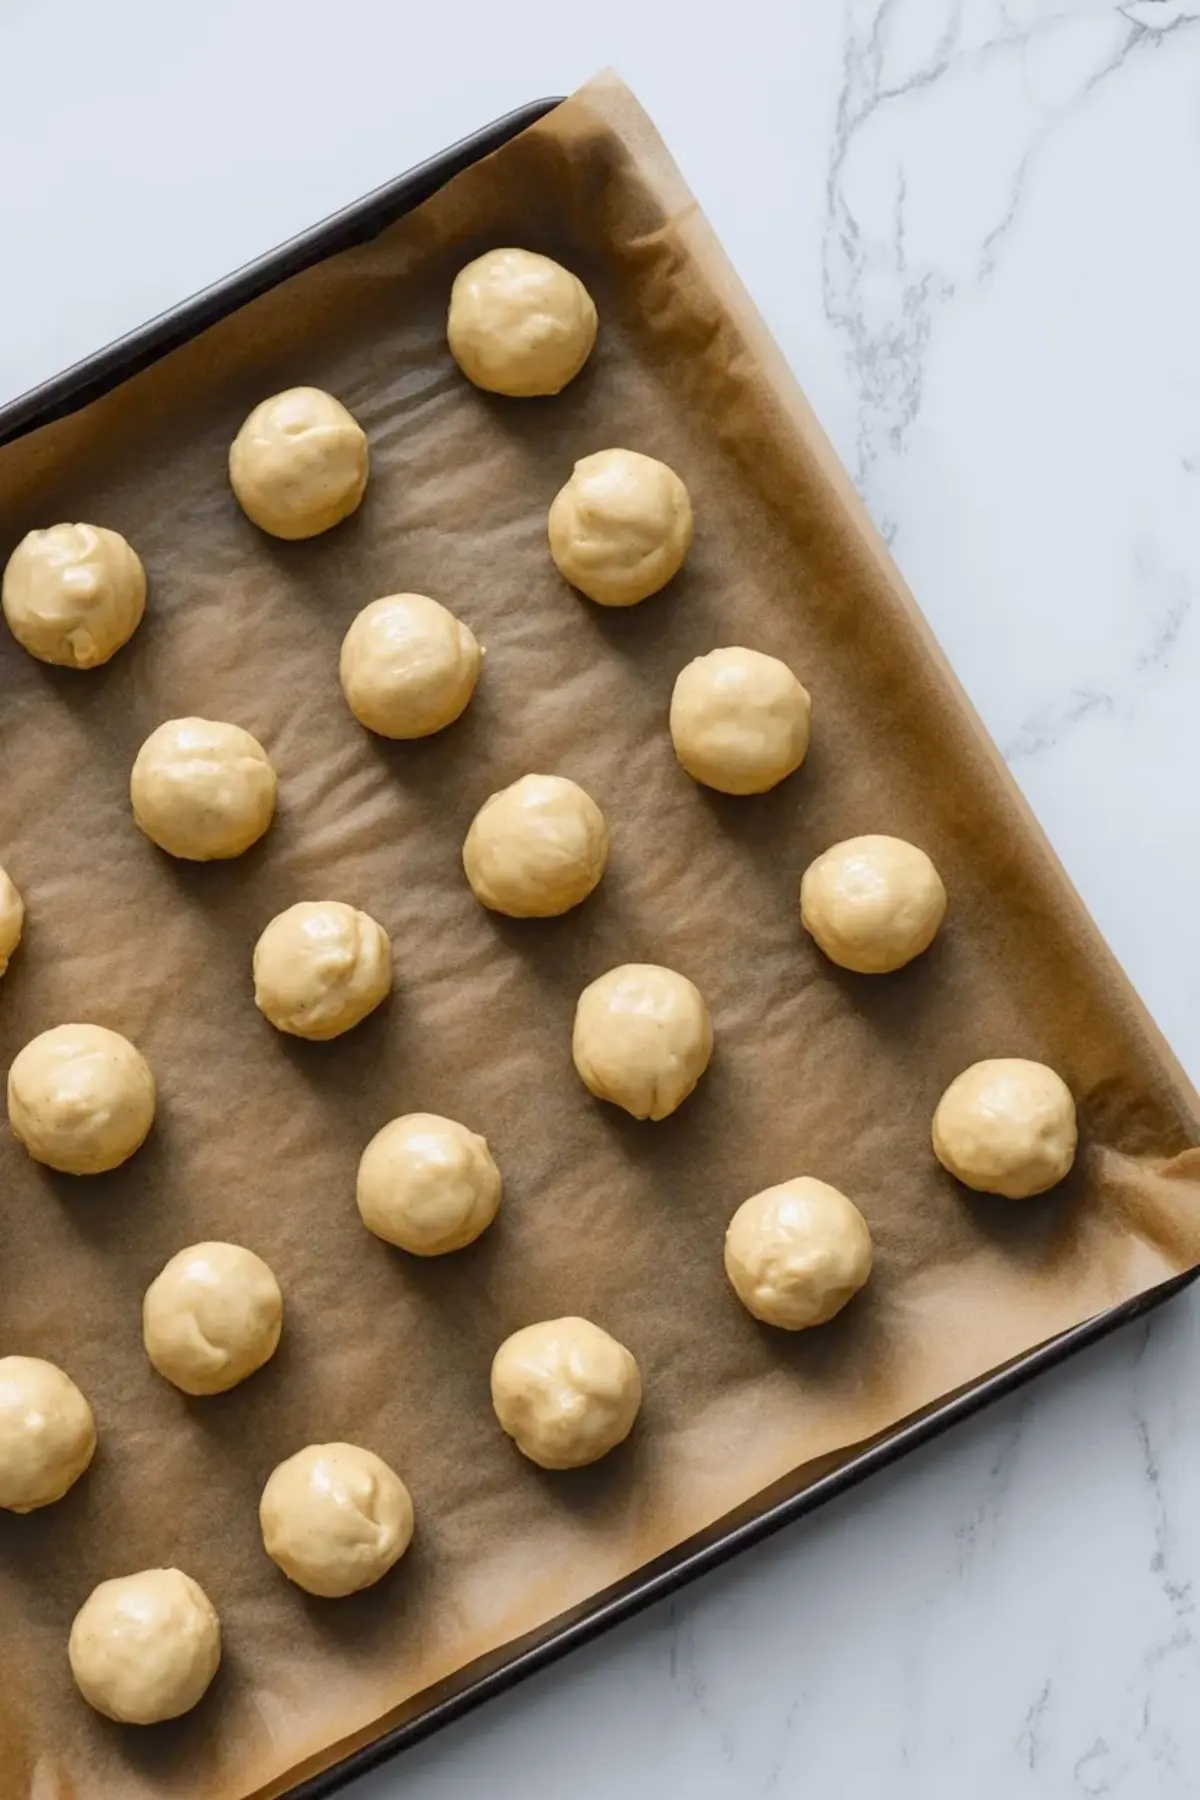
SHAPE THE DOUGH BALLS: Scoop about 1 tablespoon of dough and roll into a smooth ball. Place each ball on the prepared baking sheets, spacing them about 2 inches apart.
CREATE THE THUMBPRINT INDENTATIONS: Use your thumb or the back of a small spoon to gently press a shallow indentation into the center of each dough ball. Do not press through the bottom. The well will hold the icing after baking.
BAKE THE COOKIES: Bake for 10–12 minutes, until the edges turn lightly golden and the centers remain soft. Remove from the oven and allow the cookies to rest on the baking sheet for 5 minutes. Transfer to a wire rack and cool completely before icing.
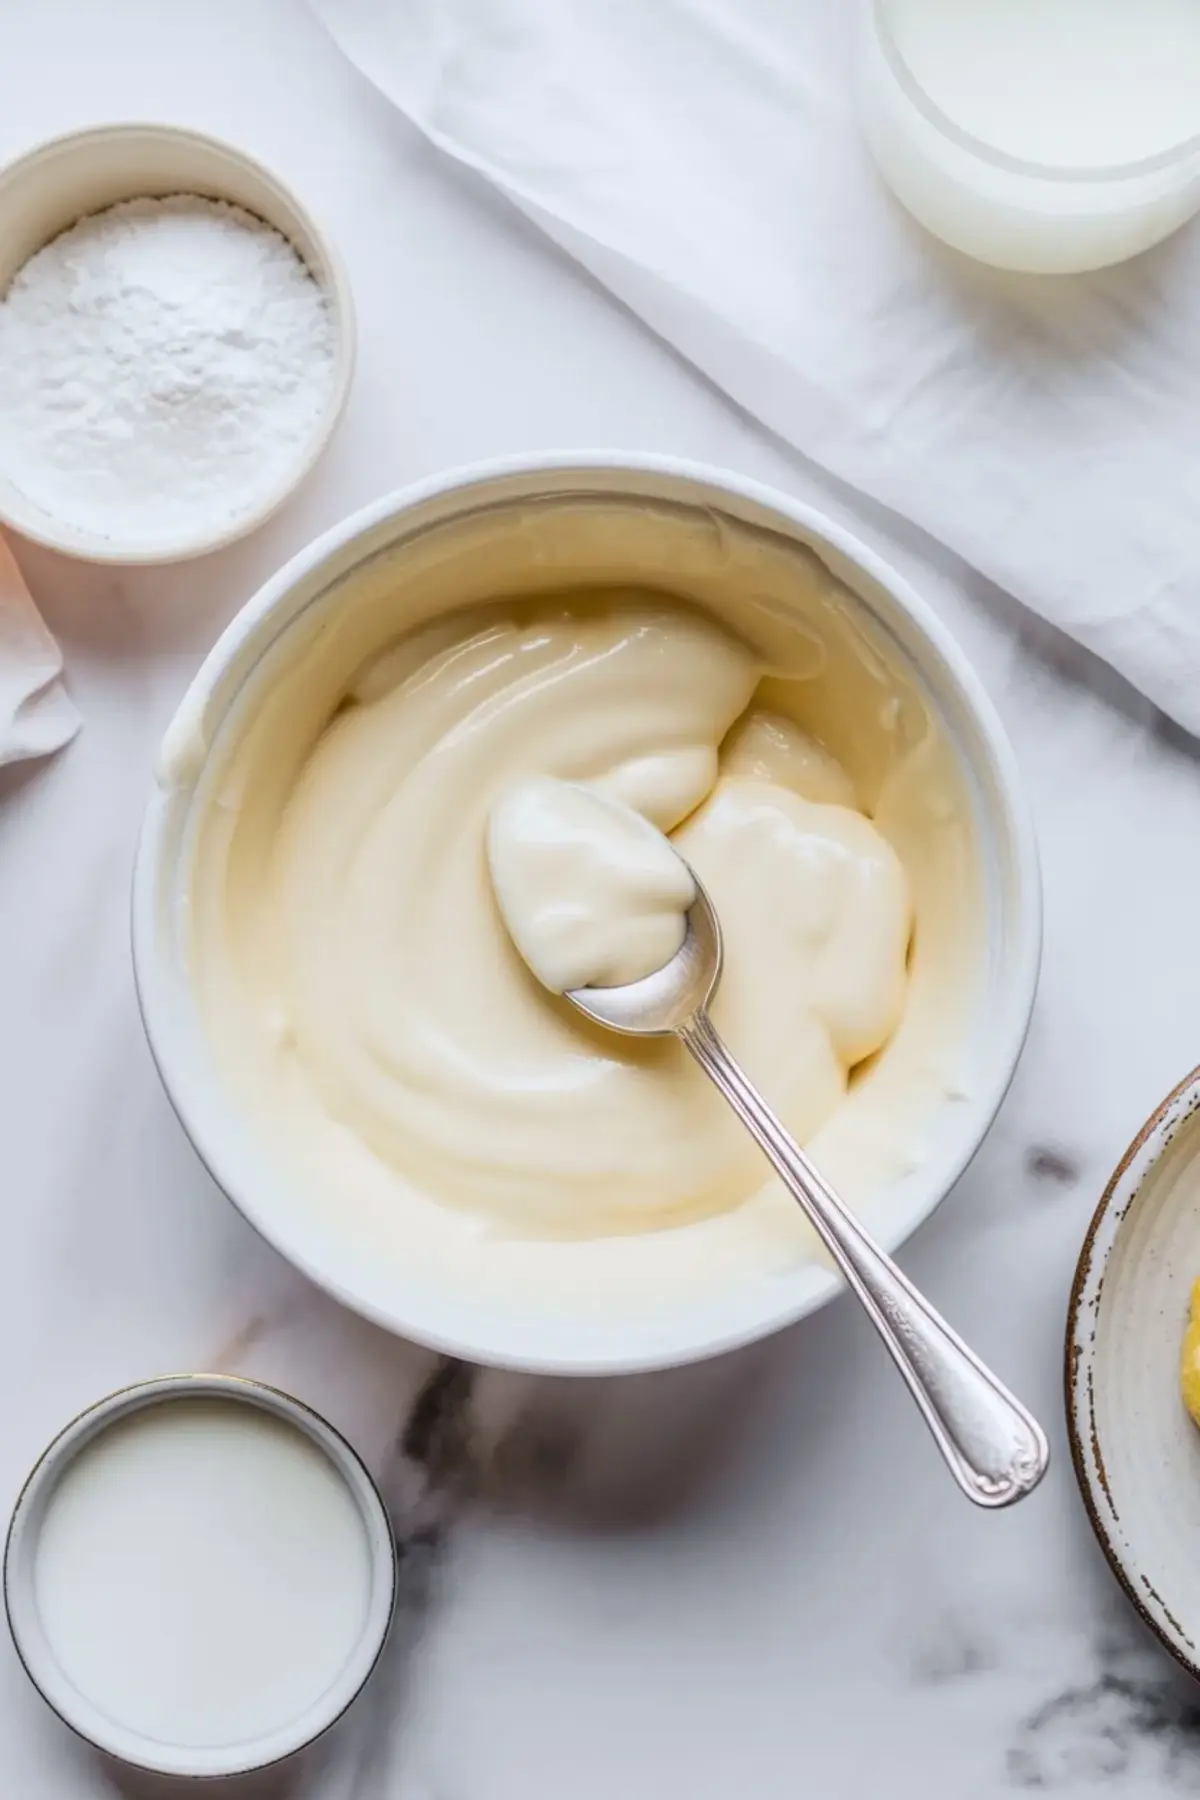
PREPARE THE VANILLA ICING: In a medium bowl, whisk together the powdered sugar, vanilla extract, and 2 tablespoons of milk. Add additional milk, 1 teaspoon at a time, until the icing reaches a thick but pourable consistency. The icing should slowly flow from a spoon without appearing watery.
FILL THE COOKIE CENTERS: Once the cookies are completely cool, spoon a small amount of icing into each thumbprint well. Allow the icing to settle naturally into a smooth layer.
ADD TOPPING AND SET: Sprinkle pastel sprinkles or nonpareils on top before the icing sets, if desired. Let the cookies rest at room temperature for 30–60 minutes until the icing firms.
Notes
For best results, use room temperature butter that is soft but not melted.
Chill the shaped cookies for 20 minutes before baking if your kitchen is warm to help control spreading.
Store cookies in an airtight container at room temperature for up to 4 days.