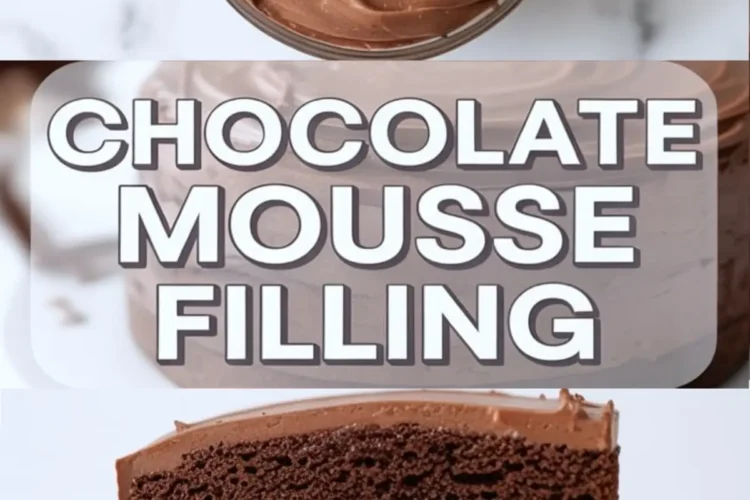
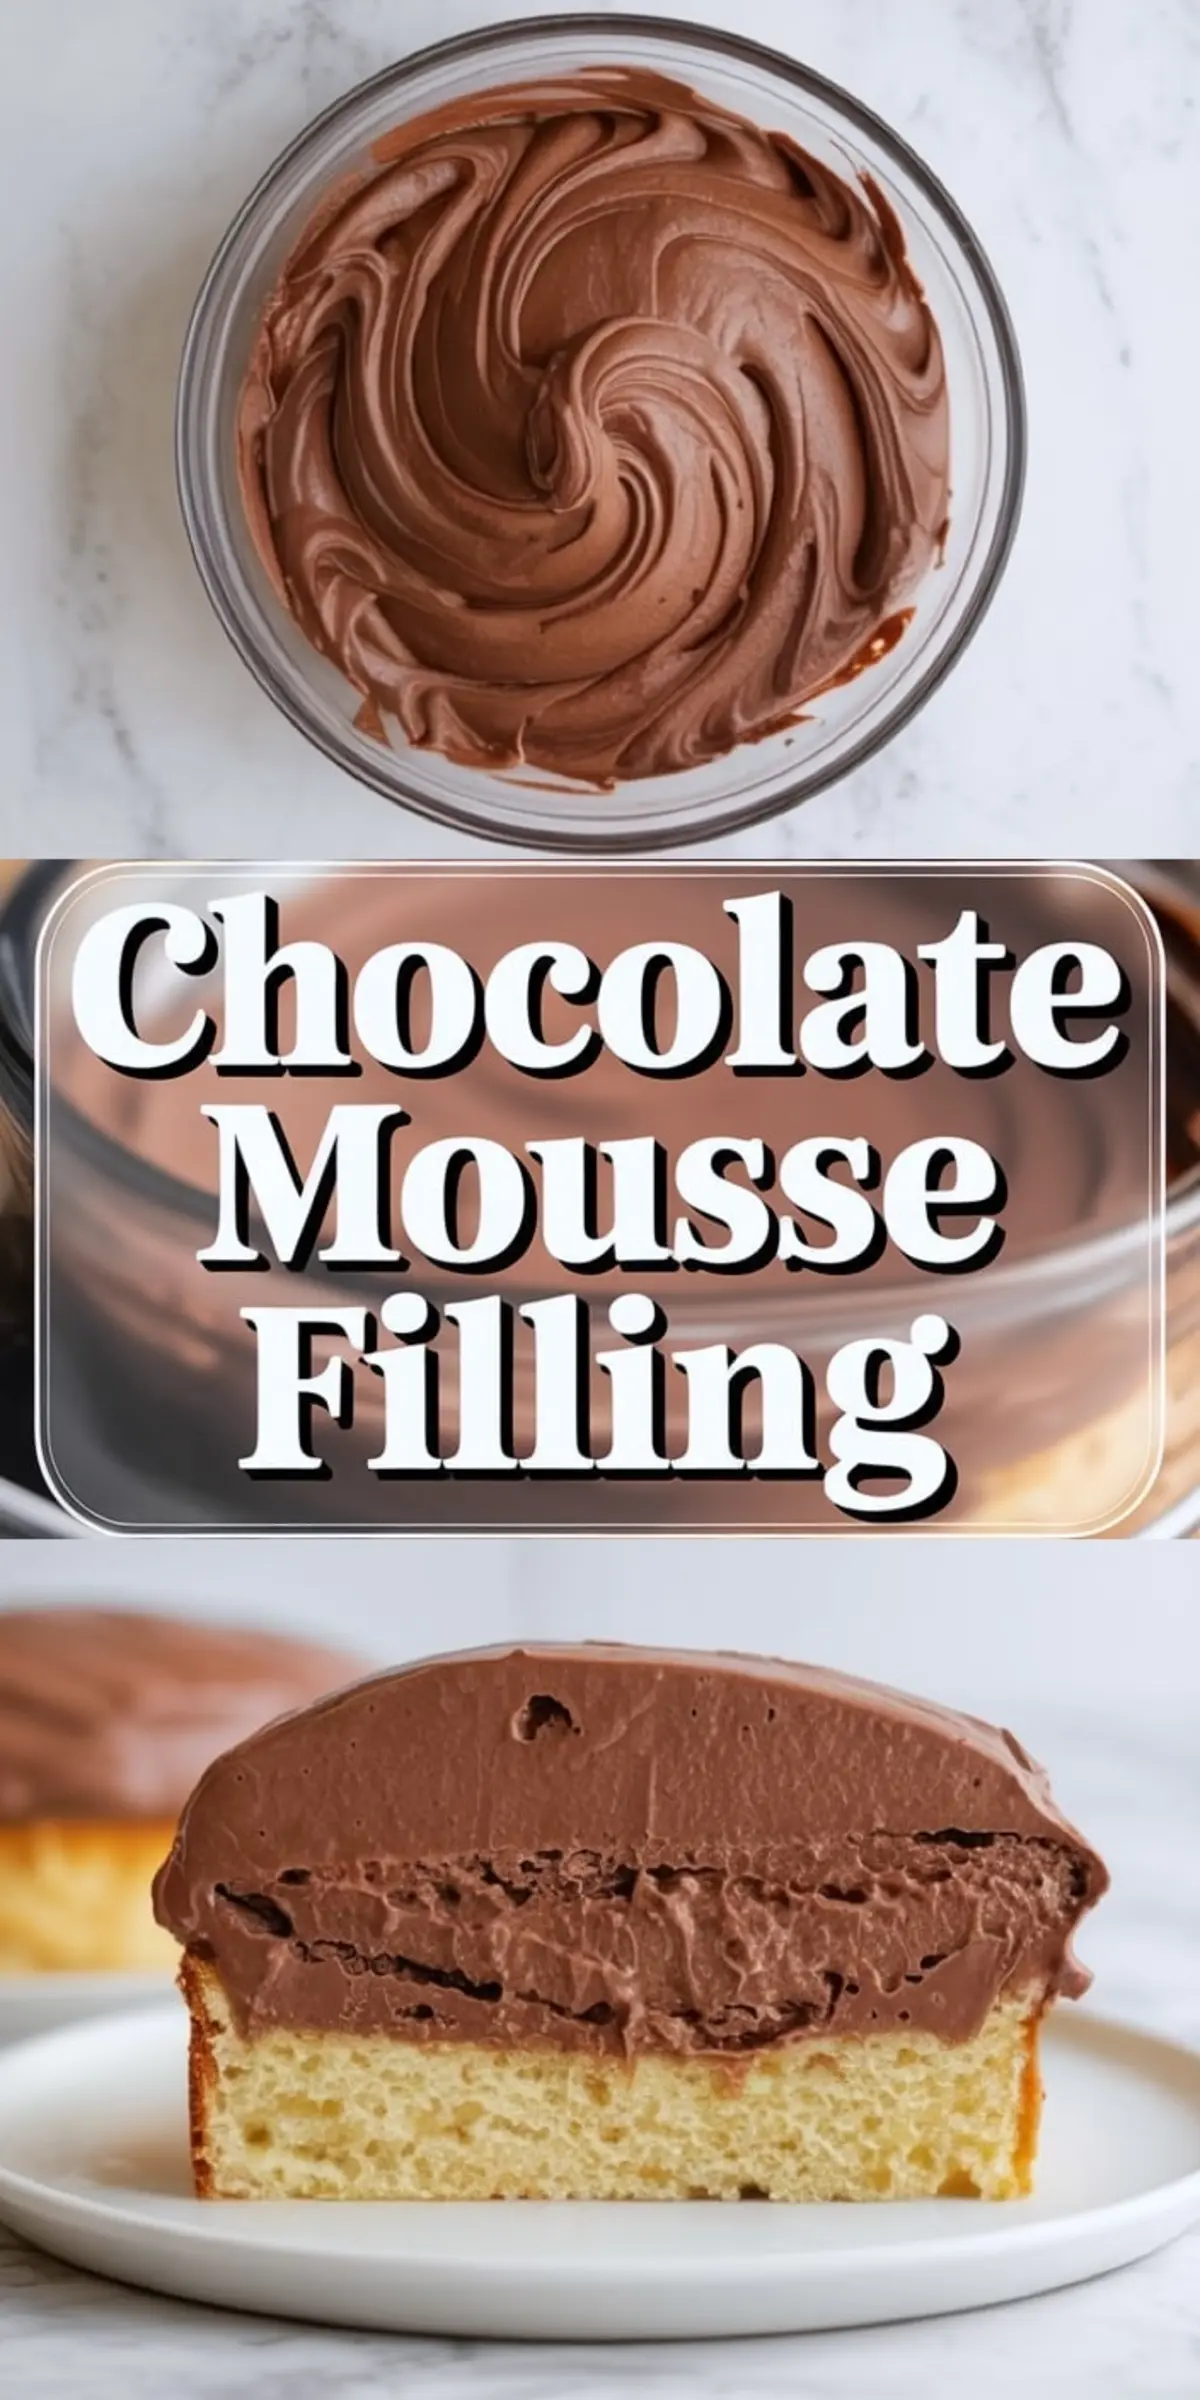
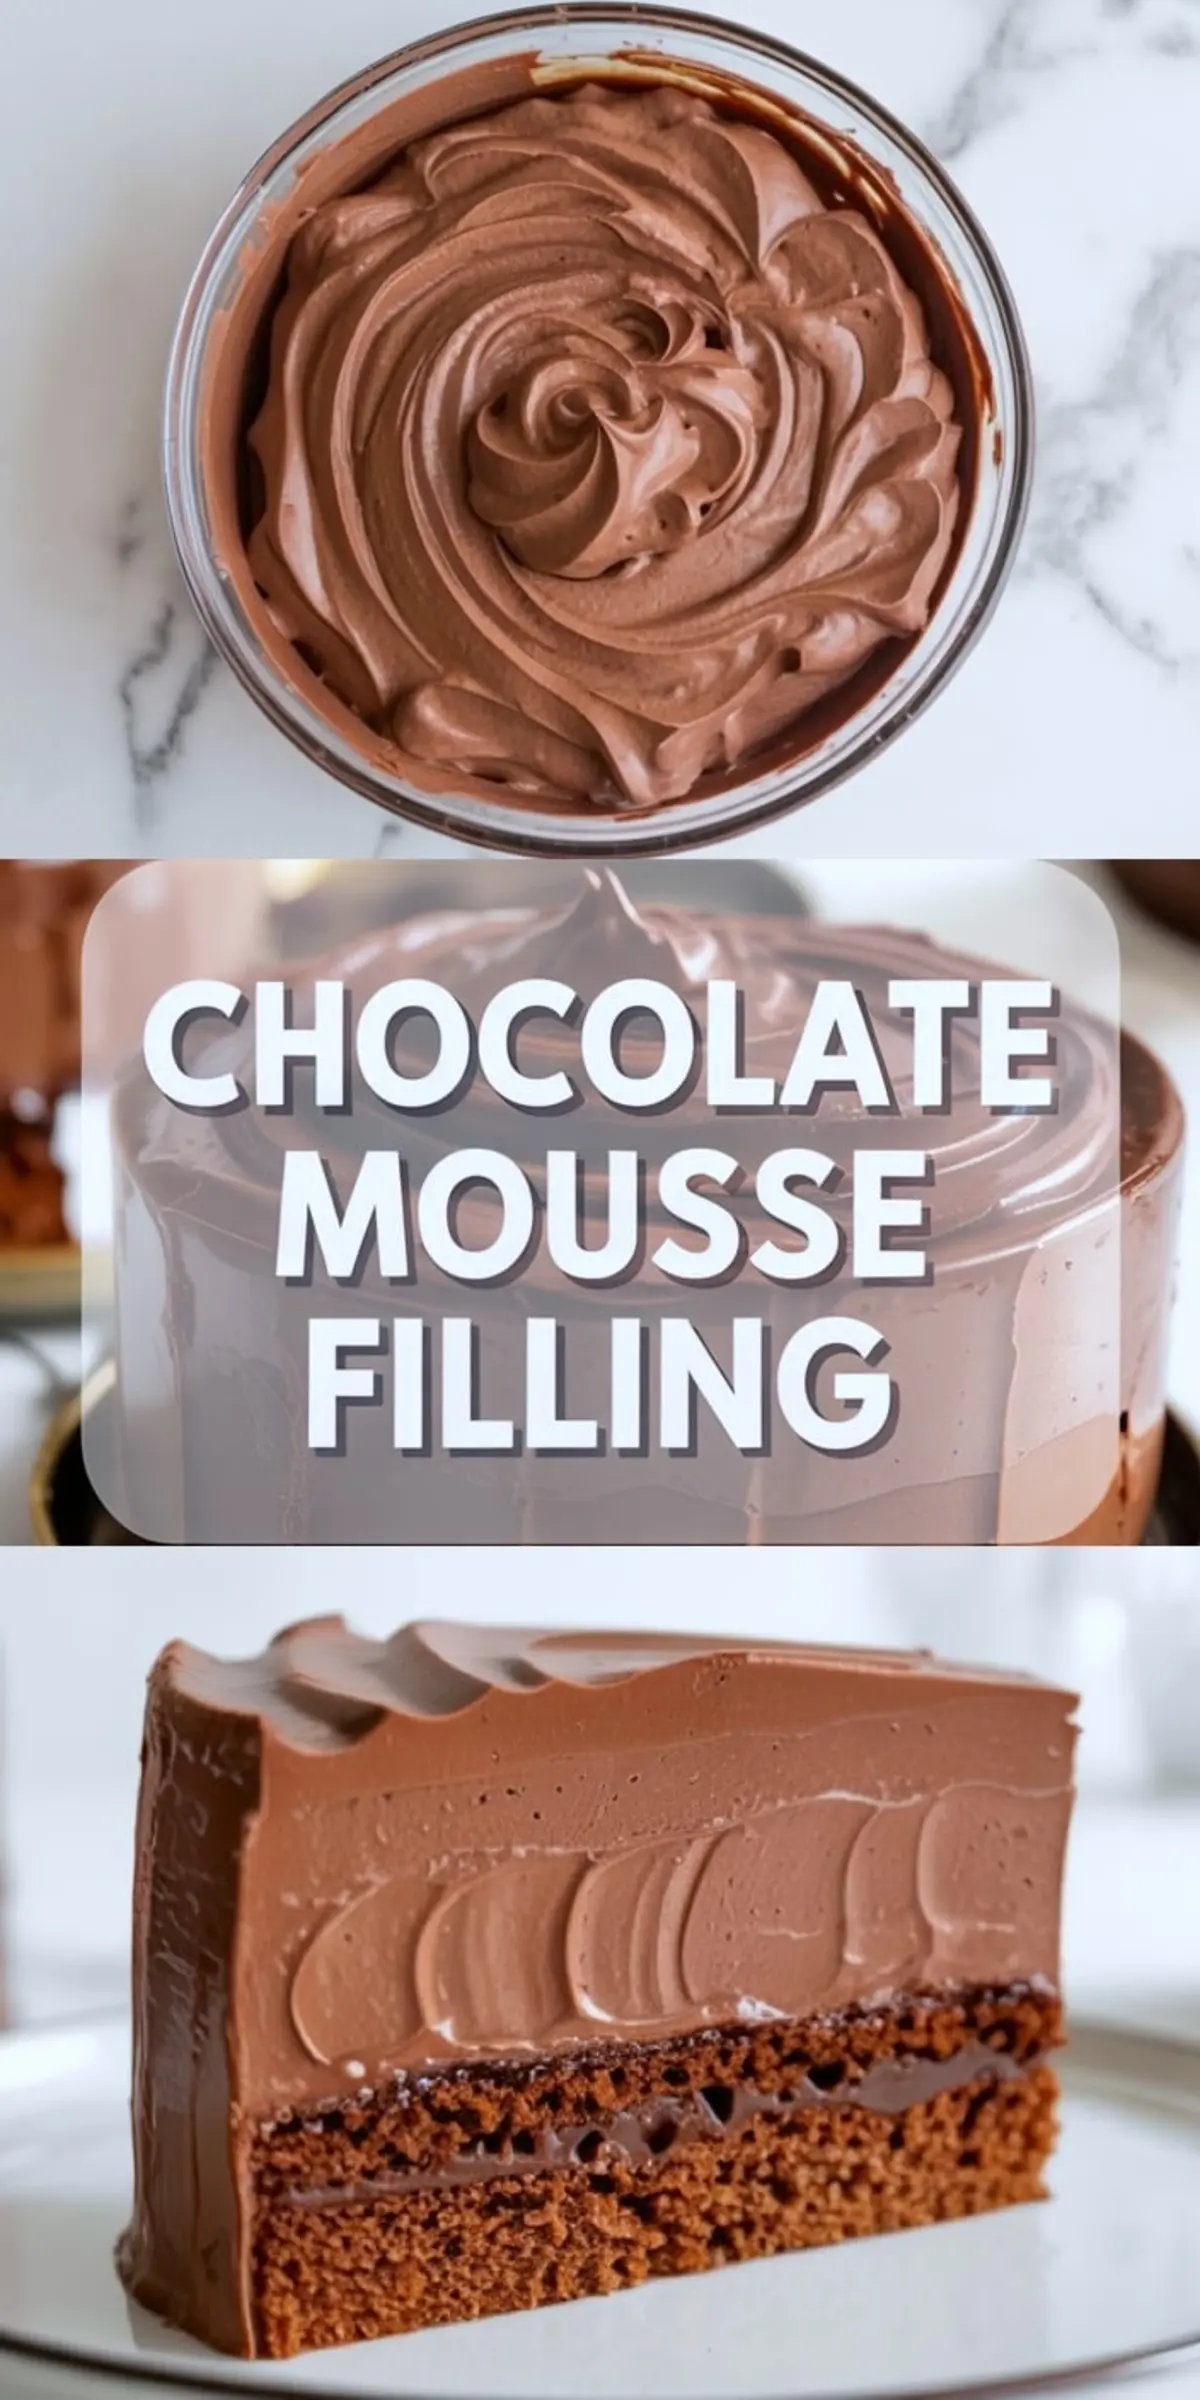
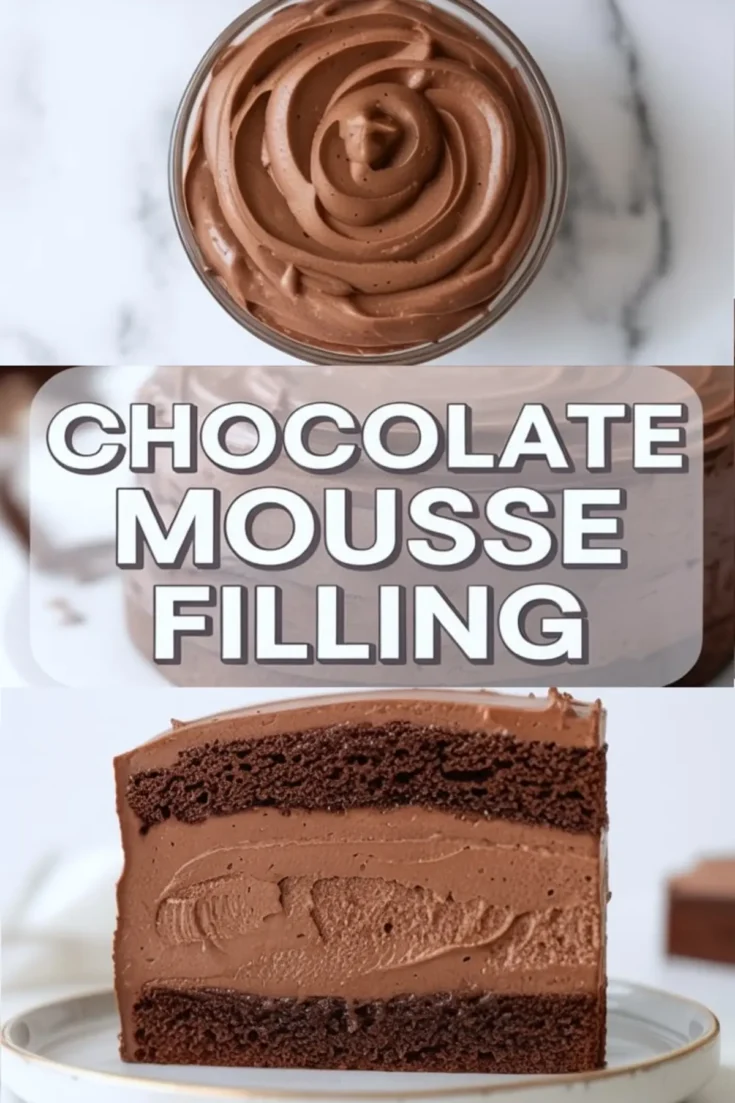
This chocolate mousse filling for cakes uses just four ingredients and delivers a whipped chocolate mousse that holds shape between layers, pipes like frosting, and tastes like ganache got a breath of air. It works beautifully as a chocolate mousse icing, cupcake filling, or even spooned into glasses for a no-bake mousse dessert. If you’re searching for a mousse cake recipe that’s stable, soft, and full of rich flavor, this easy chocolate mousse fits the job.
Following a special diet?
Every recipe on this site can be converted to gluten-free, vegan, dairy-free, keto, nut-free or egg-free with adjusted ratios so nothing falls flat.
Try the Recipe Converter →The technique behind this recipe starts with melted chocolate, not cocoa powder. That small shift changes everything. Real chocolate contains cocoa butter, so the mousse naturally firms up when chilled without needing gelatin or cornstarch.
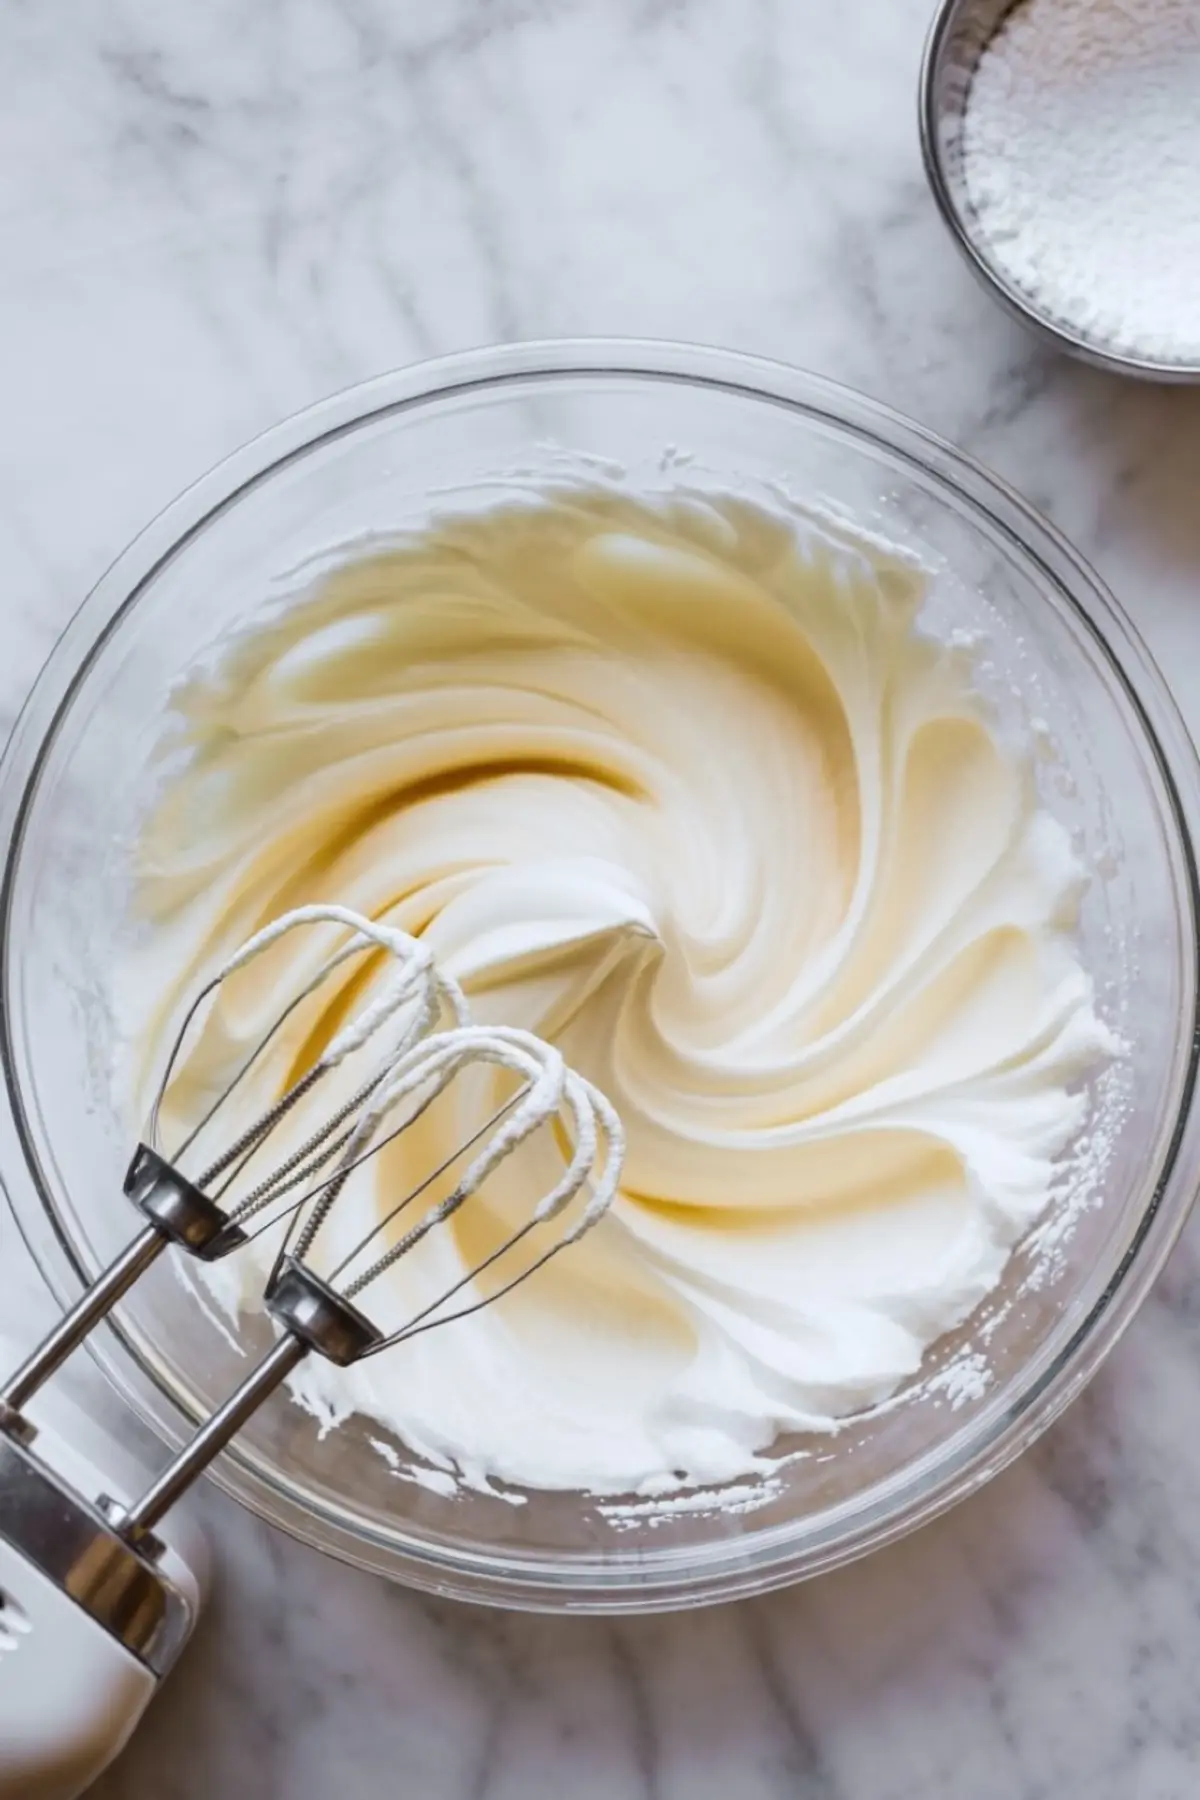
One cup of cold heavy cream provides the airiness. Whipping it first creates structure. Folding it into cooled melted chocolate builds volume. Timing is everything here. The chocolate needs to be fully melted but not hot, or it’ll seize the cream. Soft peaks in the cream give the mousse its light, spreadable feel without sacrificing body.
For a firmer chocolate mousse cake filling that slices cleanly between layers, chilling the mousse for about 45 minutes works best. This step makes a big difference in presentation. Especially if you’re planning a chocolate mousse cake like this one from my archive: Chocolate Mousse Cake Recipe.
Ingredients and Why They Matter
I use semi-sweet chocolate between 55% and 65% cocoa. Anything darker tends to stiffen too much once chilled. Anything lower feels flat in flavor. If you’re planning to make a layered chocolate cake with mousse filling, pick a chocolate that you enjoy eating straight.
Heavy whipping cream is non-negotiable. Lower fat creams won’t whip properly or hold structure. Make sure it’s cold straight from the fridge. I’ve tested this recipe with room-temperature cream before and it never sets the same. For sweetness, powdered sugar dissolves instantly and gives a smoother finish than granulated.
You’ll also need vanilla extract for flavor depth. I use 1 teaspoon, but if your chocolate is more bitter, go slightly higher. The pinch of salt is optional. I include it if I’m using unsalted chocolate or want a slightly more intense mousse flavor like I do in this Keto Chocolate Mousse, which relies on contrast between sweet and savory.
Why Chocolate Choice Shapes the Texture

This mousse depends entirely on the chocolate. It’s the backbone of the recipe. A silky, pourable melt equals a smooth mousse. I chop the chocolate into small, even pieces to ensure gentle melting over a double boiler.
Microwave melting works in short bursts. I do 20-second intervals, stir, then repeat. You’ll know it’s ready when it’s shiny and fully fluid but no longer hot. If it’s warm, it will clump when the whipped cream hits. That’s the kind of mistake you can’t fix once it happens.
If you prefer a lighter flavor or want a milk chocolate version, reduce the whipped cream to ¾ cup and increase the powdered sugar to 3 tablespoons. You’ll need to chil that version longer for it to firm up properly. More like the style used in this Creamy Cottage Cheese Chocolate Mousse which softens in texture but holds flavor.
Folding Tips for Smooth Results
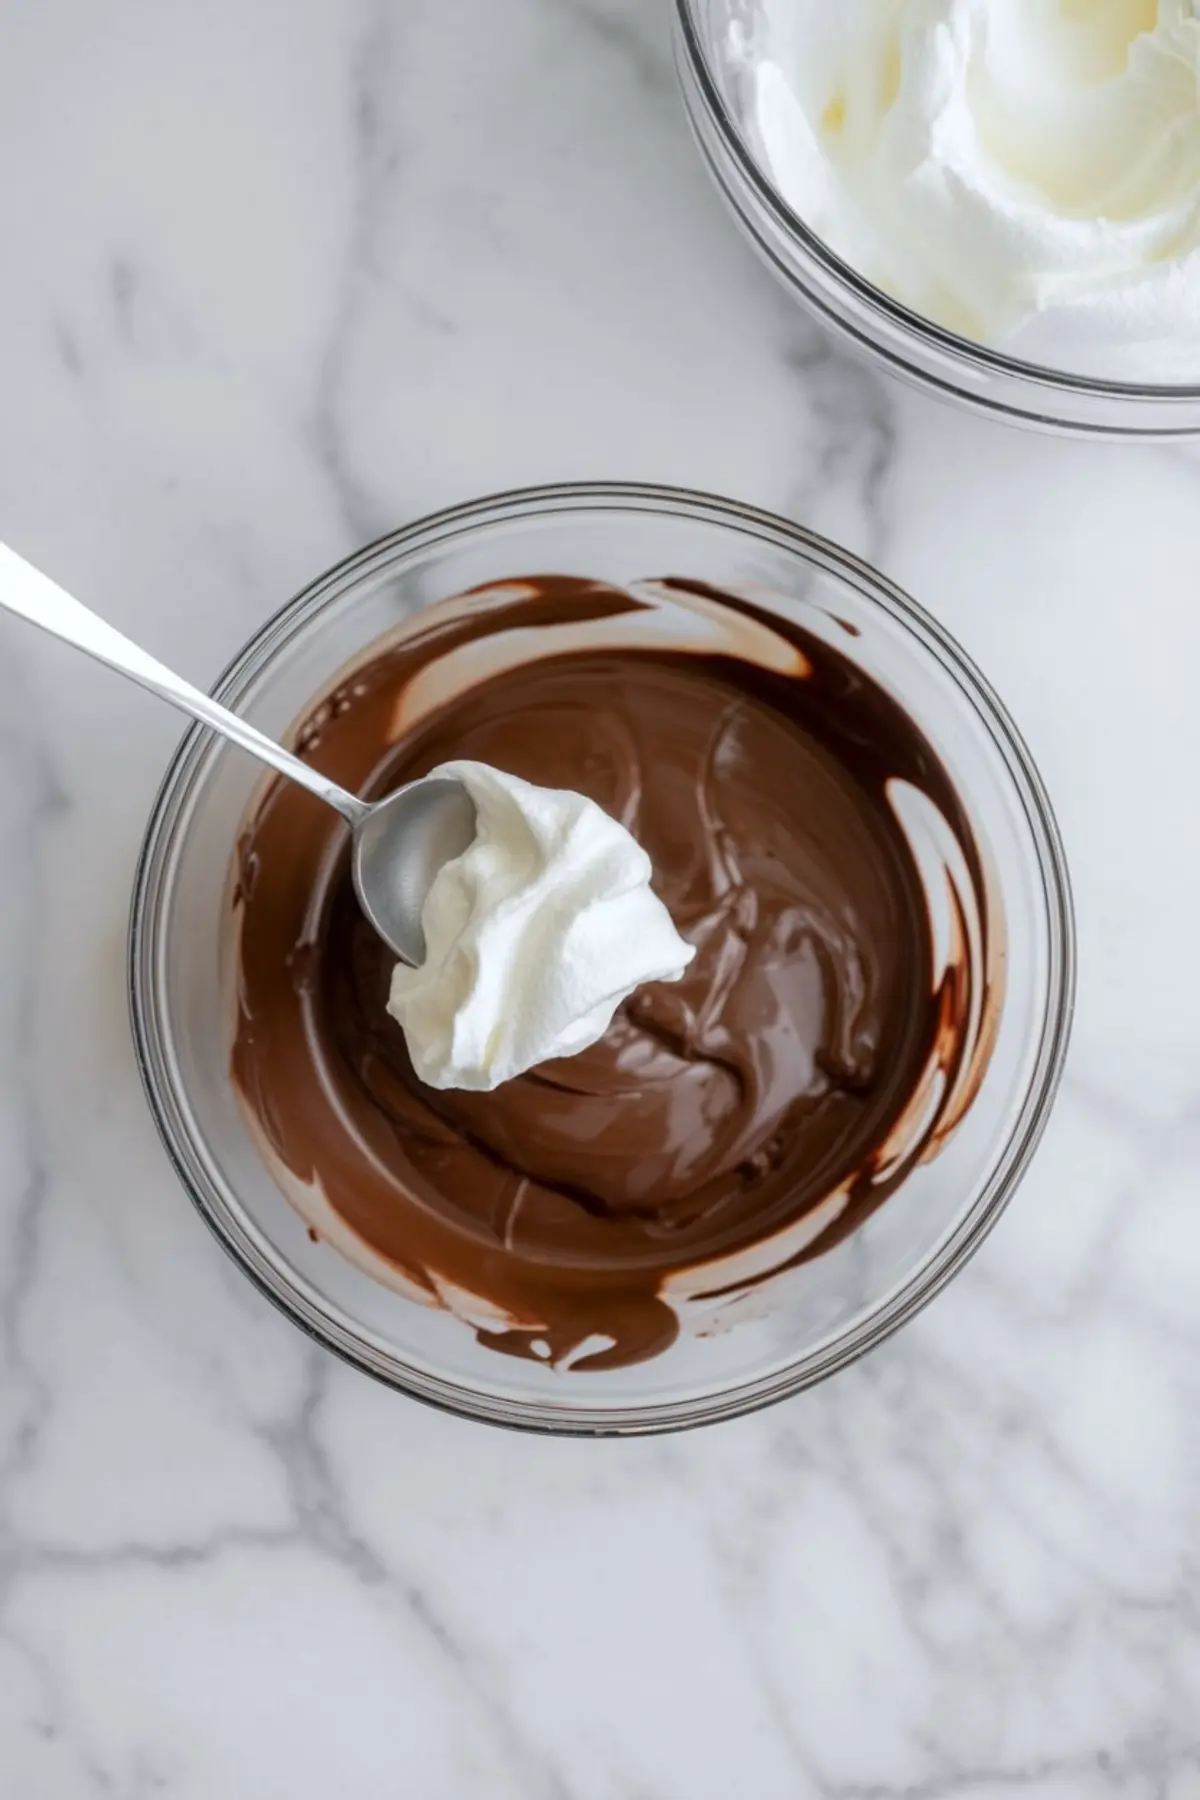
Once the chocolate is melted and cooled, the real magic begins. Start by stirring in a spoonful of whipped cream to loosen the chocolate. This tempers the base without shocking it.
Then fold in the rest in 2 to 3 rounds using a rubber spatula. Work gently. I know the urge to rush, but aggressive mixing ruins the texture. If streaks remain, keep folding, just more slowly. The finished mousse should look evenly light brown, like melted milk chocolate with volume.
This filling becomes extra creamy after about 30 minutes of chill time. That’s when I like to spoon it between layers of sponge. Or swirl it on top of cooled brownies like in my Chocolate Mousse Brownies. The contrast between baked texture and soft mousse is hard to beat.
Testing for Doneness and Texture
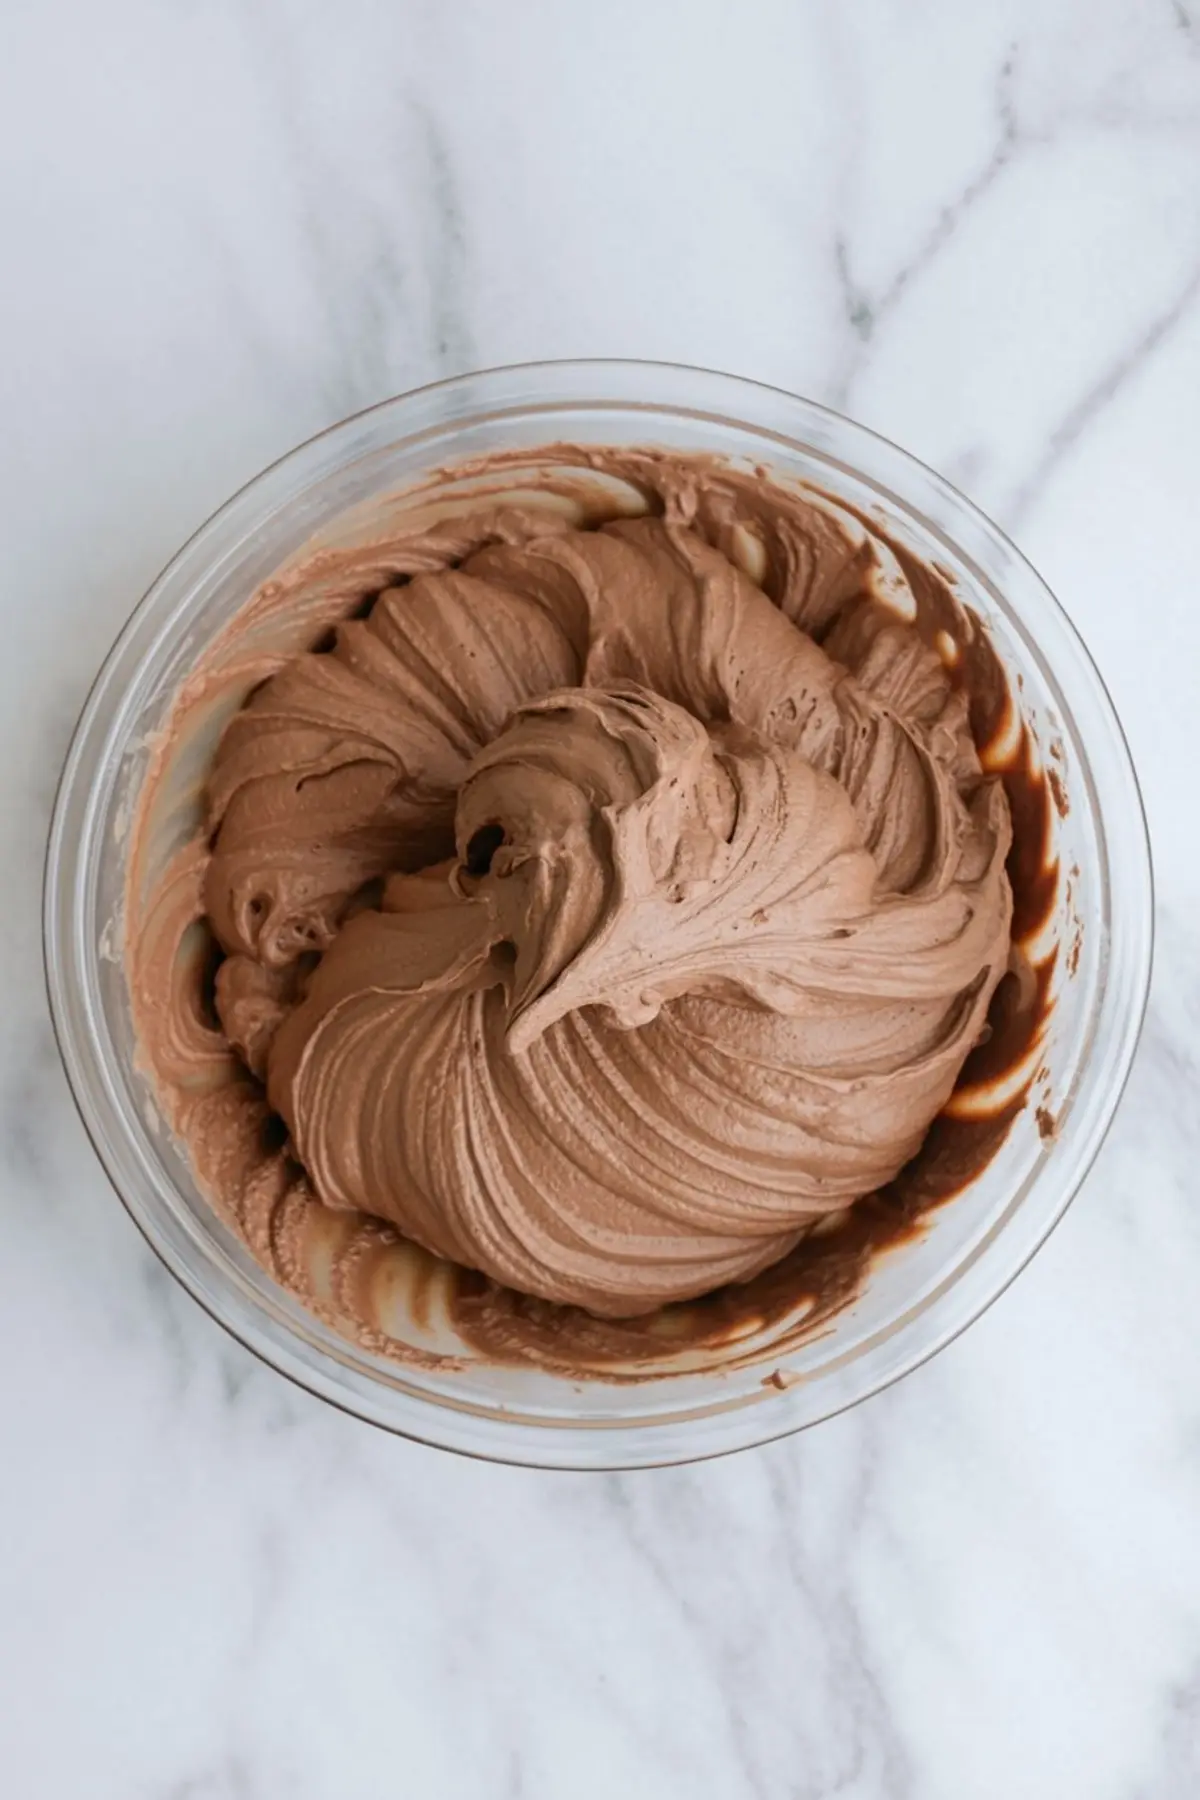
A finished mousse should hold soft peaks on a spoon and slowly slide off when tipped. That tells you it has structure without stiffness. If it feels runny, the chocolate was too warm or the cream underwhipped.
If it clumps, the chocolate may have seized. That happens sometimes if it’s still slightly warm. When in doubt, spoon a little into a cup and refrigerate it for 10 minutes. If it sets and scoops smoothly, you’re good.
For cake filling, let the mousse firm up in the fridge until it spreads without sinking. It should glide onto cake layers without dragging crumbs.
Common Mistakes and How to Fix Them
If your mousse is grainy, the cream was likely overwhipped or the chocolate was too hot. Start again with new cream and allow more cooling time.
If it feels flat, the chocolate may be too low in cocoa. Choose one with at least 55%. You can also add a splash more vanilla to deepen the flavor.
If it won’t set, chill it longer or fold in more whipped cream. This can save a mousse that feels too soft to layer. I’ve done this mid-recipe more than once, especially during warm months.
Variations and Add-Ins
Add 2 tablespoons espresso for mocha mousse. Use 100g milk chocolate plus 100g semi-sweet for a sweeter finish.
For a tangy twist, add 1 tablespoon sour cream to the whipped cream before mixing. It tastes similar to my base in this Chocolate Mousse Recipe, which leans softer and silkier.
If you want a stiffer mousse icing texture, use 200ml cream instead of 240ml. That works better for piping.
Storage and Shelf Life
This mousse stays fresh in the fridge for up to 2 days in an airtight container. I don’t recommend freezing—texture becomes uneven.
If you’re prepping it ahead, keep it chilled and covered. After about 48 hours, it loses some of its smoothness and flavor intensity. For layer cakes, I always use it the same day.
Helpful Tips from My Kitchen
Use a metal bowl for whipping cream. It holds the chill better. Chop the chocolate small and evenly. Uneven chunks melt poorly and create lumps.
Clean the spatula between folds to prevent streaking. Sounds picky, but it makes a difference in final texture.
Taste before chilling. Some chocolates need an extra touch of sweetness.
Serving Ideas for Chocolate Mousse Filling
Layer between chocolate cake rounds with fresh raspberries. Pipe into cupcake centers and top with ganache.
Serve as mousse cups with crushed cookies and whipped cream. Spread into tart shells for an easy mousse tart.
Add a layer of mousse to a trifle with chocolate sponge and whipped cream.
Save This Mousse Filling for Later
Pin this whipped chocolate mousse recipe to your board so you always have a quick, reliable cake filling on hand.
Tell me in the comments how you used it or if you tried a variation!
Chocolate Mousse Filling for Cakes
Make any dessert richer with this chocolate mousse cake filling that’s light, creamy, and loaded with flavor. Ideal for layer cakes, cupcakes, or even trifles, this chocolate mousse frosting recipe works perfectly as both a mousse icing and a filling. Whip up a batch of easy chocolate mousse with simple ingredients and enjoy a versatile mousse cake recipe you’ll come back to often. Use it in your next chocolate cake with mousse filling or spoon it into cups for a quick treat.
Ingredients
- 200g (7 oz) semi-sweet chocolate (55–65% cocoa), chopped
- 1 cup (240ml) heavy whipping cream, cold
- 2 tablespoons powdered sugar (adjust to taste)
- 1 teaspoon pure vanilla extract
- Pinch of salt (optional, only if using unsalted chocolate)
Instructions
- MELT THE CHOCOLATE: Place the chopped chocolate in a heatproof bowl and melt gently over a double boiler, stirring until smooth. Alternatively, microwave in 20-second intervals, stirring between bursts until fully melted. Set aside and allow to cool to room temperature. The chocolate must not be warm when combined with cream to prevent seizing.
- WHIP THE CREAM: In a large chilled bowl, whip the cold heavy cream with powdered sugar and vanilla using a hand mixer or stand mixer fitted with the whisk attachment. Continue whipping until soft peaks form. The cream should hold its shape but remain smooth and slightly droopy. Avoid overwhipping, which can cause the mousse to become grainy.
- COMBINE CHOCOLATE AND CREAM: Once the chocolate has cooled to room temperature but remains pourable, add one spoonful of whipped cream to the chocolate and stir gently to loosen the texture. Then fold in the remaining whipped cream in 2 to 3 additions using a rubber spatula, mixing carefully to maintain volume. Fold until the mousse is smooth and evenly colored, with no visible streaks remaining.
Notes
For a firmer texture suitable for clean slicing, chill the mousse for 30 to 60 minutes before using it in cakes or tarts. Use high-quality chocolate for best flavor, as it is the dominant ingredient. This mousse is best used the same day but can be refrigerated for up to 2 days. Do not freeze, as the texture may be compromised.
Nutrition Information
Yield
1Serving Size
1Amount Per Serving Calories 2067Total Fat 148gSaturated Fat 95gUnsaturated Fat 53gCholesterol 331mgSodium 224mgCarbohydrates 153gFiber 7gSugar 138gProtein 23g