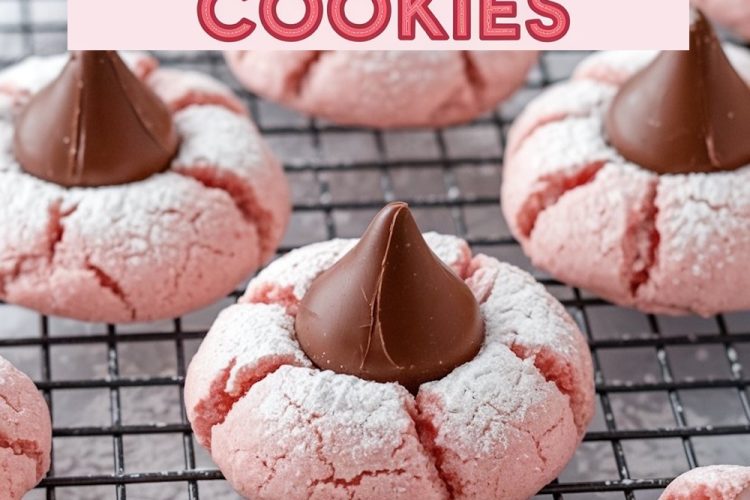
These strawberry kiss cookies are an exciting twist on traditional thumbprint cookies. Soft in texture, with a buttery dough, the slight sweetness of strawberry, and right in the middle, nice and chocolaty.
Their bright pink color and sprinkle of powdered sugar make them not just tasty but cute, too.
This will be the best treat for Valentine’s Day, birthdays, or just a good day to bake. Here’s a closer look at how these niceties are made, along with all the hints and tips that will make them perfect the first time and every time.

Following a special diet?
Every recipe on this site can be converted to gluten-free, vegan, dairy-free, keto, nut-free or egg-free with adjusted ratios so nothing falls flat.
Try the Recipe Converter →What you see in the photos didn’t happen on my first try! I tested and tweaked this recipe multiple times to get the best balance of flavor and texture. If your first batch isn’t picture-perfect, don’t worry—small adjustments (like chilling the dough longer or tweaking ingredients slightly) can make a big difference!
Disclosure: This post contains affiliate links. If you purchase through these links, I may earn a small commission at no extra cost to you. Thank you for supporting my blog!
The Story Behind Strawberry Kiss Cookies
Growing up, baking days with my grandmother were always the highlight of my week. She would bake anything simple, using the most ordinary ingredients, and make them into something special.
The thing that would remind me of those afternoon mixings, rolling, and stealing some dough bits when she was not looking would be the strawberry kiss cookies.
This recipe takes all those memories and puts them into one with the addition of a modern twist of using strawberry-flavored gelatin for a pink, strawberry-kissed dough that looks as good as it tastes.
And whenever I bake them, I am reminded of hot kitchens filled with the sound of riotous guffaws, flour, and that sweet, warm, sugary smell of a treat.
Ingredients That Make These Cookies Irresistible

Strawberry kiss cookies have a unique ingredient lineup that gives them both their flavor and beautiful color. Here’s a closer look at each ingredient and why it matters:
Butter: Softened unsalted butter makes the dough rich and tender. Creaming it well with the sugar is key to getting that soft, fluffy texture in each bite. Try Kerrygold Butter for extra flavor, though any unsalted butter works.
Granulated Sugar: Adds sweetness and helps the cookies hold their shape. The sugar also helps create the slight cracks around the edges as the cookies bake, giving them a homemade look.
Egg: The egg brings everything together, adding moisture and richness.
Vanilla & Almond Extract: Vanilla adds warmth, while almond extract (optional but recommended) enhances the strawberry flavor, giving it a sweet, nutty aroma that complements the chocolate.
Strawberry Gelatin Mix: This adds the strawberry flavor and that signature pink color. Gelatin mix is a clever addition that gives these cookies their unique look and taste.
Flour, Baking Powder, and Salt: The dry ingredients help the cookies rise slightly, giving them a soft yet structured texture. A precise measure with a Digital Kitchen Scale helps.
Chocolate Kiss Candies: The crowning jewel of each cookie, these kisses soften slightly when pressed into the warm cookies, adding an irresistible chocolate touch.
How to Make Strawberry Kiss Cookies: Step-by-Step Guide
These cookies-strawberry kiss cookies-are a breeze to make and a lot of fun. Herein is how to get the right mix of taste, feel, and look.
Preparing the Dough

Start by creaming the softened butter and granulated sugar together until the mixture is light and fluffy. This process usually takes 2-3 minutes and is essential for creating the delicate texture of the cookies.
Adding the egg, vanilla extract, and almond extract (if you’re using it) helps bind everything together and infuses the dough with a lovely aroma.
Mix the wet ingredients well, then comes the special part: adding the strawberry gelatin mix. This will turn the dough into a nice pink color and give it that light strawberry taste these cookies are so unique for.
Once the gelatin is completely mixed, add the dry ingredients-slowly-flour, baking powder, and salt-until you have a soft, partially pink dough ready for shaping.
Shaping the Cookies

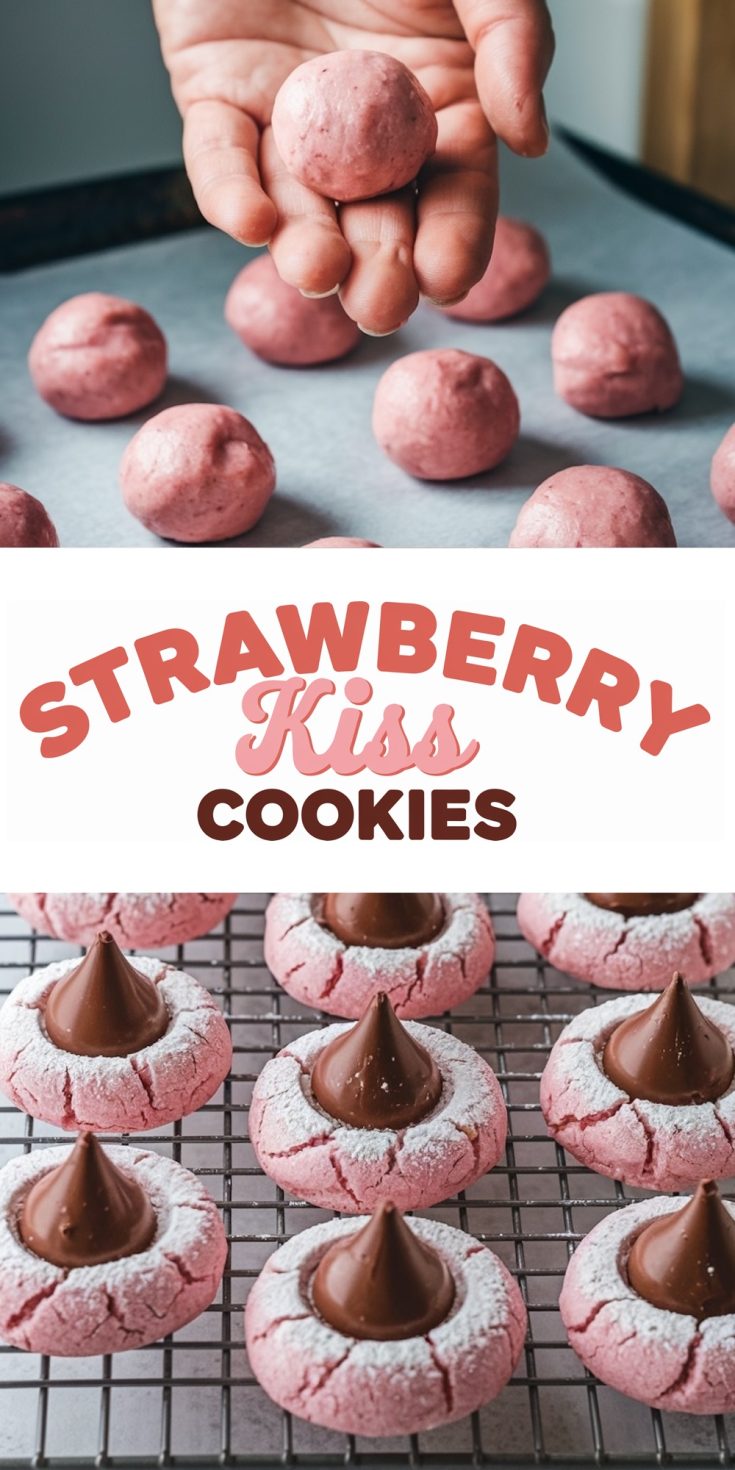
To assemble the cookies, take a rounded tablespoon of dough and round into a smooth ball. Place each onto a prepared baking sheet lined with parchment paper, leaving about two inches between each cookie to allow for slight spreading in the oven.
Make the signature thumbprint shape in the center of each dough ball by lightly pressing down with your thumb or the back of a teaspoon. A little twist as you press down makes for a smooth, rounded dip. You want it deep enough, but not to pass through to the bottom of the cookie since this is where the chocolate kiss will go later.
Baking to Perfection
Bake the cookies in a preheated oven at 350°F 175°C for 10-12 minutes, until edges are set and faint cracks just beginning to appear around the edges. The cookies should still feel very slightly soft to the touch; this ensures they remain tender even after they cool. Let them stay on the baking sheet for a few minutes before the final, delicious step.
A Finishing Touch: Dusting with Powdered Sugar
After the cookies cool down, sprinkle a little powdered sugar on top. This makes every cookie look really nice and festive, excellent for special occasions, or maybe just comforting and warming teatime.
Adding the Chocolate Kiss
When the cookies are just cool enough yet still warm, push a chocolate kiss candy into the middle of each cookie. The heat from the cookie will soften the chocolate kiss enough that it will stick in without fully melting.
This is an important step, and it is fun because every bit of the cookie combines just right with the mixture of strawberry and chocolate.

Info Provided
These will make approximately 24 to 30 cookies, all depending on the size of the cookies. Prep time is about 20 minutes, and bake time is only 10-12 minutes, so they’re pretty easy. At only 120 calories per cookie, these are a nice little treat for any sweet-tooth kinda person.
Expert Tips for Perfect Strawberry Kiss Cookies
If your cookies don’t turn out exactly like the photos on the first try, don’t worry! I baked many batches before perfecting this version. Chilling the dough properly and measuring ingredients accurately can make a big difference. Small adjustments, like adding a little extra flour or chilling longer, can will with texture and shape.
Use Room Temperature Ingredients: Room-temperature butter and egg mix more smoothly, resulting in a softer, better-textured dough.
Make Clean Indentations: Twisting your thumb or spoon as you press down in the dough creates a neater, smoother shape for the chocolate kiss.
Avoid Overbaking: Take the cookies out just as they start to firm up around the edges. They’ll continue to set on the baking sheet, giving them a perfect, tender texture.
Cool Before Dusting: Wait until the chocolate kiss and cookies have fully cooled before adding powdered sugar. This prevents the sugar from melting into the chocolate.
Serving Suggestions
These cookies are great on their own but also pair amazingly with other treats. Just serve them on top of a dessert platter with some chocolate-dipped strawberries, or put them all together with a batch of chocolate and vanilla cookies for a pretty stack of colors. Stack them up in a clear jar or box for a present that’s great for Valentine’s Day, birthdays, or any holiday.
How These Baking Tools Changed My Cookie Routine
I rely on a Mixing Bowl Set to keep wet and dry ingredients separated, which prevents clutter on my counter. The extra bowls help me move from one step to the next without tangles of flour and sugar.
I use a Hand Mixer or my KitchenAid Artisan whenever I need a smooth dough. My arms used to ache after stirring heavy butter and sugar by hand. These machines handle that chore and save me from fatigue.
A Rubber Spatula has become my go-to tool for scraping every corner of the bowl. I avoid the waste I once accepted when batter clung to the sides. Every spoonful now lands in the mixing bowl instead of the sink.
A Cookie Scoop changed how my cookies bake. Each portion comes out uniform, so the entire tray looks neat. I see even browning and consistent texture with every batch.
I bake on a Sturdy Baking Sheet lined with Parchment Paper or a Silicone Baking Mat. This setup stops dough from clinging to the pan and cuts down on cleaning time.
A Wire Cooling Rack completes the process. The cookies rest above the countertop, which allows air to move underneath. This step keeps them from turning soggy, so they stay light and fresh.
See You in the Kitchen
If you’re looking for cookies that are adorable and delectable, these strawberry kiss cookies just make any person smile. Bright pink in color, soft, and with a chocolate middle-yummy! Fun to bake and give away.
Have any of you tried these strawberry kiss cookies or another type where you just can’t get your fix? I’d love to hear from you in the comments below! Also save this recipe for when the mood is just right and add it to your holiday dessert board.
Strawberry Kiss Cookies Recipe
These strawberry kiss cookies combine buttery, melt-in-your-mouth dough with the sweetness of strawberry and a classic chocolate kiss center. A light dusting of powdered sugar adds the perfect finishing touch.
Ingredients
- 1 cup (226g) unsalted butter, softened
- 1 cup (200g) granulated sugar
- 1 large egg, at room temperature
- 1 tsp vanilla extract
- 1/2 tsp almond extract (optional)
- 2 cups + 2 tbsp (280g) all-purpose flour
- 1 tsp baking powder
- 1/4 tsp salt
- 1 package (3 oz) strawberry-flavored gelatin mix
- 1/4 cup powdered sugar, for dusting
- 24-30 chocolate kiss candies, unwrapped
Instructions
- PREPARE THE DOUGH: In a large mixing bowl, beat the softened butter and granulated sugar until light and fluffy, about 2-3 minutes. Add the egg, vanilla extract, and almond extract (if using), beating until well combined. Mix in the strawberry-flavored gelatin powder until fully incorporated.
In a separate bowl, whisk together the flour, baking powder, and salt. Gradually add the dry ingredients to the wet mixture, mixing on low speed until a soft, pink dough forms. If the dough feels too soft or sticky, add 1-2 extra tablespoons of flour. - SHAPE & CHILL THE COOKIES: Scoop about 1 tablespoon of dough and roll it between your palms to form a smooth ball. Place the dough balls on a lined baking sheet and chill in the refrigerator for at least 1 hour (or up to overnight for best results). This step is essential for preventing spreading.
- BAKE: Preheat the oven to 350°F (175°C). Arrange the chilled dough balls on a parchment-lined baking sheet, spaced about 2 inches apart.
Do NOT press an indentation into the dough before baking—this will cause excess spreading.
Bake for 11-13 minutes, or until the edges look set and slightly firm. The cookies may look soft in the center, but they will continue to firm up as they cool. - ADD THE CHOCOLATE KISSES: Remove the cookies from the oven and let them sit on the baking sheet for 2 minutes before adding the kisses. While still warm, gently press a chocolate kiss into the center of each cookie. The residual heat will help the chocolate stick without melting too much
- COOL COMPLETELY: Transfer the cookies to a wire rack and let them cool completely, allowing the chocolate to set.
- DUST WITH POWDERED SUGAR: To avoid getting powdered sugar on the chocolate, dust the cookies FIRST, then press in the kisses.
Notes
• For thicker cookies, chill the dough overnight instead of just 1 hour.
• If your cookies still spread, try baking at 325°F for 1-2 extra minutes.
• If you want a brighter pink color, a drop or two of food coloring will enhance it.
• If cookies come out too flat, gently push the edges inward with a spoon while they’re still warm to reshape them.
Nutrition Information
Yield
24Serving Size
1Amount Per Serving Calories 94Total Fat 2gSaturated Fat 1gTrans Fat 0gUnsaturated Fat 1gCholesterol 10mgSodium 72mgCarbohydrates 16gFiber 0gSugar 7gProtein 2g
I’m thinking about making these for a mixed gender baby shower. What can I sub to make them blue but still be tasty?
Hi Leah! To achieve blue cookies while keeping the tasty flavor, you could use a blueberry-flavored gelatin mix instead of the strawberry one. This will give your cookies a lovely blue color and a delightful berry flavor that complements the chocolate kisses beautifully. Just follow the same steps in the recipe, substituting the gelatin flavor. Enjoy baking for the baby shower!
Hi Emma – these cookies look very beautiful. Since I have fresh strawberries on hand, could I use them in the batter to make the cookies? Thank you for the recipe.
Hi Ashley! That’s such a great question—fresh strawberries are amazing, but they might not work well in this particular recipe since the strawberry gelatin powder provides the flavor, color, and keeps the dough dry enough to hold its shape. Adding fresh strawberries could introduce too much moisture, which might make the cookies spread or lose their texture.
If you’d like to use fresh strawberries, you could finely chop them and fold them into the dough, but I’d recommend reducing the butter slightly to compensate for the extra moisture. Or, you could try another recipe specifically for fresh strawberry cookies—I’d love to help if you need one! Let me know how it goes if you decide to experiment. 😊🍓
Hi! I am working on valentines prep and I was wondering if you’ve ever frozen these before baking??
Hi Kenzie! That’s such a great question—especially with Valentine’s Day prep in mind. I haven’t personally frozen this particular dough before baking, but based on my experience with similar cookie recipes, you absolutely can! Here’s how I’d recommend doing it:
1. Prepare the Dough Balls: Follow the recipe up to the point where you roll the dough into balls and create the indentations.
2. Flash Freeze: Place the shaped dough balls on a baking sheet lined with parchment paper and freeze them until they’re firm (about 1-2 hours). This will help them hold their shape.
3. Store for Later: Once they’re firm, transfer the dough balls to an airtight container or freezer-safe bag. Don’t forget to label it with the date! They’ll keep well in the freezer for up to 3 months.
4. Bake from Frozen: When you’re ready to bake, preheat the oven and bake the cookies directly from frozen. You might need to add an extra minute or two to the baking time, but keep an eye on them so they don’t overbake.
One tip: Add the chocolate kisses after baking, just like in the recipe, so they don’t melt while the cookies bake.
I hope this helps! Let me know if you give it a try—I’d love to hear how it works out for you. 😊
Hi Emma, I tried these following recipe and instruction to the T, my result was complete spread flat and very large. The second tray I put in fridge for one hour but got same result.
Hi Jackie,
Thank you for sharing your experience, and I’m so sorry to hear the cookies didn’t turn out as expected. When cookies spread too much, it’s often due to one of a few culprits, so let’s troubleshoot this together!
1. Butter Consistency: Was your butter softened but not melted? If the butter is too soft, it can cause the dough to spread excessively in the oven. For best results, the butter should hold its shape but give slightly when pressed with your finger. If it’s overly soft, try chilling the dough for at least 30 minutes before rolling it into balls.
2. Flour Measurement: Did you measure the flour by spooning it into the measuring cup and leveling it off? Too little flour can also lead to spreading. If the dough feels sticky or overly soft after mixing, adding 1-2 tablespoons of flour might help.
3. Oven Temperature: Oven temperature can sometimes vary. If your oven runs a bit hot, the butter might melt too quickly, causing the cookies to spread. Ensure it’s at the correct 350°F (175°C).
4. Baking Sheet: Were you using a nonstick or greased baking sheet? These can sometimes make cookies spread more. Lining your sheet with parchment paper is best for this recipe.
I want these cookies to work out beautifully for you—they’re too delicious to miss out on!
Looking forward to hearing how your next batch goes. 😊
Warmly,
Emma
Your cookie recipe is the same as mine with one exception. It calls for 3 cups of flour and they come out perfect every time. I only used 2 cups of flour and had the same result. Flat, spread,greasy,oily mess. Next time I’ll add the 3 cups and see what happens.
These are so very pretty! I was scrolling Pinterest for Valentines Day ideas for my grands and these the winner! 🩷🍪
Miriam, that’s wonderful to hear! I love that you’re making something special for your grandkids. I hope they enjoy them as much as you enjoy making them! Let me know how they turn out. 💕🍪
Could this dough be rolled out and cut into heart shapes instead of using the balls?
Great question! This dough is pretty soft, so it might not hold its shape well if rolled out and cut with cookie cutters. If you want heart-shaped cookies, you could try chilling the dough longer before rolling it out or lightly flattening the dough balls into heart shapes before baking. Let me know if you give it a try—I’d love to hear how it works!
If you’re looking for more heart-shaped treats, you might like these:
Can these be used with sugar free strawberry jello?
Great question. Sugar free strawberry Jello can work but the texture and flavor might be slightly different. Since sugar adds some bulk, the dough may turn out a little softer, and the cookies might not have the same level of strawberry flavor. If you try it, I’d recommend chilling the dough a little longer to help with structure. Let me know if you give it a go.
I also followed the directions exactly as stated. I now have large flat cookies. Nothing like what is pictured. I have to say they do taste good so I will drizzle white chocolate on top with sprinkles so it won’t be a total waste of my time . Very disappointing.
I appreciate your honest feedback, and I’m really sorry the cookies didn’t turn out as expected. Flat cookies can sometimes happen due to butter softness, ingredient variations, or even slight temperature differences. Chilling the dough longer (at least 30 minutes) and adding 2–3 extra tablespoons of flour can help them hold their shape better.
I love your idea of drizzling white chocolate and adding sprinkles—great way to make the best of it! If you ever decide to try them again and need help troubleshooting, feel free to ask. I want every batch to be a success for you!
I am so sorry to report that my cookies were also flat. I weighed the ingredients and used a lined baking sheet as directed. My butter was not to soft as it held its shape. I’m not sure what I could change, except try more flour as another commenter suggested.
Tracey, I really appreciate you taking the time to share your experience. Since you followed everything carefully, I’d recommend adding 2-3 extra tablespoons of flour and chilling the dough for at least an hour or even overnight to help with structure. Also, make sure to press the kiss in after baking, not before, as that can sometimes cause excess spreading. I’ve updated the recipe with these fixes, so if you give it another try, I’d love to hear how it goes!
I had the same problem as Hackie, spread like a pancake. Do bake all the time and followed the direction. Im so disappointed, these were for a bake sale. When they came out of the oven I kinda squished them together so they sorta look like Rose’s. They taste good just dont look great but I’ll see if they sell.
I completely understand how frustrating that must have been, especially for a bake sale! If this ever happens again, you can gently reshape the cookies right when they come out of the oven by using a spoon to push the edges inward while they’re still soft. I’ve also updated the recipe with some changes to prevent spreading next time. Hoping your cookies still sell well!
Shoot directions shared to dust w/powdered sugar after completely cool … any tips on how you avoided white on choc kisses please
A little trick to avoid getting powdered sugar on the kisses is to dust the cookies first, then add the chocolate kiss afterward once the cookies have cooled slightly but are still warm enough for the chocolate to stick. Hope that helps!
Like other commenters above, I got large flat cookies. 😥 I chilled for an hour, and followed your other tips. Very disappointed.
I hear you on the spreading issue, and I really appreciate the feedback. After testing again, I’ve adjusted the recipe to include a bit more flour, a longer chilling time, and a change in how the indentation is made. These changes should help prevent flat cookies and give you the thicker, bakery-style result you were expecting. I’d love for you to try again and let me know how it goes!
These cookies are tasty but your recipe is a little confusing. Step 2 says to put the indentation in prior to step 3 which is baking. But step 3 says do not indent before baking.
What can we use that doesn’t contain red dye 40? Is there an alternative?
Yes! If you want to avoid Red Dye 40, you can use freeze-dried strawberry powder (3-4 tbsp for flavor and color) or beet powder (start with 1 tsp and adjust as needed). There are also natural food coloring brands like Watkins or India Tree that use plant-based dyes. The cookies might not be as vibrant pink, but they’ll still taste great! Hope that helps! 😊
Just so you’re aware, the instructions say to make the indentation in one step then the next step says to avoid it. Read through the comments while I wait for them to chill. Much love!
I weighed everything exactly as mentioned and also ended up with cookie spread! Super disappointing, they’re for my son’s school. I ended up using a biscuit cutter while still hot to at least have them uniform size. They don’t look anything like the photo. This recipe needs some tweaking!
I have my dough in the fridge to chill overnight. Do I put in the indentation BEFORE or AFTER baking tomorrow? Thank you.
Shelby & B, I really appreciate you both pointing that out! I’ve updated the recipe yesterday and that has mixed the steps up a bit. Now I fully cleaned up the steps to remove any contradictions. Thanks for your patience, and I hope this version makes everything much smoother! Let me know if anything still feels unclear. 😊
Thank you so much Emma! I should have read the full recipe before starting but this tired mama just went for it so when I got to step 3, i thought.. uh oh! I fixed it the 2nd time around and my daughters class and my coworkers loved them! I appreciate you and your recipes
I totally get that—sometimes we just dive right in! I’m really glad you were able to adjust it the second time, and even better that everyone loved them. Thanks for sharing, and I appreciate you too! 😊
I made these today and they turned out great! I followed the recipe exactly, refrigerated them for about 2 hours before baking and they did not come out flat at all! Perfect size/shape and taste delicious. Thanks for the great recipe!
That’s amazing to hear, Brittany! Thanks for sharing your experience. Chilling for 2 hours sounds like the perfect sweet spot to keep them from spreading. I’m so glad they turned out just right—enjoy! 😊🍓🍪
What can we use that doesn’t contain red dye 40? Is there an alternative?
Great question! If you’re looking to avoid Red Dye 40, here are a few natural alternatives:
Freeze-dried strawberry powder – Adds both color and flavor naturally. Use about 3-4 tablespoons.
Beet powder – A great natural red colorant without affecting taste. Start with 1 teaspoon and adjust as needed.
Natural food coloring – Brands like Watkins and India Tree make plant-based red food coloring without artificial dyes.
The cookies might not be as vibrant pink, but they’ll still taste delicious! Let me know if you try any of these options. 😊
Hi Emma, I am in the process of the recipe making steps but super confused as when to indent? Any guidelines would be so helpful!!
Hey Courtney! The best approach depends on the look you want:
For a rounder, thicker cookie – Bake the dough as a smooth ball with no indentation, then press the kiss in after baking while the cookies are still warm. This helps them hold their shape better.
If you want the crinkled look (like in the picture) – You can press a very shallow indentation before baking, but pressing too deep can cause the cookies to spread more. If you try this, keep the dough tall and don’t flatten it.
If you’re worried about spreading, I’d stick with the first method! Hope that helps! 😊🍓
Do you have a recipe like this for blossom cookies (not strawberry) that are not peanut butter based? We made it when I was a kid and I have been unsuccessfully looking for the recipe for years.
Carolyn, I think I have exactly what you’ve been looking for! If you loved blossom cookies as a kid but want a version without peanut butter, try these Kiss Sugar Cookies – they have that same nostalgic feel but with a buttery, classic sugar cookie base instead. Here’s the recipe: Christmas Kiss Sugar Cookies.
I know how frustrating it can be to search for a recipe from childhood, so I hope this brings back those sweet memories. Let me know if this is the one!
Thank you for this recipe!! I chilled the dough balls over night and they turned out perfectly! I think that may be the best thing to get that puffy, lovely cookie😋
Hi Kristen,
Love hearing this! Chilling the dough overnight really does make all the difference — I’ve found the same thing when I want that thick, soft center. It’s one of those little tricks that pays off every time. I’m so glad you had great results, and now you’ve got me craving a batch of these puffy cookies myself 😊 Thanks for sharing what worked for you!
I was hoping to make these, but wondered if I could press a fork in them to make a waffle pattern like in peanut butter blossoms. Would that work?
Hey Lyn! Great question—and I love that idea because that crisscross pattern is such a nostalgic touch from peanut butter blossoms 😊
That said, for these strawberry kiss cookies, I’d skip the fork press. The dough is meant to stay domed and smooth so it can cradle the chocolate kiss in the center. Pressing them down beforehand (even gently) tends to make them spread more during baking, which can lead to thinner cookies and less structure to hold the kiss candy.
If you’re really set on adding texture, you could try a super light press right after baking—before the kiss goes in—but it might still take away from that puffy, soft look. I’ve tested a batch that way before and it gave the cookie a flatter finish, which didn’t hold the kiss quite as nicely.
Stick with the chilled dough rolled into balls, and you’ll get that perfect soft center with the kiss nestled right on top ✨ Let me know how yours turn out!
Like many of the bakers above, I followed this recipe exactly as written. Butter was perfect consistency. I weighed all of the ingredients. The dough was even a little dry when I was scooping before refridgerating. I don’t think I could have added any more flour. I even tested different over temperatures to see if I could help with spreading. Nothing helped. I’m sad as I am making these for gifts and they have all baked very inconsistently. Some of the cookies are flatter than others. I tried turning the cookies sheets mid bake to see if that would help them cook more evenly, nope. I am glad that you’ve had success Emma, but these were an absolute fail for me.
Hi, Tasha! I can tell you followed the recipe closely, and I’m sorry the cookies didn’t turn out as expected—especially when you’re baking for gifts. If the dough felt dry from the start, that can lead to uneven spreading. Next time, try adding 1 to 2 teaspoons of milk or an extra egg yolk to help bring the dough together more evenly.
Also, make sure the cookie dough balls are tightly packed before chilling. I’ve had better results when I roll them firmly by hand rather than just scooping. And if your oven has hot spots, stacking two pans can help prevent the bottoms from browning too fast.
If you want to share more details, I’d be happy to help troubleshoot further. I always want these recipes to feel reliable and worth your time.