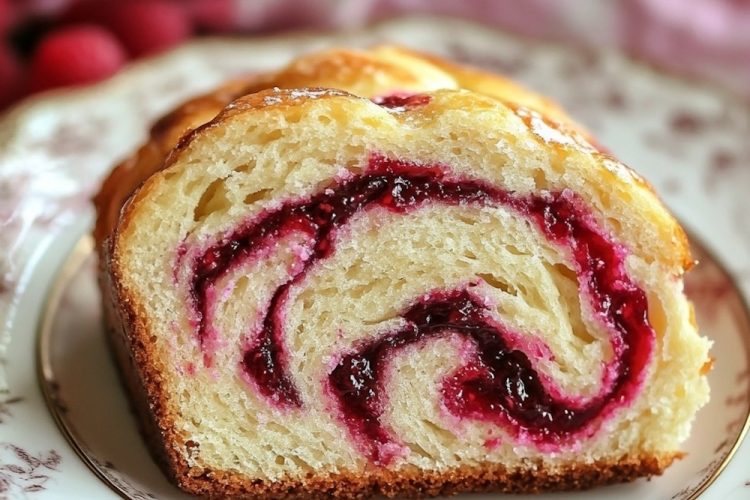
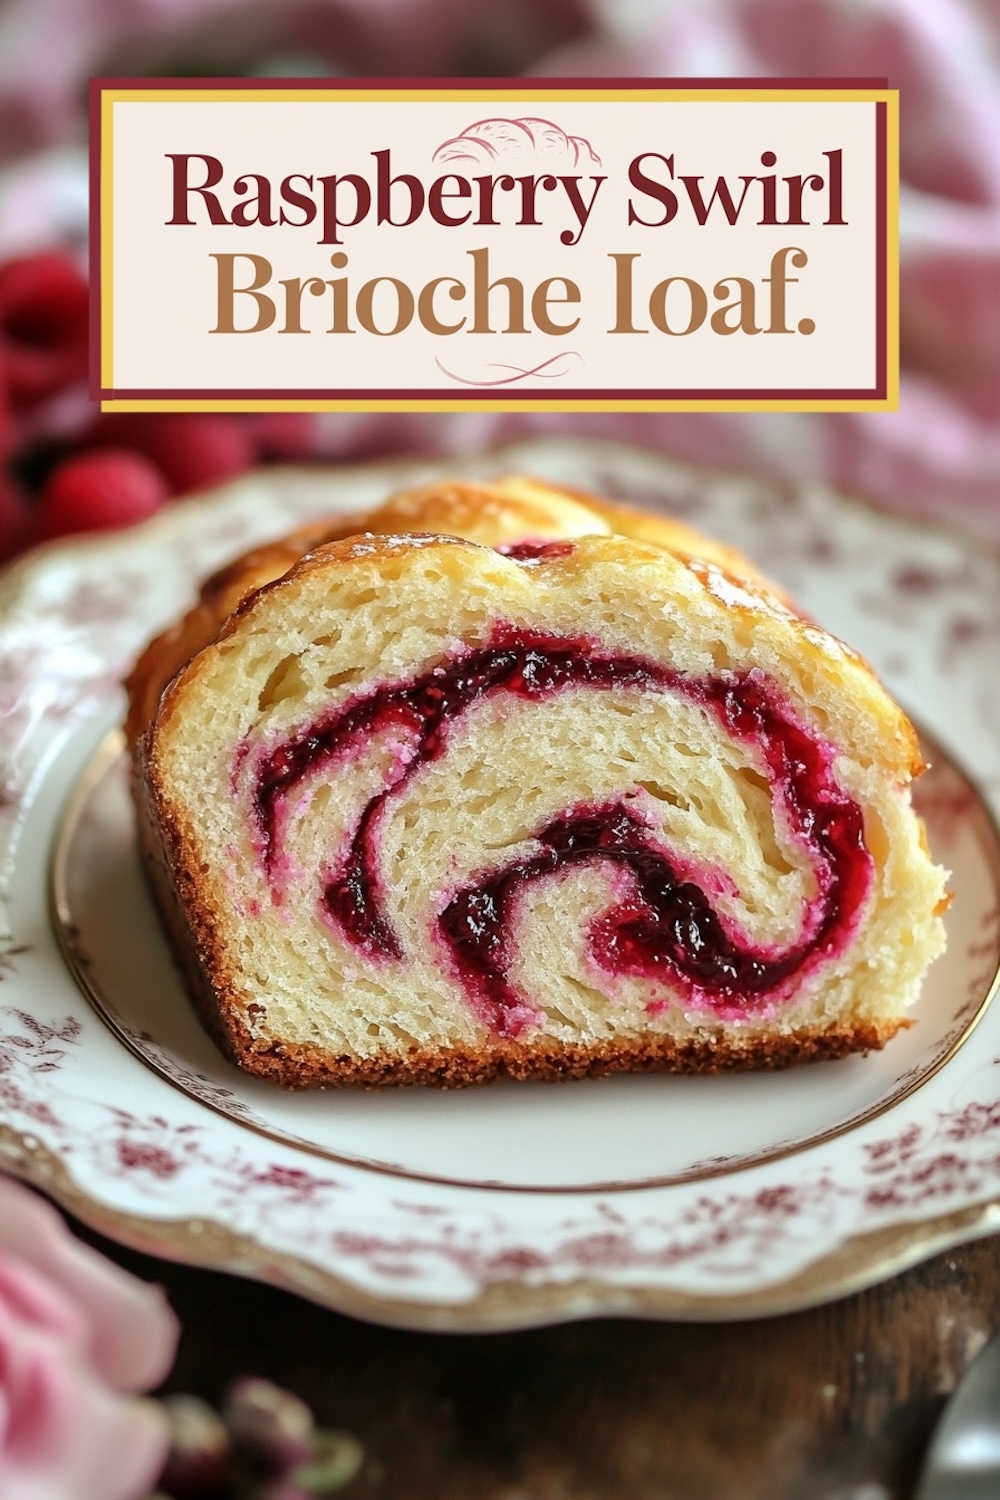
Sliced into, this golden loaf swirls deep red with raspberry filling, seeming to promise in each single bite a burst of flavor at once sweet and tangy. The Raspberry Swirl Brioche Loaf is as much of a treat to the sight as it is to the taste and therefore is ideal for adorning festive tables on occasions dear and special.
This is most comforting, with sweet berry tang and tender, buttery layers, on those chilly days, and it is to be shared among friends and family.
Following a special diet?
Every recipe on this site can be converted to gluten-free, vegan, dairy-free, keto, nut-free or egg-free with adjusted ratios so nothing falls flat.
Try the Recipe Converter →The Inspiration Behind This Recipe
Growing up, my memories in the kitchen have always involved sounds and scents of baking. The work of my mother’s hands moved deftly through dough; the yeasty, warm waft as it rose by the kitchen window; the sheen of fruity jams-to-be on their path into pastry.
The holiday season brings a special chance to recapture those moments in time, and this Raspberry Swirl Brioche Loaf brings back every one of those magical memories for me.
This is a comforting throwback to those times and an elegant update for the joys of sharing with loved ones today.
You will make this loaf, but it is not about the recipe; it’s about the slowing down, embracing the rhythm of holiday baking: the rolling, twisting, and shaping that will attune you to that warm, ageless tradition.
Ingredients for an Irresistible Raspberry Swirl Brioche Loaf
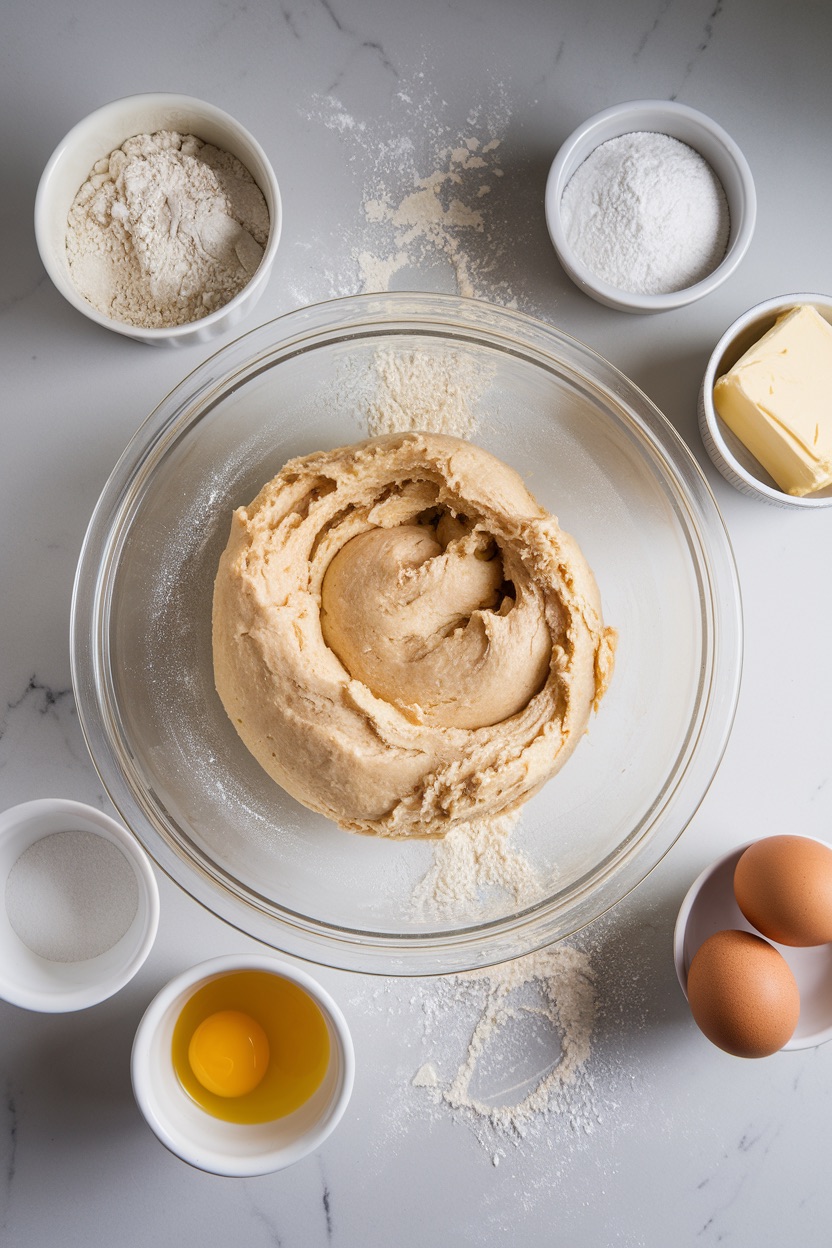
To create this gorgeous, flavorful loaf, you’ll need a few essential ingredients for both the soft brioche dough and the raspberry filling:
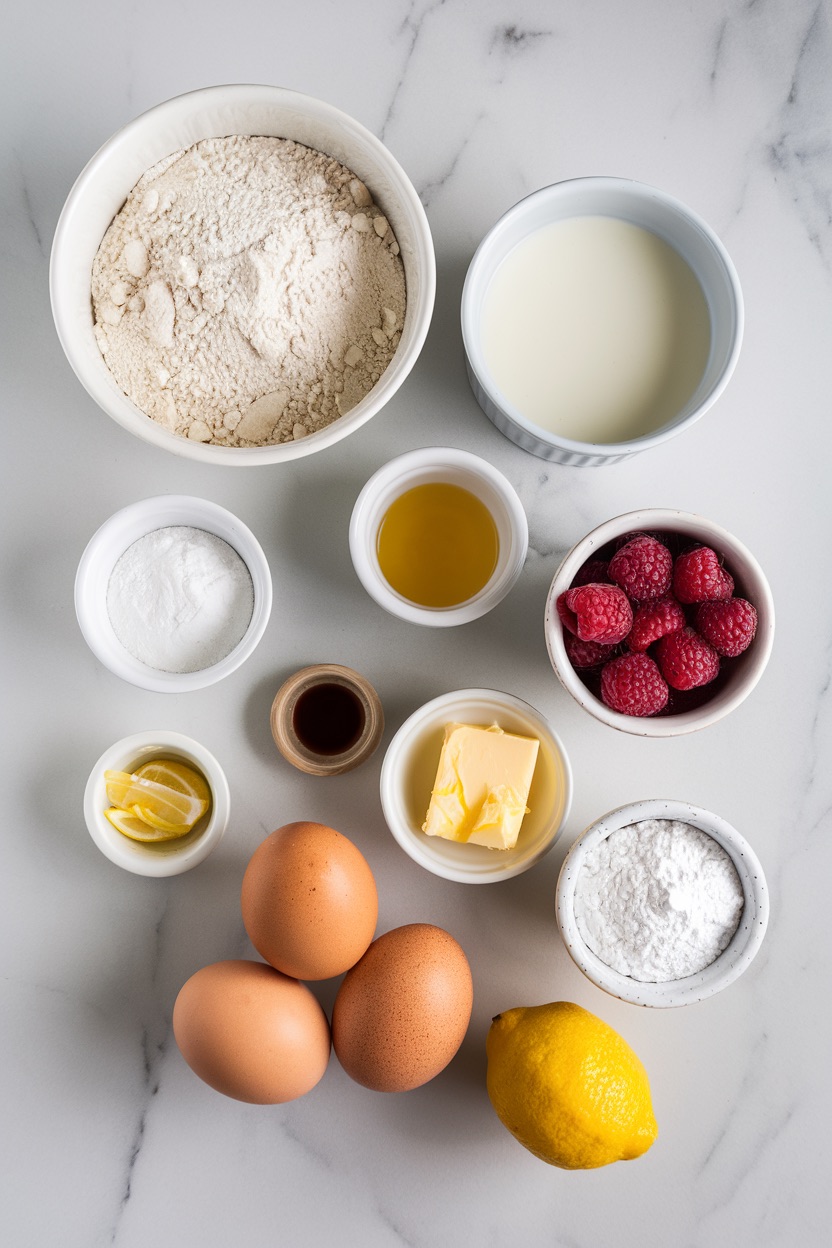
- Brioche Dough: This begins with all-purpose flour, active dry yeast, granulated sugar, salt, warm milk, softened butter, eggs, vanilla, and a hint of optional lemon zest. Together, these ingredients give the loaf its signature richness and pillowy softness.
- Raspberry Filling: This filling uses raspberry preserves or jam, cornstarch, water, and melted butter for brushing. The cornstarch and water mixture helps thicken the jam, so it doesn’t seep too much while baking.
- Optional Glaze: A simple glaze made from powdered sugar, lemon juice, and a touch of milk or cream gives this loaf a finishing touch that’s visually stunning and adds a tangy contrast to the sweet filling.
Crafting the Dough: Patience and a Touch of Magic
The perfect setting of the brioche dough happens when time and touch come together. It begins with the action of foaming yeast into warm milk with a pinch of sugar for that light rise we all know and love about brioche.
The yeast should still be foamy when it is combined with flour, sugar, salt, softened butter, eggs, vanilla, and lightly grated lemon zest, if desired, for brightness against the sweetness of the raspberry filling.

Mix and begin to knead. The kneading will take 10 to 12 minutes; this will give the required elasticity to the dough. It is one of the rhythmic steps in baking, which allows you to connect with the dough-you feel it change from rough to smooth.
Let the dough rise in a warm place for 1 to 1.5 hours, just the right time to make the filling with raspberries.
Making the Raspberry Filling: A Simple Step with Big Flavor
Meanwhile, prepare the raspberry filling while the dough rises. Take some of the preserves and mix with cornstarch and a little water to get to a thickened consistency-so it doesn’t make for excessive seepage when baking.
That’s a quick yet important move since by the time the filling cools down completely, it’s way easier to build on the dough and isn’t going to run all over the place.
It’s a rich filling, full of berry flavor, and a perfect textural contrast to the buttery dough in which it sits.
Shaping the Loaf: Roll, Slice, and Twist
It’s also quite fun shaping the loaf itself, turning this rather plain dough and filling into this swirly beauty. Make sure to roll out the dough into a big rectangle, spread in the cooled raspberry filling, and leave just a little border around to catch the spills.
Now take the dough tightly into a log, slice it in half lengthwise, showing all the layers of dough and jam inside.
This might seem like intimidation if it’s your first time to twist the two halves together, but it is really fun and a pretty forgiving step besides. It doesn’t have to be perfect, as the swirls bake in a beautiful marbled effect.
Tuck the twisted loaf into a greased pan and give it one last rise for volume and lightness.
Baking and Glazing the Perfect Loaf
Brush the top with a little melted butter when the oven is hot-the type of golden crust that crackles just slightly. This brioche, once it has been baked for 35-40 minutes, sends an aroma wafting from the kitchen, teasingly divulging the beauty of the finished product.
For the last 10 minutes, cover the top loosely with foil so that it does not brown too much.
Once done baking, let the bread cool for a little, then drizzle with lemon glaze, if desired. The glaze adds that level of sweetness, coupled with a little tartness that really brings out the natural flavor of the raspberry.
Tips for the Best Brioche Loaf
- Dough Texture: The dough should be soft but not overly sticky. Adjust with a little flour as needed, but be cautious not to overdo it.
- Warm Environment: Brioche dough loves warmth. If your kitchen is cool, let it rise in a slightly warmed (but turned off) oven.
- Careful Twisting: The twist doesn’t have to be perfect! A little imperfection adds character, and each slice will reveal its unique pattern.
Serving Suggestions
This Raspberry Swirl Brioche Loaf is delicious on its own but also shines with a few pairing ideas:
- For Breakfast or Brunch: Serve a thick slice with butter and a hot cup of coffee or tea for a decadent morning treat.
- Holiday Dessert: Present the loaf on a dessert tray with other holiday sweets. The vibrant raspberry swirl is visually stunning and tastes just as good as it looks!
- Toasted with Cream Cheese: Lightly toast a slice and spread a little cream cheese for an indulgent twist that balances the loaf’s sweetness with a creamy tang.
Let the Sweetness Begin
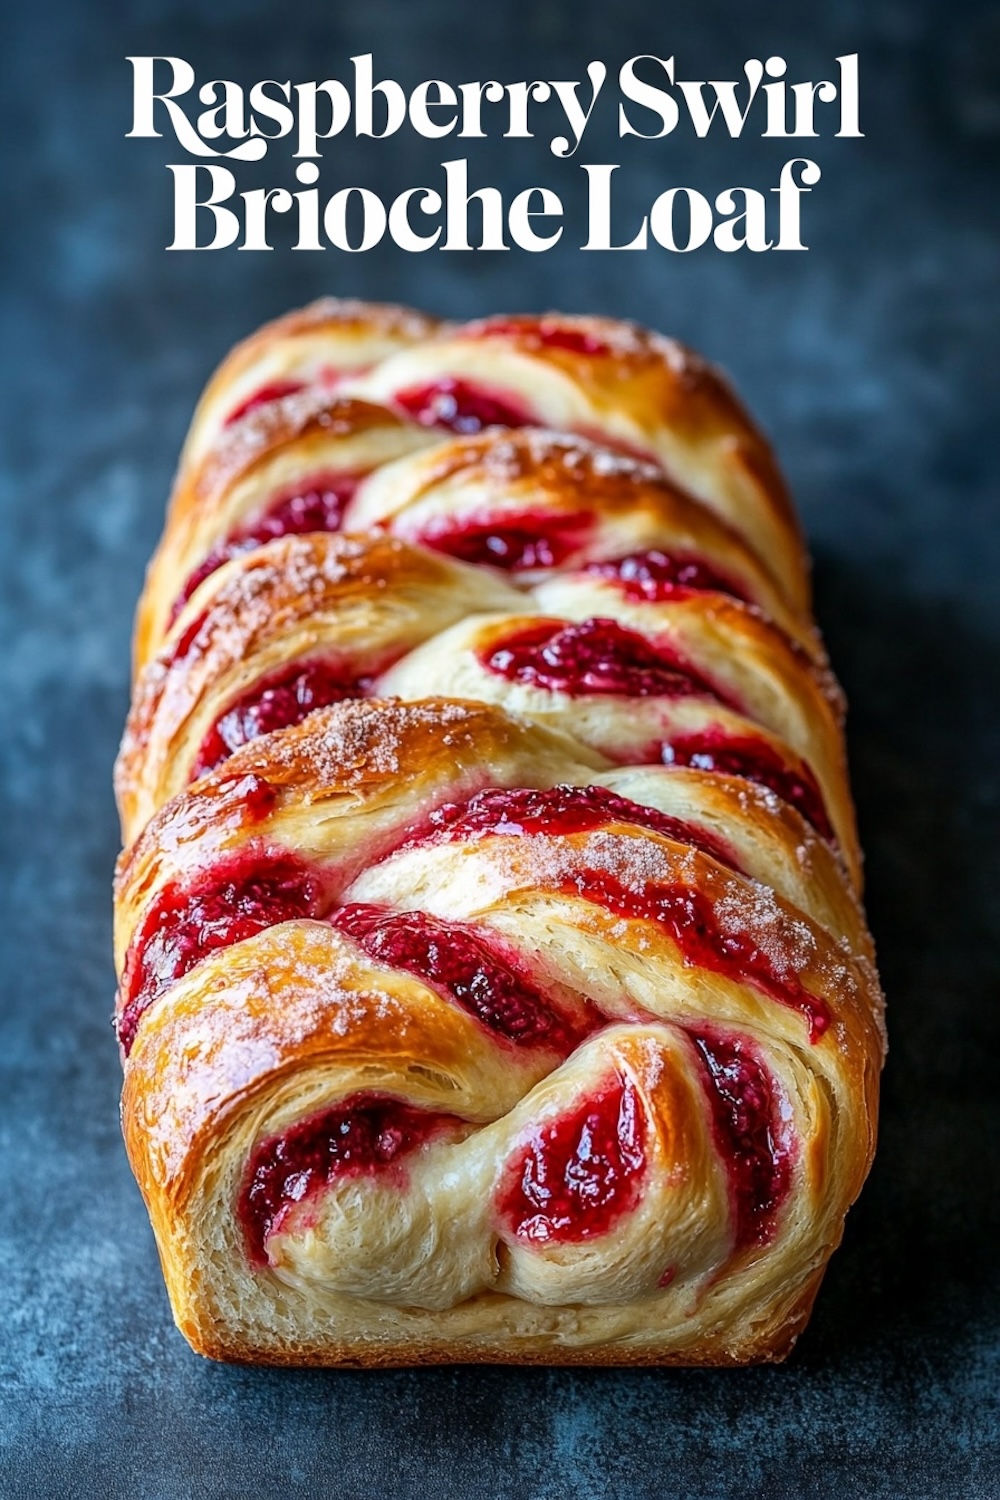
This Raspberry Swirl Brioche Loaf is beautiful and adds beauty to any holiday table. Soft, buttery bread with jelly packed inside and bright red raspberry swirls-this is one treat of a dessert; it’s as beautiful as it tastes.
A little more patience, but the result is well worth the effort: a dessert to bring them all together for the joy of baking and feasting.
Love this recipe? Be sure to pin this recipe to your Holiday Baking Board and share with your friends and family. Any twists of your own or special tips? Drop them in the comments below!
Getting excited for the holidays? Make each day leading up to Christmas even more special with exclusive treats from my ‘24 Days of Christmas Desserts’ eBook, featuring a delightful new recipe for every day of the season.

Raspberry Swirl Brioche Loaf
Ingredients
- FOR THE BRIOCHE DOUGH:
- 3 ¼ cups all-purpose flour
- 1 packet (2 ¼ tsp) active dry yeast
- ¼ cup granulated sugar
- ½ tsp salt
- ½ cup warm milk (about 110°F)
- 4 tbsp unsalted butter, softened
- 2 large eggs, at room temperature
- 1 tsp vanilla extract
- 1 tsp lemon zest (optional)
- FOR THE RASPBERRY FILLING:
- 1 cup raspberry preserves or jam
- 1 tbsp cornstarch
- 2 tbsp water
- 1 tbsp butter, melted (for brushing)
- FOR THE GLAZE (OPTIONAL):
- ¾ cup powdered sugar
- 1–2 tbsp lemon juice
- 1 tbsp milk or cream
Instructions
- ACTIVATE THE YEAST: In a small bowl, combine warm milk and a pinch of sugar, then sprinkle the yeast over the top. Let it sit for 5–10 minutes until foamy.
- MIX DRY INGREDIENTS: In a large mixing bowl, whisk together the flour, granulated sugar, and salt until evenly combined.
- COMBINE WET INGREDIENTS: Add the foamy yeast mixture, softened butter, eggs, vanilla extract, and lemon zest (if using) to the dry ingredients. Mix until a shaggy dough forms.
- KNEAD THE DOUGH: Transfer the dough to a lightly floured surface and knead by hand for 10–12 minutes, until the dough becomes smooth and elastic. Add small amounts of flour if the dough is too sticky.
- LET DOUGH RISE: Place the kneaded dough in a lightly greased bowl. Cover with a damp towel and let rise in a warm area for 1 to 1 ½ hours, or until doubled in size.
- THICKEN THE FILLING: While the dough rises, stir together raspberry preserves, cornstarch, and water in a small saucepan. Cook over medium-low heat, stirring constantly, until the mixture thickens slightly. Set aside to cool completely.
- ROLL OUT THE DOUGH: After the first rise, punch down the dough and roll it into a 10x15-inch rectangle on a floured surface.
- ADD THE FILLING: Spread the cooled raspberry mixture evenly over the dough, leaving a ½-inch border on all sides.
- FORM THE LOAF: Starting from one long edge, roll the dough into a tight log. Slice the log lengthwise down the center to reveal the layers, then twist the two halves together with the cut sides facing up.
- SECOND RISE: Gently transfer the twisted dough into a greased 9x5-inch loaf pan. Cover and let rise for another 30–40 minutes.
- PREHEAT THE OVEN: While the loaf is rising, preheat your oven to 350°F (175°C).
- BAKE THE LOAF: Brush the top of the loaf with melted butter. Bake for 35–40 minutes until golden brown and fully baked. If it browns too quickly, cover loosely with foil for the final 10 minutes.
- COOL THE LOAF: Let the baked loaf cool in the pan for 10 minutes, then transfer to a wire rack to cool completely before glazing.
- MAKE THE GLAZE (OPTIONAL): In a small bowl, whisk together powdered sugar, lemon juice, and milk until smooth. Drizzle over the cooled loaf.
Notes
For a brighter flavor, use lemon zest in the dough and lemon juice in the glaze. If using seedless raspberry preserves, no straining is needed. Store the loaf in an airtight container at room temperature for up to 2 days, or refrigerate for longer freshness. Warm slices briefly before serving for best texture.
Nutrition Information
Yield
10Serving Size
1Amount Per Serving Calories 387Total Fat 8gSaturated Fat 4gUnsaturated Fat 3gCholesterol 55mgSodium 149mgCarbohydrates 73gFiber 1gSugar 37gProtein 6g
Great job on the great recipes.
Thank you, Marilyn that really means a lot. I love sharing recipes that actually get used and enjoyed in real kitchens. Appreciate you being here 💛
Is there a way to make this ahead of time and freeze? I know some recipes you can make it ahead and when needed let it rise than cook it.
Hi Karen, freeze the shaped loaf after the first rise, thaw overnight in the fridge, let it proof on the counter, then bake as usual. Alternatively, freeze the baked loaf and reheat at 325 °F until warm 😊
The result is so beautiful, but I dont understand how to make it even I’m already read the instruction couple of time 😰.
Is there any video instrucion I can watch?
Riana, thank you for sharing that. Brioche can feel a bit tricky the first time since there are several steps, especially with the rolling and twisting. I don’t have a video tutorial for this loaf yet, but I can walk you through with some extra tips to make it easier. One thing that helps is to focus on each step separately instead of reading the whole recipe at once. For example, you can prepare the dough one day and shape and bake it the next. If you’d like, I can suggest a simpler shaping method that still gives a pretty swirl without the full twist 😊.
I agree. Even breaking it down I do not understand 😭
Jenna, thank you for chiming in, you’re not alone in feeling that way. This one’s a bit of a project, especially the shaping part. If it helps, I can share a simpler version that skips the twist and still gives you that beautiful swirl inside. Let me know if you’d like that, and I’ll walk you through it step-by-step 😊
Maybe I made the jam too thin, but I am having trouble rolling the dough into a tight log without completely squeezing the jam out. Do you have any tips for getting the jam to stay put?
Hey Dara, I’ve definitely run into this before, and you’re probably right that the jam was just a bit too thin. When it’s not thick enough, it loves to slip and slide as you roll, which makes it tough to keep things neat. What’s helped me is cooking the jam down until it’s nice and thick, almost like a spreadable paste. It also really helps to let it cool completely before using it. Warm jam has a mind of its own and just won’t stay put.
When you’re rolling, try not to press too hard. I like to gently lift and roll the dough forward so I’m not pushing the filling out. Leaving a little border around the edges also gives the jam less room to escape. If you’ve already made the jam, you can thicken it a bit more by reheating it with a touch more cornstarch, then let it cool before trying again.
Hope that helps. this one can be a little messy at first, but once you find the right consistency, it’s a game changer.
I teach a class and we do not have 3 hours. Would I be able to refrigerate overnight?
Hi Keri, yes, you can definitely refrigerate the dough overnight after the first rise. Once it’s doubled in size, just cover it well and place it in the fridge. The next day, take it out about 30 to 45 minutes before shaping to let it come back to room temperature a bit. That makes it easier to handle and helps with the second rise.
If you have time, I’d really suggest trying it once ahead of your class. Cold-proofing usually works really well, and I’ve done it myself when prepping ahead for a busy morning, but it’s always good to see how your fridge and timing affect the dough. That way, you’ll feel more confident walking your class through it. Let me know if you want help tweaking the steps to fit your schedule 😊
I made this for my church family this weekend. They loved it. It was absolutely delicious.
That sounds wonderful, Iris. I really appreciate you sharing that it was a hit with your church family. There’s something special about bringing homemade bread to a group like that. I’m glad the recipe worked well for you.
Do I need to refrigerate or leave the loaf out once it’s finished? It’s really yummy!
Rivers, I’m glad you enjoyed it 😊
You can leave the brioche loaf out at room temperature. I usually keep mine in an airtight container for two to three days, and the texture stays tender. If your kitchen runs warm or if you added the glaze, refrigeration can help keep the fruit layer fresh, but it does firm up the crumb a bit.
When I chill it, I like to let slices sit out for a few minutes before serving. That brings the softness back.
I think you have either the flour or the milk amount wrong. I just made this and the dough ball came out dry and hard, not stretchy at all. Based on this you’ve got a hydration of roughly 29% ~420g flour to ~120g milk… i feel like the milk needs to be doubled for a hydration of roughly 50-60%…
Hi, Michael! Thanks for trying the loaf and for looking closely at the ratios. Enriched doughs like this one do feel dry before they’re fully developed, and the texture you’re describing can happen when the dough hasn’t fully come together yet. The amounts listed are what I tested to get that soft, slightly tender crumb without it being sticky.
If your dough was hard and didn’t stretch, it could be due to factors like flour type (some absorb more), how the ingredients were measured, or how long the dough was worked. I’ve seen the same recipe behave a bit differently in cooler kitchens.
Adding a bit more milk can help with stretchiness, but I’d suggest doing that in small increments rather than doubling right away. Start with an extra tablespoon or two so the dough stays workable without becoming too slack.