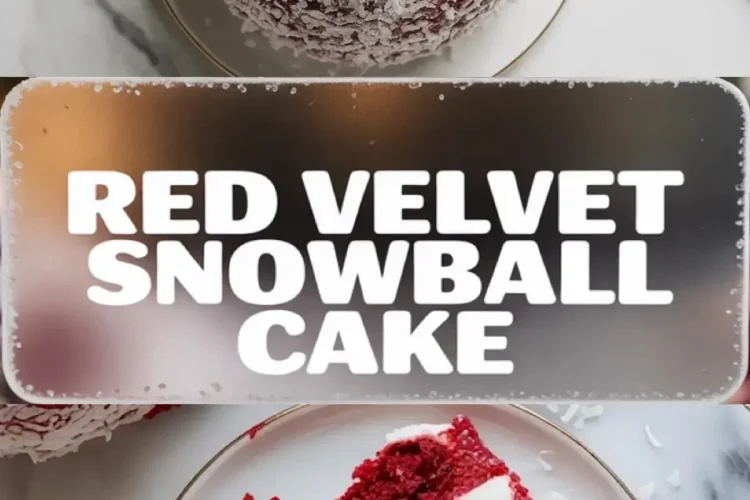
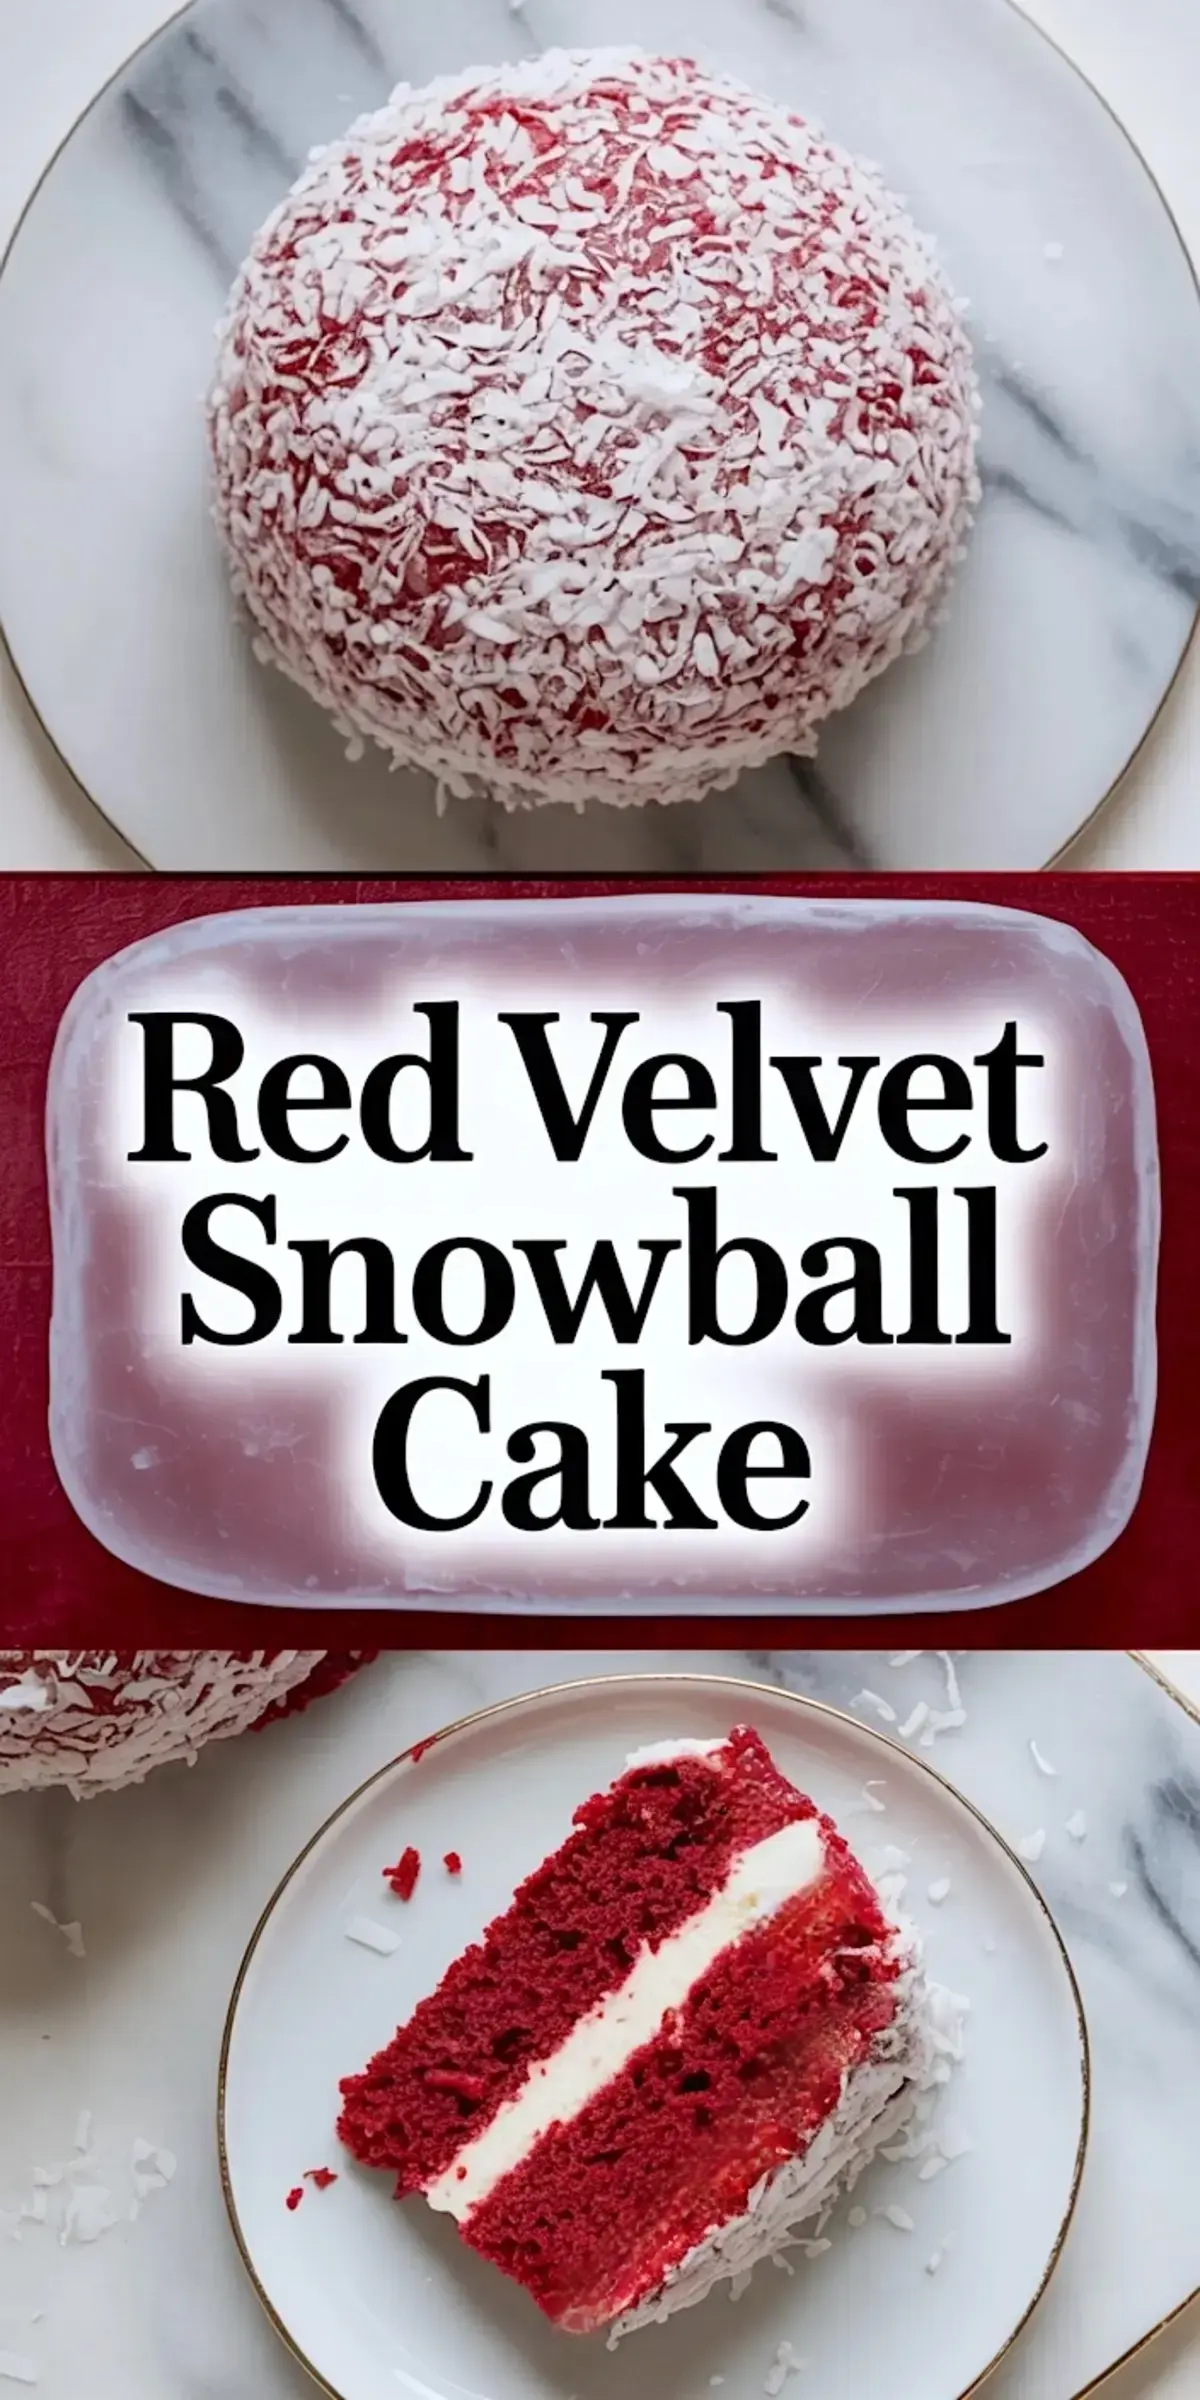
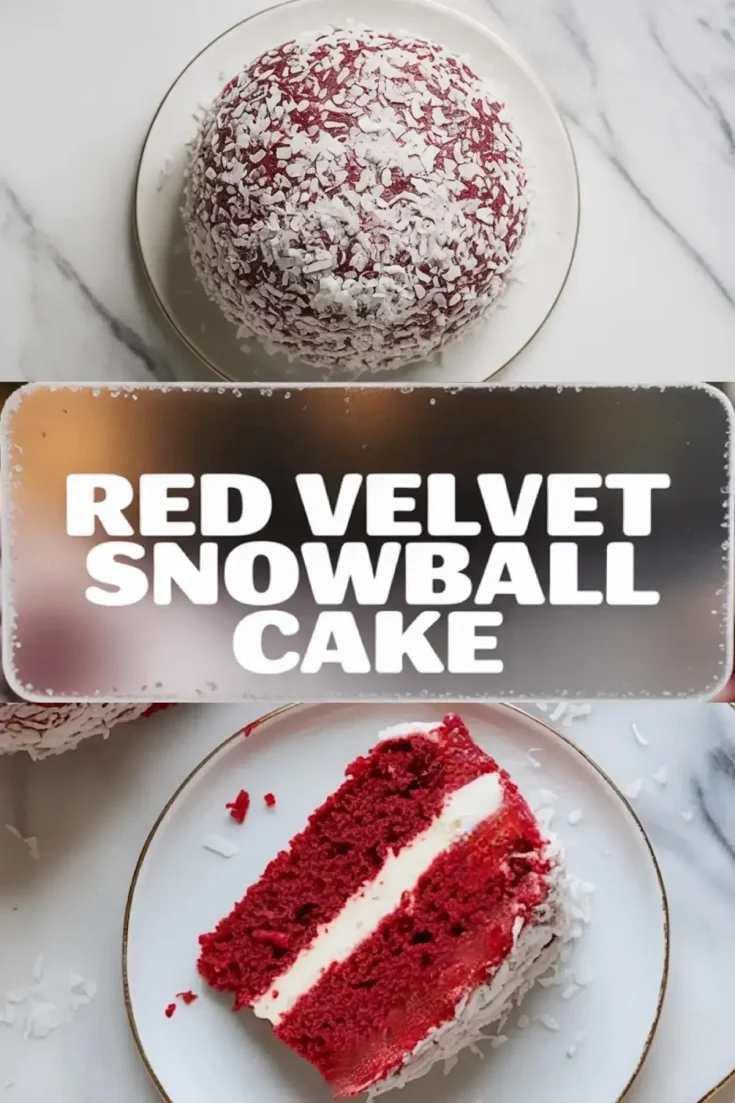
A snowball cake with red velvet layers sounds dramatic, and it is but in the best kind of way.
This Red Velvet Snowball Cake brings together soft, deeply colored cake layers, creamy frosting, and a snowy coat of sweetened coconut. You get the richness of a Red Velvet Layer Cake, the festive look of a Snowball Cake Recipe, and the kind of structure that holds its shape beautifully when sliced.
You’ll learn how to build it dome-style in a bowl, how to get the layers right without fussing over perfection, and why each ingredient plays a specific role in texture, color, or flavor. If you’re after the best red velvet cake that also looks like a snow globe centerpiece, this is it.
I’ve made this on Christmas Eve, boxed it for gifting, and served it after dinners where nothing else on the table could follow it.
It holds its own.
Following a special diet?
Every recipe on this site can be converted to gluten-free, vegan, dairy-free, keto, nut-free or egg-free with adjusted ratios so nothing falls flat.
Try the Recipe Converter →What Makes This a Snow Ball Cake Recipe That Actually Works
Most recipes for snowballs cake either stay too close to coconut cream pies or don’t hold shape once turned out.
This one’s built for balance.
The soft red velvet layers chill into form, the frosting stiffens just enough, and the coconut sticks without sliding.

It’s made inside a bowl, chilled, then flipped like a jelly mold. The result is smooth on the outside, snowy on the surface, and creamy on the inside.
I learned this shape from an old bundt-mold cake my grandmother used to make. It was a chocolate dome she covered with ganache, but the technique stuck with me.
Same chill. Same flip. New flavor.
If you want it to sit proudly on a holiday table next to your Red Velvet Crinkle Cookies, it will.
Try the Red Velvet Crinkle Cookie
Choosing the Right Red: Cocoa, Food Coloring, and Buttermilk
Red velvet cake always raises questions—how much cocoa, which food coloring, and why the vinegar?
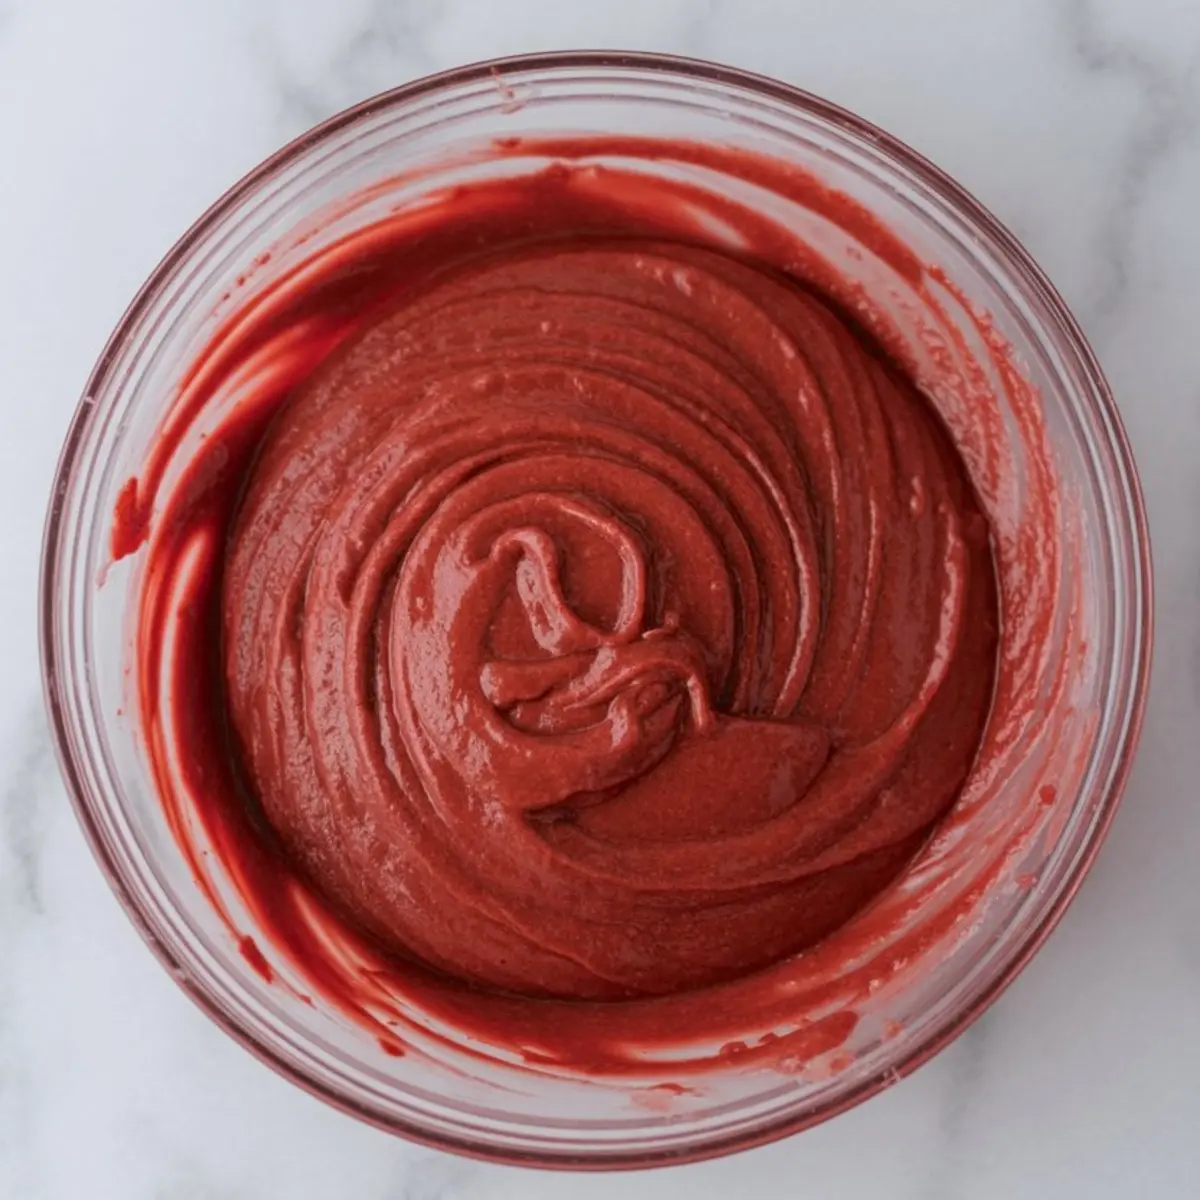
The answer depends on what kind of red you want. For this recipe, I prefer a lighter touch of cocoa and a deep red color, closer to a vintage Red Cake than a full chocolate one.
Gel food coloring gives a bold hue without thinning the batter. I’ve used liquid coloring before, and while it works, the cake turns out slightly less structured if you’re not careful with measurements.
The buttermilk and vinegar aren’t just there to create a tangy note. They react with the baking soda to create a fine, soft crumb. That texture matters when layering thin rounds into a bowl you don’t want them breaking apart.
A Quick Note on Frosting and How It Holds the Cake Together
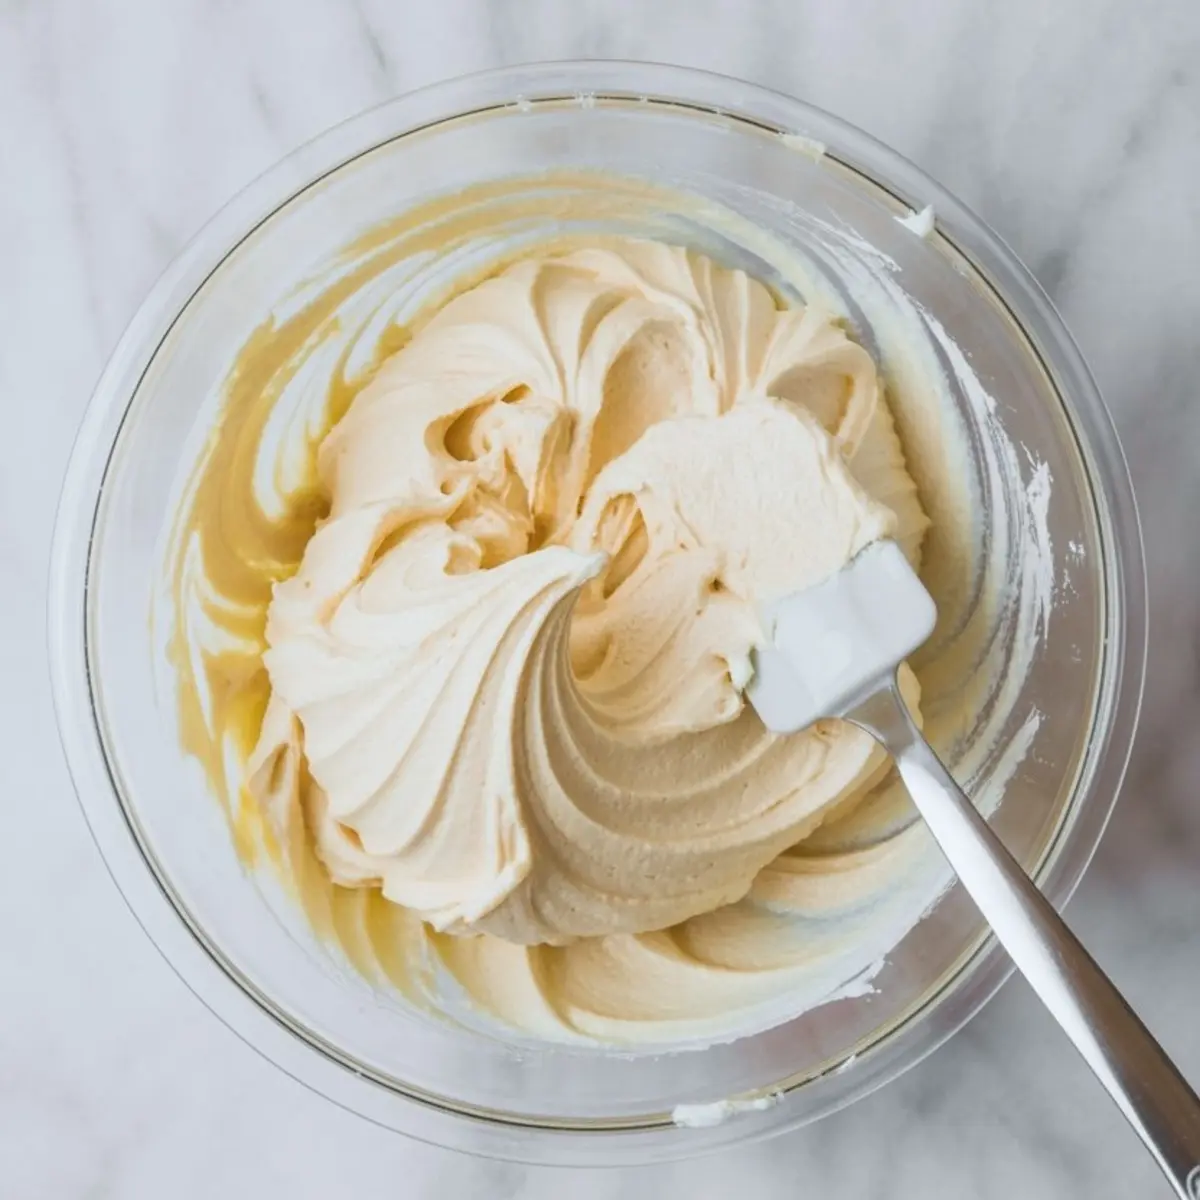
This isn’t a frosting that melts or drips.
It’s cream cheese and butter, whipped smooth, then stiffened with powdered sugar.
Once chilled, it acts like mortar between bricks. That’s the reason the cake dome holds its shape when turned out of the bowl.
I’ve tried whipped cream frosting for a variation, but it doesn’t hold long out of the fridge and collapses too fast. Stick with this version if you want clean slices and reliable texture.
If you want to go one layer deeper, pair this with Red Velvet Tiramisu Cups for a creamy finish to a red velvet spread.
One Comparison That Can Make or Break This Cake
You’ll come across two schools of thought for red velvet cakes: butter-based versus oil-based. I’ve tested both.
Oil-based cakes do come out moister and hold moisture longer, especially when refrigerated. But butter-based cakes like this one offer better structure and flavor, especially in a molded format.
Oil can sometimes make layers too slick and slippery for this kind of assembly. Butter firms up when cold, helping everything stay where it should.
In my recipe notes, I’ve written: “Use oil when layering flat. Use butter when flipping into domes.”
That rule has held true every time.
You can try both, but for this Snowball Cake Recipe, the butter wins.
Assembling the Snowball: Patience, Plastic Wrap, and Pressure
This cake comes together in a bowl, not a springform or a pan. That means your layers won’t look pretty at first, and they don’t have to.
The most important part is lining the bowl with plastic wrap. Give it enough overhang to seal everything once the layering’s done.
You’ll slice your cake layers horizontally, spread frosting in between, and gently press them into the bowl.
Every press matters.
The goal is to fill the curves and keep it level so the dome flips out clean.
If you’ve made Red Velvet Cupcakes, you’ll recognize the batter’s smooth consistency here.
Why the Chill Time Isn’t Optional
Refrigeration firms the frosting, stiffens the cake layers, and lets the whole structure settle.
Don’t skip this step or shorten it.
I’ve rushed it before and ended up with a slouched dome that had to be re-frosted. Now I give it three hours, or more if I have the time.
Even 20 minutes in the freezer before unmolding can make a big difference if the fridge didn’t quite firm it enough.
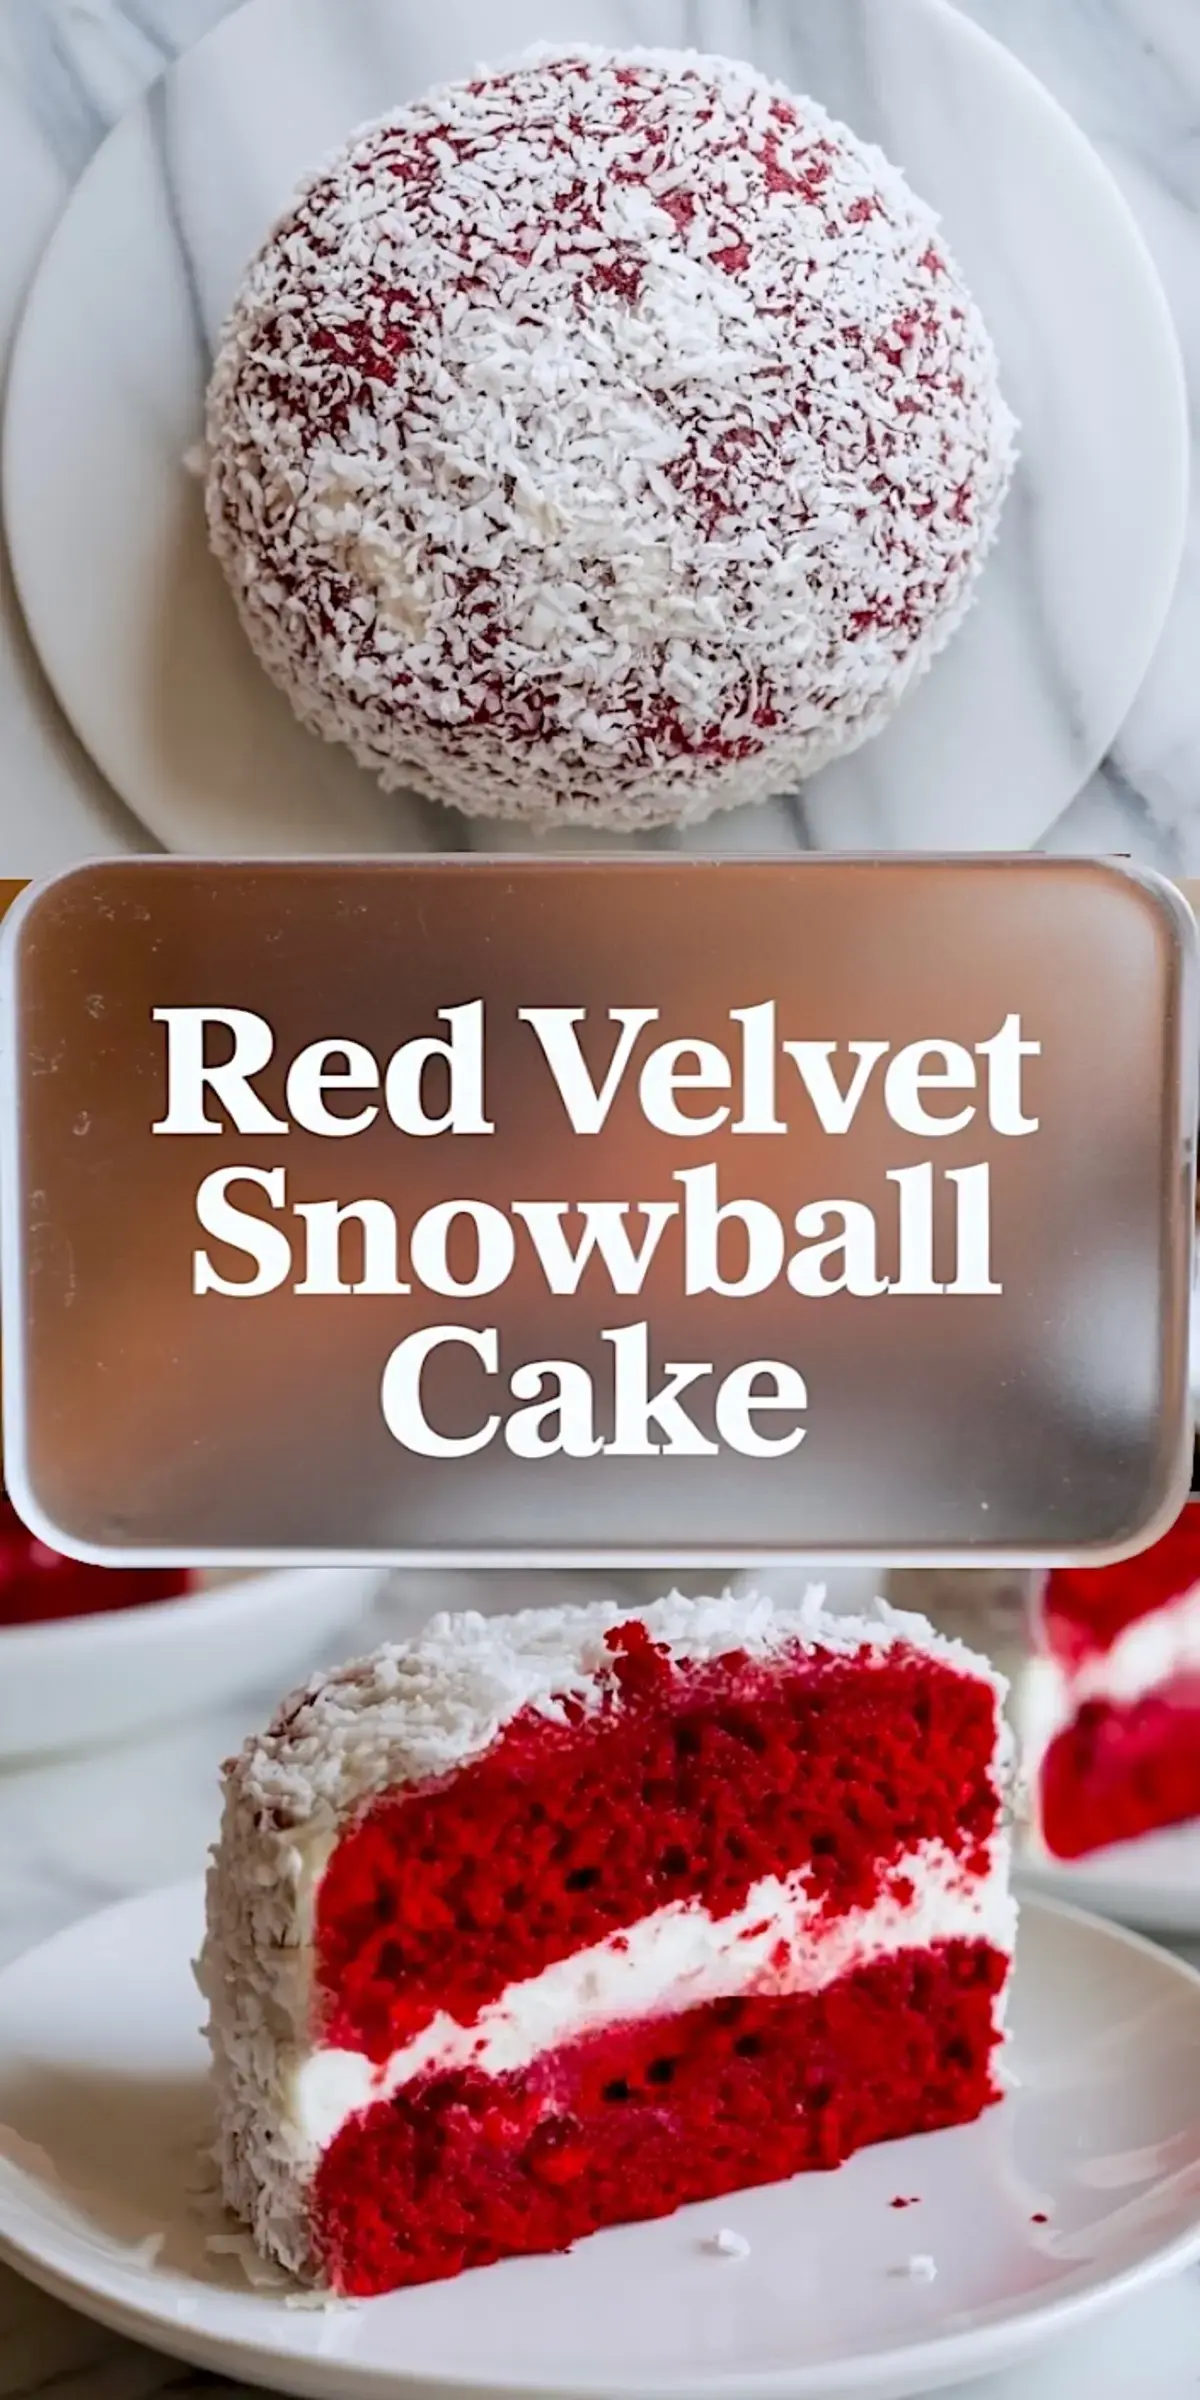
Once flipped, you’ll peel off the plastic and spread on the rest of the frosting. Then comes the coconut.
This is where the Snow Balls Recipe name comes alive.
Coating It in Coconut: Snowball Look, Subtle Sweetness
Sweetened shredded coconut clings easily to the chilled frosting.
Use your hands, press lightly, and rotate the cake as you go.
You’ll want to coat the top first, then the sides. I find that a light touch works better than trying to press it in too hard. Let the coconut sit where it falls.
This is where the vintage cake look takes over.
It doesn’t need sprinkles or piping. It already looks like a Snowball Cake from a 1960s magazine. I mean that in the best way.
If you like this snow-dusted finish, the Red Velvet Snowball Cookies follow a similar idea.
Serving Tips and Storage That Keep It Beautiful
Slice with a sharp knife wiped clean between cuts. The dome shape will hold if the chill was long enough.
I usually serve this on a cake stand or wide plate with a lip. If you’re traveling, chill it again before transporting.
For leftovers, cover the cake and refrigerate. It keeps well for up to 4 days.
The coconut protects the frosting from drying out.
It’s one of those cakes that actually slices better on day two.
You can prep the layers a day ahead and assemble just before chilling. I do this when my holiday prep list gets long.
Save It. Share It. Bake It This Week.
Pin this Red Velvet Snowball Cake to your holiday board so it doesn’t get lost in the shuffle.
Leave a comment and let me know how it turned out. Did you try gel coloring? Use your own coconut twist? I’d love to hear what you did with it.
And if you’re building out a red velvet spread, don’t miss this Red Velvet Cake with White Chocolate Frosting. It pairs well with snowball slices too.
Red Velvet Snowball Cake
This stunning Red Velvet Snowball Cake combines the richness of Best Red Velvet Cake with a light, snowy coconut finish. It’s the ultimate Snowball Cake Recipe for the holidays — soft layers of Red Velvet Layer Cake wrapped in creamy frosting and coated in shredded coconut for that dreamy Snow Ball Cake look. Whether you’re hosting or gifting, this beautiful Red Cake brings vintage charm and delicious flavor to any celebration. A fun twist on classic Snowballs Recipe, this dessert is a showstopper on every winter dessert table. Add this to your list of must-bake holiday treats — the perfect Snowball Cake for cozy Christmas vibes.
Ingredients
- FOR THE RED VELVET CAKE:
- 2 ½ cups (312g) all-purpose flour
- 2 tablespoons unsweetened cocoa powder
- 1 teaspoon baking soda
- ½ teaspoon salt
- 1 cup (240ml) buttermilk, room temperature
- 1 tablespoon white vinegar
- 1 teaspoon vanilla extract
- 1 tablespoon red food coloring (liquid or gel)
- ½ cup (113g) unsalted butter, softened
- 1 ½ cups (300g) granulated sugar
- 2 large eggs
- FOR THE CREAM CHEESE FROSTING:
- 1 cup (226g) cream cheese, room temperature
- ½ cup (113g) unsalted butter, room temperature
- 3 ½ cups (420g) powdered sugar
- 1 teaspoon vanilla extract
- Pinch of salt
- FOR DECORATION:
- 2 ½ cups (200g) sweetened shredded coconut
Instructions
- PREPARE THE CAKE PANS AND OVEN: Preheat the oven to 350°F (175°C). Grease and line two 8-inch round cake pans with parchment paper.
- MIX DRY INGREDIENTS: In a medium bowl, whisk together the flour, cocoa powder, baking soda, and salt until well combined.
- COMBINE WET INGREDIENTS: In a separate small bowl, stir together the buttermilk, vinegar, vanilla extract, and red food coloring until evenly mixed.
- CREAM BUTTER AND SUGAR: In a large mixing bowl, beat the butter and granulated sugar on medium speed for 3–4 minutes, or until light and fluffy. Add the eggs one at a time, beating well after each addition.
- COMBINE BATTER: Add the dry ingredients and buttermilk mixture to the butter-sugar mixture in three additions, alternating between dry and wet, beginning and ending with the dry. Mix just until combined, being careful not to overmix.
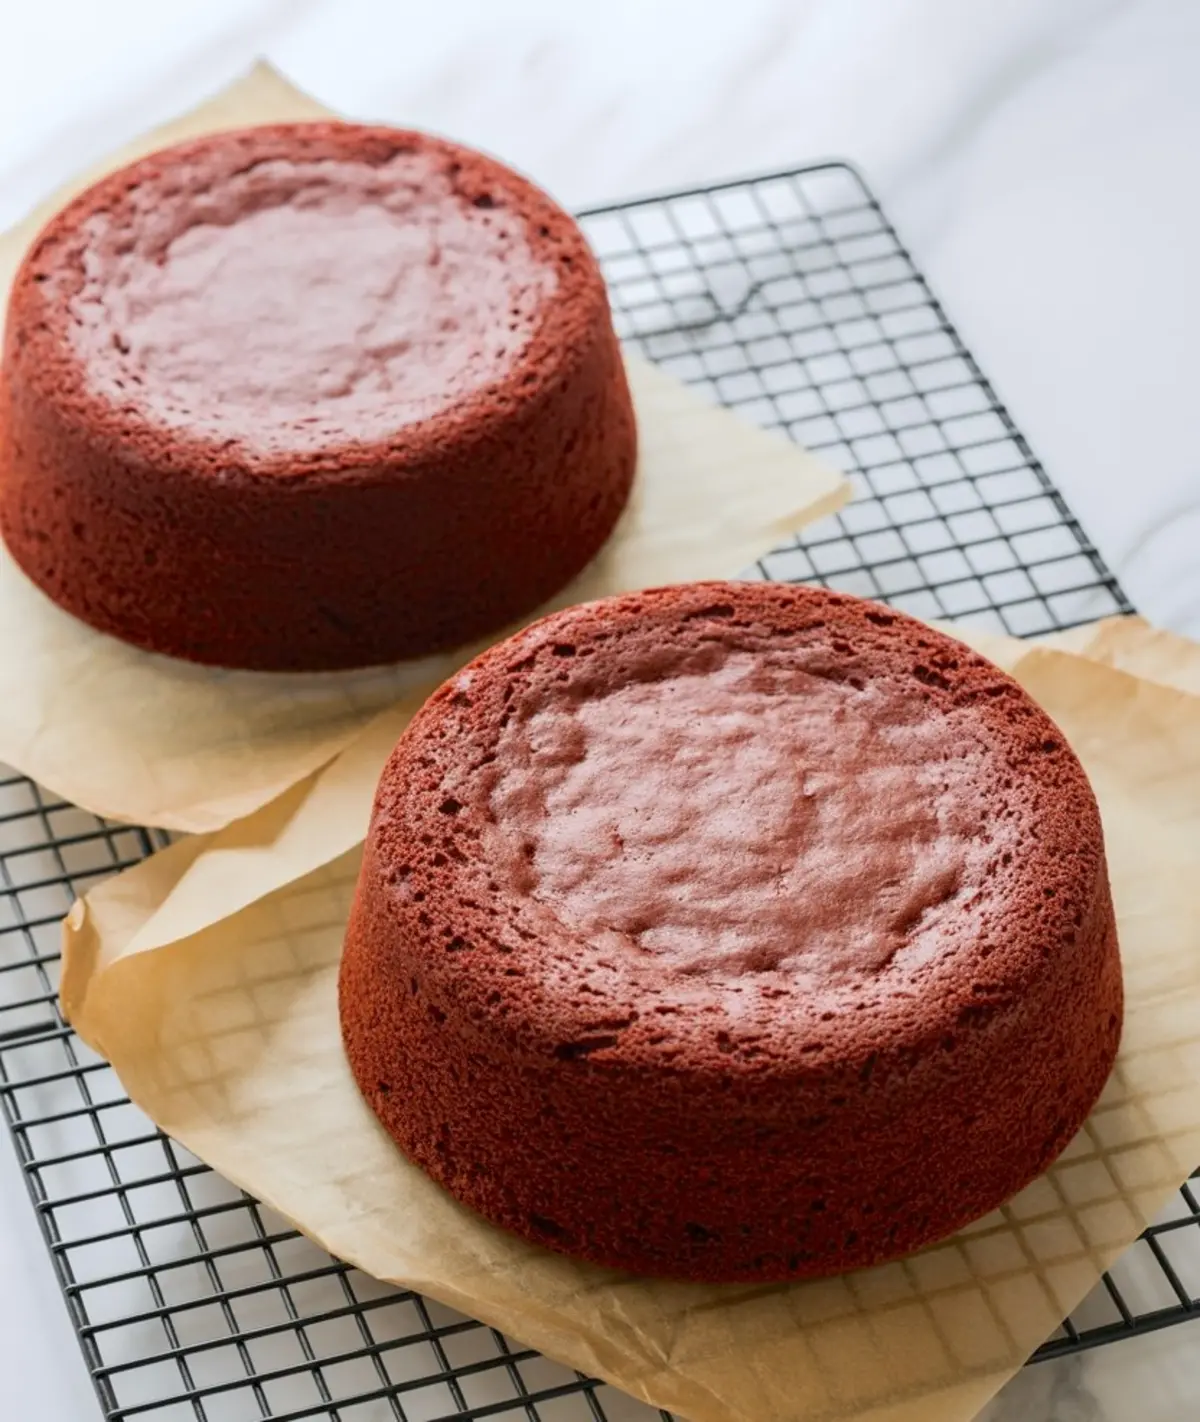
- BAKE THE CAKES: Divide the batter evenly between the prepared pans and bake for 25–30 minutes, or until a toothpick inserted in the center comes out clean. Cool in the pans for 10 minutes, then turn out onto a wire rack and cool completely.
- MAKE THE FROSTING: In a clean bowl, beat the cream cheese and butter together until smooth and creamy. Add powdered sugar gradually, mixing on low speed until fully incorporated. Add vanilla and salt, then beat on medium speed until fluffy.
- PREPARE THE MOLD: Line a large mixing bowl (about 8 inches wide) with plastic wrap, allowing enough overhang to cover the top later.
- SLICE AND LAYER THE CAKE: Using a serrated knife, slice each cooled cake layer horizontally to create four thin layers. Place one layer at the bottom of the lined bowl (this will become the top of the cake). Spread a layer of cream cheese frosting over it. Repeat layering cake and frosting, gently pressing each layer down to fit the bowl’s shape.
- CHILL THE CAKE: Once all layers are in place, cover the top of the bowl with the excess plastic wrap and refrigerate for 2–3 hours, or until the cake is firm and holds its shape.
- UNMOLD THE CAKE: Remove the cake from the refrigerator and flip it onto a serving plate. Carefully peel off the plastic wrap.
- FROST THE OUTSIDE: Spread the remaining cream cheese frosting evenly over the entire surface of the cake, smoothing it into a dome shape.
- DECORATE WITH COCONUT: Press the shredded coconut all over the frosted cake, covering it completely to give the appearance of a snowball.
Notes
Use gel food coloring for a deeper red tone. The cake layers can be made a day ahead and refrigerated before assembly. If the cake feels too soft after chilling, place it in the freezer for 15–20 minutes before unmolding.
Nutrition Information
Yield
12Serving Size
1Amount Per Serving Calories 635Total Fat 29gSaturated Fat 19gUnsaturated Fat 8gCholesterol 94mgSodium 377mgCarbohydrates 89gFiber 3gSugar 65gProtein 7g