This chocolate espresso cake isn’t rushed. It builds its richness in layers. The cocoa, the hot espresso, the whipped filling, each one doing its part to deliver that bold, balanced bite. If you’ve ever searched for an espresso cake recipe that actually tastes like coffee, this one won’t leave you guessing.
You’ll learn how to make a chocolate cake that holds its moisture for days, how to prepare an espresso filling that cuts the sweetness with depth, and how to frost the cake with a mocha buttercream that spreads like silk.
Everything is made from scratch, and each component supports the other, like good construction. No fluff, no gimmicks. Just a cake that tastes like it should.
Following a special diet?
Every recipe on this site can be converted to gluten-free, vegan, dairy-free, keto, nut-free or egg-free with adjusted ratios so nothing falls flat.
Try the Recipe Converter →Why This Espresso Dessert Stands Out
This is the cake I bring out when a birthday needs something grown-up. It’s the one I’ve made for an espresso martini birthday cake request, and the one I bring to the table when someone says, “I don’t like frosting.” They change their minds after one slice.
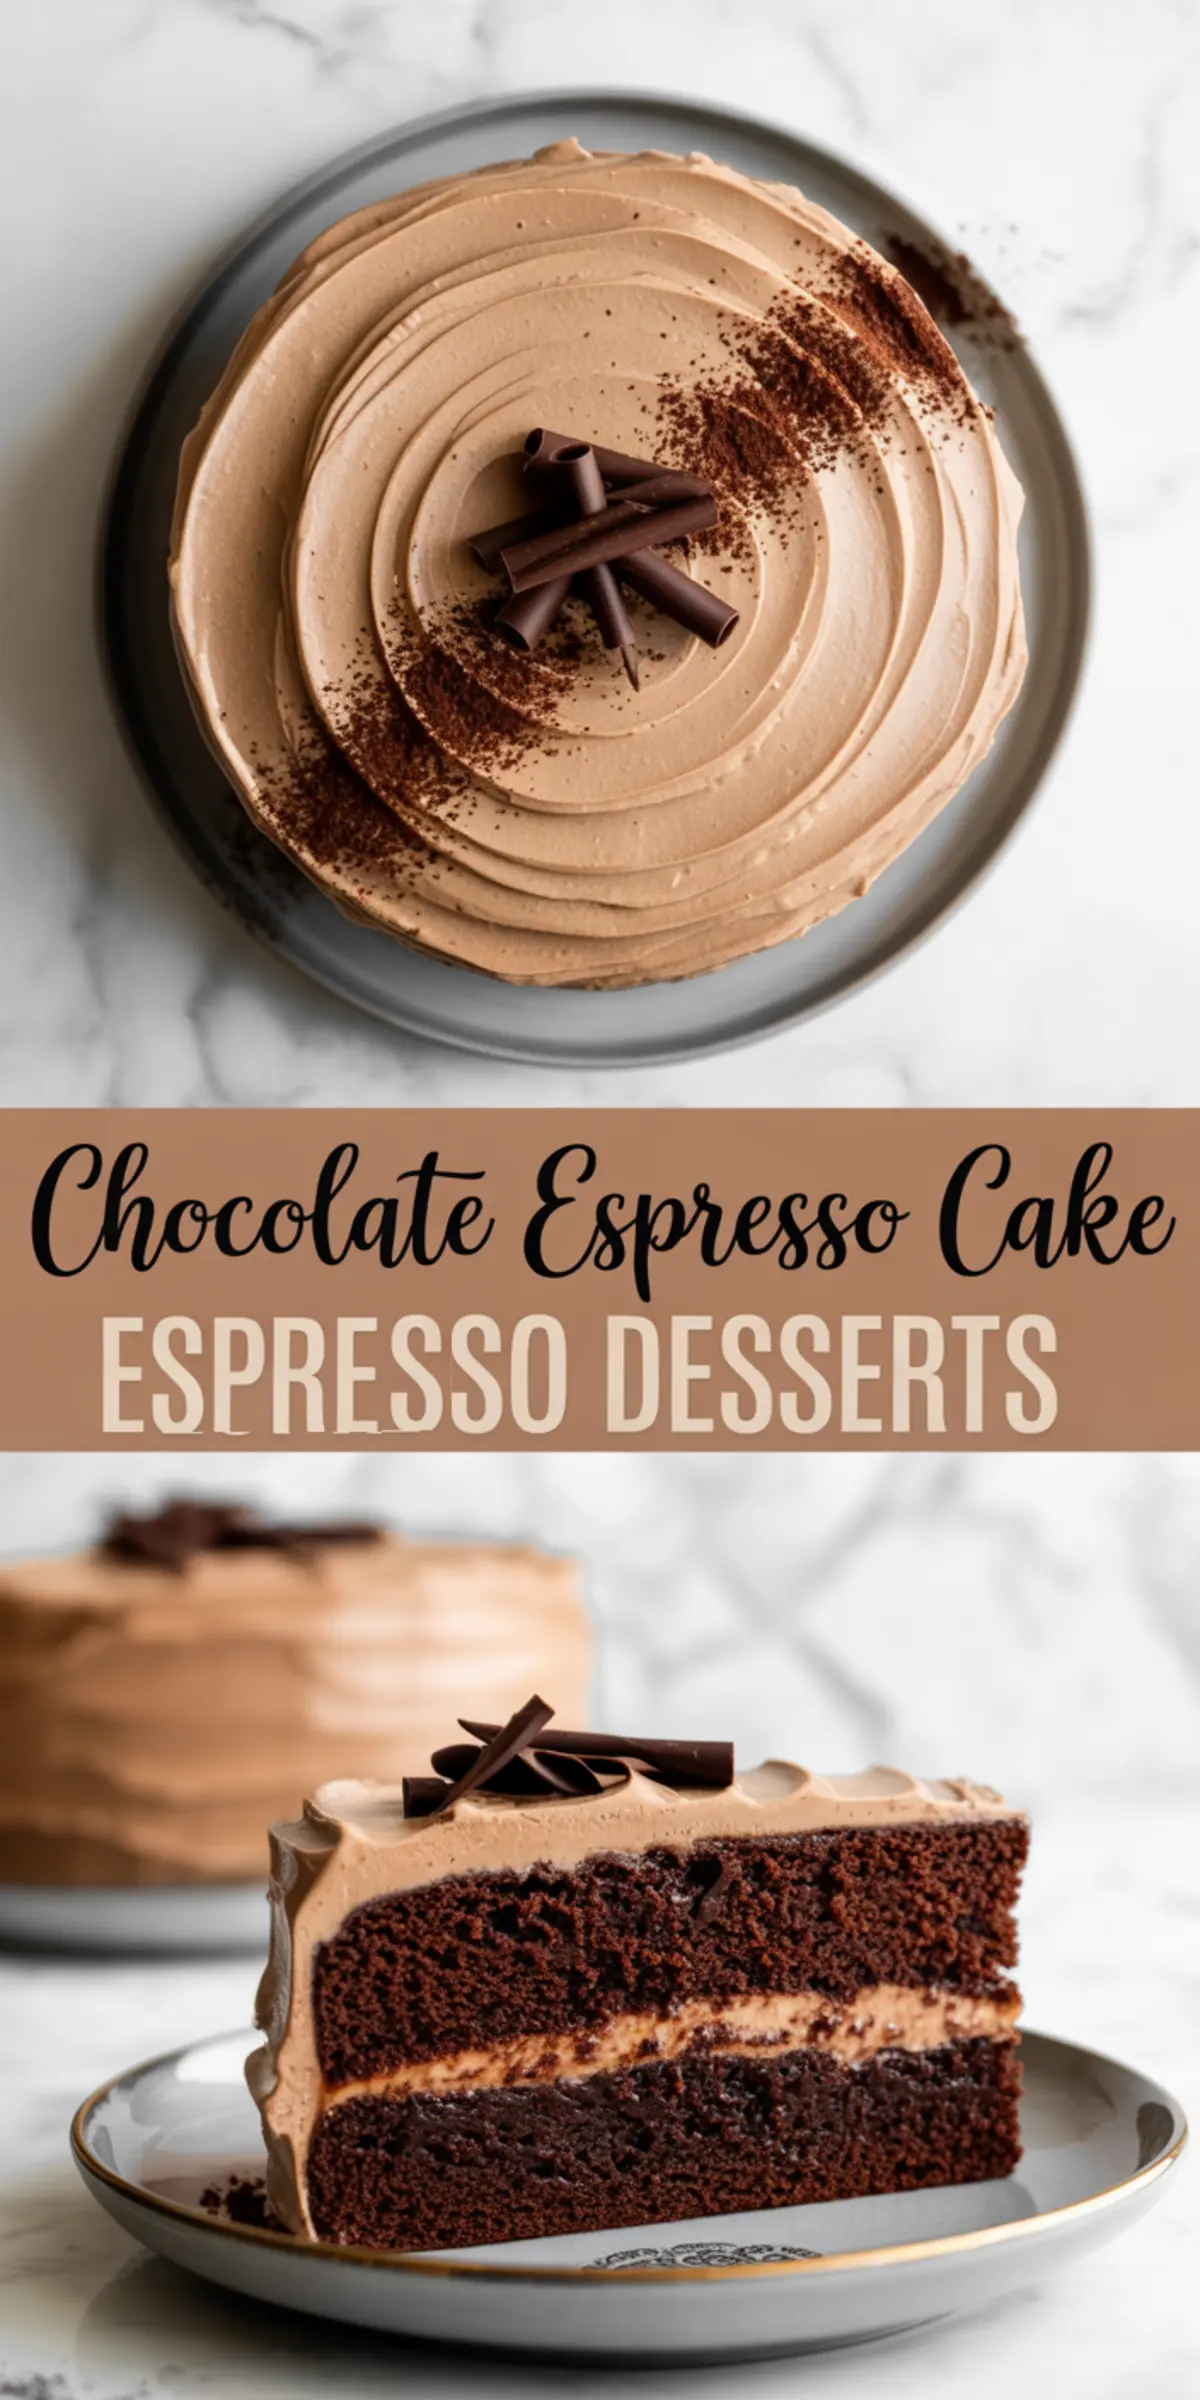
The recipe uses brewed espresso three times. Once in the batter, again in the filling, and finally in the frosting. That’s not overkill. That’s layering. The cocoa doesn’t compete, it supports. The result tastes like a mocha cake should complex but clear.
Building the Chocolate Cake Base with Brewed Espresso
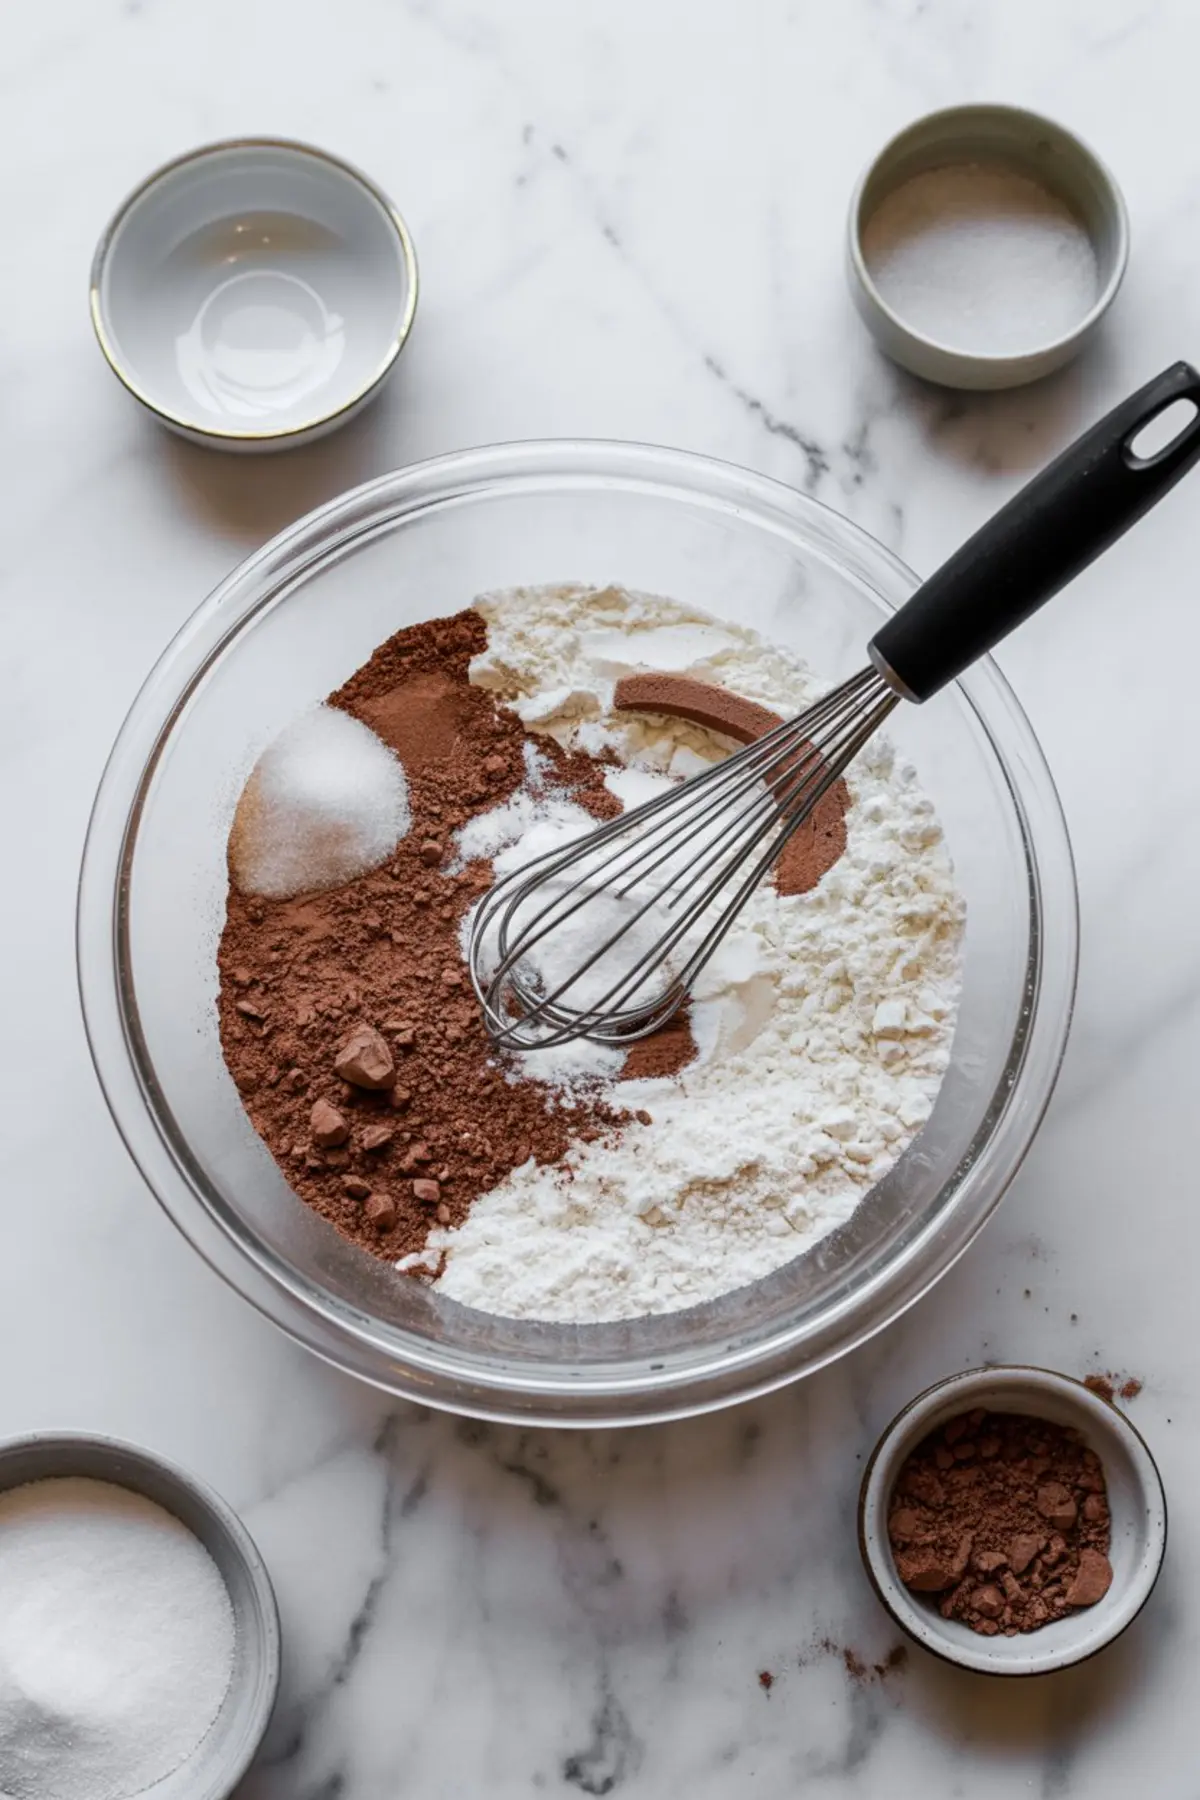
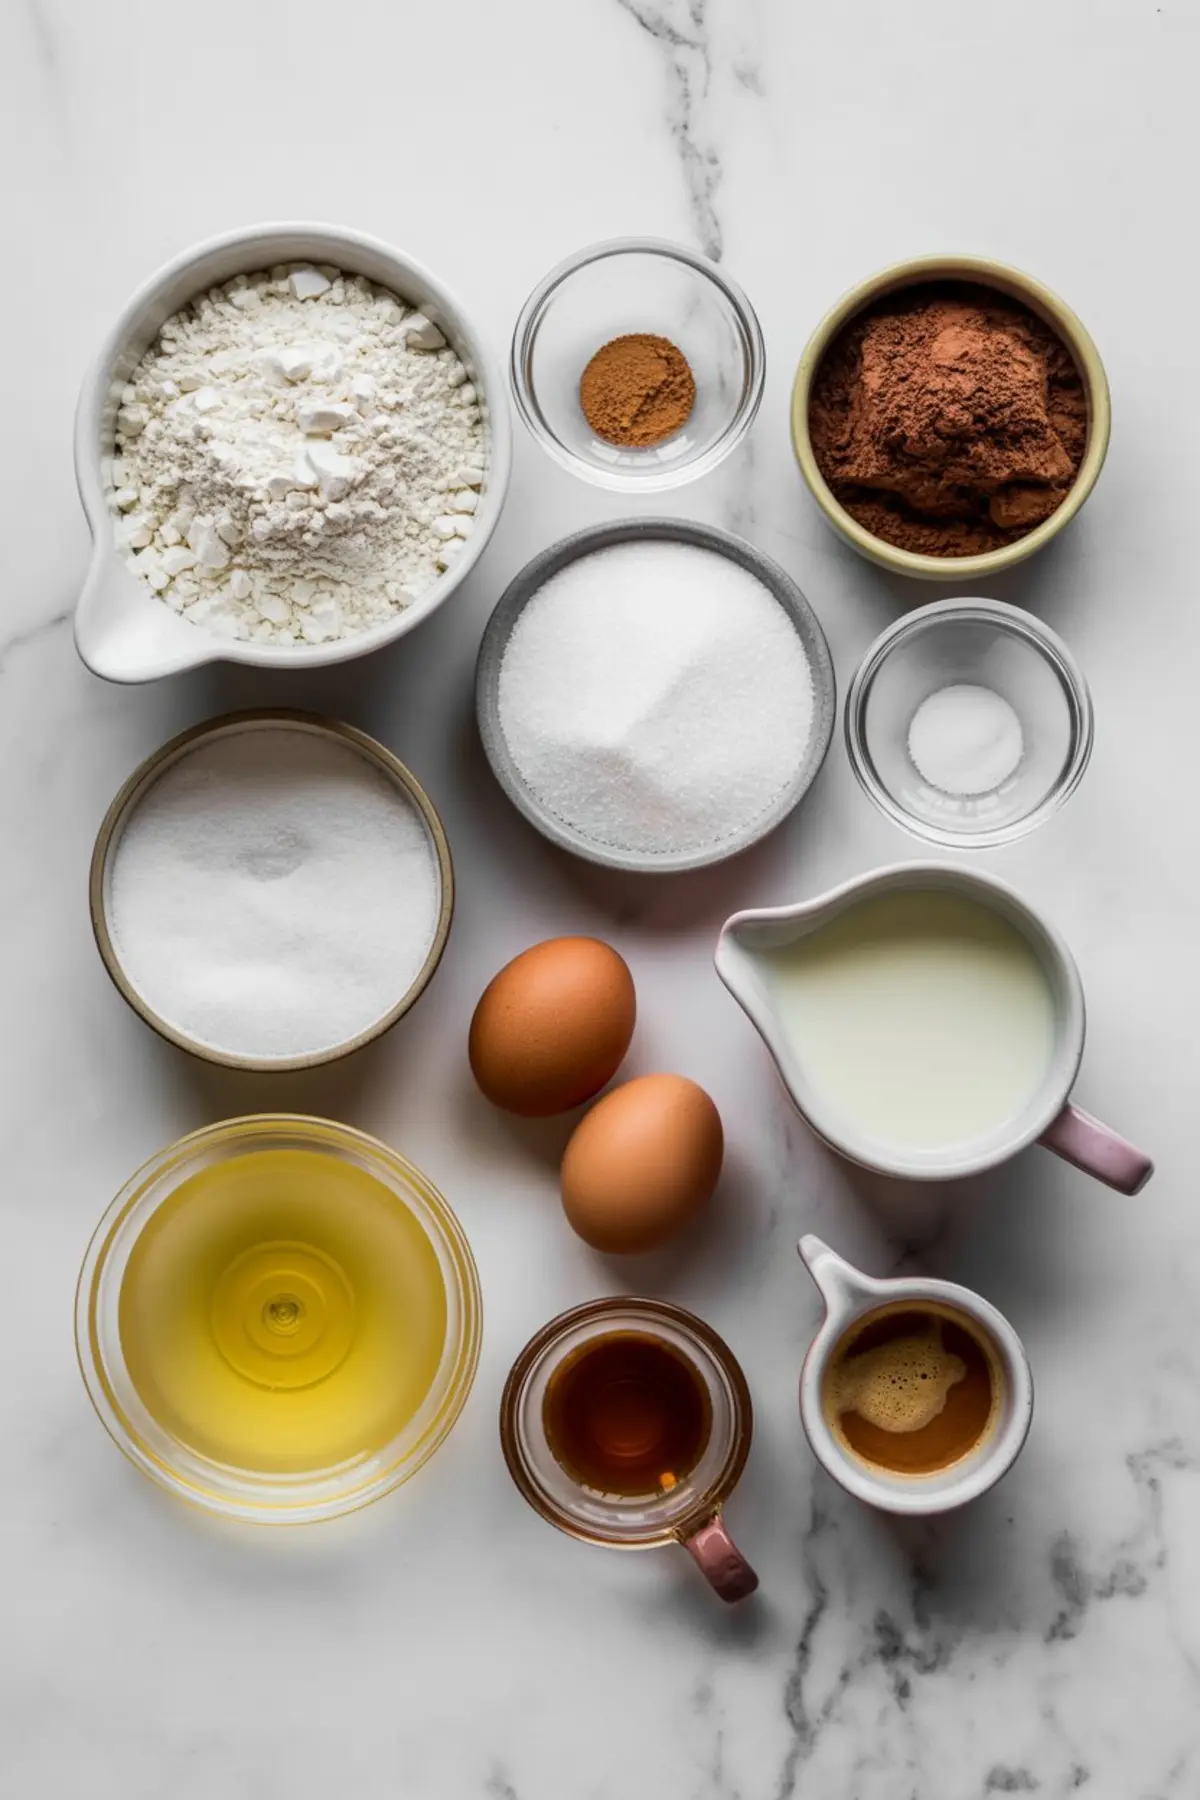
The flour, cocoa powder, baking soda, and sugar are mixed together dry, so each has a chance to distribute properly. A bit of baking powder lifts it without too much dome.
The liquid ingredients, milk, eggs, oil, vanilla form the backbone of the cake’s texture. When hot brewed espresso is poured in at the end, it wakes everything up. The batter turns glossy and loose. That’s exactly what it should do.
I’ve tested with instant espresso as a replacement. It works, but you lose the roasted bitterness that comes from a fresh brew. If you want that bakery-style depth, use real espresso.

Espresso Cream Filling: Soft, Sweet, and Balanced
Cream cheese gives the filling its body. Butter smooths it out. I always let both sit at room temperature before mixing they blend better that way and stay fluffier.
Powdered sugar gets added gradually. The espresso and vanilla come in at the end, just enough to loosen it and cut through the sweetness. When chilled, the texture firms into a spreadable cream that doesn’t slide around.
This isn’t a whipped mousse or a stiff buttercream. It sits somewhere in between, and that’s what makes it work between two cake layers.
Chocolate Cake Comparison: Milk vs Buttermilk
In my notes, I’ve tried swapping the whole milk for buttermilk. The result is a little tangier and slightly more tender, but the espresso gets overshadowed.
If you’re after that true mocha profile, I recommend sticking with whole milk. It supports the structure without changing the flavor profile.
Frosting with Mocha Buttercream and Making It Hold
Mocha frosting needs balance. Cocoa brings the chocolate, espresso brings the punch. Butter carries both.
Softened butter gets whipped first. Then the powdered sugar and cocoa are added gradually. It may look too dry at first, don’t rush to add liquid. Keep whipping. It pulls together.
Heavy cream and cooled espresso finish the job. I like to stop beating once it holds soft peaks and glides easily off a spatula. If it feels too thick, a spoonful of cream solves it.
If you’ve worked with espresso frosting before, you know it can break if rushed. This version holds up well, even at room temperature for a couple of hours. Still, I refrigerate the finished cake before serving so the layers stay clean.
Assembling and Decorating This Espresso Cake Recipe
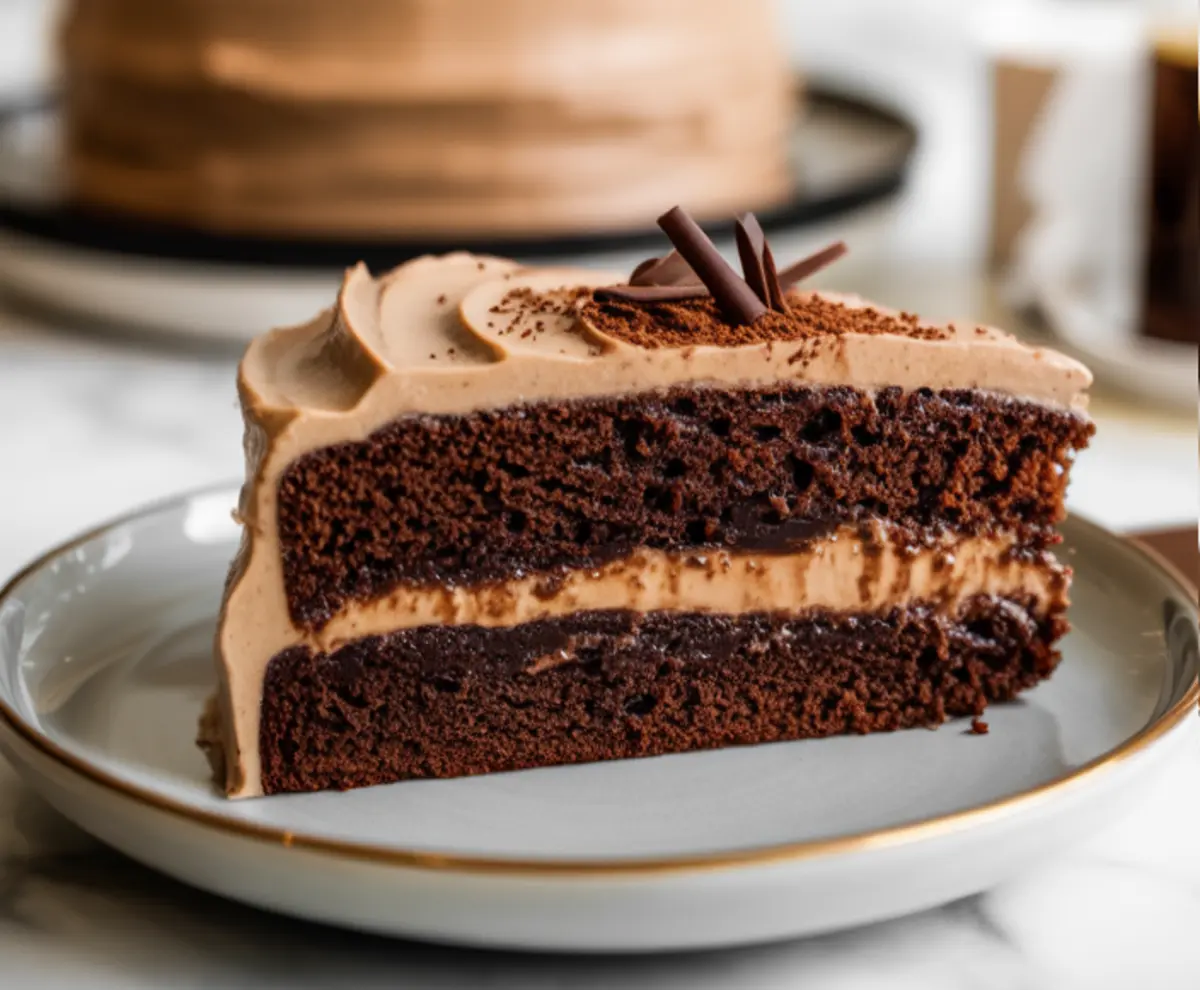
Once the cake layers have cooled completely, one goes on the plate and gets topped with the chilled espresso cream filling. You don’t have to pipe it an offset spatula is enough. Push it just to the edge.
The second layer goes on, and here’s where a light press helps it set. Don’t smash, just settle.
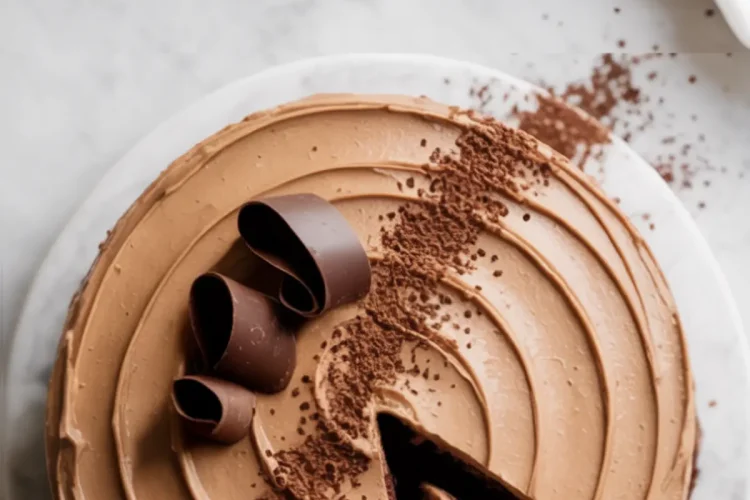
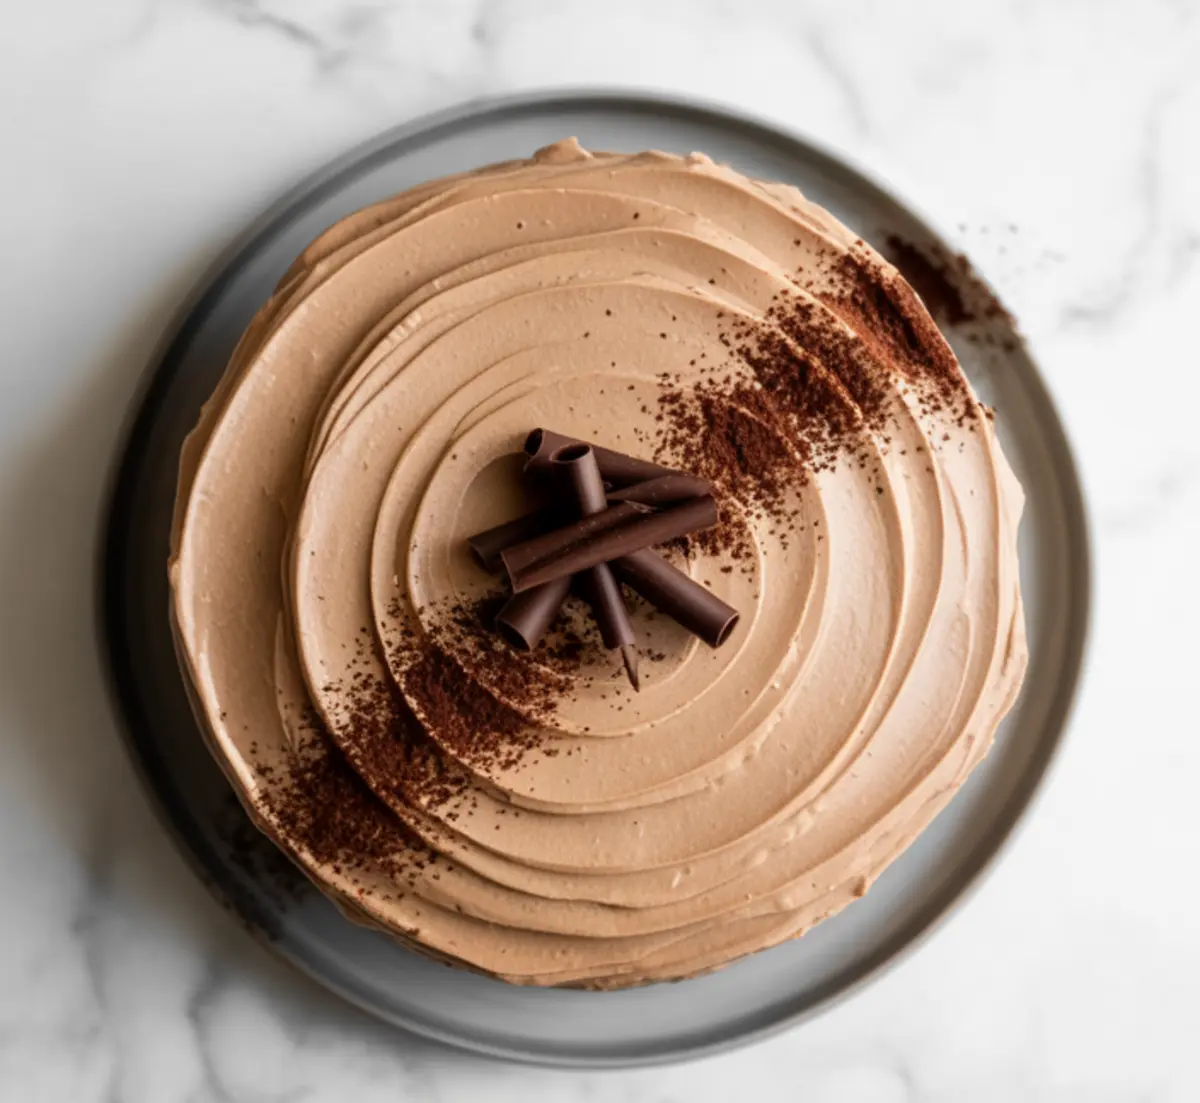
Frost the top and sides with mocha buttercream. If you want swirls, use the back of a spoon. If you want smooth edges, run a warm spatula around the outside.
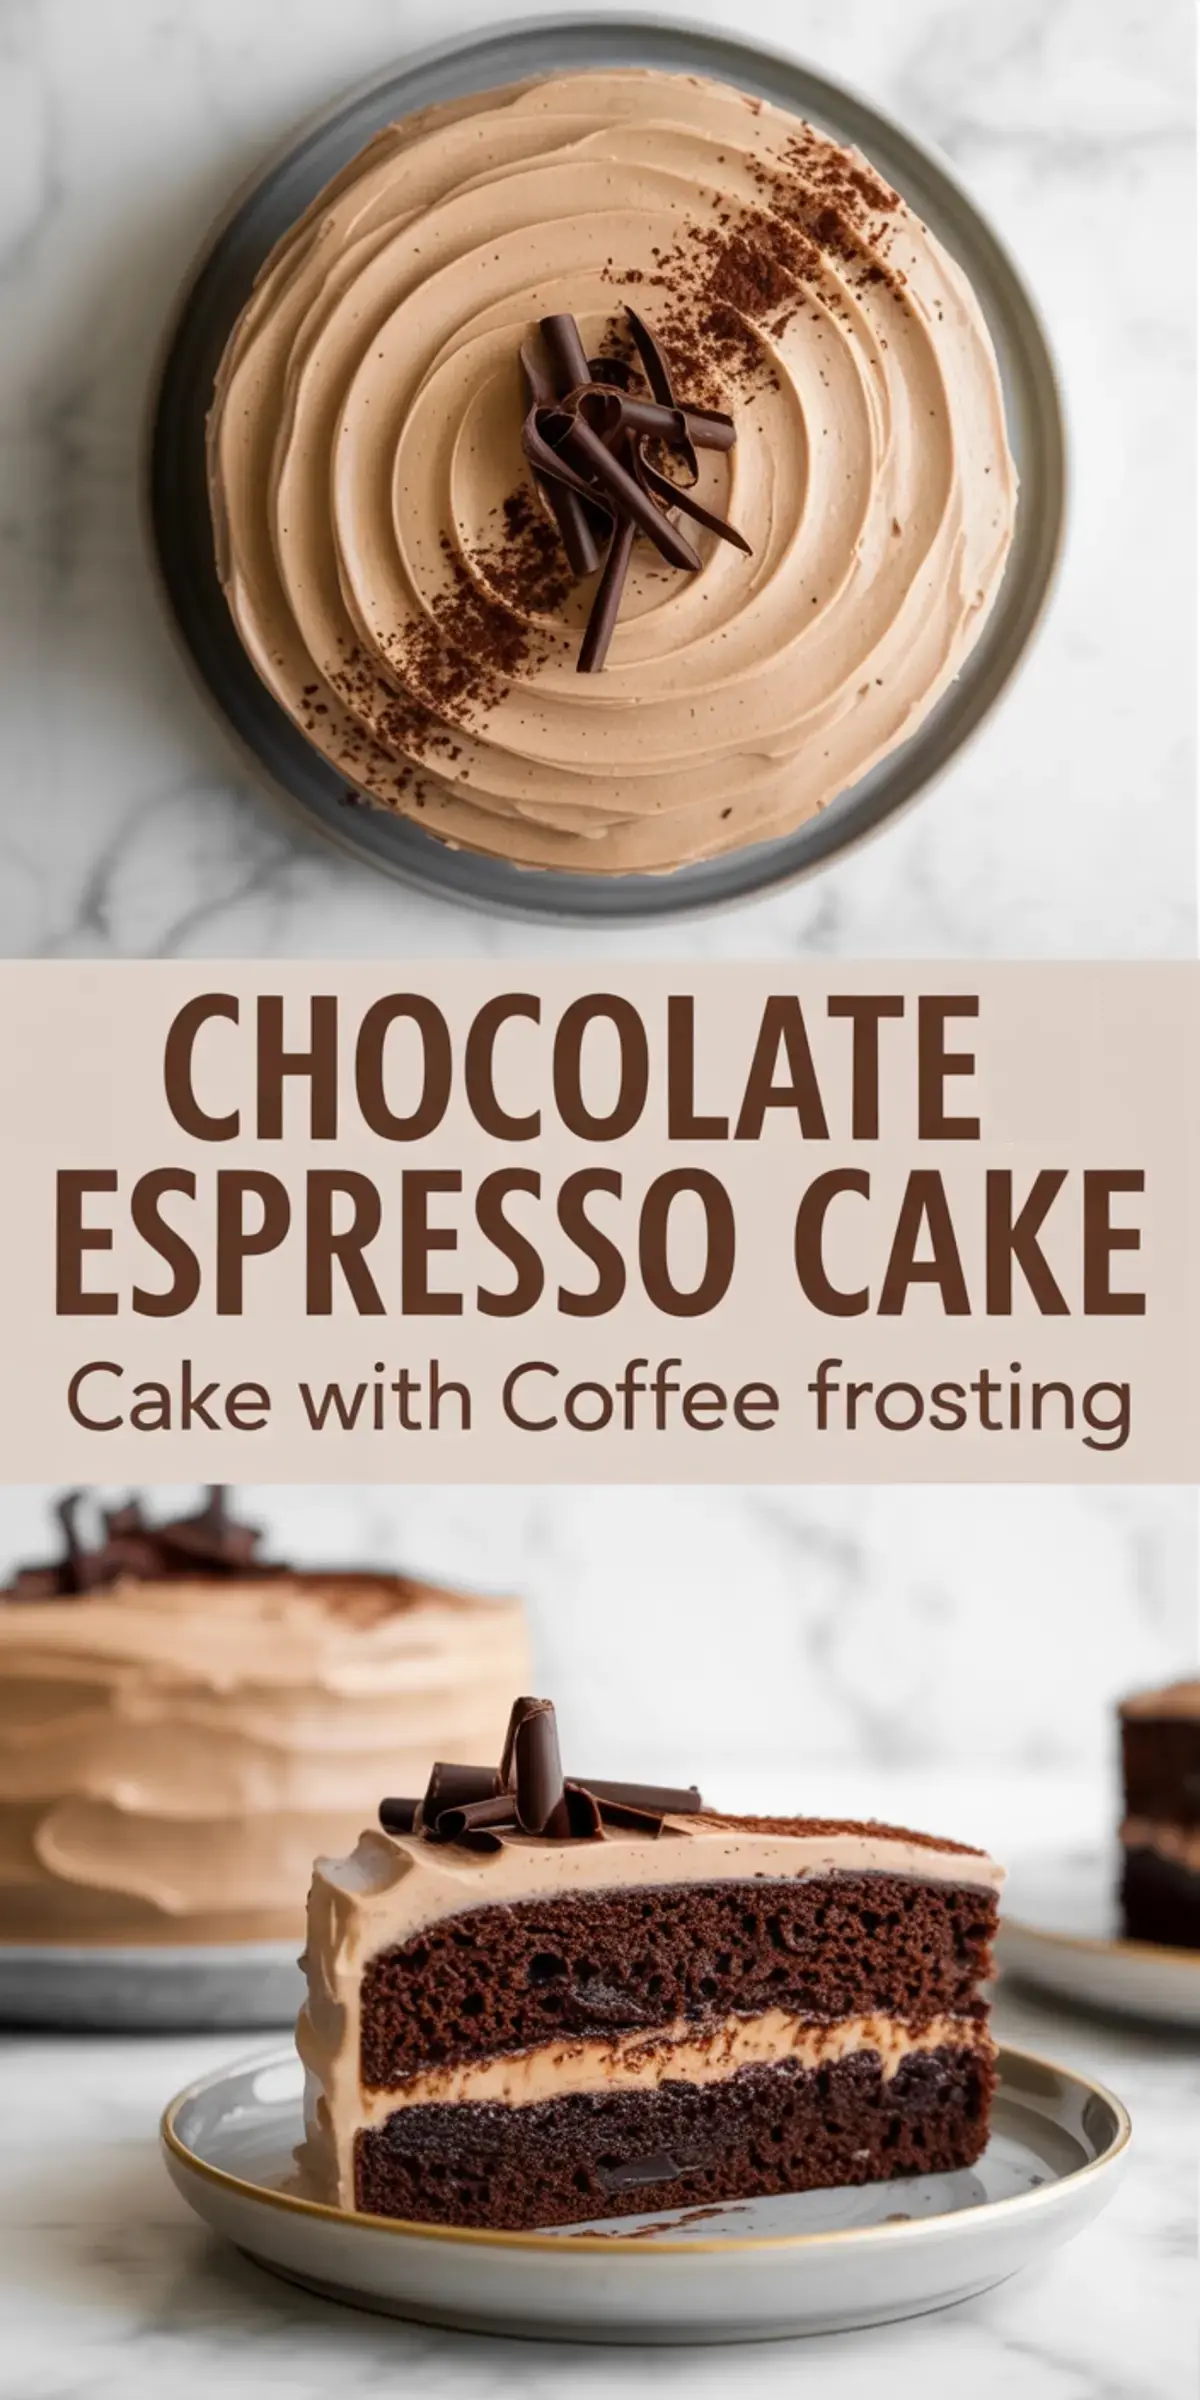
For decoration, a light dusting of cocoa powder and a few chocolate curls do the trick. You don’t need more than that. This is a chocolate cake aesthetic moment let it show.
Serving and Storing Chocolate Espresso Cake
Let the cake sit out for 20–30 minutes before slicing. Cold frosting can dull the flavor a bit. Once it softens, you’ll taste the espresso notes clearly.
Store leftovers in an airtight container in the fridge. The cake stays moist for up to four days, and the flavor deepens slightly after day one.
If you want to try another rich chocolate option, my Espresso Brownies offer a denser bite with a simpler method. They’re also easier to slice and pack.
Related Espresso Desserts to Explore

For cookie lovers, these Coconut Espresso Cookies blend toasted coconut and coffee in a crisp edge, chewy center format.
Craving a layered showstopper? My Chocolate Hazelnut Cake uses a similar method but with hazelnut crunch in the filling.
If you’re working with a peanut butter theme, this Chocolate Peanut Butter Cake uses the same cocoa base and offers an easy template for mix-and-match frostings.
Final Thoughts and a Note to Pin
This mocha cake isn’t fancy for the sake of it. Every step has a reason, and the flavor speaks for itself. I’ve made this for birthdays, coffee lovers, and late-night gatherings where something sweet—but not too sweet—was needed.
You’ll know it’s done right when you can taste both the chocolate and the espresso, and neither one overshadows the other. The texture? Soft enough to eat with a fork, firm enough to hold its shape.
Save this recipe to your Chocolate Desserts board so you can find it when you need a confident mocha cake.
And if you bake it, tell me in the comments. Share your notes, your tweaks, your thoughts. I read every one.
Chocolate Espresso Cake Recipe
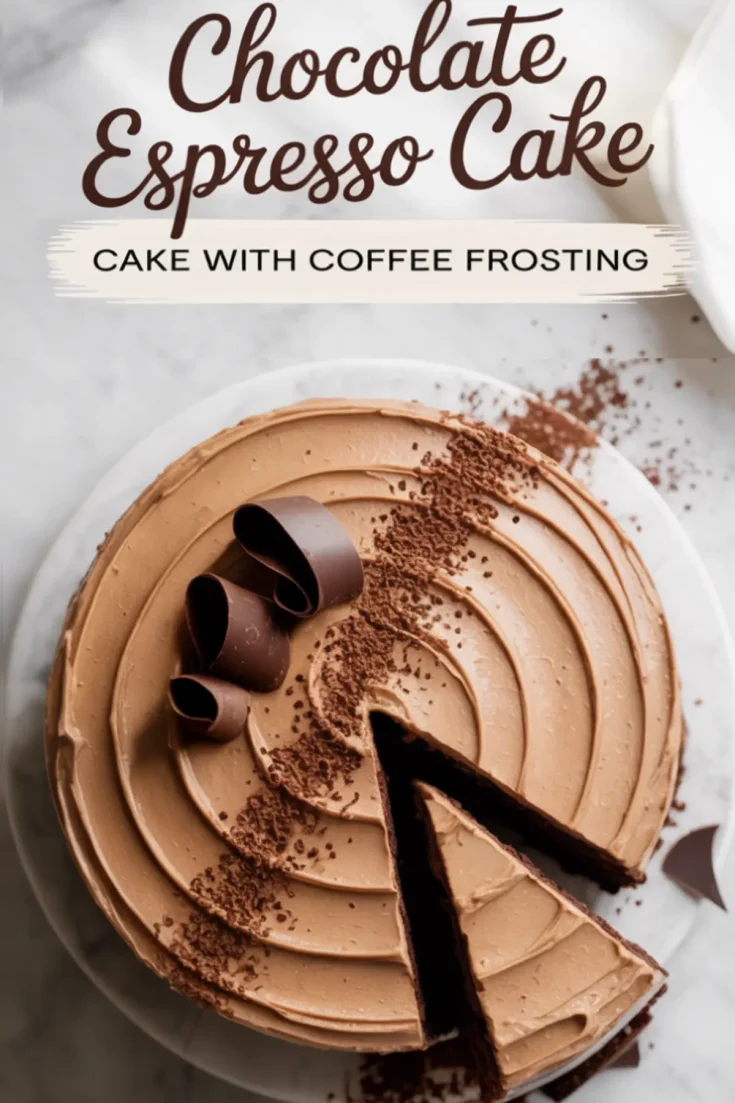
Chocolate espresso cake layers are paired with a creamy espresso filling and topped with rich mocha buttercream. The combination of brewed espresso and cocoa creates a bold flavor, while the smooth textures make each slice satisfying and balanced.
Ingredients
- FOR THE CHOCOLATE CAKE
- 1 ¾ cups (220g) all-purpose flour
- 1 ½ teaspoons baking powder
- 1 ½ teaspoons baking soda
- ¾ cup (65g) unsweetened cocoa powder
- 2 cups (400g) granulated sugar
- 1 teaspoon fine sea salt
- 2 large eggs, room temperature
- 1 cup (240ml) whole milk
- ½ cup (120ml) vegetable oil
- 2 teaspoons pure vanilla extract
- 1 cup (240ml) hot brewed espresso or very strong coffee
- FOR THE ESPRESSO CREAM FILLING
- 8 oz (225g) cream cheese, softened
- ½ cup (115g) unsalted butter, softened
- 3 cups (360g) powdered sugar, sifted
- 2 tablespoons espresso, cooled
- 1 teaspoon vanilla extract
- FOR THE MOCHA BUTTERCREAM FROSTING
- 1 cup (230g) unsalted butter, softened
- 3 cups (360g) powdered sugar, sifted
- ½ cup (45g) unsweetened cocoa powder
- 3 tablespoons heavy cream
- 2 tablespoons espresso, cooled
- 1 teaspoon vanilla extract
- Pinch of salt
- FOR DECORATION
- Dark chocolate curls or shavings
- Light dusting of cocoa powder
Instructions
- PREPARE THE CAKE PANS: Preheat the oven to 350°F (175°C). Grease and line two 9-inch round cake pans with parchment paper to ensure easy removal after baking.
- MIX THE DRY INGREDIENTS: In a large mixing bowl, sift together the flour, cocoa powder, baking powder, baking soda, granulated sugar, and salt. Stir to combine evenly.
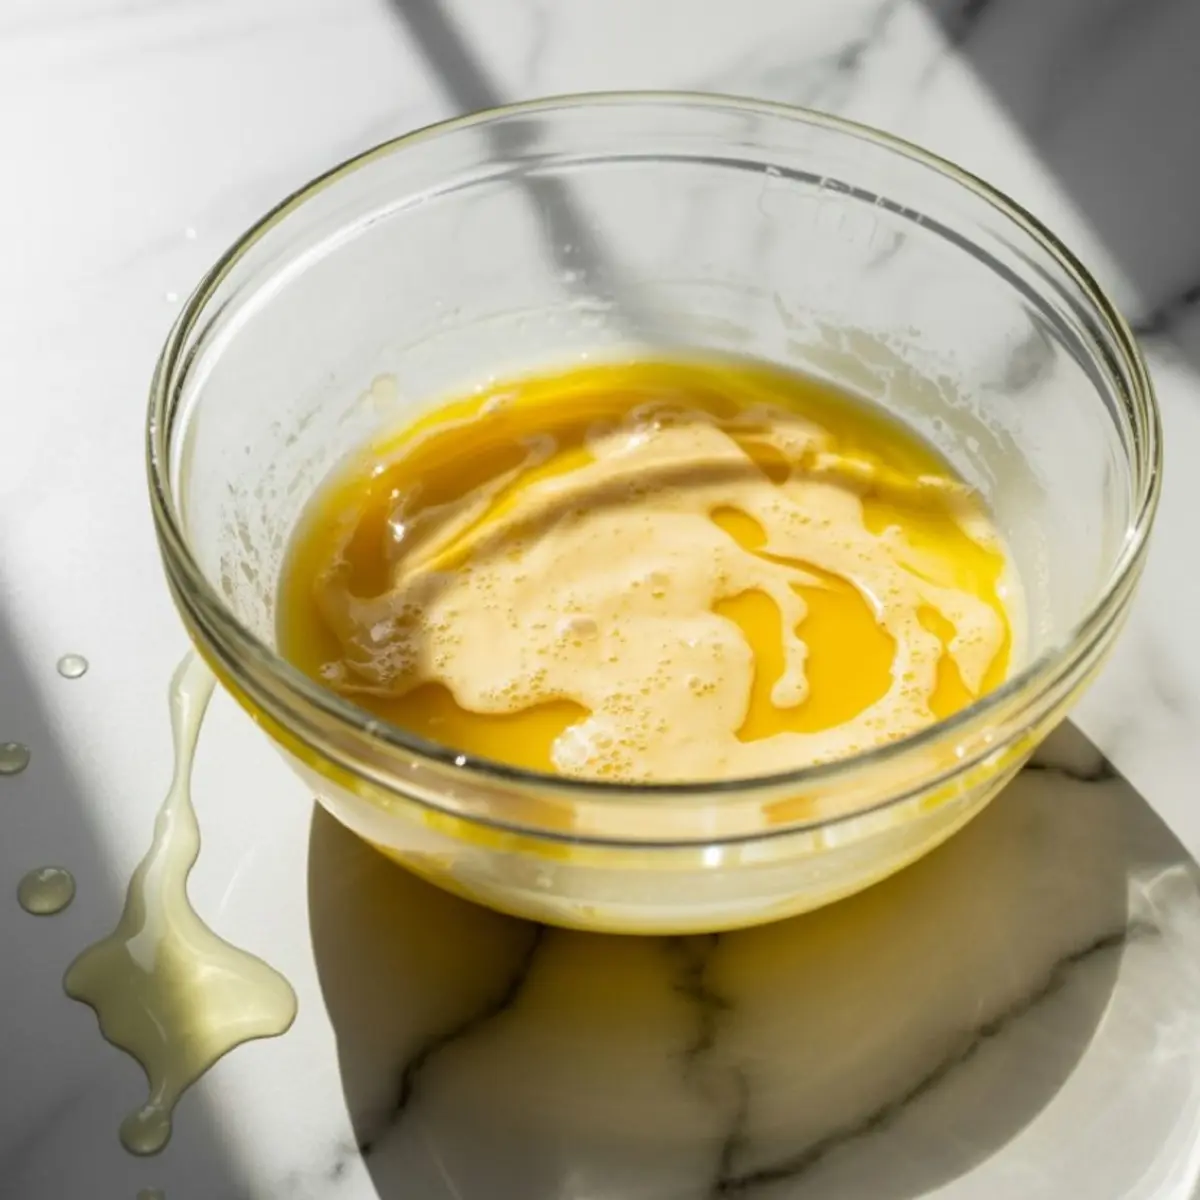
- COMBINE THE WET INGREDIENTS: In a separate bowl, whisk the eggs, whole milk, vegetable oil, and vanilla extract until fully blended and smooth.
- MAKE THE BATTER: Gradually pour the wet mixture into the dry ingredients, stirring continuously until just combined. Add the hot brewed espresso and mix until the batter becomes smooth and slightly runny.
- BAKE THE CAKE: Divide the batter evenly between the prepared pans. Bake for 30 to 35 minutes, or until a toothpick inserted into the center comes out clean. Remove from the oven and cool the cakes in the pans for 10 minutes, then transfer to wire racks to cool completely.
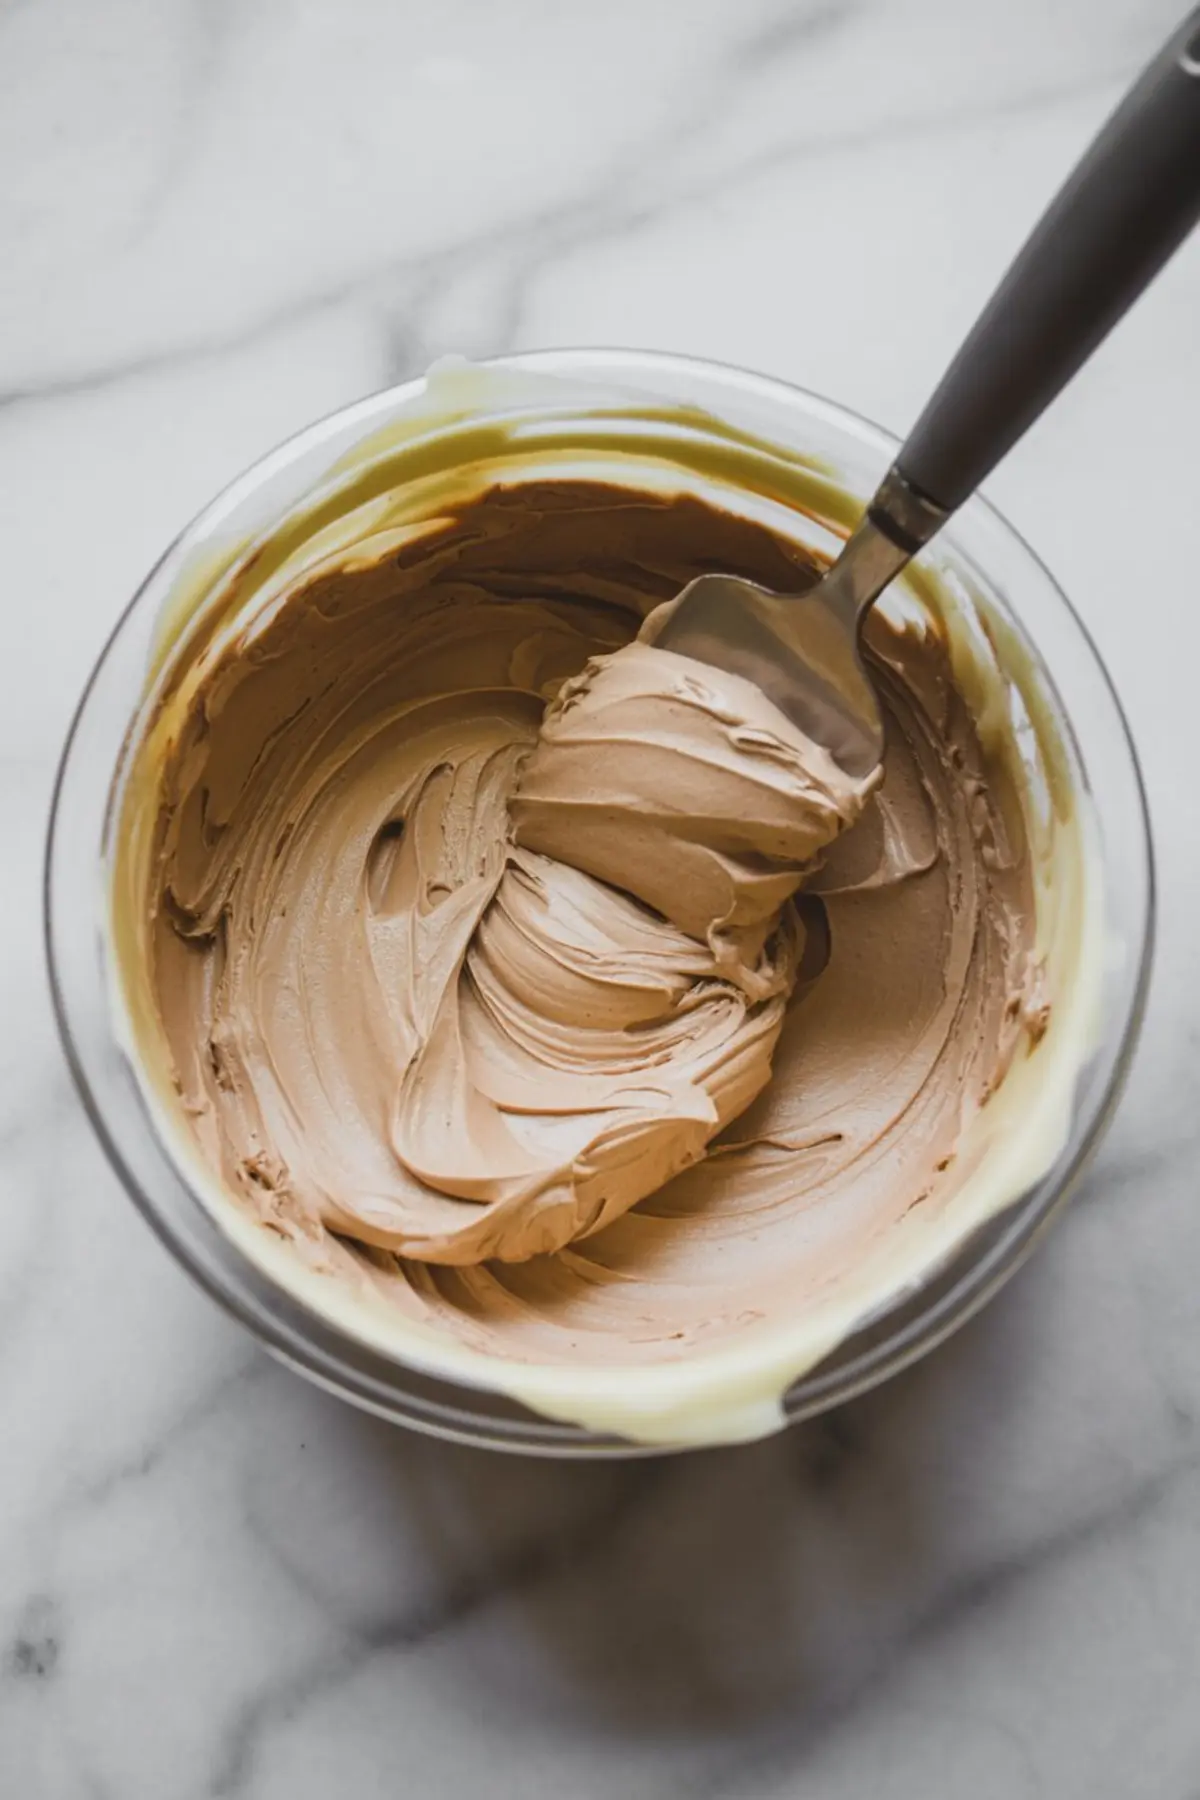
- MAKE THE ESPRESSO CREAM FILLING: In a mixing bowl, beat the softened cream cheese and butter together until light and fluffy. Slowly add the sifted powdered sugar, mixing until smooth. Add the cooled espresso and vanilla extract, and beat until creamy. Refrigerate for 15–20 minutes to help firm up the texture for easier spreading.
- PREPARE THE MOCHA BUTTERCREAM: In a large bowl, beat the softened butter until pale and creamy. Gradually add the sifted powdered sugar and cocoa powder, mixing well after each addition. Pour in the heavy cream, espresso, vanilla extract, and a pinch of salt. Beat until the frosting is smooth, light, and spreadable. Add a little extra cream if needed to adjust consistency.
- ASSEMBLE THE CAKE: Place one cooled cake layer on a serving plate or cake board. Spread the espresso cream filling evenly over the top, reaching all the way to the edges. Place the second cake layer on top and press gently to secure.
- FROST THE CAKE: Using an offset spatula, apply a generous layer of mocha buttercream over the top and sides of the cake. Smooth the surface and create swirls or patterns as desired for texture.
- DECORATE THE CAKE: Lightly dust the top of the frosted cake with cocoa powder. Add chocolate curls or shavings to finish. Refrigerate the cake for 20 minutes to help set the frosting before serving.
- SERVE: Let the cake come to room temperature before slicing for the best texture and flavor.
Notes
Store leftovers in an airtight container in the refrigerator for up to 4 days. For a stronger espresso flavor, use a dark roast brew and cool it slightly before incorporating into the filling and frosting.
Nutrition Information
Yield
12Serving Size
1Amount Per Serving Calories 313Total Fat 16gSaturated Fat 8gTrans Fat 0gUnsaturated Fat 6gCholesterol 70mgSodium 614mgCarbohydrates 31gFiber 1gSugar 13gProtein 10g
Delicious cake! Made it for my husband’s birthday and it was a huge hit with everyone. Very moist but didn’t fall apart, sliced well, and great flavor.
I will say, the buttercream was a bit difficult to spread. Even after doubling the cream added it was still very thick (and my butter was VERY soft), though it was workable. With only 3 tablespoons of cream it seemed like it would have torn the cake up.
I’m also confused how the pictures show the cream inside the cake and the buttercream as the same color? My buttercream was a brown thanks to the cocoa, but the cream was still a slightly tan cream color since the espresso wasn’t enough to color the cream cheese and butter significantly. Which is fine, but it did make me question whether I’d followed the recipe right or if the recipe itself was supposed to have cocoa powder in the cream.
Hey, Annika, love hearing that it worked well for your husband’s birthday and that it sliced cleanly. That’s always my goal with this cake.
For the buttercream, it is meant to be on the thicker side for stability, but it should spread without pulling the cake. I usually add cream one tablespoon at a time and beat it a bit longer than expected. Extra mixing often makes it much smoother. Temperature in the kitchen can also affect the texture.
For the color, you followed the recipe correctly. The buttercream has cocoa, which makes it brown. The espresso filling does not, so it stays lighter. The photos can make them look closer in color than they are in real life.
P.S. I just saw your pics on Pinterest! Looking amazing!