I still remember the first time I tasted that sweet, crunchy mix of chocolate and peanut butter. My childhood kitchen seemed brighter on those days, and the aroma felt like a small celebration. This recipe keeps that warm memory alive, and I believe it will spark similar moments for you.
Following a special diet?
Every recipe on this site can be converted to gluten-free, vegan, dairy-free, keto, nut-free or egg-free with adjusted ratios so nothing falls flat.
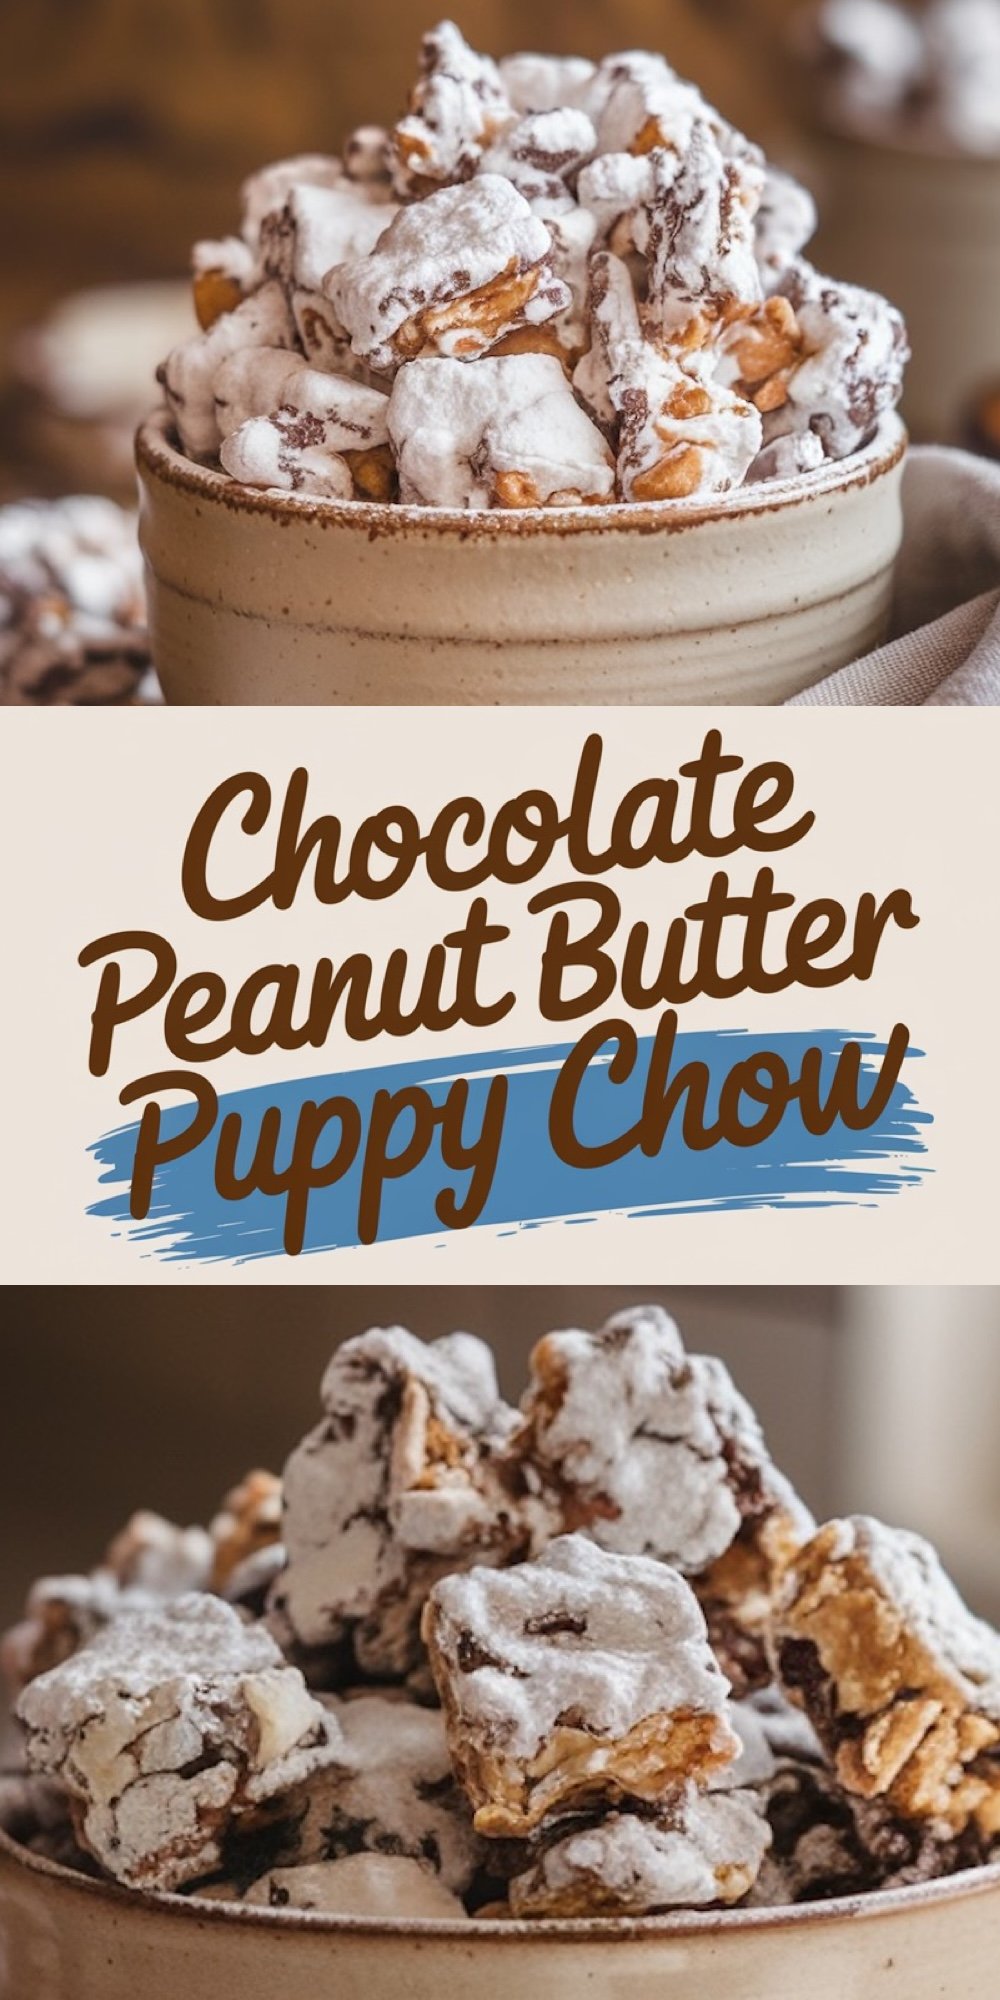
Try the Recipe Converter →Why I Keep Coming Back to These Peanut Butter Chocolate Clusters
I found myself experimenting in my tiny dorm room years ago. My old mixing bowl held cornflakes, and a roommate contributed peanut butter chips. We ended up making a sticky, chocolatey creation that left us grinning in delight. That moment inspired me to chase new ways of combining chocolate and peanut butter, and the result became these Puppy Chow Clusters. Family and friends still request them at gatherings. My aunt calls them “little drops of heaven.” I just call them easy happiness.
Key Ingredients: Building the Foundation of Sweetness
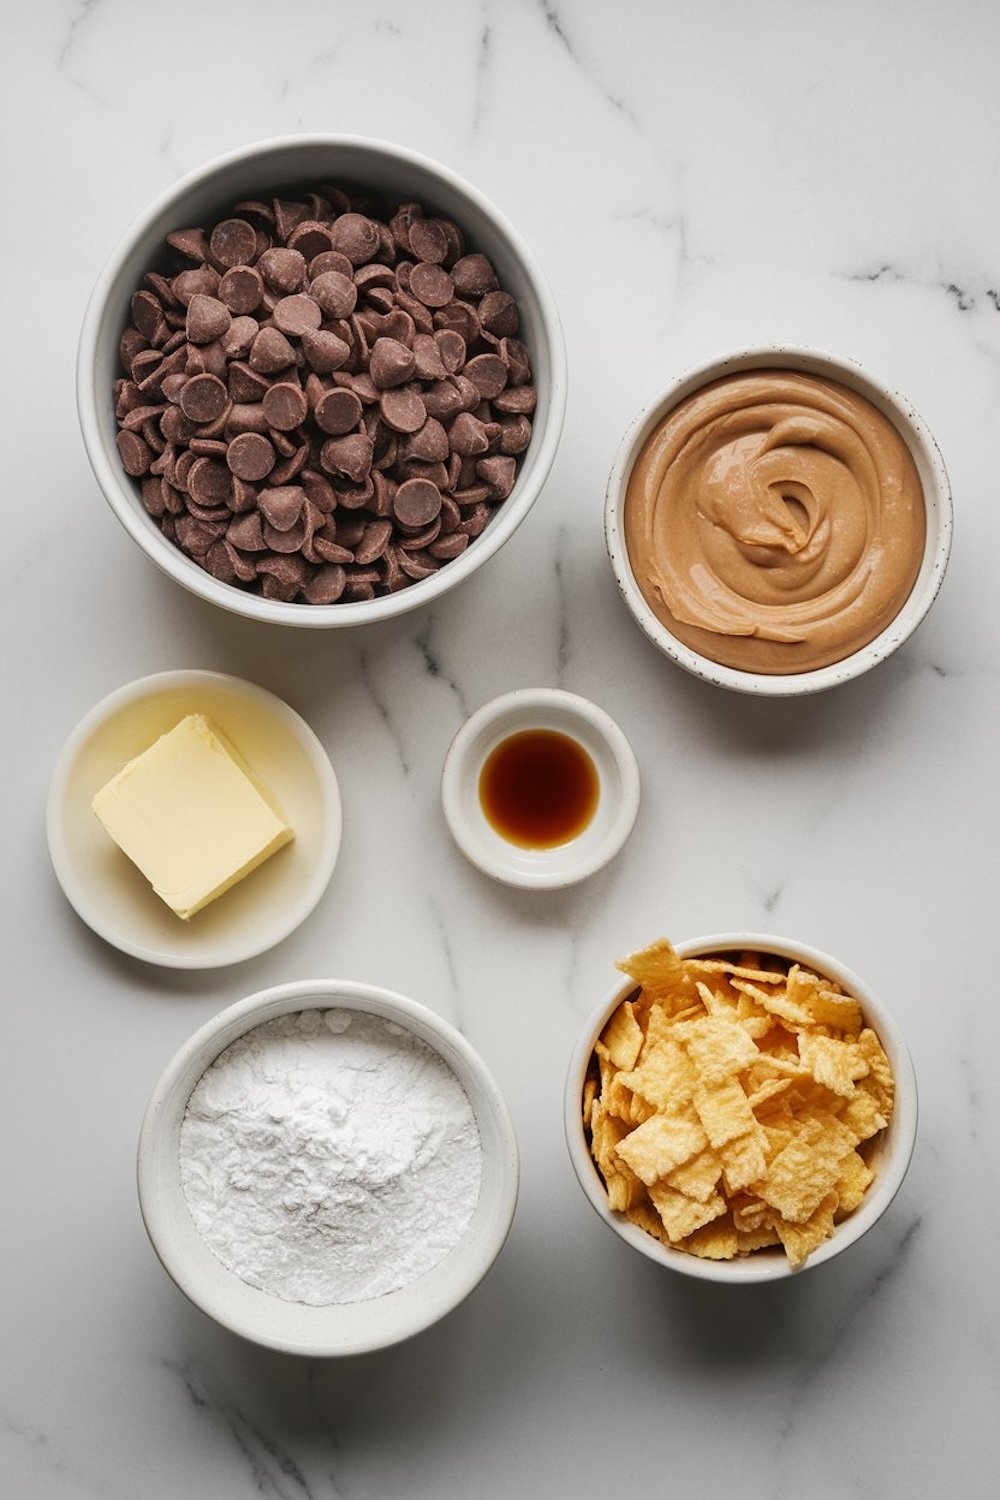
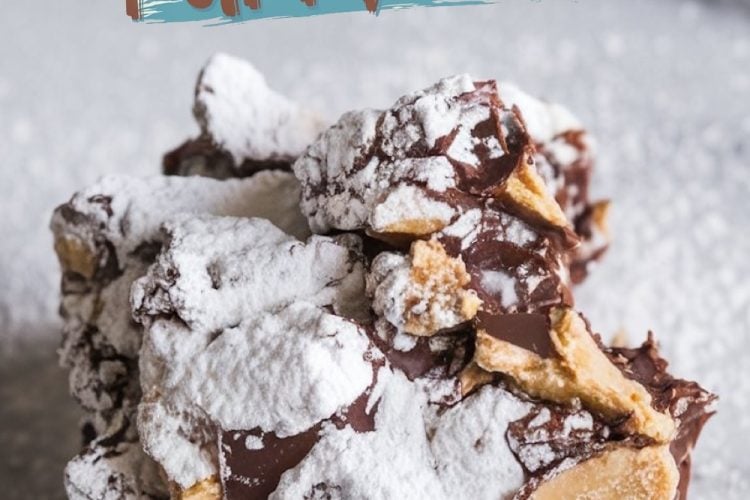
I rely on crisp cornflakes to provide a gentle crunch that supports the melted chocolate and peanut butter. Some cooks swap in rice cereal or broken pretzel sticks, but I love how cornflakes hold their shape. A creamy peanut butter always works best in my kitchen. Chunky peanut butter adds extra bits of peanuts, which some people enjoy. I grab semi-sweet chocolate chips for a smooth, balanced sweetness. A dash of unsalted butter merges everything into a glossy mixture, and a small amount of vanilla extract helps the flavors shine. Powdered sugar forms that recognizable white dusting that reminds me of snowy winter days.
Steps to Create Chocolate Peanut Butter Puppy Chow Clusters
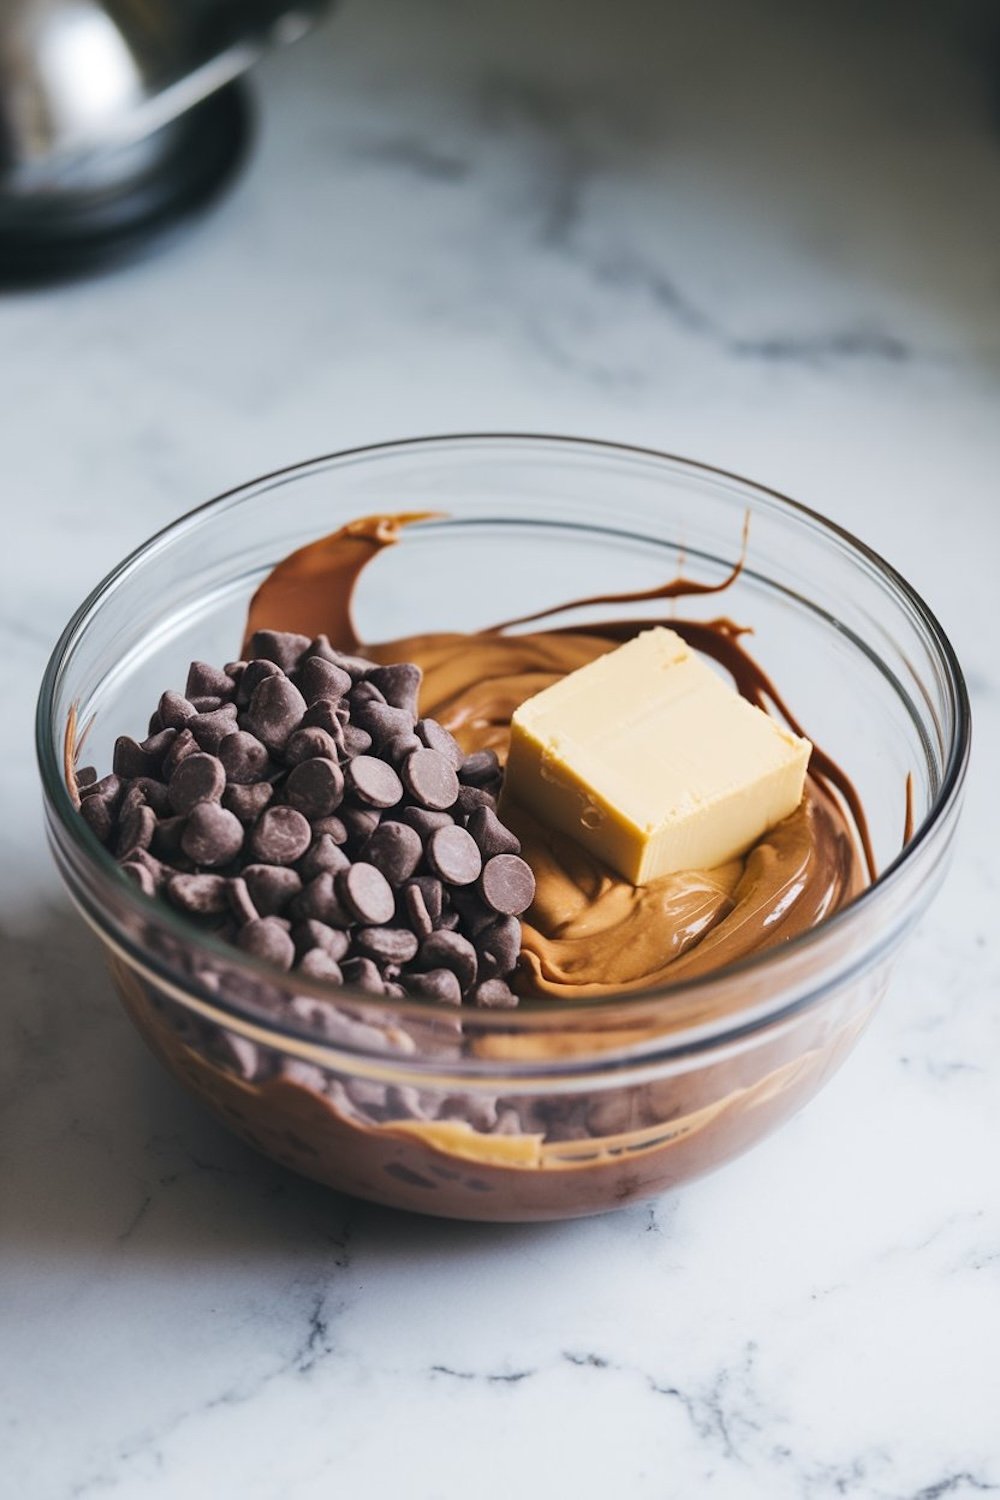
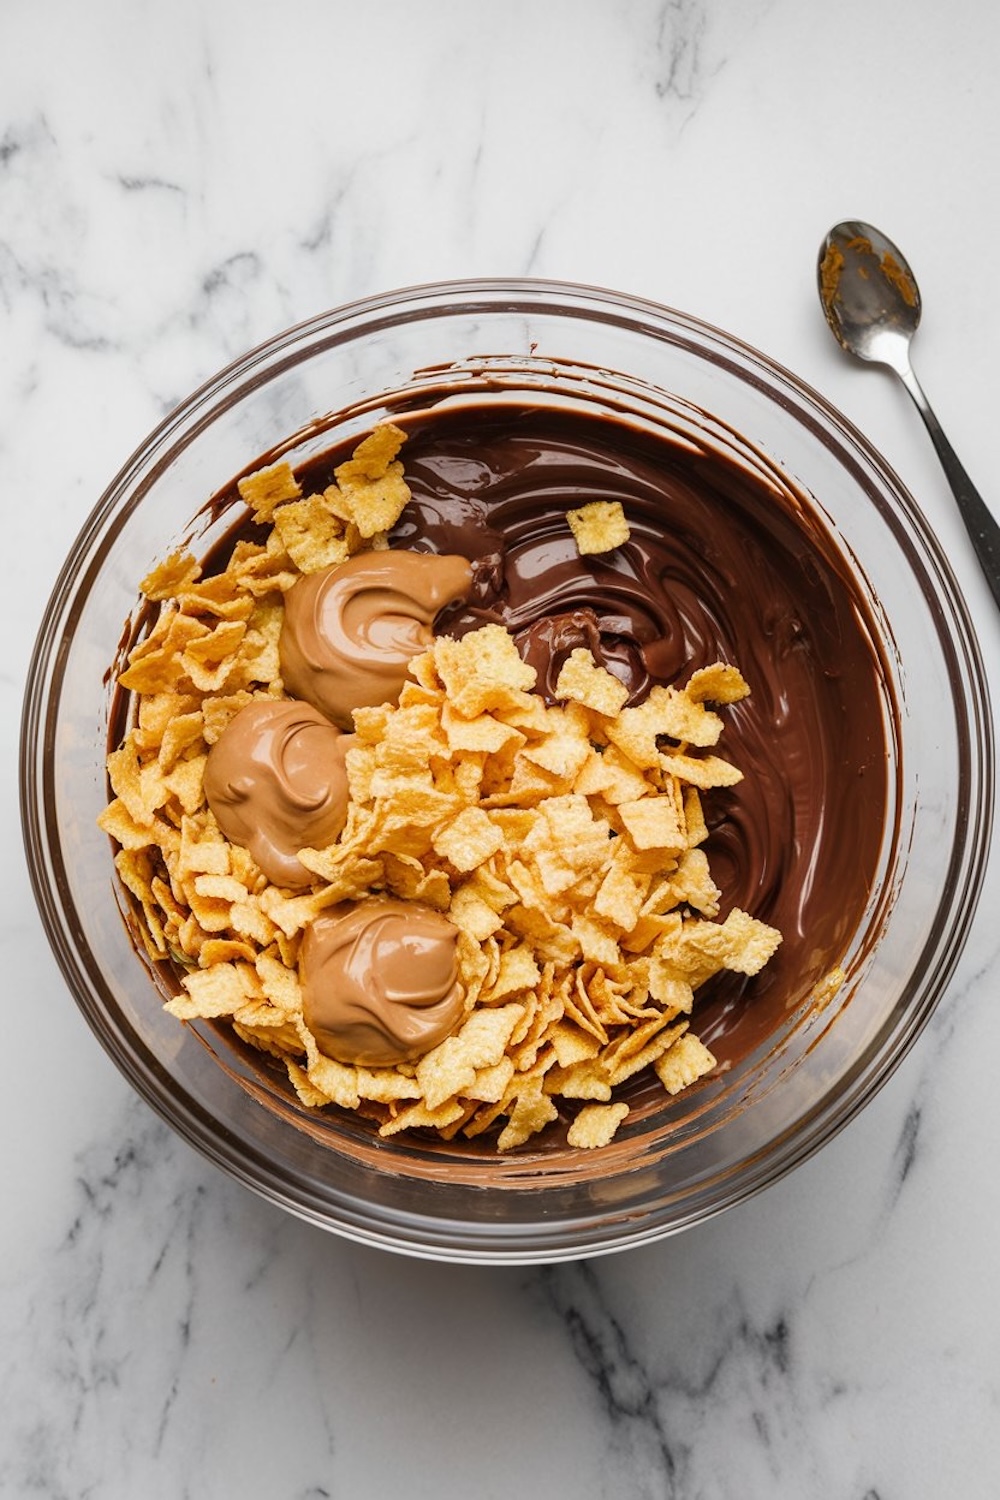
I start by taking a microwave-safe bowl and combining the chocolate chips, peanut butter, and butter. Short bursts in the microwave prevent scorching. A quick stir every 20 or 30 seconds helps everything melt evenly. The inviting smell of warm chocolate usually pulls me in for a taste test. I stay disciplined, though, because the real magic comes with the crunch from the flakes.
Then I pour the cornflakes over the melted chocolate mixture. A gentle folding motion covers each flake without breaking them too much. Big pieces hold the coating and deliver a satisfying bite. I sometimes add little drops of extra peanut butter at this stage. Those bits hide between the flakes and form small surprises that make me smile.
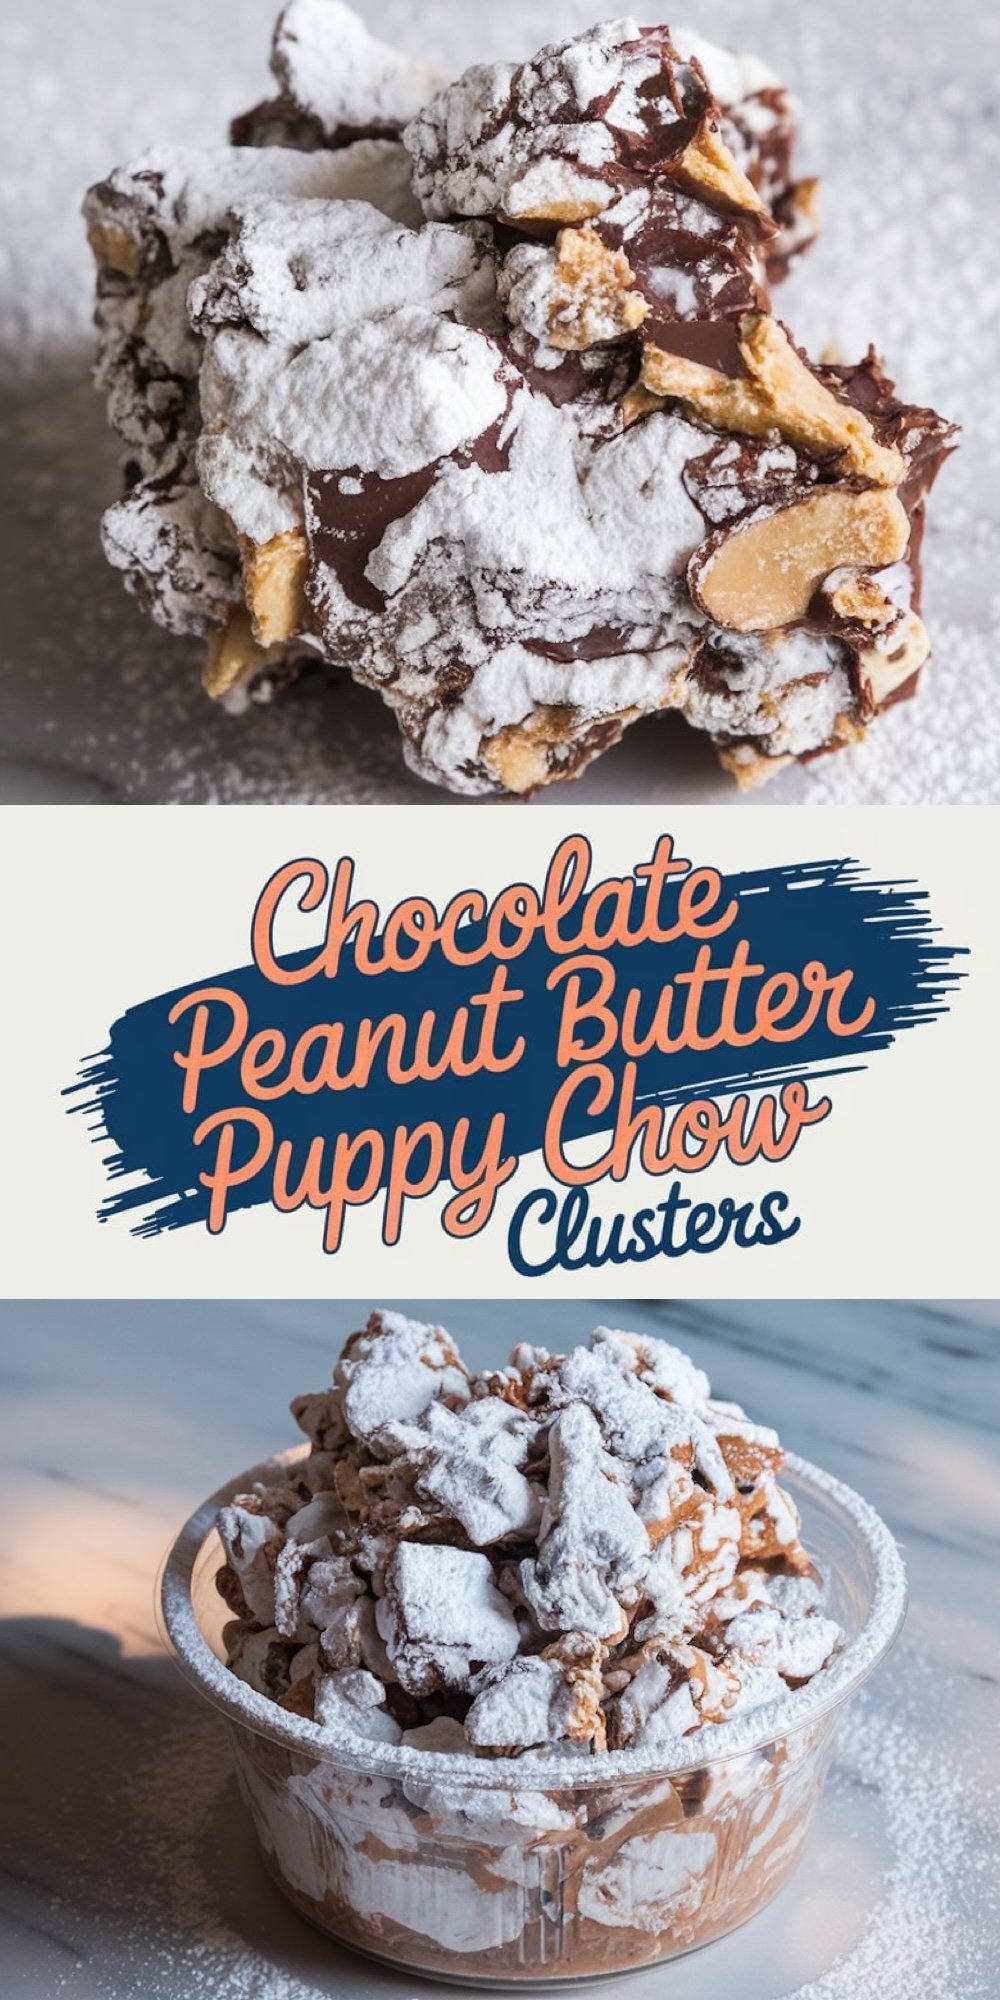
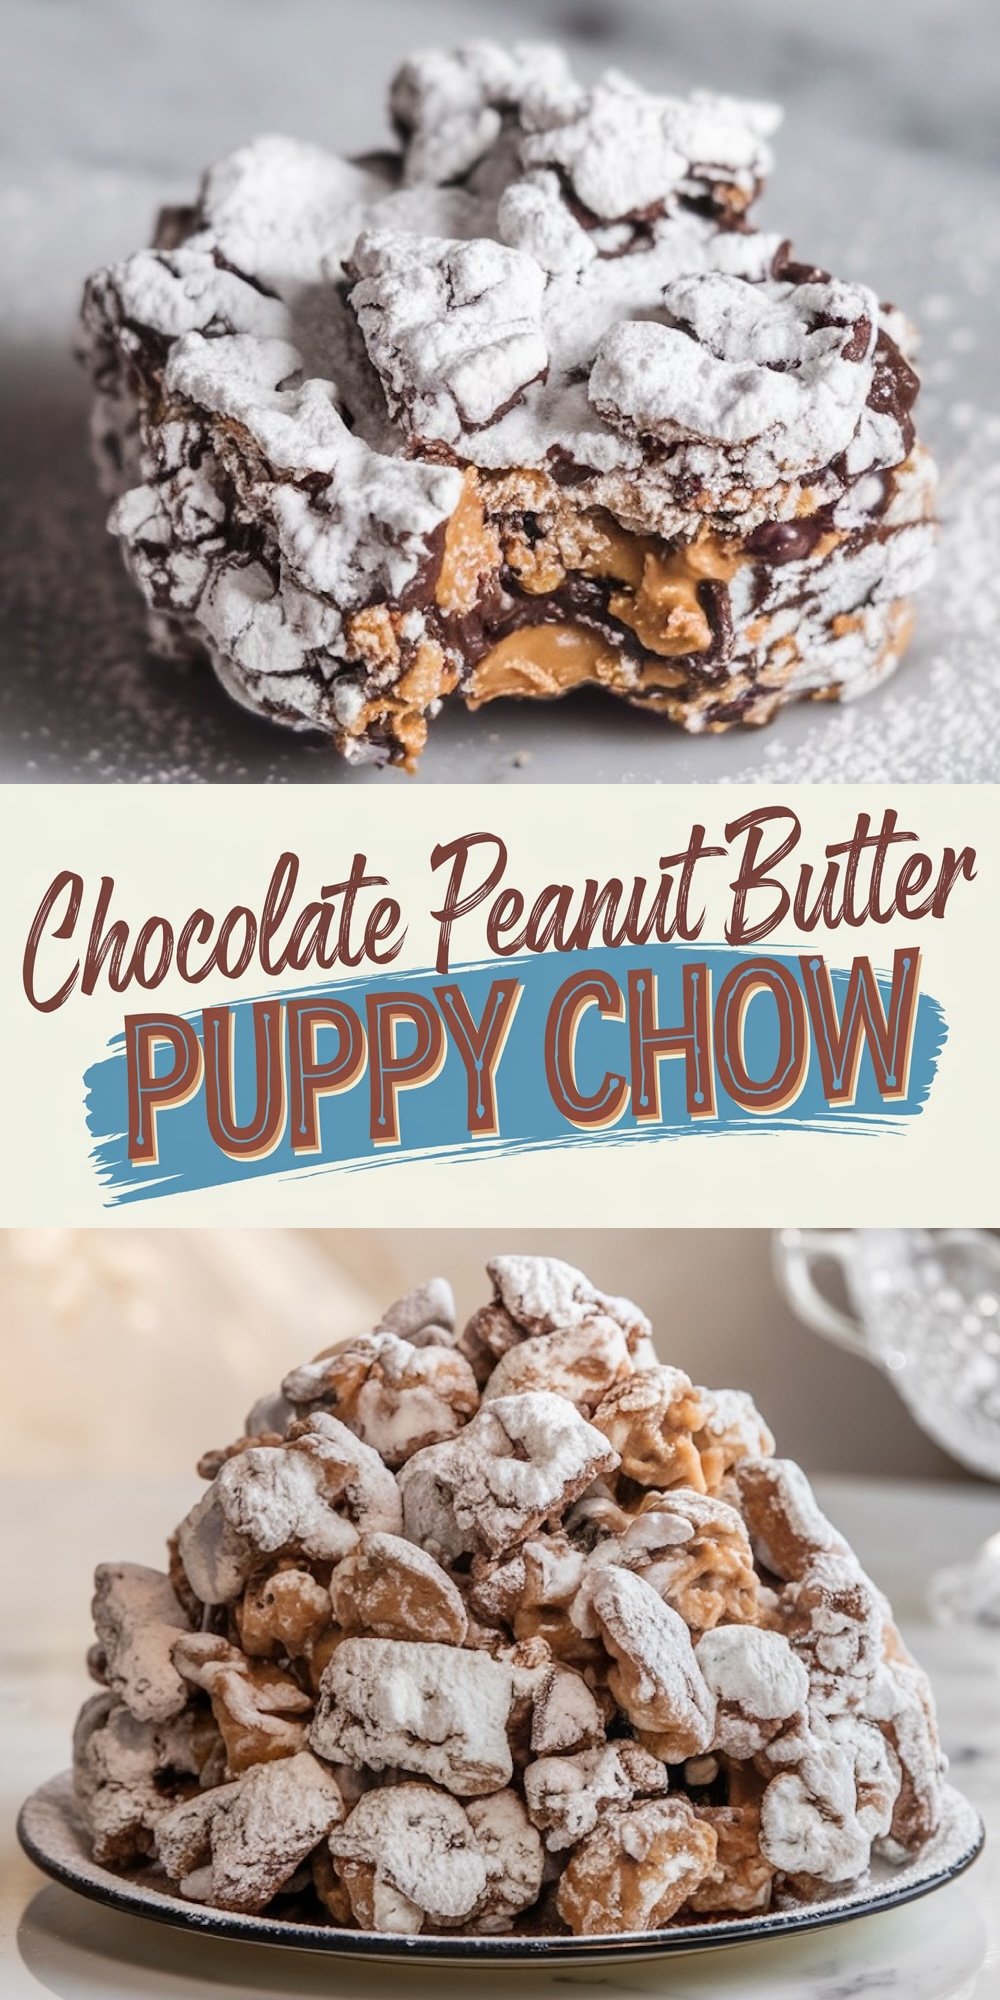
I line a baking tray with parchment paper and spoon small clusters onto it. Each cluster stands on its own, which keeps everything neat. A few minutes in the fridge helps them set, but my impatient side has been known to pop one in the freezer for a quicker result. My favorite part is dusting them in powdered sugar. This step feels like sprinkling fairy dust on each one.
Storage Tips: Preserving Freshness
I keep these clusters in an airtight container at room temperature if I plan to eat them within a week. My brother likes them slightly chilled, so sometimes I store them in the fridge for two weeks. I see no harm in popping them into the freezer for up to a month, especially if a special event is around the corner. It comforts me to know that a stash of sweet treats waits in there, ready to bring a little joy on a tough day.
Fun Flavor Variations: Adding Personal Twists
I adore a dash of whimsy in my recipes. A sprinkle of sea salt on top of the clusters creates a salty-sweet flavor. My cousin likes tossing in toasted coconut flakes for an island twist. Another friend stirs in a bit of instant espresso powder for a hint of mocha, which surprises people in the best way. I once tried crushed freeze-dried strawberries, and the bright red flecks looked beautiful against the powdered sugar.
These choices reflect my personality and mood. I like to say these clusters are a canvas for creative mixing. My mother sometimes sneaks in chopped almonds or toffee bits, and the result never disappoints. I encourage you to follow your instincts here.
Serving Ideas: Delighting Guests and Loved Ones
I have served these clusters at birthday parties, baby showers, and casual movie nights. A pretty plate with a few clusters and some fresh berries works as a quick dessert that looks more elaborate than it is. My neighbor once packed them in mason jars for holiday gifts. She tied each jar with bright ribbon and said everyone was thrilled with their little jar of sweetness.
I enjoy placing a bowl of them on the coffee table before friends arrive. It sparks conversation and provides a nostalgic treat for anyone who takes a handful. Some folks remember making puppy chow as kids. Others try it for the first time and get hooked right away.
Why This Dessert Matters to Me
I cherish recipes that connect me to my past. My mother taught me that a good kitchen memory can turn an ordinary day into something worth remembering. These clusters represent that spirit. I can whip them up in under 20 minutes, and I don’t need fancy equipment. The process calms me, especially the moment I stir that glossy blend of chocolate and peanut butter. The crispy flakes and sweet powdered sugar close the deal. Each bite makes me think about the people I love and the simple moments we share.
Sharing this recipe feels like sharing a piece of my story. I believe in the joy of cooking and the comfort it brings. The playful crunch of Puppy Chow Clusters reminds me that food can be fun and sentimental at once. I hope you find that sense of delight in your own kitchen.
Final Thoughts and Recipe Inspiration
Chocolate Peanut Butter Puppy Chow Clusters stay in my rotation for a reason. They combine basic ingredients with a nostalgic charm that I can’t resist. The short ingredient list means you can put them together even on a busy day. A batch can turn a regular Tuesday night into a cozy dessert moment. These morsels also make great conversation starters, especially at gatherings where people crave something sweet but fuss-free.
I love seeing people’s faces light up after the first taste. This treat embodies simple cooking that connects hearts and memories. My wish is that you experience that spark of happiness and carry it with you. I hope you try a batch and find your own creative ways to make them unique. You might even pass on the recipe to someone dear. That’s how treasured family traditions begin, one spoonful at a time.
More Chocolate Desserts to Try
If you’re looking to explore more chocolate treats, here are some great options to add to your recipe collection. Each dessert offers a unique twist on chocolate, perfect for sharing or enjoying on your own.
1. Chocolate Ganache Tart
This tart combines a buttery crust with a smooth and rich ganache filling. It’s simple to make yet has an elegant finish, making it a great choice for gatherings or celebrations.
2. Chocolate Nutella Crepes
These crepes are thin, soft, and filled with creamy Nutella. Pair them with fresh fruit or a dollop of whipped cream to make a versatile dessert or even a sweet breakfast treat.
3. Chocolate Peanut Butter Brownies
These brownies are rich and fudgy with swirls of peanut butter for added flavor. They’re perfect for anyone who loves the classic combination of chocolate and peanut butter.
These recipes are straightforward to make and packed with flavor. Try them out to enjoy chocolate in new and delicious ways.

Chocolate Peanut Butter Puppy Chow Clusters Recipe
Course: Cake Ideas12-15
servings15
minutes40
minutes220
kcalIngredients
6 cups cornflakes or rice crackers (or a mix of both)
1 cup semi-sweet chocolate chips
1/2 cup creamy peanut butter
1/4 cup unsalted butter
1 teaspoon vanilla extract
1 1/2 cups powdered sugar
Steps
- Step 1: Prepare the Ingredients
- Line a large baking sheet with parchment or wax paper. Set aside.
- Lightly crush the cornflakes by hand or with a rolling pin, ensuring they remain in small pieces but not fully ground.
- Step 2: Melt the Chocolate and Peanut Butter
- In a microwave-safe bowl, combine the semi-sweet chocolate chips, 1 cup of peanut butter, and unsalted butter.
- Microwave in 30-second intervals, stirring after each interval, until the mixture is completely smooth and melted. This should take about 1–2 minutes.
- Stir in the vanilla extract for an extra layer of flavor.
- Step 3: Combine the Ingredients
- Pour the melted chocolate and peanut butter mixture into a large bowl. Add the lightly crushed cornflakes and fold gently to combine.
- Using a small spoon, drop tiny dollops of the reserved 1/4 cup of peanut butter randomly throughout the mixture. Do not mix them in—these dollops will create the gooey peanut butter pockets in the clusters.
- Step 4: Form the Clusters
- Using a spoon or small scoop, carefully scoop portions of the mixture onto the prepared baking sheet, ensuring some of the visible peanut butter dollops remain in each cluster.
- Gently press each cluster together with the back of the spoon to shape them.
- Step 5: Coat with Powdered Sugar
- Generously dust powdered sugar over the clusters, ensuring they are fully coated.
- For a smoother coating, place the clusters in a large resealable bag with the powdered sugar and shake gently to coat evenly.
- Step 6: Let Them Set
- Allow the clusters to cool and set completely on the baking sheet. To speed up the process, place the sheet in the refrigerator for about 20 minutes.
- Once firm, transfer the clusters to an airtight container for storage.