You want a dessert that works. One that doesn’t make you question your life choices halfway through melting chocolate or crimping pie dough. This one never disappoints. I’ve brought it to dinner parties, set it out at birthdays, and made it for myself on random Tuesdays.
It’s that kind of dessert—low effort, high reward, zero drama.
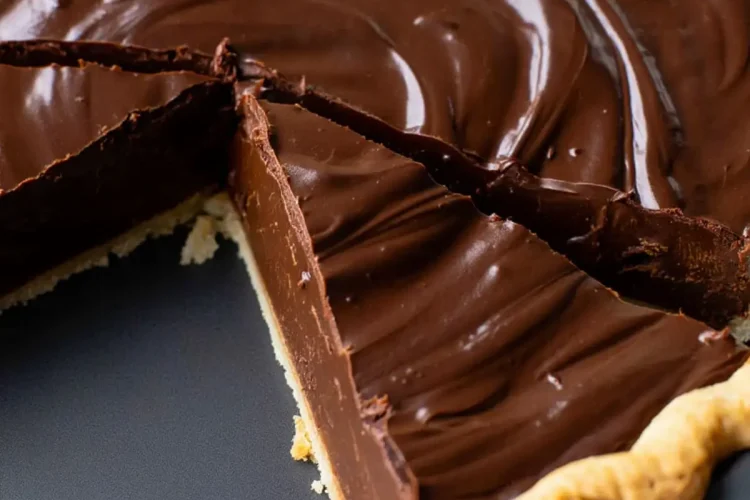
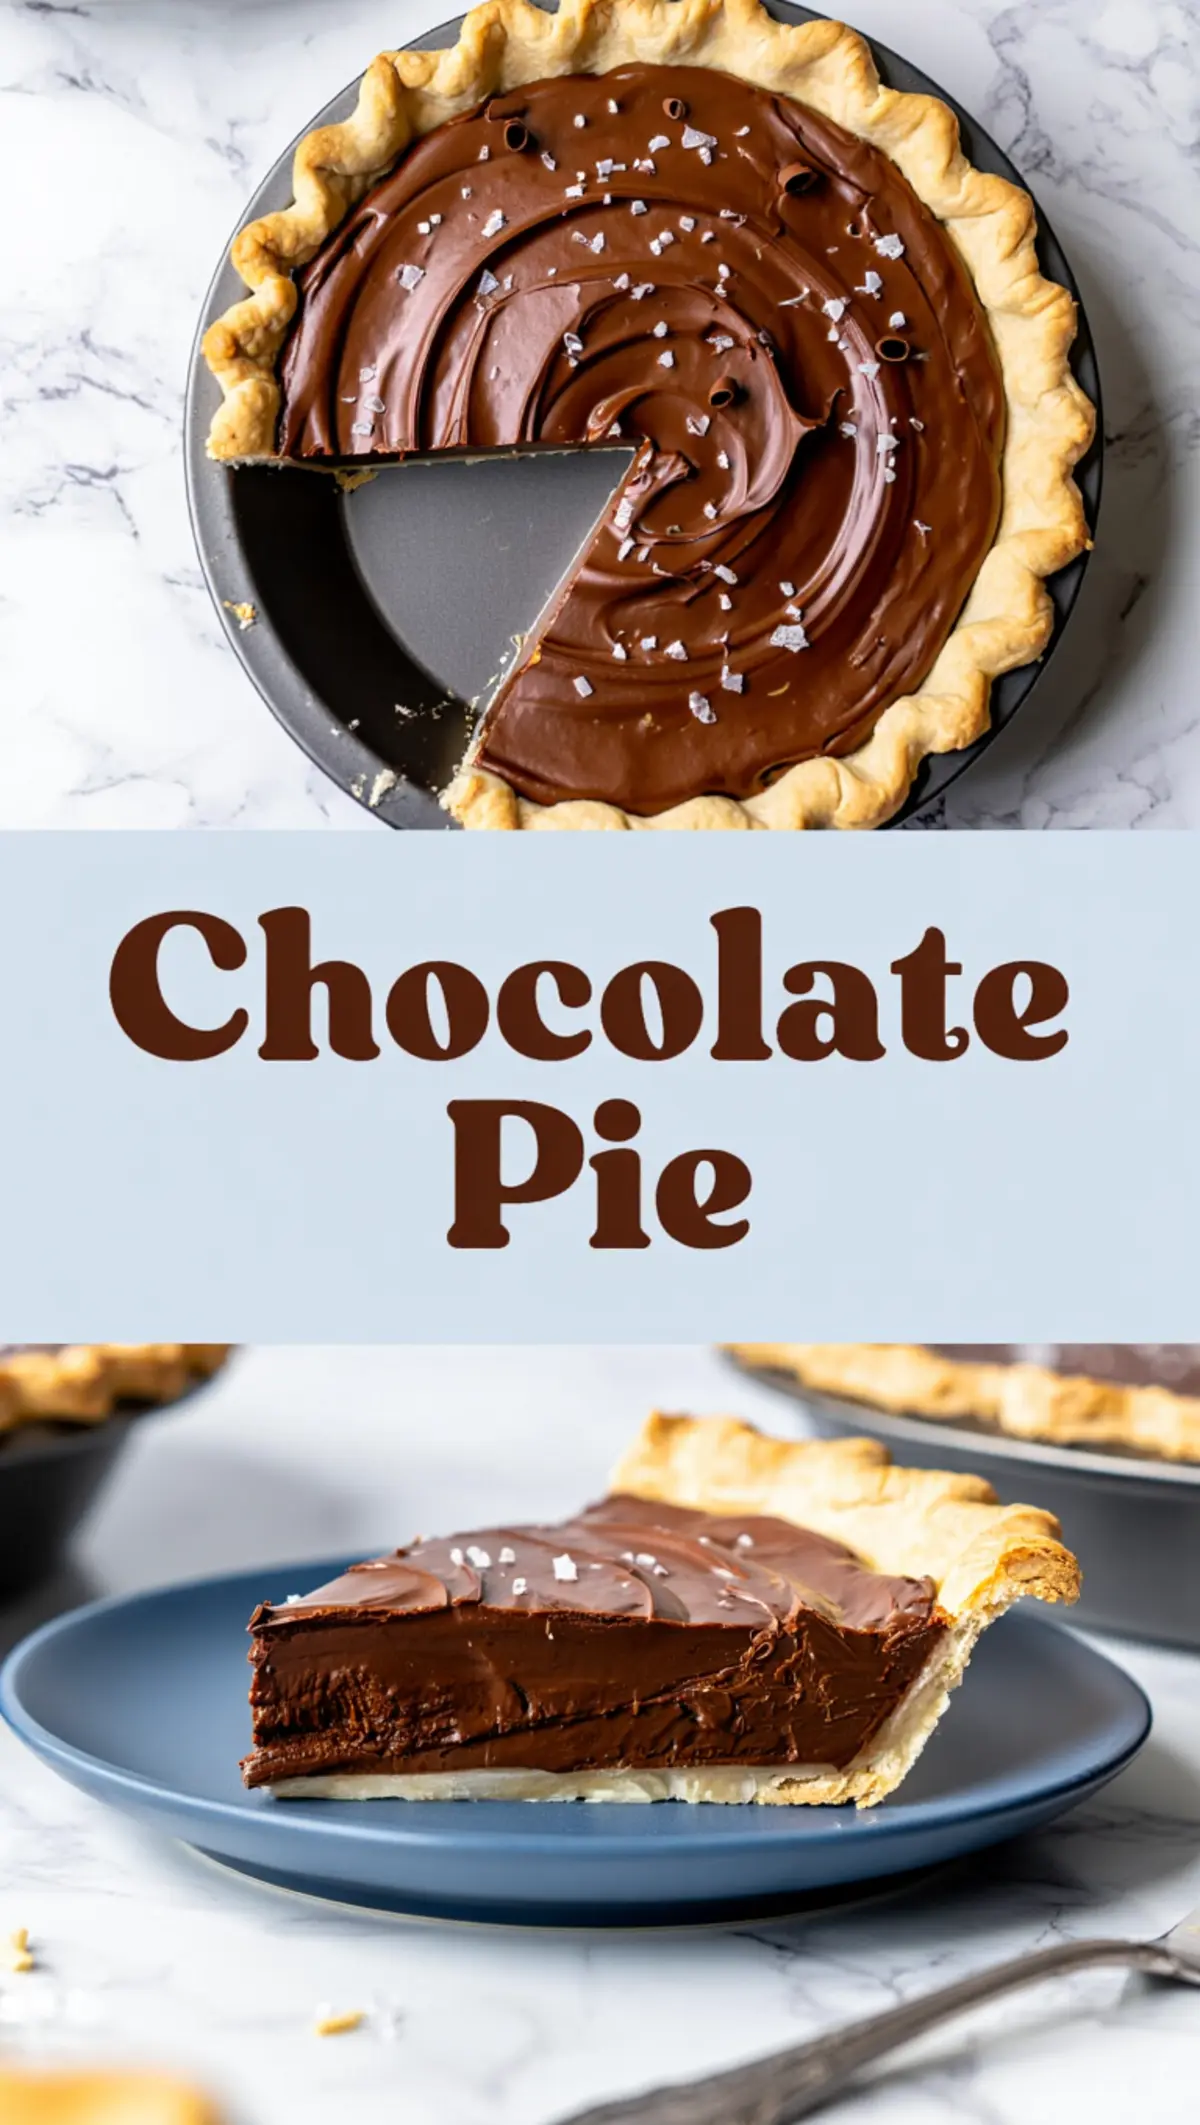
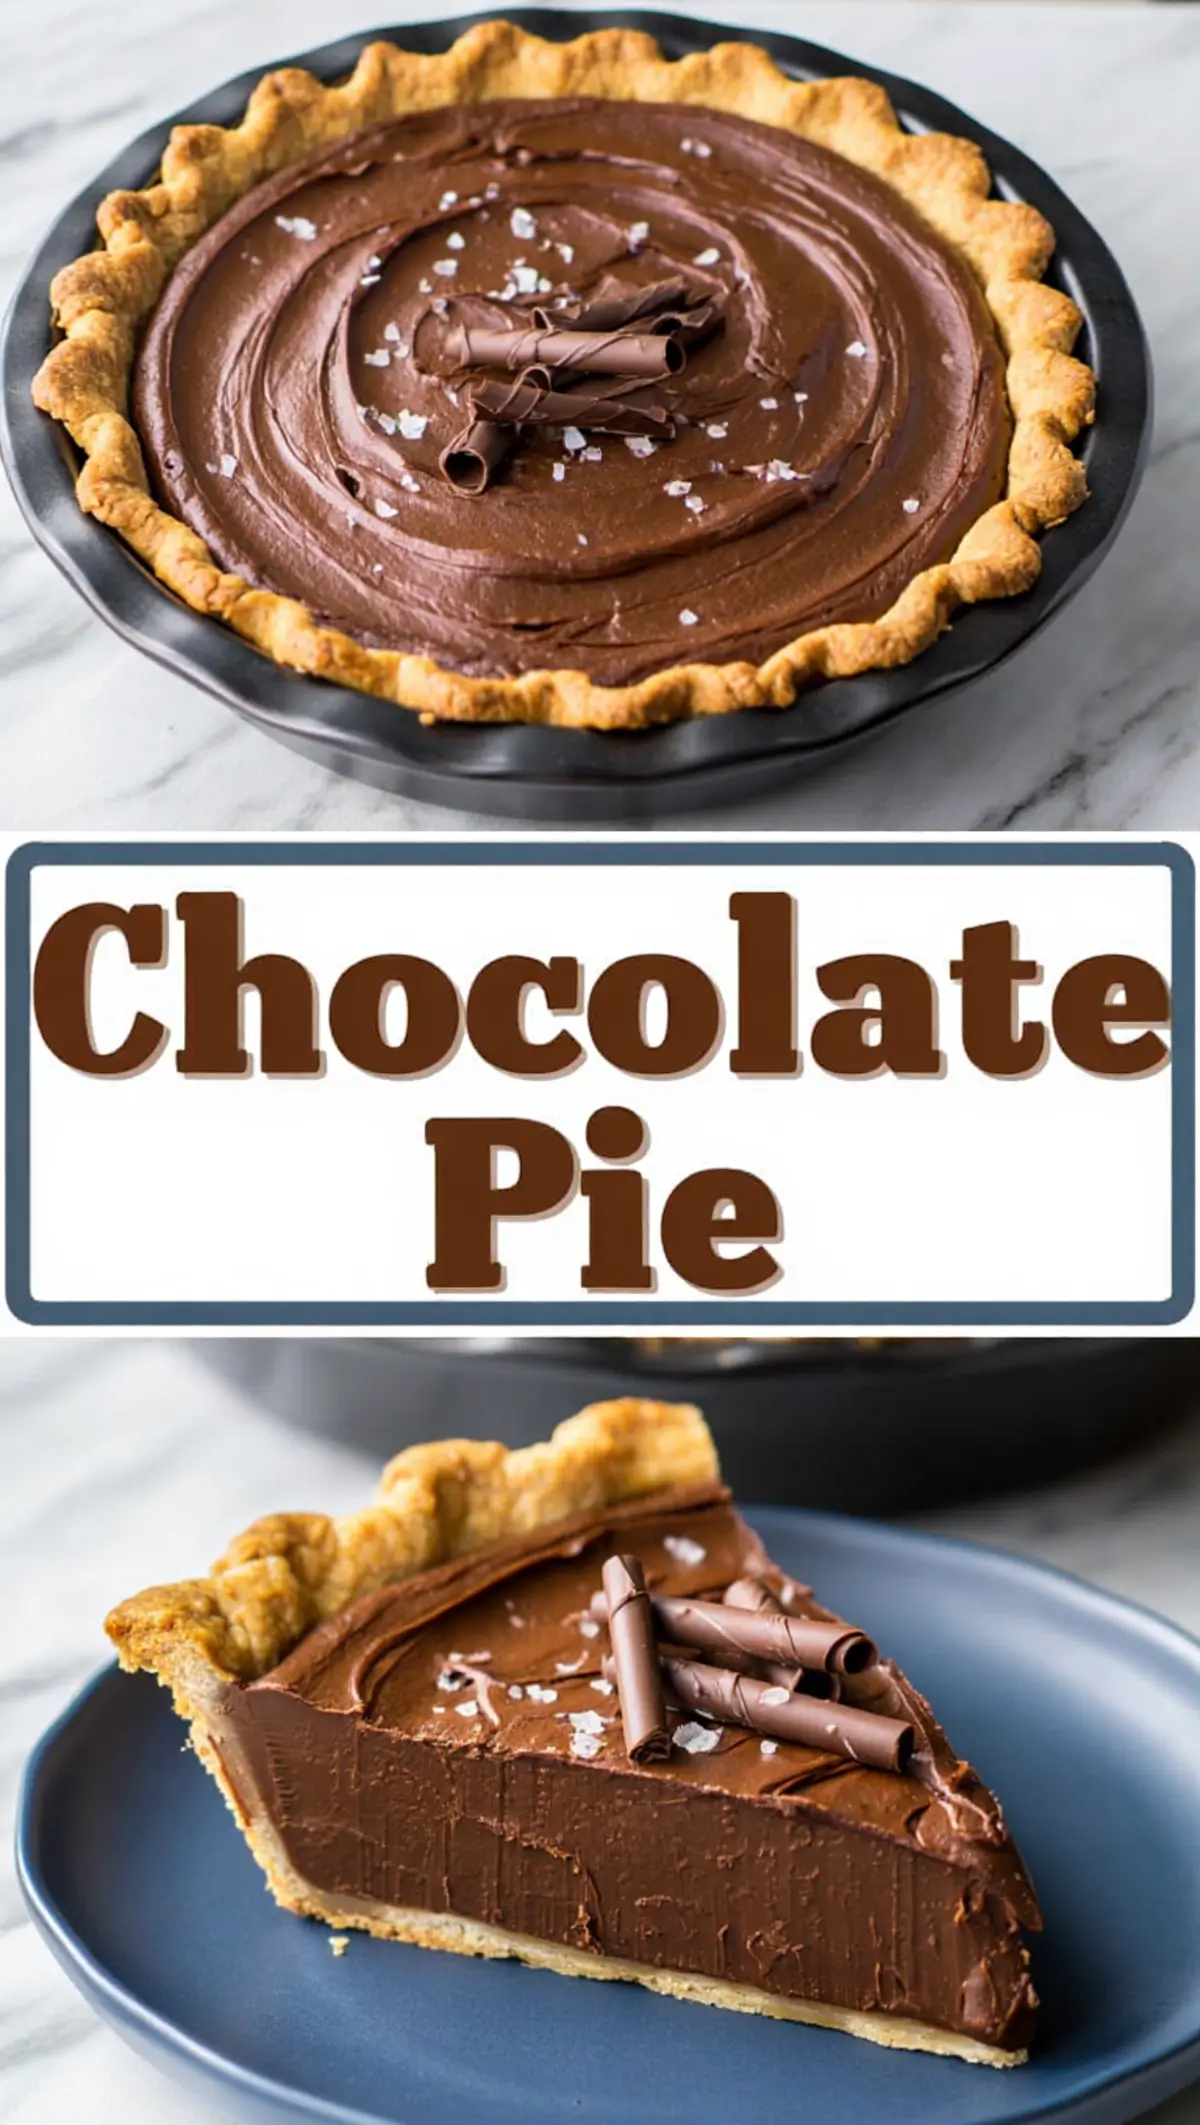
This Silky Salted Chocolate Pie is rich without being heavy. It has a dark ganache filling that settles cleanly in the crust like it was born there. The salt isn’t just for show—it balances the chocolate, keeps things interesting, and makes people ask for the recipe before their second bite.
If you’ve been burned by overly sweet chocolate pies or fillings that never set quite right, let this be your redemption.
Following a special diet?
Every recipe on this site can be converted to gluten-free, vegan, dairy-free, keto, nut-free or egg-free with adjusted ratios so nothing falls flat.
Try the Recipe Converter →What Makes This Chocolate Pie So Reliable
The ganache base gives the pie a steady structure without requiring gelatin or extra eggs. Once it chills, it holds up beautifully. You don’t get a wobbly mess or a crack-riddled surface. Just a clean slice, rich flavor, and a glossy finish that looks like you knew what you were doing.
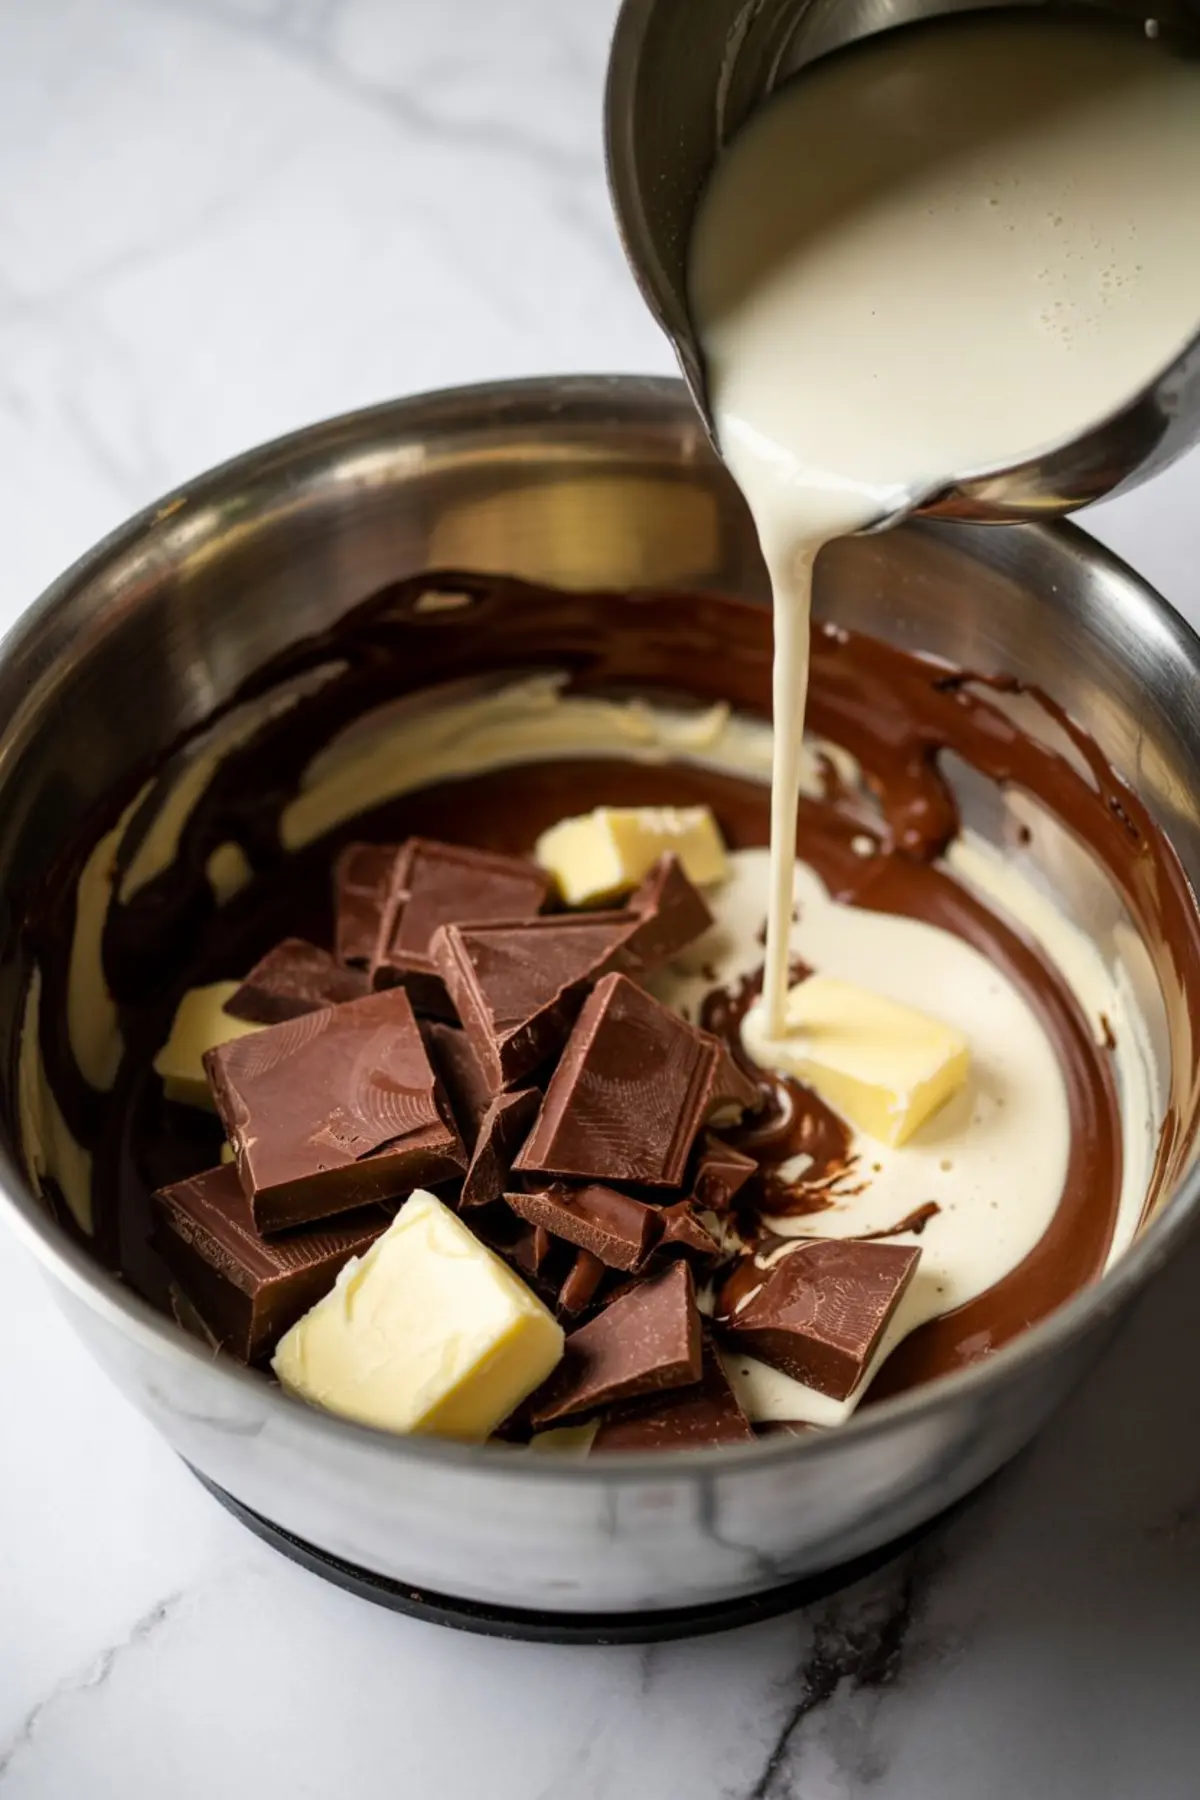
The filling begins with heavy cream, brought just to a simmer. You pour it over dark chocolate and butter and let time do the work. No whisking frenzy. No risk of scorching. After a couple minutes, the chocolate softens enough to stir into a smooth, shiny mixture. Vanilla brings in warmth, but it’s the salt that sharpens the flavor. I use a dark chocolate with at least 60% cocoa. Anything lower makes it too sweet. Anything higher and it might lean bitter unless paired with a sweeter crust.
I’ve used this same filling as the base for tartlets and even layered with whipped cream for a two-tone dessert. But in this pie, it really stands on its own.
The Pie Crust Is Low-Maintenance, Not an Afterthought
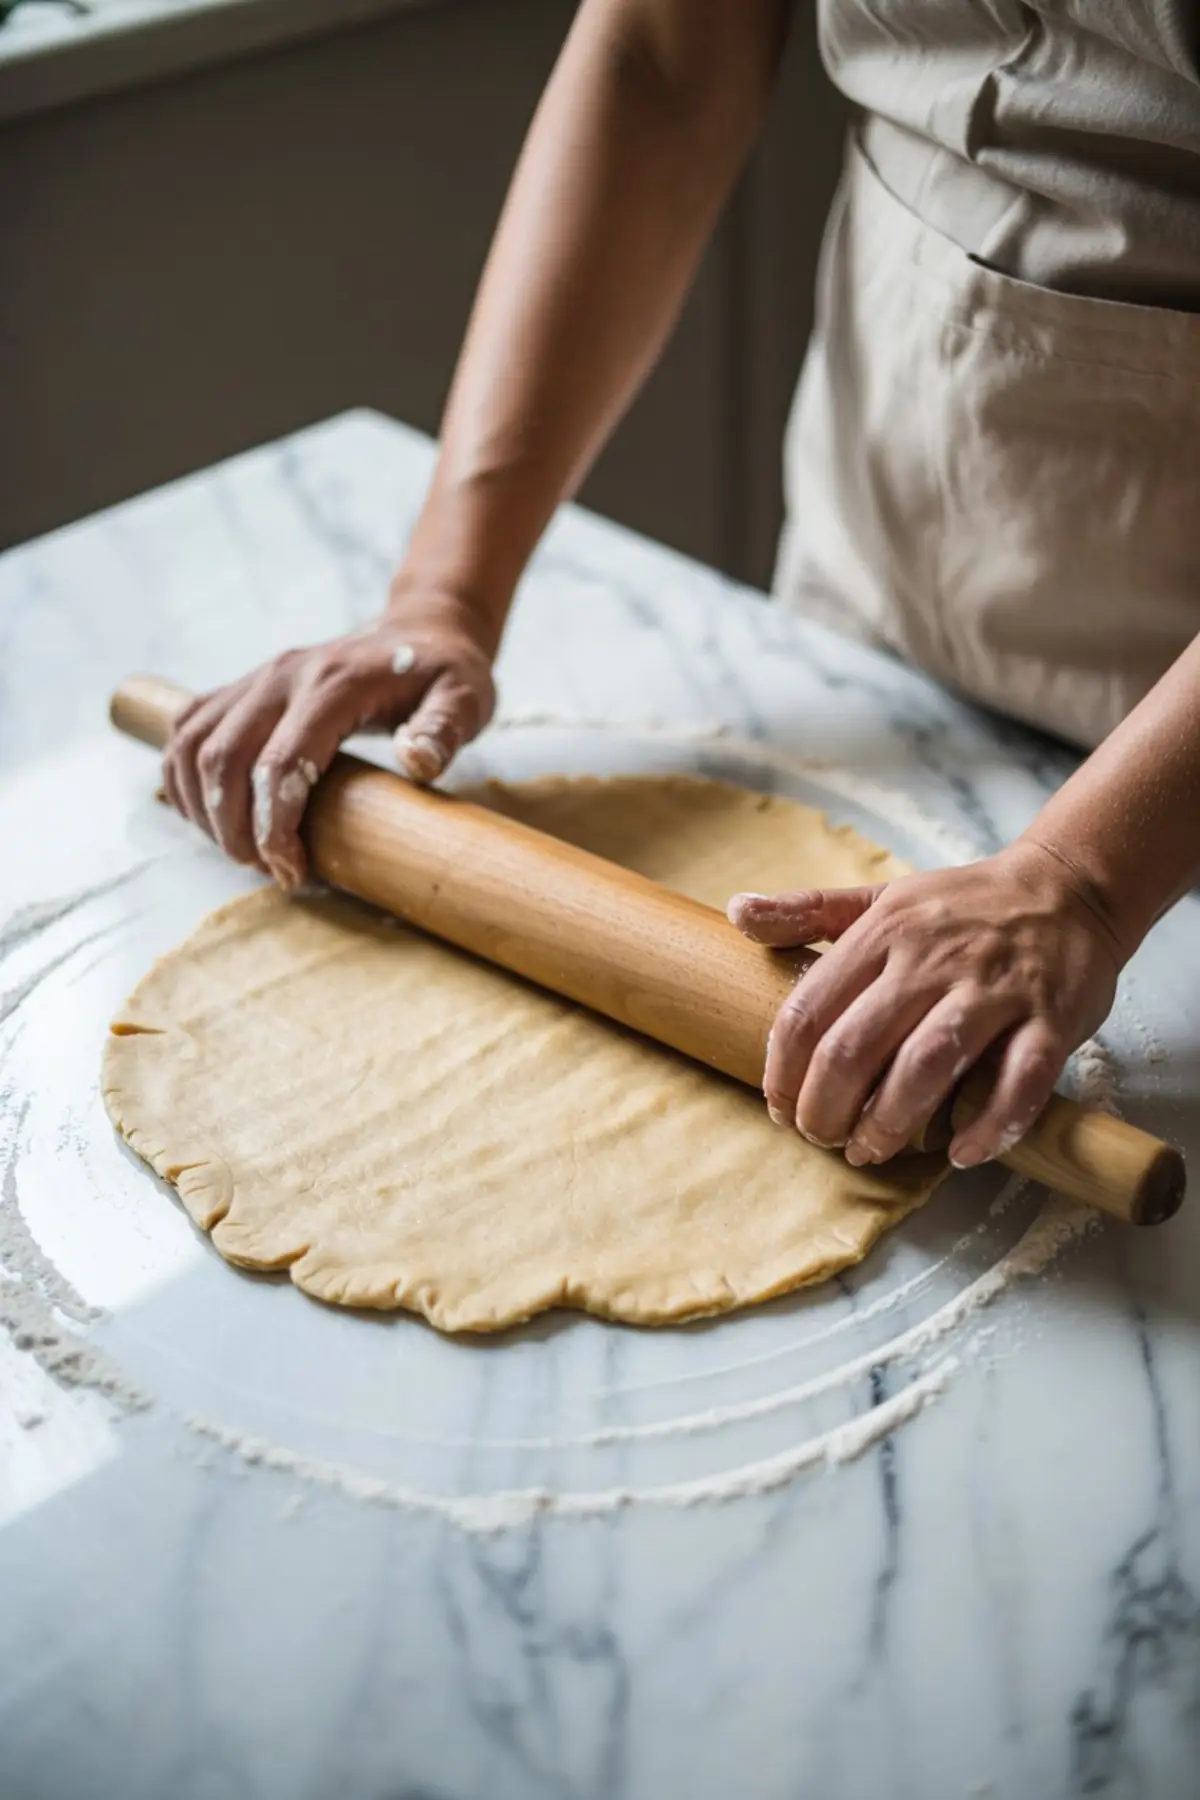
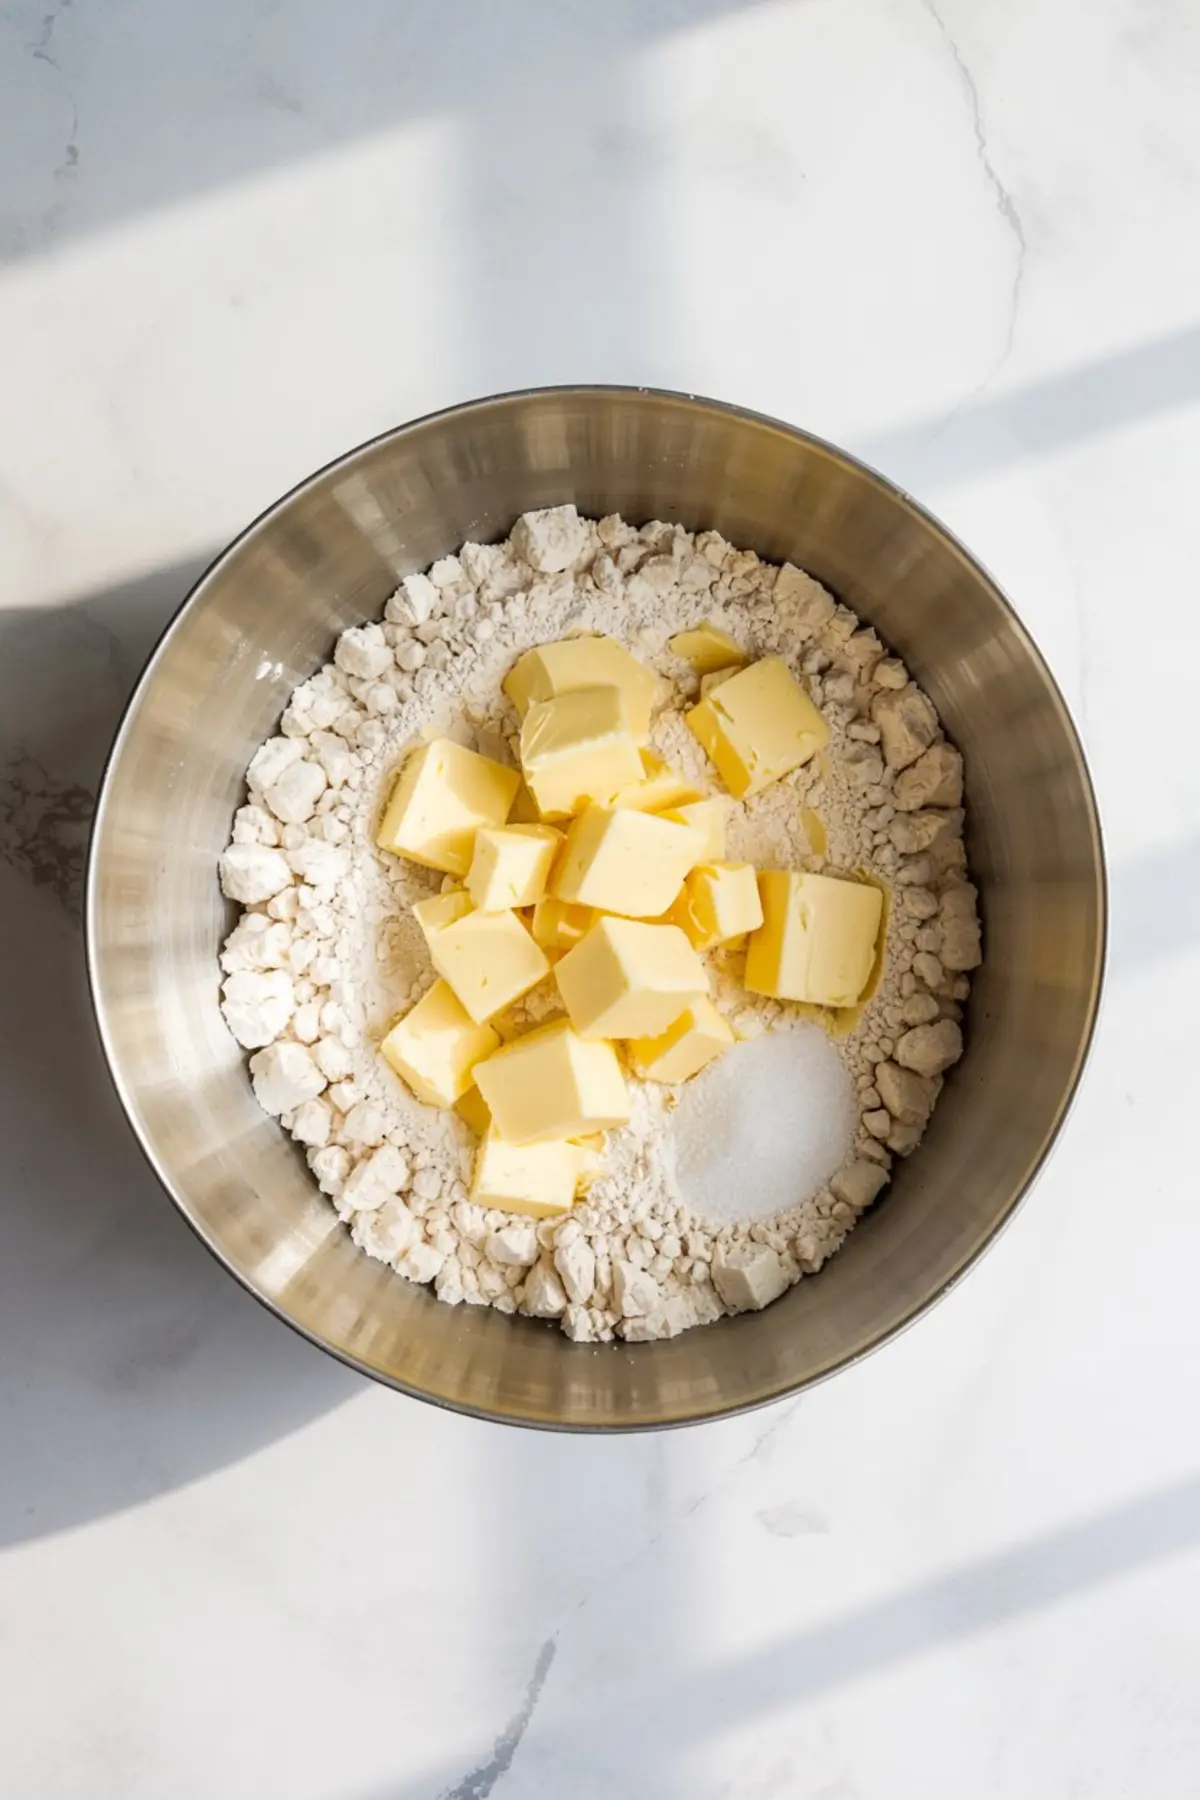
There’s no shame in using a store-bought crust. But if you have 15 minutes, make this one. The crust combines flour, cold butter, a touch of sugar, and ice water. Nothing fancy. The trick is keeping the butter cold and the mixing light. I use my fingers to break the butter into the flour until it forms visible chunks. That’s what gives you those flaky pockets.
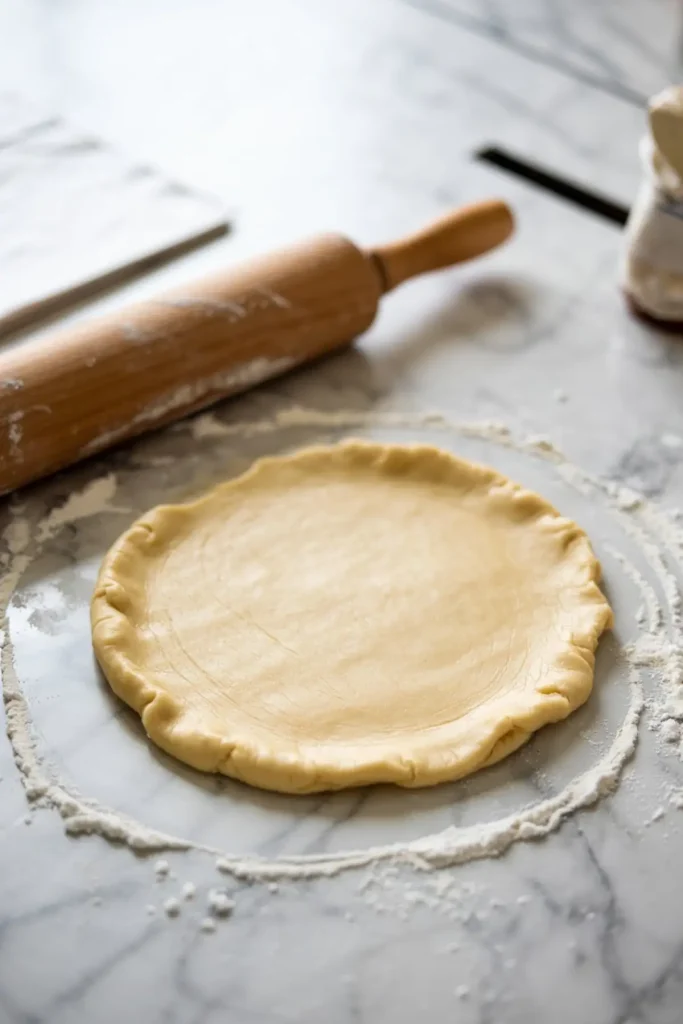
After rolling, the dough needs a short chill. Then you blind bake it with parchment and pie weights. This step matters—if you skip it, the crust can puff or slump. After about 25 minutes total bake time, it comes out golden and crisp. Let it cool completely before adding the filling.
That contrast—crisp crust and smooth chocolate—is what gives this pie its texture.
Want a different crust? Try an Oreo base like in Coffee Cookies and Cream Ice Cream for a darker, crunchier twist.
What You Need to Know About Chilling and Slicing
Once filled, the pie needs at least 3 hours in the fridge. More is better. I usually make it the night before and forget about it until guests arrive.
For clean slices, dip your knife in hot water and wipe it dry between cuts. This isn’t a pie that collapses. It stands confidently on the plate, glossy top and all.
You don’t need whipped cream. You don’t need garnish. But if you do want to dress it up, a dollop of crème fraîche or a dusting of cocoa powder won’t hurt.
Storage Notes and Why This Pie Travels Well

This pie holds up well in the fridge for up to four days. I’ve brought it to picnics, potlucks, even once to a friend’s wedding rehearsal dinner. Just cover it tightly, and it stays fresh. The salt may melt a bit with time, so add it right before serving for best texture.
I wouldn’t freeze it. The texture of ganache doesn’t always survive thawing. But honestly, I’ve never had a reason to freeze it—it disappears too quickly.
Serving Ideas Beyond the Ordinary
I’ve served this pie in narrow slivers with espresso after a heavy meal. I’ve also served it in full-size slices with scoops of vanilla ice cream. Try it once with a glass of red wine or a dark beer. The salt opens up the cocoa notes in a way that makes even a small bite feel rich.
You can even make mini versions in tart pans for individual servings. Or bake the same crust in a square pan, fill it, chill it, and cut into bars.
If you’re on a chocolate kick, follow this with a slice of Chocolate Chess Pie. It leans sweeter and more traditional, so it’s a fun side-by-side comparison.
One Last Note on Confidence
This pie looks polished. It tastes expensive. But it doesn’t ask much of you. That’s the magic. You follow a few clear steps, use good chocolate, and give it time to chill. That’s it.
I’ve made this pie while hosting dinner and also while hosting stress. It worked both times. So if you’re staring at this recipe thinking, “Can I really pull this off?”—yes, you can.
I did. Many times.
You can too.
Save This Pie for Later or Share Your Take
Want to remember this for the next time you need a reliable chocolate dessert? Pin it now to your pie board or dessert recipes.
Have questions? Did you try it? Drop a comment and tell me how it turned out. I love hearing your twists and stories.
Silky Salted Chocolate Pie Recipe

Silky Salted Chocolate Pie features a buttery homemade crust filled with smooth dark chocolate ganache and finished with a sprinkle of flaky sea salt. The rich texture and balanced flavor make this a straightforward yet satisfying dessert. The filling sets up beautifully in the fridge and slices cleanly for easy serving.
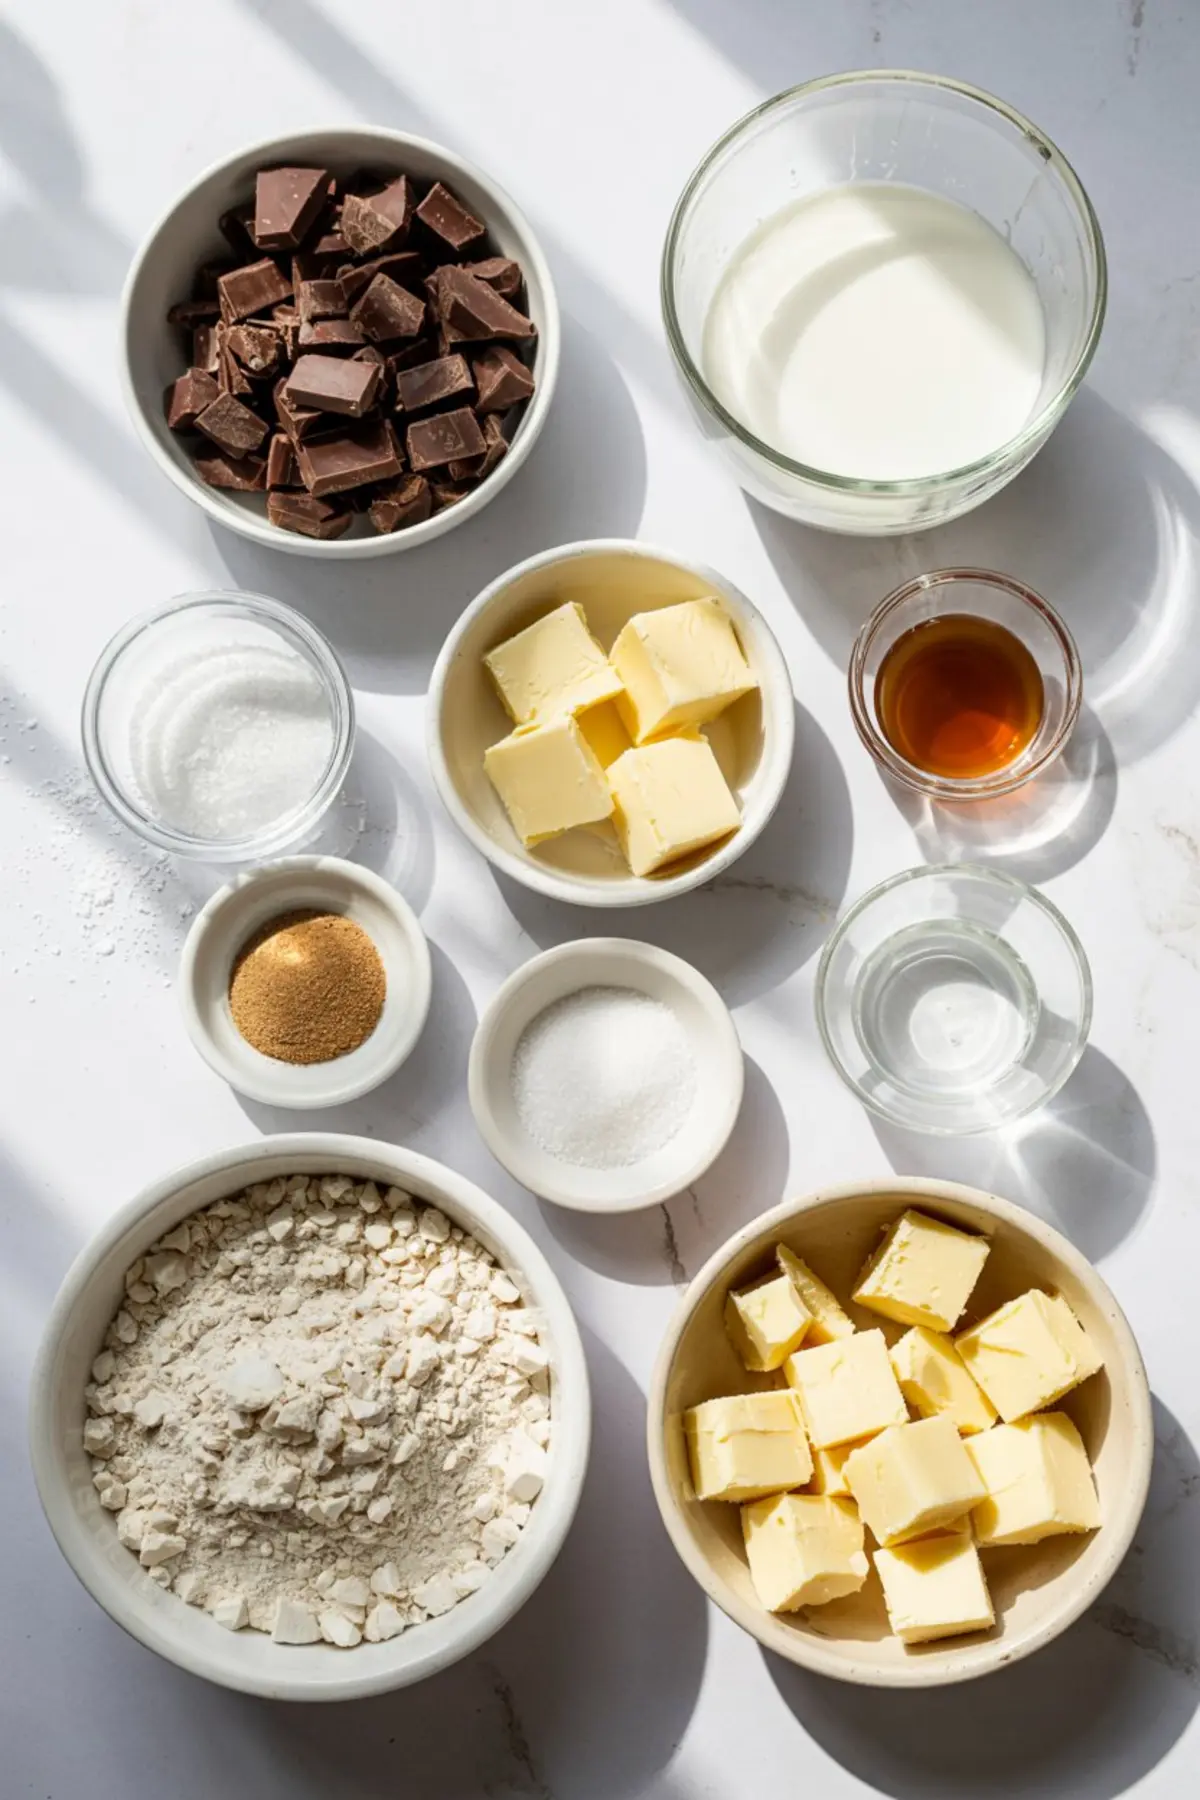
Ingredients
- FOR THE PIE CRUST
- 1 ¼ cups all-purpose flour
- ½ tsp salt
- 1 tbsp sugar
- ½ cup unsalted butter, cold and cubed
- 3–4 tbsp ice water
- FOR THE CHOCOLATE FILLING
- 1 ½ cups heavy cream
- 12 oz high-quality dark chocolate (60–70%), chopped
- 3 tbsp unsalted butter
- 1 tsp vanilla extract
- Flaky sea salt, for topping
Instructions
- MAKE THE PIE CRUST: In a large bowl, whisk together the flour, salt, and sugar until combined evenly.
- CUT IN THE BUTTER: Add the cold, cubed butter and use a pastry cutter or your fingers to blend it into the flour until the mixture forms coarse crumbs with pea-sized pieces of butter.
- ADD WATER AND FORM DOUGH: Drizzle in the ice water, one tablespoon at a time, gently mixing until the dough holds together when pressed. Avoid overmixing.
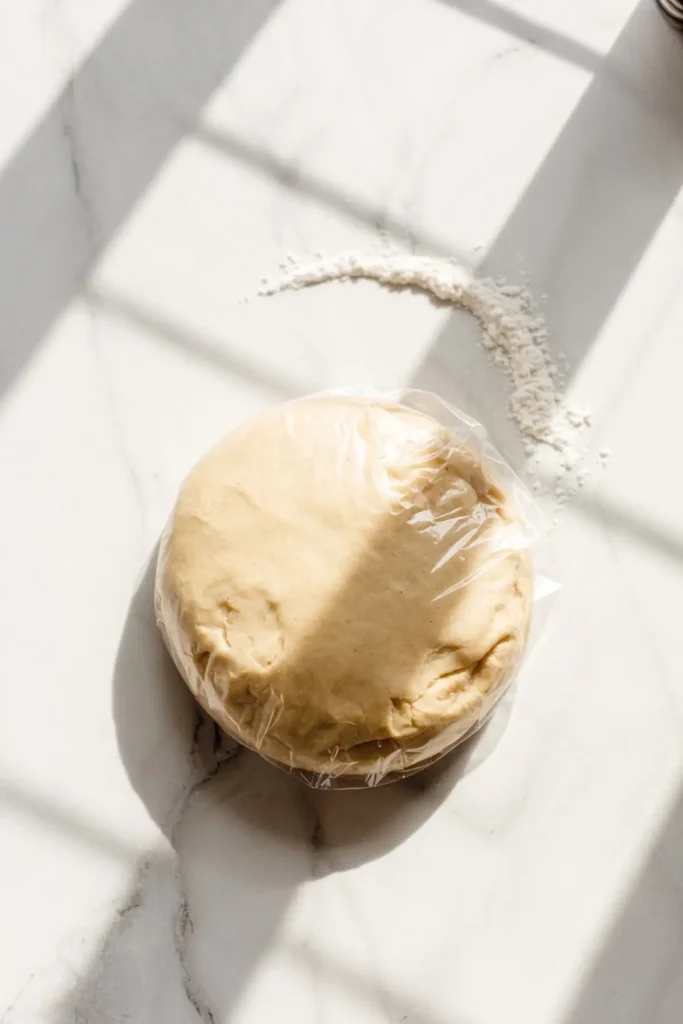
- CHILL THE DOUGH: Shape the dough into a flat disk, wrap it tightly in plastic wrap, and refrigerate for at least 30 minutes.
- ROLL AND SHAPE: On a lightly floured surface, roll out the chilled dough to fit a 9-inch pie pan. Transfer it to the pan, trim any overhang, and crimp the edges as desired.
- PREPARE FOR BLIND BAKING: Place the shaped crust in the refrigerator while preheating the oven to 375°F (190°C). Once chilled, line the crust with parchment paper and fill it with pie weights or dried beans.
- BLIND BAKE THE CRUST: Bake the crust for 15 minutes, then remove the parchment and weights. Return to the oven and bake for another 10–12 minutes until golden brown. Let the crust cool completely.
- HEAT THE CREAM: In a small saucepan, heat the heavy cream over medium heat until it just begins to simmer. Do not let it boil.
- MELT THE CHOCOLATE: Place the chopped chocolate and butter in a large heatproof bowl. Pour the hot cream over the mixture and let it sit undisturbed for 2–3 minutes to melt.
- STIR UNTIL SMOOTH: Gently stir the chocolate, cream, and butter together until the mixture is fully melted, smooth, and glossy. Stir in the vanilla extract.
- FILL THE CRUST: Pour the finished chocolate filling into the cooled pie crust. Use a spatula to smooth the top evenly.
- CHILL THE PIE: Transfer the filled pie to the refrigerator and chill for at least 3 hours, or until the filling is fully set and firm to the touch.
- ADD FINAL TOUCH: Just before serving, sprinkle a pinch of flaky sea salt evenly over the surface for a balanced sweet-salty finish.
Notes
Store leftovers covered in the refrigerator for up to 4 days. For clean slices, use a warm knife and wipe between cuts. A store-bought pie crust can be used for convenience.
Nutrition Information
Yield
8Serving Size
1Amount Per Serving Calories 705Total Fat 51gSaturated Fat 30gTrans Fat 1gUnsaturated Fat 18gCholesterol 96mgSodium 336mgCarbohydrates 55gFiber 4gSugar 25gProtein 7g