
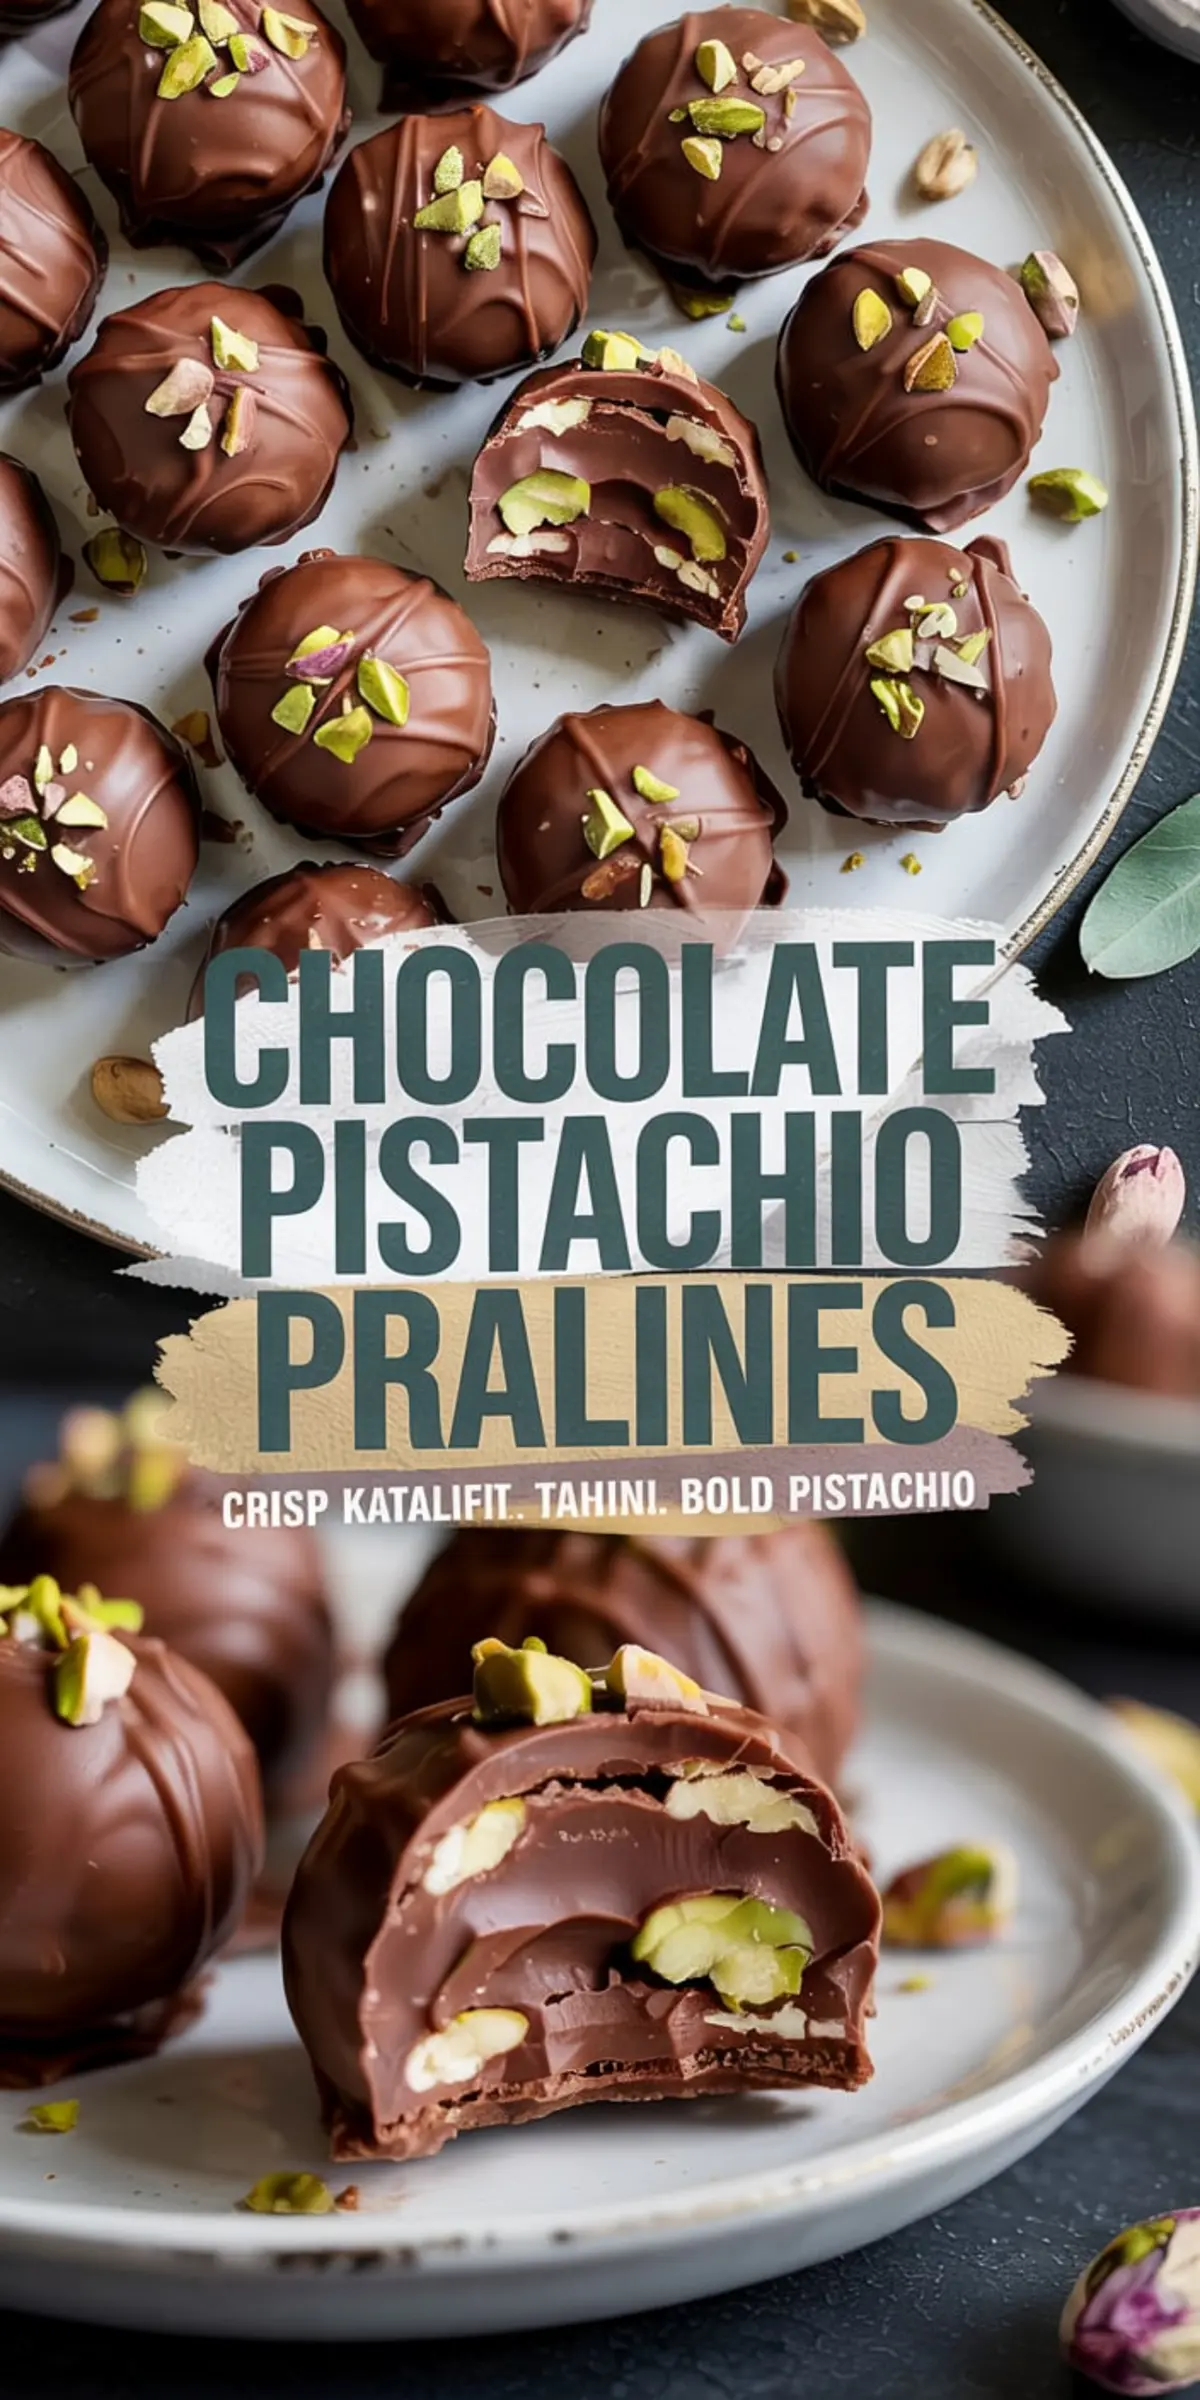
If you’ve ever stared down a craving and wished you had something rich, creamy, and deeply satisfying—but still manageable in a bite—this is your moment.
These chocolate pistachio pralines aren’t holiday treats. They’re freezer staples.
I make them when I need a dessert that feels luxurious but doesn’t demand an oven or special skill.
In this post, you’ll learn how to make them with simple pantry ingredients, plus how to serve and store them so they stay as crisp and creamy as the day you unmold them.
I’ll also share why I keep them tucked in my freezer year-round—and why they beat any store-bought chocolate I’ve tried.
Following a special diet?
Every recipe on this site can be converted to gluten-free, vegan, dairy-free, keto, nut-free or egg-free with adjusted ratios so nothing falls flat.
Try the Recipe Converter →What Makes These Pralines More Than Just Homemade Candy
Let’s start with what you actually get in each bite.
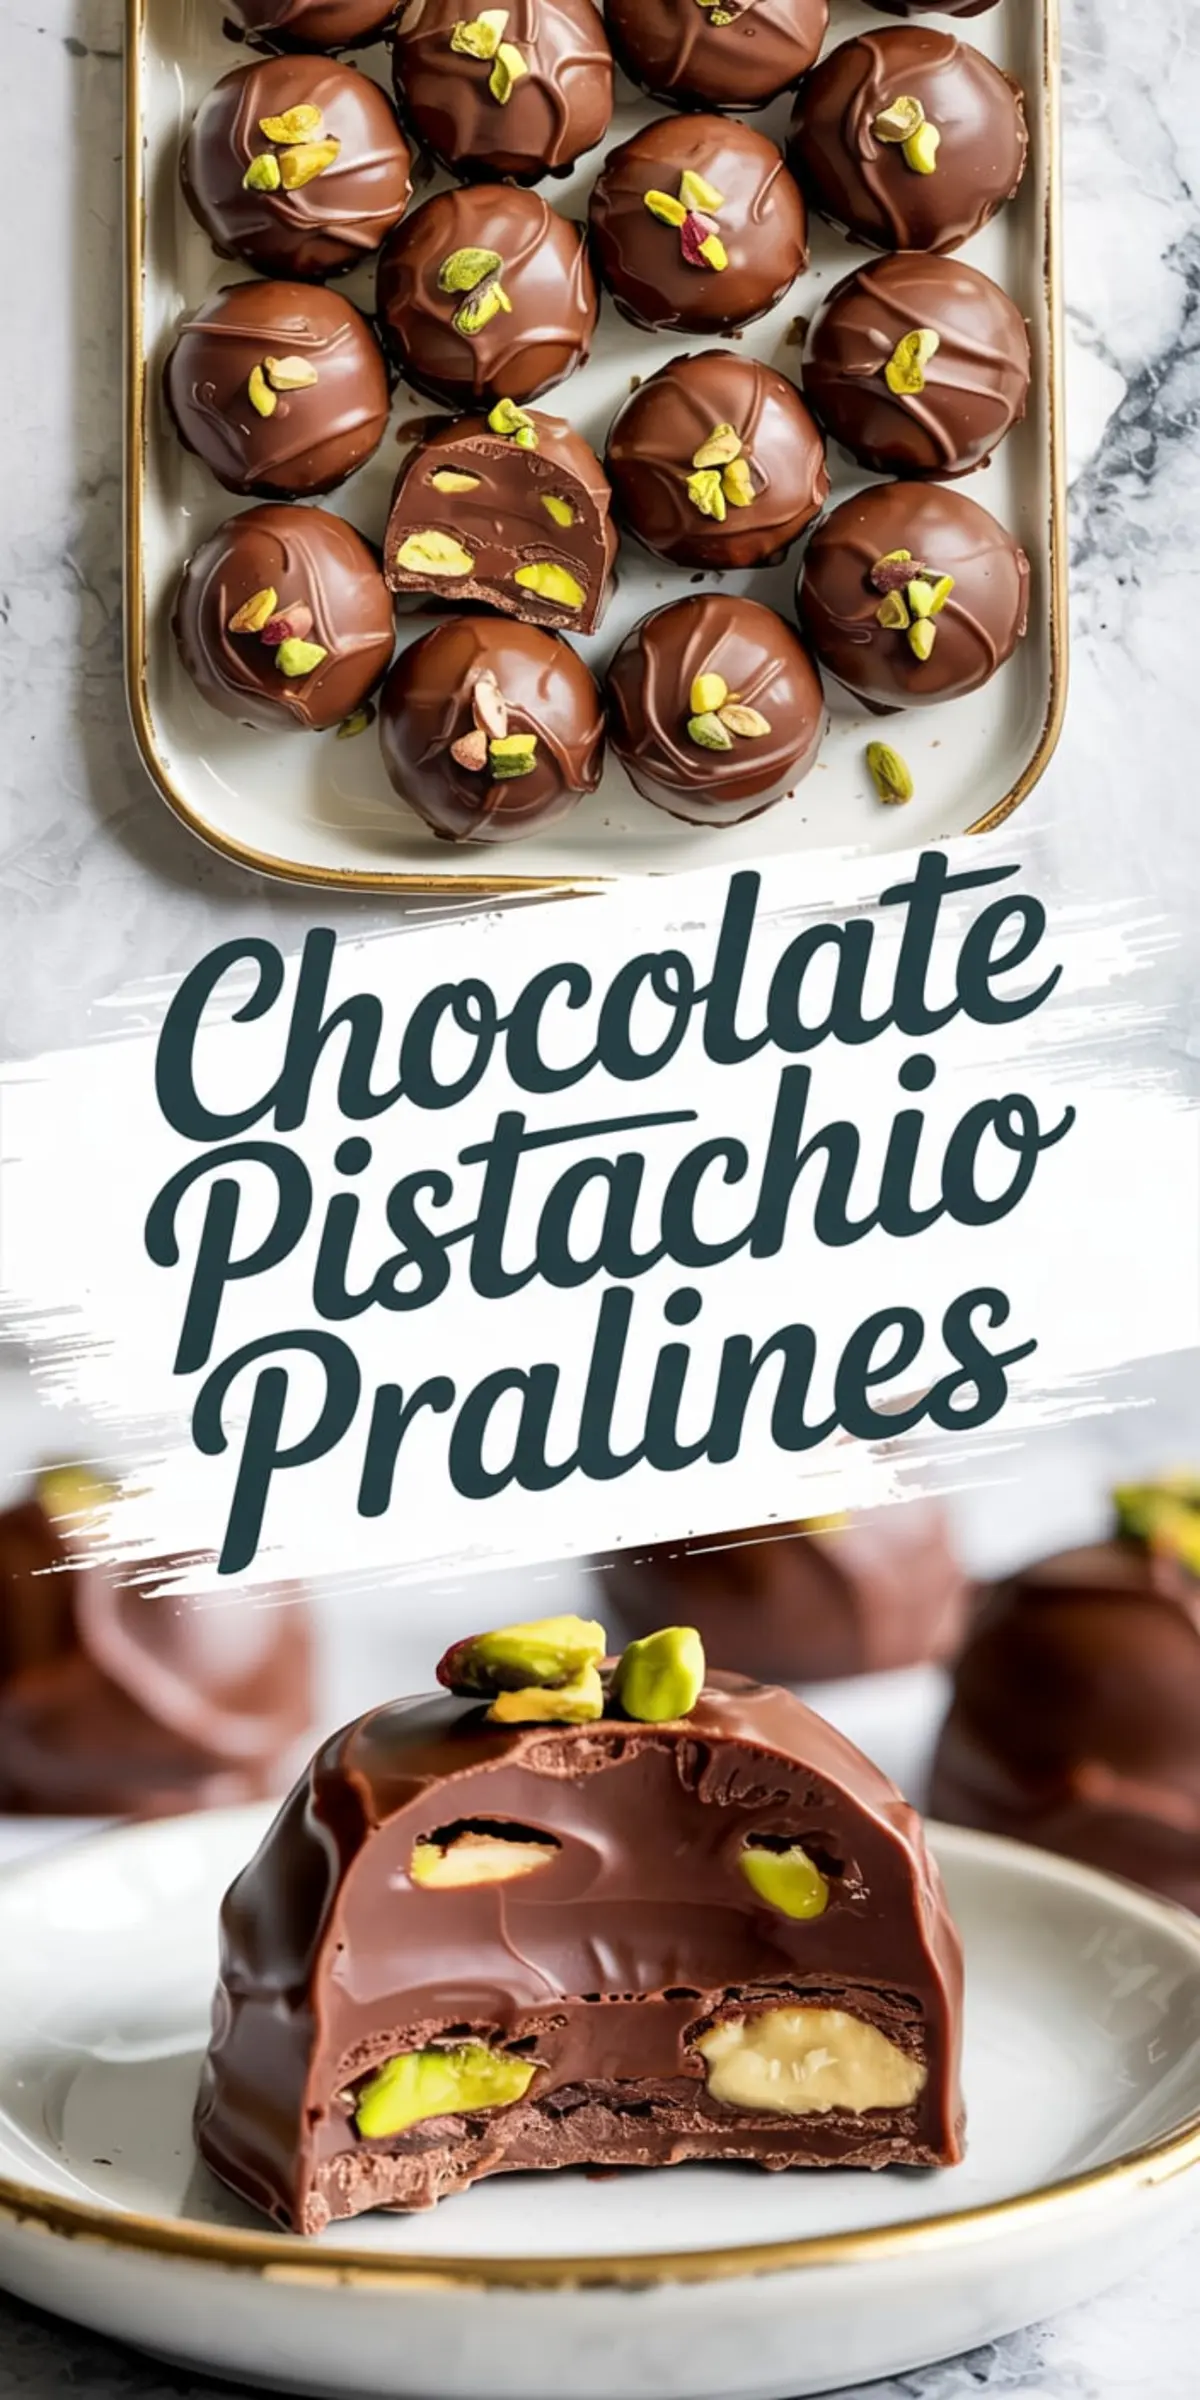
The shell is smooth, glossy dark chocolate with that satisfying snap.
The inside is buttery, nut-studded, and just barely sweet. That contrast matters. I’ve tried too many homemade pralines that taste like fudge with a crunch. These don’t.
They’re molded with care—yes—but they’re built to survive busy hands, fridge shuffles, and late-night cravings.
And there’s no candy thermometer. No tempering drama. Just real ingredients handled thoughtfully.
I learned early that the secret isn’t in complexity. It’s in balance.
You’ll taste the pistachios, not just sugar. You’ll feel the texture, not just chew. And that’s why these keep showing up in my kitchen—long after the first batch.
Why You Don’t Need Candy-Making Experience

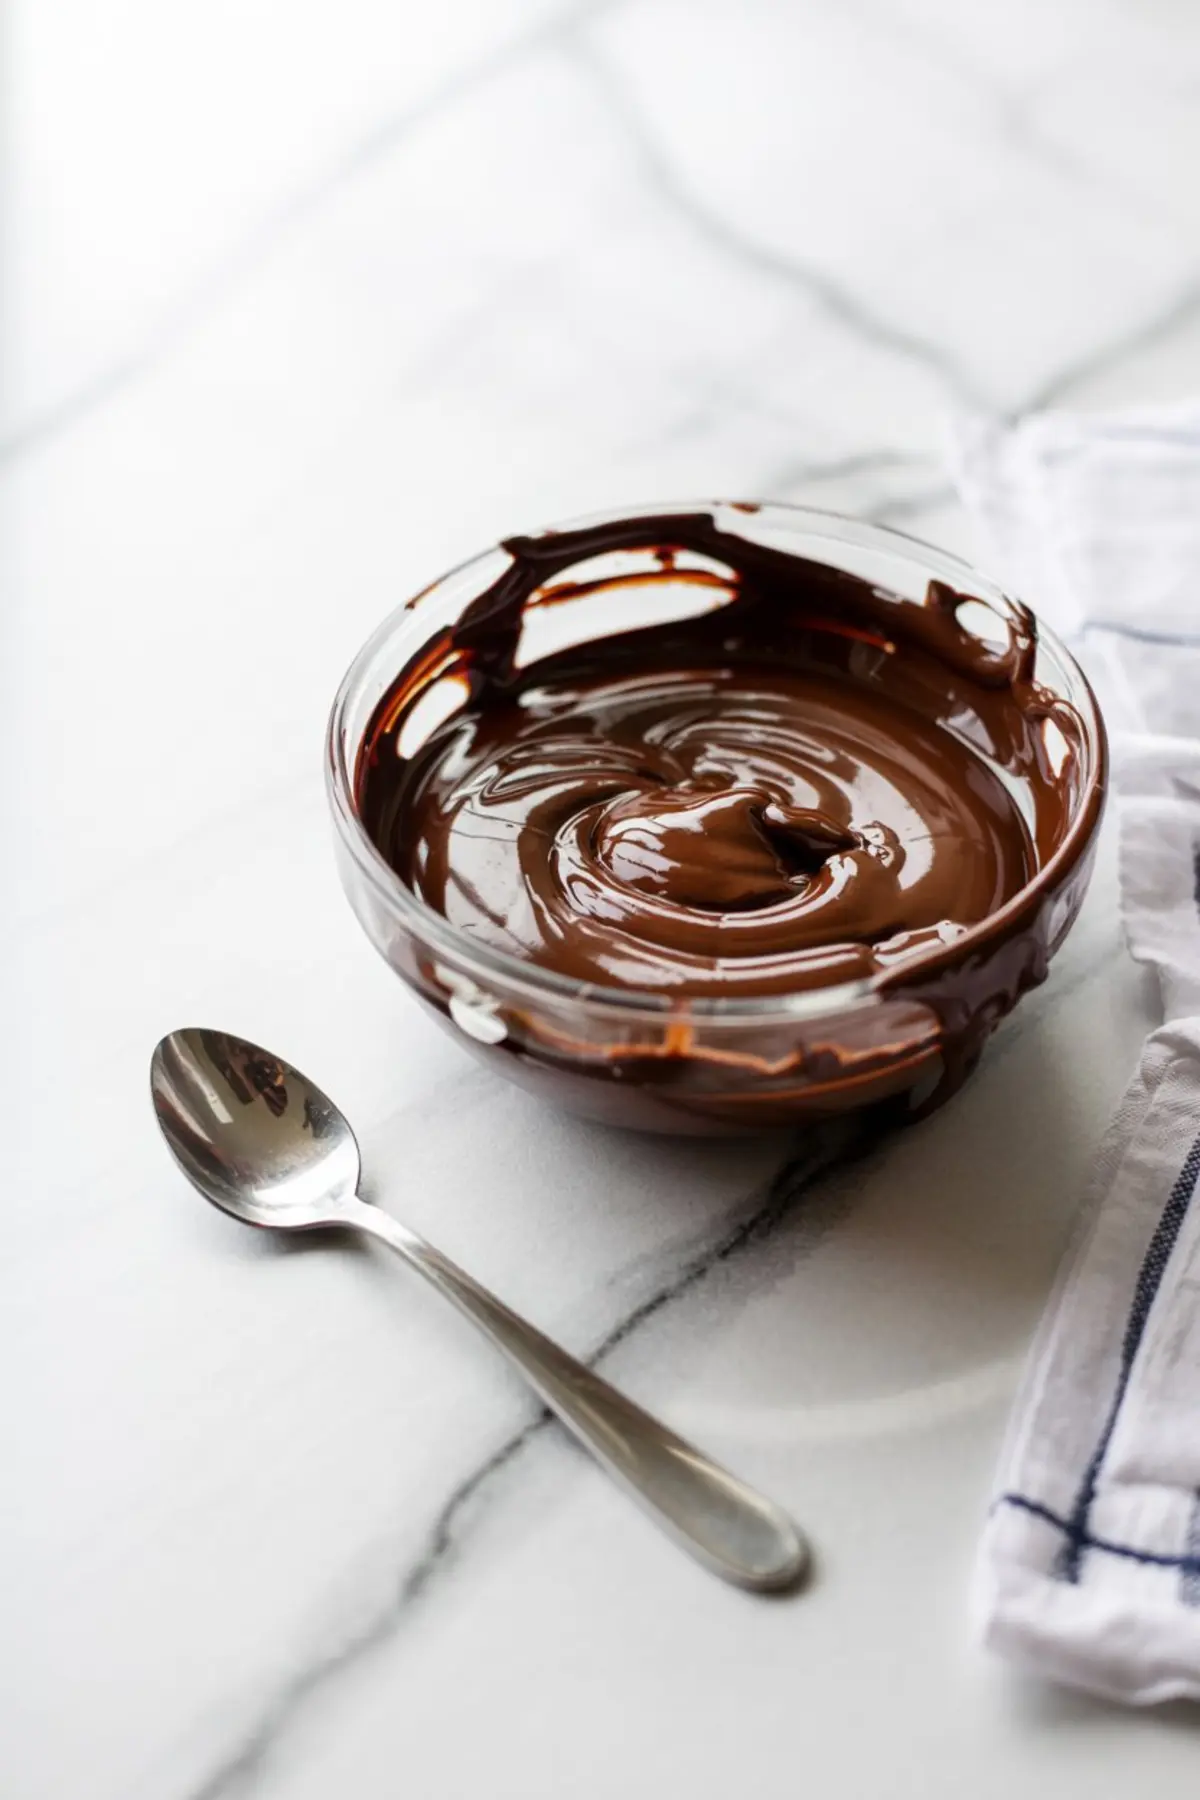
Start with good chocolate. That’s non-negotiable.
Anything under 60% cocoa won’t hold up against the sweetened condensed milk filling. I like something between 70–75%, especially if I’m serving these cold.
Roasted pistachios add salt and crunch, but they also mellow out the condensed milk.
If I’m roasting them myself, I keep it under 10 minutes and avoid salting—since I like adding sea salt separately.
The filling is made on the stovetop with butter and milk, stirred gently until it’s velvety.
Once the pistachios go in, it starts to smell like warm holidays and burnt sugar.
But here’s what makes it practical—it sets up quickly. You don’t need hours to wait for the texture to firm.
You can fill, seal, and chill in less than 30 minutes of active prep.
I often do this while dinner is in the oven.
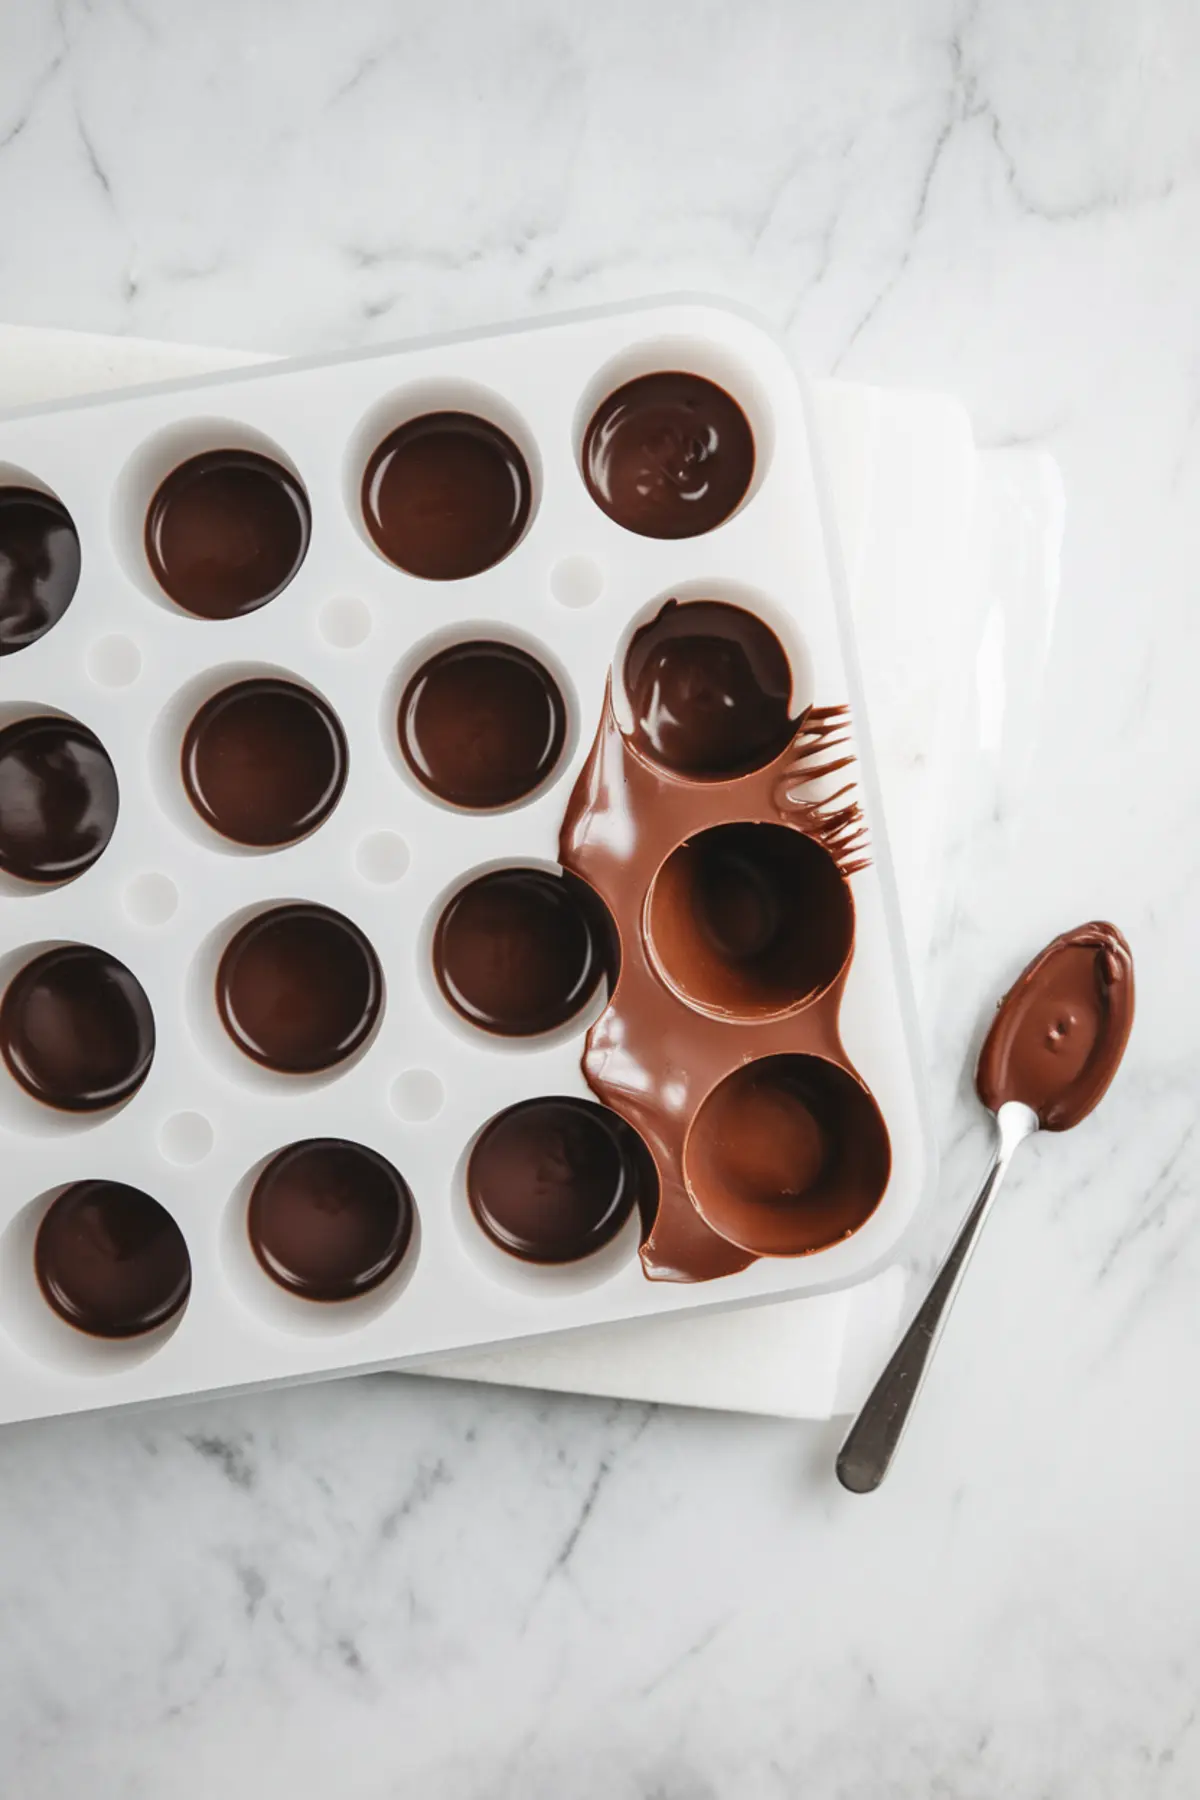
How to Mold Chocolate Without a Fuss
I use silicone molds with small domes or simple rounds. Nothing fancy.
You spoon in melted chocolate, spread it up the sides, and chill.
Once firm, you press the pistachio filling in gently, leaving just enough space for the final chocolate top.
Then you pour the last bit of melted chocolate, tap to release air, and sprinkle extra pistachios if you’re feeling generous.
There’s something quietly satisfying about popping them out once they’re chilled.
No cracking. No sticking. Just neat little bites with clean edges.
If you haven’t worked with silicone molds before, I shared a similar technique in my Chocolate Ganache Recipe—a good one to bookmark for later.
Serving and Storing Chocolate Pistachio Pralines
Let’s talk storage, because this matters more than people think.
These pralines keep best in the fridge for up to a week.
But my favorite move? Freezer storage.
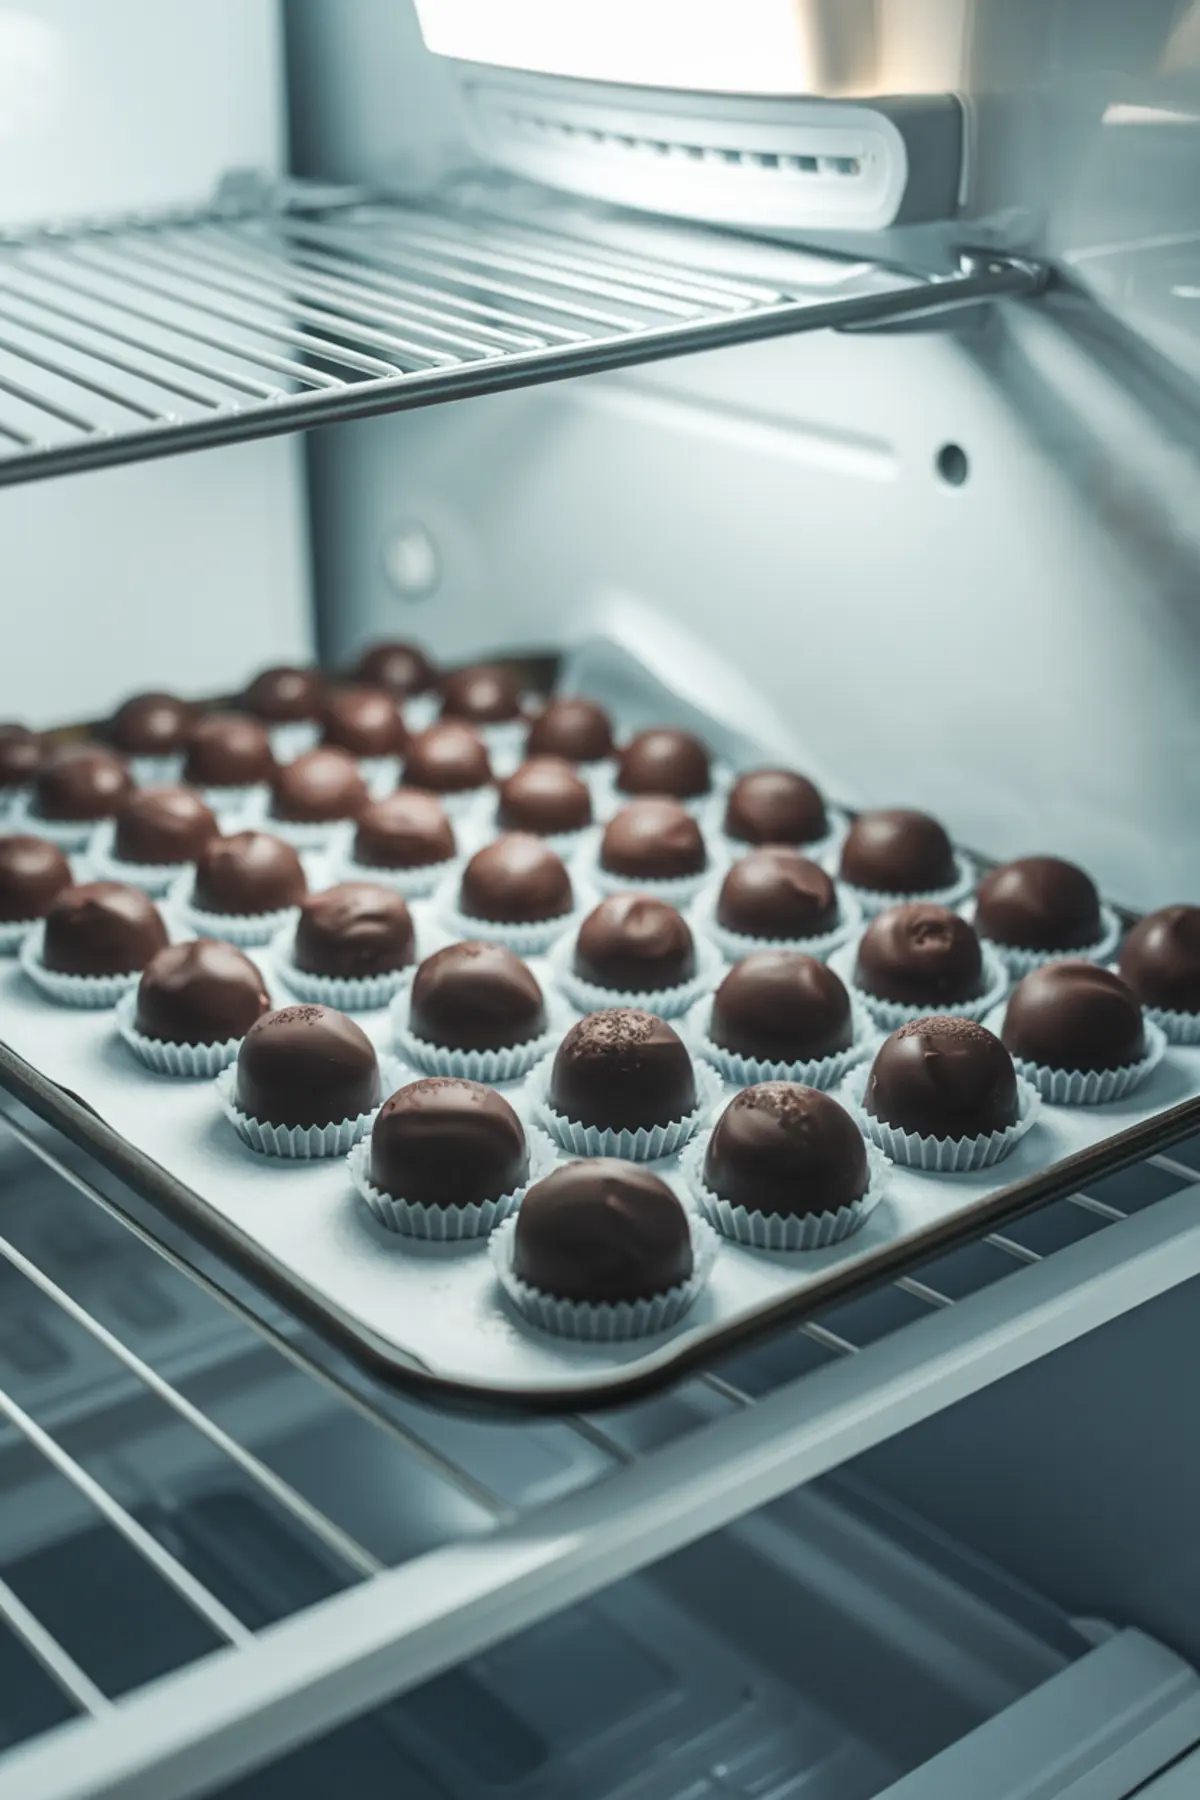
The cold makes the shell extra snappy.
The filling firms up just enough to give structure, but stays creamy once it warms slightly in your mouth.
I keep them in a sealed tin, lined with parchment.
When guests drop by, I pull a few out and plate them next to tea or wine. You don’t need a dessert course. These are the dessert.
If you’re building a dessert board or hosting something casual, I suggest pairing them with slices of this Chocolate Pistachio Tart.
There’s a rhythm between the crunchy tart and these meltaway pralines that always works.
Why These Belong in Your Recipe Repeats
I’ve made these for birthdays, New Year’s, and one very cold Wednesday in March when I needed chocolate and had 20 minutes to spare.
They’ve never let me down.
The ingredients are dependable.
The steps are easy to follow.
The results feel generous, even when the batch is small.
And most importantly—they taste handmade.
Not in a rustic, lumpy way. In a way that tells you someone cared enough to make something better than store-bought.
If you like the idea of chocolate with character, you might also enjoy this German Chocolate Cake Frosting—especially if you’re planning a layered cake to go with your pralines.
Or, if you’re looking for something a little playful, my Chocolate Hummus makes a curious companion to these if you’re setting up a dipping spread.
Save This Recipe and Share Your Chocolate Story
If you try these pralines, I’d love to hear how you served them.
Did you chill them? Share them? Hoard them?
Drop your version in the comments. Or your tweaks. Or your freezer strategy.
That’s how this kitchen keeps learning—bite by bite.
📌 Save this post to your Chocolate Recipes board and come back to it anytime.
Whether it’s your first batch or your tenth, there’s always something new to taste.
Chocolate Pistachio Pralines Recipe

Chocolate Pistachio Pralines combine dark chocolate with roasted pistachios and a smooth, buttery filling. These bite-sized confections have a crisp shell, creamy center, and nutty crunch. They’re easy to prepare at home with simple ingredients and require no special equipment beyond a silicone mold.
Ingredients
- 200g (7 oz) good-quality dark chocolate, chopped (at least 60% cocoa)
- 1/2 cup roasted pistachios, shelled
- 1/4 cup sweetened condensed milk
- 1 tablespoon unsalted butter
- 1/4 teaspoon sea salt (optional)
- 1/4 teaspoon vanilla extract
- Extra pistachios, for topping
Instructions
- MAKE THE FILLING: In a small saucepan over low heat, combine the sweetened condensed milk and butter. Stir constantly until the butter is fully melted and the mixture is smooth. Add the vanilla extract, sea salt, and pistachios, then stir to coat the nuts evenly. Remove the pan from the heat and allow the filling to cool slightly.
- MELT THE CHOCOLATE: Melt the chopped dark chocolate using a double boiler or in a microwave-safe bowl in 30-second intervals, stirring after each until smooth and glossy.
- FILL THE MOLDS: Spoon about 1 teaspoon of melted chocolate into each cavity of a silicone candy mold. Use the back of a spoon or a brush to coat the sides with chocolate, ensuring full coverage. Place the mold in the refrigerator for 10 to 15 minutes to set.
- ADD THE FILLING: Once the chocolate shells are firm, spoon a small amount of the pistachio filling into each cavity. Leave enough space at the top for the final chocolate layer to seal the pralines.
- SEAL THE PRALINES: Spoon additional melted chocolate over the filling to completely cover and seal each piece. Tap the mold gently on the counter to release air bubbles and smooth the tops. Sprinkle chopped or whole pistachios on top if desired.
- CHILL: Return the mold to the refrigerator and chill for at least 1 hour or until the pralines are fully set. Once firm, carefully pop each praline out of the mold and store in an airtight container.
Notes
For best results, use silicone molds with small dome or round shapes. Store finished pralines in a cool, dry place for up to one week. Avoid high humidity or warm storage conditions to preserve the chocolate’s texture.
Nutrition Information
Yield
20Serving Size
1Amount Per Serving Calories 43Total Fat 3gSaturated Fat 1gTrans Fat 0gUnsaturated Fat 2gCholesterol 3mgSodium 45mgCarbohydrates 4gFiber 0gSugar 3gProtein 1g