I treasure small moments in my kitchen each March, especially when I prepare these joyful mini pies.
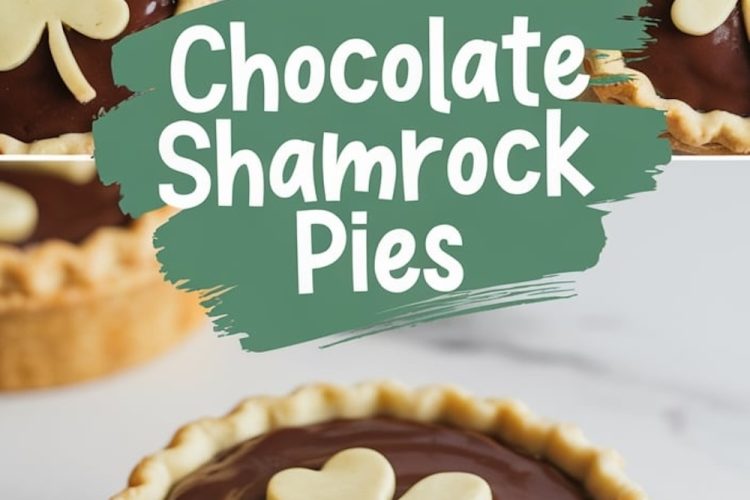
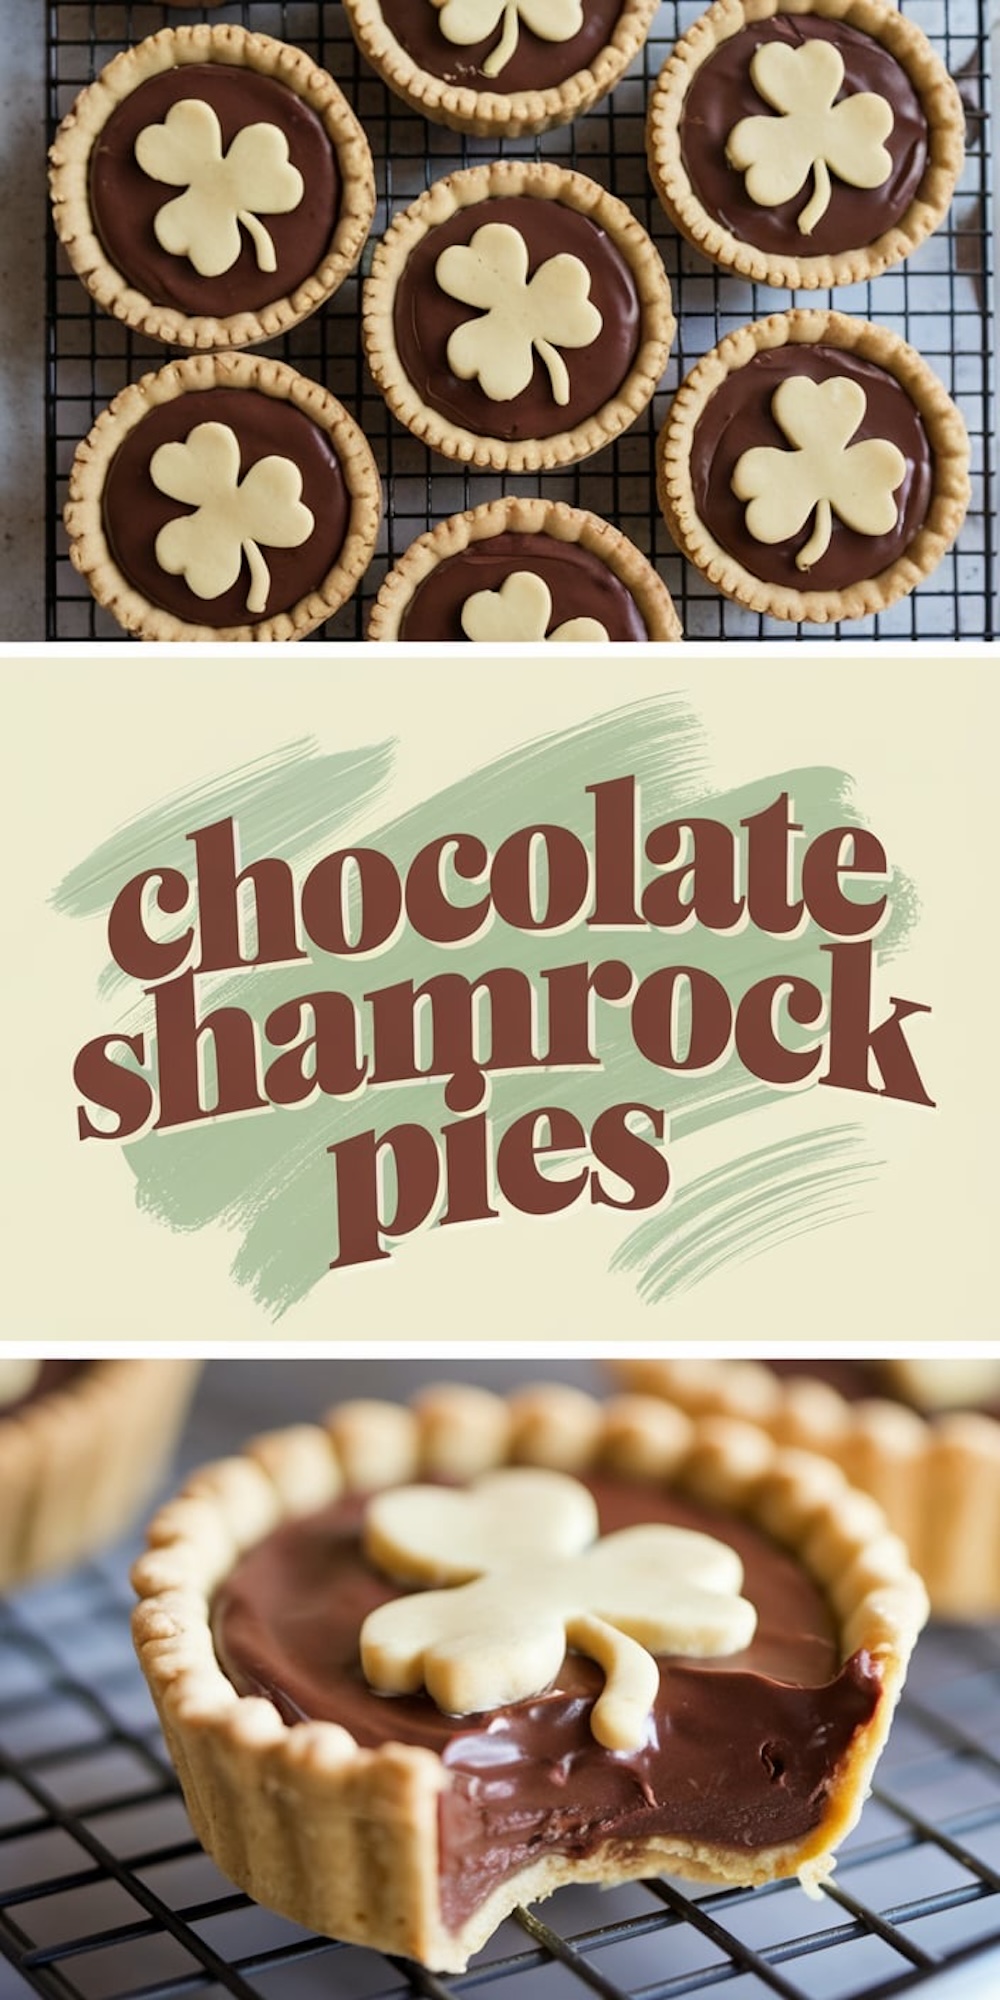
St. Patrick’s Day has always stirred up warm memories for me, and I like marking the occasion with something sweet. Chocolate Shamrock Pies bring a blend of buttery pastry, smooth chocolate filling, and a whimsical decoration on top. My first encounter with this recipe left me grinning as I realized how easy it was to craft something that looked so cheerful and tasted so comforting.
Following a special diet?
Every recipe on this site can be converted to gluten-free, vegan, dairy-free, keto, nut-free or egg-free with adjusted ratios so nothing falls flat.
Try the Recipe Converter →Why Chocolate Shamrock Pies Mean So Much To Me
I savor the memories of rolling out dough while music plays in the background. My siblings often hovered around, waiting for stray scraps of pastry. I enjoy the way this recipe brings people together. You might find an excuse to share these pies at a small gathering or keep them all to yourself for a moment of indulgence. A sprinkle of good humor goes into every batch, and I suspect that hint of laughter makes each bite taste even better.
Gathering The Simple Ingredients For Success
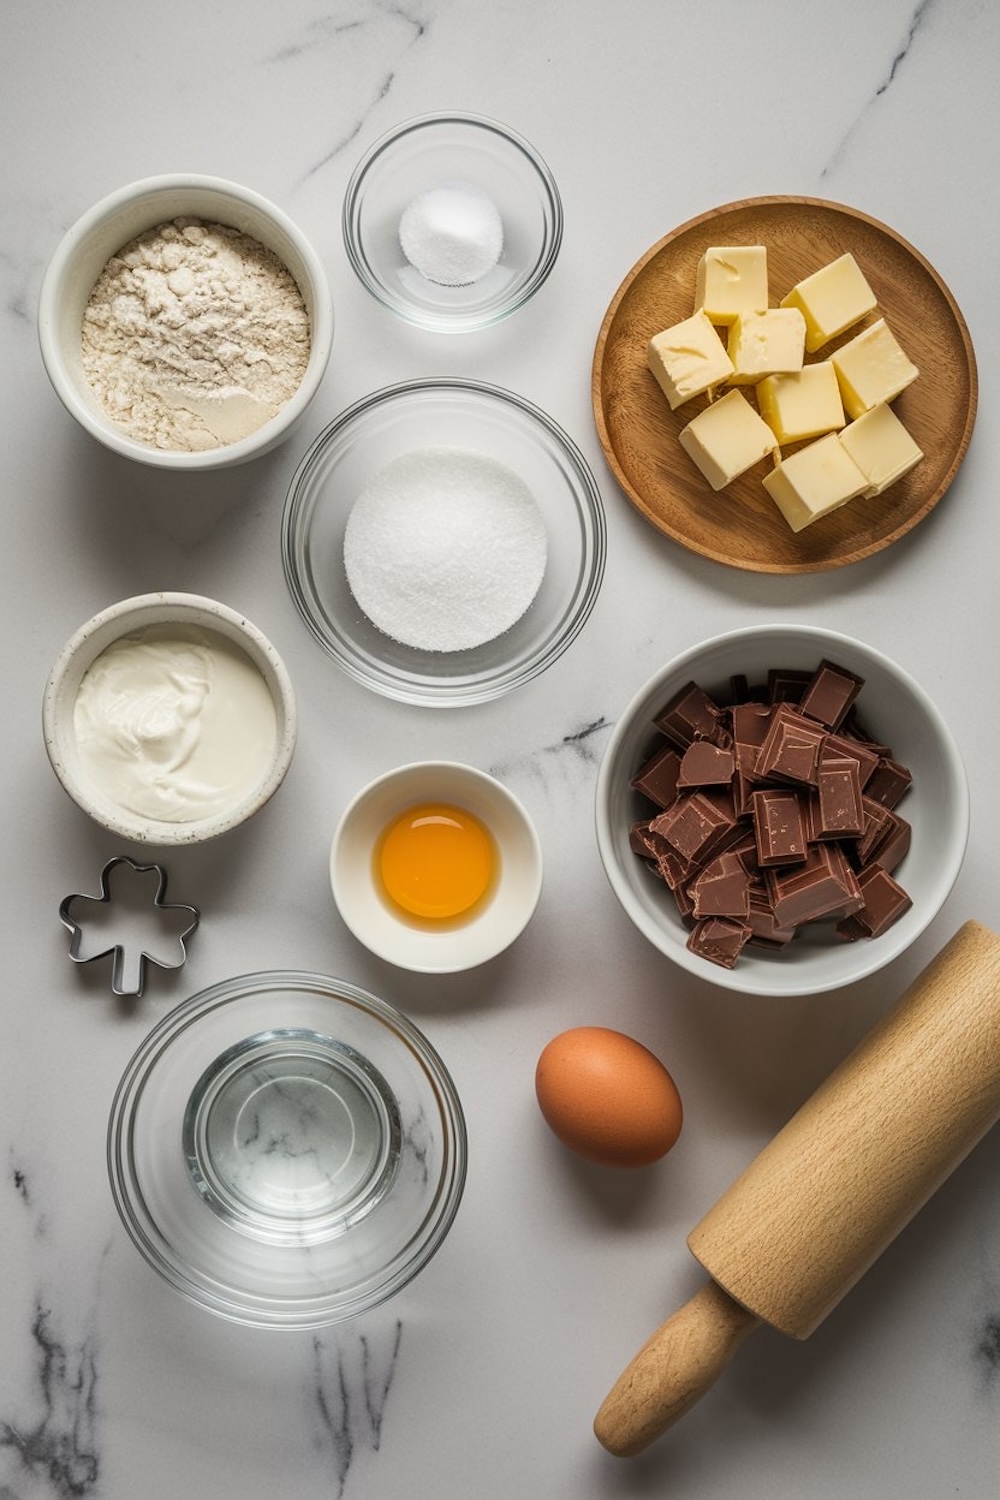
I rely on all-purpose flour, sugar, salt, and ice-cold cubes of butter to form a crisp foundation. That combination helps the crust hold up well and creates a tender bite. Enough water ensures the dough clings together without being soggy. A second set of essentials includes heavy cream, chopped semi-sweet chocolate, milk chocolate, vanilla extract, and butter. Chocolate remains the highlight, so I pick brands with a taste I already love. That attention to flavor pays off when the filling sets and guests take their first spoonful.
Crafting The Dough For A Buttery Crust
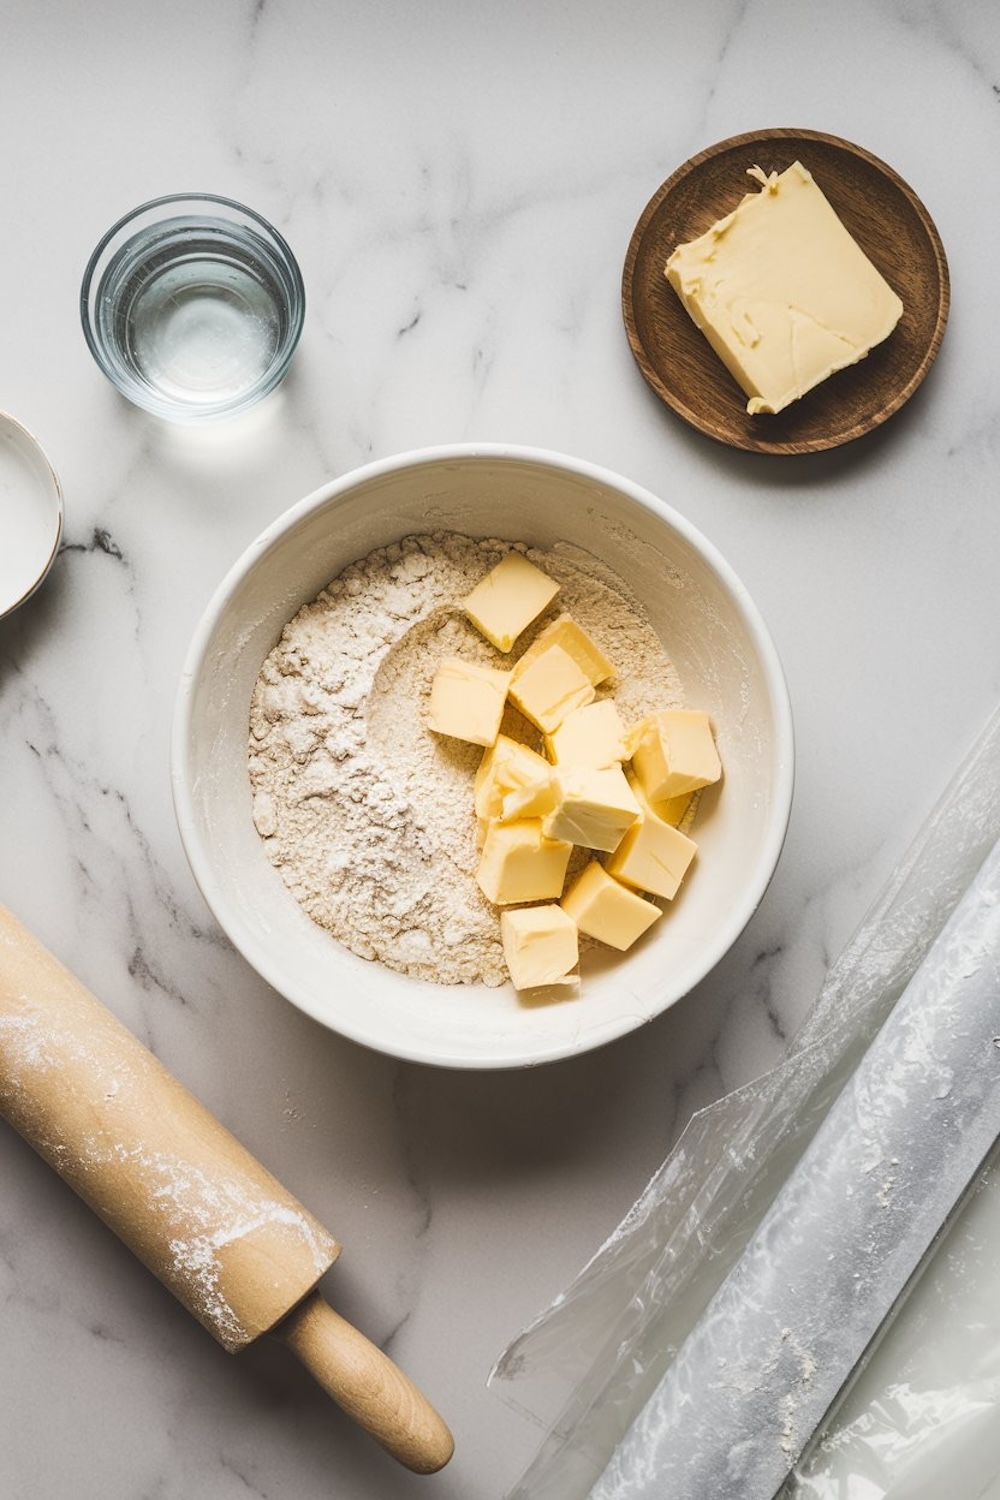
I combine the dry ingredients in a roomy bowl and stir them together with a whisk. I then add the butter cubes and use my fingers to blend until it resembles loose crumbs. My palms always feel chilly with the cold butter, so I work quickly. A few tablespoons of icy water help pull the mixture into a shaggy dough. I divide that dough, flatten it into two discs, and let it rest in the fridge.
That resting time ensures a balanced texture and flavor. I dislike waiting, but I have learned that patience promises a lovely crust that bakes to a delicate golden hue.
Rolling Out And Forming Pie Shells
My oven usually gets preheated to 375°F (190°C), so it’s ready when I am. One disc of dough gets rolled on a floured surface, and I carefully cut out circles to fit my mini tart pans or muffin tin. I like pressing each circle firmly to avoid unwanted bubbles. A quick chill for those crusts helps them hold shape during the initial bake. Pie weights or dried beans prevent them from puffing.
After baking a few minutes, I remove the weights and give the crusts another short spell in the oven until they take on a light golden color. That visual cue signals they’re crisp enough to cradle a luscious filling.
Creating A Creamy Chocolate Center
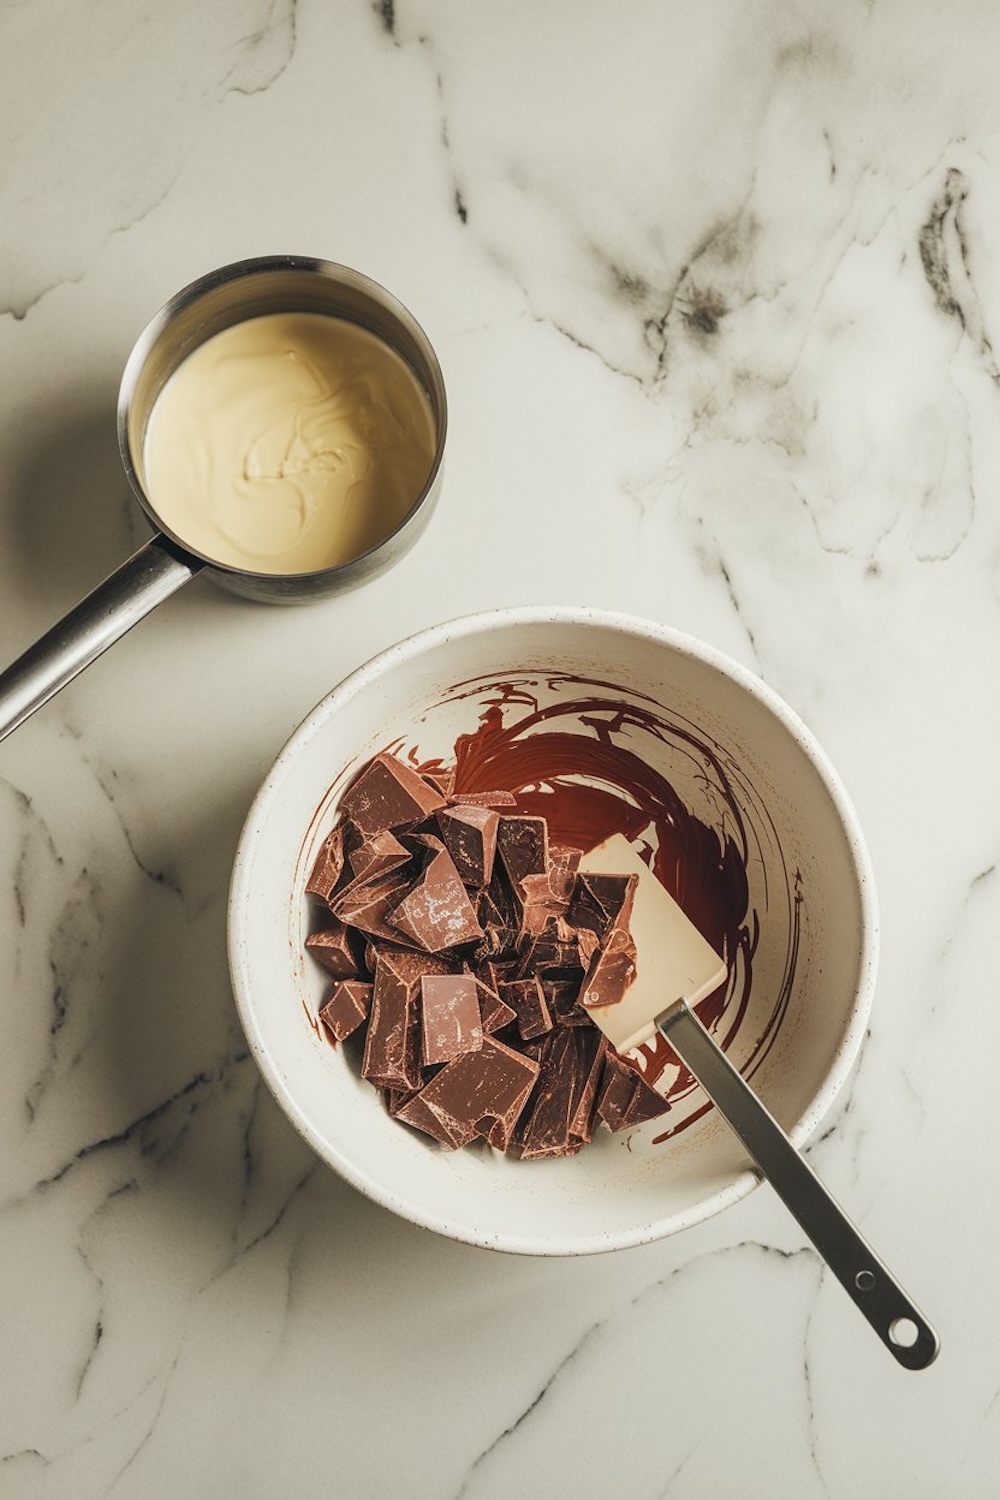
Heavy cream warms in a saucepan on medium heat until a gentle simmer appears. I switch off the heat and pour in my chopped chocolate. A two-minute rest allows the chocolate to melt. Then I stir until a cohesive mixture forms. Adding butter and vanilla gives a glossy sheen. My favorite part is tasting a small spoonful at this stage. I often close my eyes and sense the soft, sweet warmth of chocolate. That sensation reminds me of simpler times, when a rich filling felt like a gift from a secret confectionery shop.
Shamrock Toppers For St. Patrick’s Day Fun
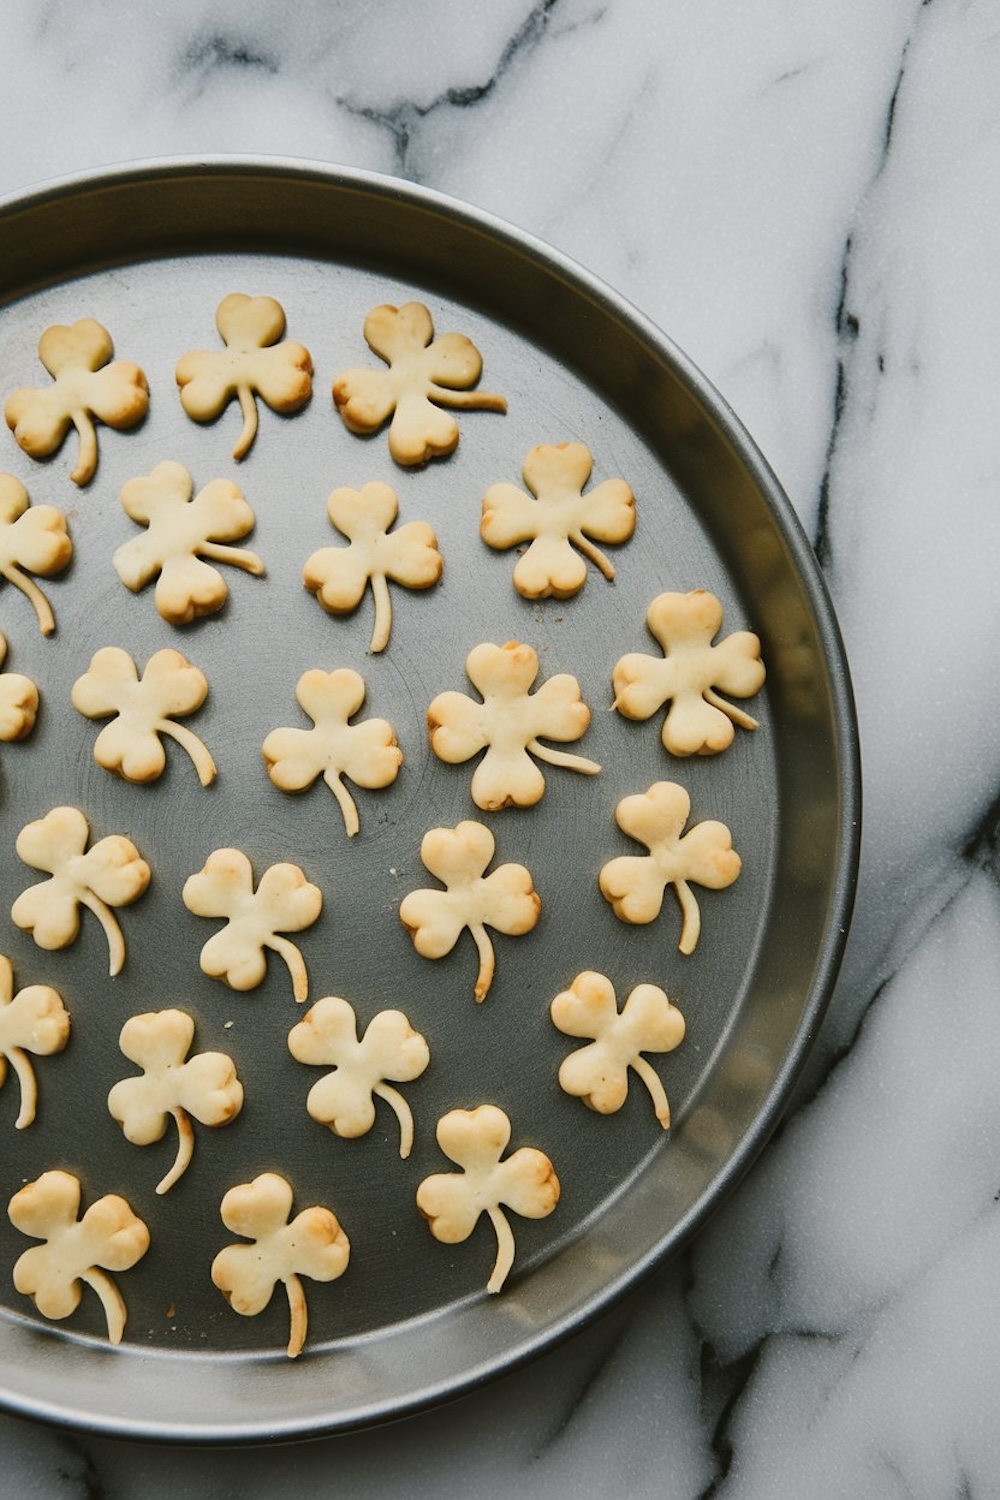
The second disc of dough becomes the base for cute shamrock shapes. A small shamrock-shaped cutter helps me achieve uniform pieces. I arrange them on a baking sheet, then brush them with the egg wash. A handful of minutes in the oven browns them nicely. My kitchen starts to smell cozy once those shapes turn golden. I catch myself smiling because I know these dough cutouts will sit proudly atop the chocolate pies, adding a festive highlight.
Finishing The Assembly And Letting It Chill
The cooled crusts are ready to be filled with the chocolate mixture. I gently pour it in, aiming for a level surface. Any small swirl on top looks inviting once it sets. Each mini pie gets its own shamrock placed gently on the center. A wait of at least two hours in the refrigerator gives the filling time to firm up. I enjoy sneaking a peek before that time is up, but I advise letting the magic happen undisturbed. Chilled pies emerge glossy and thick, prepared to delight taste buds as soon as the first fork slides through.

Mixing Up The Dessert Table With More Treats
I enjoy variety whenever I host friends, so I keep a few other playful treats around. A nibble of Irish Cream Oreo Truffles can pair well with these pies if you crave a velvety burst of chocolate and cream. I have also tried Sweet and Salty Pickle Cookies for a bold contrast that surprises my guests. Anyone wishing for a rich sip on the side often leans toward a chocolate martini to complete the theme. I love adding these ideas to create a playful dessert spread that leaves everyone satisfied.
Tips From My Own Kitchen
I have discovered a few small secrets through trial and error. I keep my tools cold while mixing the dough, so the butter stays firm until the crust hits the oven. I rotate my baking sheet halfway through when I cook the shamrock toppers to get an even color. That small step seems to produce a uniform appearance. I also make the filling a day in advance if I anticipate a busy schedule. A small reheat on the stove or a quick zap in the microwave softens it enough for easy pouring. Friends always applaud the result, and I breathe a sigh of relief when everything fits neatly into my plan.
Serving And Storing Your Pies
I serve these pies either chilled or slightly warmed. A swirl of whipped cream on top or a drizzle of chocolate sauce can make a nice garnish. Leftovers keep in the fridge for a few days, but they rarely last that long in my house. A final dusting of powdered sugar gives them a classic bakery flair. Sometimes I box them up and deliver them to a neighbor. That small gesture never fails to spark a bright smile.
Save This Recipe And Share Your Experience
I suggest pinning these Chocolate Shamrock Pies on your Pinterest board. Keep them on hand for any St. Patrick’s Day gathering or a playful nod to Irish-inspired sweets. I welcome questions in the comments, and I love hearing how your pies turned out. Let’s spark a sense of community by sharing tips, tweaks, and proud baking triumphs.
Chocolate Shamrock Pies: A Sweet St. Patrick’s Day Treat Recipe
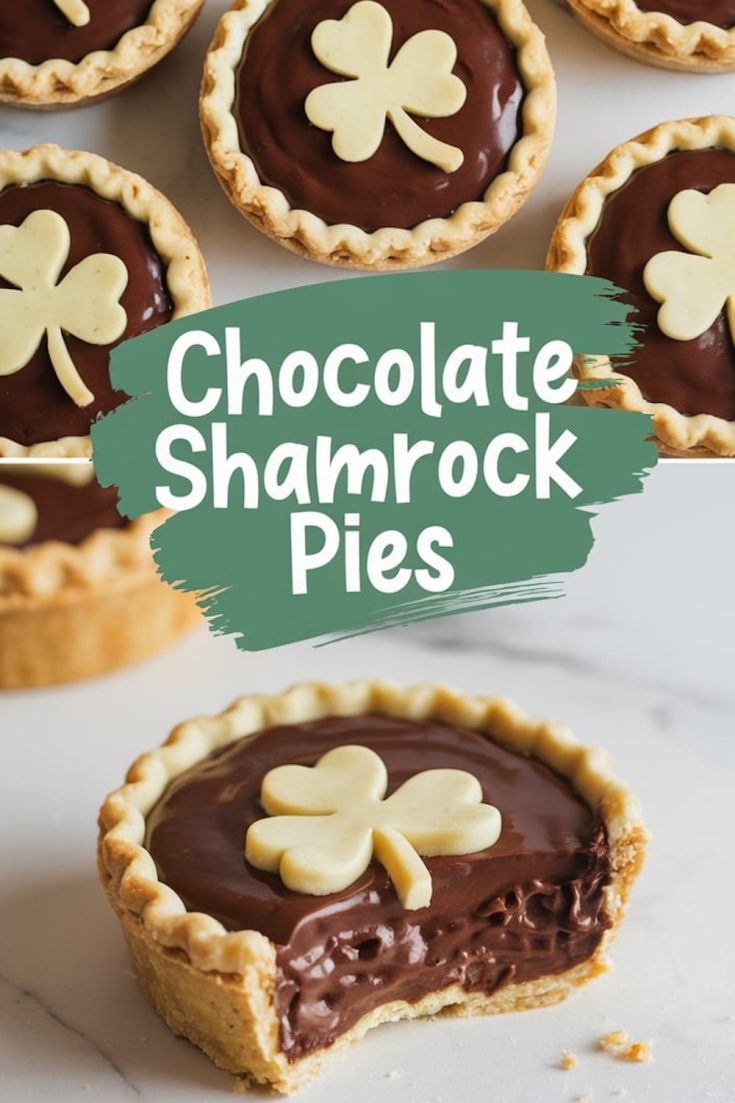
A sweet and festive treat for St. Patrick's Day, these mini pies feature a buttery crust, creamy chocolate filling, and charming shamrock-shaped decorations.
Ingredients
- FOR THE PIE CRUST
- 1 ½ cups all-purpose flour
- 1 tablespoon sugar
- ½ teaspoon salt
- ½ cup unsalted butter, chilled and cubed
- 4-6 tablespoons ice water
- FOR THE CHOCOLATE FILLING
- 1 cup heavy cream
- 6 ounces semi-sweet chocolate, chopped
- 2 ounces milk chocolate, chopped
- 1 teaspoon vanilla extract
- 1 tablespoon unsalted butter
- DECORATION
- 1 egg yolk, beaten with 1 teaspoon water (egg wash)
- A small shamrock-shaped cookie cutter
Instructions
- MAKE THE PIE CRUST: In a large bowl, whisk together the flour, sugar, and salt. Add the chilled butter cubes and use a pastry cutter or your fingers to combine until the mixture resembles coarse crumbs. Gradually mix in the ice water, one tablespoon at a time, until the dough just comes together. Divide the dough in half, flatten each into a disc, wrap in plastic wrap, and refrigerate for at least 30 minutes.
- PREPARE THE PIE SHELLS: Preheat your oven to 375°F (190°C). On a floured surface, roll out one disc of dough to about ⅛ inch thick. Cut circles large enough to fit into a muffin tin or mini tart pans. Gently press the circles into the tins and refrigerate for 15 minutes to firm up. Dock the bottom of each crust with a fork, line with parchment paper, and fill with pie weights or dried beans. Bake for 10-12 minutes. Remove the weights and bake for another 5 minutes until lightly golden. Allow to cool.
- MAKE THE CHOCOLATE FILLING: In a small saucepan, heat the cream over medium heat until just simmering. Remove from heat, add the chopped chocolate, and let sit for 2 minutes. Stir until smooth. Stir in the vanilla extract and butter until glossy. Set aside to cool slightly.
- CREATE THE SHAMROCK TOPPERS: Roll out the second dough disc and use a small shamrock-shaped cutter to cut out shapes. Place the shamrocks on a lined baking sheet, brush with egg wash, and bake for 5-7 minutes, or until golden.
- ASSEMBLE THE PIES: Pour the chocolate filling into the cooled pie crusts, smoothing the tops with a spatula. Place a baked shamrock cutout on top of each pie. Refrigerate for at least 2 hours, or until the filling is set.
Notes
To ensure the butter stays cold when making the pie crust, work quickly and chill your tools, such as the bowl and pastry cutter, beforehand.
For an even bake on the shamrock toppers, rotate the baking sheet halfway through the baking time.
The chocolate filling can be made up to 1 day in advance and stored in the refrigerator. Warm slightly before pouring into the crusts for easier spreading.
If you don't have a shamrock-shaped cutter, use any small cookie cutter or create a stencil and cut the shapes with a knife.
Store the assembled pies in the refrigerator for up to 3 days. Serve chilled or at room temperature.
Nutrition Information
Yield
8Serving Size
1Amount Per Serving Calories 576Total Fat 40gSaturated Fat 22gTrans Fat 0gUnsaturated Fat 15gCholesterol 93mgSodium 254mgCarbohydrates 52gFiber 3gSugar 20gProtein 7g