
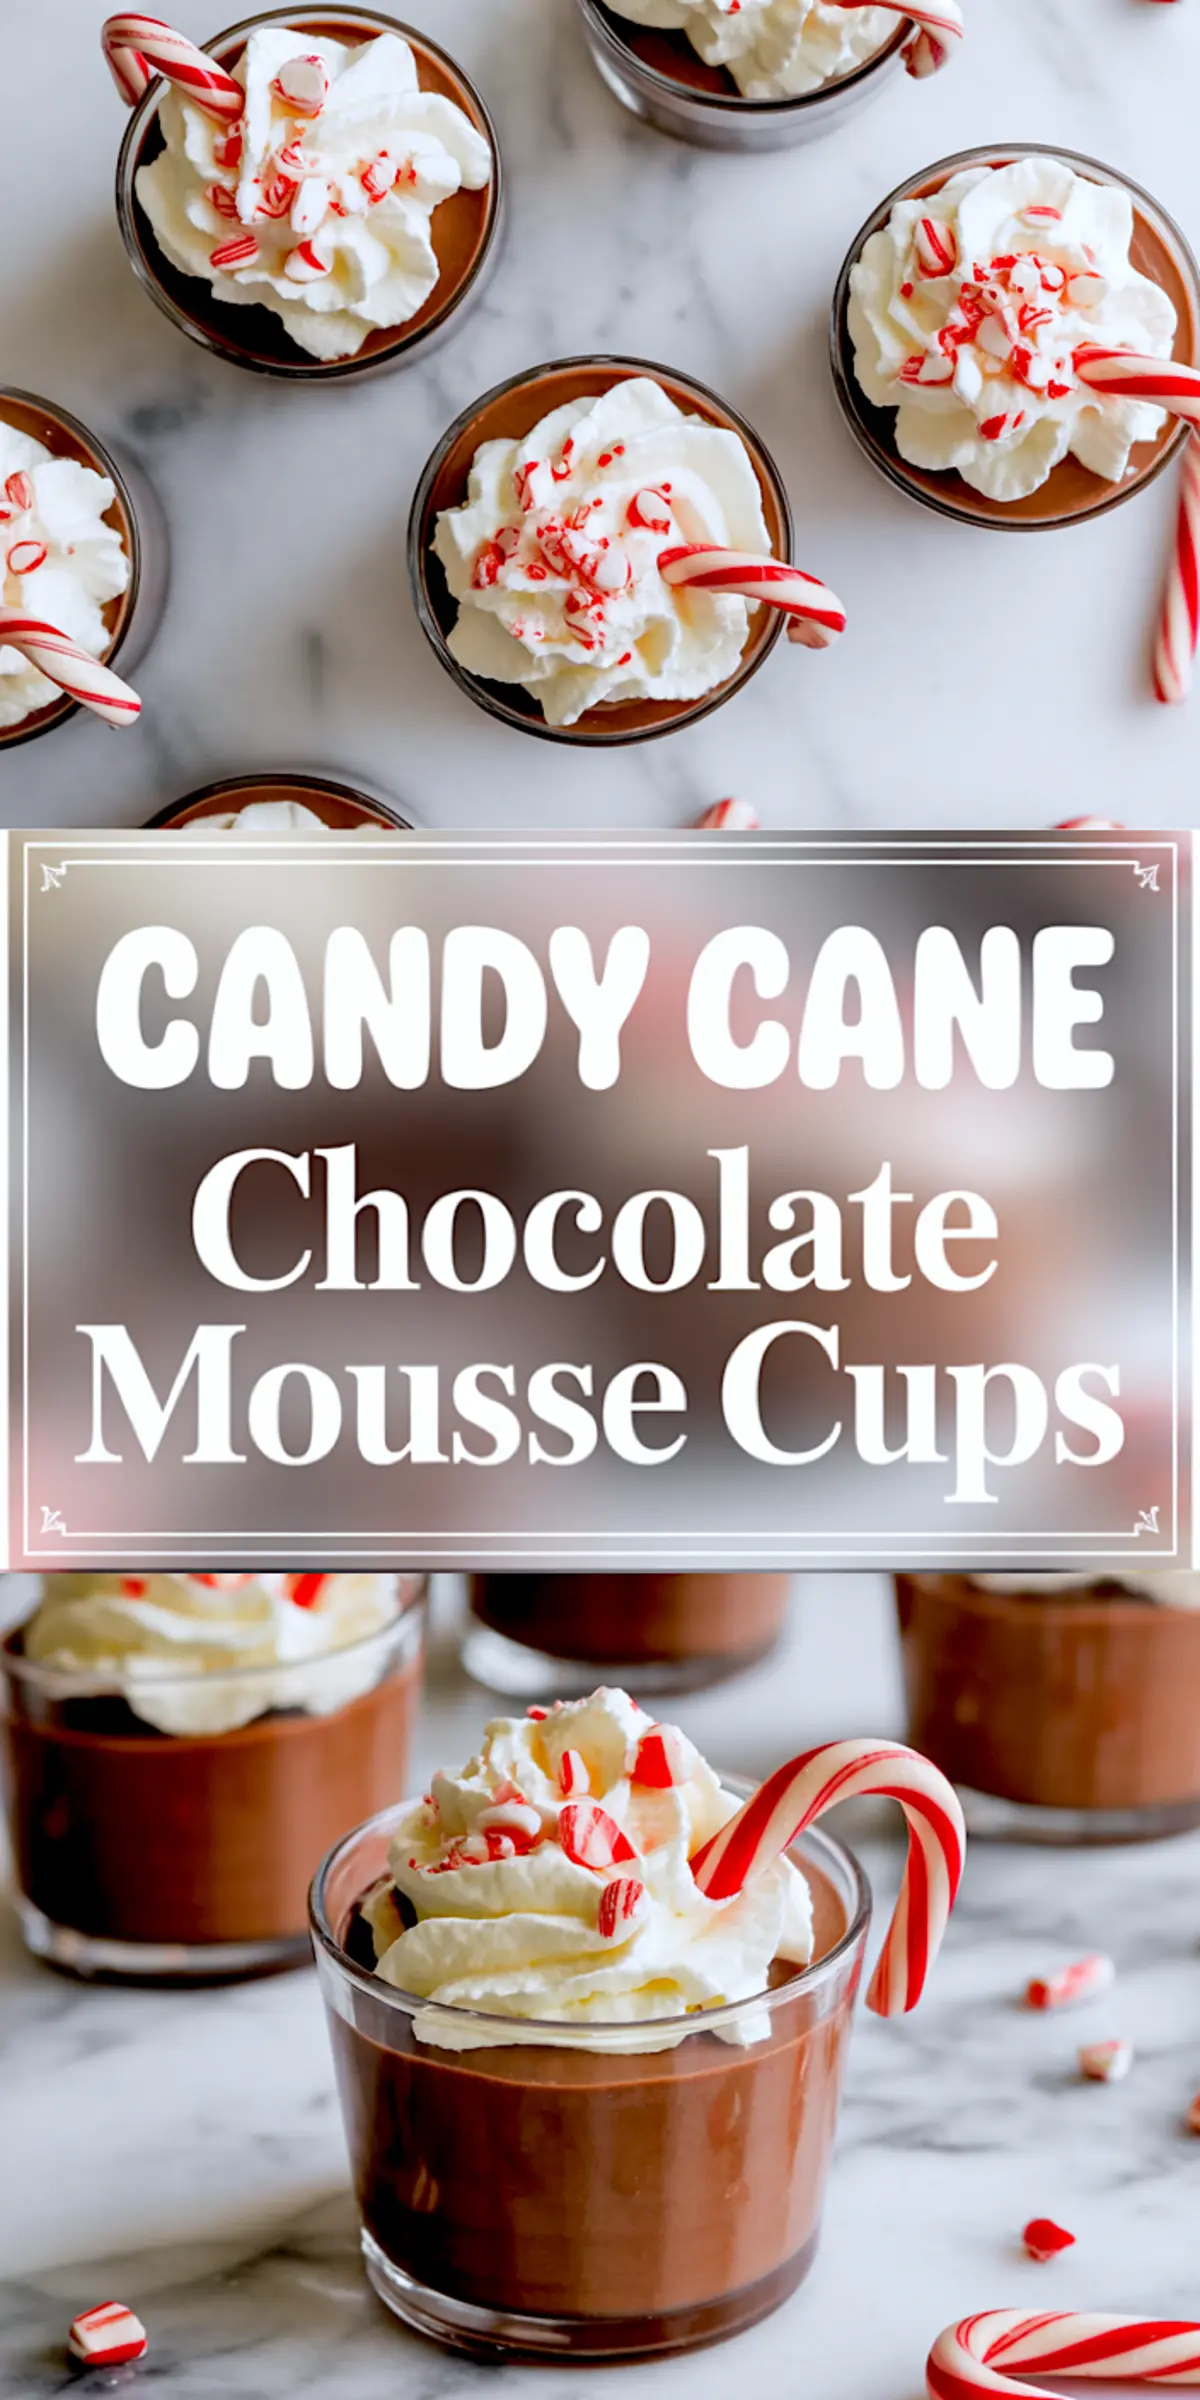
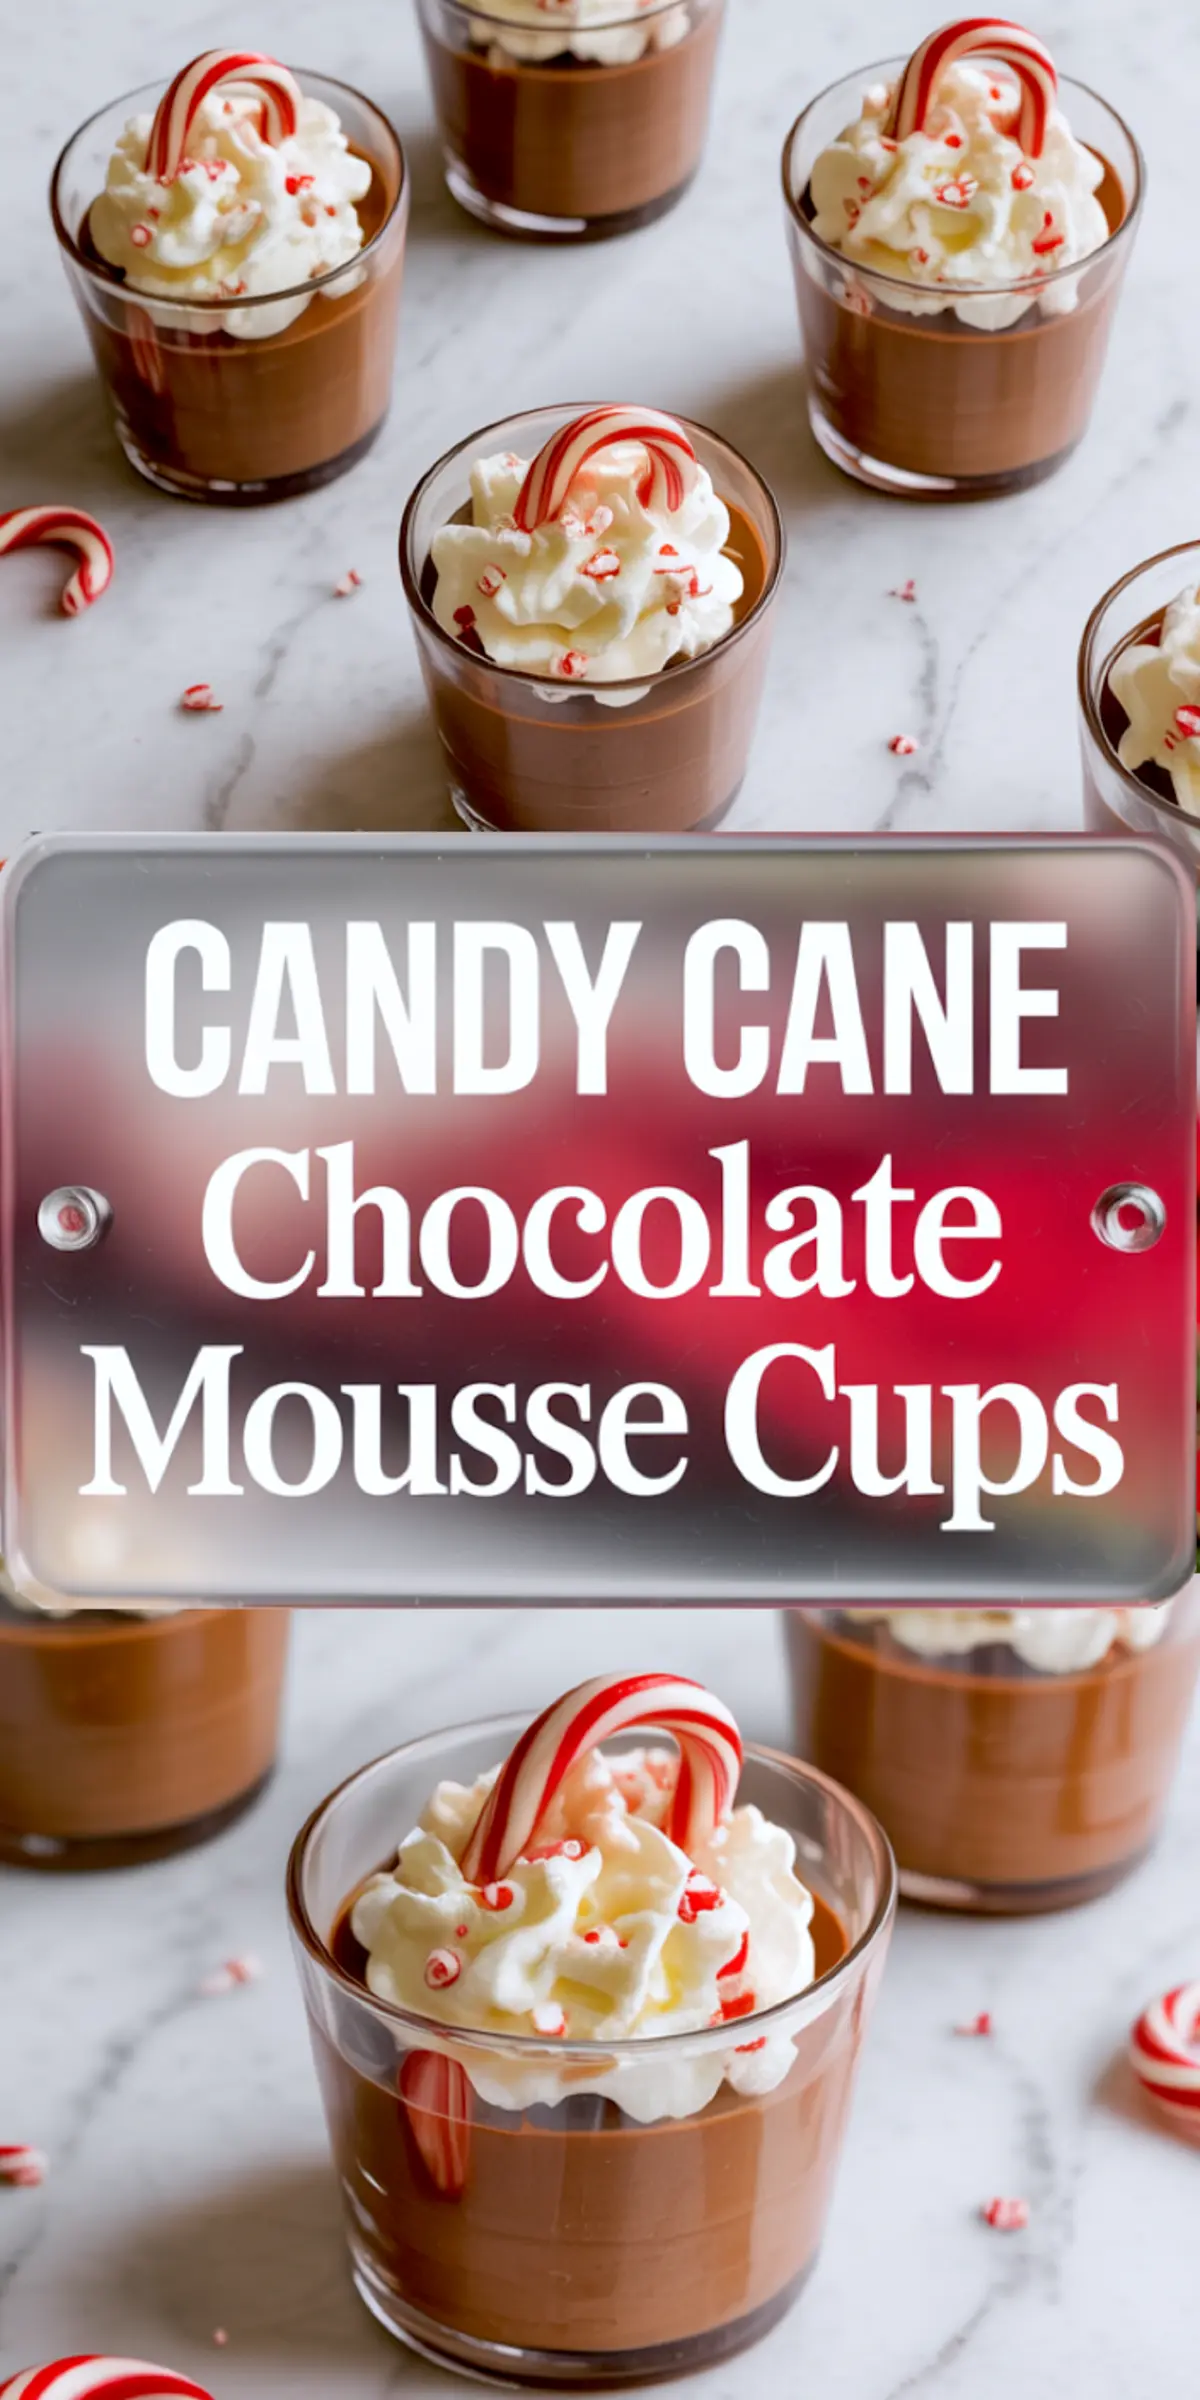
This Christmas mousse dessert blends dark chocolate, whipped cream, and peppermint candy canes into a layered treat with real structure and balance. These Candy Cane Chocolate Mousse Cups aren’t just easy to serve. They’re polished, clean, and steady. The kind of dessert that stacks beautifully on a buffet but also holds its own at the table.
In each cup, you’ll find cool peppermint crunch layered into velvety chocolate mousse and crowned with soft whipped cream. That contrast—dark and smooth beneath, crisp and bright on top is what makes these Christmas chocolate mousse cups stand out.
You’ll learn how to make the chocolate mousse from scratch. How to fold in whipped cream without deflating it. How to keep the peppermint in the topping, where it doesn’t disrupt the texture below. I’ve tested this base over the years, adjusted ratios, and held it up beside everything from ganache pots to layered trifles. This version holds shape and flavor better than most mousse recipes I’ve worked with.
And I’ll say this plainly: these cups work.
They set up quickly, travel well, and carry just the right amount of peppermint to please without overpowering.
Following a special diet?
Every recipe on this site can be converted to gluten-free, vegan, dairy-free, keto, nut-free or egg-free with adjusted ratios so nothing falls flat.
Try the Recipe Converter →Why Each Ingredient Matters in This Christmas Dessert
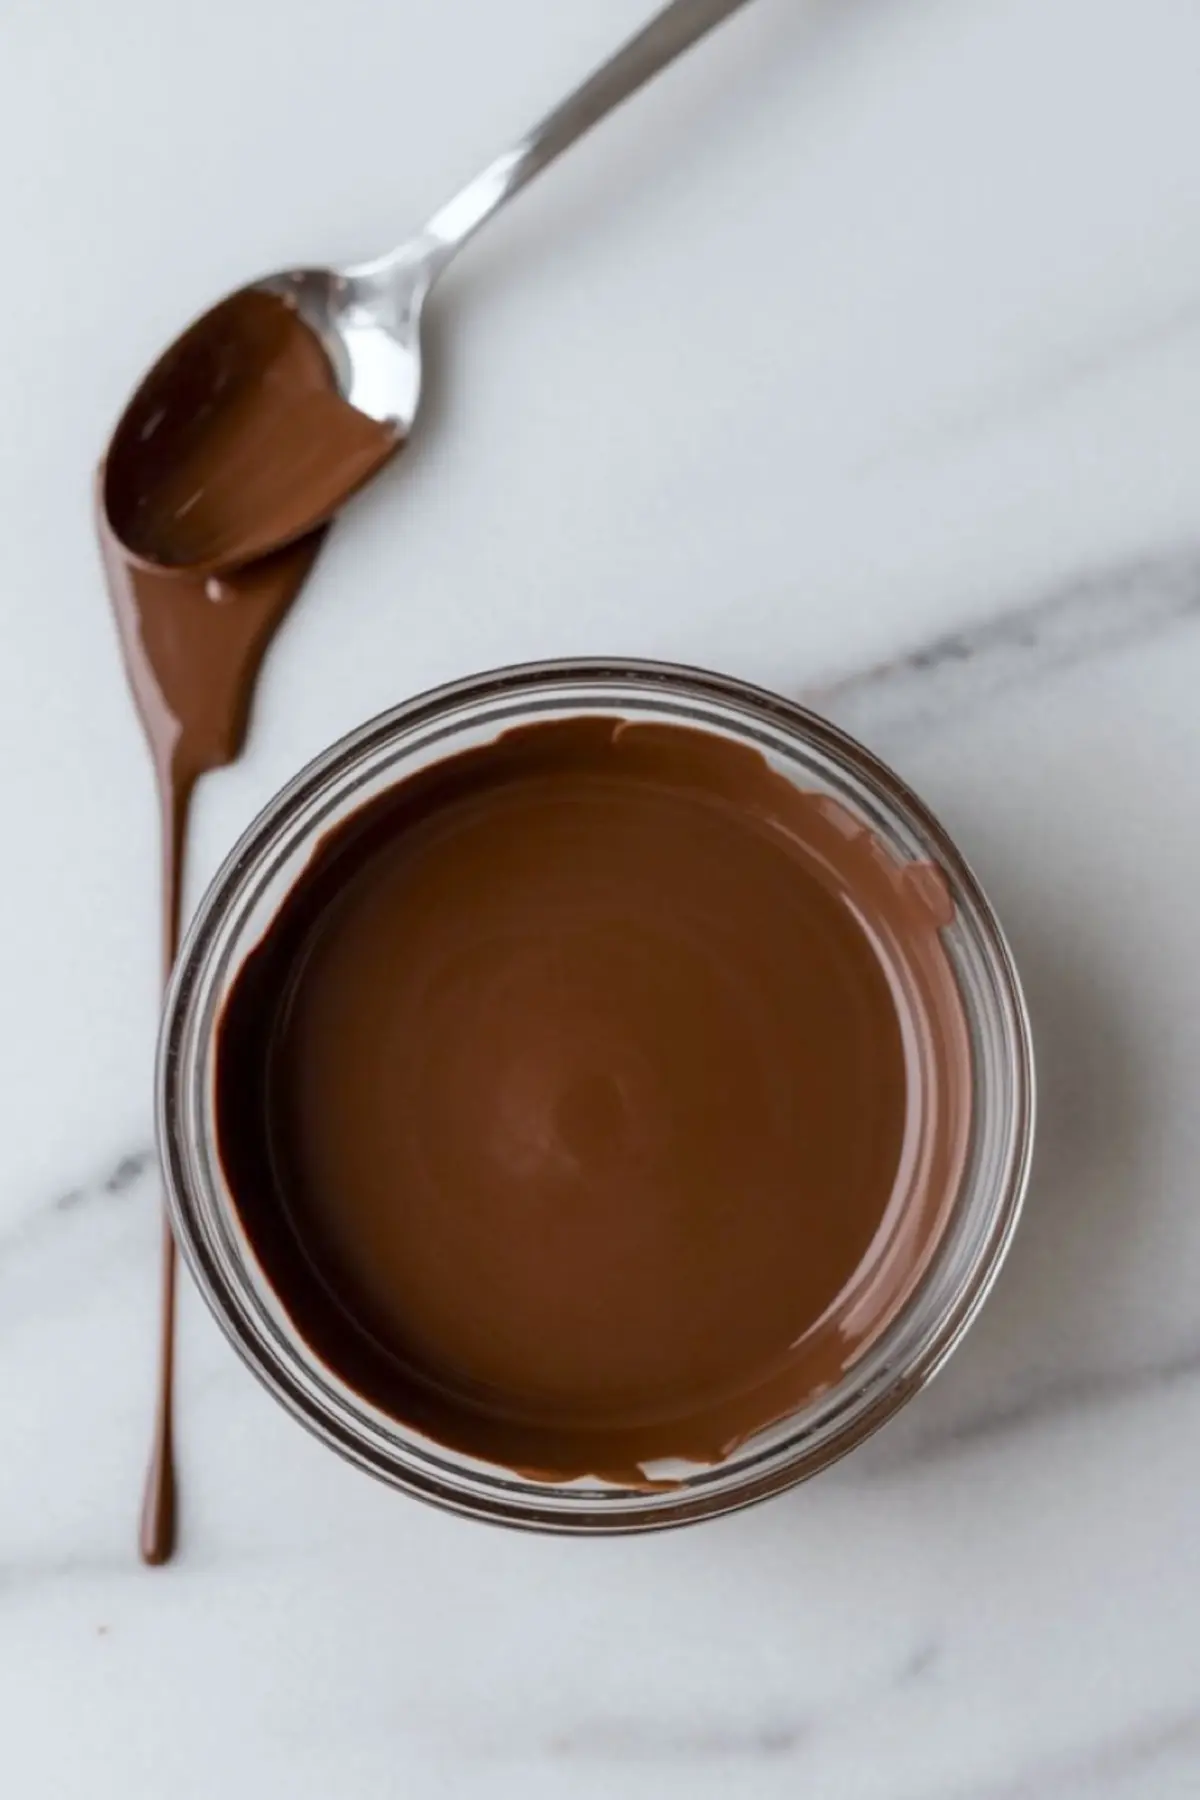
You’ll start with good-quality semi-sweet or dark chocolate. I prefer 60% cacao for this because it gives the mousse structure without turning it bitter. In my notes, I’ve tried bittersweet bars above 70%, but they made the mousse too dense. For a layered dessert like this, the chocolate needs to melt smoothly, blend easily with the yolks, and balance the cream.
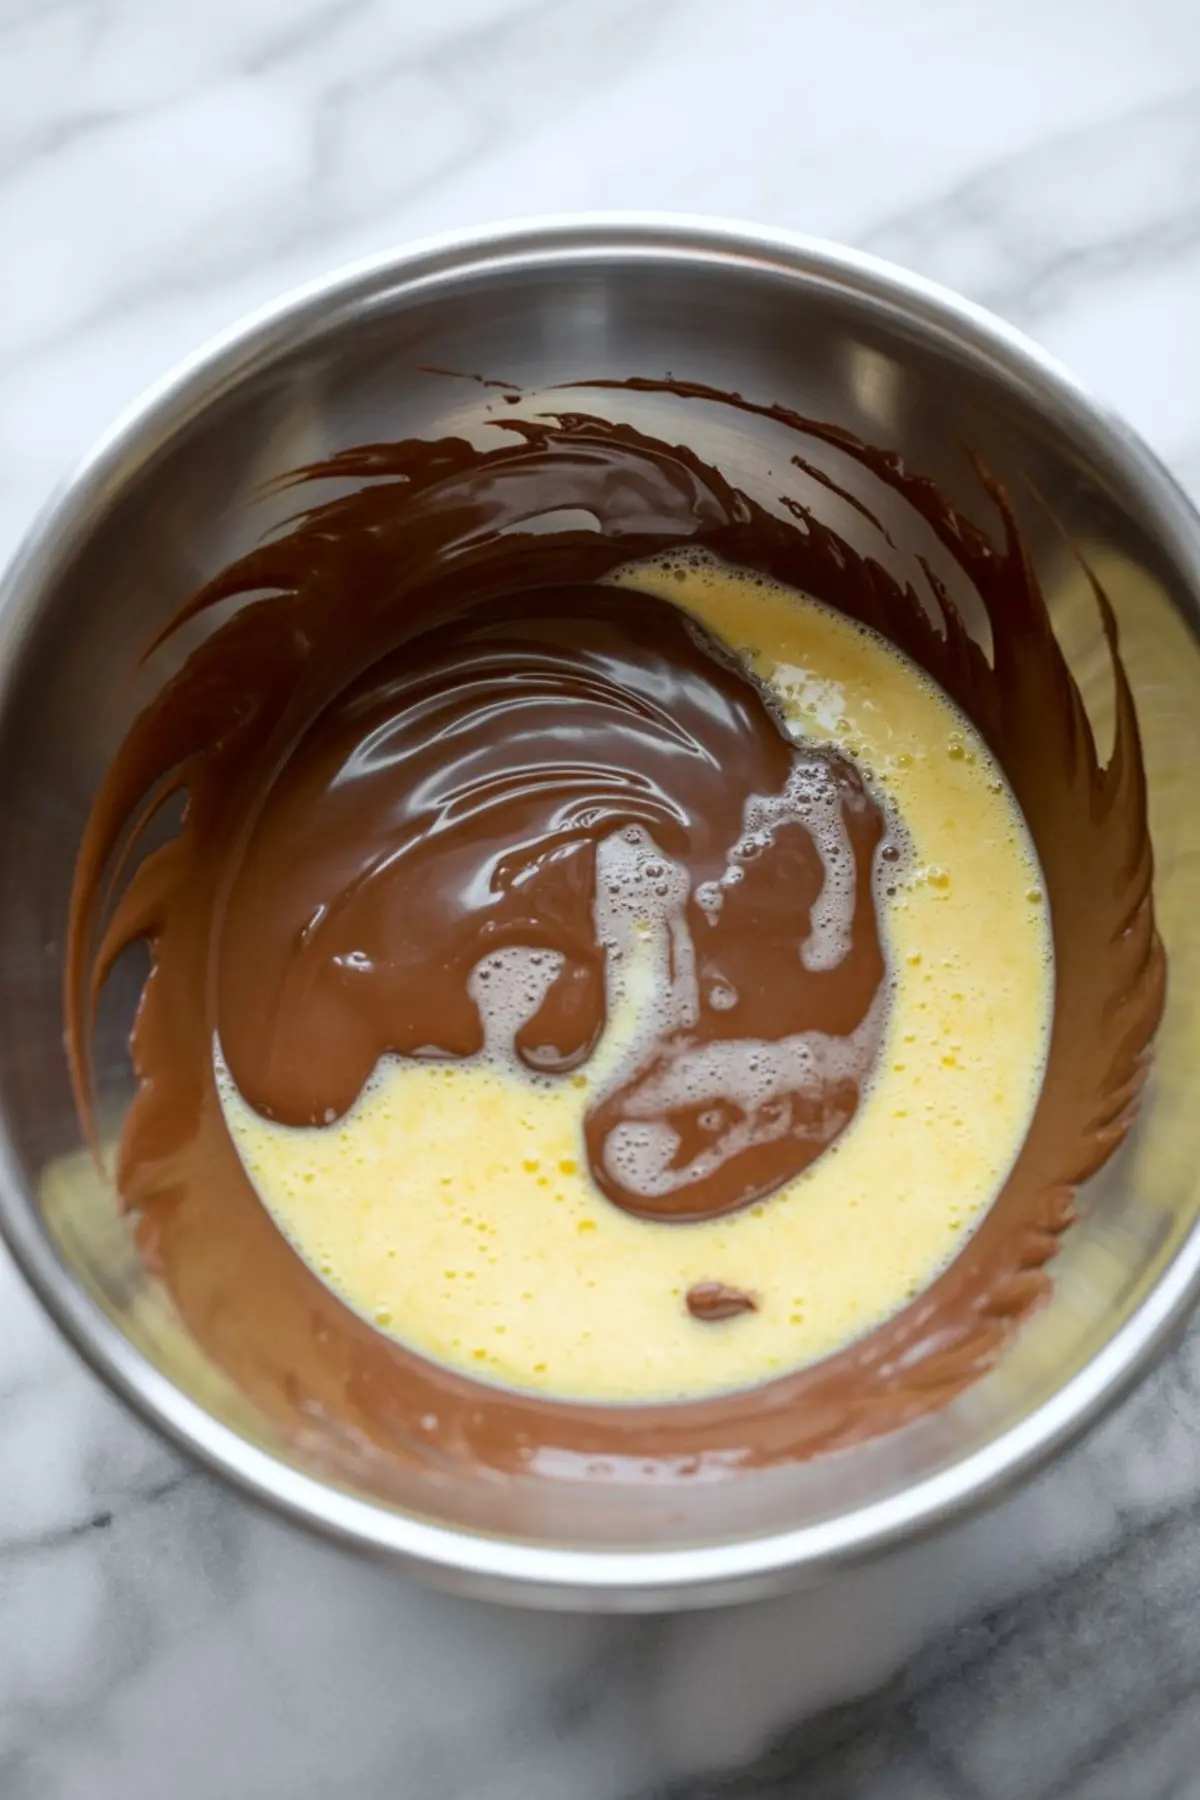
The egg yolks serve two roles here. First, they thicken the mousse slightly and give it richness. Second, they help the chocolate emulsify, so you don’t end up with separation in the final cups. If you’re concerned about using raw yolks, pasteurized ones hold up just as well in this recipe.
Heavy cream comes in twice. First to lighten the mousse. Second to form the whipped topping. Make sure it’s cold before you start whipping, or it won’t hold. You’ll see the mousse come together into a structure that feels almost like a firm pudding—but without any gelatin or cornstarch.
The sugar softens the egg mixture. A pinch of salt sharpens the chocolate. And vanilla steadies everything in the background.
For the topping, powdered sugar gives the cream stability. The peppermint extract (optional, but I use it) helps the flavor carry through to the top without interrupting the mousse below. And crushed candy canes? Those are more than just garnish. They give each bite a crisp finish.
You can also explore other peppermint dessert options like these Peppermint Chocolate Chip Cookies, if you’re planning a full spread.
Why Mousse Cups Work Better Than a Full Trifle
I’ve made full-size Christmas trifles. They look stunning but often collapse when scooped. With mousse, especially a chocolate mousse like this one, individual cups hold better.
The layering in this recipe highlights each component—mousse, whipped cream, candy cane—without overmixing. And because you chill them in small glasses, the dessert sets more evenly than in a large dish.
If you’ve ever served a mousse that sank or split, the issue likely came from overmixing or temperature shock. The step-by-step structure in this recipe prevents both.
And unlike these Candy Cane Brownie Bites, which benefit from a firmer base, this mousse needs air and lightness. Cups support that texture without compromise.
Steps That Matter Most in the Process
When melting the chocolate, go slow. I use the double boiler method because it prevents scorching. Stir it with a metal spoon and keep the water at a gentle simmer. Too much heat, and the chocolate seizes. I’ve seen that happen even with tempered chocolate, so stay patient here.
Once the chocolate cools slightly, whisk it into the yolk mixture. This moment matters. The chocolate must be warm enough to blend but not hot enough to scramble the yolks. I usually test with a fingertip. If I can hold it comfortably for five seconds, it’s ready.
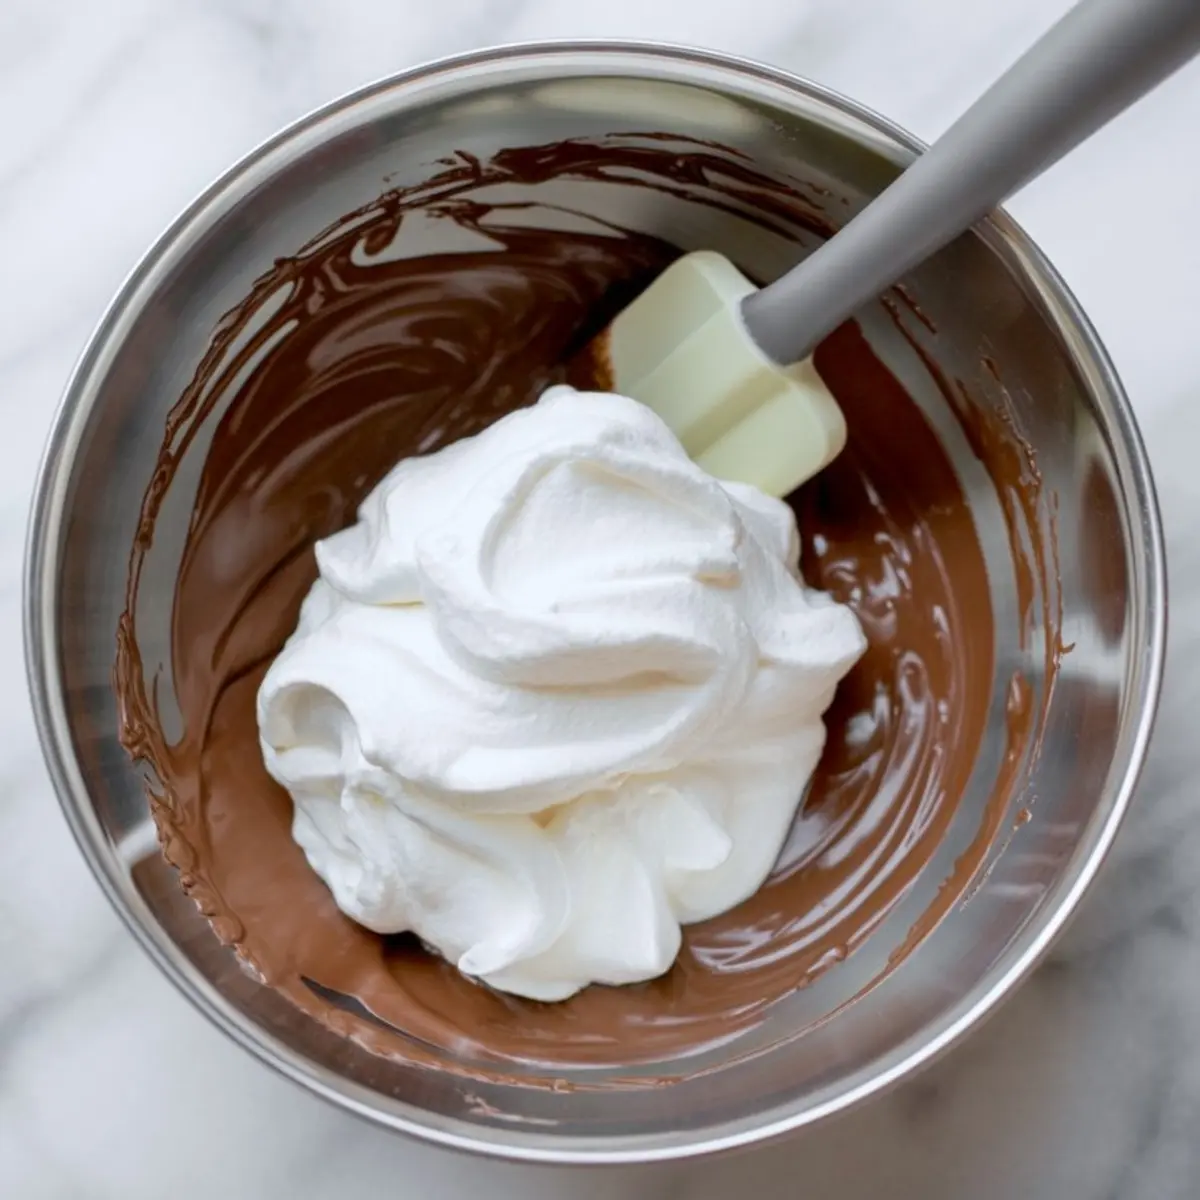
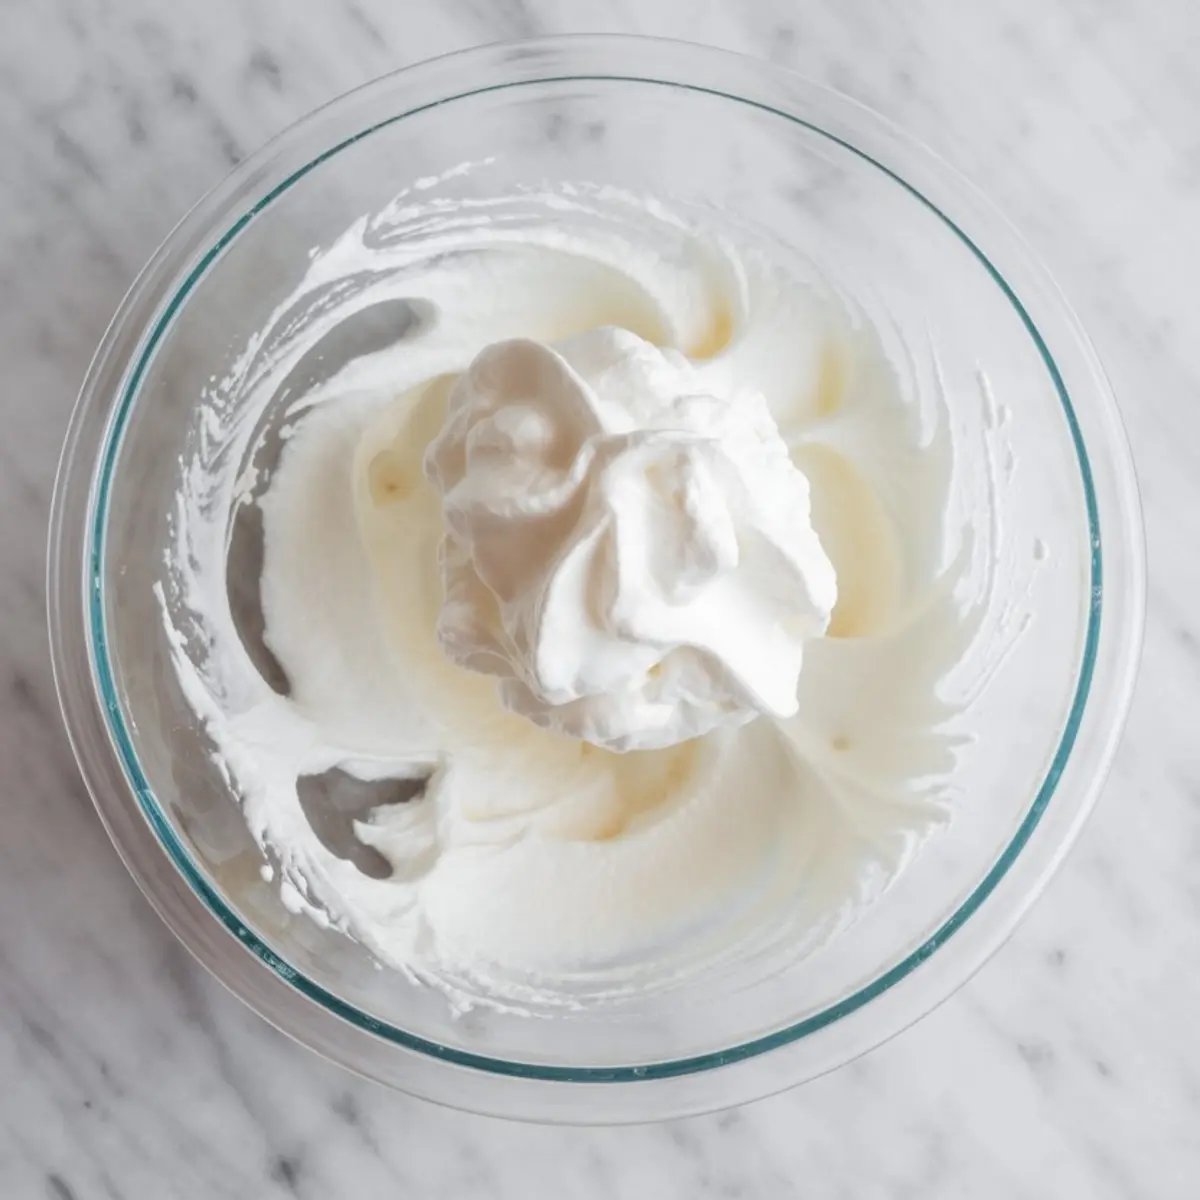
The whipped cream needs medium-stiff peaks before folding. Not soft, not hard. If it’s too stiff, the mousse turns clumpy. Too soft, and it won’t hold.
Fold the cream in gently, in stages. I start with a third to loosen the chocolate. Then the rest, in two parts. Stir with care. I’ve found that metal spoons or silicone spatulas work better than wooden spoons here.
Once the mousse is portioned into glasses, smooth the tops. Cover with plastic wrap and chill. At least two hours. Overnight works too.
Before serving, make the topping fresh. Overwhipped cream can split. Keep an eye on it. Stop at soft peaks, then pipe or spoon over each chilled mousse cup.
If you’re looking for more festive chocolate mousse cups, try these Chocolate Cranberry Tartlets. They pair well with the same whipped topping, and you can garnish both with crushed candy cane for consistency across your dessert table.
Storage, Serving, and Peppermint Crunch Tips
Serve these cups straight from the fridge. Cold mousse holds better than room temperature mousse, especially when topped with cream. I use small glass jars or 5-ounce dessert cups. Clear sides show the layers, which makes them ideal for buffets or photo-heavy holiday spreads.
If you’re storing them overnight, wait to top with cream and candy until just before serving. The peppermint candy softens quickly in the fridge and can lose its snap. That sharp texture is part of what sets this dessert apart from other layered desserts.
Store leftovers covered. They hold for two days in the fridge. Longer than that, and the candy bleeds into the cream.
This dessert pairs especially well with something bold like Candy Cane Cake if you’re planning a holiday menu. Together, they form a cohesive peppermint dessert board.
Comparison: Whipping Cream vs. Pre-Made Topping
I’ve tested this mousse with both fresh whipped cream and store-bought whipped topping. The difference is clear.
Fresh cream gives more structure, a cleaner mouthfeel, and a smoother finish. It also holds the peppermint flavor better. Store-bought topping tends to break down faster and adds a processed note that clashes with the dark chocolate.
If you’re short on time, you can make the topping earlier in the day and keep it in the fridge. Just give it a quick whip before piping. In my tests, this method held longer than pre-made topping by nearly a full day.
Stick to fresh cream. It’s one step more, but it earns its place in the final texture.
A Few Final Notes and a Quick Thought
These Candy Cane Chocolate Mousse Cups bring balance and contrast to the holiday dessert table. They’re smooth, structured, and visually crisp.
No gelatin. No box mix. Just well-built mousse and clean peppermint layers.
This is the kind of dessert that guests remember. Not because it’s loud, but because it’s steady. Thoughtful. Seasonal without shouting.
Pin This Recipe and Join the Conversation Below
Save this mousse dessert to your Christmas Desserts board to keep it handy for the holidays.
If you’ve made it or if you’re planning to drop a comment below and share how it turned out. I’d love to hear your tips, swaps, or questions.
Let’s build something delicious, together.
Candy Cane Chocolate Mousse Cups

These Candy Cane Chocolate Mousse Cups are the ultimate festive dessert for your holiday table. Featuring layers of silky chocolate mousse, crushed peppermint candy canes, and fluffy whipped cream, these Christmas mousse cups are easy to serve and visually stunning. Perfect for layered desserts, they offer a rich, creamy texture with a cool peppermint crunch. Whether you’re planning a holiday gathering or looking for a new peppermint dessert, these Christmas chocolate mousse cups bring cheer in every spoonful. Great for Xmas food spreads, dessert buffets, or classy Christmas food desserts. Save this now if you love mousse recipes with a seasonal twist!
Ingredients
- For the chocolate mousse:
- 1 ½ cups (360 ml) heavy cream, cold
- 6 oz (170 g) semi-sweet or dark chocolate (around 60% cacao), finely chopped
- 2 tablespoons granulated sugar
- 2 large egg yolks
- 1 teaspoon vanilla extract
- Pinch of salt
- For the topping:
- 1 cup (240 ml) heavy cream
- 2 tablespoons powdered sugar
- ½ teaspoon peppermint extract (optional)
- 6–8 mini candy canes, crushed + extra whole ones for garnish
Instructions
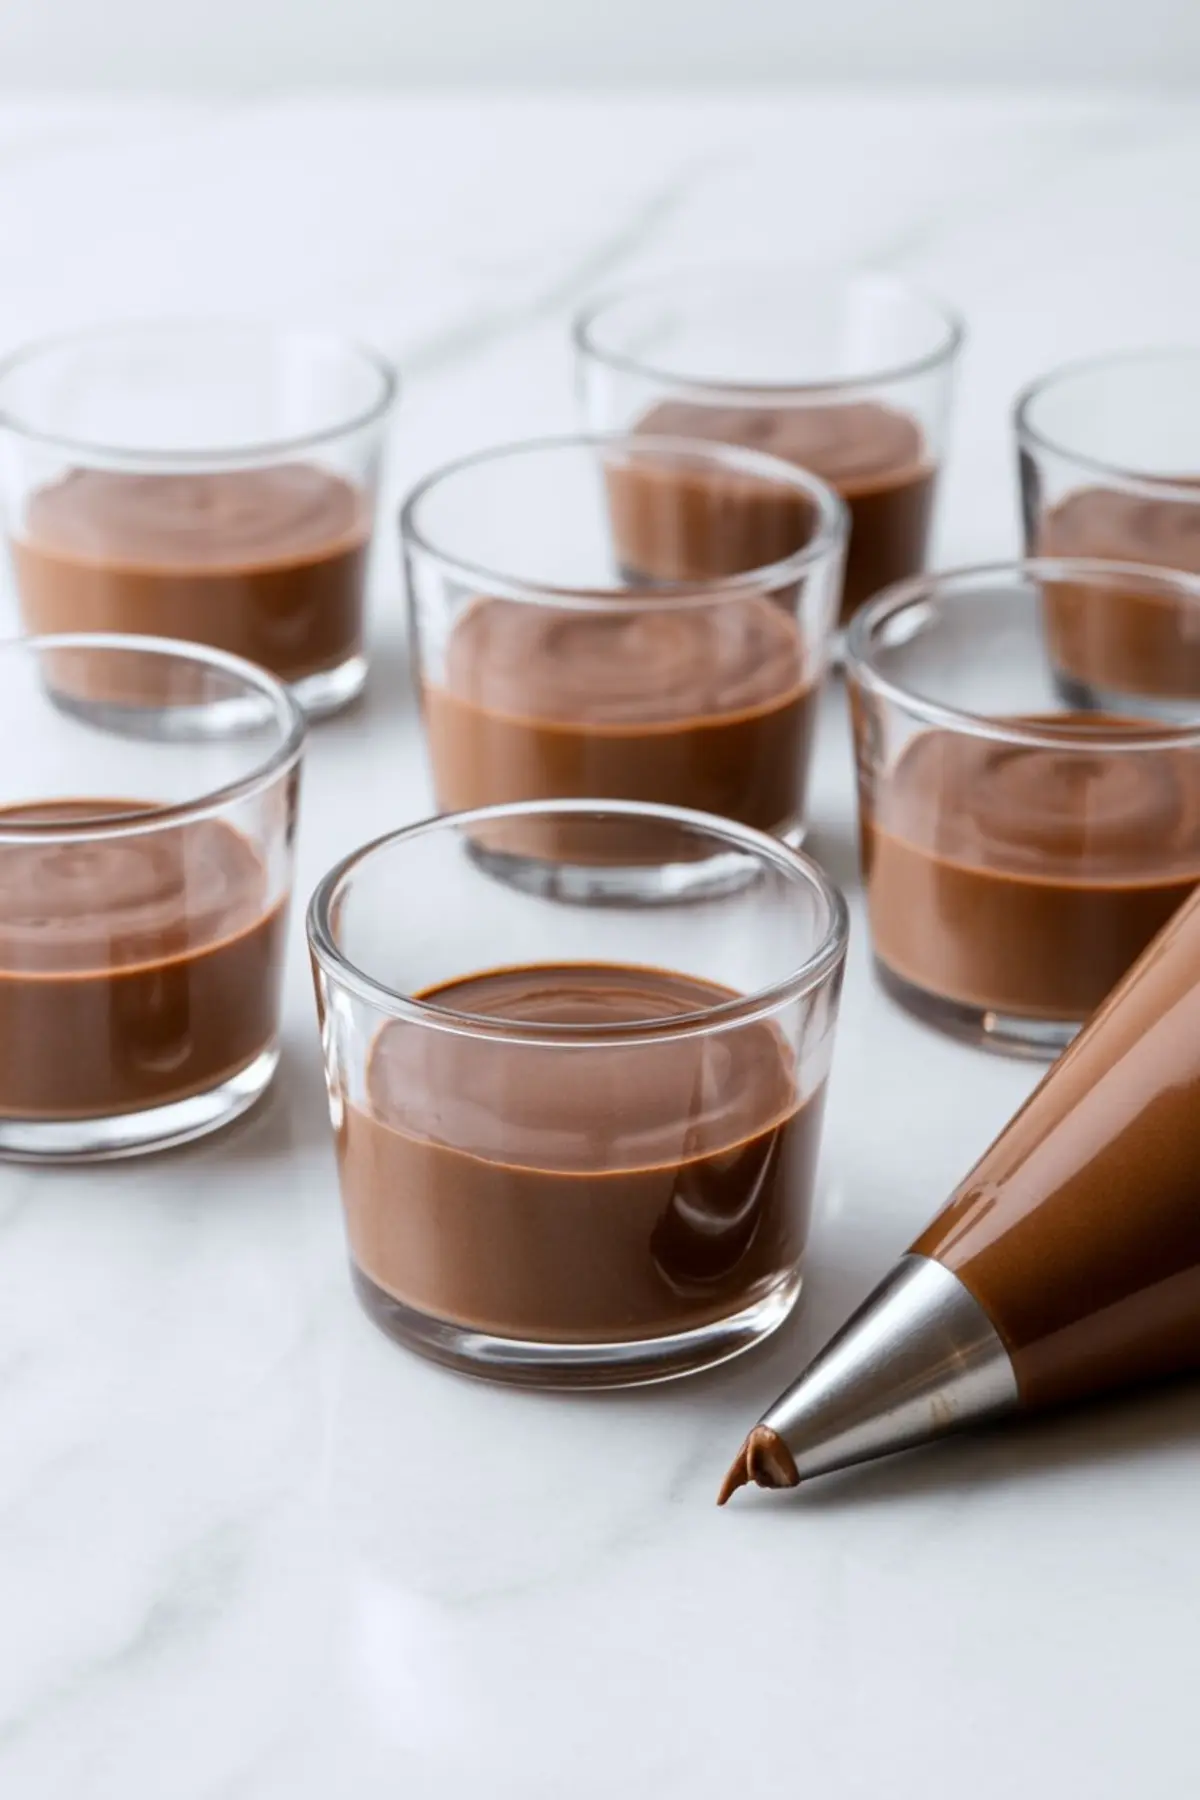
- MELT THE CHOCOLATE: In a heatproof bowl, melt the chopped chocolate over a saucepan of gently simmering water using the double boiler method. Stir occasionally until smooth and fully melted, then remove from heat and let cool slightly.
- MAKE THE EGG MIXTURE: In a separate bowl, whisk together the egg yolks, granulated sugar, and a pinch of salt until the mixture is smooth and pale. Slowly add the slightly cooled melted chocolate, whisking continuously to combine without curdling the yolks.
- WHIP THE CREAM: In a large bowl, whip the 1 ½ cups of cold heavy cream until medium-stiff peaks form. Gently fold the whipped cream into the chocolate mixture in 2 to 3 additions, mixing until the mousse is smooth and fully incorporated.
- CHILL THE MOUSSE: Spoon or pipe the mousse evenly into small serving glasses or dessert cups. Smooth the tops and refrigerate for at least 2 hours, or until fully set.
- MAKE THE WHIPPED CREAM TOPPING: Just before serving, whip the remaining 1 cup of heavy cream with the powdered sugar and peppermint extract (if using) until soft peaks form. Be careful not to overwhip.
- ASSEMBLE AND DECORATE: Top each chilled mousse cup with a generous swirl of whipped cream. Sprinkle with crushed mini candy canes and garnish with a whole mini candy cane for a festive finish.
Notes
If using pasteurized egg yolks, the mousse is safe for more sensitive diets. For stronger peppermint flavor, increase the peppermint extract slightly in the whipped topping. Store mousse cups covered in the refrigerator for up to 2 days.
Nutrition Information
Yield
8Serving Size
1Amount Per Serving Calories 889Total Fat 36gSaturated Fat 22gTrans Fat 1gUnsaturated Fat 11gCholesterol 156mgSodium 107mgCarbohydrates 137gFiber 2gSugar 93gProtein 5g