
A Make-Ahead No-Bake Dessert for Holiday Gatherings
This Candy Cane Pie recipe brings together peppermint cream, crushed candy, and a chocolate cookie crust into a cool, refreshing dessert that slices clean and holds its shape. It’s one of those holiday desserts you can prepare in advance, chill until serving, and watch disappear slice by slice.
You’ll learn how to build a smooth peppermint pie filling that holds its structure without losing that soft, airy bite. You’ll also get my notes on balancing extract strength with texture, tips on storing ahead for winter parties, and how to avoid the two most common pitfalls, grainy fillings and soggy crusts.
This is one of my go-to Christmas pie recipes when time is tight and the fridge is already full of casseroles and ham. It stands up beautifully in the cold, travels well in a covered tin, and looks festive without needing too much effort.

Following a special diet?
Every recipe on this site can be converted to gluten-free, vegan, dairy-free, keto, nut-free or egg-free with adjusted ratios so nothing falls flat.
Try the Recipe Converter →The Chocolate Crust That Holds Its Own
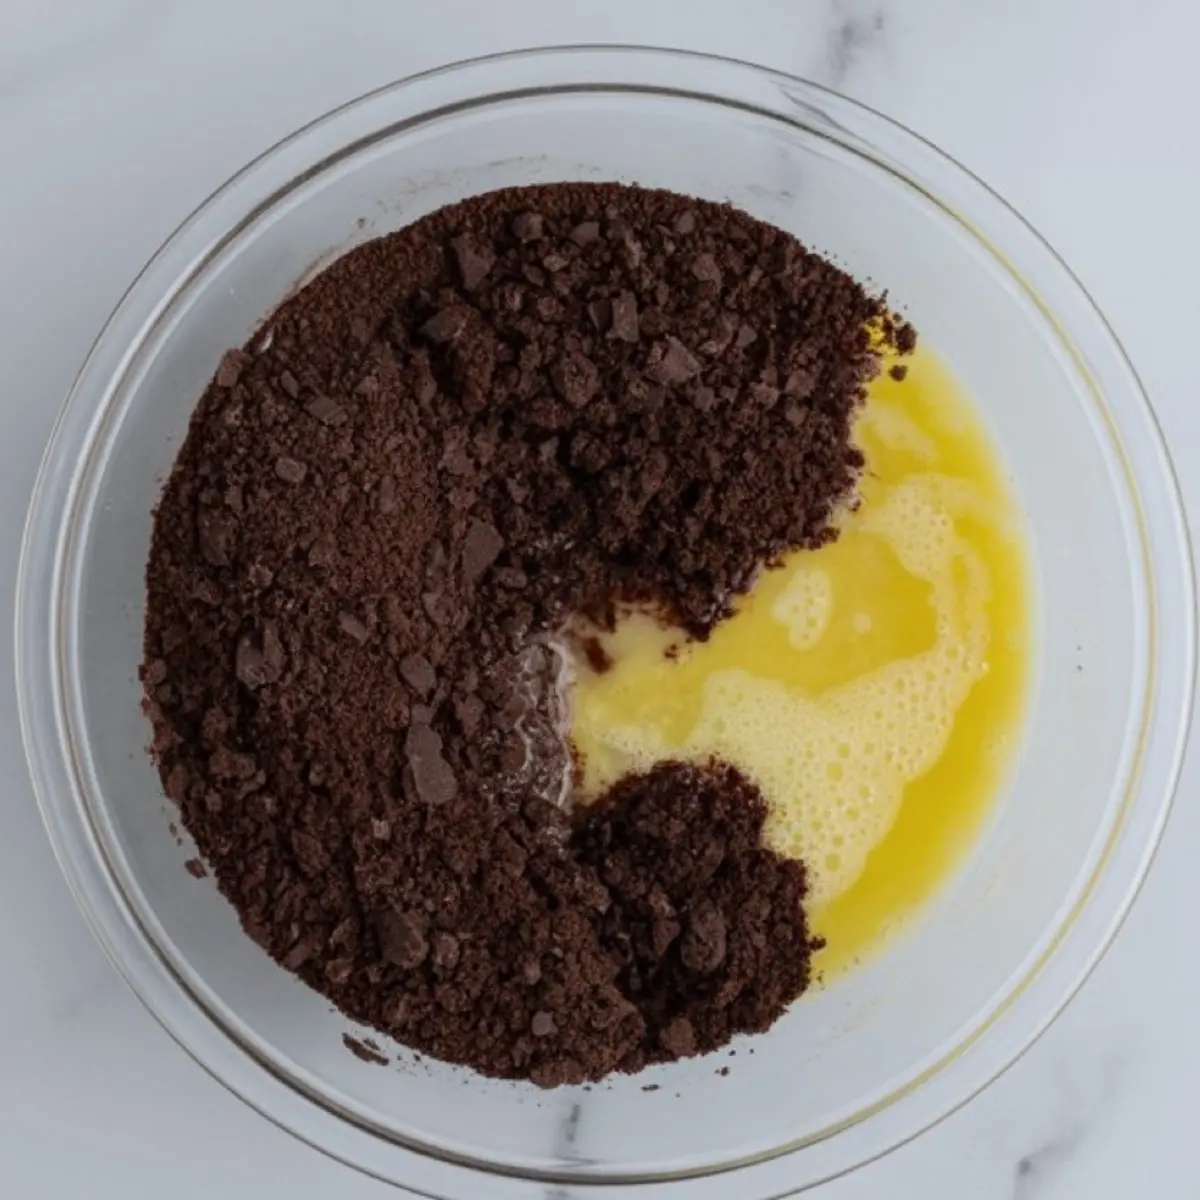
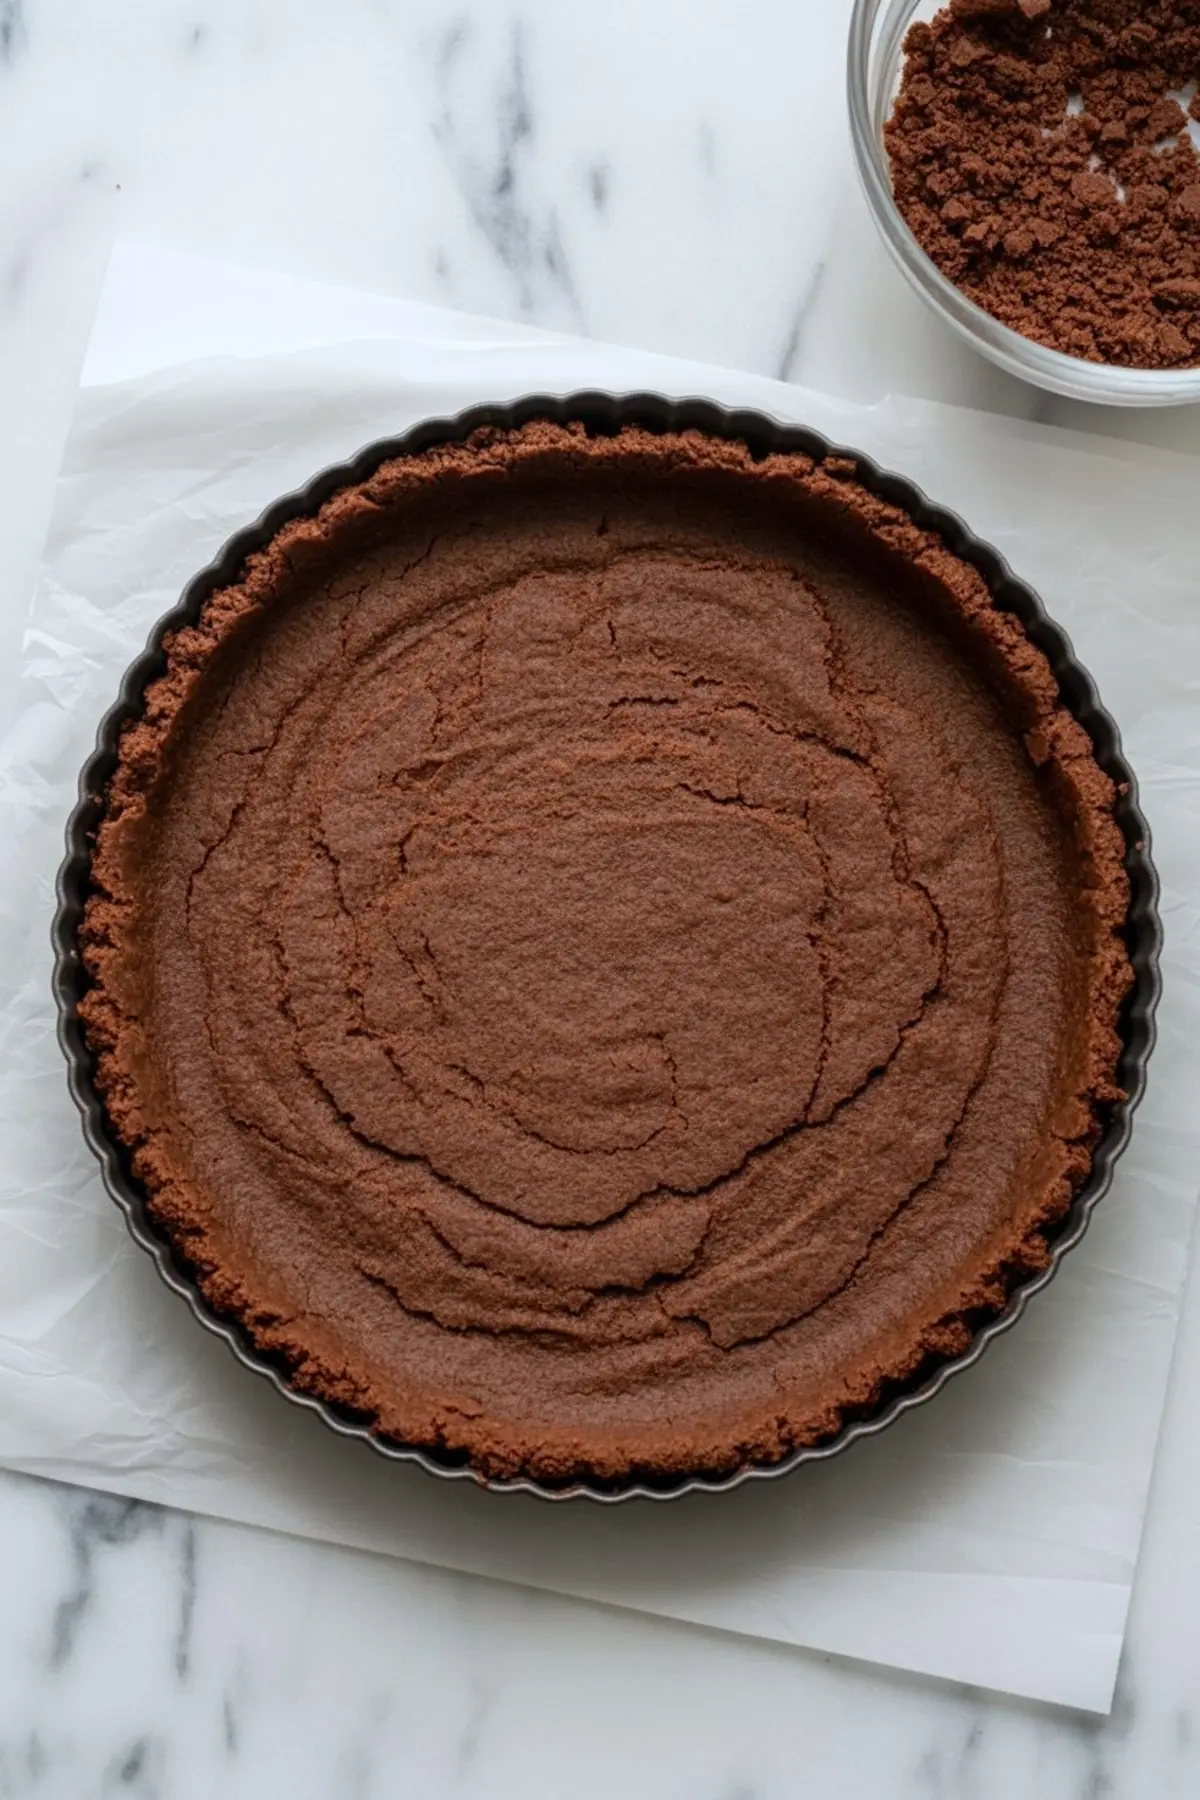
A cookie crust has one job: stay firm without getting in the way. For this peppermint pie recipe, I use chocolate sandwich cookies. Not just for taste, but because the cream filling inside the cookies binds with the butter to form a crust that holds its shape better than dry cookie crumbs alone.
The butter helps create that base layer you can press and mold into the pie plate. Once chilled, it stays crisp but not hard, giving you a clean edge when slicing. You can use a tart pan with a removable bottom for easy release, but a standard pie dish works just as well.
If you’re looking for another chocolate-mint option that holds shape beautifully, the Candy Cane Brownie Bites are worth bookmarking too.
The Peppermint Filling That’s Fluffy but Stable
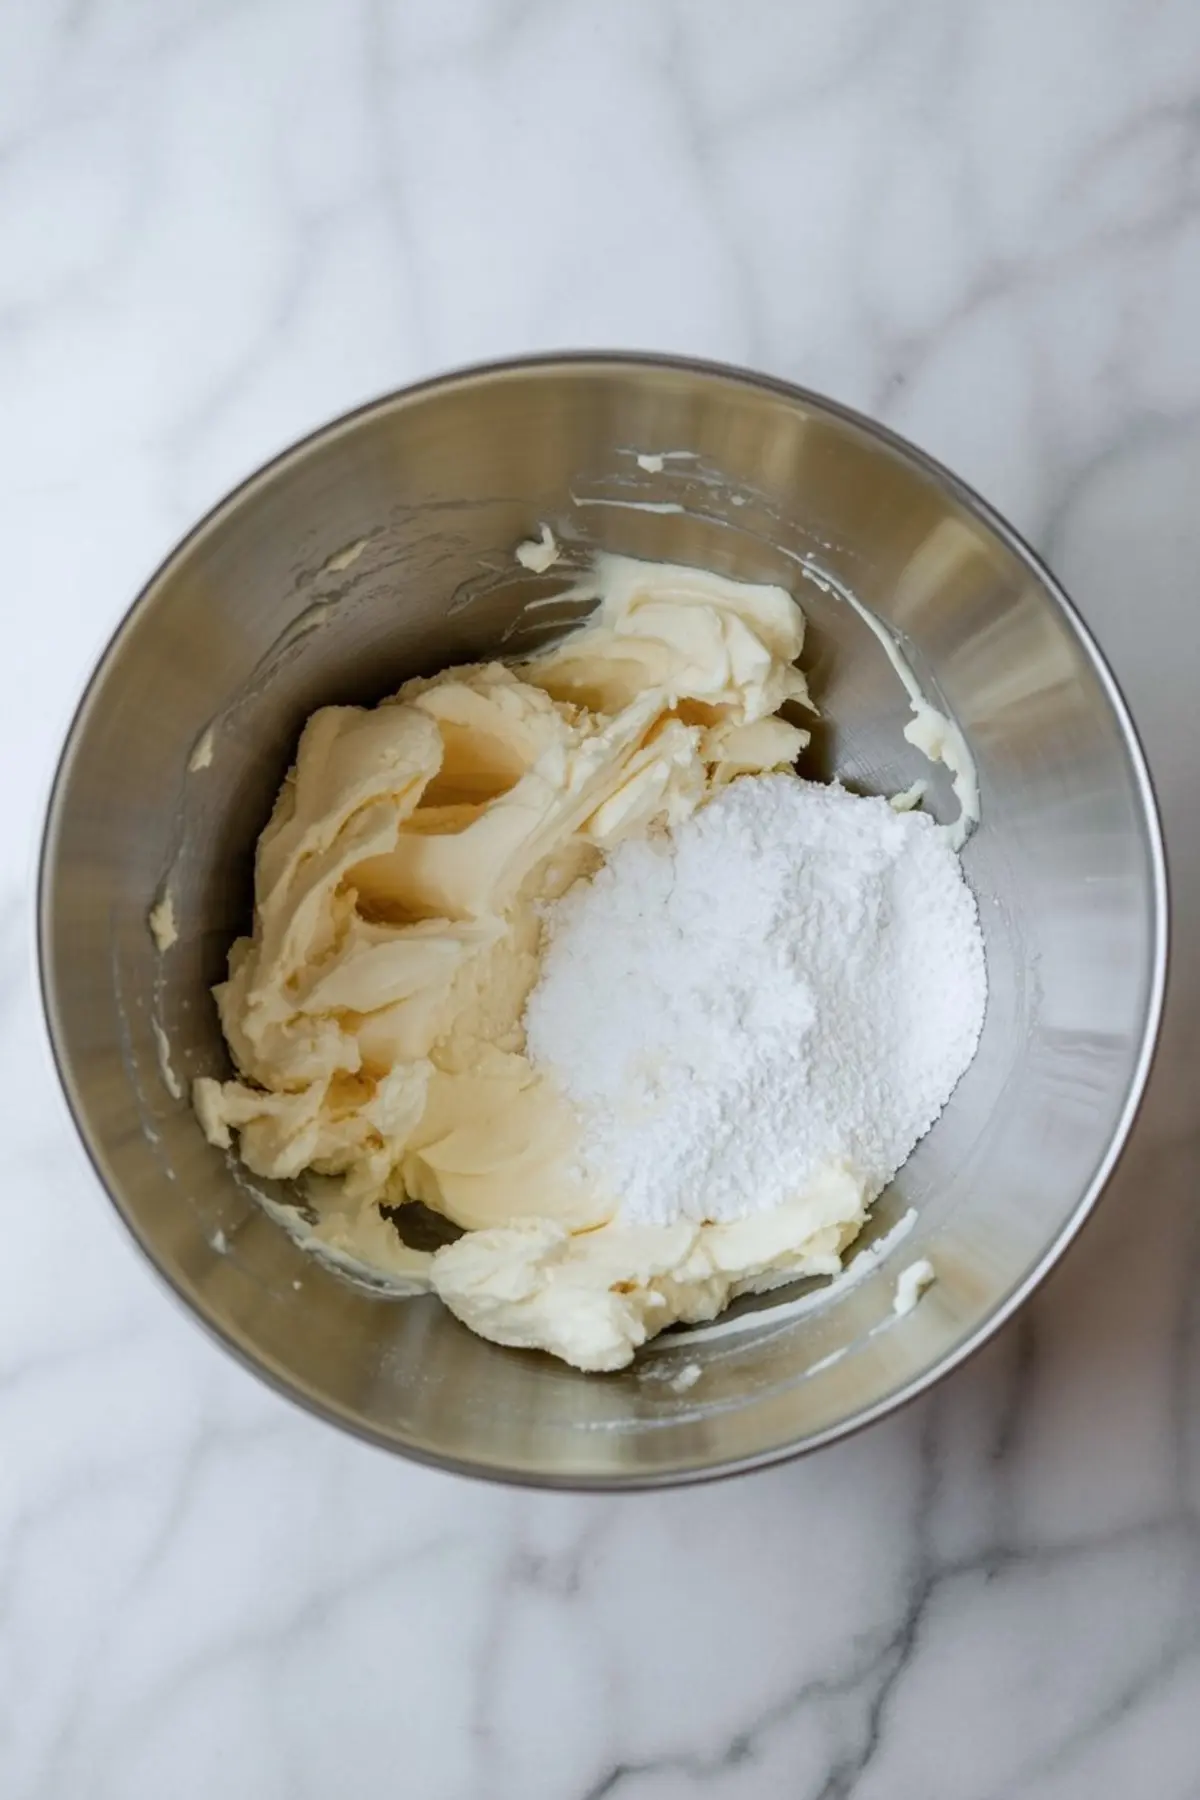
This is where texture matters. The filling starts with cream cheese and powdered sugar. Softened cream cheese blends smoothly, creating the dense base for the whipped cream to lighten. That air is what lifts the pie and gives it height.
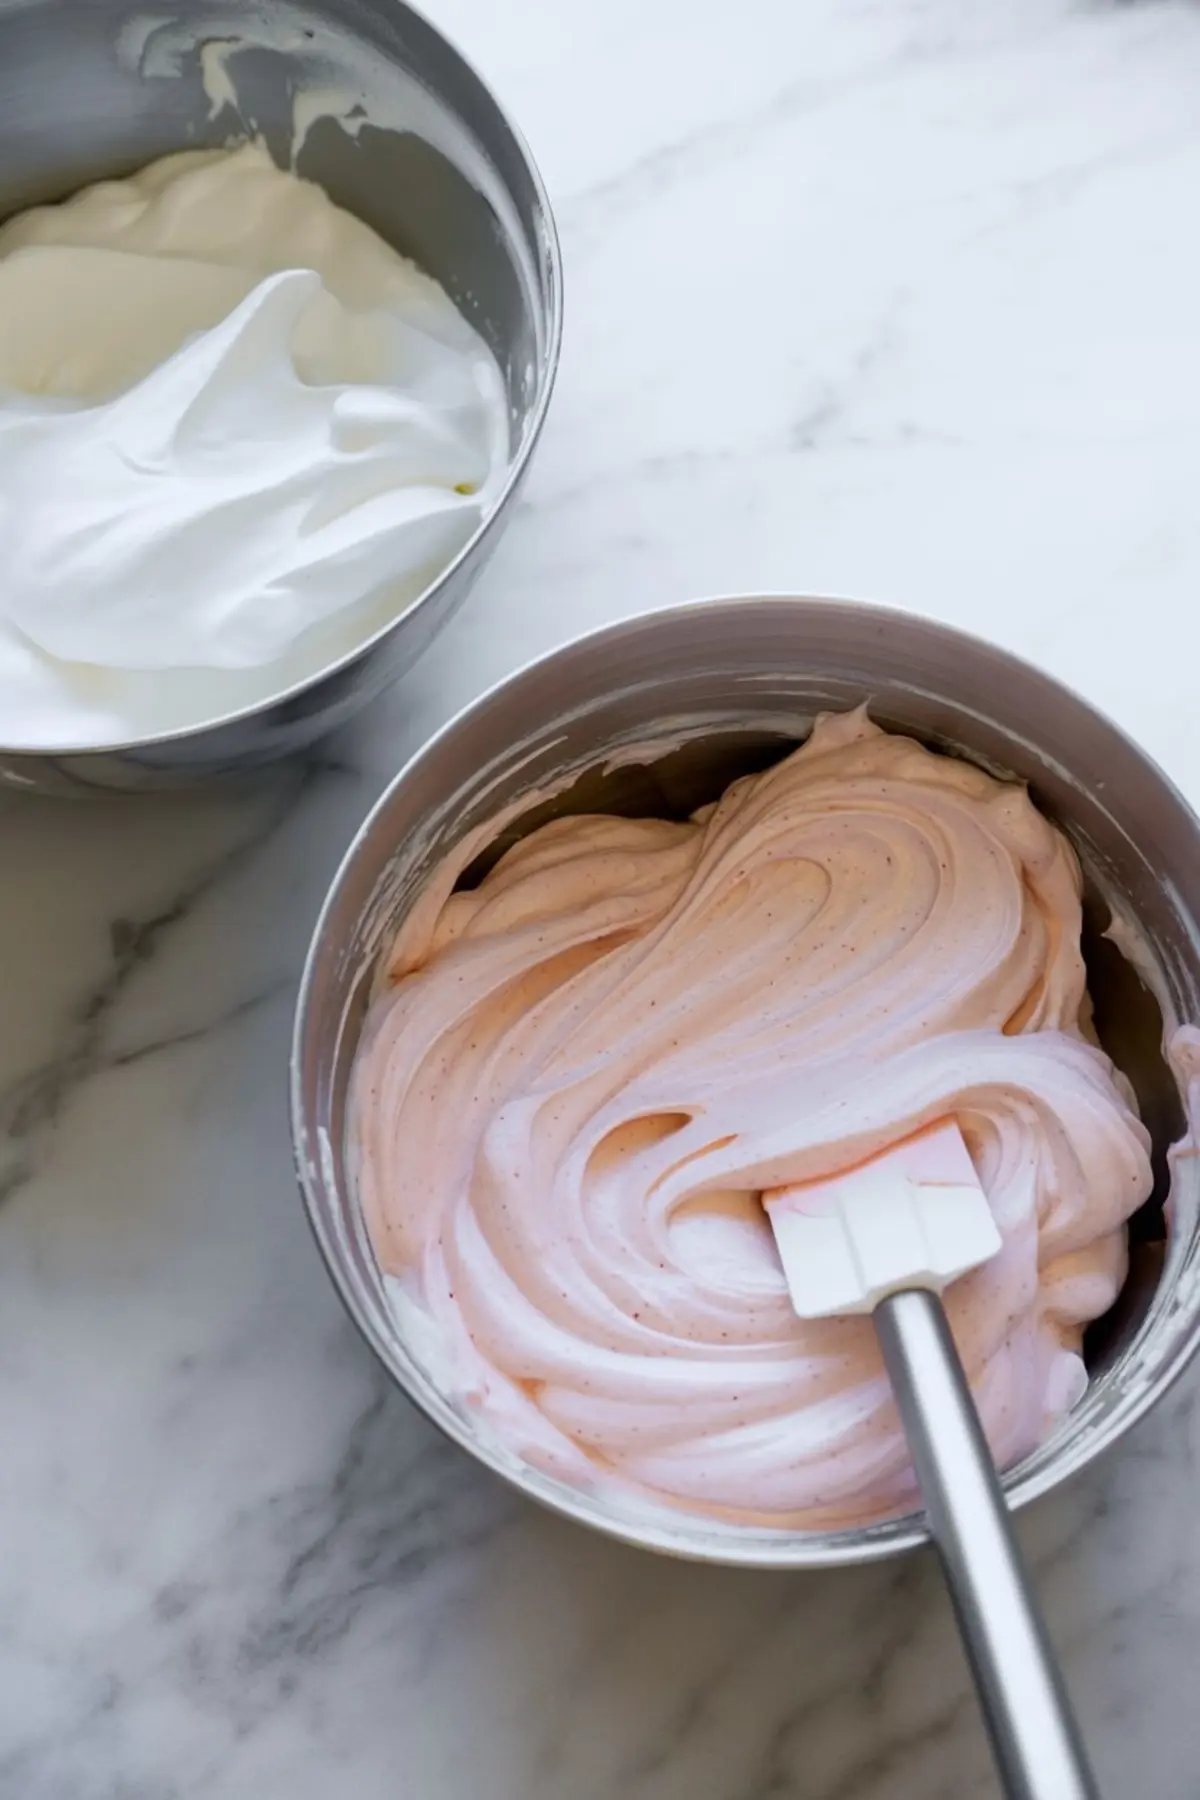
I’ve found that folding in whipped cream in two batches makes a big difference. The first round loosens the structure. The second locks in air pockets that hold the pie tall even after hours in the fridge. This way, it doesn’t flatten by the time you slice it.
A few drops of red food coloring swirled through adds that soft blush without overpowering. Use gel if you can. It keeps the mixture from becoming watery.
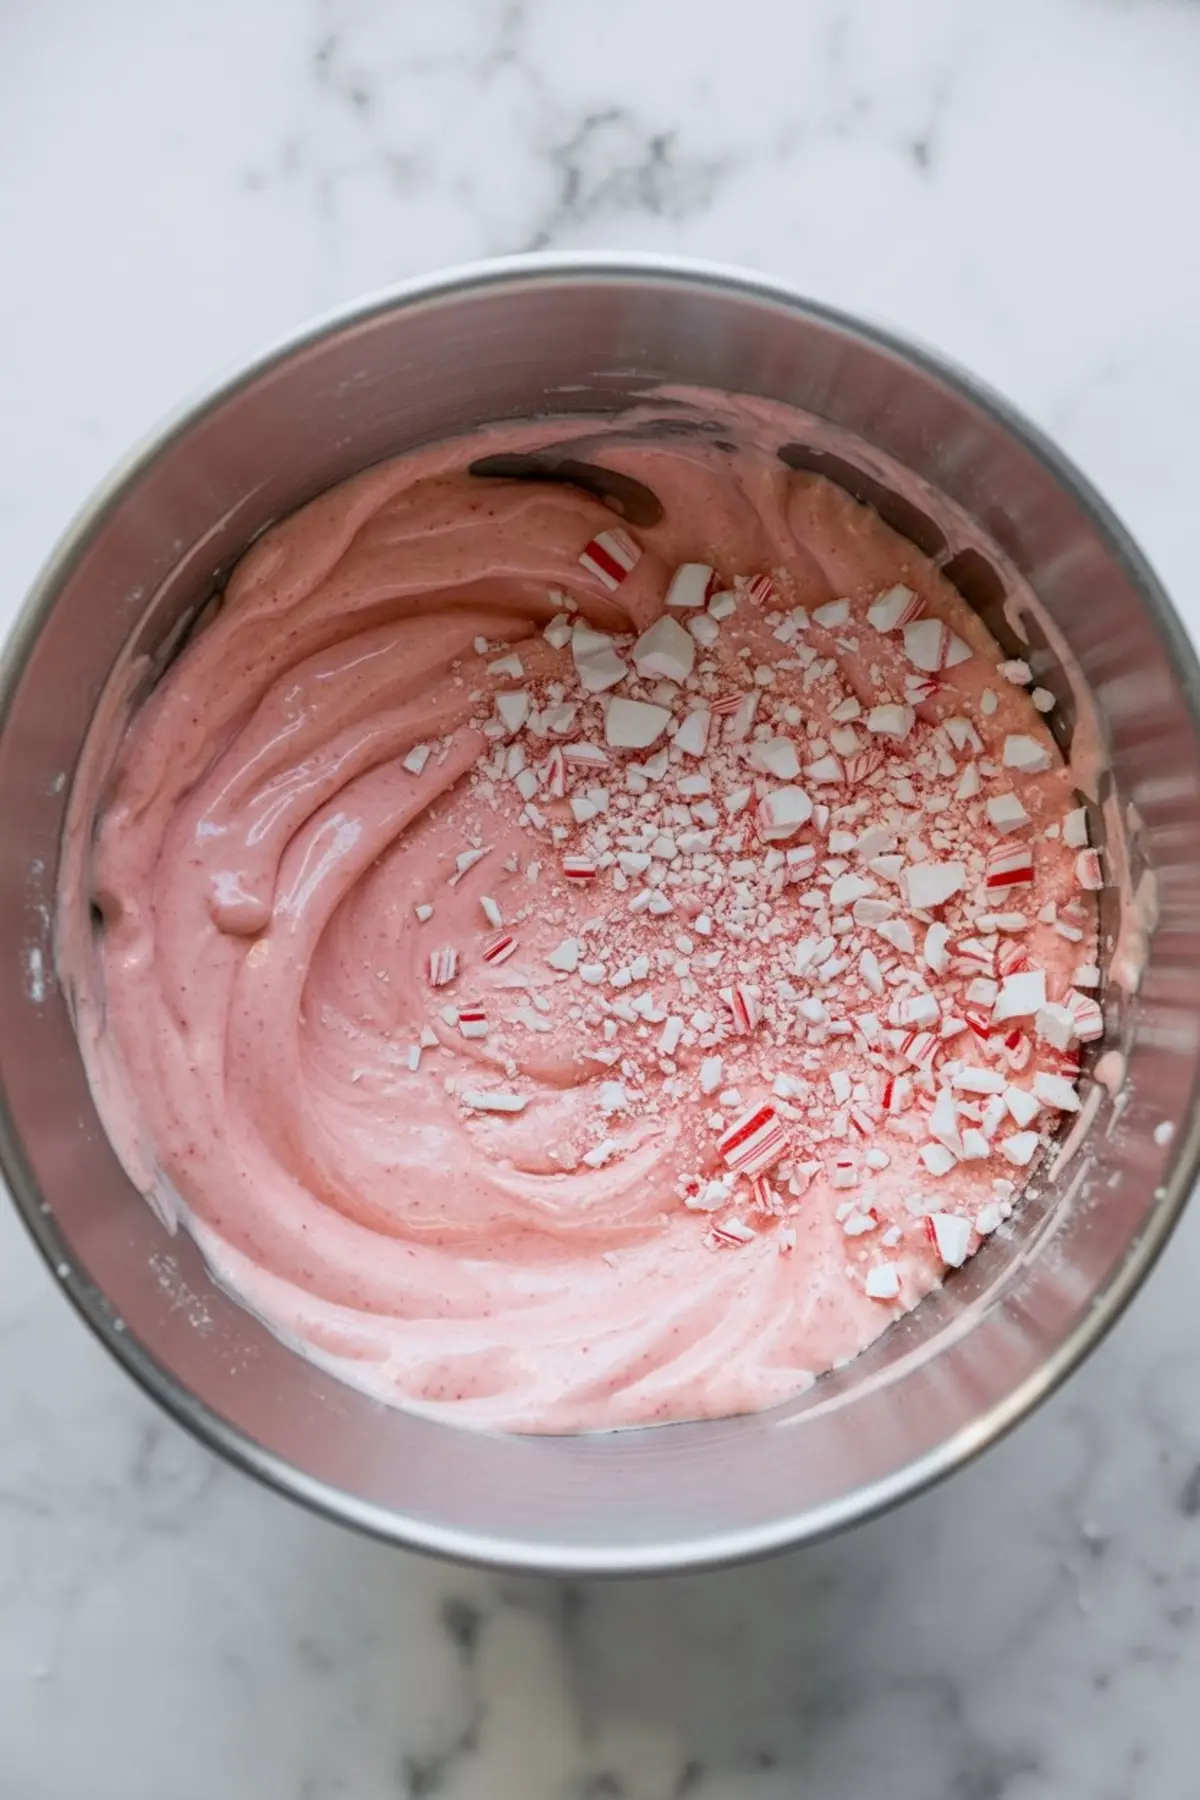
Crushed candy canes add texture inside the filling. Crush them finely so they melt slightly into the mix. That gives you bits of mint without crunching through large shards.
Peppermint Extract vs. Crushed Canes: A Balancing Act
I’ve tested a few combinations here. Full extract without crushed candy made the filling smooth but flat in flavor. Too many crushed candy canes without extract made the texture gritty and the flavor weak after chilling.
In my notes, the best balance came from combining ½ teaspoon peppermint extract with ½ cup crushed candy. The extract gives it that clean, cool mint throughout. The crushed canes melt just enough to add interest without fighting the smooth cream.
This same flavor balance works beautifully in Candy Cane Cupcakes, which use a similar ratio in the frosting.
Topping That Adds Height and Holiday Finish
Once the filling sets, I pipe whipped cream around the edges. It frames the pie without hiding the blush pink filling. You can also use store-bought whipped topping if the party prep is already stretching your energy.
Crushed candy canes or mini ones placed upright in the center give it a festive look that doesn’t wilt or slide in the cold.
If you’re aiming for another chilled and layered holiday dessert, try these Candy Cane Chocolate Mousse Cups which layer mousse instead of cream cheese.
Storage, Serving, and Make-Ahead Tips That Work
This pie improves after sitting. The flavors round out and the filling firms. I always chill for at least four hours, but overnight is even better. Keep it loosely covered to avoid moisture buildup.
It keeps in the fridge for up to two days without losing structure. Don’t freeze it—the texture won’t recover.
For clean slices, use a warm knife and wipe between cuts. That helps show off the filling layers and keeps the crushed topping from dragging down into the cream.
Serve chilled, never room temp. The structure depends on the cold. I usually remove it from the fridge about five minutes before slicing.
Related Recipes for Holiday Dessert Planning
Need more winter party ideas? Try these next.
• Candy Cane Cake – A layered beauty with bold peppermint flavor.
• Candy Cane Brownie Bites – Small, rich, and festive.
• Candy Cane Chocolate Mousse Cups – Great for single-serve elegance.
Save, Share, and Let’s Bake Together

Save this Candy Cane Pie Recipe to your Christmas Desserts board for later. If you make it, let me know how it turned out in the comments below. Did you try a twist with white chocolate or a dash more extract?
Feel free to ask questions if you’re not sure about texture or prep timing. I read every note, and the best baking happens when we learn from each other.
Candy Cane Pie Recipe

This creamy Candy Cane Pie is the ultimate no-bake holiday dessert, made with a chocolate cookie crust, fluffy peppermint filling, and crushed candy cane topping. Whether you’re planning a winter party or just need a quick festive treat, this peppermint pie recipe is as eye-catching as it is delicious. Perfect for make-ahead prep and great for serving at holiday gatherings, it’s one of the easiest and most delicious pies you’ll make this season. Save this for your collection of Christmas pie recipes—it’s cool, minty, and totally irresistible.
Ingredients
- FOR THE CRUST
- 24 chocolate sandwich cookies (like Oreos)
- 5 tablespoons unsalted butter, melted
- FOR THE FILLING
- 1 package (8 oz) cream cheese, softened
- 1 cup powdered sugar
- 1/2 teaspoon peppermint extract
- 1/4 teaspoon vanilla extract
- 1 1/2 cups heavy whipping cream
- 6–8 drops red food coloring (optional)
- 1/2 cup crushed candy canes (plus extra for garnish)
- FOR THE TOPPING
- 1 1/2 cups whipped cream or whipped topping
- Extra crushed candy canes or mini candy canes, for garnish
Instructions
- MAKE THE CRUST: Place the chocolate sandwich cookies in a food processor and pulse until they become fine crumbs. Add the melted butter and process again until the mixture is evenly moistened. Firmly press the crumb mixture into the bottom and up the sides of a 9-inch pie dish or tart pan to form an even crust. Refrigerate the crust for at least 15 minutes while preparing the filling.
- MAKE THE PEPPERMINT FILLING: In a large mixing bowl, beat the softened cream cheese until smooth and creamy. Add the powdered sugar, peppermint extract, and vanilla extract, and continue beating until fully blended. In a separate bowl, whip the heavy cream until stiff peaks form. Gently fold the whipped cream into the cream cheese mixture in batches, being careful not to deflate the mixture. If using, add red food coloring and fold just until the color is evenly distributed. Stir in the crushed candy canes until well combined.
- ASSEMBLE THE PIE: Spoon the peppermint filling into the chilled crust and spread it evenly with a spatula. Pipe or spoon the whipped topping around the edges of the pie. Sprinkle with additional crushed candy canes or place mini candy canes in the center for decoration.
- CHILL: Cover the pie loosely with plastic wrap and refrigerate for at least 4 hours, or overnight, until the filling is firm and sliceable.
Notes
Use gel-based food coloring for a more vibrant color with less liquid. Crush candy canes finely to avoid overly crunchy pieces in the filling. Pie can be made up to two days ahead and stored covered in the refrigerator.