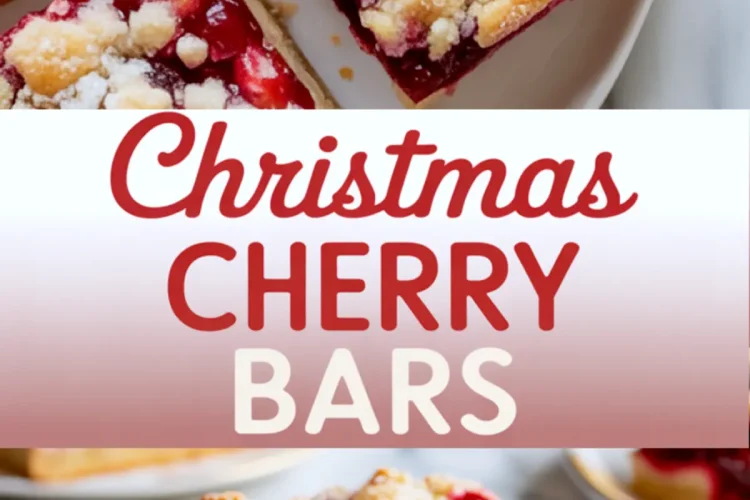
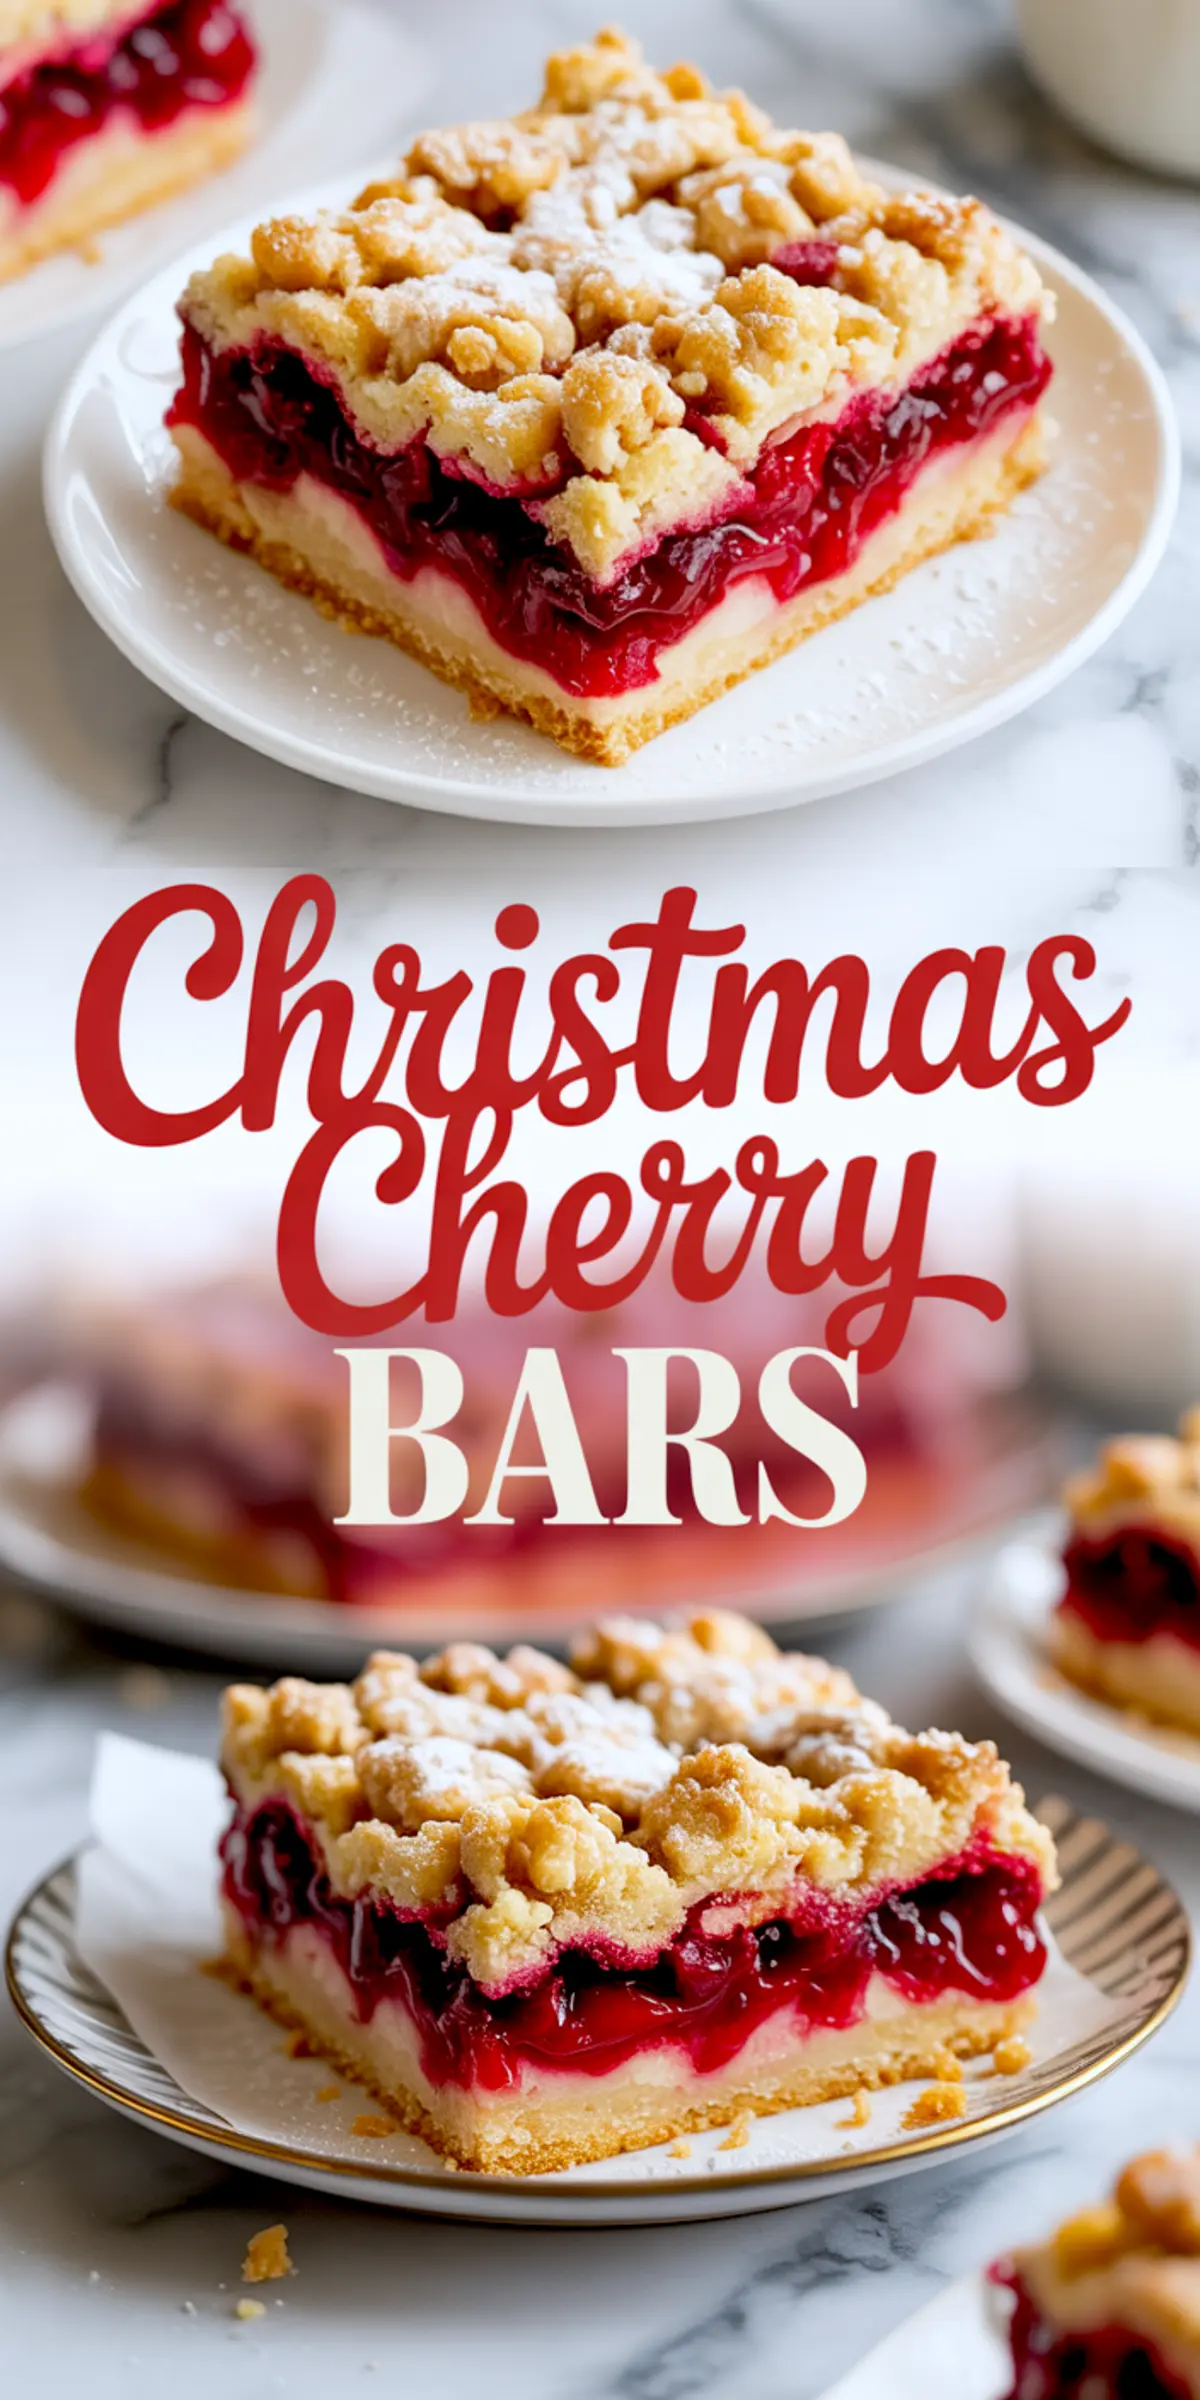
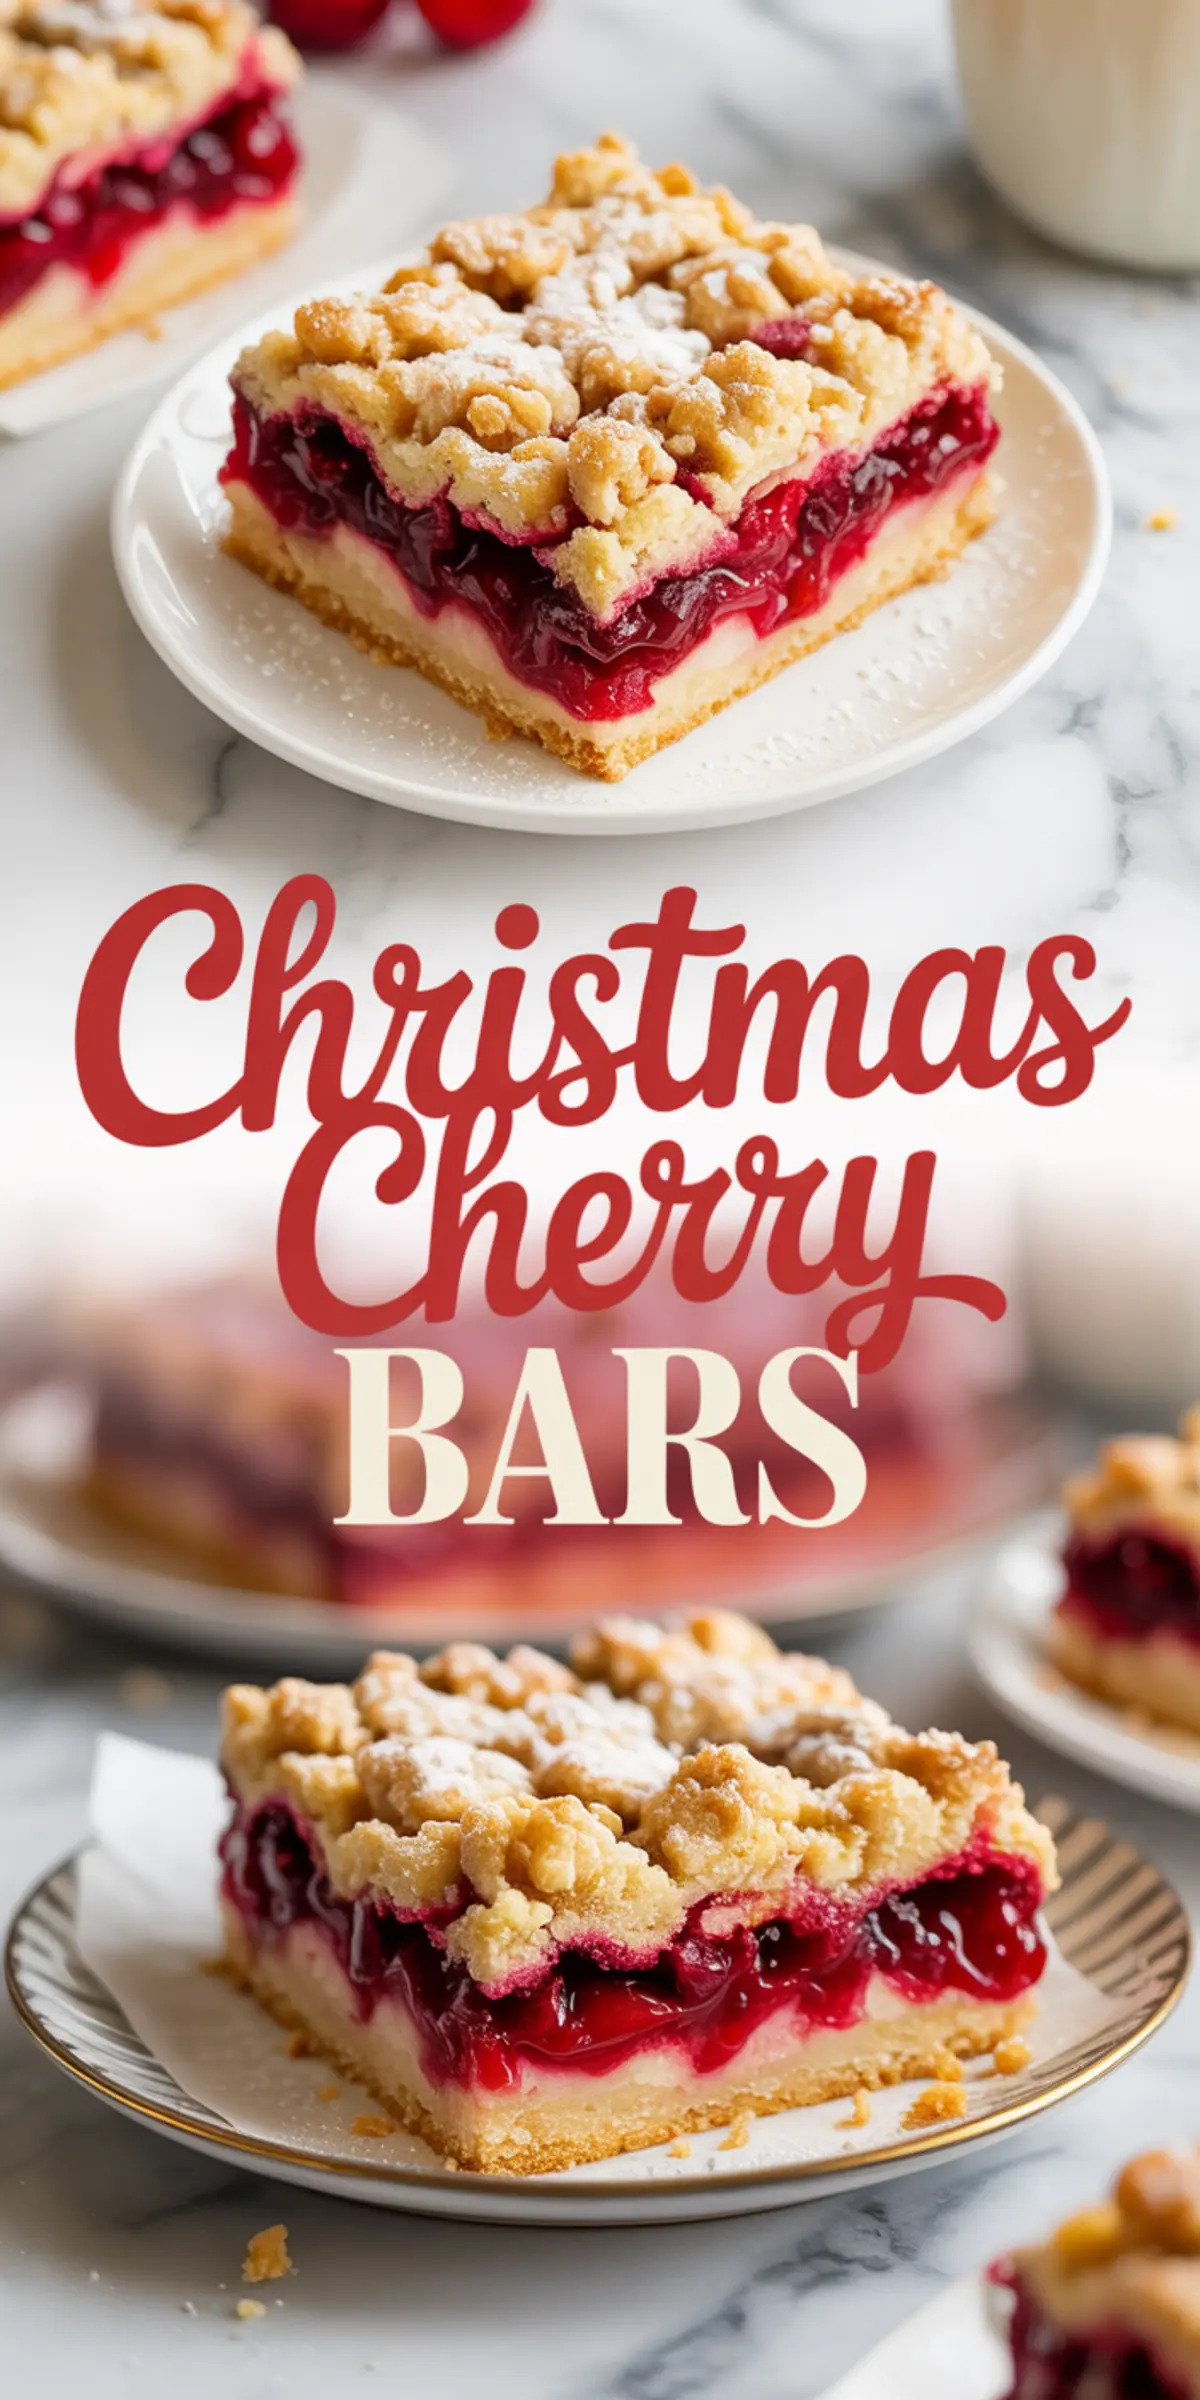
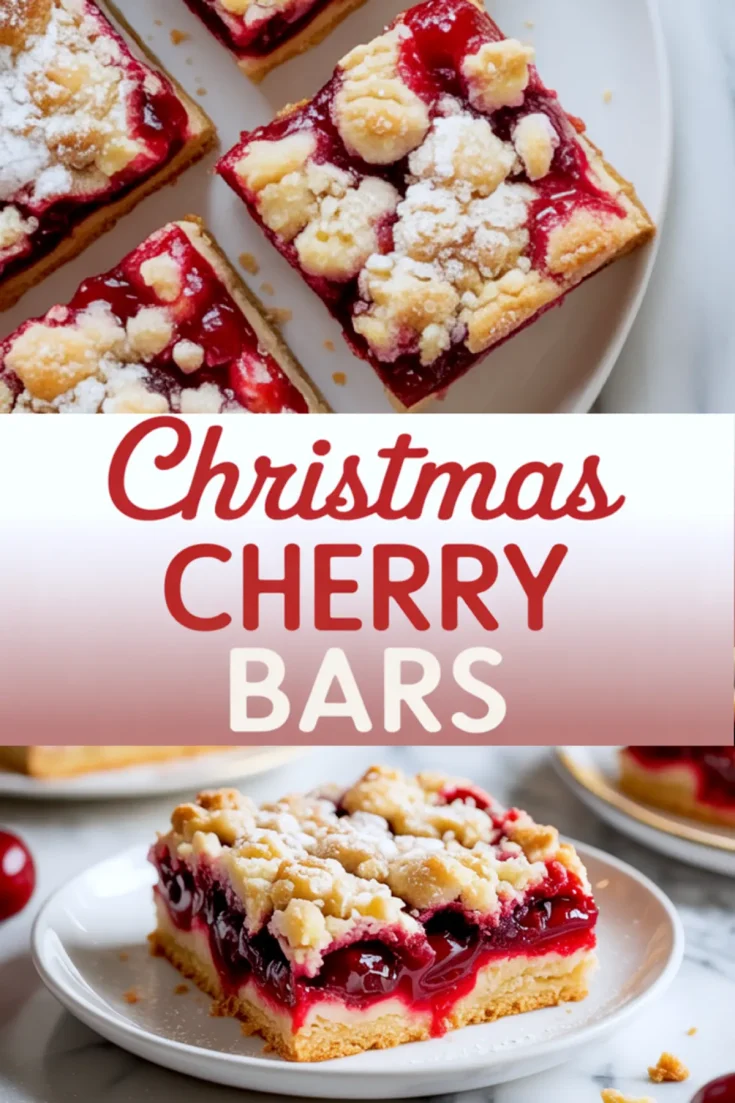
There’s something about cherry desserts that feels deeply tied to December. These Christmas Cherry Bars bring that feeling to life with a sturdy vanilla-almond base, a glossy layer of cherry pie filling, and a golden crumble top that bakes into a rustic finish. This recipe balances ease and presentation. You’ll get that festive red color from the filling, a neat square cut from the firm base, and just enough almond to set it apart from your usual cherry bars recipe.
If you’ve been looking for a reliable, giftable holiday dessert that travels well and looks bright on a holiday desserts table, this one delivers. You’ll learn how to keep the base soft but structured, how to prevent sogginess, and how to get those clean slices even after hours of serving.
Following a special diet?
Every recipe on this site can be converted to gluten-free, vegan, dairy-free, keto, nut-free or egg-free with adjusted ratios so nothing falls flat.
Try the Recipe Converter →The Base Holds Everything Together
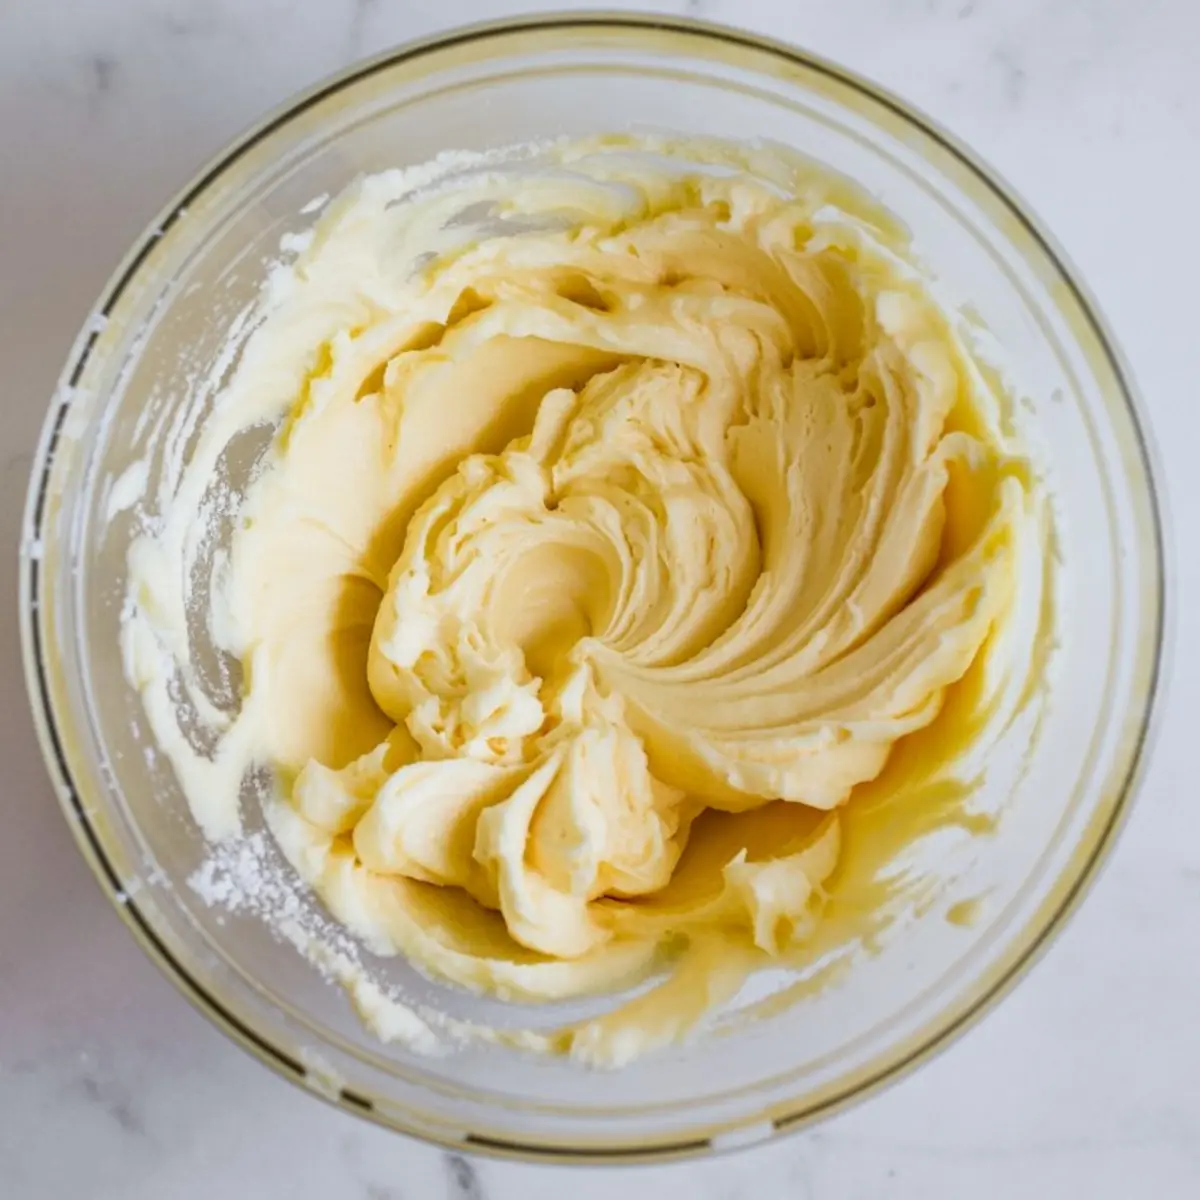
Softened butter starts this batter off with flavor and structure. I’ve found that room temperature butter gives the crust that light, cake-like bite without turning greasy. Granulated sugar brings the needed sweetness without overcomplicating the texture.
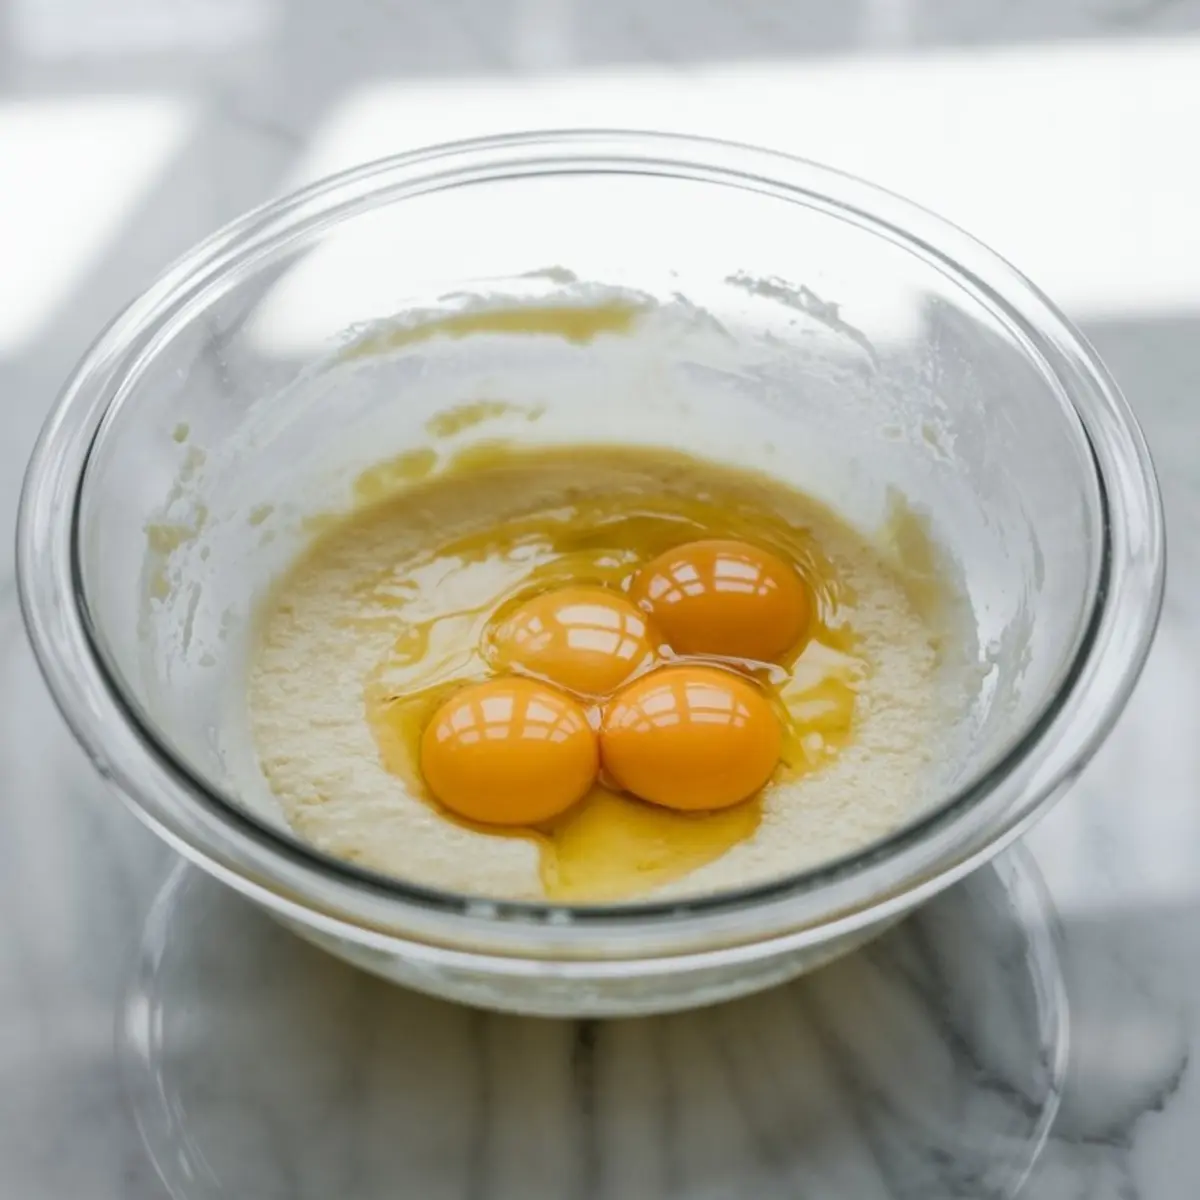
Eggs give the batter its body. I use four. It might seem like a lot, but with the two layers and a thick cherry filling, it gives the crust the backbone it needs to hold its shape. That also means you can slice and stack these cherry dessert bars without any mess.
Vanilla extract adds comfort, but the real depth comes from a splash of almond extract. You can leave it out, but I wouldn’t. Almond rounds out the cherry flavor and makes the whole thing taste more finished. I’ve tested it both ways, and every time I skip it, something feels missing. This almond note separates it from a generic holiday dessert bar.
Choosing Between Homemade and Canned Cherry Filling
I’ve made this recipe with both homemade cherry filling and canned cherry pie filling. If you’re baking in bulk or short on time, the canned version holds up better in texture and thickness. Homemade filling can go soft and leak into the base unless it’s been thickened and cooled properly. For gifts or transport, I use canned. For a quieter family day, I might go with homemade. But I always make sure it’s fully cooled before layering, or it will bleed into the batter.
How to Build the Layers Without Making a Mess
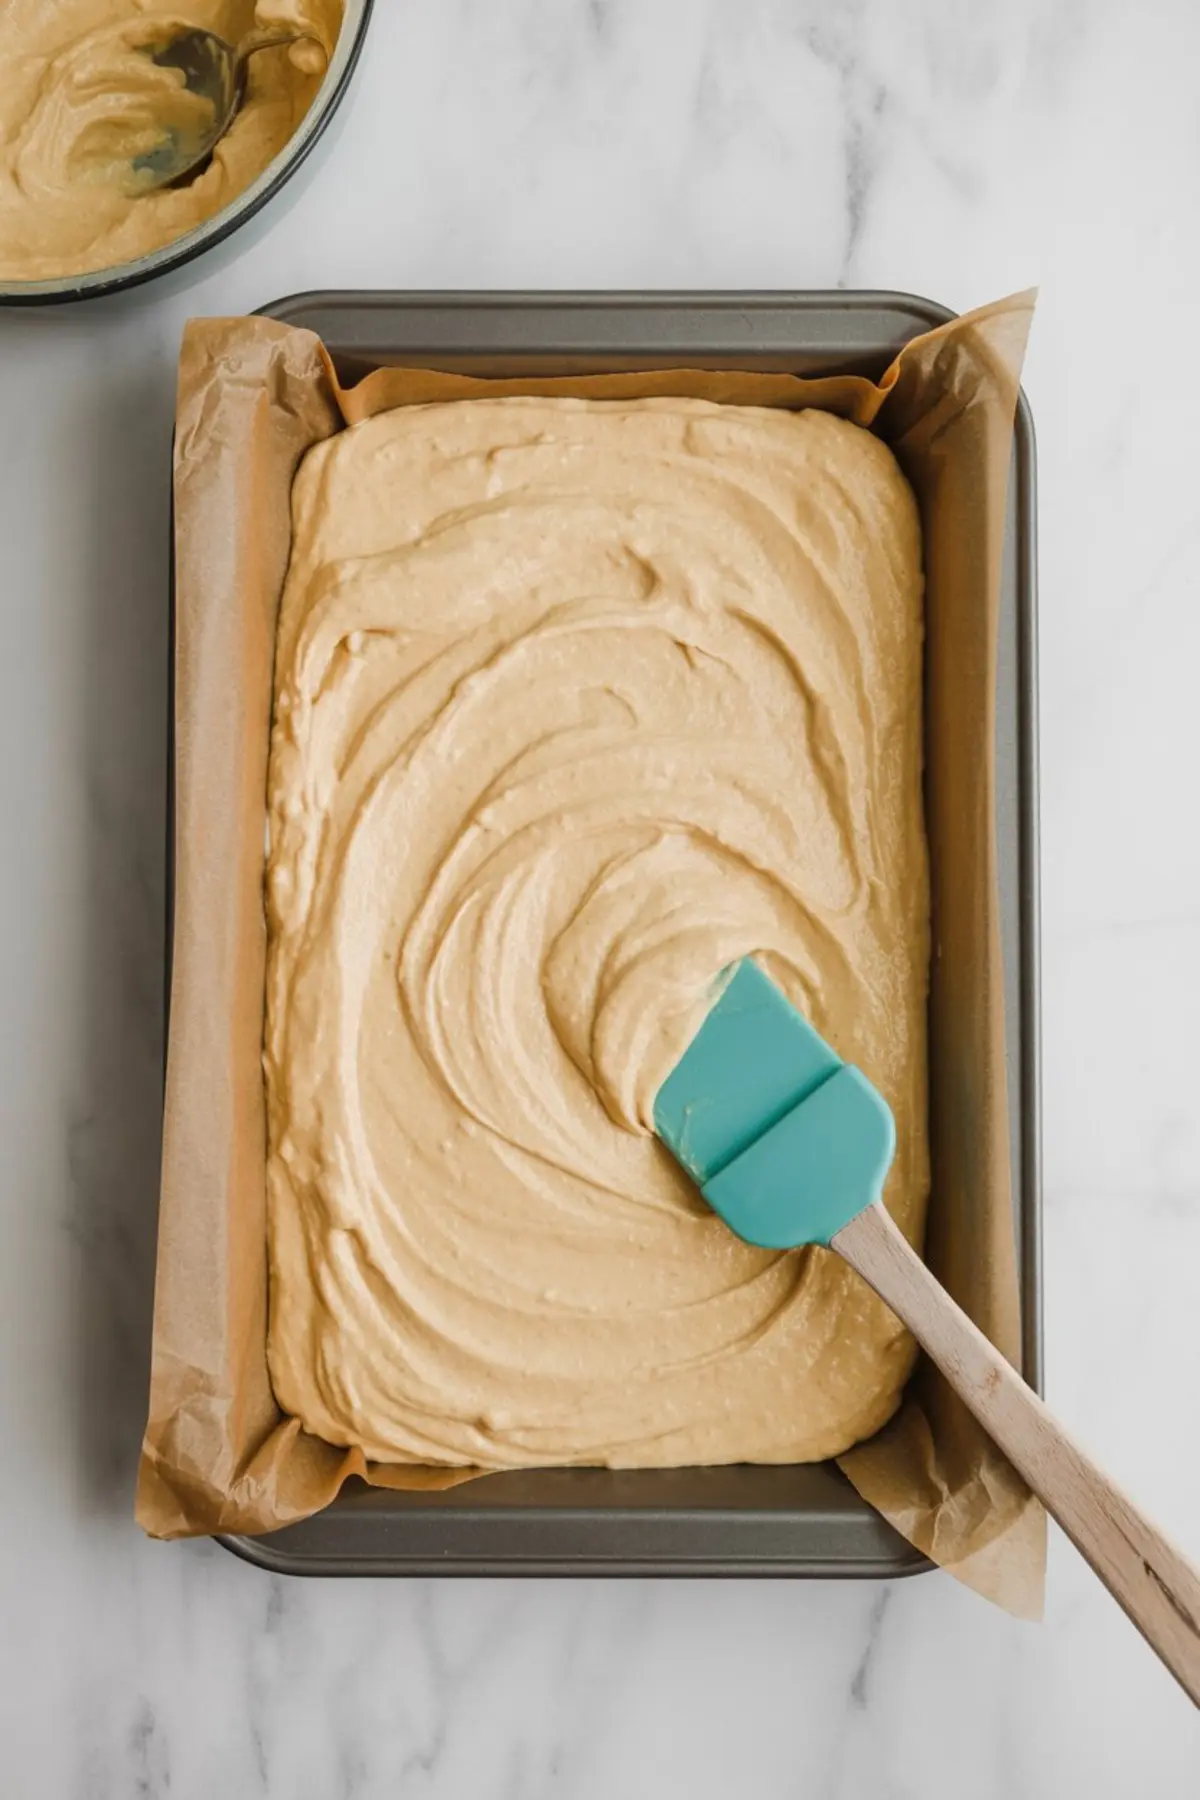
The batter is thick. That’s what gives the bottom structure and the top those golden edges. Spread about two-thirds across the lined pan first. It helps to dampen your spatula slightly if it sticks. I use a silicone one so I can scrape the edges clean and get an even press.
After that, the cherry layer goes on. Two cans spread edge to edge without overflowing. It’s bright, generous, and holds its shape in the oven.
For the top layer, I don’t smooth it out. I drop spoonfuls of the remaining batter over the cherries. The cherry pie filling peeks through and gives the bars a rustic, casual finish. That unevenness bakes up beautifully, and the contrast between the golden top and the red cherry filling feels festive without trying too hard.
Baking Time and Cooling Tips for Clean Cuts
These bars need about 40 minutes in the oven. The edges should look set, and the top will turn golden. The center may look slightly soft at first. That’s expected. As it cools, it will settle and firm up.
Once out of the oven, I leave the pan on a rack to cool for at least an hour. But the real secret to those crisp edges? Refrigeration. Let them chill for another hour before slicing. It makes all the difference.
I dust with powdered sugar just before serving. That little snowy top adds contrast, and it clings nicely to the slightly craggy surface of the crust.
Storing and Sharing Christmas Cherry Bars
I often bake these a day ahead and store them in an airtight container at room temperature. They hold their shape well and stay moist for up to three days. For longer storage, I refrigerate them for up to five days. They’re still soft straight from the fridge.
On busy baking days, I wrap individual bars in wax paper and stack them in tins. They don’t smudge or fall apart, and they look neat when unwrapped. That makes them ideal for neighbor gifts or cookie swaps.
If you’re planning a dessert platter, these bars fit right next to softer cookies and balance the texture. Try pairing them with these Christmas Sugar Cookie Bars for color variety.
Holiday Baking That Actually Travels Well
Many desserts don’t handle travel well. These do. The base holds firm. The filling stays in place. They don’t weep or get soggy. If you’re setting up a Holiday Dessert Recipes board, this one deserves a spot.
They’ve also earned a place on my holiday repeat list. I bring them every year to my aunt’s potluck. They vanish by the time the coffee brews.
For something with a similar festive feel, I also rotate these Cranberry Bliss Bars into my baking days. They hold just as well and add a different fruit tone to the mix.
More Cherry Recipes to Add to Your Holiday Baking List
If you’re collecting cherry ideas this season, consider trying:
- Christmas Red Velvet Cupcakes: Deep color, soft crumb, and a creamy frosting with just enough tang.
- Maraschino Cherry Chocolate Chip Cookies with a chewy base and crisp edge.
- A simple cherry dump cake using yellow cake mix and melted butter, when you’re short on time.
Save and Share This Holiday Favorite
These Christmas Cherry Bars deserve a spot on your holiday Pinterest board. Their sturdy crust, glossy cherry filling, and easy prep make them a go-to for December baking.
If you try them, let me know in the comments. I’d love to hear if you adjusted the almond or used homemade filling. This is one of those recipes that always has room for little twists.
Christmas Cherry Bars
Christmas cherry bars bake up with a soft vanilla-almond crust, a sweet layer of cherry pie filling, and a optional icing drizzle on top. I keep this Christmas cherry bars recipe on repeat when I need a quick dessert that slices neatly and travels well. The crust is soft but sturdy, which holds up to the cherry filling without turning soggy. These cherry dessert bars look bright and festive on a holiday desserts table and taste like something between a cookie and pie. I always save this under cherry recipes that work well for gifting or casual holiday gatherings. If you love easy cherry bars recipe ideas, this one covers all the bases for Christmas baking.
Ingredients
- FOR THE BASE AND CRUMBLE:
- 1 cup (2 sticks) unsalted butter, softened
- 1 1/2 cups granulated sugar
- 1/2 teaspoon salt
- 4 large eggs
- 1 teaspoon pure vanilla extract
- 1/4 teaspoon almond extract (optional, but highly recommended)
- 2 1/2 cups all-purpose flour
- FOR THE FILLING:
- 2 cans (21 oz each) cherry pie filling
- Powdered sugar, for dusting
Instructions
- PREHEAT THE OVEN: Set the oven to 350°F (175°C). Line a 9x13-inch baking pan with parchment paper or lightly grease with nonstick spray.
- MAKE THE BATTER: In a large mixing bowl, cream the softened butter and granulated sugar together until light and fluffy, about 2–3 minutes using a hand mixer on medium speed. Add eggs one at a time, mixing well after each addition. Stir in vanilla extract and almond extract. Gradually add flour and salt, mixing until the batter is smooth and thick.
- SPREAD THE BASE LAYER: Scoop about 2/3 of the batter into the prepared pan and spread it evenly across the bottom using a spatula. Slightly dampen the spatula if needed to prevent sticking.
- ADD THE FILLING: Spoon the cherry pie filling evenly over the base layer, spreading it out to cover the entire surface.
- ADD THE TOP LAYER: Drop spoonfuls of the remaining batter over the cherry filling. Do not worry about covering the entire surface; the exposed cherry filling and uneven top will create a rustic, golden finish.
- BAKE: Place the pan in the preheated oven and bake for 38–42 minutes, or until the top is golden brown and the edges are set. The center may appear slightly soft but will firm up as it cools.
- COOL AND SLICE: Allow the bars to cool completely in the pan. For cleaner cuts, refrigerate for at least 1 hour before slicing into squares. Dust with powdered sugar just before serving.
Notes
If using homemade cherry filling, make sure it is fully cooled before layering. For a stronger almond flavor, increase the almond extract to 1/2 teaspoon. Bars can be stored in an airtight container at room temperature for up to 3 days or refrigerated for up to 5 days.