
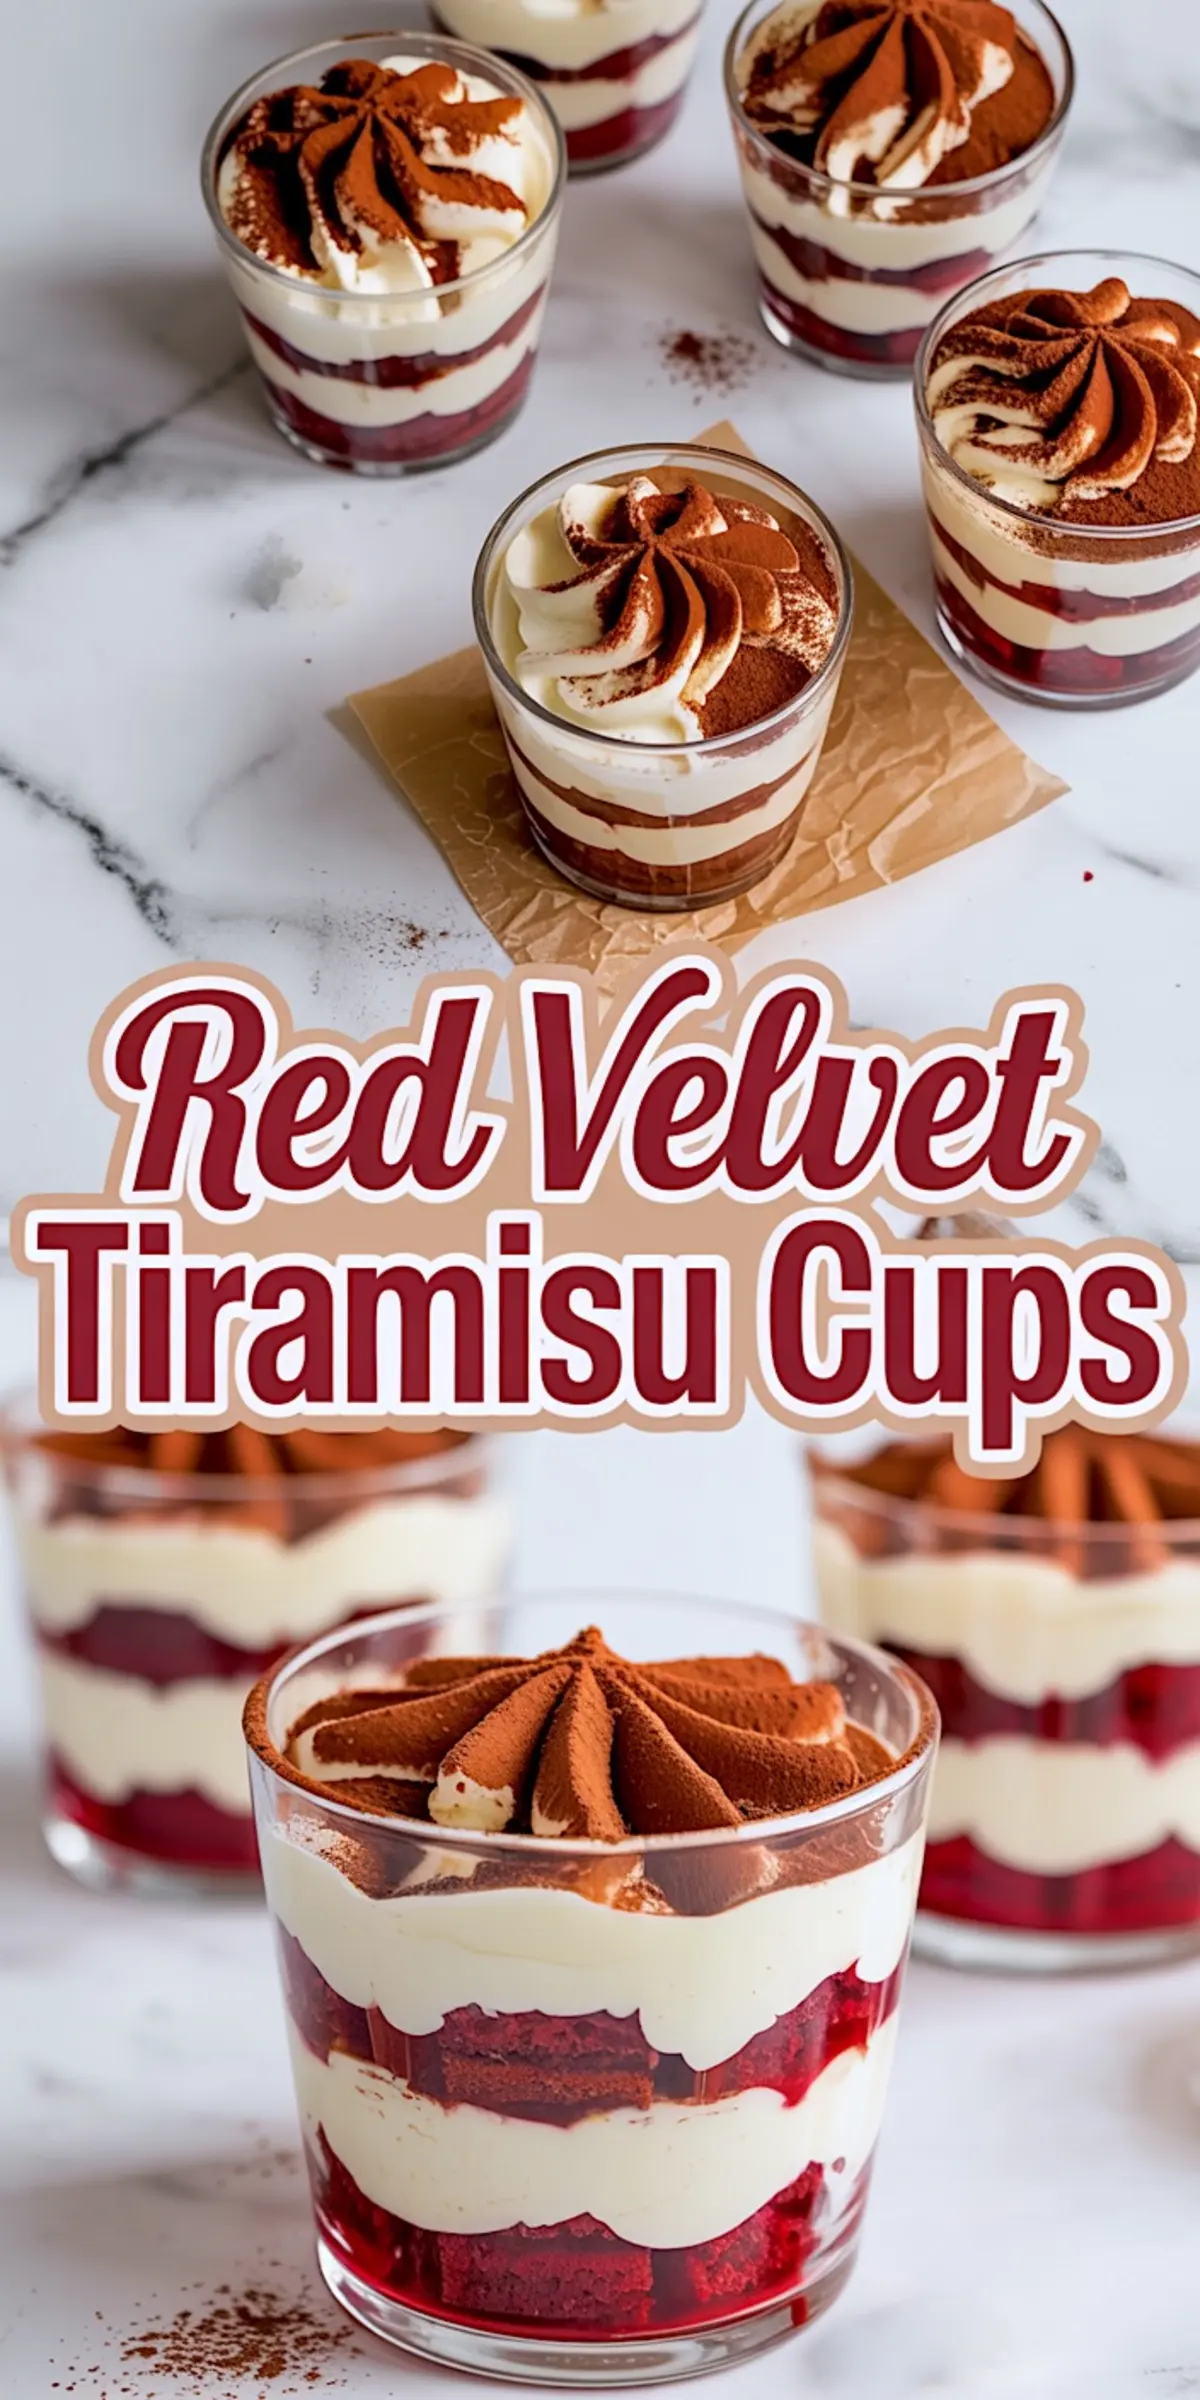
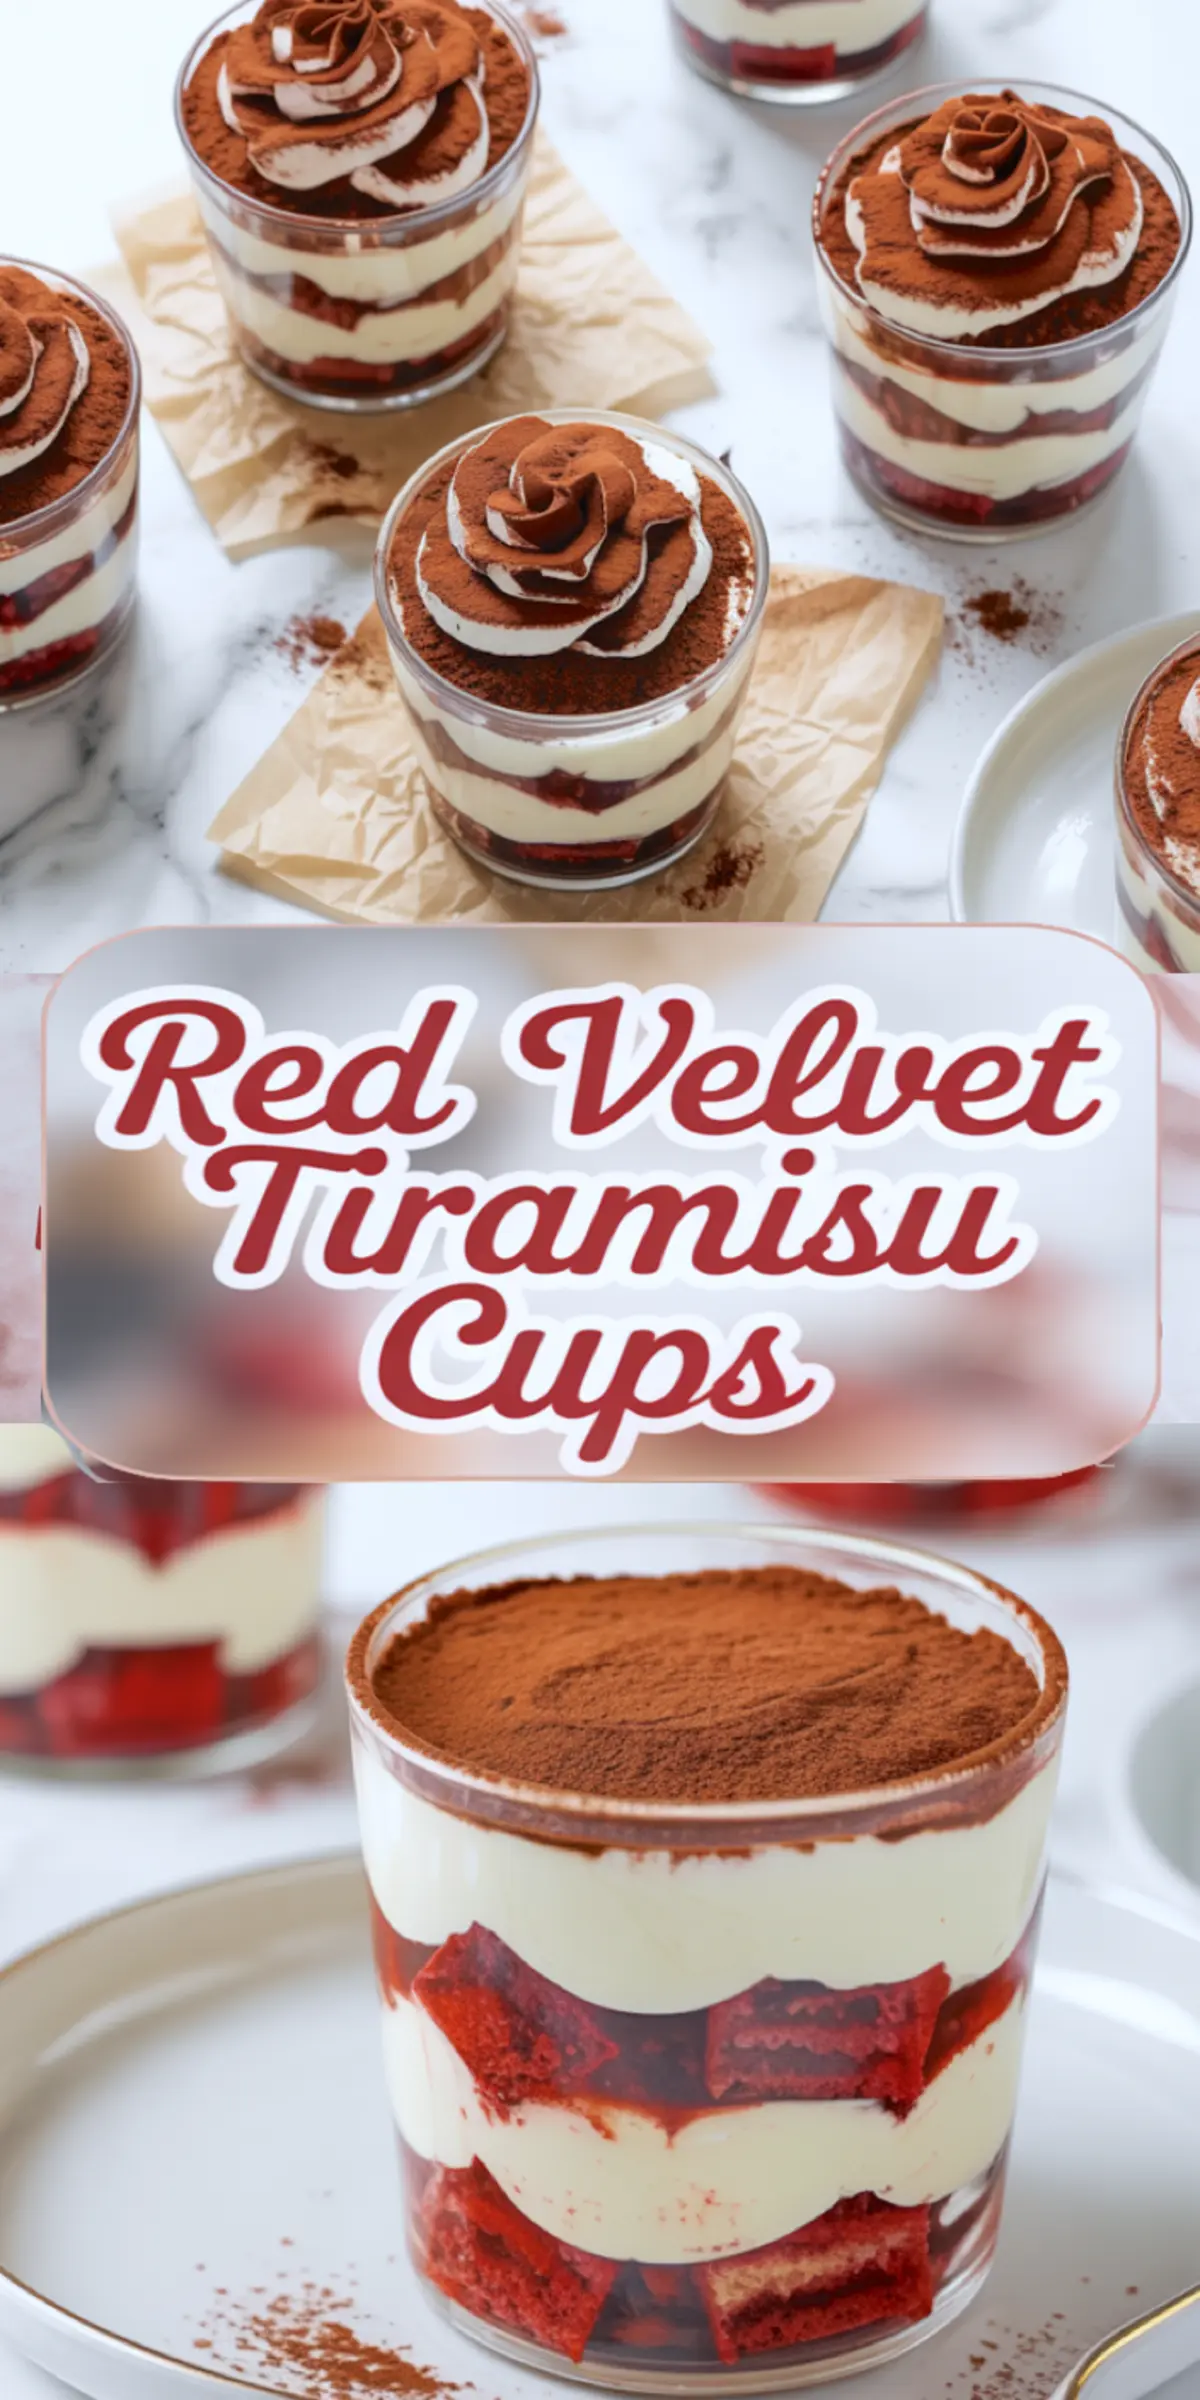
Red Velvet Tiramisu Cups combine two beloved desserts into one stylish, practical presentation. Each cup layers homemade red velvet cake cubes with soft mascarpone cream and a touch of espresso syrup.
The look is striking. The flavors are balanced. The effort stays low.
These individual tiramisu cups are simple to serve, easy to store, and beautiful on a holiday dessert table or romantic dinner tray.
You’ll learn how to build them cleanly, keep the layers distinct, and adjust for sweetness or richness depending on your preference.
Following a special diet?
Every recipe on this site can be converted to gluten-free, vegan, dairy-free, keto, nut-free or egg-free with adjusted ratios so nothing falls flat.
Try the Recipe Converter →Why Red Velvet Cake Works Better Than Ladyfingers
Red velvet has a gentle crumb and slightly tangy finish that stands up well to espresso. Unlike store-bought ladyfingers, which can turn brittle or mushy, red velvet cubes hold structure while absorbing flavor evenly.
I bake the cake in a single 8×8 pan, then slice it into half-inch cubes once cooled. These cubes form the base and middle of each cup, and the height gives room for two full layers without crowding the glass.
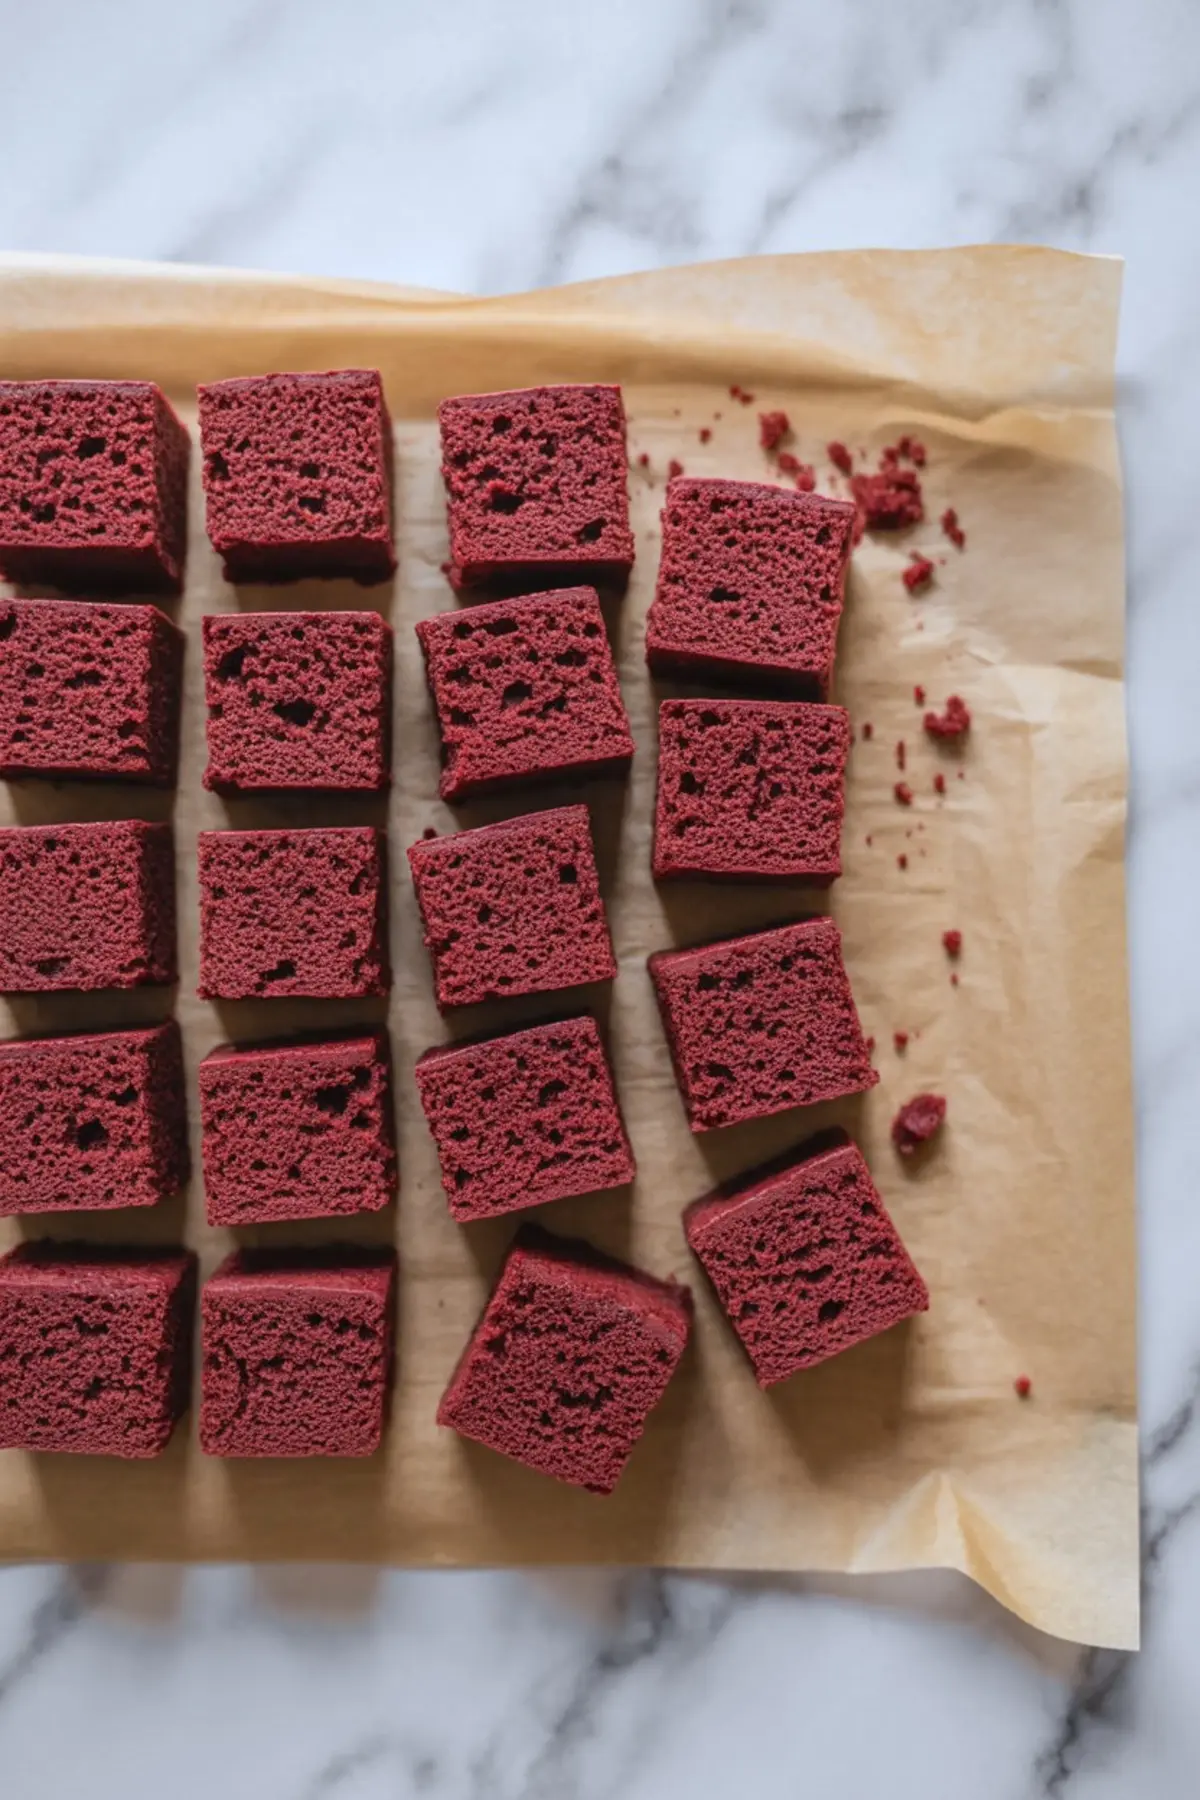
For a comparison, I’ve made this same recipe with boxed red velvet mix. It saves time but lacks the same tender bite. Homemade gives you a moister crumb and more control over color and flavor.
To pair these with another visually bold option, I like serving them next to my Red Velvet Crinkle Cookies on the same tray. The contrast in texture makes each dessert feel more distinct.
Building the Mascarpone Cream Layer That Holds Up
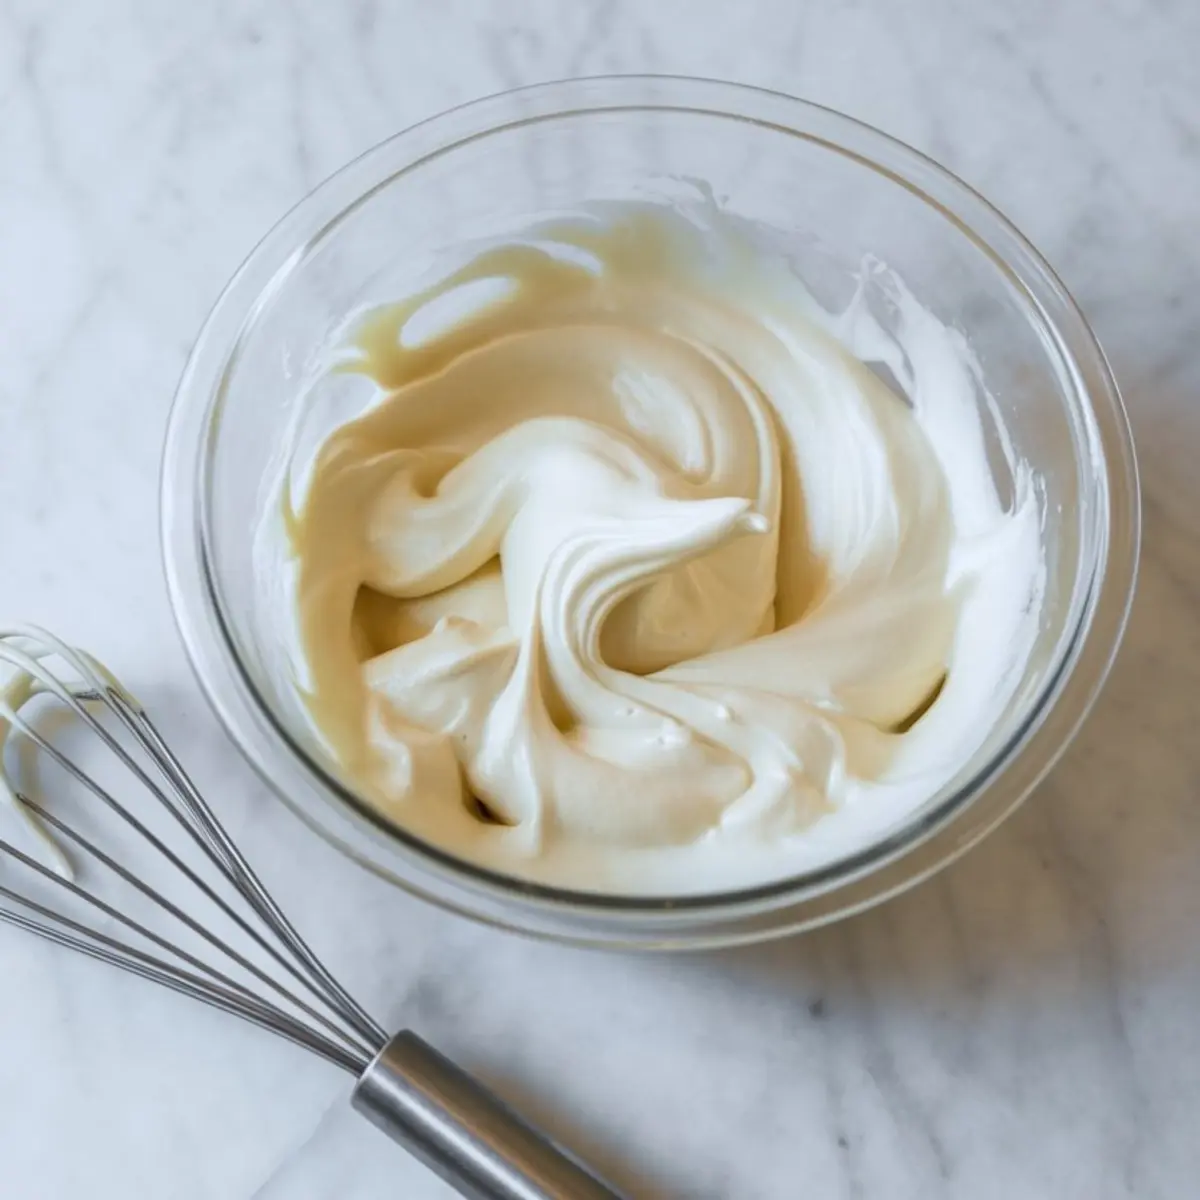
Mascarpone cream should be soft but stable. My version starts with cold heavy cream, whipped separately, then folded into mascarpone mixed with powdered sugar and vanilla.
This approach avoids overmixing and gives the cream just enough lift. You’ll notice it pipes cleanly but doesn’t slide, which matters when you’re stacking layers in a clear cup.
Mascarpone offers a deeper flavor than cream cheese and a smoother finish. If you’ve ever made tiramisu using just whipped cream, you’ll recognize how flat that can taste by comparison.
You can try this layering technique in other forms too. My Tiramisu Cookie Cups use a cookie base instead of cake and give the same layered experience with a crisp shell.
Coffee Syrup with Optional Liqueur

A quick soak in espresso syrup ties the dessert to traditional tiramisu. I brew strong coffee or use cooled espresso, then stir in a tablespoon or two of coffee liqueur.
The liqueur is optional, but I find it brings warmth that rounds out the mascarpone. You can also add a teaspoon of sugar if your coffee is especially bitter. Most times I leave it plain.
Add just a teaspoon or two of syrup per layer. Red velvet is already moist, and too much liquid will make it soggy. You want flavor without saturation.
This method is different from my Easy Tiramisu Recipe, where ladyfingers need a more generous soak. Here, you drizzle lightly.
Layering Like a Pro, Even Without Piping Tools
Start with red velvet cubes, then drizzle the coffee syrup. Add mascarpone cream with a spoon or piping bag. Repeat once or twice depending on cup size.
I usually do two layers of each for standard glass tumblers.
If the cups are shallow, one layer still delivers plenty of flavor.
For the top, I reserve a portion of the mascarpone cream and pipe it using a star or rose tip. Then I dust with unsweetened cocoa powder. The cocoa cuts through the sweetness and gives a clean visual contrast.
These cups remind me of my Easy Tiramisu Dip in spirit. Both use similar ingredients but adapt well to casual or elegant occasions.
Storage, Serving, and Practical Tips
Once assembled, refrigerate for at least four hours. Overnight is better. The chill time allows the flavors to meld and the cream to set.
Cover each cup with plastic wrap if making ahead.
Add the piped top layer and cocoa dusting just before serving for the best texture.
These will hold in the fridge for up to two days. Beyond that, the cream may start to loosen. I do not recommend freezing them.
Serve them cold, straight from the fridge. They don’t need garnishes, but chocolate curls or edible flowers can be added for extra detail.
Pair these with Red Velvet Snowball Cookies for a red-and-white color theme on your dessert spread.
Save This One and Tell Me How Yours Turned Out
These tiramisu dessert cups look like they belong at a catered event, but they’re built with simple ingredients and no complicated techniques. If you’ve made them and tried a variation—extra coffee syrup, or maybe no cocoa on top—I’d love to hear about it.
Leave a comment below and let me know how yours turned out. Or ask a question if something gave you trouble.
And pin this recipe to your dessert board. It’s one worth keeping for Valentine’s Day, Christmas, or any evening when something soft, layered, and thoughtful feels right.
Red Velvet Tiramisu Cups Recipe

These Red Velvet Tiramisu Cups are an elegant twist on a classic Italian favorite. Layers of red velvet cake, whipped mascarpone cream, and a dusting of cocoa make these individual tiramisu cups perfect for holidays, dinner parties, or romantic date nights. Unlike traditional tiramisu, these are made in clear cups for a beautiful layered look—no baking dish needed. If you’re searching for creative red velvet dessert ideas, mini tiramisu cups, or tiramisu in a cup recipes, this festive no-bake option will impress with its bold color and creamy texture. Great for Christmas dessert tables, Valentine’s Day, or any time you want a stylish sweet treat.
Ingredients
- FOR THE RED VELVET CAKE
- 1 ¼ cups all-purpose flour
- 1 tbsp cocoa powder
- ½ tsp baking soda
- ¼ tsp salt
- ½ cup buttermilk
- 1 tsp white vinegar
- 1 tsp vanilla extract
- 1 tbsp red food coloring (gel preferred)
- ½ cup unsalted butter, softened
- ¾ cup granulated sugar
- 1 large egg
- FOR THE MASCARPONE CREAM
- 1 cup mascarpone cheese, room temperature
- 1 cup heavy cream, cold
- ½ cup powdered sugar
- 1 tsp vanilla extract
- FOR THE SOAKING SYRUP
- ½ cup strong brewed coffee or espresso, cooled
- 2 tbsp coffee liqueur (optional but recommended)
- 1 tbsp sugar (optional, for added sweetness)
- FOR GARNISH
- Unsweetened cocoa powder, for dusting
- Additional mascarpone cream (reserved from above)
- Optional: chocolate curls or edible flowers
Instructions
- PREPARE THE RED VELVET CAKE: Preheat the oven to 350°F (175°C) and grease and line an 8x8-inch baking pan. In a small bowl, whisk together the flour, cocoa powder, baking soda, and salt. In another bowl, mix the buttermilk, vinegar, vanilla extract, and red food coloring. In a large mixing bowl, cream the softened butter and sugar until light and fluffy. Add the egg and beat well to combine. Alternate adding the dry and wet mixtures into the butter mixture, starting and ending with the dry ingredients. Mix until just combined and smooth.
- BAKE AND COOL: Pour the batter into the prepared pan and smooth the top. Bake for 20–25 minutes or until a toothpick inserted into the center comes out clean. Allow the cake to cool completely in the pan. Once cooled, cut the cake into ½-inch cubes and set aside.
- MAKE THE MASCARPONE CREAM: In a chilled bowl, whip the cold heavy cream to soft peaks using a hand or stand mixer. In a separate bowl, beat the mascarpone, powdered sugar, and vanilla extract until smooth and creamy. Gently fold the whipped cream into the mascarpone mixture until fully blended and fluffy. Reserve about 1 cup of this mixture for topping later.
- PREPARE THE SOAKING SYRUP: In a small bowl or measuring cup, combine the cooled coffee or espresso with the coffee liqueur and sugar (if using). Stir until the sugar dissolves. Set aside.
- ASSEMBLE THE CUPS: Place a layer of red velvet cake cubes at the bottom of each individual serving glass. Lightly drizzle with the soaking syrup, using about 1–2 teaspoons per layer. Spoon or pipe a generous layer of mascarpone cream over the cake. Repeat the layers, adding more cake, syrup, and cream, until the glasses are nearly full. You can do two or three layers depending on the size of the cups.
- CHILL AND TOP: Refrigerate the assembled cups for at least 4 hours or overnight to allow the flavors to meld and the cream to set. Just before serving, pipe the reserved mascarpone cream on top using a star tip or rose tip for decoration. Dust with unsweetened cocoa powder and garnish with chocolate curls or edible flowers if desired.
Notes
You may substitute the homemade cake with store-bought red velvet cake to save time. To make ahead, assemble up to 24 hours in advance and add the piped topping just before serving for the best texture.
Nutrition Information
Yield
8Serving Size
1Amount Per Serving Calories 631Total Fat 41gSaturated Fat 25gTrans Fat 1gUnsaturated Fat 13gCholesterol 145mgSodium 259mgCarbohydrates 59gFiber 1gSugar 39gProtein 6g