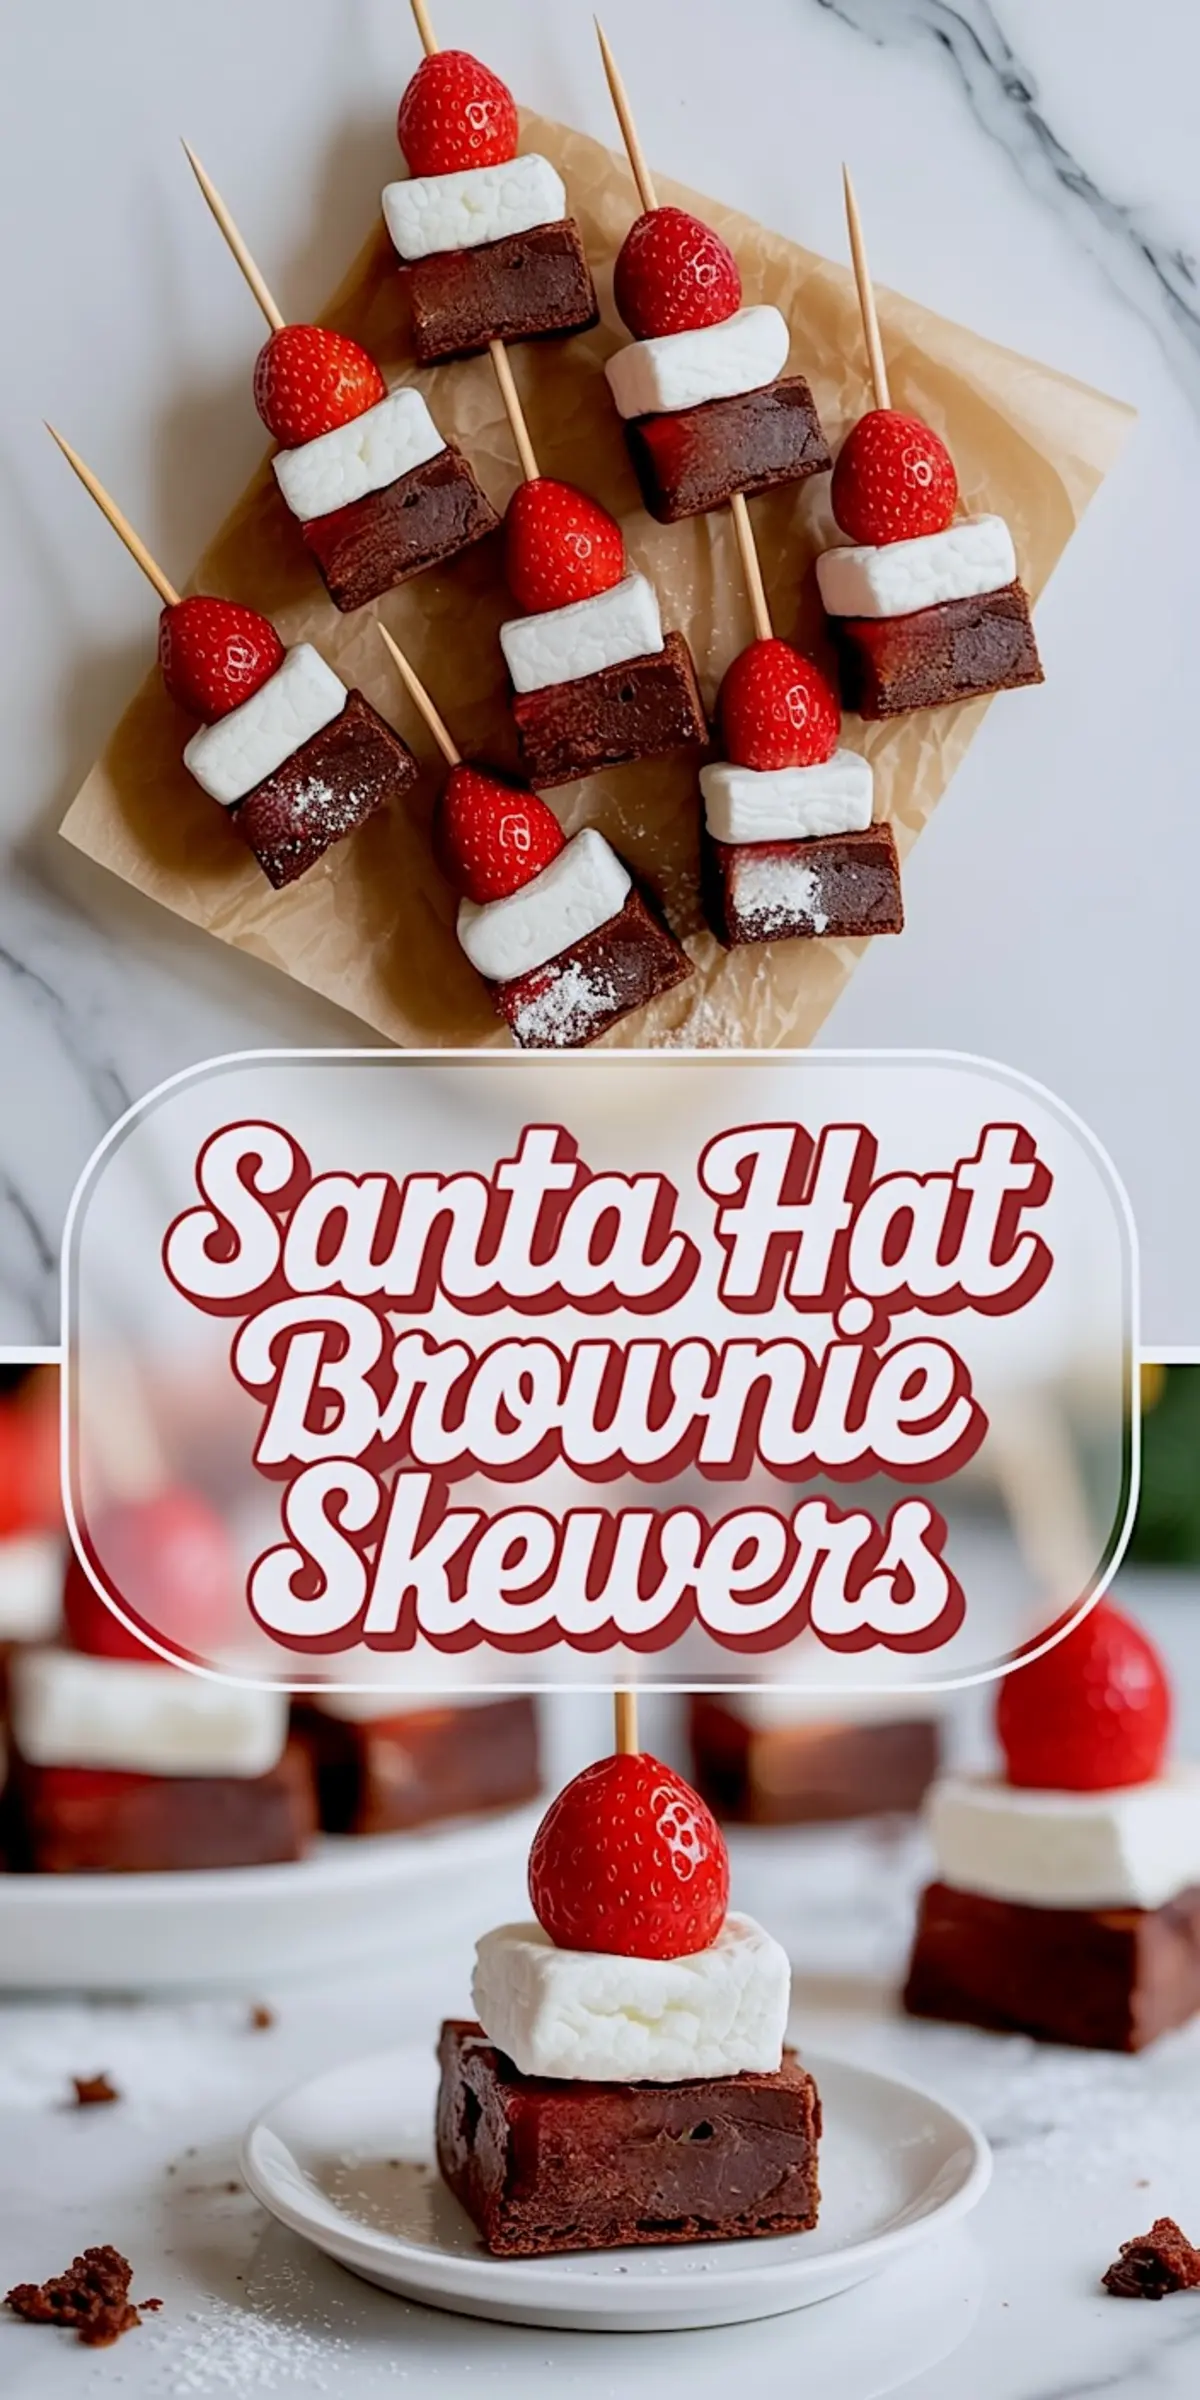
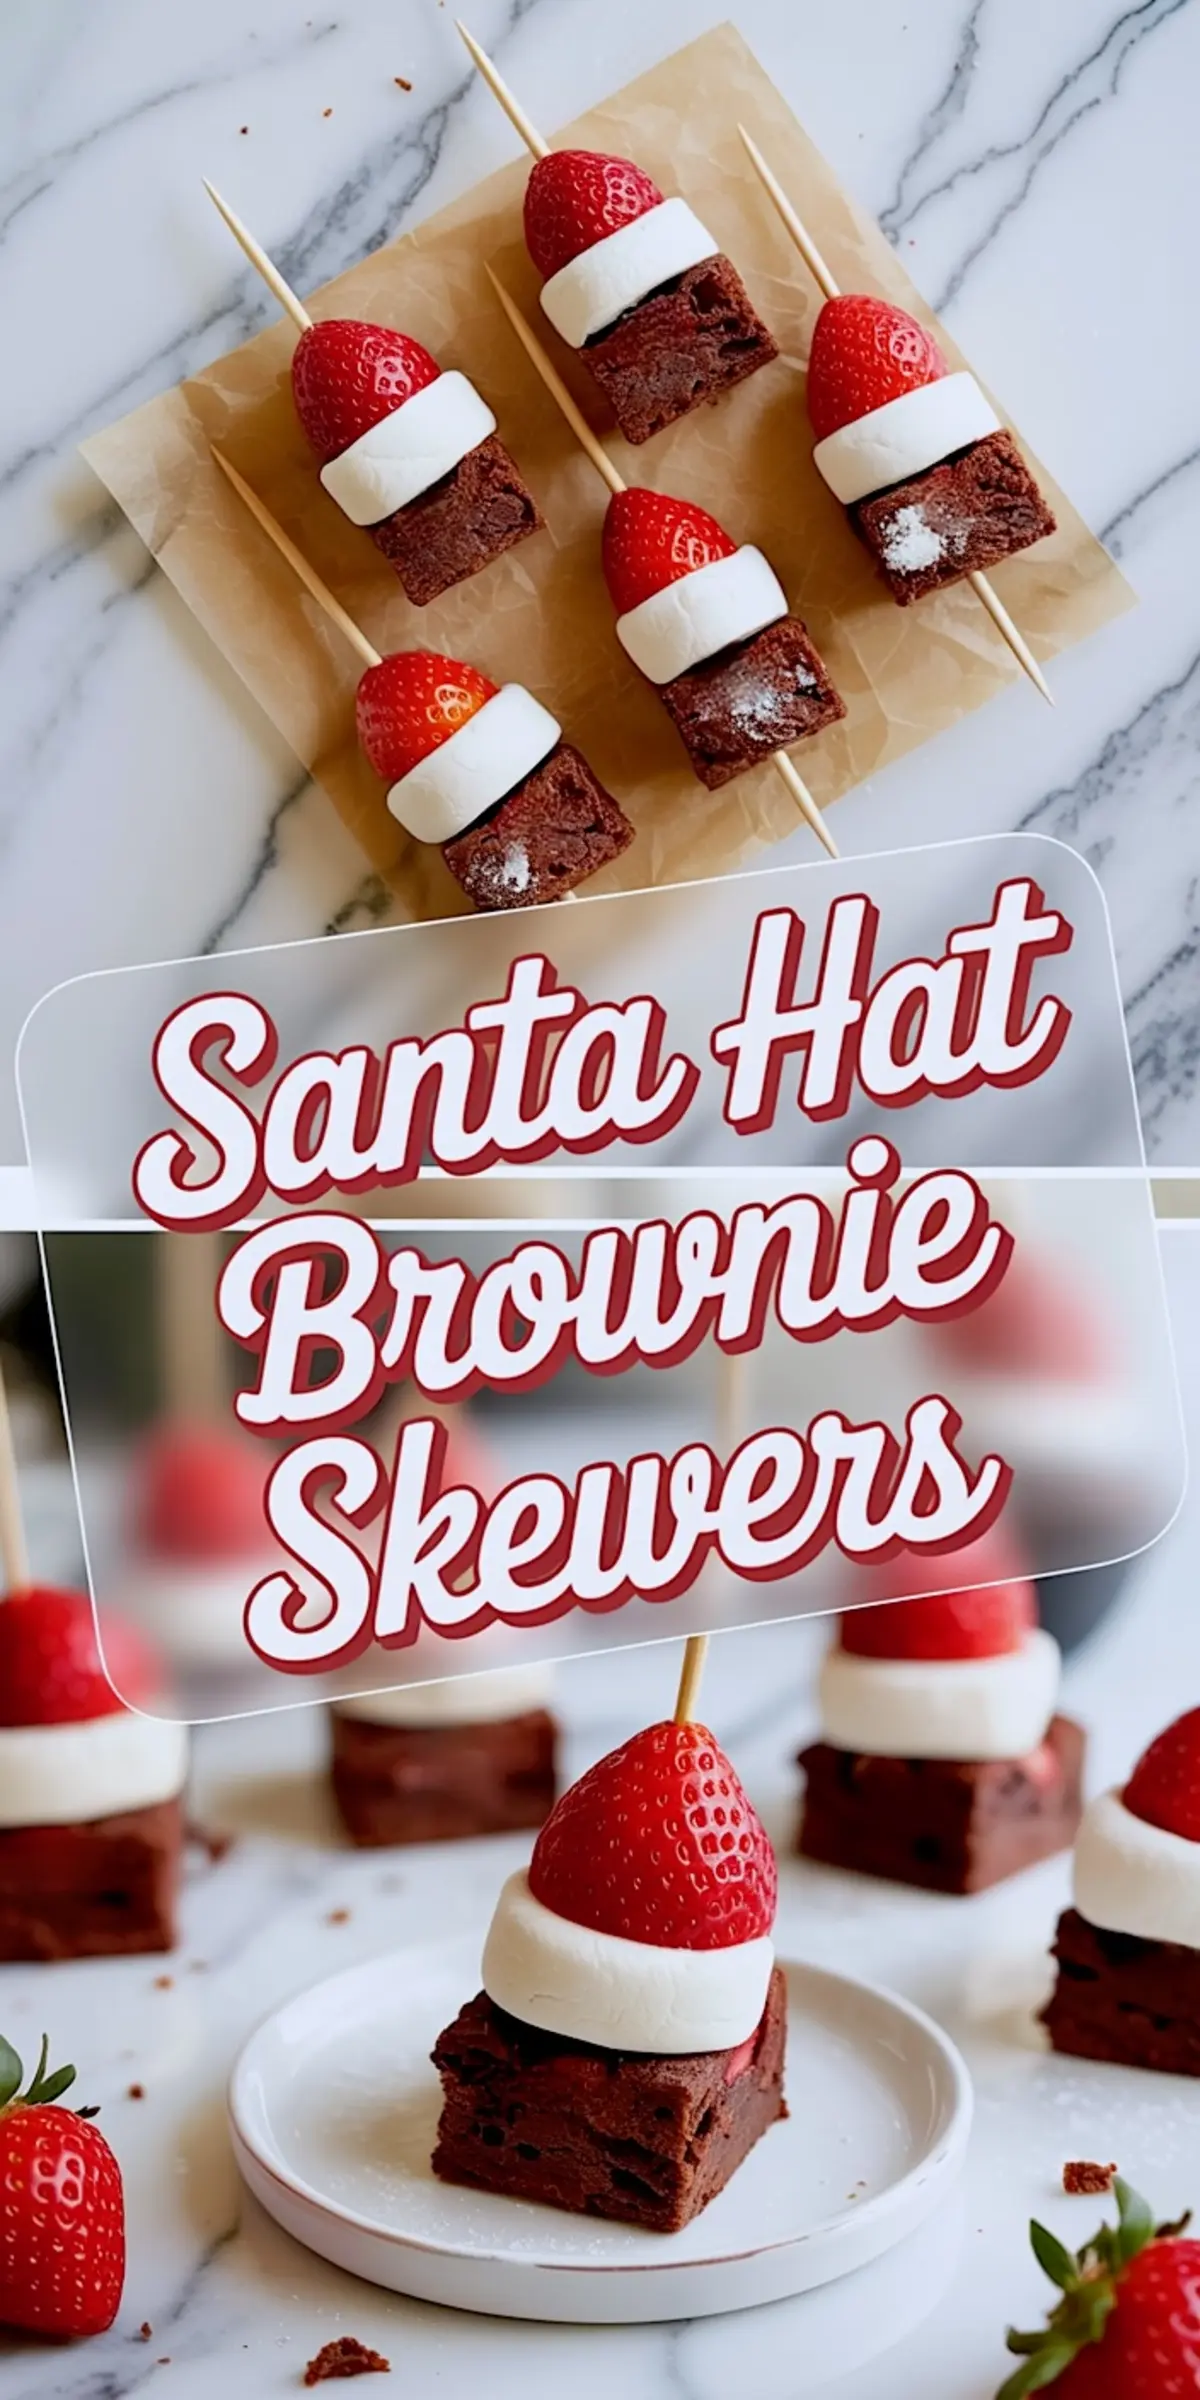
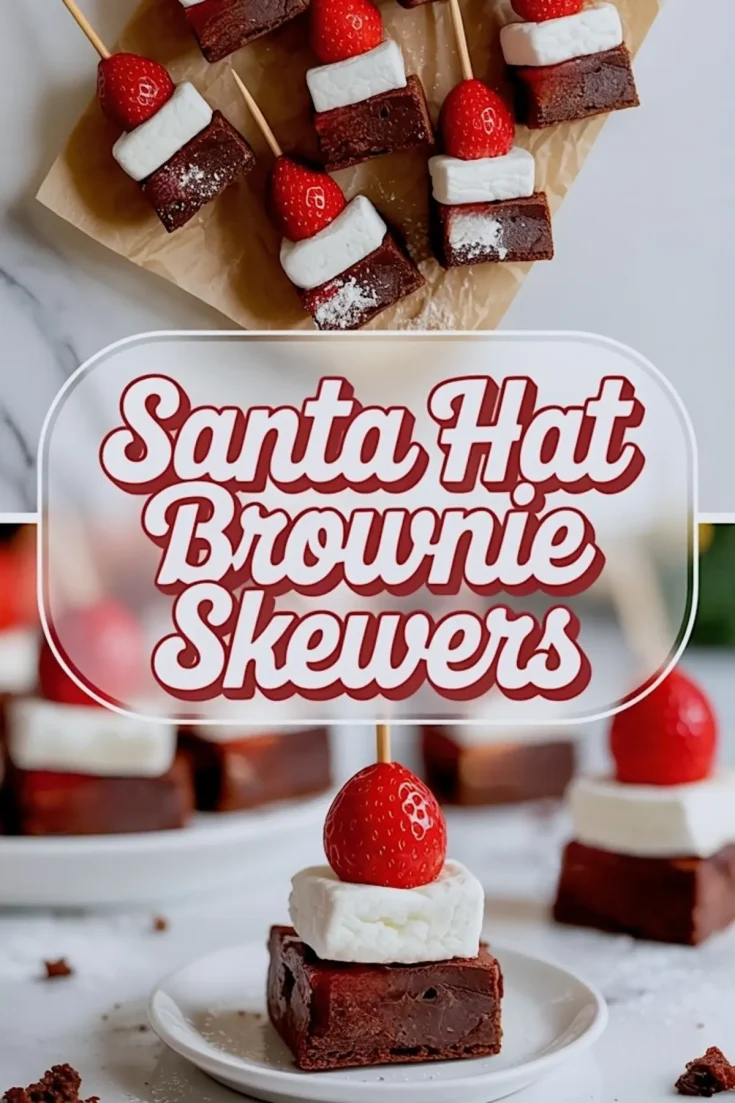
These Santa Hat Brownie Skewers come together with just brownies, marshmallows, and strawberries. No piping. No frosting. No extra bowls to clean after glazing or decorating. You get soft chocolate squares, a fluffy white center, and a bright red top that looks like it belongs on Santa’s dessert tray.
You’ll walk away with a tray of Christmas brownies that actually look like Santa hats. These Brownie Santa Hats do more than fill space on a dessert table. They bring a sense of order to the chaos of holiday baking. Kids grab them. Adults admire them. You don’t need piping bags or precision, just simple stacking.
These brownie strawberry Santa hats are ideal for quick classroom treats, Christmas baking day with kids, or when you want the look of festive baking without the mess. Their structure holds. Their colors pop. And every bite stays neat. That’s not something I can say about frosted cupcakes after a three-hour party.
Following a special diet?
Every recipe on this site can be converted to gluten-free, vegan, dairy-free, keto, nut-free or egg-free with adjusted ratios so nothing falls flat.
Try the Recipe Converter →Why I Chose These Ingredients and What They Do
Brownies are the base. I use a simple cocoa brownie with a high fat-to-flour ratio so the texture stays dense and chewy, not fluffy. A cake-like brownie won’t hold its shape well on a skewer, and it doesn’t provide that satisfying bite.
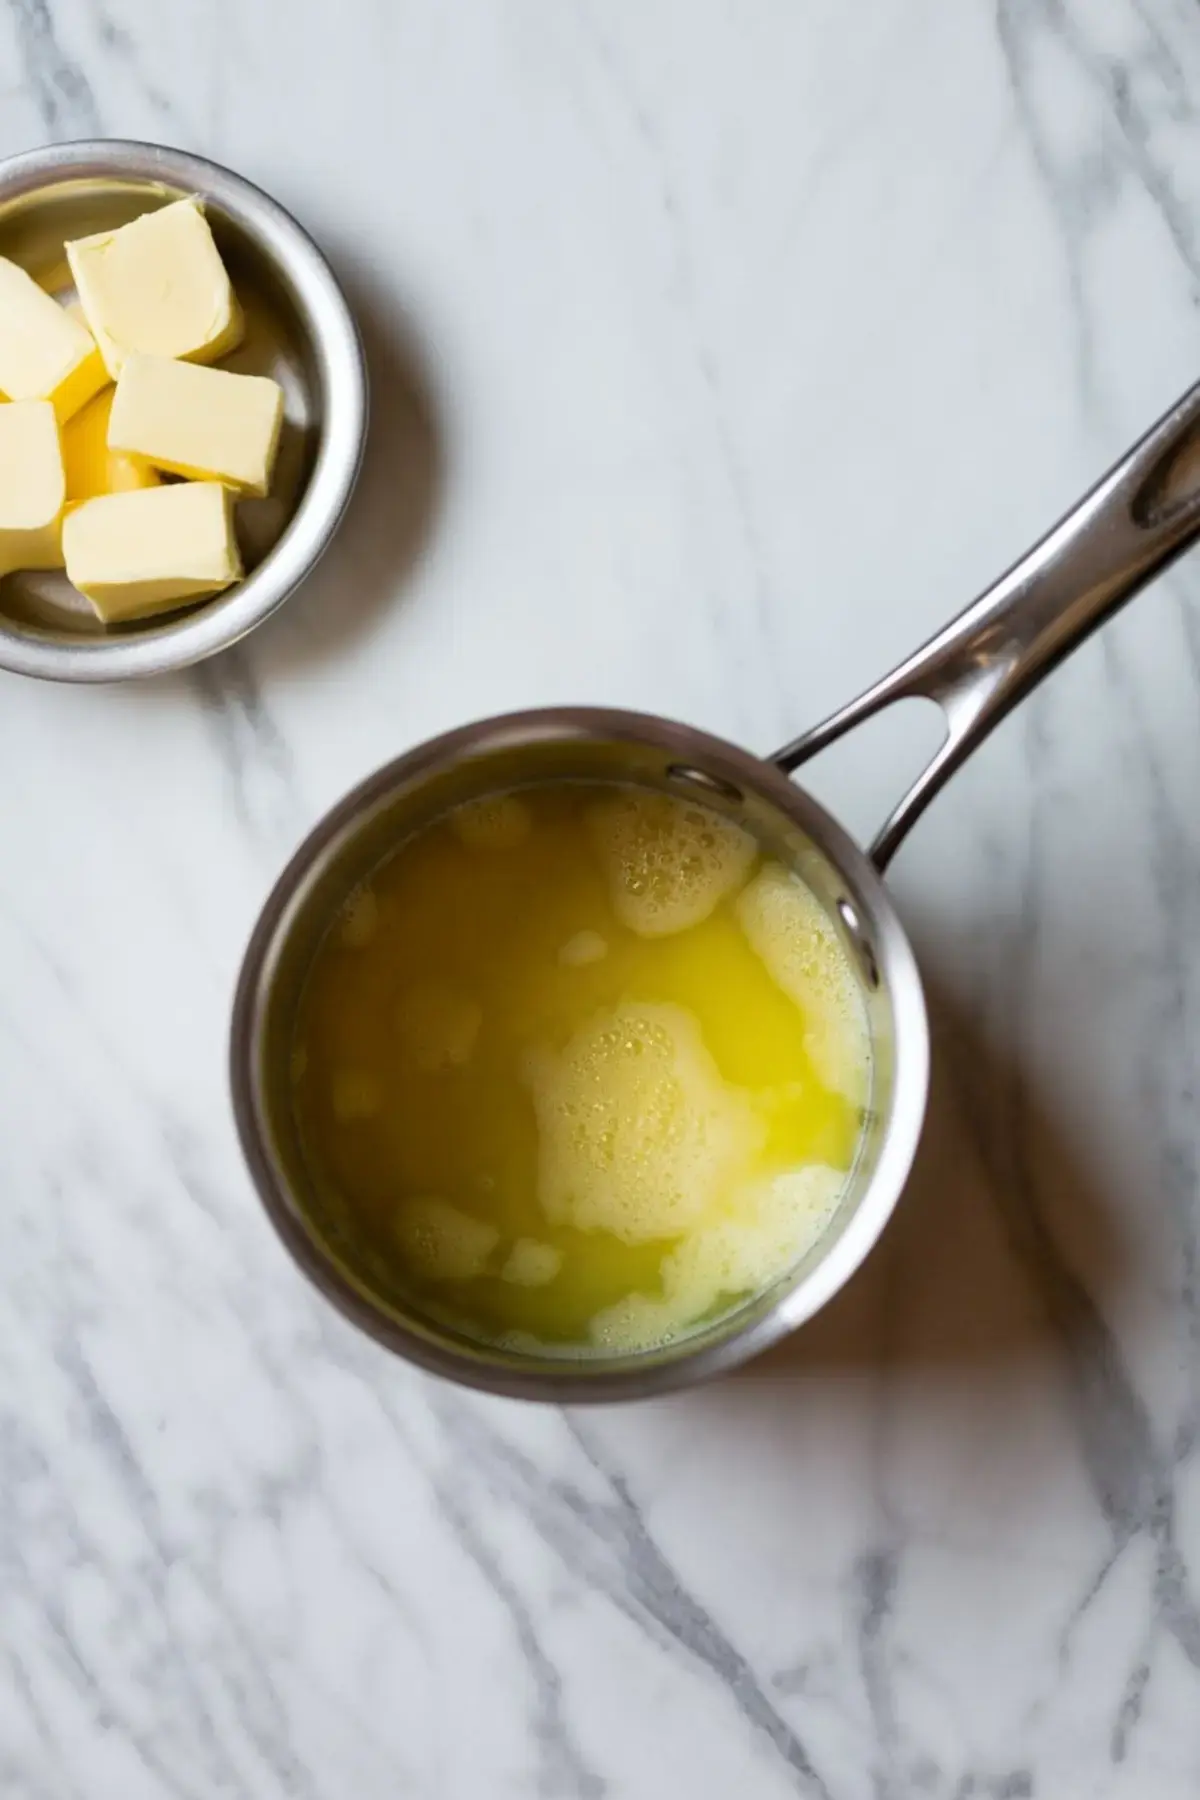
I use butter, not oil. Butter brings depth, structure, and solid edges when cooled. I’ve tested oil-based brownie recipes for skewers, and they tend to smudge or slide. You want the bottom to anchor the stack.
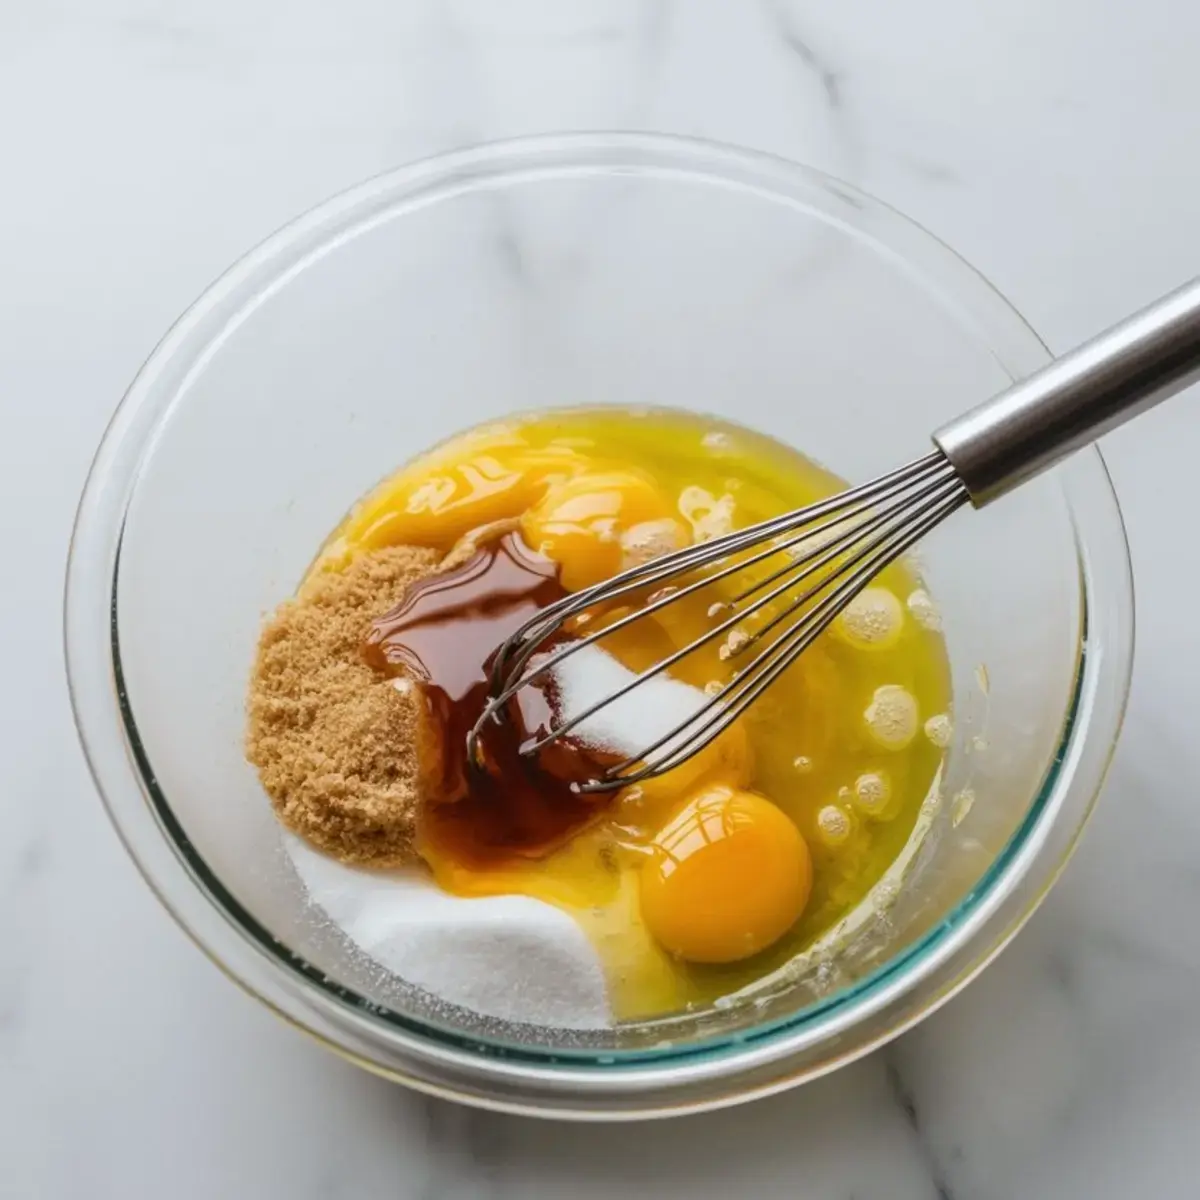
Sugar isn’t just there for sweetness. In this brownie recipe, it also helps create that thin, crackly top that adds contrast to the marshmallow and fruit above. Keep the ratio consistent. Reducing it makes the brownie dense in the wrong way.
Cocoa powder gives better structure than melted chocolate. I’ve tried both. Melted chocolate makes the texture softer but less stable. Cocoa keeps the crumb firm without drying out.
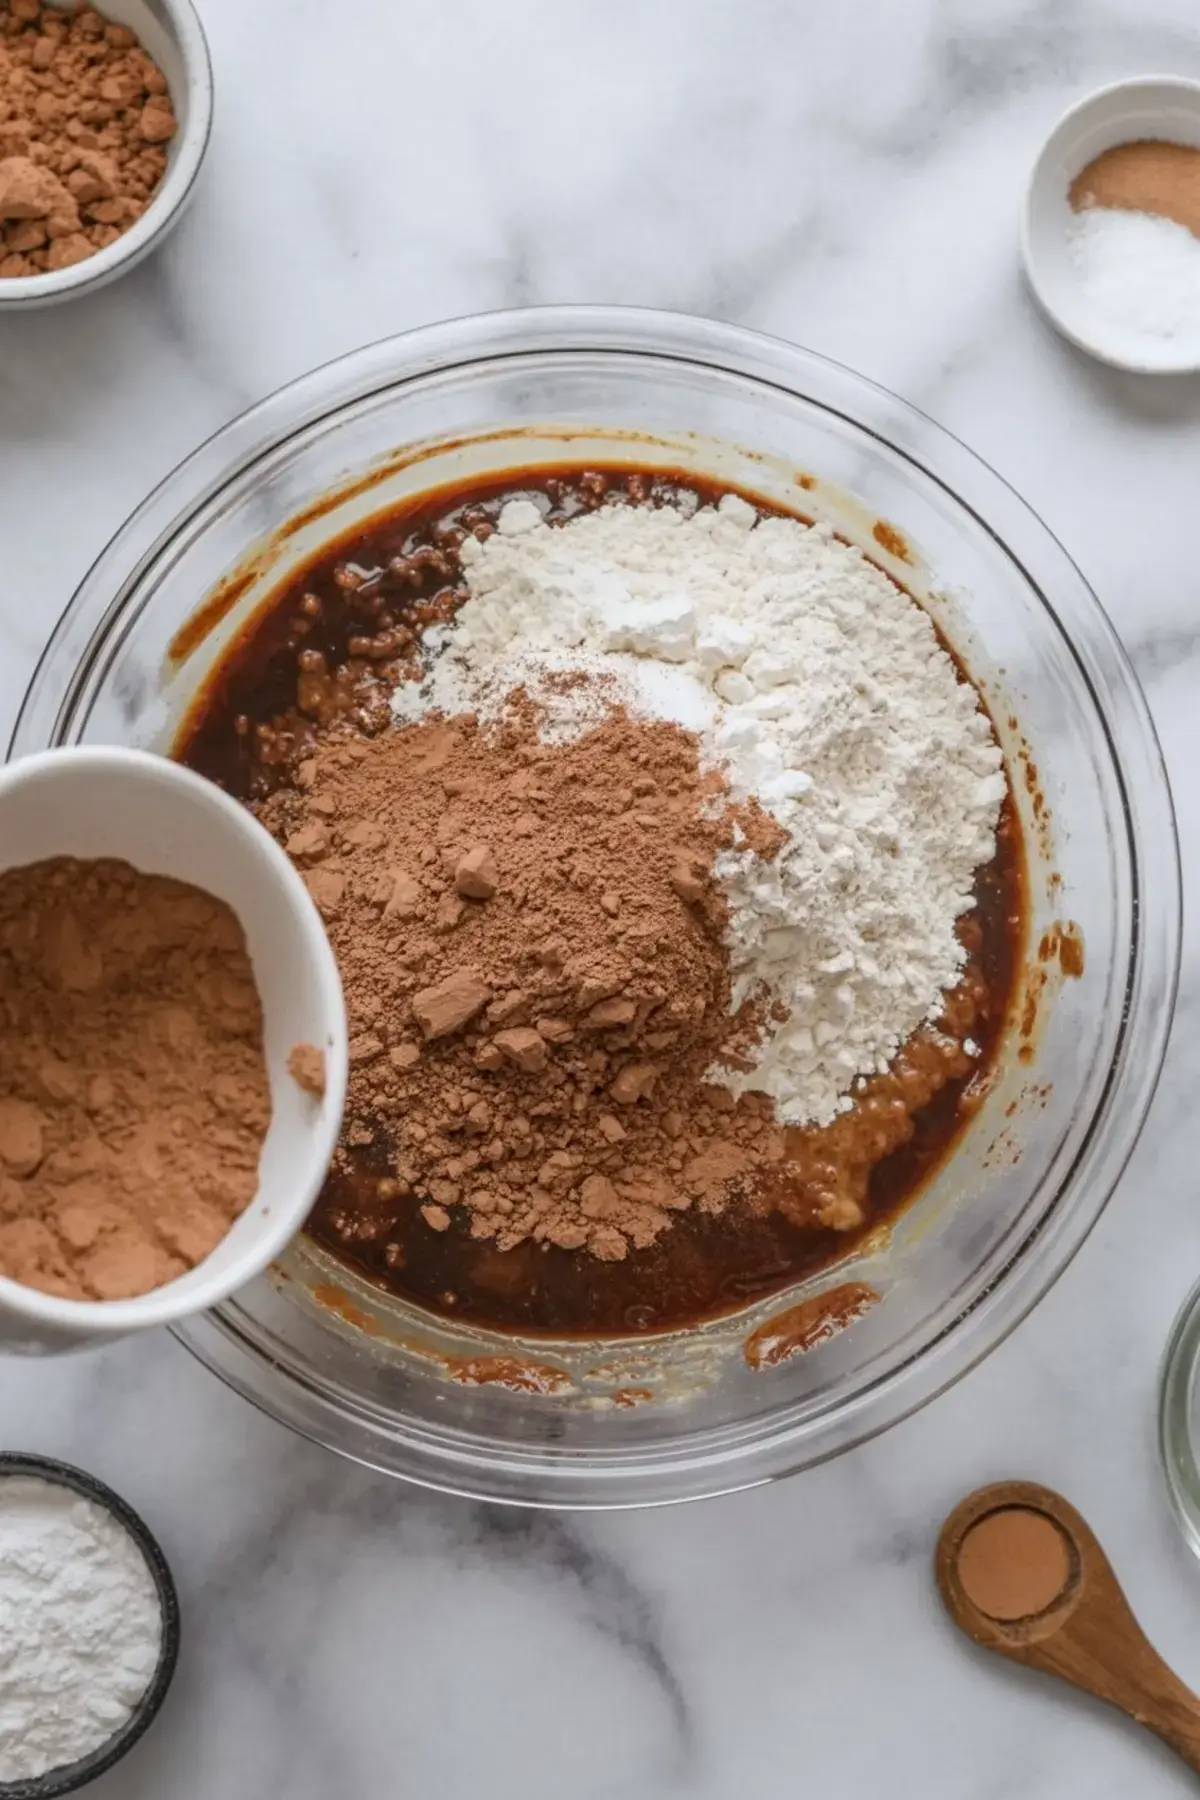
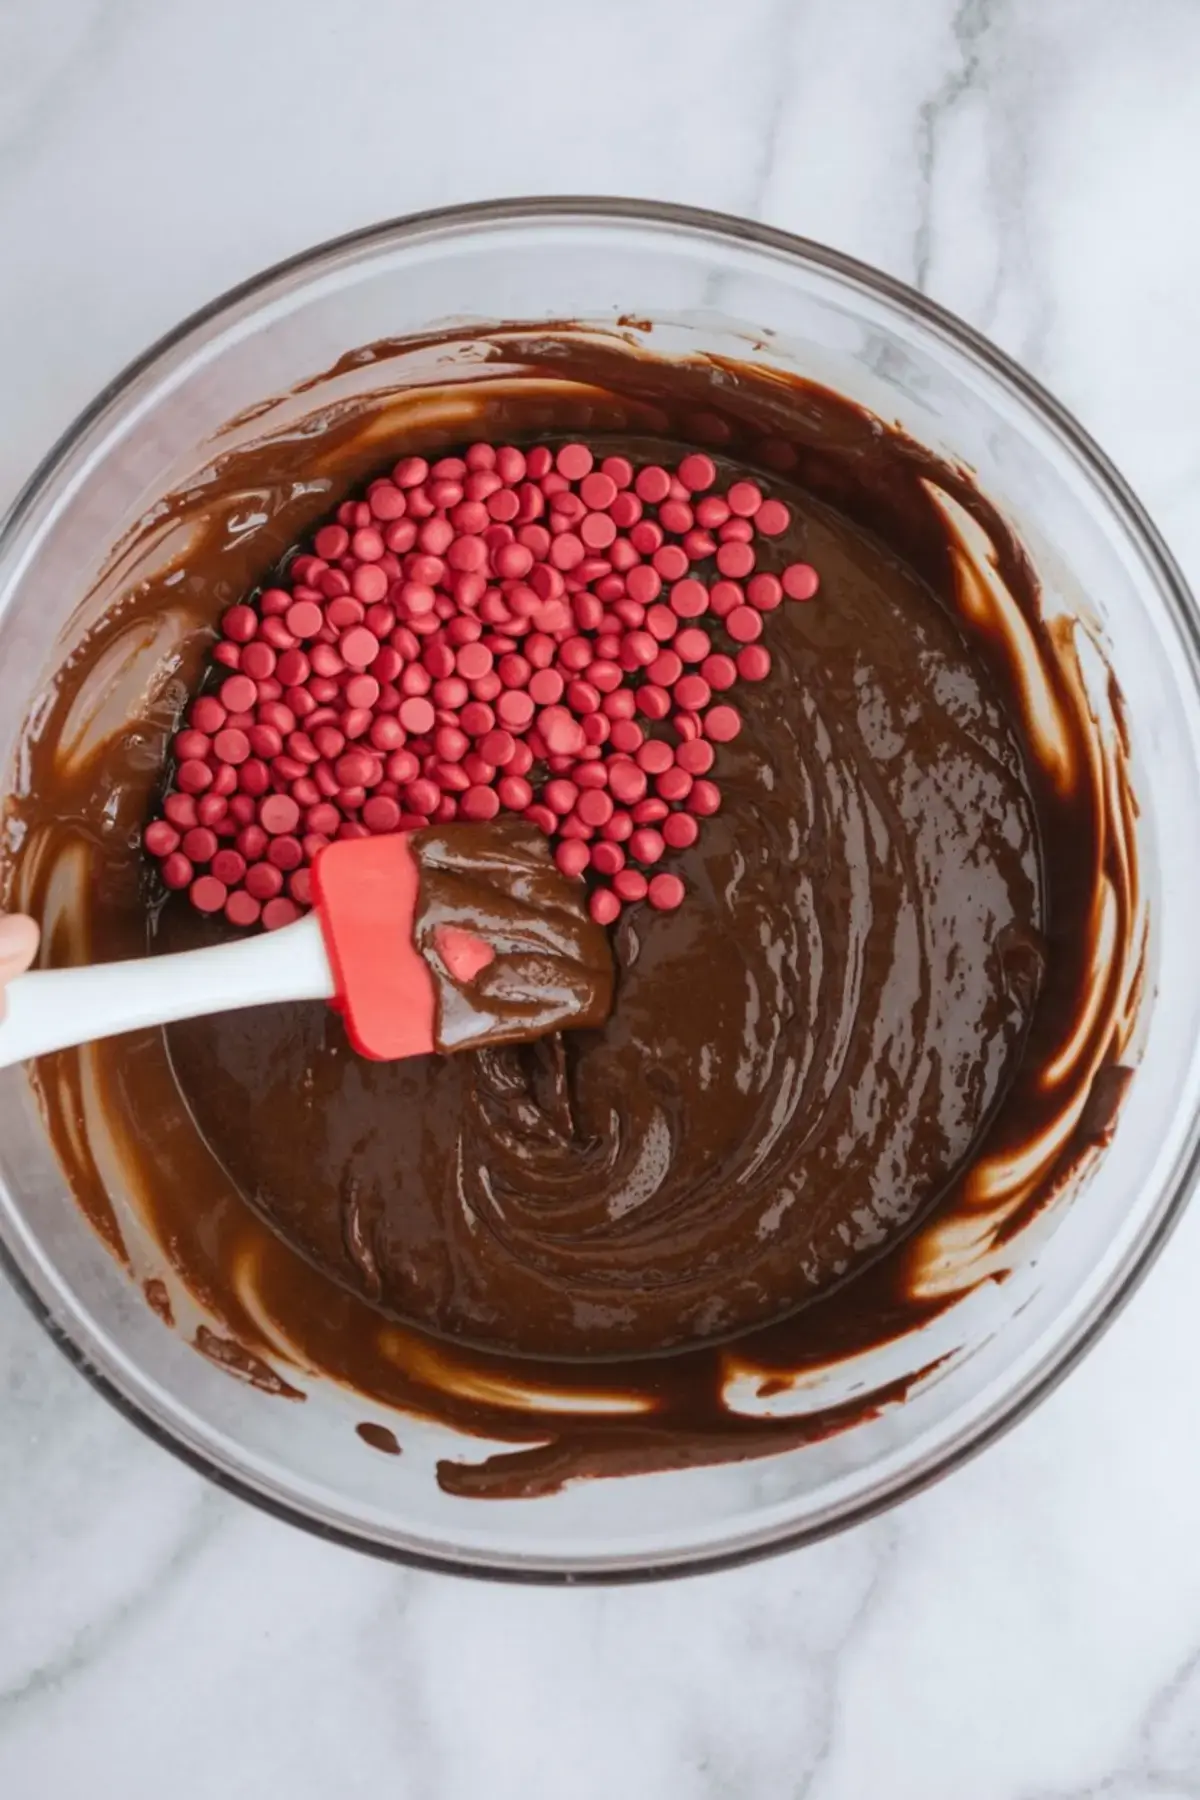
I sometimes stir in red velvet chips or red candy melts. They don’t change the texture, but they do add little red flecks when sliced. If you’re bringing these to a party, the extra color looks festive without any food dye.
If you want a shortcut, box brownie mix works too. But make sure it bakes into a sturdy square. Thin or crumbly brownies won’t hold the skewer.
Try these Santa Hat Chocolate Cupcakes if you’d rather use frosting and cake instead of skewers.
Why Marshmallows Are the Best Center
Large marshmallows create that white puff in the middle without needing a piping bag. I flatten each one slightly with a fingertip to help it stack more evenly. Don’t skip this. Marshmallows hold their shape and stay soft for hours. I’ve tried using whipped cream or piped frosting. Both melt or shift unless served immediately.
The advantage with marshmallows is consistency. You can prep a whole tray, walk away, and they’ll look exactly the same an hour later. I’ve brought them to outdoor markets and church events where frosting would have failed by the time I got there.
How I Prepare the Strawberries for Santa Hat Tops
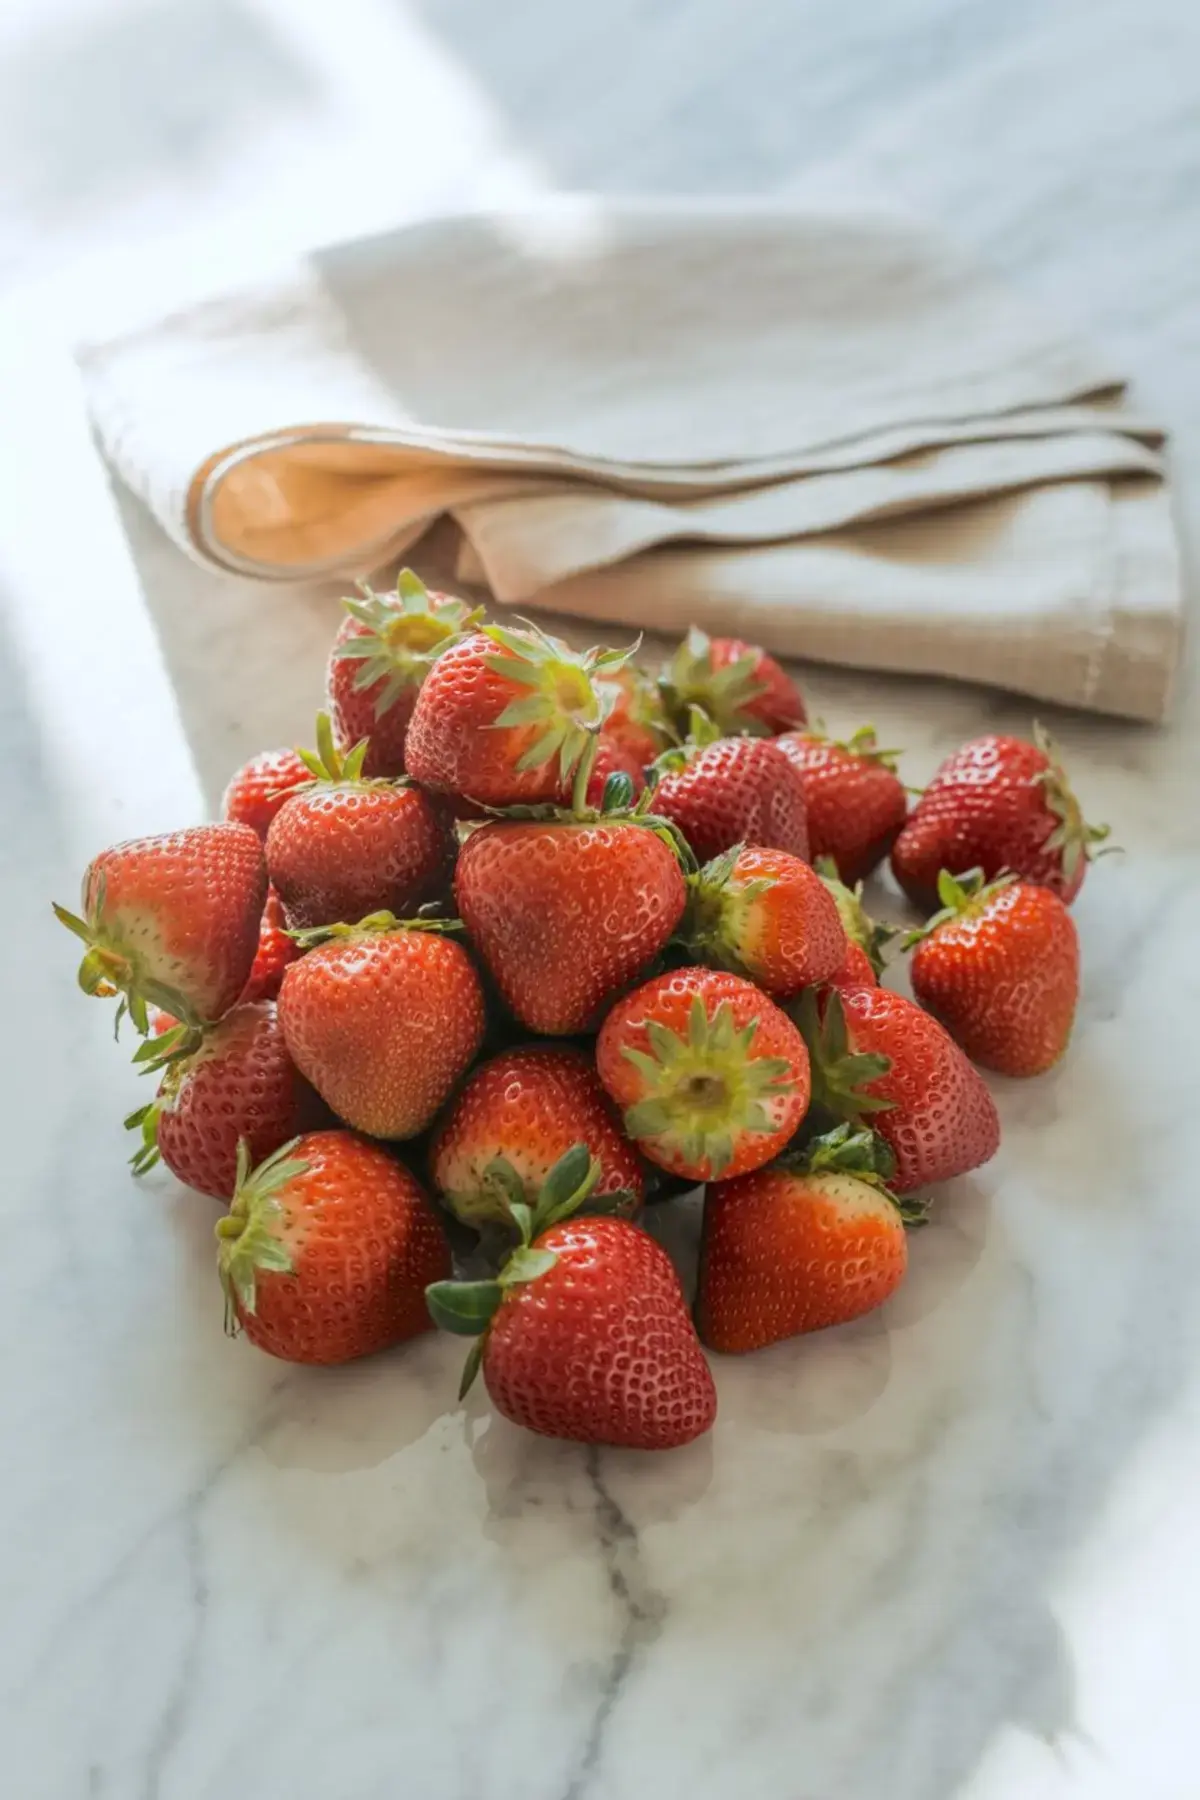
Strawberries form the tip of the Santa hat. I use medium to small berries with firm, pointed ends. The sharper the tip, the more they resemble little hats. I always cut the base flat. That gives them a stable foundation when stacked.
They must be completely dry. Water on the surface makes the marshmallow slide. I dry them twice—once after rinsing, once just before stacking.
If you love the combo of strawberry and chocolate, you’ll also enjoy these Santa Hat Cheesecake Bites. They follow the same concept but with a cheesecake base.
One Choice That Matters: Fresh Brownies vs. Make-Ahead
I’ve made these both ways—fresh brownies the day of, and brownies baked the day before. Both work, but the fresh brownies slice cleaner. If you need picture-ready presentation, make them the same day. For school parties or family trays, the day-before option holds up fine. Just cover them well so they don’t dry out overnight.
Use a plastic knife or bench scraper to cut the cooled brownie slab. I get more even 1-inch squares that way compared to metal knives which tend to drag through the crumb.
A quick aside from my notes: if you chill the brownie tray before slicing, you’ll get sharper edges and fewer crumbs.
Stacking Tips to Avoid Wobble
Start with the brownie base directly on the tray. Place the marshmallow firmly on top and gently press to flatten slightly. Then set the strawberry, point up, as the final layer. Push the skewer straight down through the center of all three. If anything feels unstable, gently press the whole stack with your palm before inserting the skewer.
For kids, swap the skewers for lollipop sticks. I’ve used those for kindergarten events, and they’re easier for small hands.
To change things up, you can dust the finished skewers with powdered sugar. It gives a snowy effect on the strawberry tops. I use a small mesh strainer to keep the coating light and even.
For a brownie variation with more spice, try these Gingerbread Brownies. They also work as a base for Santa Hat Brownie Bites if you want something different from cocoa.
Serving Notes and Storage Advice
These Christmas Brownies Santa Hat skewers should be served at room temperature. They’ll stay fresh and firm for about four hours uncovered, which makes them reliable for holiday parties or bake sales.
You can prep them ahead by cutting the brownies and washing the strawberries, but wait until just before serving to stack and skewer. Marshmallows tend to dry out if left overnight, and strawberries may leak slightly into the brownie if assembled too early.
Avoid the fridge. It makes the brownie go stiff and the strawberry lose its shine. If needed, store each component separately and build the stacks on-site. That’s what I do when transporting them to larger events.
Related Recipes to Try Next
• Santa Hat Chocolate Cupcakes
Save This and Share How It Turned Out
If you love easy Christmas baking ideas that kids can help with, save this Santa Hat Brownie Skewers recipe to your board. It’s one of the most practical desserts I’ve ever made during the holidays.
Share in the comments if you tried a different base or added your own twist. I’d love to hear how you used these in your Christmas baking this year.
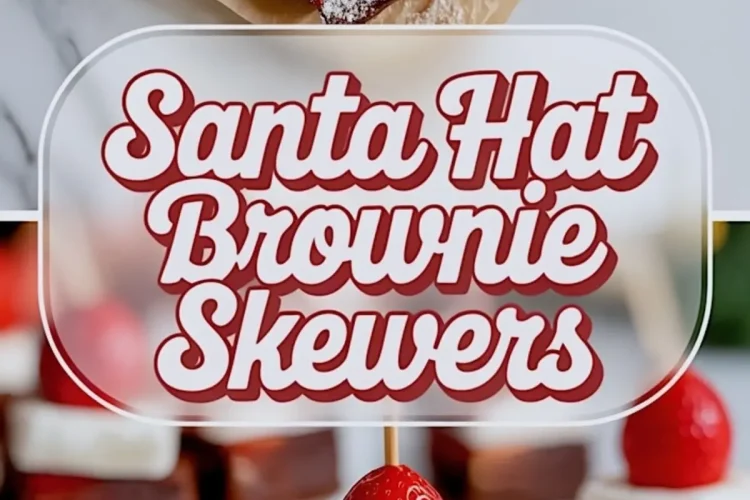
Santa Hat Brownie Skewers
These fun and festive Santa Hat Brownie Skewers are made with chewy brownie bites, fluffy marshmallows, and juicy strawberries stacked to look like cute Santa hats. No frosting or piping needed! Whether you’re making brownie Santa hats for a Christmas baking day, classroom party, or dessert tray, this simple treat is always a hit. Easy to assemble and made with just a few ingredients, these brownie strawberry Santa hats are a no-fuss holiday snack. Save this fun idea for your next Christmas brownies board or try them as bite-sized Santa hat brownie bites on festive skewers.
Ingredients
- FOR THE BROWNIES:
- 1/2 cup (1 stick) unsalted butter
- 1 cup granulated sugar
- 2 large eggs
- 1 teaspoon vanilla extract
- 1/3 cup unsweetened cocoa powder
- 1/2 cup all-purpose flour
- 1/4 teaspoon salt
- 1/4 teaspoon baking powder
- 1/3 cup red velvet chocolate chips or chopped red candy melts (optional, folded into batter)
- FOR THE SKEWERS:
- 12 whole strawberries, hulled
- 12 large marshmallows
- Powdered sugar, for dusting
- Wooden skewers or toothpicks
- Cooled, cut brownies (1-inch squares)
Instructions
- PREHEAT AND PREP: Preheat the oven to 350°F (175°C). Grease and line an 8x8-inch square baking pan with parchment paper, allowing the edges to hang over for easy removal.
- MAKE THE BATTER: In a medium saucepan, melt the butter over low heat. Remove from heat and whisk in the granulated sugar, eggs, and vanilla extract until smooth and combined.
- ADD DRY INGREDIENTS: Stir in the cocoa powder, flour, salt, and baking powder. Mix until the batter is smooth and no streaks of flour remain. If using red velvet chocolate chips or chopped red candy melts, fold them in now.
- BAKE THE BROWNIES: Pour the batter into the prepared pan and smooth the top. Bake for 20 to 25 minutes, or until a toothpick inserted in the center comes out with moist crumbs. Let cool completely in the pan before cutting.
- SLICE THE BROWNIES: Once cooled, lift the brownies out of the pan using the parchment overhang. Cut into 1-inch squares for the base of each skewer.
- PREP THE STRAWBERRIES: Wash and hull the strawberries. Slice off the base of each one to create a flat surface so they sit upright. Pat them dry with a paper towel to remove excess moisture.
- ASSEMBLE THE SKEWERS: Place a brownie square on a serving tray. Top with a marshmallow, pressing down gently to flatten if needed. Add a strawberry, pointed side up, on top of the marshmallow.
- SECURE THE STACK: Insert a wooden skewer or toothpick straight through the center of each stack to hold everything in place.
- FINISH WITH POWDERED SUGAR: Lightly dust the tops of the strawberries with powdered sugar to give a snowy effect. Serve immediately or store loosely covered at room temperature for up to 4 hours.
Notes
You can use a box brownie mix to save time—just bake and cool according to package directions, then cut into 1-inch squares. For younger kids, use blunt-edged lollipop sticks instead of skewers for safer handling.
Nutrition Information
Yield
12Serving Size
1Amount Per Serving Calories 285Total Fat 11gSaturated Fat 6gUnsaturated Fat 4gCholesterol 54mgSodium 89mgCarbohydrates 45gFiber 1gSugar 34gProtein 3g