If you’ve ever stood in the fancy chocolate aisle, wondering which truffles are worth it, this is your answer. You don’t need a gold-wrapped box to feel fancy. What you need is real chocolate, toasted hazelnuts, and a ganache that behaves. That’s what this recipe gives you.
You’ll learn exactly how to make truffles that taste like they came from a chocolatier, but with ingredients you probably already have. No special skills required. And yes, I make these every December—but honestly, they don’t stay exclusive to winter in my kitchen.
Following a special diet?
Every recipe on this site can be converted to gluten-free, vegan, dairy-free, keto, nut-free or egg-free with adjusted ratios so nothing falls flat.
Try the Recipe Converter →How to Build Flavor Into the Ganache Without Making it Complicated
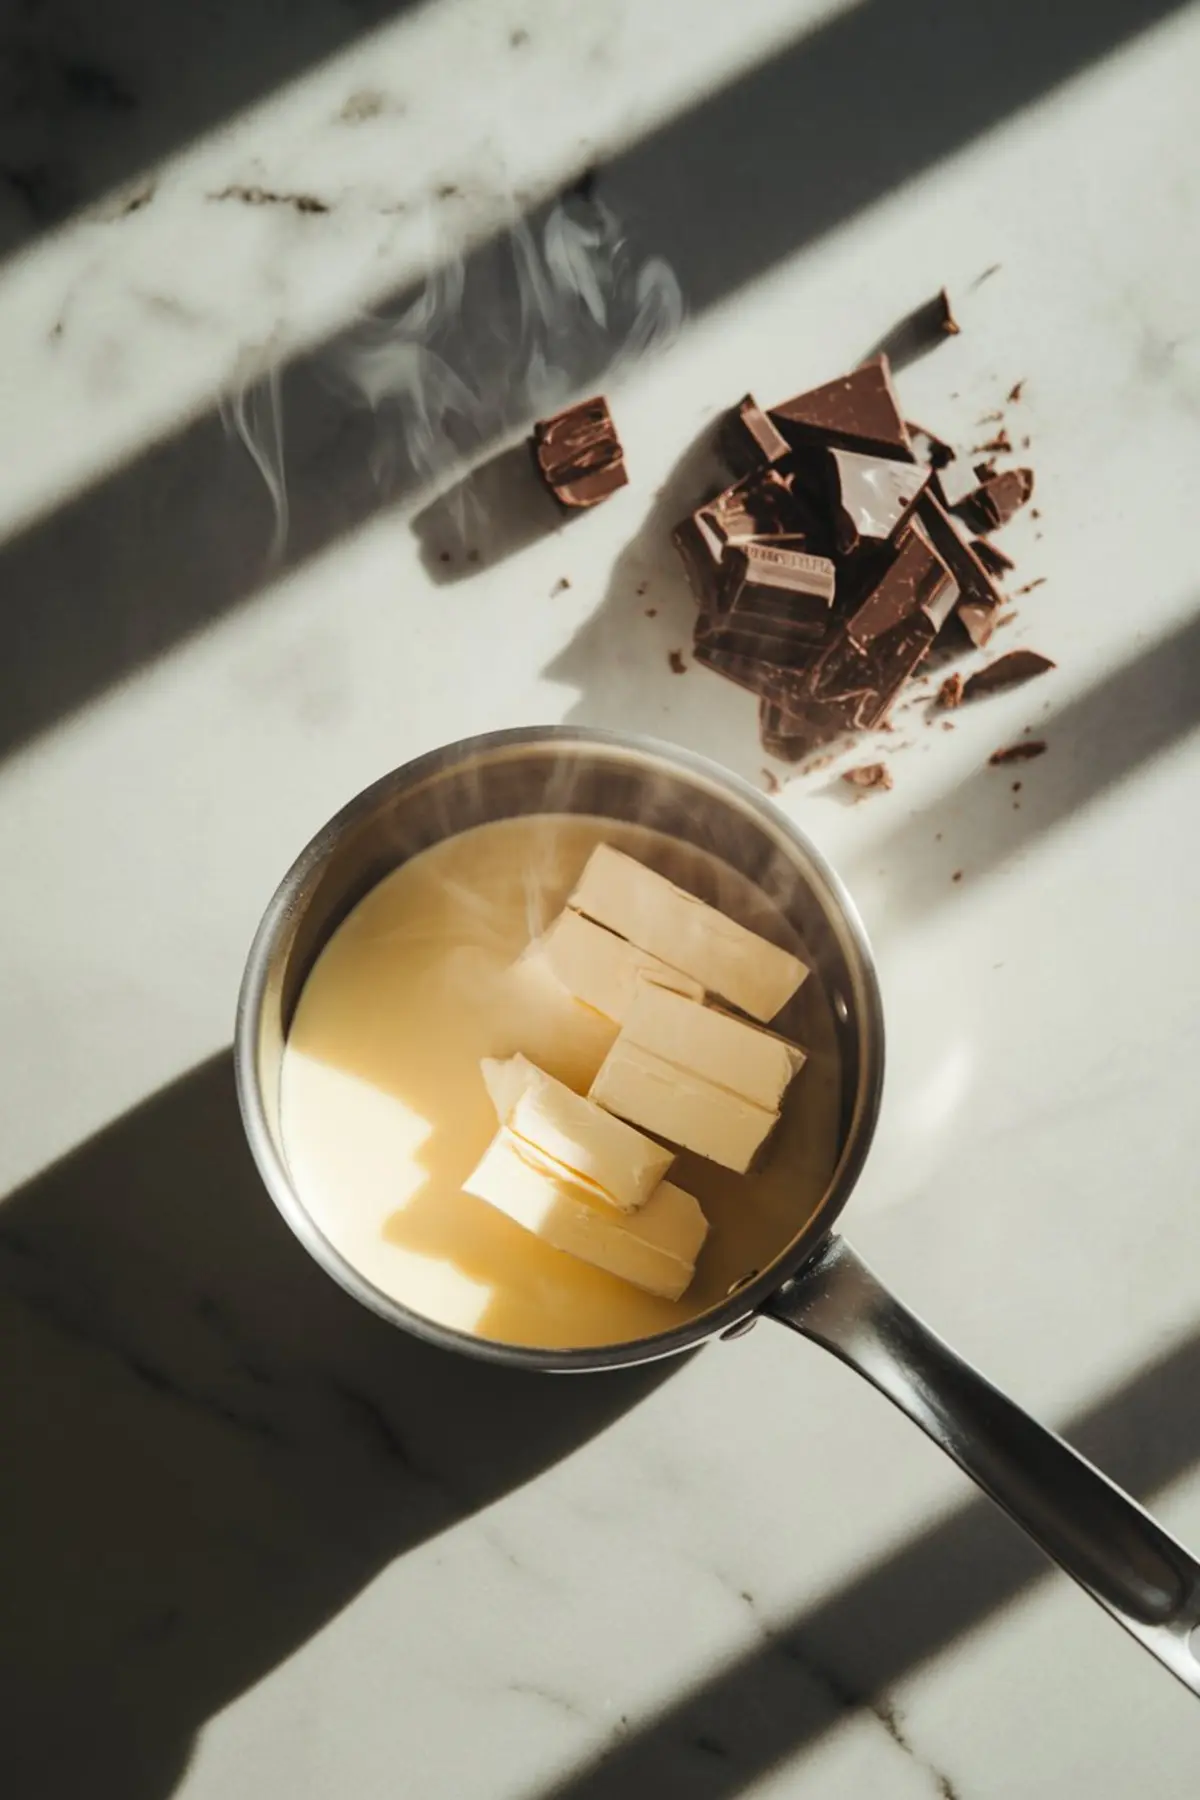
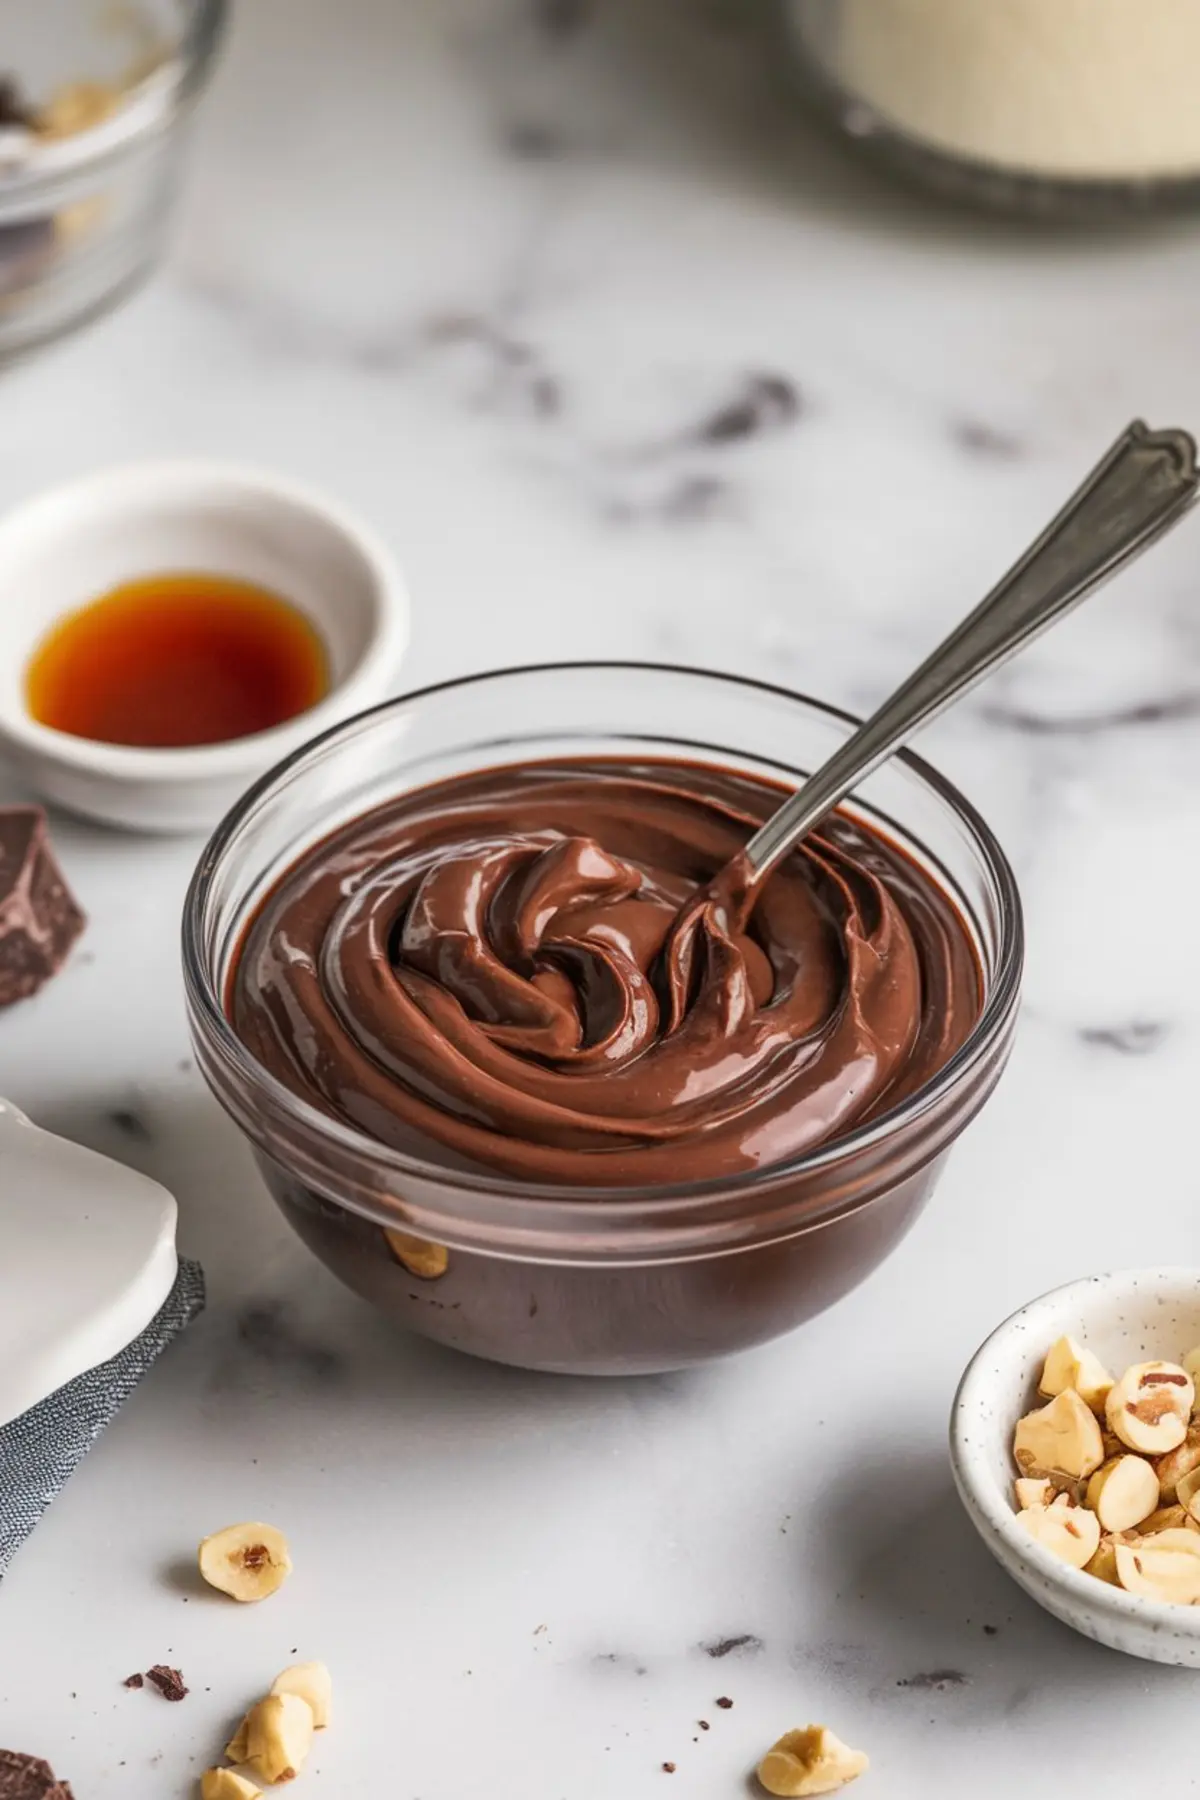
Start with chocolate you’d happily eat on its own. That’s the base. I use dark chocolate that sits around 60% cocoa for depth without bitterness. Add heavy cream and butter—not too much, just enough to soften things without turning the ganache into a puddle.
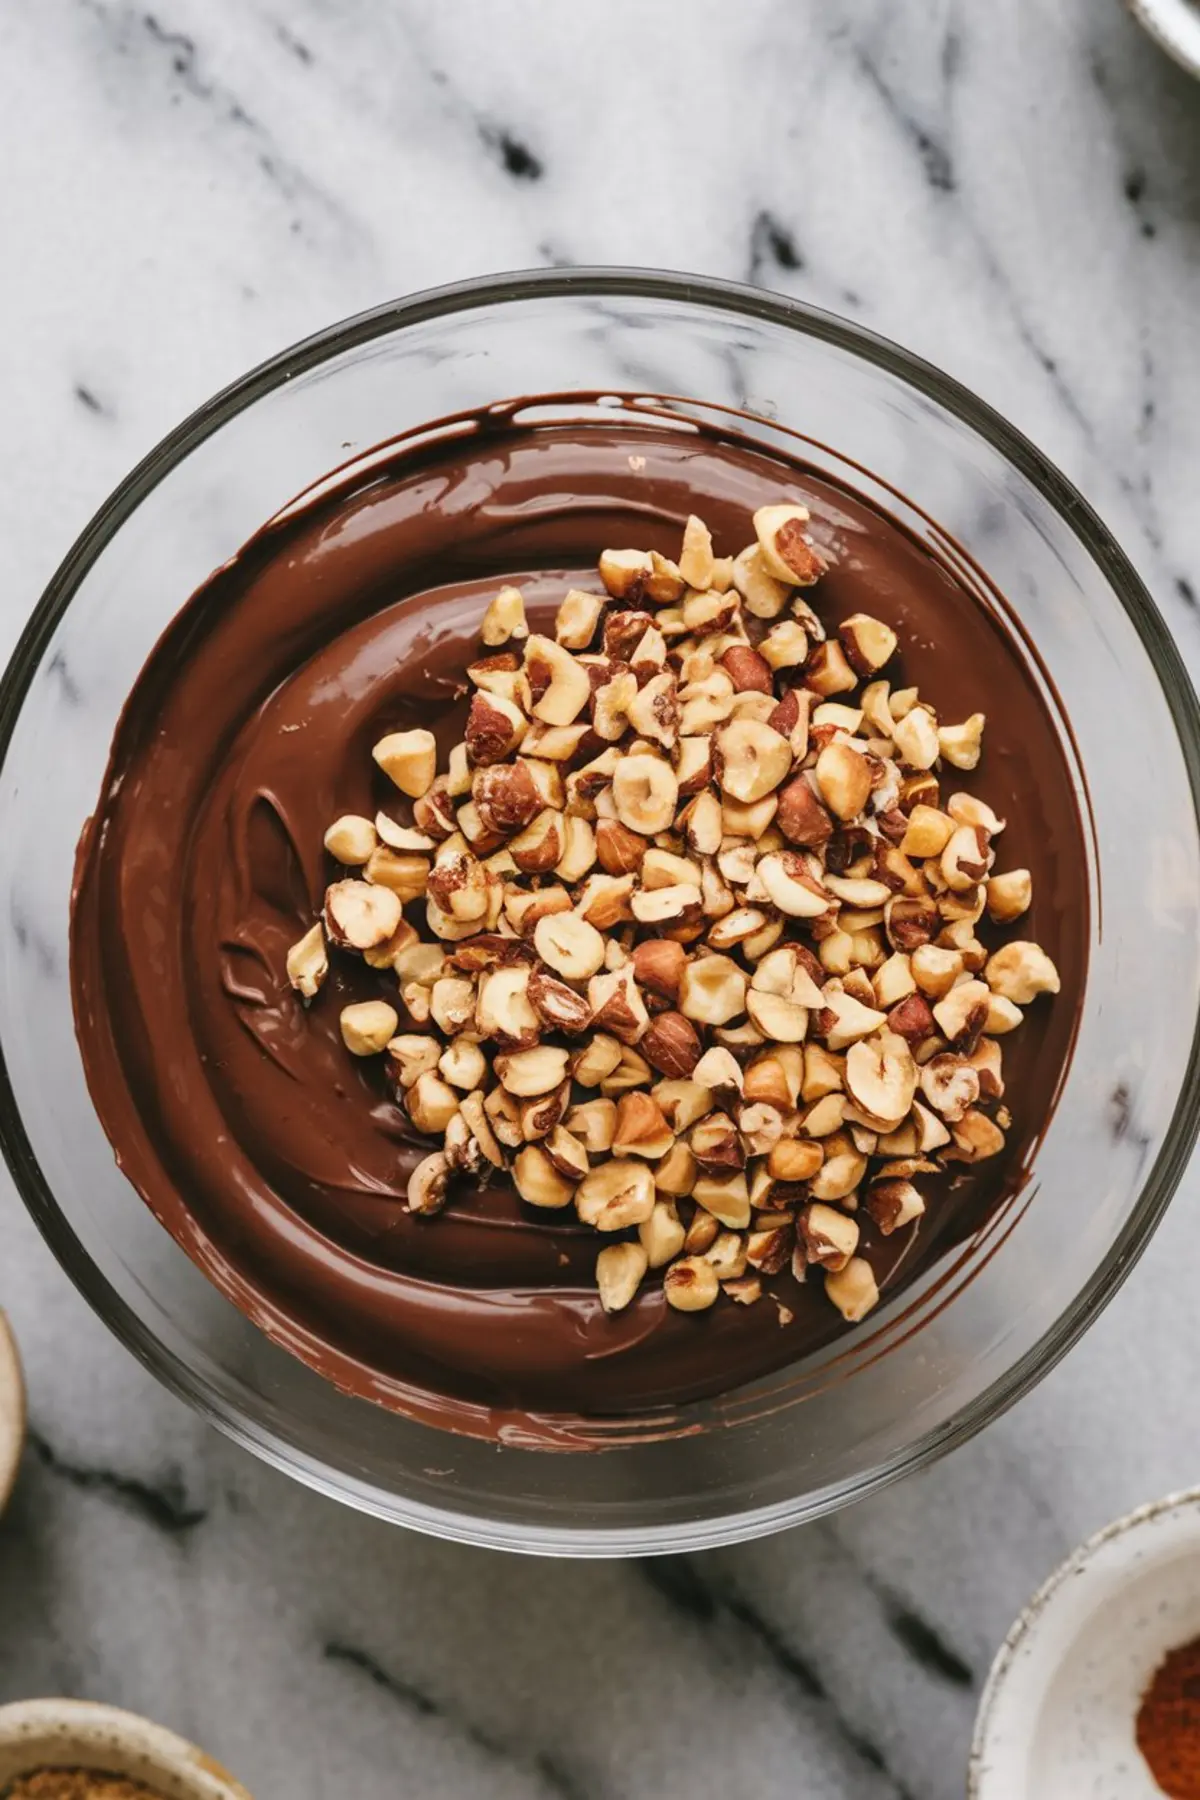
The vanilla brings balance. It smooths out the chocolate’s sharp edge. Toasted hazelnuts are where the magic happens. Toasting changes everything. If you skip it, the flavor sits flat. I toast mine at 350°F until they smell like warmth and sugar.
Once mixed, the ganache needs to rest. It’s a bit like us after a long day. Letting it chill in the fridge lets it hold shape later, and gives the flavors a moment to deepen.
How to Shape Truffles Without Making a Mess
This is the step where most people get frustrated. The ganache feels too soft, too sticky, too much. I’ve been there. The trick is simple: chill the ganache just until scoopable, not rock solid.
Then use gloves or lightly greased hands to roll them. The ganache softens fast in warm hands, so work quickly. You don’t need perfection here. Each one has its own charm, and once they’re dipped, no one sees the shape.
A quick freeze after shaping helps them keep form during dipping. I only skip this if the house is freezing cold—which, where I live, it sometimes is.
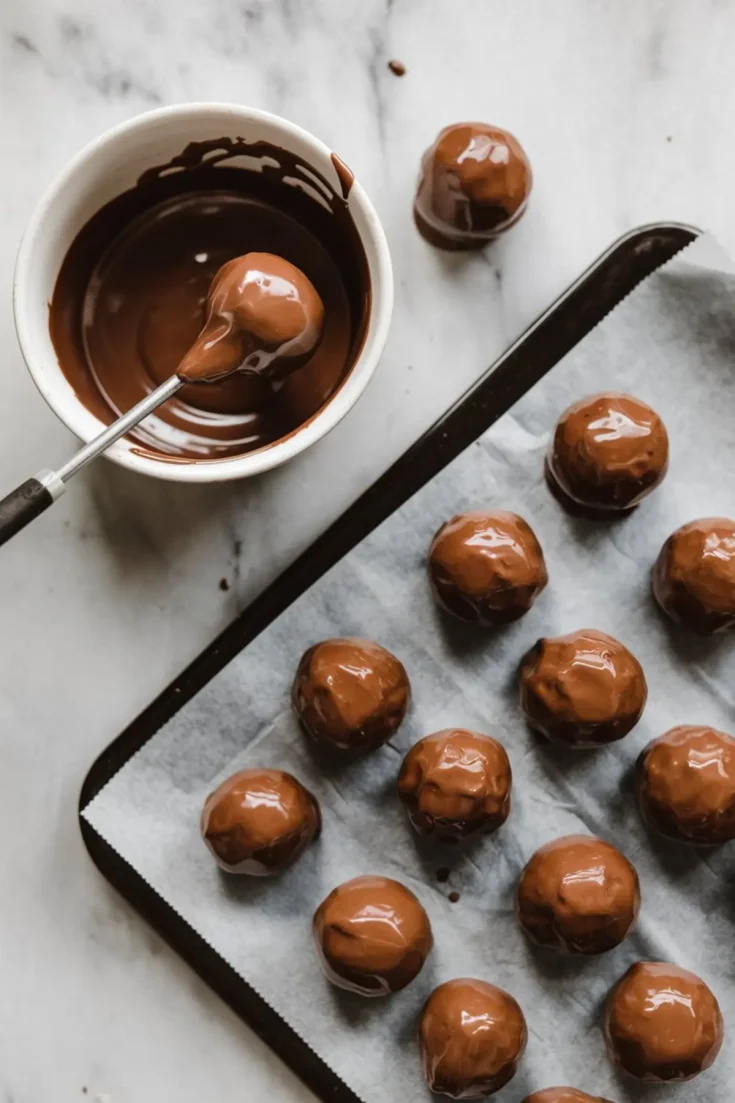
Why the Chocolate Coating Matters More Than You Think
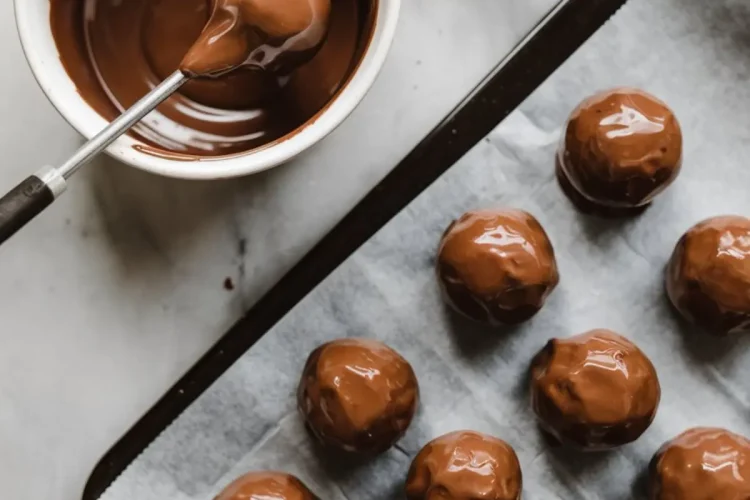
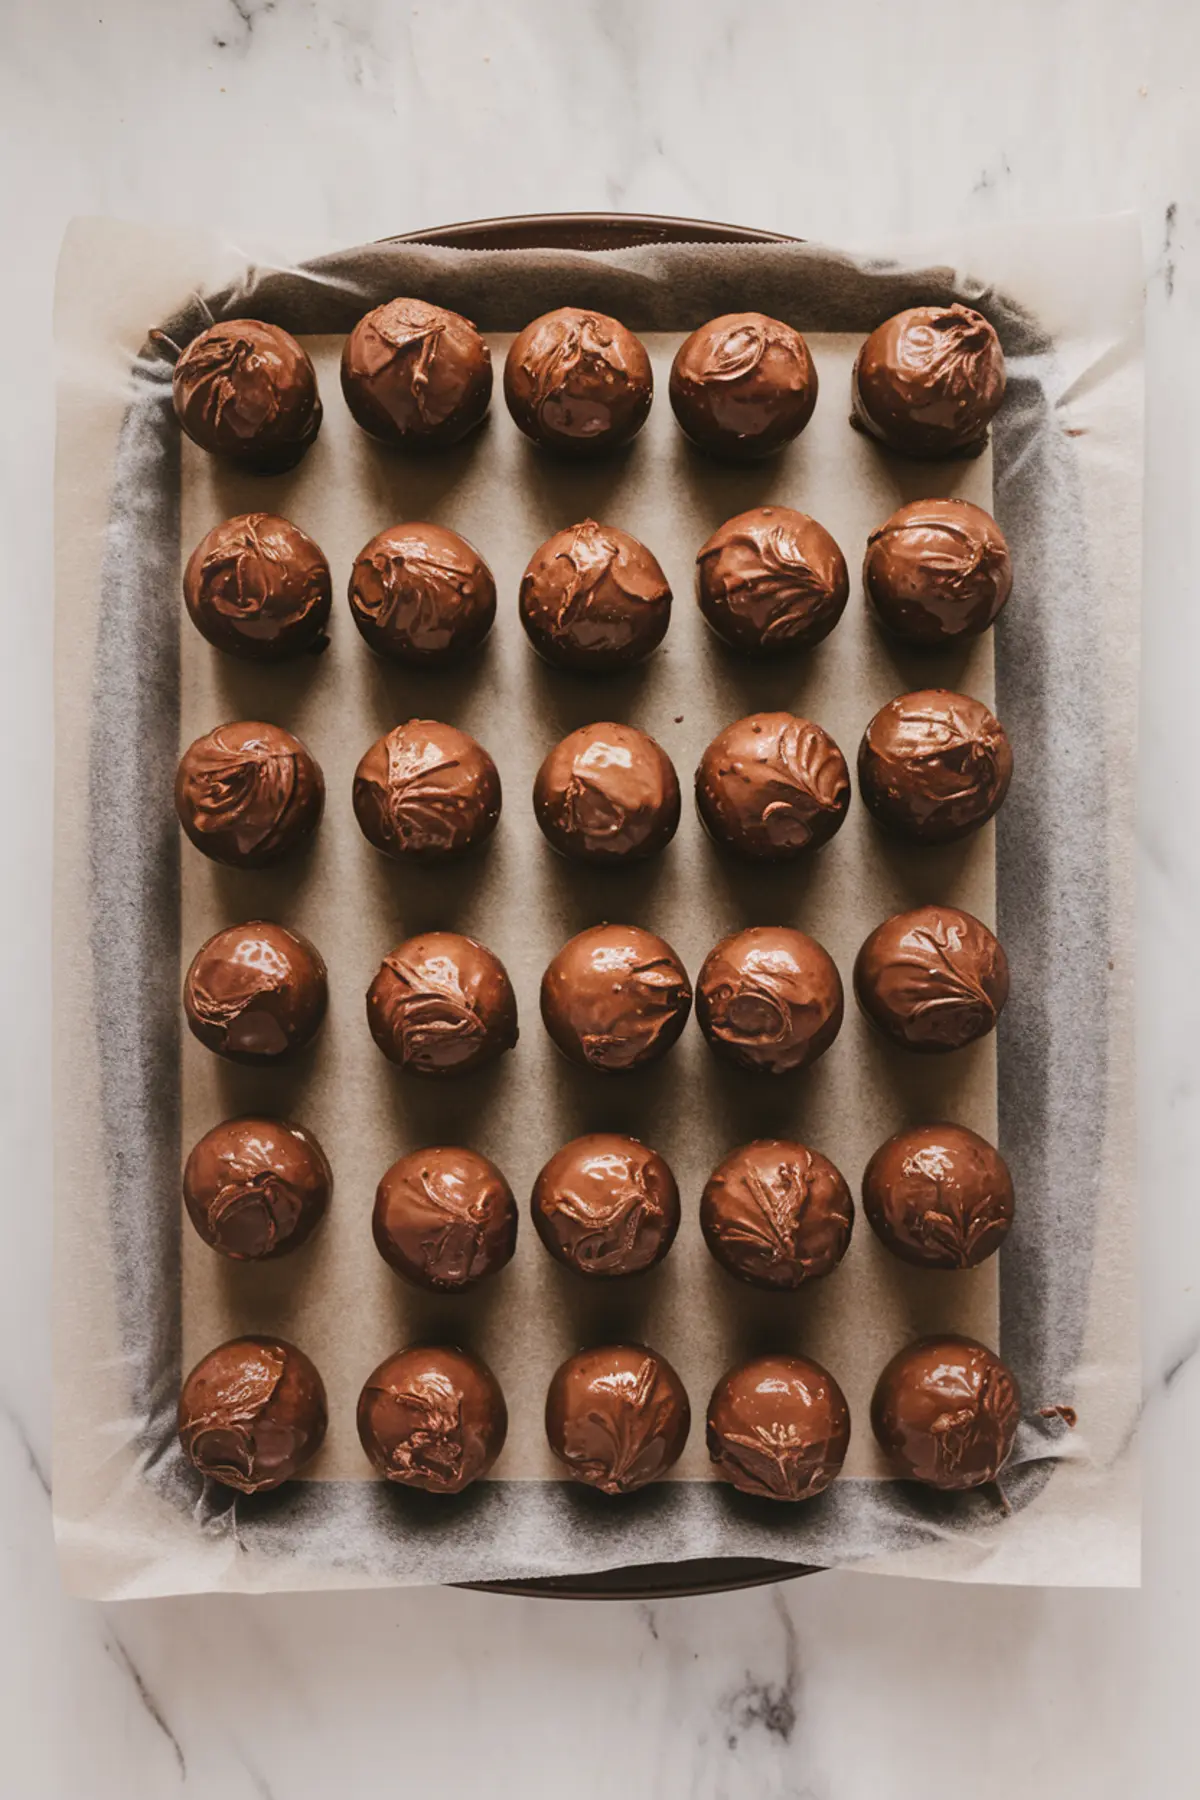
You can use milk or dark for coating. I go with dark if I want drama, milk if I’m sharing with kids. Either way, melt it gently. If it gets too hot, it seizes or turns gritty.

Coconut oil adds shine and makes dipping smoother. You don’t need much. It doesn’t taste like coconut unless you want it to. The coating should be fluid and glossy, never thick.
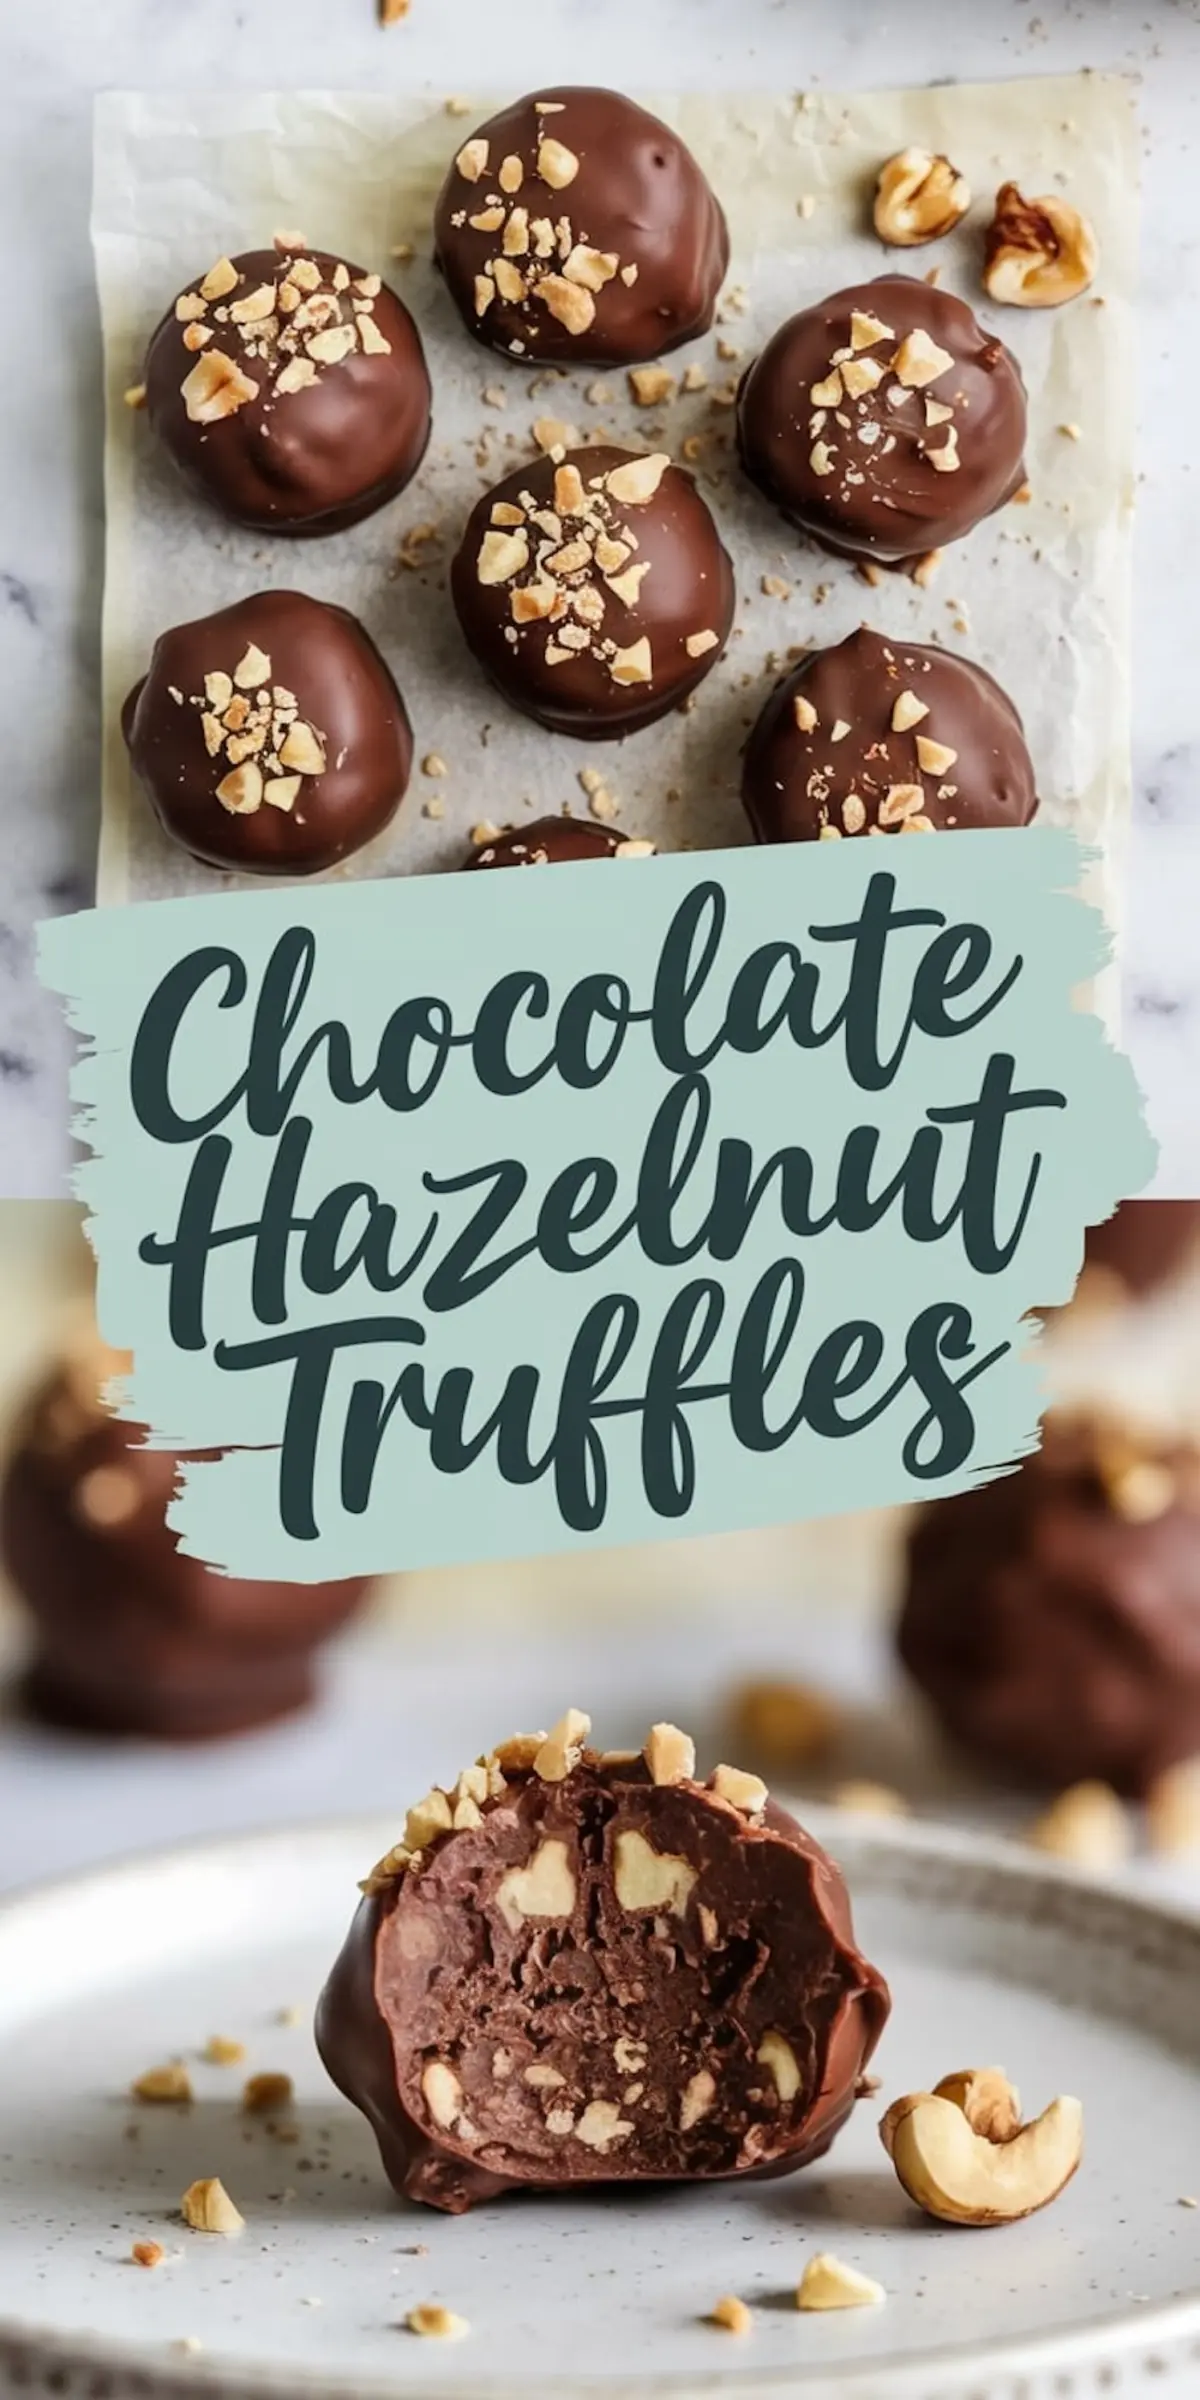
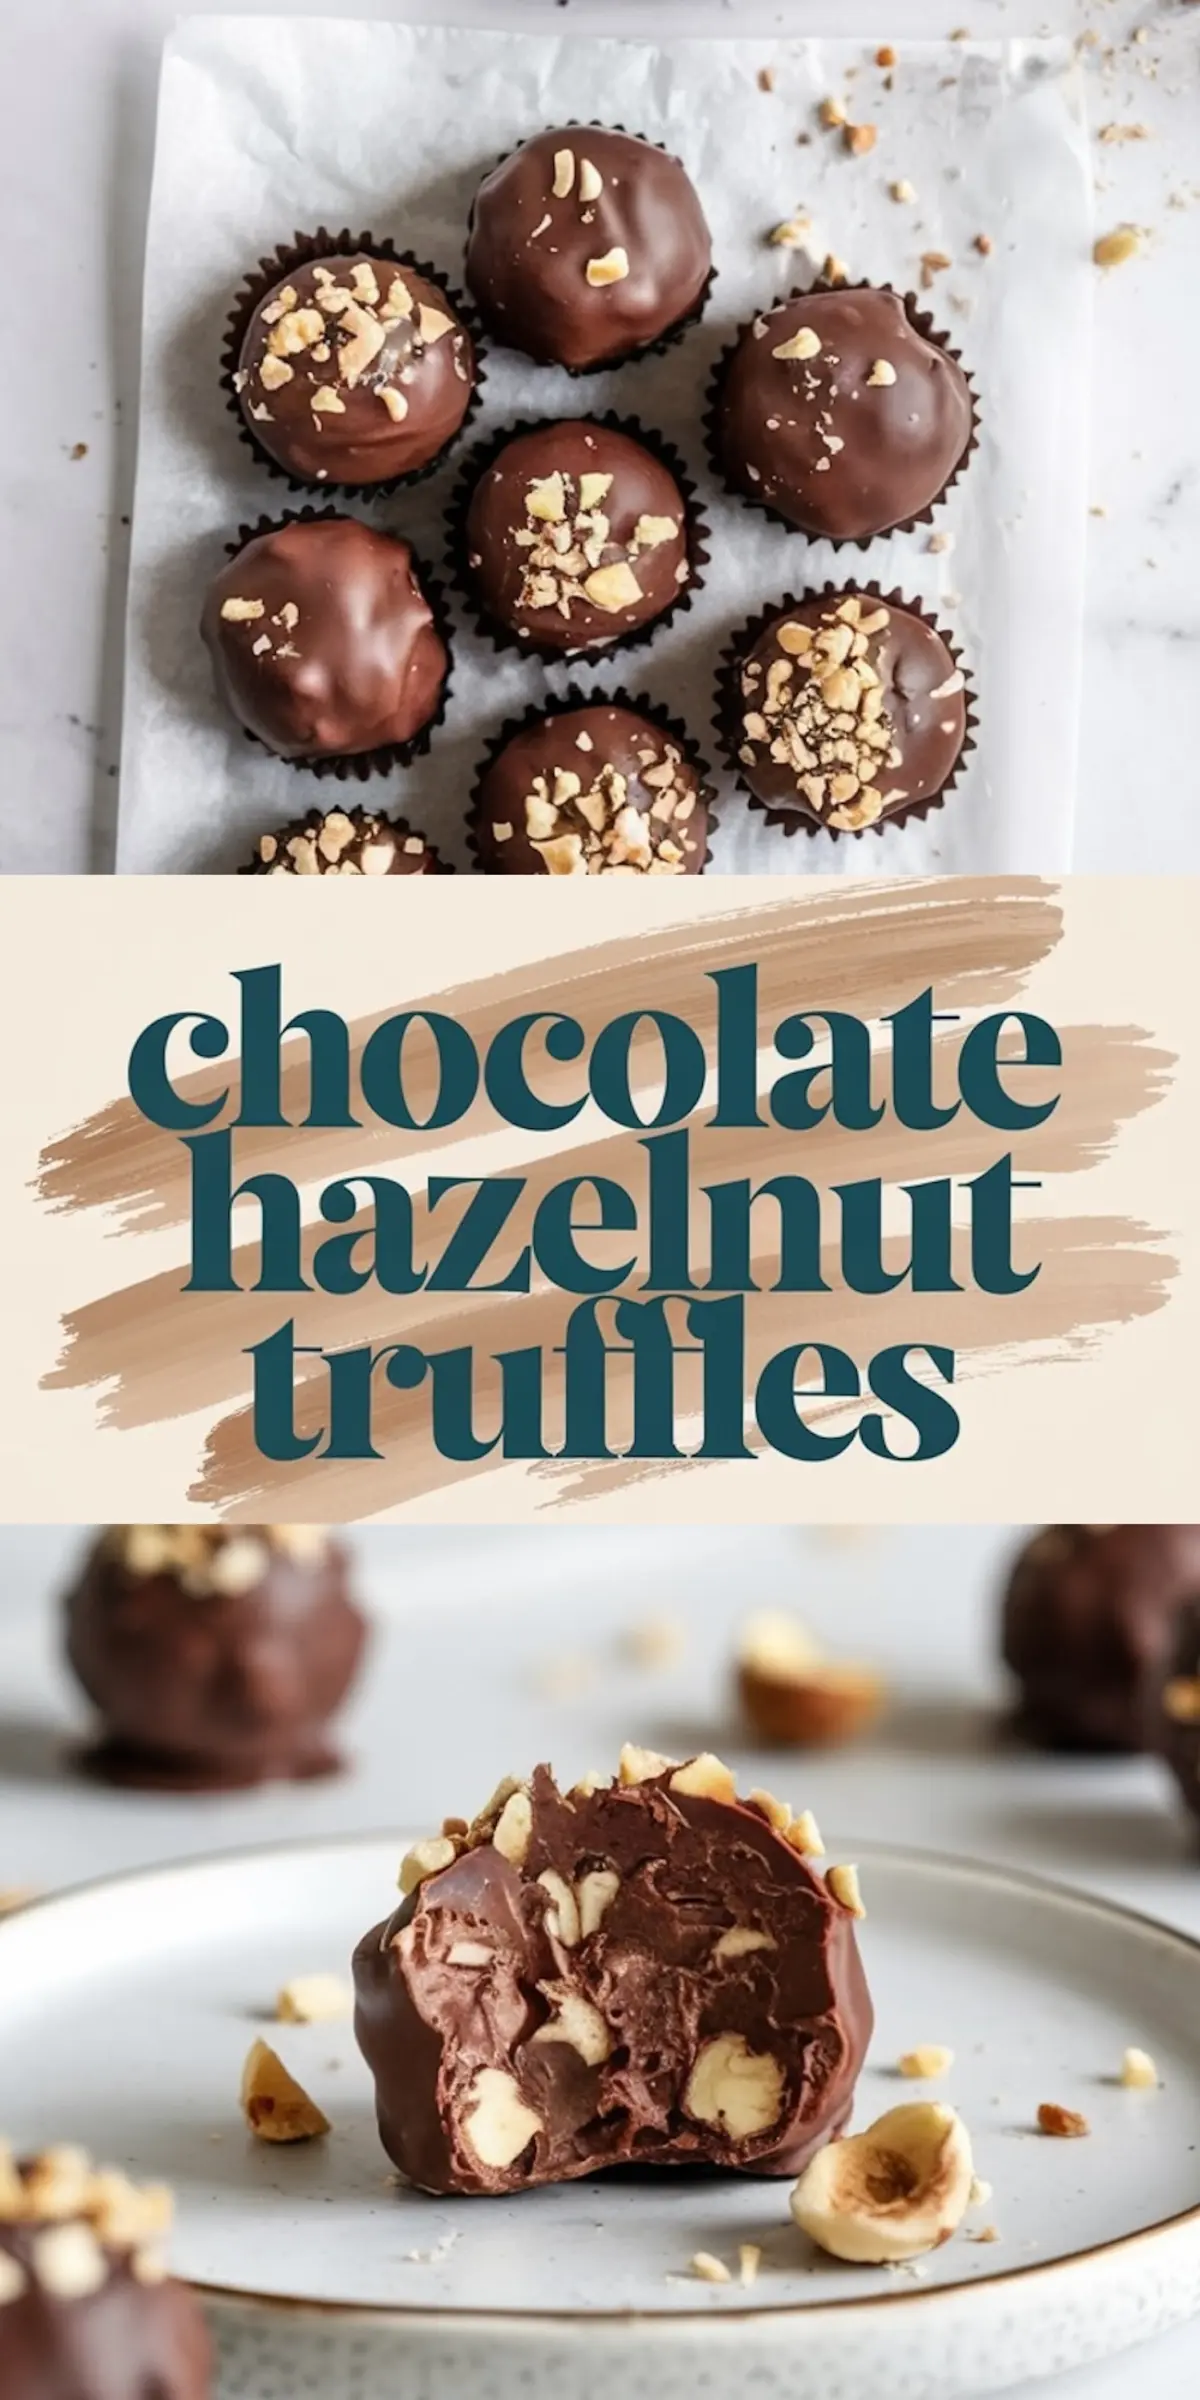
Once dipped, the truffles need to be topped fast. I sprinkle more toasted hazelnuts while the chocolate is still wet. That crunch on top adds contrast and keeps the texture from feeling flat.
Serving These Truffles Like You Actually Meant to Make Them
Serve these at room temperature. Cold truffles lose flavor. I usually set them out 30 minutes before guests arrive. They go well with coffee or dry sparkling wine.
At gatherings, I place them on a plain tray lined with parchment or a slab of dark stone. Something that doesn’t compete. These truffles speak for themselves.
If you’re making edible gifts, pack them in parchment-lined tins or small boxes. Add a handwritten tag—people love that kind of thing.
How I Store Them So They Don’t Taste Like Fridge
Always use an airtight container. Moisture is the enemy here. I layer with parchment paper and keep them in the back of the fridge. Never near onions or garlic.
They hold for a week easily. If I freeze them, I do it in single layers and let them thaw in the fridge overnight. Don’t rush the thaw. If they go straight from freezer to table, they taste dull and the coating might crack.
Sometimes I make a double batch and stash half away for last-minute invites or just Thursday night cravings.
Want More Chocolate Treats? These Might Be Next:
Chocolate Covered Pretzels — Sweet, salty, and so easy to batch-make.
Irish Cream Oreo Truffles — For when you want something creamier.
Coconut Almond Truffles — A lighter bite with the same handmade vibe.
Save This and Share Your Thoughts
Pin this recipe for your holiday board or anytime-you-need-chocolate board. You’ll be glad you did.
Tried these? I’d love to hear how they turned out. Leave a comment below with your tweaks, tips, or questions. Let’s make this a space where great truffle stories live.
Chocolate Hazelnut Truffles Recipe
These chocolate hazelnut truffles have a smooth ganache center made with real chocolate, cream, and toasted hazelnuts. Each truffle is dipped in melted chocolate and topped with more roasted hazelnuts for a rich, crisp finish. The recipe is approachable for all skill levels and uses simple ingredients to create boutique-style confections at home.
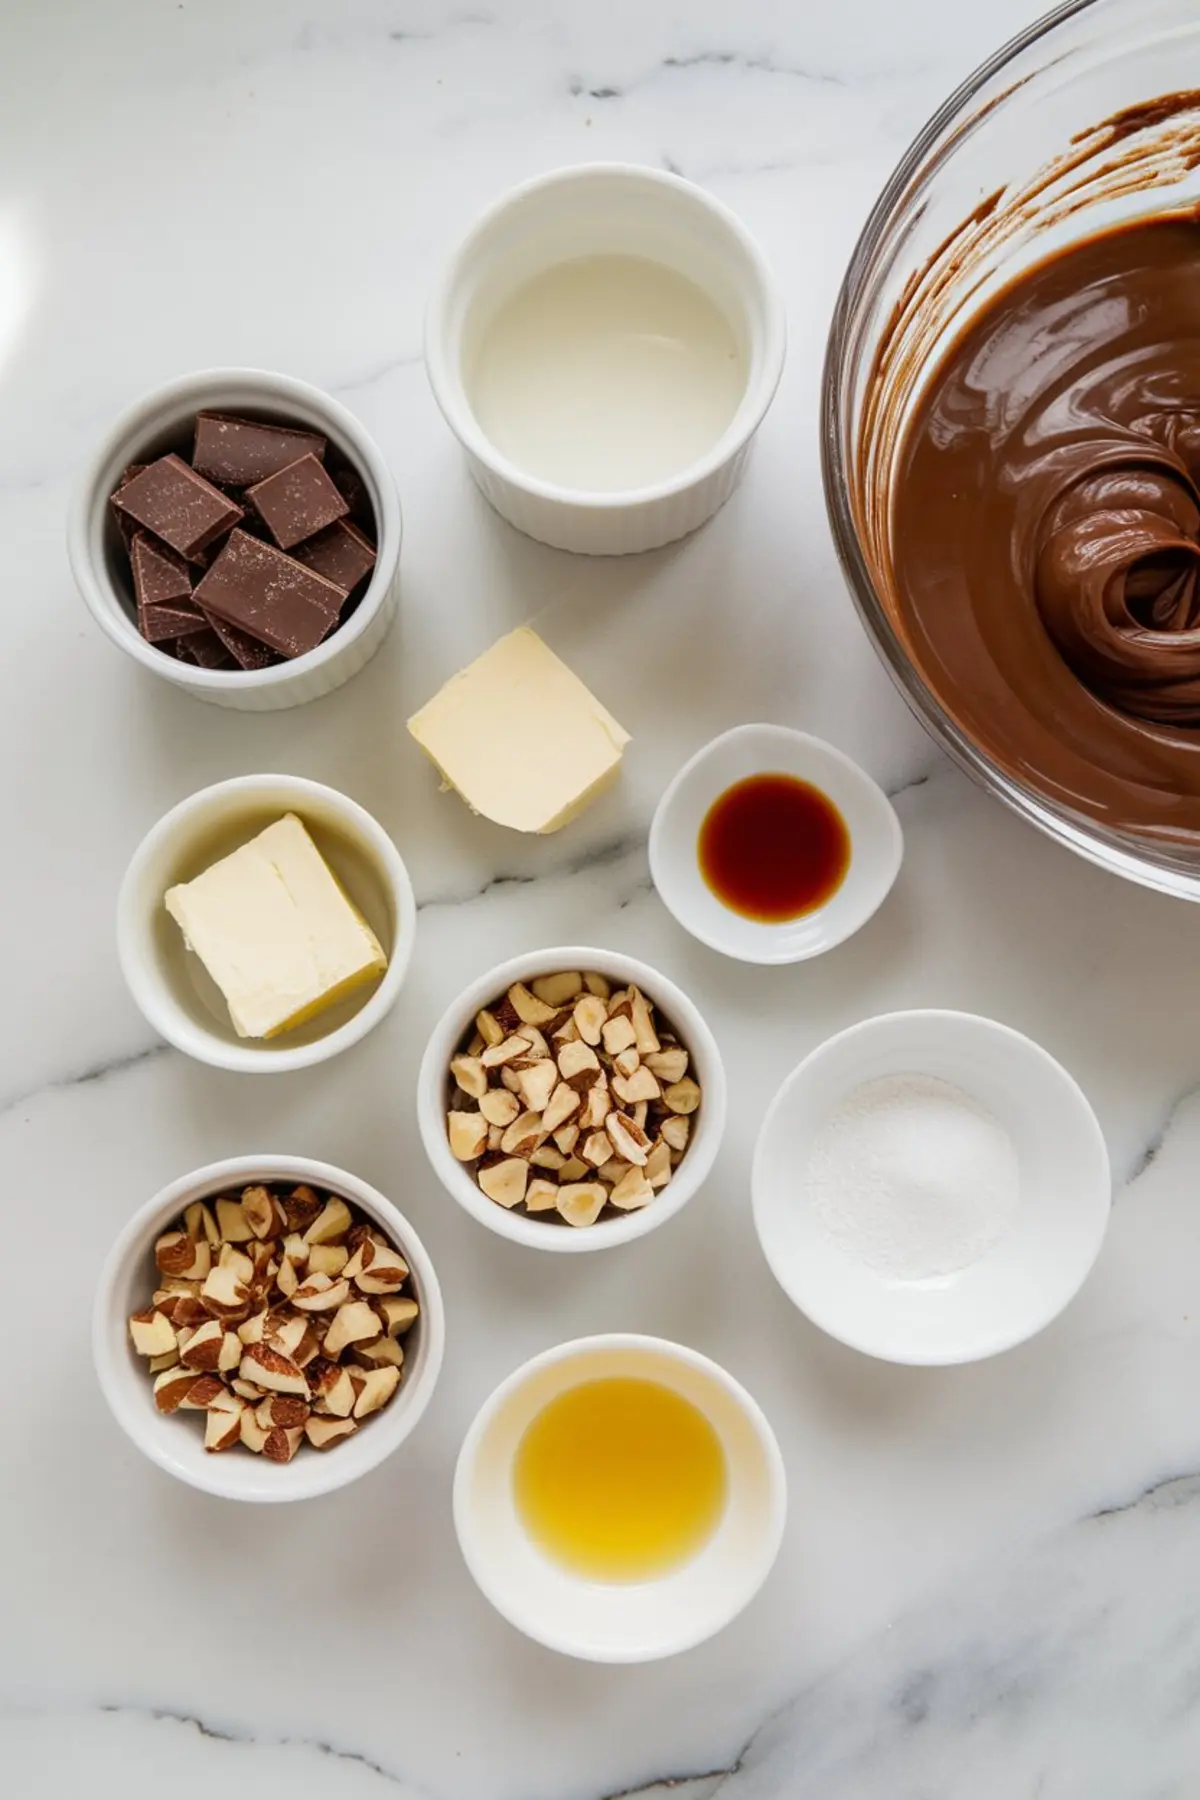
Ingredients
- FOR THE GANACHE FILLING
- 200g (7 oz) semi-sweet or dark chocolate, finely chopped
- 100ml (just under ½ cup) heavy cream
- 2 tbsp unsalted butter
- 1 tsp vanilla extract
- ½ cup finely chopped toasted hazelnuts
- FOR THE COATING
- 200g (7 oz) milk or dark chocolate (for melting)
- 2 tbsp coconut oil or neutral oil (optional)
- ½ cup finely chopped roasted hazelnuts
Instructions
- MAKE THE GANACHE: In a small saucepan, heat the heavy cream and butter over medium heat until it just begins to simmer. Do not let it boil. Remove from heat and pour over the chopped chocolate in a heat-safe bowl. Let sit for 2 minutes, then stir gently until the mixture becomes smooth and glossy.
- FLAVOR AND CHILL: Stir in the vanilla extract and chopped toasted hazelnuts. Cover the bowl and refrigerate the ganache for 1 to 2 hours, or until firm enough to scoop.
- SHAPE THE TRUFFLES: Once the ganache is firm, use a melon baller or teaspoon to scoop small portions and roll into balls between your palms. Lightly grease your hands or wear gloves to prevent melting. Place the shaped truffles on a parchment-lined tray and freeze for 15 to 20 minutes to firm them up for dipping.
- MELT THE COATING CHOCOLATE: In a double boiler or microwave in short bursts, melt the chocolate with the coconut oil if using. Stir until smooth and fluid.
- DIP AND DECORATE: Using a fork or dipping tool, dip each chilled truffle into the melted chocolate, allowing excess to drip off. Return each dipped truffle to the tray and immediately sprinkle with chopped roasted hazelnuts before the coating sets.
- SET THE TRUFFLES: Let the coated truffles sit at room temperature or place them in the refrigerator until the chocolate is fully set, about 20 to 30 minutes.
Notes
For the smoothest ganache texture, use high-quality chocolate bars rather than chocolate chips, as chips contain stabilizers that can affect melting and consistency. Choose a chocolate with at least 60% cocoa for a richer flavor, or opt for milk chocolate if you prefer a sweeter profile. Toasting the hazelnuts before chopping intensifies their flavor—spread them on a baking sheet and roast at 350°F (175°C) for about 10 minutes, shaking halfway through, then rub off the skins with a clean towel once cooled.
When shaping the truffles, working quickly with cold hands or wearing food-safe gloves can prevent the ganache from melting as you roll. Chilling the shaped truffles before dipping ensures they hold their form and keeps the coating process clean. If the melted chocolate begins to thicken while dipping, briefly warm it again in the microwave or over a double boiler to maintain a smooth consistency.
Adding coconut oil or a neutral oil like grapeseed helps thin the coating chocolate and gives the finished truffles a slight sheen. This step is optional but recommended if you want a polished finish without tempering the chocolate.
If gifting or storing the truffles, line containers with parchment paper and separate layers with additional parchment to prevent sticking. Truffles can be kept refrigerated in an airtight container for up to 1 week or frozen for up to 1 month. If frozen, thaw in the refrigerator overnight before serving.
For flavor variations, try adding a teaspoon of hazelnut liqueur to the ganache in place of vanilla, or mix in a pinch of sea salt for contrast. You can also roll the finished truffles in cocoa powder, powdered sugar, or crushed wafer cookies instead of dipping in chocolate, depending on the texture and look you want.
Nutrition Information
Yield
20Serving Size
1Amount Per Serving Calories 110Total Fat 10gSaturated Fat 3gTrans Fat 0gUnsaturated Fat 7gCholesterol 5mgSodium 1mgCarbohydrates 3gFiber 1gSugar 2gProtein 2g