There’s something truly magical about the holiday season—the crisp air, the glittering lights, and the aroma of fresh-baked cookies filling the house. And in my kitchen, no Christmas is complete without a batch of my favorite Christmas Lights Sugar Cookies. These cookies combine the buttery sweetness of classic sugar cookies with the playful, colorful decorations reminiscent of twinkling holiday lights. Not only are they delicious, but they’re also a joy to create, making them the perfect treat to share with loved ones or bring a smile to a holiday gathering.
For more simple and delicious ideas, check out my collection of 50 Easy Christmas Desserts—perfect for effortless holiday baking everyone will love!
Following a special diet?
Every recipe on this site can be converted to gluten-free, vegan, dairy-free, keto, nut-free or egg-free with adjusted ratios so nothing falls flat.
Try the Recipe Converter →A Personal Tradition: Decorating Christmas Cookies as a Family
For as long as I can remember, decorating cookies has been a holiday tradition in my family. As a child, I looked forward to the day we’d gather around the kitchen table with bowls of colorful icing and an assortment of sprinkles. My siblings and I would compete to see who could come up with the most creative designs, while my mom always seemed to create the most perfect, magazine-worthy cookies with delicate piping and intricate designs.
One year, while wrapping strings of lights around the Christmas tree, inspiration struck: Why not decorate our cookies to resemble those twinkling lights? It felt like the perfect way to capture the festive spirit of the season, and that’s how our Christmas Lights Sugar Cookies tradition began. Now, every year, we replicate the messy, fun tradition of stringing lights—except this time, on cookies.
The Basics of the Recipe
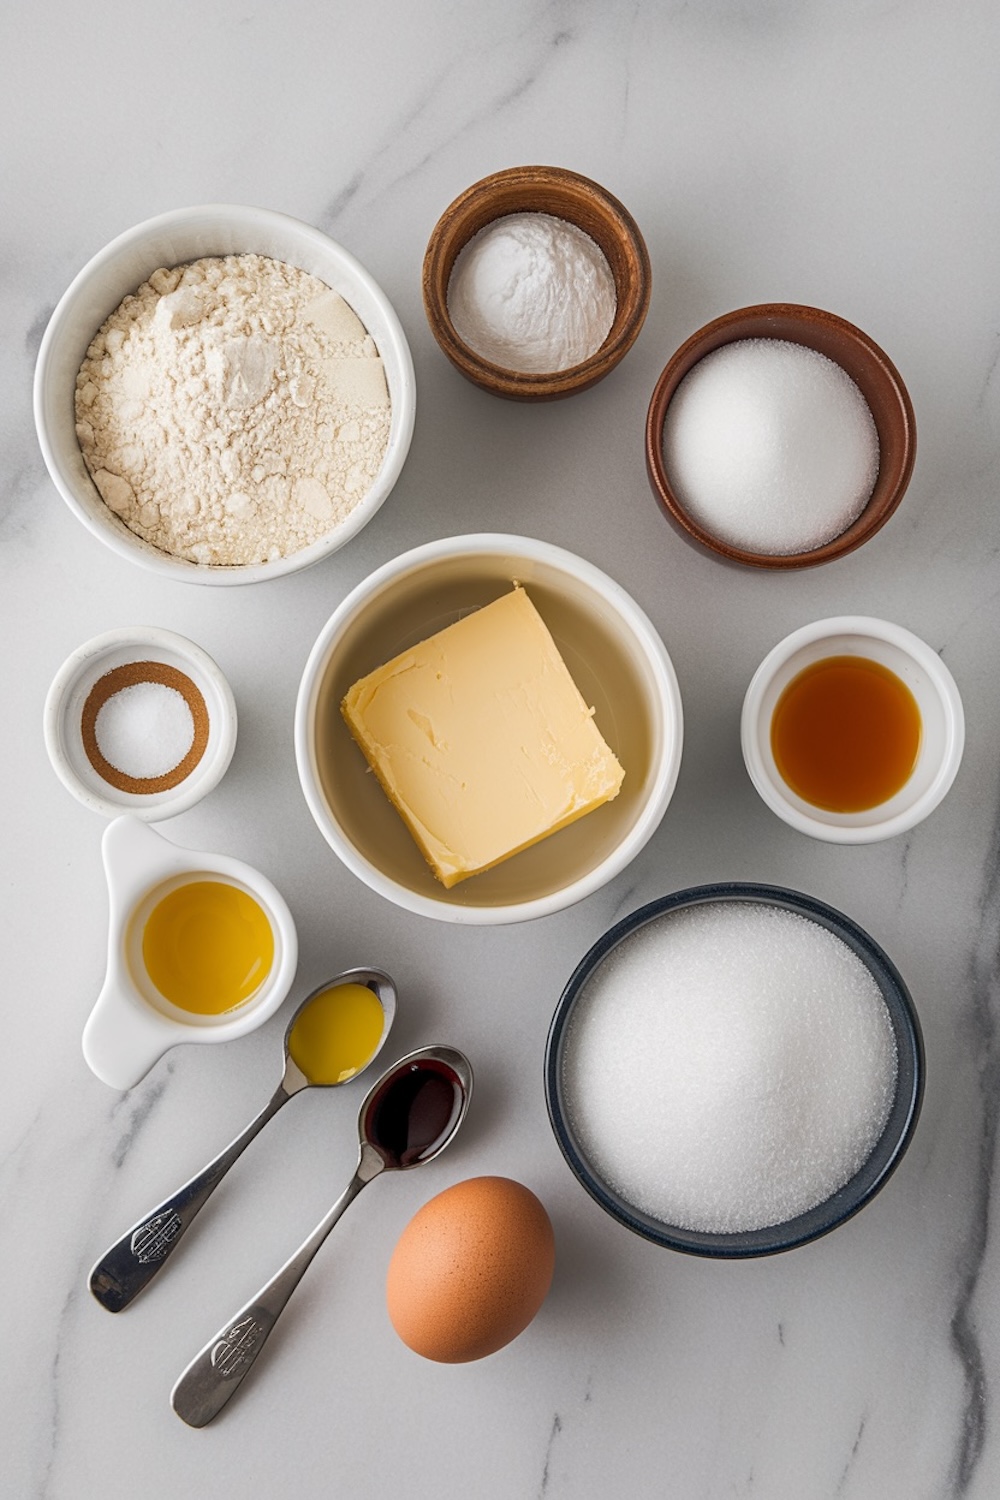
The beauty of these cookies lies in their simplicity. At their core, they are classic sugar cookies, which are both tender and sturdy enough to hold up to elaborate decorating. The dough is made with just a few pantry staples—flour, sugar, butter, and an egg. A touch of vanilla and almond extract adds a depth of flavor that sets these cookies apart from the typical store-bought varieties.
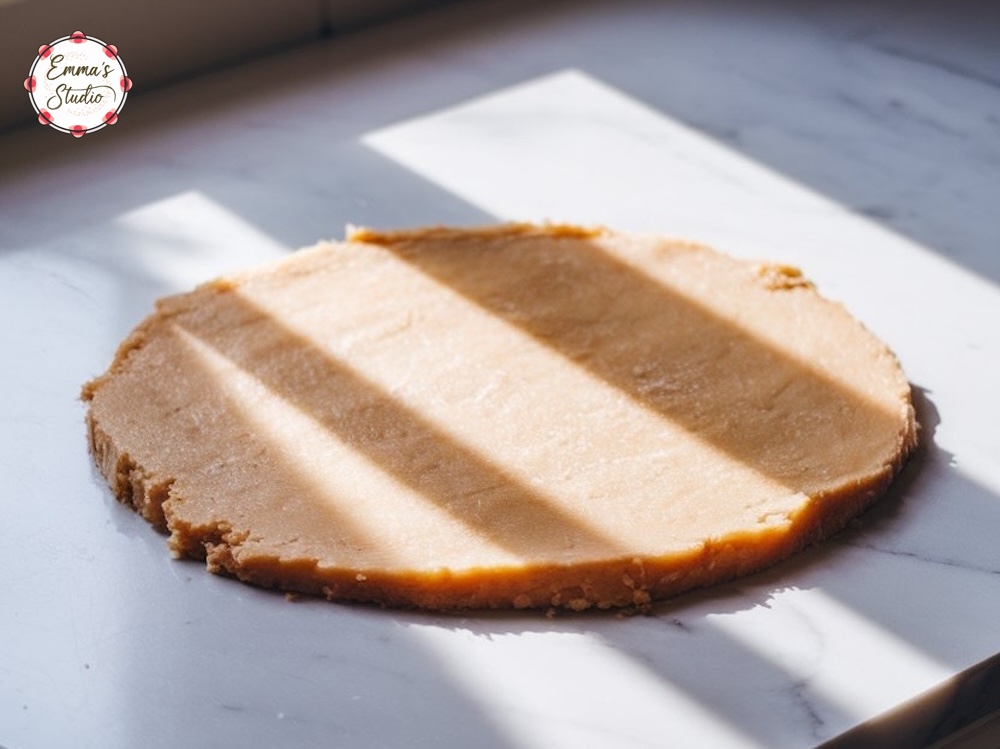
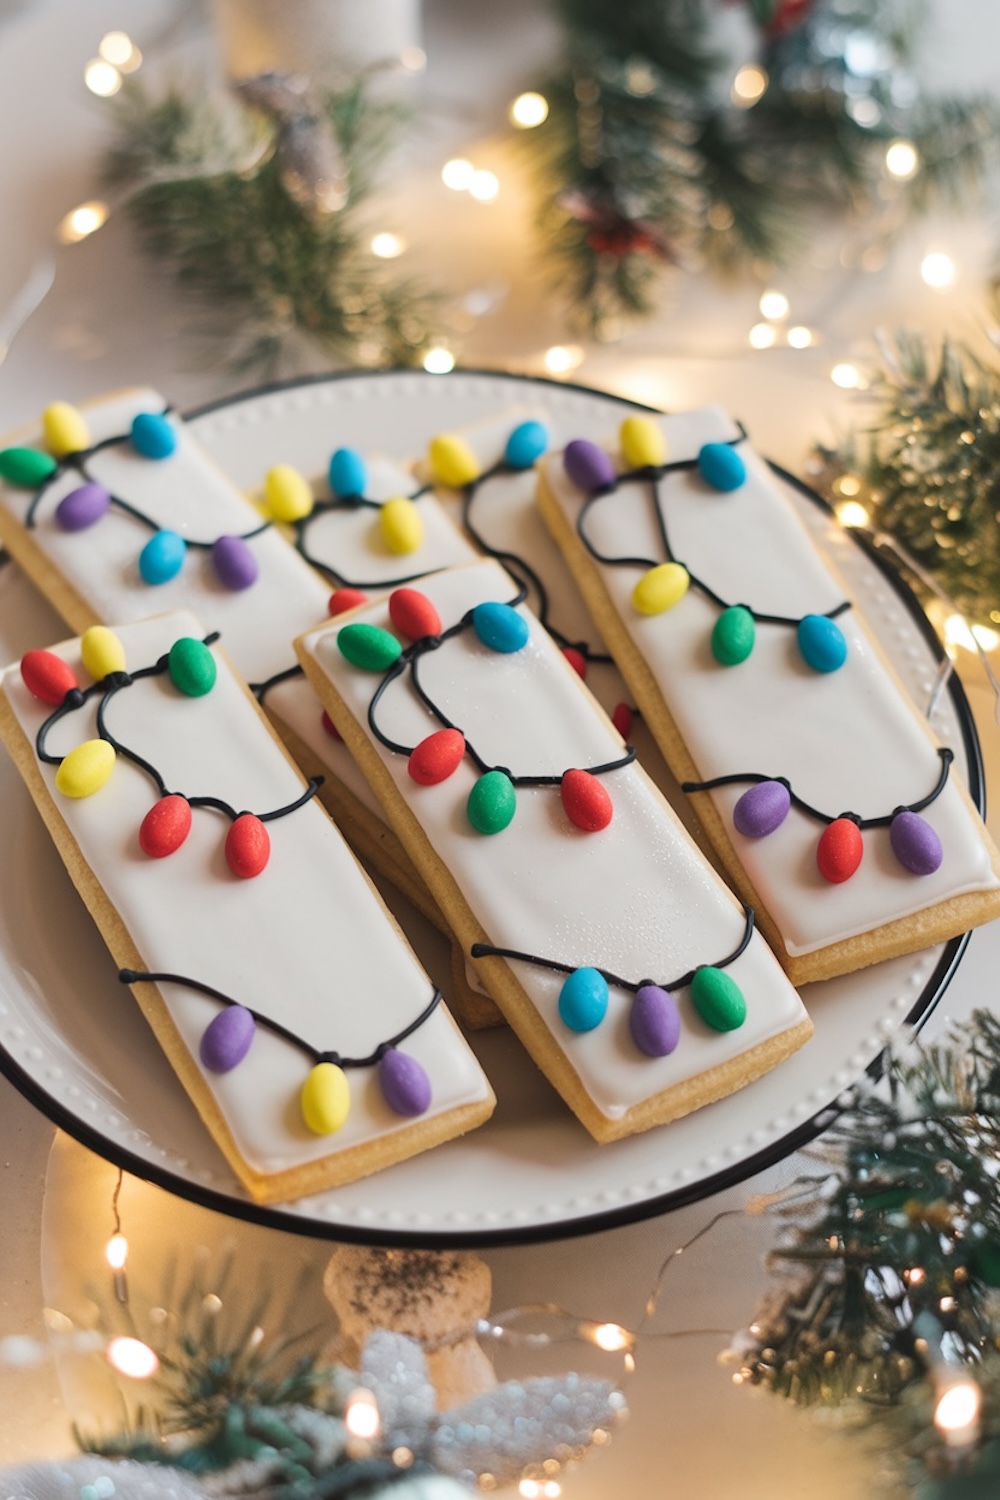
The key to success with this recipe is chilling the dough. Since sugar cookie dough is fairly soft, chilling helps it firm up and makes it easier to roll out and cut into shapes. After rolling the dough to about a quarter-inch thickness, you can use any shape of cookie cutter, but I recommend sticking with oval or rectangular shapes for that “light string” look. Once baked, the cookies are a golden blank canvas, ready to be transformed into mini works of edible art.
Preparing the Royal Icing: A Decorating Essential
One of the most exciting parts of this recipe is the decorating. To achieve that smooth, professional-looking finish, royal icing is a must. It’s made by whipping powdered sugar and meringue powder with just enough water to create a thick, pipeable icing. The trick to royal icing is getting the right consistency—thicker icing is perfect for outlining the cookies, while slightly thinned icing can be used to flood, or fill in, the centers.
I usually separate my royal icing into two bowls—one for the thicker outlining consistency and another for flooding. Once you have your icing ready, fill a piping bag (or a simple plastic zip-top bag with a snipped corner works in a pinch) and start by outlining each cookie. After that, you can flood the center with the thinner icing, using a toothpick to gently nudge the icing into place, covering the cookie evenly.
Decorating: Bringing Christmas Lights to Life
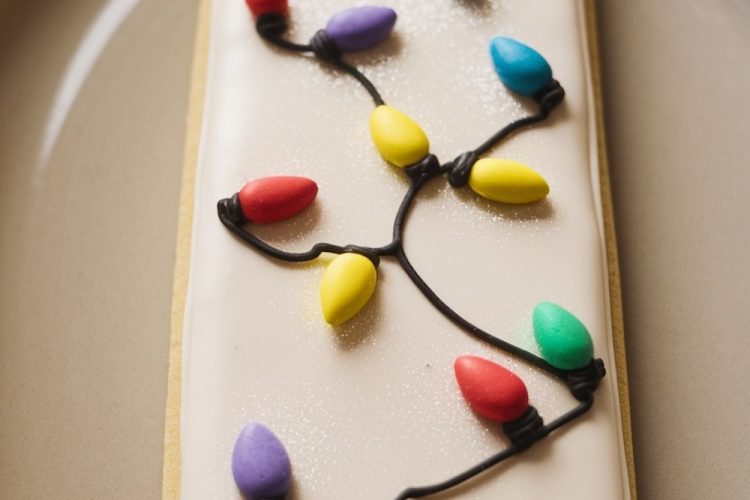
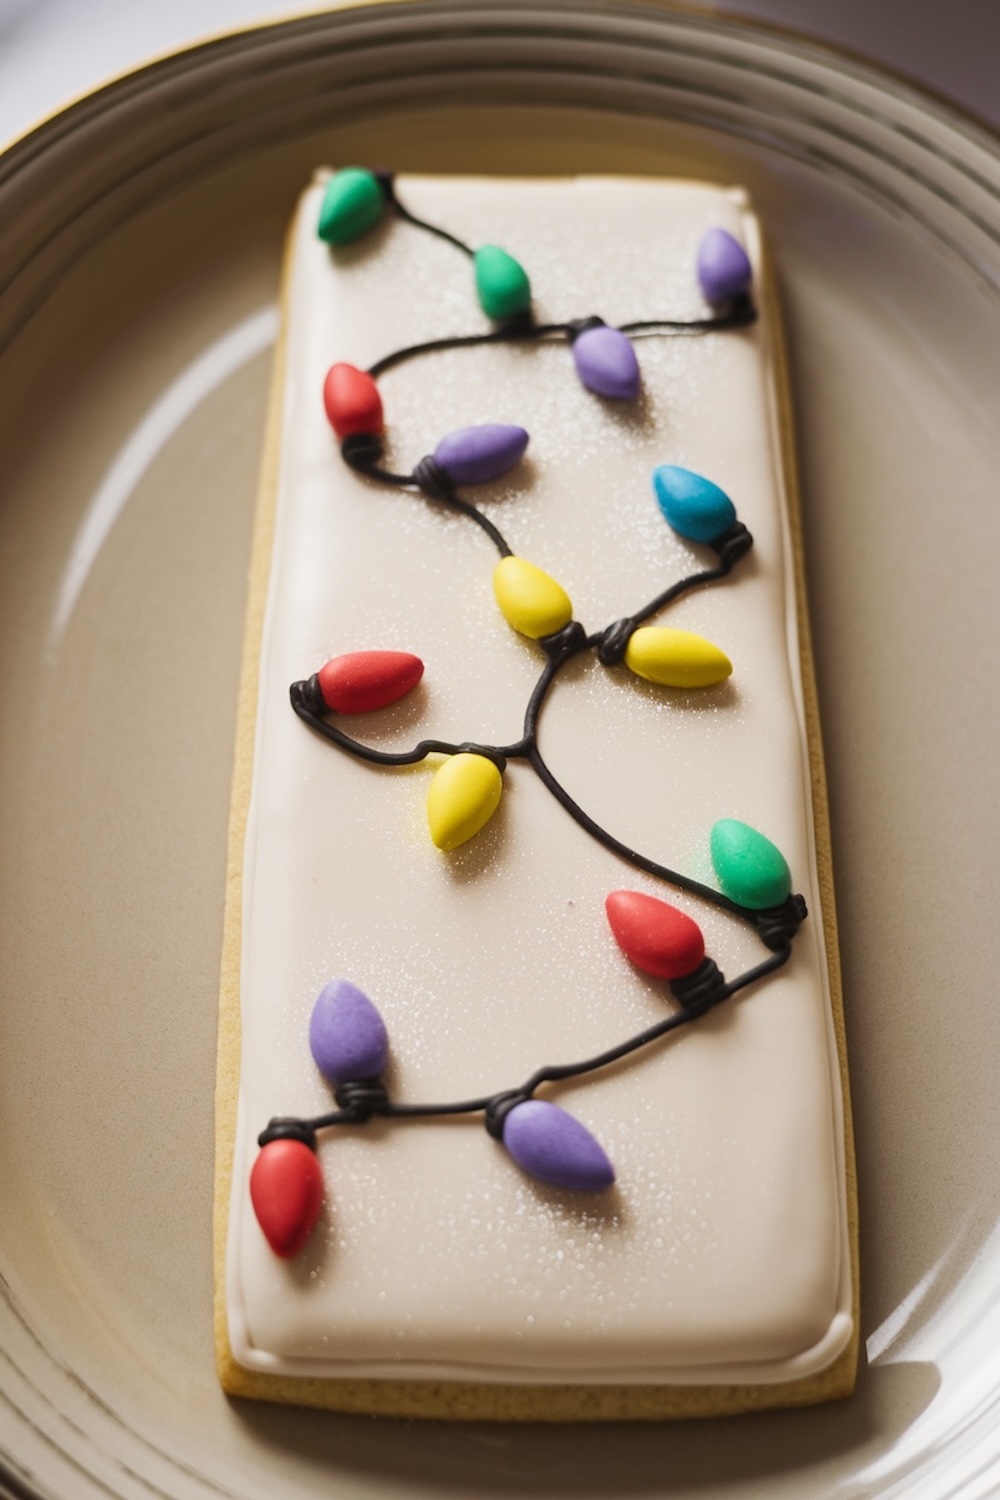
Now for the fun part—bringing the “Christmas lights” to life! Once the base layer of royal icing has dried, it’s time to add the finishing touches. Using a black icing gel or colored royal icing, draw a string of lights across each cookie, letting the lines crisscross and loop like real Christmas lights tangled around a tree.
For the lights themselves, mini M&Ms or other colorful candy-coated chocolates work wonderfully. You can also get creative and use fondant, shaping it into little teardrop bulbs to add a more homemade touch. If you’re feeling particularly artistic, use colored icing to add tiny highlights to each “light bulb” to mimic the shine of real lights.
The cookies need to dry completely before stacking or storing—this ensures the icing hardens properly and stays intact. And voila, you have a batch of delicious cookies that not only taste amazing but look like they were pulled straight from Santa’s workshop.
Expert Tips for Perfect Christmas Lights Sugar Cookies
- Chill the dough: Don’t skip chilling the dough before rolling it out. This prevents the cookies from spreading too much in the oven and helps them hold their shape.
- Control your icing consistency: Start with thicker icing for the outline and gradually thin it out for flooding. A little water goes a long way, so add it sparingly to avoid overly runny icing.
- Make it a group activity: Decorating these cookies is a fantastic group project! Set up a decorating station with candies, sprinkles, and extra piping bags so everyone can create their own unique designs.
Creative Serving Suggestions for Christmas Lights Sugar Cookies
These cookies are meant to stand out on your dessert table! Here are a few creative ways to serve them:
- Holiday Gift Boxes: Arrange a few cookies in a festive box with colorful tissue paper. They make the perfect homemade gift for neighbors, teachers, or coworkers.
- Christmas Eve Treats: Leave a plate of these cookies out for Santa, paired with a warm cup of cocoa. Don’t be surprised if he leaves an extra gift under the tree!
- Cookie Exchange Party: These decorated cookies are a hit at holiday cookie exchanges. Their bright and cheerful look will make them the star of the show.
Happy Baking Adventures!
There’s something so special about homemade cookies during the holiday season, and these Christmas Lights Sugar Cookies are the perfect way to celebrate. Whether you’re spending an afternoon with family, baking for a holiday party, or crafting homemade gifts, these cookies bring joy to every occasion. So why not turn on some Christmas music, pour yourself a glass of eggnog, and get started on these festive treats?
Love this recipe? Don’t forget to pin it to your favorite holiday dessert board for later! And if you try it, leave a comment below to share how your cookies turned out. Happy baking!

Christmas Lights Sugar Cookies Recipe
Course: Cake Ideas24-30
servings1
hour10
minutes180
kcalIngredients
- For the Sugar Cookies:
2 ¾ cups (345g) all-purpose flour
1 teaspoon baking powder
½ teaspoon salt
1 cup (225g) unsalted butter, room temperature
1 cup (200g) granulated sugar
1 large egg
1 teaspoon vanilla extract
½ teaspoon almond extract (optional)
- For the Royal Icing:
4 cups (480g) powdered sugar, sifted
3 tablespoons meringue powder
5-6 tablespoons water
½ teaspoon vanilla extract
- For Decorating:
Black icing gel (for the “light strings”)
Assorted colorful mini M&Ms, candy-coated chocolates, or fondant shaped into little light bulbs
Steps
- Step 1: Prepare the Sugar Cookie Dough
- In a medium bowl, whisk together the flour, baking powder, and salt. Set aside.
- In a large bowl, cream together the butter and sugar using an electric mixer on medium speed until light and fluffy, about 3-4 minutes.
- Beat in the egg, vanilla extract, and almond extract (if using).
- Gradually add the dry ingredients to the wet ingredients, mixing on low speed just until combined. The dough will be soft but not sticky.
- Divide the dough into two discs, wrap in plastic wrap, and chill in the fridge for at least 1 hour (or overnight).
- Step 2: Roll and Cut the Cookies
- Preheat the oven to 350°F (175°C). Line two baking sheets with parchment paper.
- On a lightly floured surface, roll out the dough to about ¼-inch thickness.
- Using a rectangular or oval cookie cutter (or a knife to freehand), cut out the cookie shapes. Place them about 1 inch apart on the prepared baking sheets.
- Bake the cookies for 10-12 minutes, or until the edges are lightly golden. Let them cool on the baking sheet for 5 minutes before transferring to a wire rack to cool completely.
- Step 3: Make the Royal Icing
- In a large bowl, combine the powdered sugar and meringue powder. Add 5 tablespoons of water and the vanilla extract. Mix on low speed until the icing holds soft peaks, adding more water a little at a time if necessary.
- For flooding consistency (to cover the cookie surface smoothly), thin the icing by adding ½ teaspoon of water at a time until the icing is thin enough to spread but still holds its shape when piped.
- Step 4: Decorate the Cookies
- Fill a piping bag with the royal icing and outline the cookie, then fill the center (this is called “flooding”). Use a toothpick to spread the icing into an even layer. Allow the icing to set for at least 1 hour.
- Once the base icing has dried, use black icing gel to pipe thin lines resembling tangled Christmas light strings across the cookie.
- Add colorful candy-coated chocolates or fondant lights along the string. If using fondant, mold small teardrop-shaped pieces and stick them onto the black line.
- Allow the cookies to dry completely before serving or storing.