
I recall a bright morning in my grandmother’s kitchen when the sweet scent of vanilla filled the air. She held a wooden spoon with a flourish, guiding me through a simple technique that turned flour and butter into little gems. I felt such joy pressing my thumb into each delicate dough ball, knowing a treat awaited everyone in the household.
That memory still warms my heart today, and these Easter Thumbprint Cookies rekindle that same delight. The contrasting textures keep me hooked, with a crisp edge leading into a buttery center. A spoonful of creamy white chocolate adds a sweet burst of flavor, making this dessert a highlight of my spring table.
Friends and family often linger around the cookie tray, sampling color after color of these pastel beauties. I love watching a simple bite transport them to a place of comfort and nostalgia. This treat carries me back to those early days, helping me share fond traditions with anyone who visits.
Following a special diet?
Every recipe on this site can be converted to gluten-free, vegan, dairy-free, keto, nut-free or egg-free with adjusted ratios so nothing falls flat.
Try the Recipe Converter →My Story with Easter Thumbprint Cookies
I started making these thumbprint cookies during my college years, surprising friends in my dorm with trays of freshly baked sweets. I remember balancing a textbook in one hand and a mixing bowl in the other, determined to recreate those childhood tastes. No one complained when I tested new pastel shades or tried different variations on the filling.
This dessert evolved over time, shaped by experiments and family preferences. My sister insisted on extra vanilla notes, while my mom loved swapping in a hint of lemon. The final version turned out to be a perfect match for festive gatherings and casual afternoons alike.
I cannot resist these lovely morsels whenever Easter approaches. The softness and gentle color scheme give them an inviting appearance on any dessert table. Guests enjoy that touch of whimsy, and I get excited to tell them how the recipe came to life in my grandmother’s kitchen.
Ingredients and Preparation
A quick mix of butter, sugar, an egg yolk, vanilla, flour, and salt creates the dough. I keep the butter at room temperature, ensuring a smooth and cohesive blend that forms easily between my hands. This step reminds me of my grandmother’s advice to never rush the dough, and I appreciate her patience to this day.
Chilled dough keeps its shape during baking, preventing excessive spreading in the oven. A short rest in the refrigerator usually does the trick, although I sometimes let it sit a bit longer. My preference is to have a manageable dough that rolls into uniform balls without hassle.
Steady hands are important once everything is combined. That thumbprint in the middle of each cookie transforms a humble recipe into something with real personality. I think of those old techniques passed down through generations, linking me with bakers from every corner of my family tree.
Shaping and Baking the Dough
Rolling the chilled dough into small spheres feels meditative. I find that one-inch balls bake more evenly, and they look tidier on a serving platter. Placing them on a parchment-lined sheet keeps cleanup easy, which makes me very happy after a day of baking.
A gentle press with my thumb, or a measuring spoon, creates the signature indentation. The oven then turns the dough golden at the edges, locking in that soft center. I often keep an eye on them for the final minute, since a light golden hue preserves the tender bite I love.
Cooling them fully on a wire rack is critical before adding the pastel filling. I have rushed that step before, and the chocolate ran too thin. That small delay pays off by creating a neat spot for the melted white chocolate to settle.
Colorful White Chocolate Filling
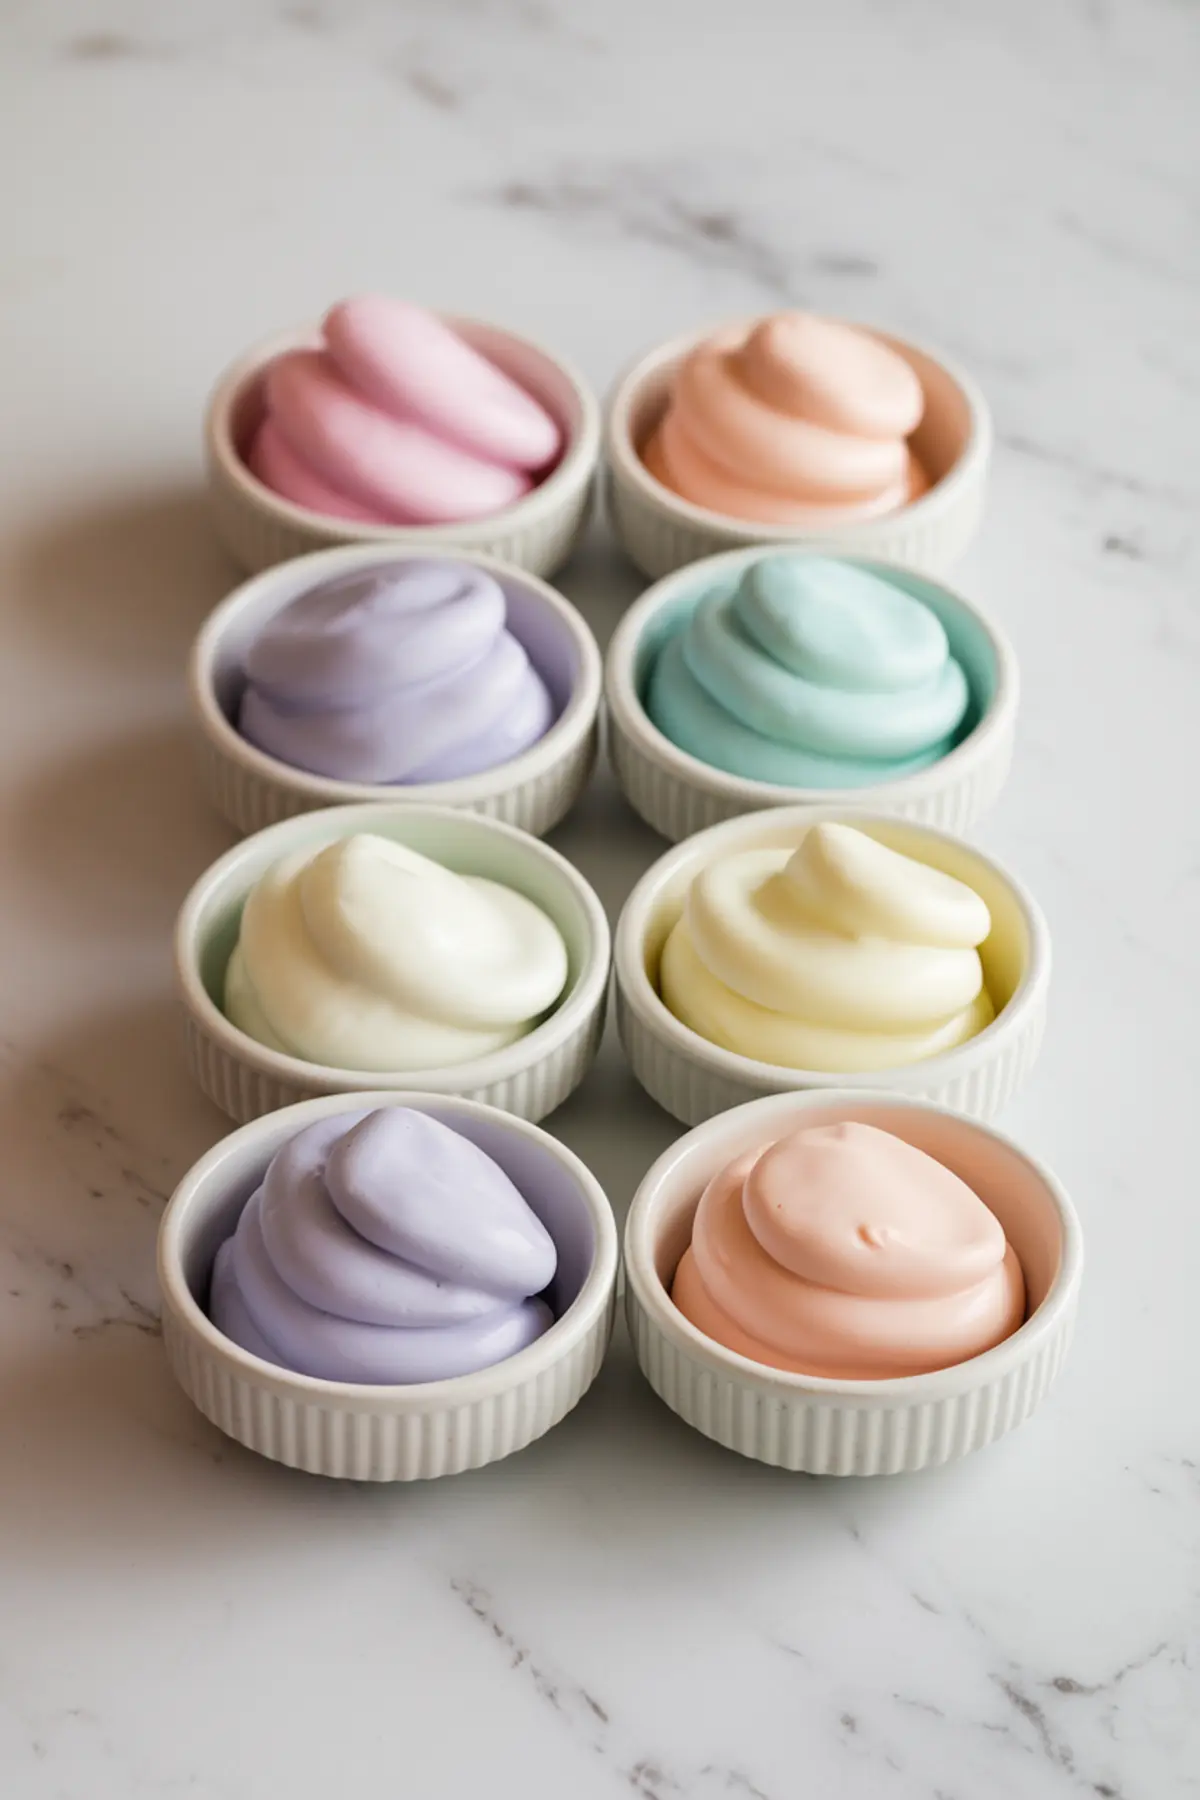
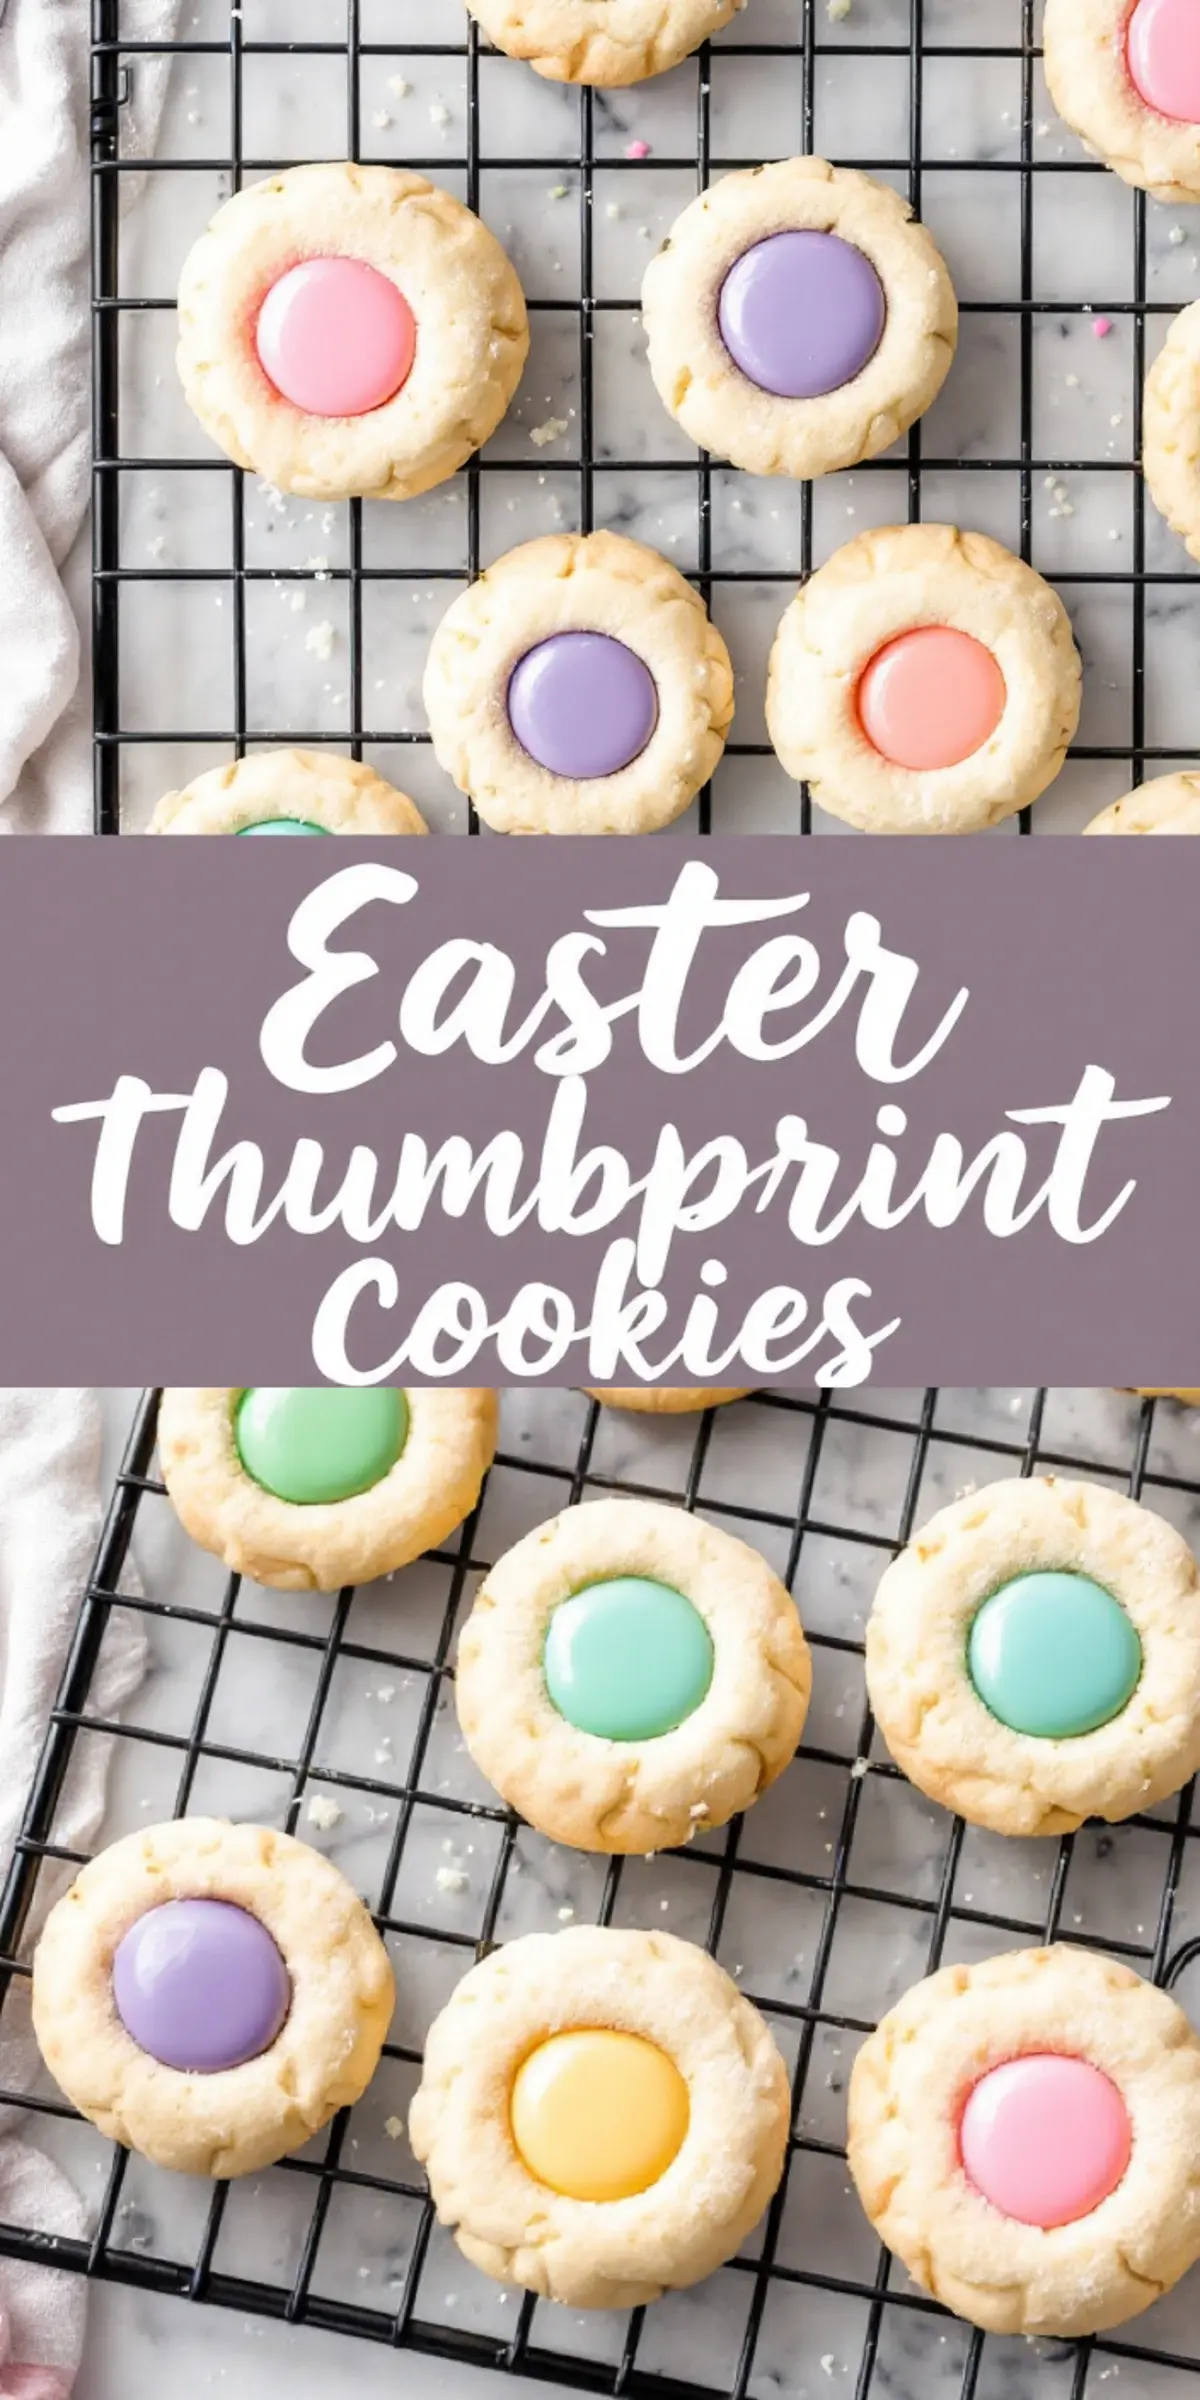
Freshly melted white chocolate, combined with heavy cream, brings a velvety texture. Pastel shades turn these cookies into an Easter showcase, reminding me of bright eggs in a woven basket. A few drops of food coloring go a long way, so it is wise to proceed slowly until I see the right hue.
I prefer to divide the chocolate into separate bowls for pink, yellow, blue, green, and purple. Each color represents a different corner of spring, reflecting the soft blossoms outside my window. Filling the indentations brings a sense of calm, as though I am painting small works of art.
A short rest at room temperature sets the filling to a lightly firm consistency. Ten minutes in the fridge helps if I need to plate them fast for a gathering. Friends marvel at the pastel display and wonder how something so simple looks so appealing.
Additional Easter Treat Ideas
I like to present these cookies alongside other Easter specialties to create a lively dessert spread. The Hot Cross Buns on my table add a comforting blend of spices and dried fruit for a classic holiday touch. My nieces adore Bunny Oreo Popswith their playful designs, bringing grins to everyone around.
A tray of Marbled Easter Egg Cookies alongside these thumbprints brings an artistic flair to any celebration. Variety keeps the experience fresh, allowing guests to sample diverse shapes and flavors. It also makes the dessert table fun to explore, especially for children seeking bright, colorful sweets.
Spring feasts become more exciting with this combination of treats. Everyone can nibble on an assortment that captures the season’s spirit. My family grows more enthusiastic each year, waiting to see which recipes I pick.
Final Thoughts on Easter Thumbprint Cookies

I hope this dessert brightens your kitchen as much as it has mine. Each bite feels like a reminder of shared laughter and time spent with loved ones. The pastel filling sparks conversation, and the buttery dough pleases even the pickiest eater in my family.
Feel free to pin this recipe for future reference on your Easter boards. I welcome your feedback in the comments, and I love hearing how your cookies turned out or if any questions popped up. That sense of community keeps me inspired to share more treats from my home to yours.
Easter Thumbprint Cookies Recipe

A buttery, tender cookie with a creamy white chocolate filling in soft pastel shades. These festive treats are perfect for spring celebrations.
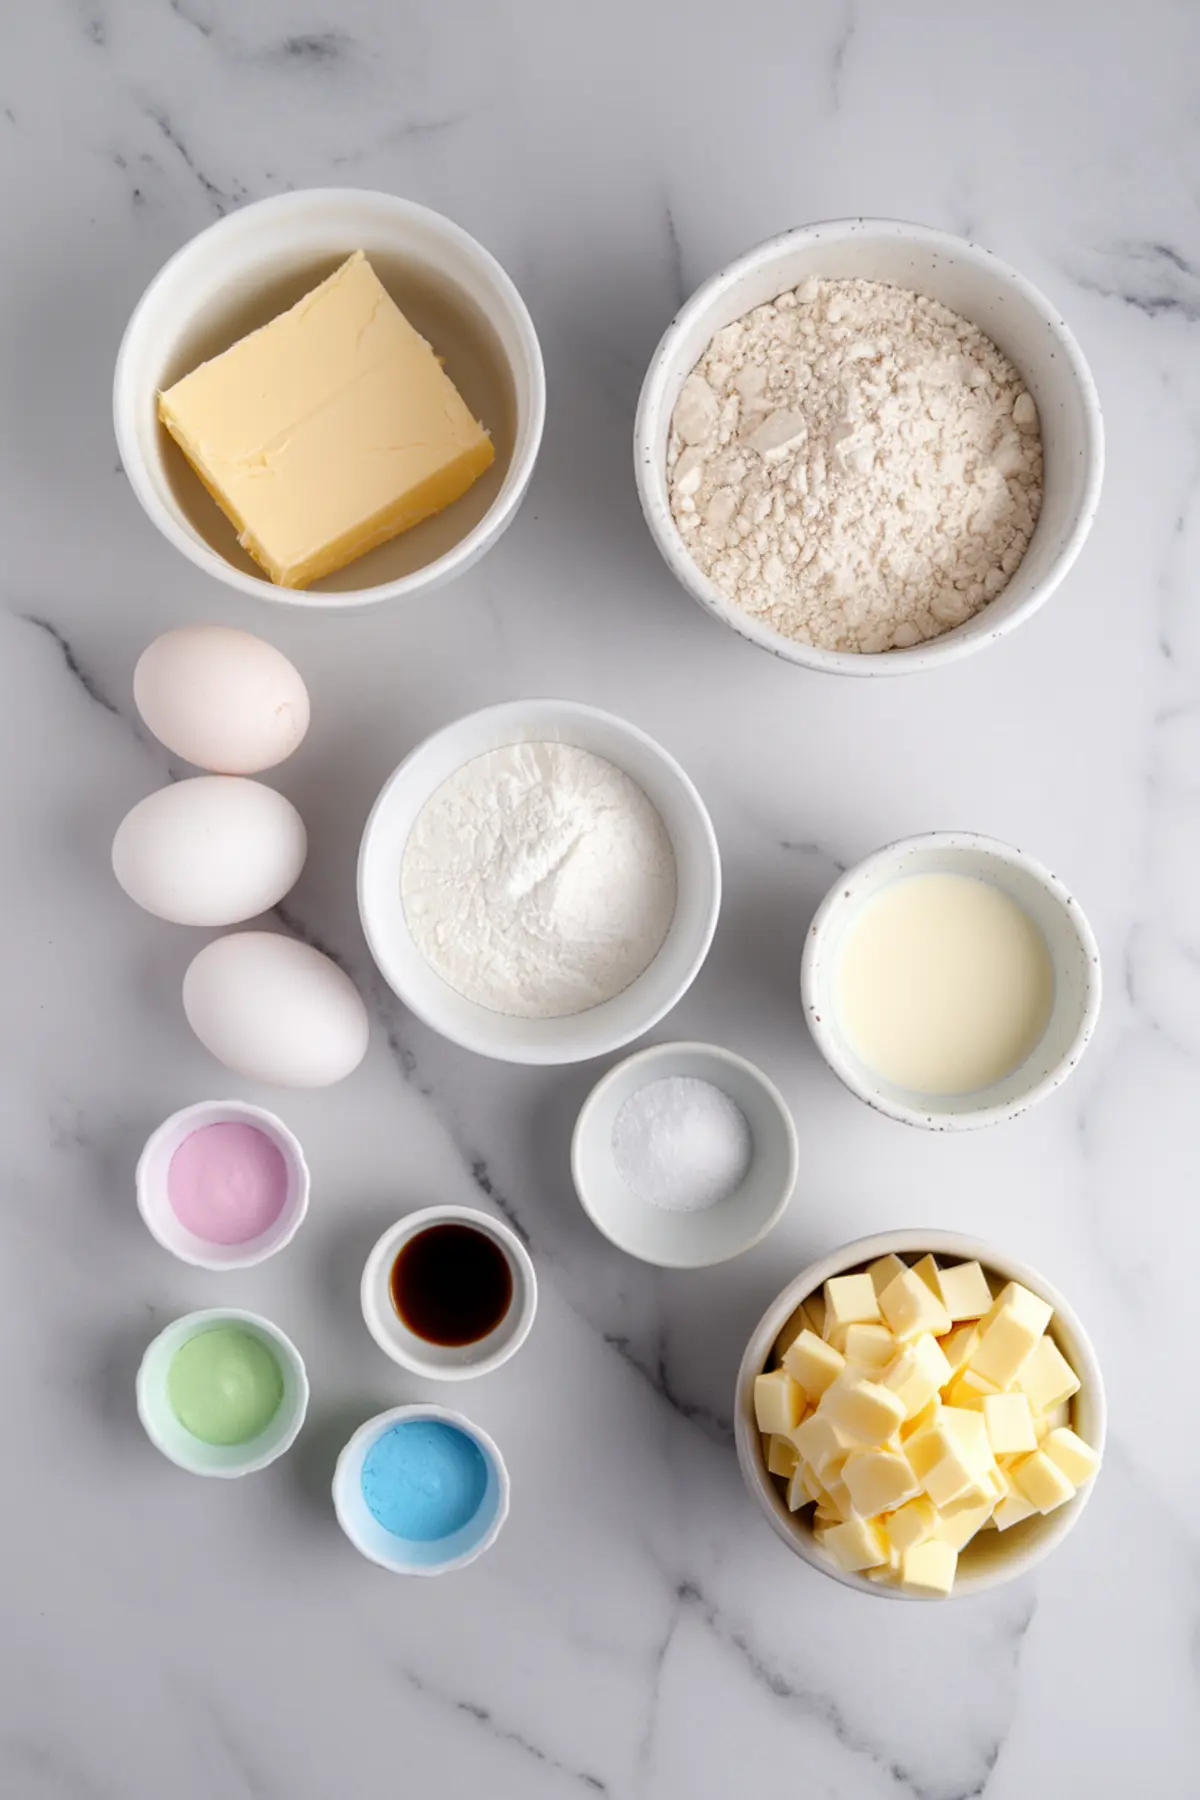
Ingredients
- FOR THE COOKIES:
- 1 cup (226g) unsalted butter, softened
- ½ cup (100g) granulated sugar
- 1 large egg yolk
- 1 teaspoon vanilla extract
- 2 cups (250g) all-purpose flour
- ¼ teaspoon salt
- FOR THE FILLING:
- 6 oz (170g) white chocolate, chopped
- ¼ cup (60ml) heavy cream
- ½ teaspoon vanilla extract
- Gel food coloring in pastel shades (pink, yellow, blue, green, purple)
Instructions
- MAKE THE COOKIE DOUGH: In a large mixing bowl, cream together the softened butter and granulated sugar until light and fluffy. Add the egg yolk and vanilla extract, mixing until well incorporated. Gradually add the flour and salt, stirring until a soft dough forms. Wrap the dough in plastic wrap and chill for 30 minutes to make it easier to handle.
- SHAPE AND BAKE: Preheat the oven to 350°F (175°C) and line a baking sheet with parchment paper. Roll the chilled dough into 1-inch balls and place them 2 inches apart on the prepared baking sheet. Use your thumb or the back of a teaspoon to create an indentation in the center of each cookie. Bake for 12-14 minutes, or until the edges are lightly golden. If the indentations puff up during baking, gently press them down again while the cookies are still warm. Allow the cookies to cool completely on a wire rack before filling.
- PREPARE THE COLORFUL FILLING: In a heatproof bowl, melt the white chocolate and heavy cream together over a double boiler or in the microwave in 15-second increments, stirring until smooth. Stir in the vanilla extract. Divide the melted chocolate into small bowls, one for each color. Add a tiny drop of gel food coloring to each bowl and stir well to achieve soft pastel shades.
- FILL THE COOKIES: Using a small spoon, carefully fill each cookie indentation with the colored white chocolate mixture. Let the cookies sit at room temperature for about 30 minutes to allow the filling to set. For a quicker set, place them in the fridge for 10 minutes.
Notes
Chilling the dough helps prevent the cookies from spreading too much while baking.
If the dough feels too firm after chilling, let it sit at room temperature for 5 minutes before shaping.
Use gel food coloring instead of liquid food coloring to maintain the right consistency in the filling.
Store the cookies in an airtight container at room temperature for up to 3 days or in the refrigerator for up to a week.
Nutrition Information
Yield
24Serving Size
1Amount Per Serving Calories 70Total Fat 2gSaturated Fat 1gTrans Fat 0gUnsaturated Fat 1gCholesterol 18mgSodium 45mgCarbohydrates 10gFiber 1gSugar 1gProtein 2g