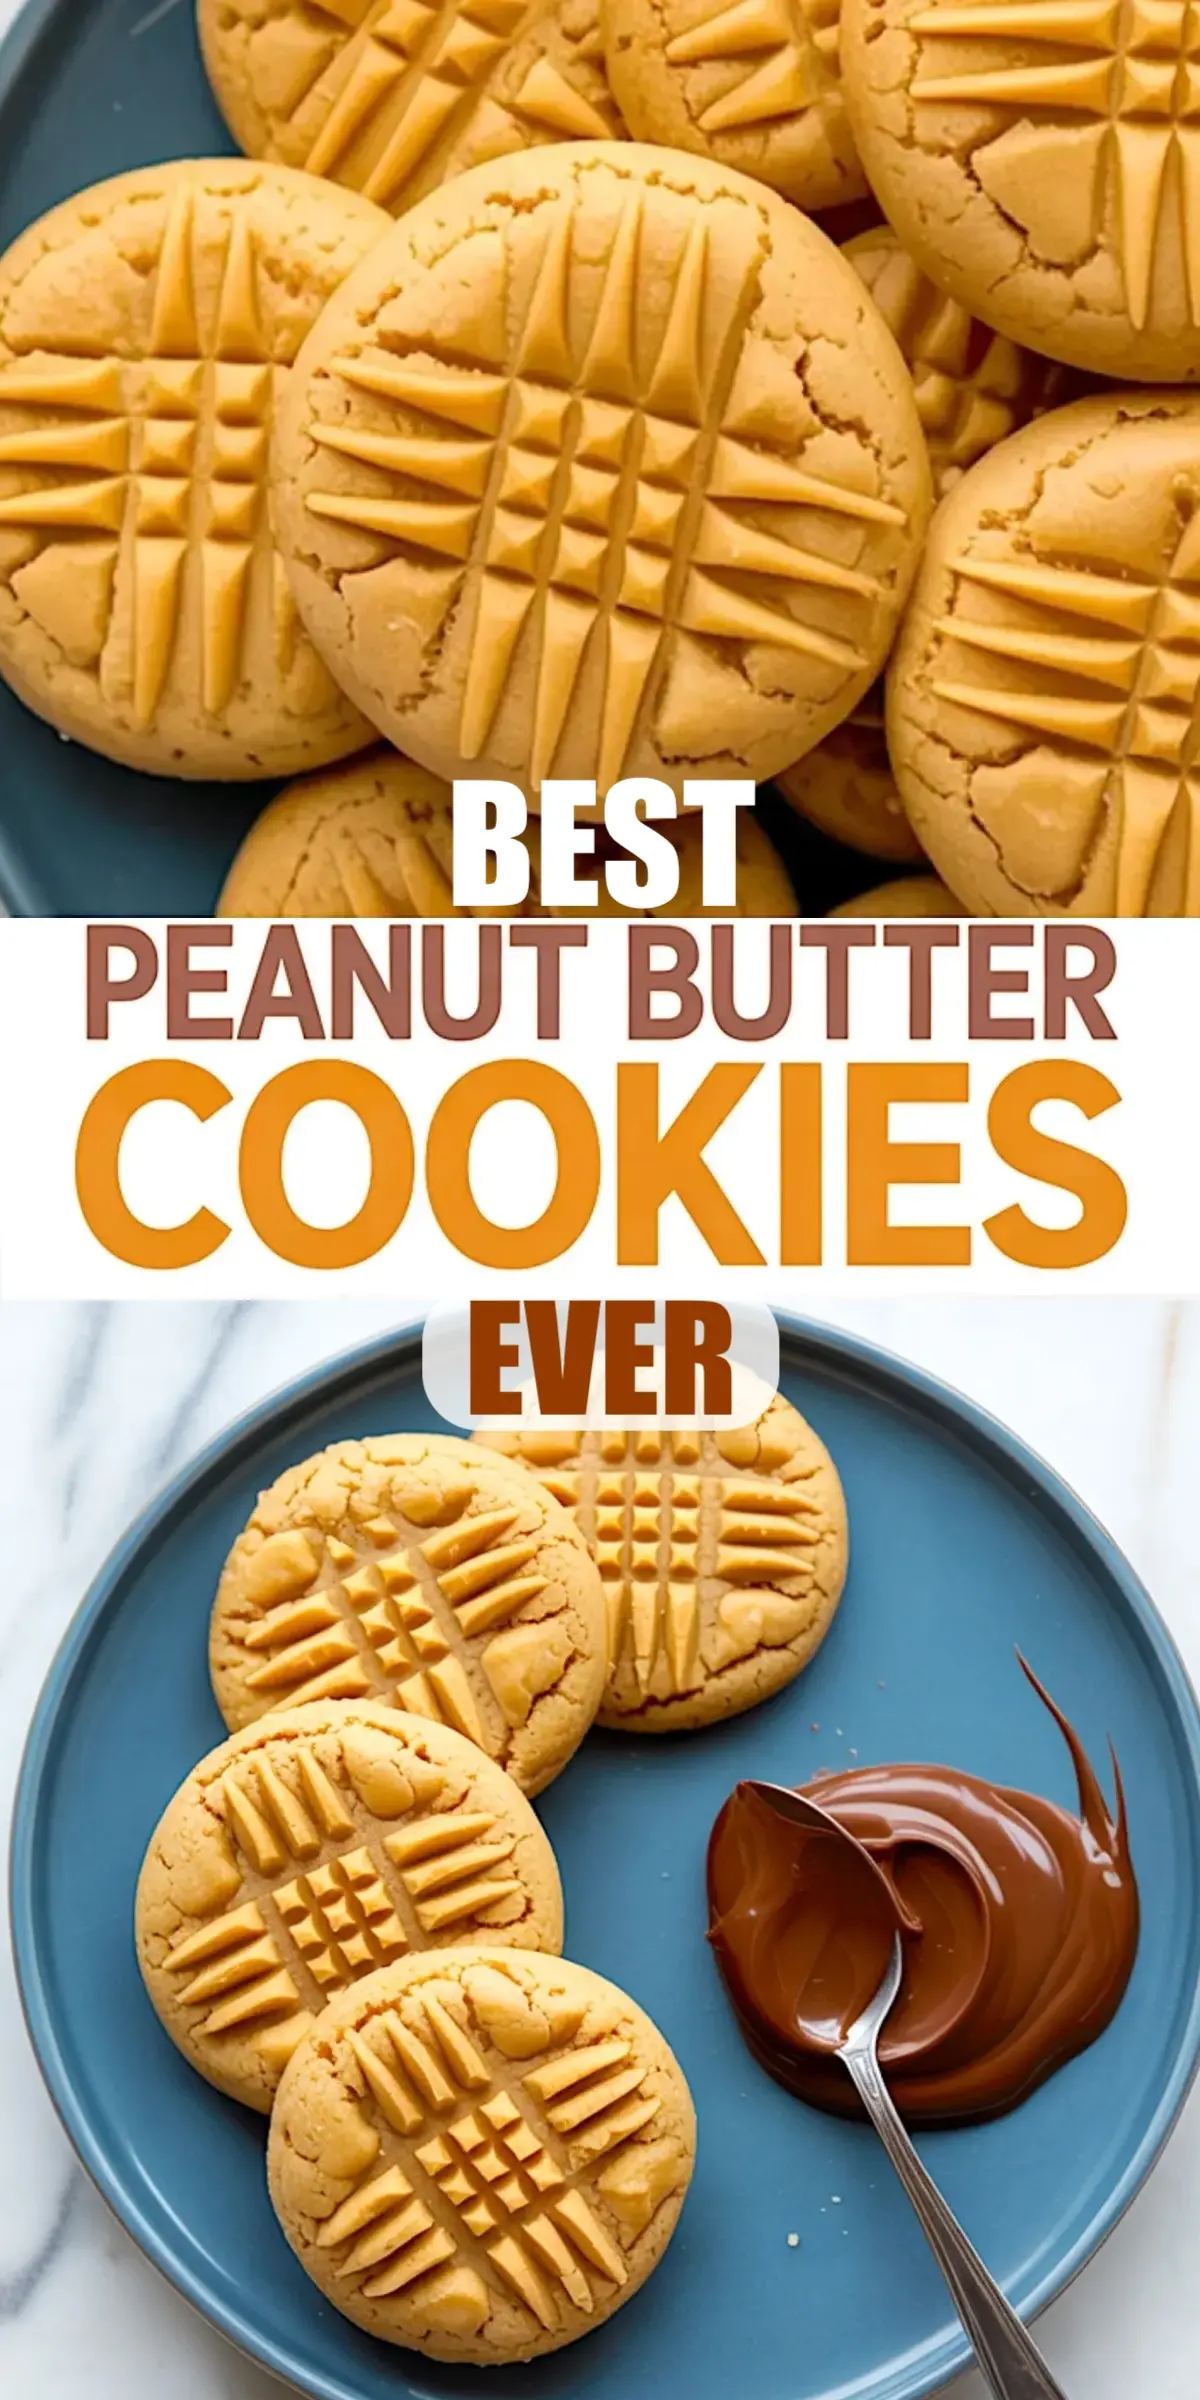
If you’ve ever been promised soft peanut butter cookies and ended up with hockey pucks, this is for you.
You’ll get cookies that hold their shape but stay tender inside. No fridge time, no fancy techniques. Just one bowl and a fork. I’ve tested this method more times than I can count on rainy days, bake sales, and late-night cravings and it delivers every time.
This post walks you through the process and gives you the confidence to get it right, even if you’ve never baked a cookie in your life.
Following a special diet?
Every recipe on this site can be converted to gluten-free, vegan, dairy-free, keto, nut-free or egg-free with adjusted ratios so nothing falls flat.
Try the Recipe Converter →Why This Peanut Butter Cookie Recipe Works
Peanut butter cookies walk a fine line between too soft and too dry. This one nails the balance by using both brown and white sugar, which help with structure and chew. The butter softens the bite, and the baking soda and baking powder add just enough lift to keep things light.
These bake fast, stay soft, and taste like childhood with a hint of grown-up sensibility.
I use this recipe when I need a no-fuss dessert with consistent results. You won’t find gimmicks here, just the kind of cookie people ask you to bring again.
Ingredients That Make a Difference
You’ll start with creamy peanut butter not the natural kind. I’ve tried both, and while natural peanut butter has its charm, it just doesn’t hold up here. It changes the texture and causes too much spread.
Stick to something like Jif or Skippy. You’ll thank yourself later.
Softened butter blends smoothly with both sugars. Granulated gives the classic crunch on the edge, while brown sugar gives moisture and depth. Together, they build that chewy bite that separates the best peanut butter cookies from the crumbly ones.
A single egg gives structure, and vanilla warms the flavor without overpowering it. I’ve seen versions skip the vanilla, but I always keep it in it rounds things out.
As for the dry mix, a balance of baking soda and baking powder gives these cookies their subtle rise. Just enough to avoid dense middles without puffing them too much. A pinch of salt brings it all together. The flour adds body and holds the shape for that crisscross press.
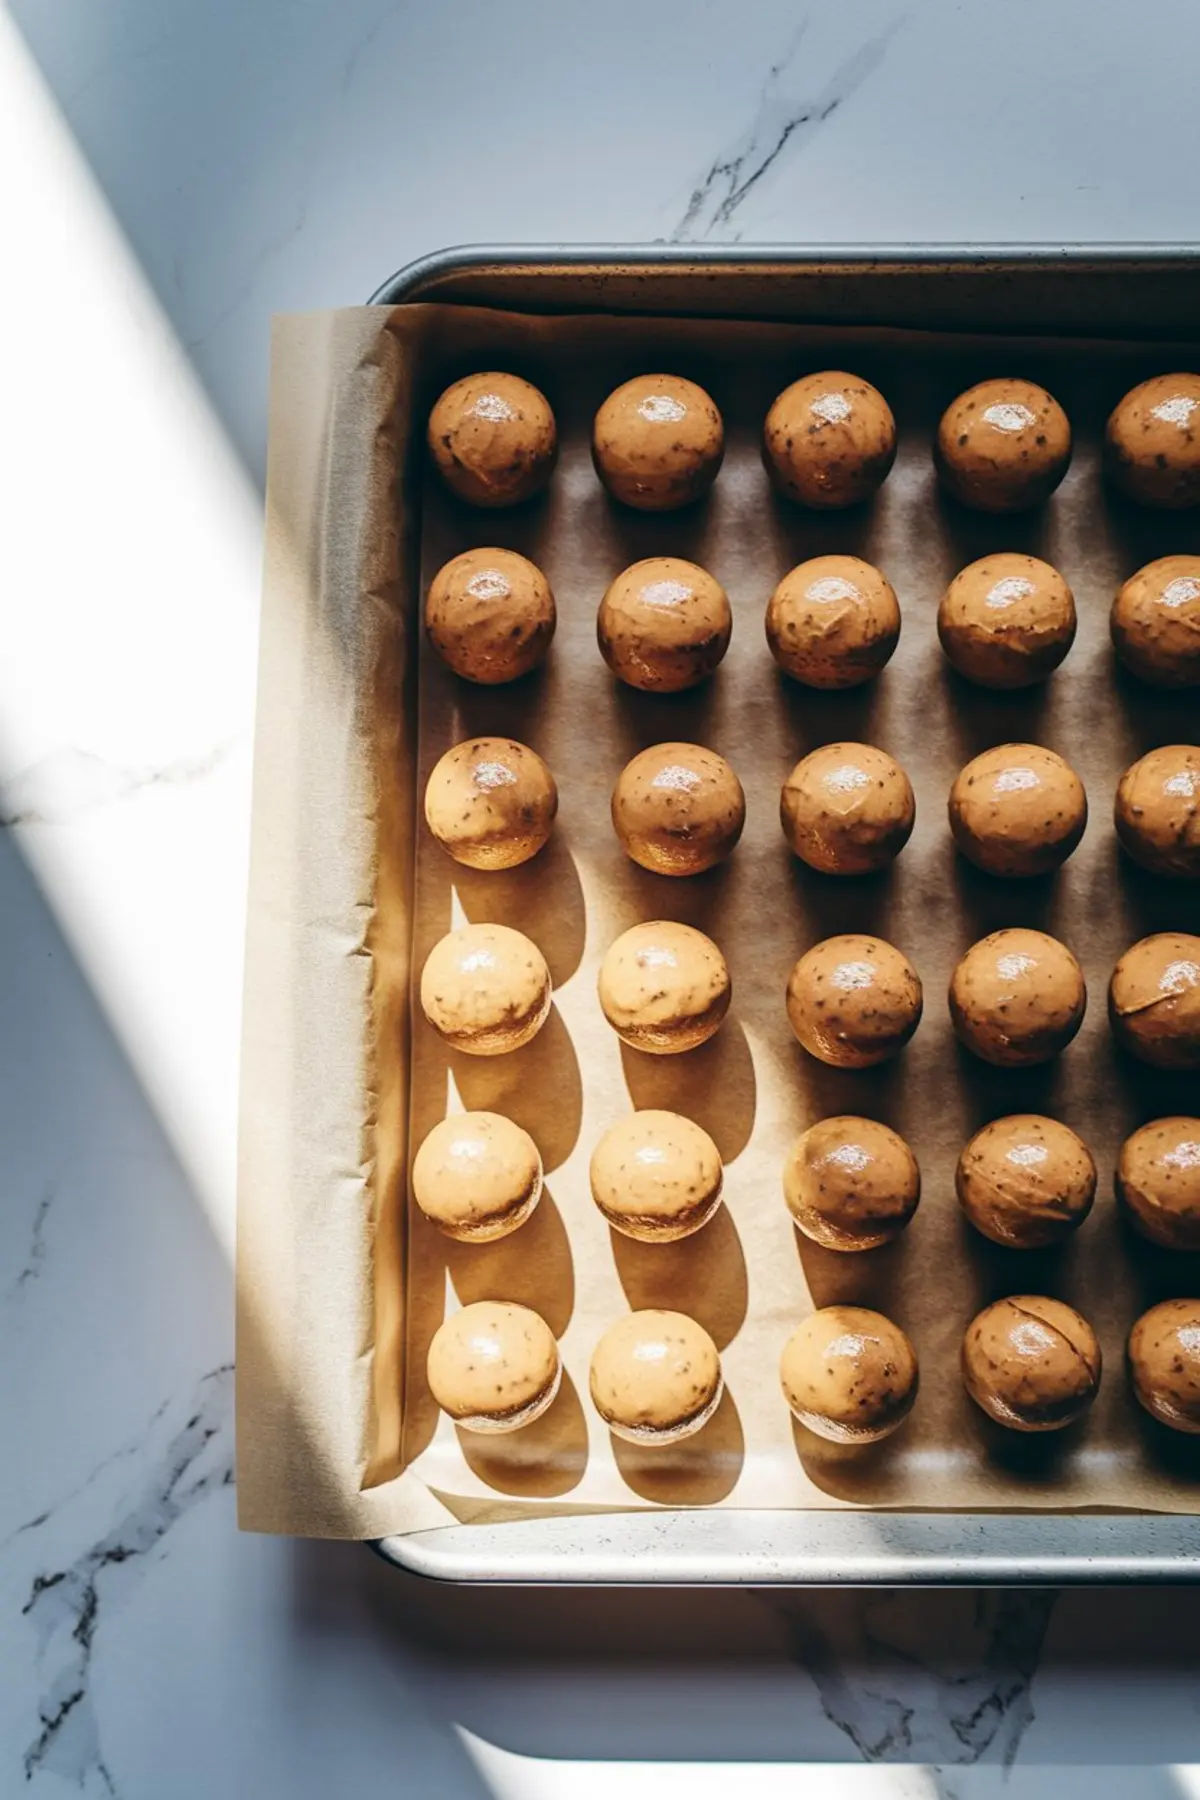
I Don’t Chill the Dough
I’ve tested this recipe chilled and unchilled. Chilled dough yields thicker cookies, but they often lose that signature fork mark. The dough becomes stiff and cracks around the edges.
Room temperature dough spreads just enough and takes the crisscross beautifully. Since these cookies don’t over-spread, chilling is unnecessary here. That saves time and dishes.
Baking Notes From Experience
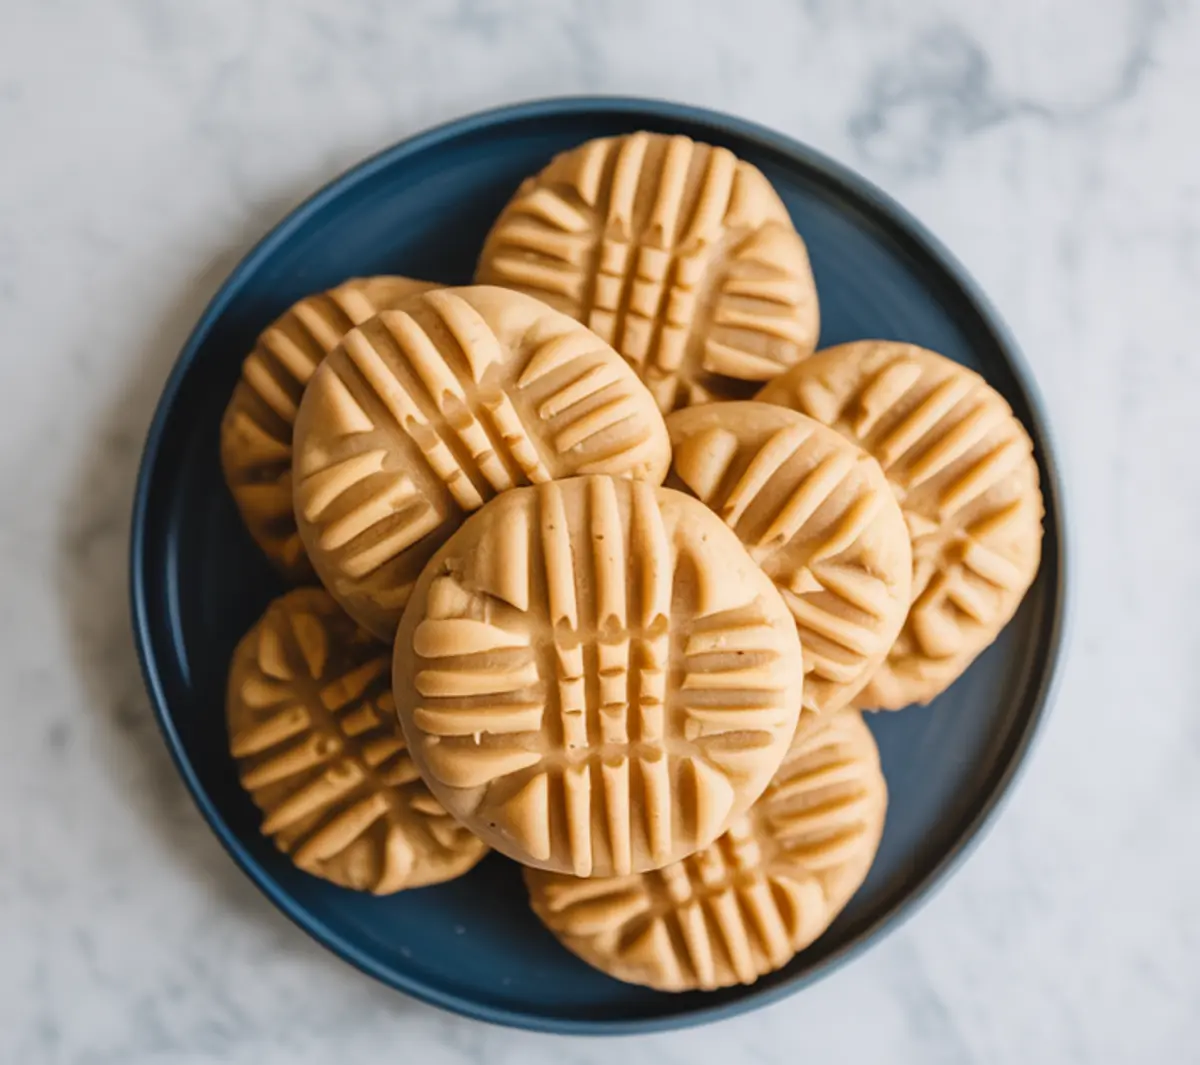
Bake at 350°F for 10 to 12 minutes. Watch the edges. They should be lightly golden, but the centers will still look soft.
That’s where the magic is.
If you wait until the centers are golden too, they’ll overbake. They’ll still be edible, but you’ll miss the soft, chewy middle.
Let them sit on the baking sheet for five minutes. Don’t rush this step. The cookies will finish setting and lift easily without crumbling.
Then move them to a cooling rack and try not to eat one right away. They smell like every bake sale you’ve ever walked past.
The Real Difference: Creamy vs. Natural Peanut Butter
I’ve tested this recipe with both shelf-stable creamy peanut butter and natural peanut butter—the kind with oil separation and no added sugar. The results aren’t subtle.
Cookies made with natural peanut butter spread too much, bake unevenly, and often end up with an oily sheen. The dough also feels stickier and harder to shape. It’s frustrating when the flavor’s there, but the texture falls apart.
With conventional creamy peanut butter, the dough holds its shape, presses cleanly with a fork, and bakes up with soft centers and crisp edges every time. Brands like Jif or Skippy give consistent results because the fat and sugar ratios stay fixed. No guessing. No surprises.
In my kitchen notes, the natural kind is better left for toast or smoothies. For cookies, stick with creamy.
How to Serve and Store Them
These cookies do well on a platter or in a lunchbox. If you want to dress them up, dip half in melted dark chocolate and let it set on parchment. It’s simple, but it adds a little polish.
To store, keep them in an airtight container at room temperature. They hold for about four days without getting stale. I usually tuck a slice of bread into the container to keep them soft longer.
They also freeze beautifully. Stack them between parchment sheets and seal in a freezer bag. I’ve kept them frozen up to a month with no noticeable change in taste or texture.
For something different, crumble a few over vanilla ice cream or press them into the base of a peanut butter pie. They’re flexible, even if the recipe itself is fixed.
Related Recipes You’ll Want Next
If you’re on a peanut butter streak, try my 3 Ingredient Peanut Butter Cookies when the pantry’s running low. They’re quick, flourless, and surprisingly satisfying.
For a chocolate twist, you’ll want to see my Peanut Butter and Chocolate Chip Cookies or the Peanut Butter Blossom Cookies—those are the ones with the kiss on top.
Or explore something different like my Cake Mix Cookies if you want soft, bakery-style cookies without pulling out a mixer.
And for readers avoiding sugar or carbs, my Keto Peanut Butter Cookies keep the texture with none of the sugar crash.
No oven? I’ve got Peanut Butter No Bake Cookies that set up right on the counter.
Final Thoughts: Save and Share
If you try this recipe, pin it to your “Easy Cookies Few Ingredients” board or wherever you keep your go-tos. It’s a reliable, weeknight-ready recipe that won’t disappoint.
I’d love to hear how they turned out. Did you try chocolate chips? Did you use crunchy peanut butter just to prove me wrong? Leave a comment and share what worked for you.
You might just help the next reader make their best ever peanut butter cookies.
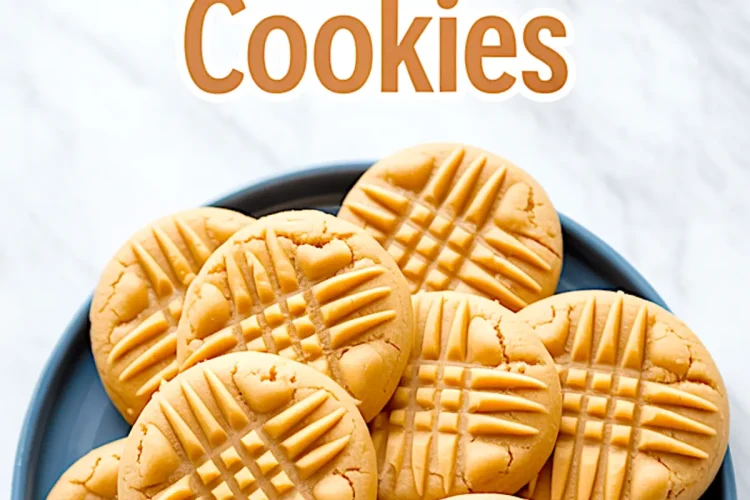
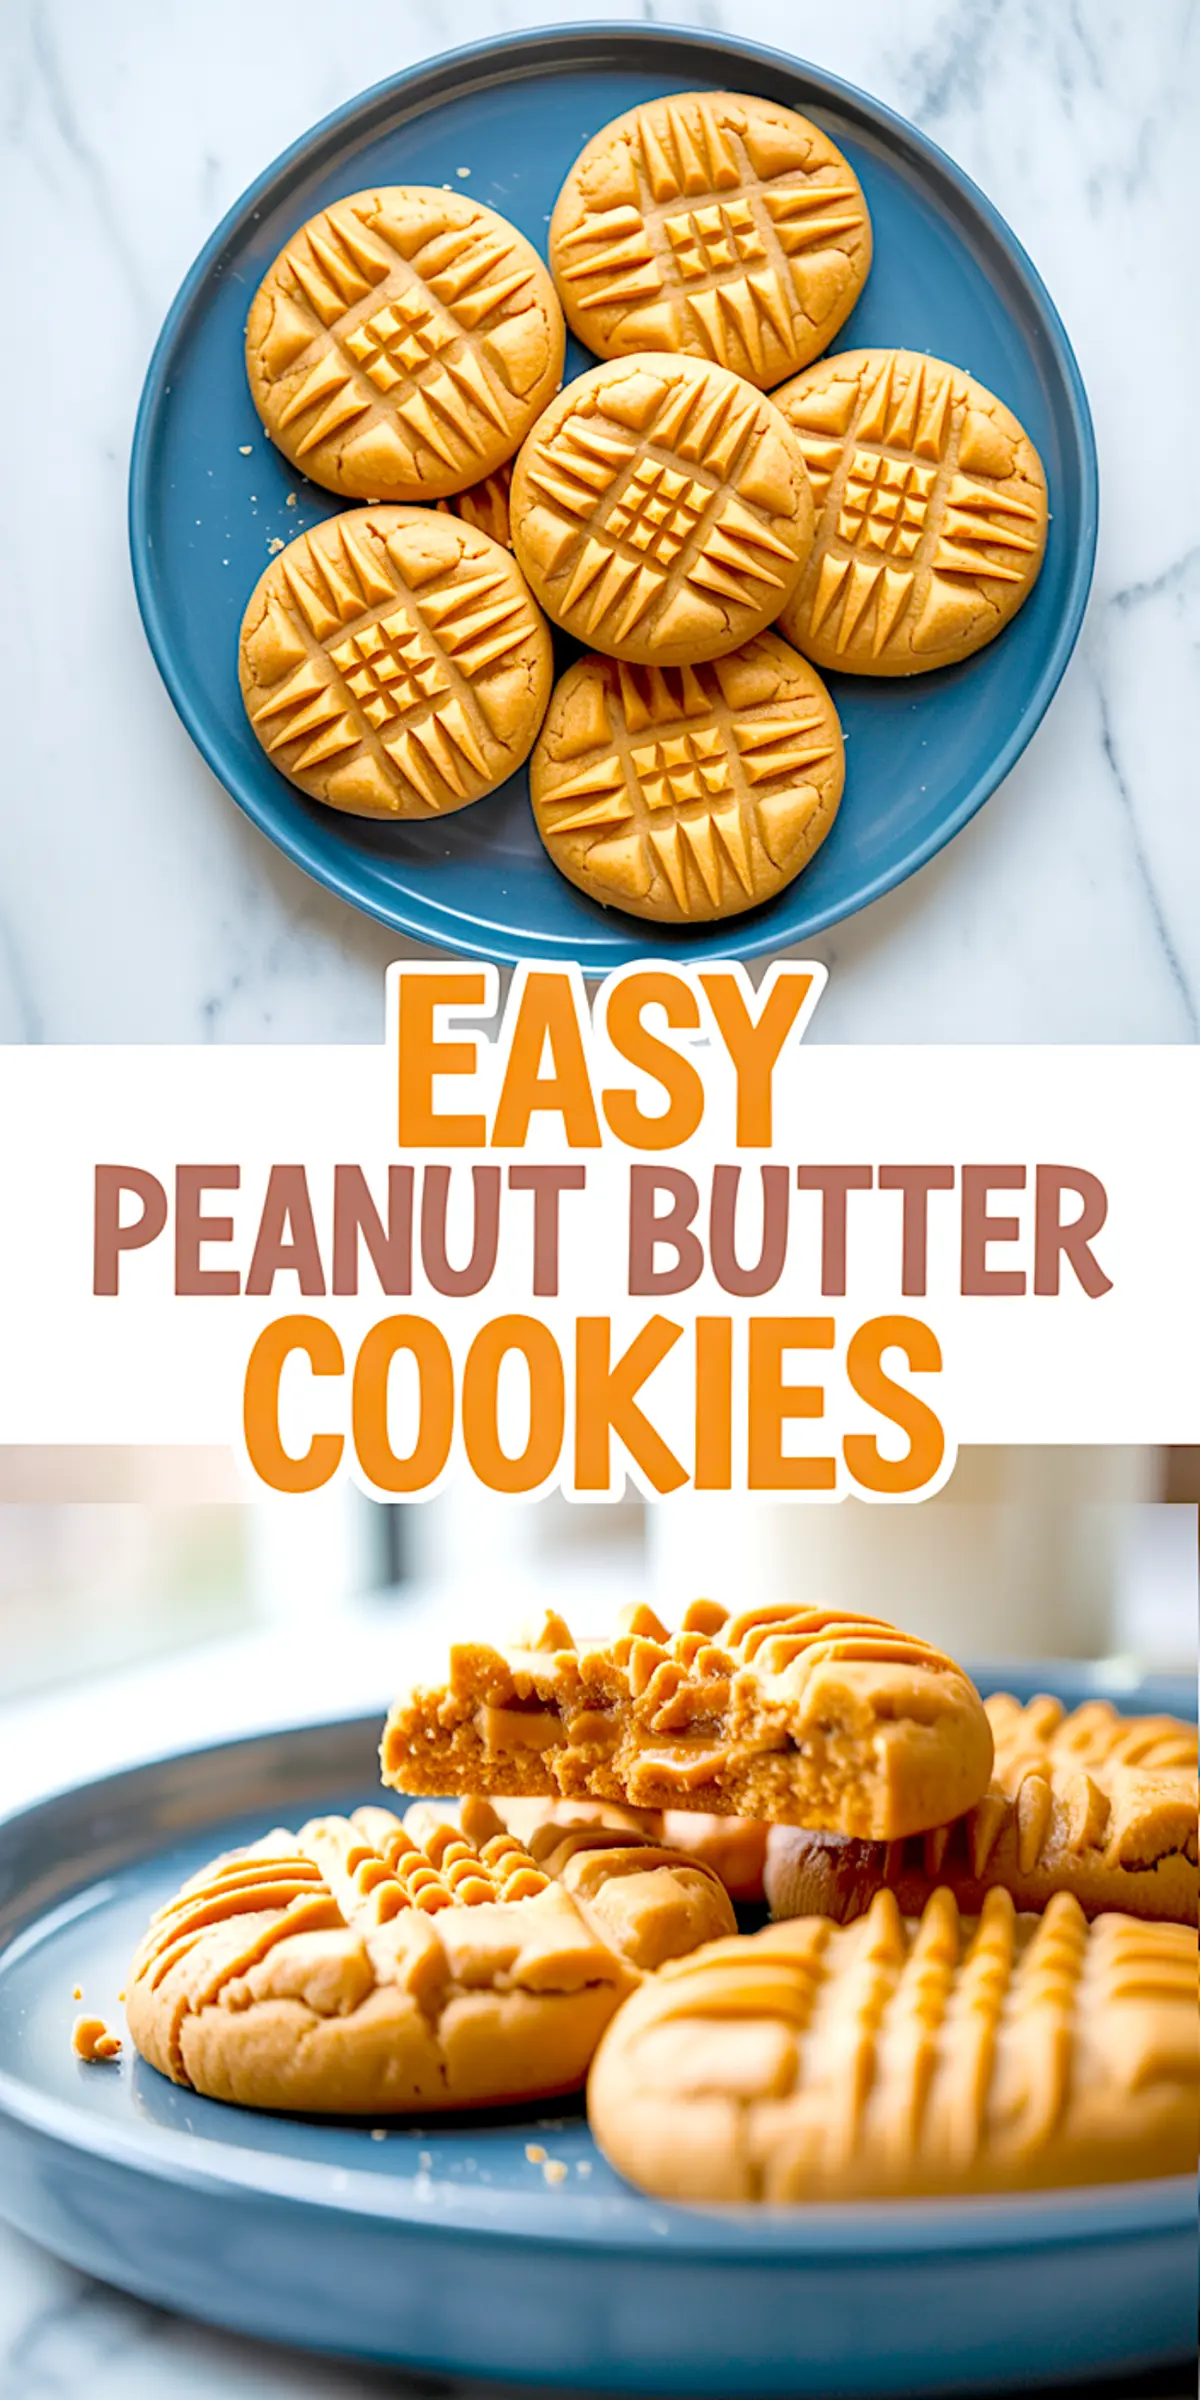
Easy Peanut Butter Cookies

These soft peanut butter cookies are made with simple pantry ingredients and come together quickly. They bake up with a tender center, lightly crisp edges, and a rich, classic peanut butter flavor. No chilling required, and they’re easy enough for kids to help with—just mix, scoop, press, and bake.
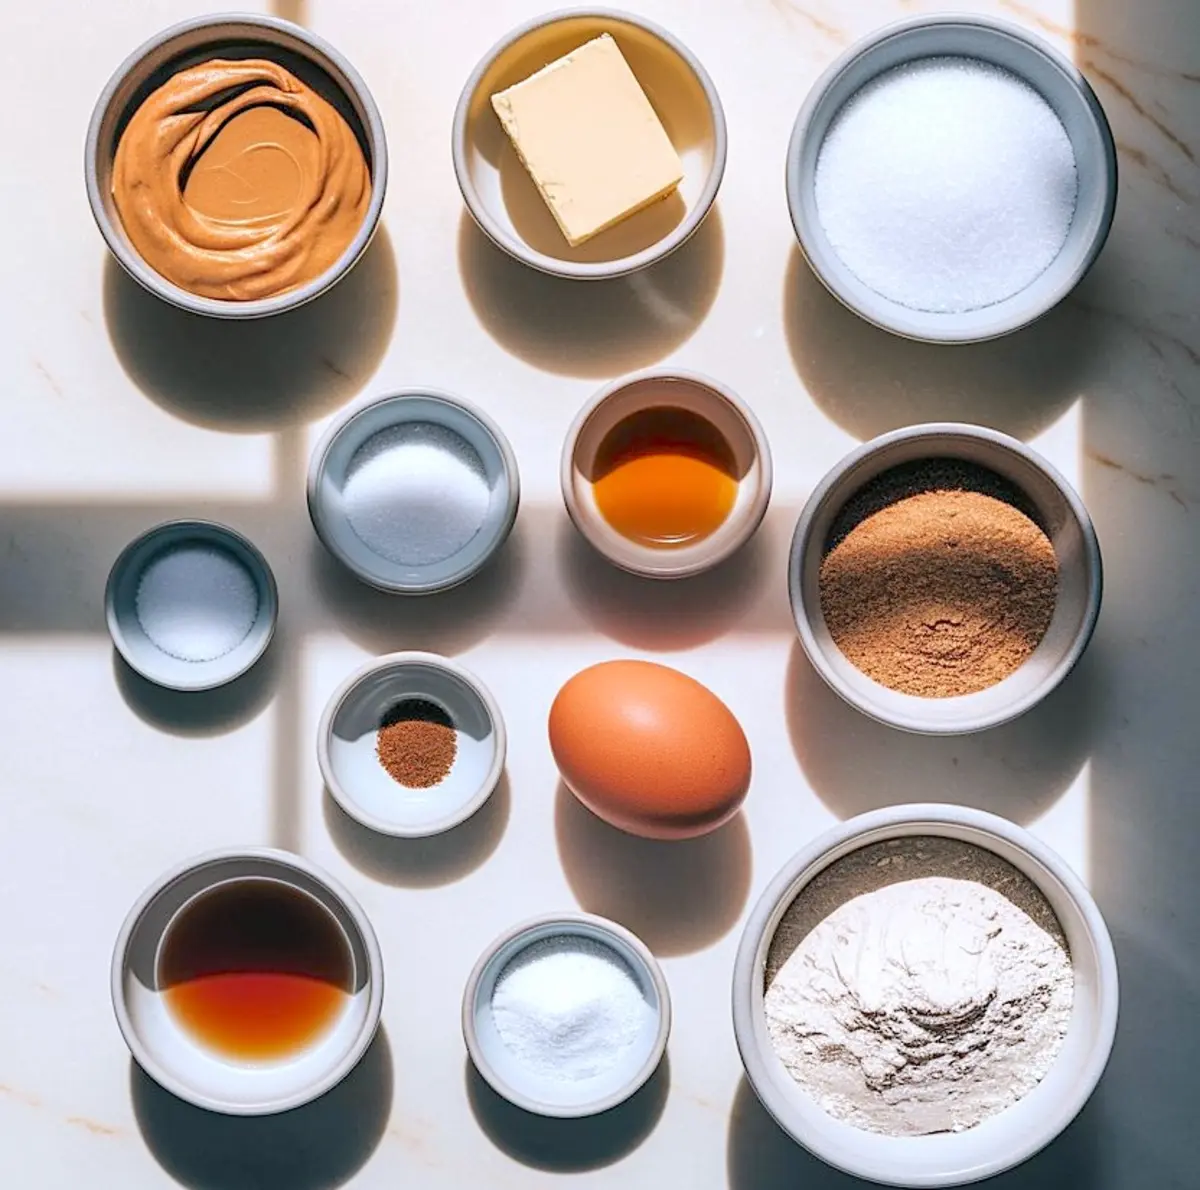
Ingredients
- 1 cup creamy peanut butter (not natural-style)
- 1/2 cup unsalted butter, softened
- 1/2 cup granulated sugar
- 1/2 cup light brown sugar, packed
- 1 large egg
- 1 1/2 teaspoons vanilla extract
- 1/2 teaspoon baking soda
- 1/2 teaspoon baking powder
- 1/4 teaspoon salt
- 1 1/4 cups all-purpose flour
Instructions
- PREHEAT THE OVEN: Preheat the oven to 350°F (175°C). Line a baking sheet with parchment paper or a silicone baking mat.
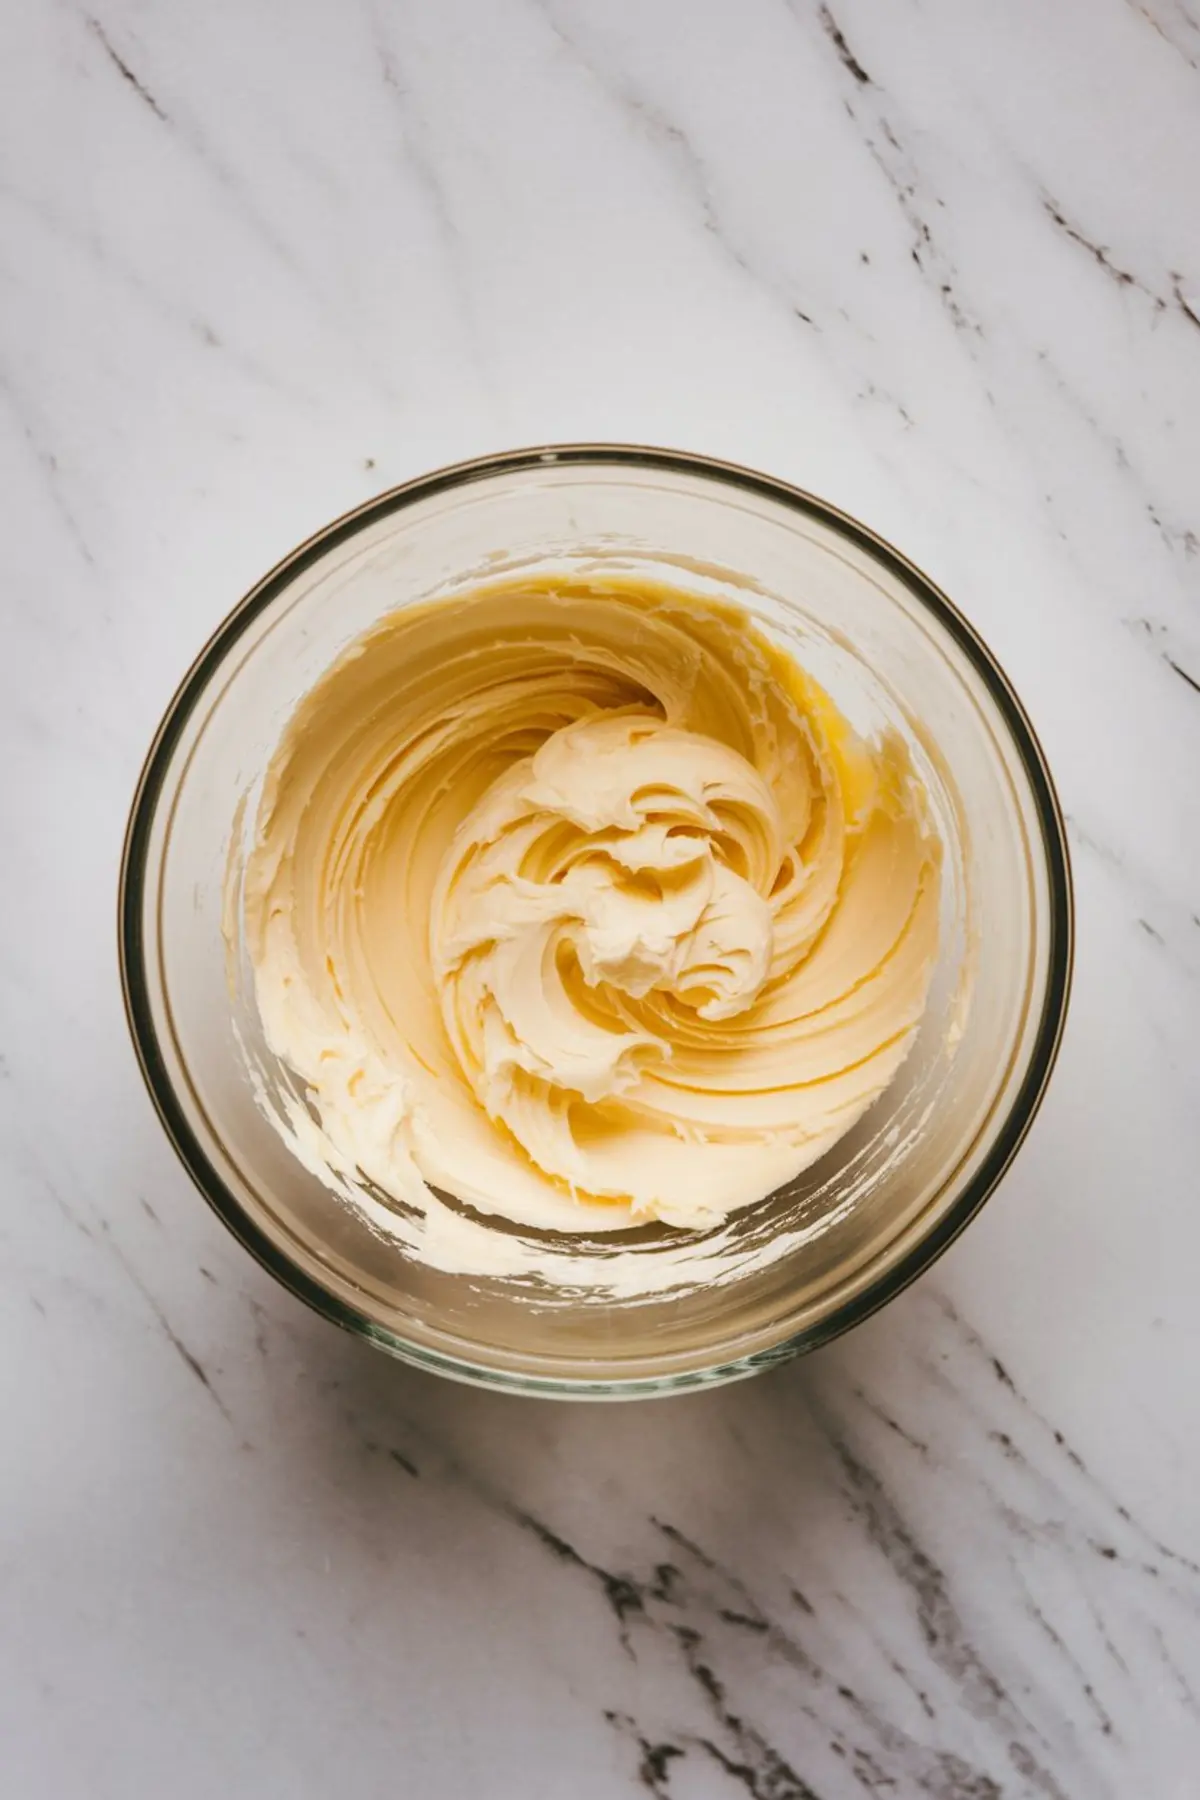
- CREAM THE BUTTER AND SUGARS: In a large mixing bowl, beat the peanut butter, softened butter, granulated sugar, and brown sugar together until smooth and fluffy, about 2 minutes.
- ADD THE EGG AND VANILLA: Add the egg and vanilla extract to the mixture. Beat until fully incorporated and smooth.
- COMBINE DRY INGREDIENTS: In a separate bowl, whisk together the flour, baking soda, baking powder, and salt until well blended.
- MIX IT ALL TOGETHER: Gradually add the dry ingredients to the wet mixture, stirring just until the dough comes together. Avoid overmixing.
- SCOOP AND ROLL: Scoop about 1 tablespoon of dough and roll into smooth balls. Place on the prepared baking sheet about 2 inches apart.
- CREATE THE CRISSCROSS PATTERN: Use a fork to gently press a crisscross pattern on the top of each dough ball, slightly flattening them.
- BAKE: Bake for 10 to 12 minutes, or until the edges are just beginning to turn golden. The centers should still look soft—do not overbake.
- COOL: Let the cookies sit on the baking sheet for 5 minutes before transferring them to a wire rack to cool completely.
Notes
Use conventional creamy peanut butter (such as Jif or Skippy) for best results. Natural peanut butter will alter the texture and spread. Cookies can be stored in an airtight container at room temperature for up to 4 days or frozen for longer storage.
Nutrition Information
Yield
24Serving Size
1Amount Per Serving Calories 155Total Fat 9gSaturated Fat 3gTrans Fat 0gUnsaturated Fat 5gCholesterol 18mgSodium 114mgCarbohydrates 16gFiber 1gSugar 9gProtein 3g
Delicious cookies and so easy to make! Thank you for the recipe!
Glad you enjoyed them, Sharon. Easy and tasty is always the goal, really appreciate you taking a moment to share that 🍪