I remember my first taste of a macaron in a cozy Parisian bakery. The colorful rows of delicate shells made me pause as I savored the idea of bringing that indulgent delight into my own kitchen. That experience lit a spark inside me. It made me believe that anyone can create a sweet masterpiece at home, even if the process seems complicated at first.
Following a special diet?
Every recipe on this site can be converted to gluten-free, vegan, dairy-free, keto, nut-free or egg-free with adjusted ratios so nothing falls flat.
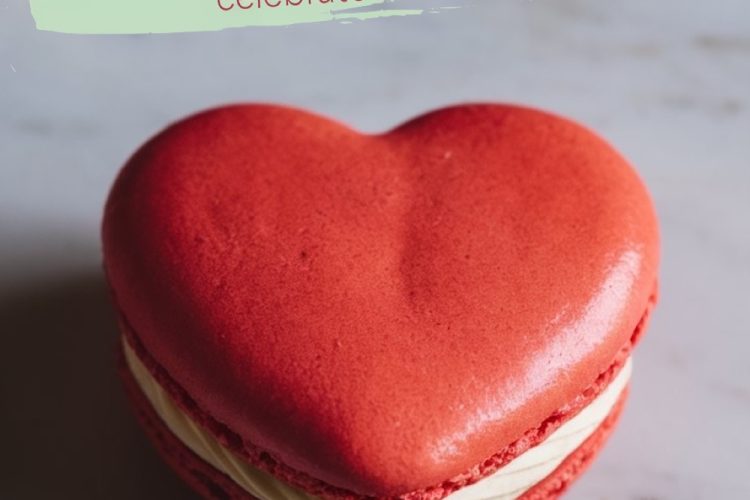
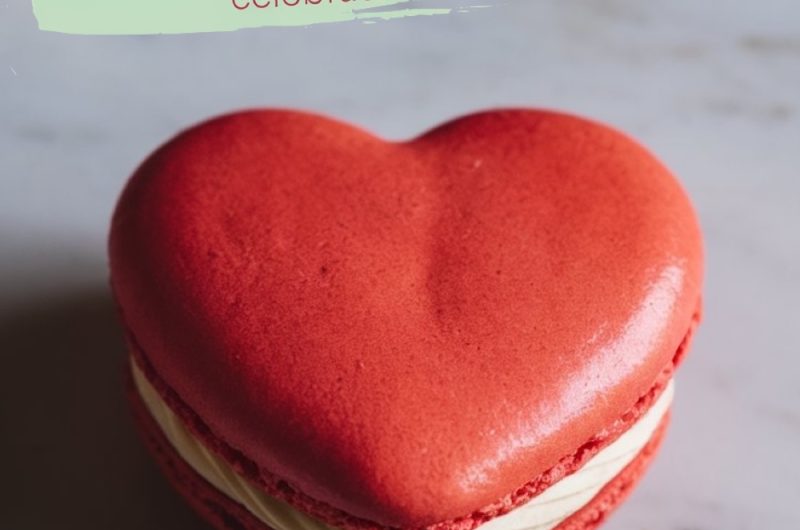
Try the Recipe Converter →Heart-shaped macarons soon became my favorite project for romantic events. They add a charming note to Valentine’s Day, weddings, anniversaries, and any moment that calls for a gentle touch of affection.
My Personal Connection to Parisian Macarons
I stood in line near the bustling streets of Paris, watching skilled bakers work behind the counter. Their elegance and precision fascinated me. When I returned home, I decided to recreate those flavors in my humble kitchen. My early attempts led to cracked shells or uneven textures, and I felt discouraged. A friend told me to keep trying small tweaks to fix the batter consistency.
That advice helped me discover a rhythm with macaron-making. My confidence soared once I got the hang of piping graceful shapes onto baking sheets. These heart-shaped treats later became my go-to gift for special people in my life. They capture joy, warmth, and a bit of Parisian flair.
Gathering Key Ingredients and Kitchen Tools
Heart-shaped macarons depend on simple items. Almond flour, powdered sugar, egg whites, and granulated sugar form the base for delicate shells. A pinch of cream of tartar helps maintain the whipped texture of the egg whites.
Food coloring brings any shade of pink or red you prefer, though I sometimes experiment with soft pastel hues as well. A sturdy piping bag with a round tip ensures smooth piping. Parchment-lined baking sheets let you trace or mark heart shapes as guides. A thermometer for measuring oven temperature keeps each batch consistent. I measure everything with a scale because accuracy leads to well-formed shells.
Shaping the Macaron Shell Mixture
Almond flour and powdered sugar need a fine texture, so I sift them together. That method prevents lumps. I whip egg whites in a separate bowl, adding cream of tartar once the whites start to foam. Granulated sugar goes in slowly to create stiff, glossy peaks. I keep watch for a firm structure in the meringue. The next step is folding the dry mixture into the meringue with a gentle touch.
I scoop a small amount of the dry blend into the whites, stir a bit, then repeat until the batter flows in a ribbon-like stream. That flow test signals the right consistency.
Whipping Egg Whites for Light, Airy Shells
I recall my grandmother’s advice: “Egg whites at room temperature whip with more volume.” She used that trick for her meringue pies, and I adapted it for my macarons. I place the eggs on the counter for at least an hour.
Cold whites often take longer to whip, and the texture might turn grainy if they don’t warm up. I watch my mixer carefully because a few extra seconds can overwhip the foam. Achieving just the right peak means I can move to the folding process without delay.
Tinting and Folding the Batter With Care
Food coloring enters the mix once the meringue is thick and glossy. I add a small drop, then fold with smooth circular motions. Folding demands patience. I aim for that ribbon consistency that settles into the bowl without leaving chunky streaks. I learned to check the batter by lifting some with the spatula and letting it flow back into the bowl. If it holds its shape for a moment, then relaxes into the rest, it’s time to stop mixing.
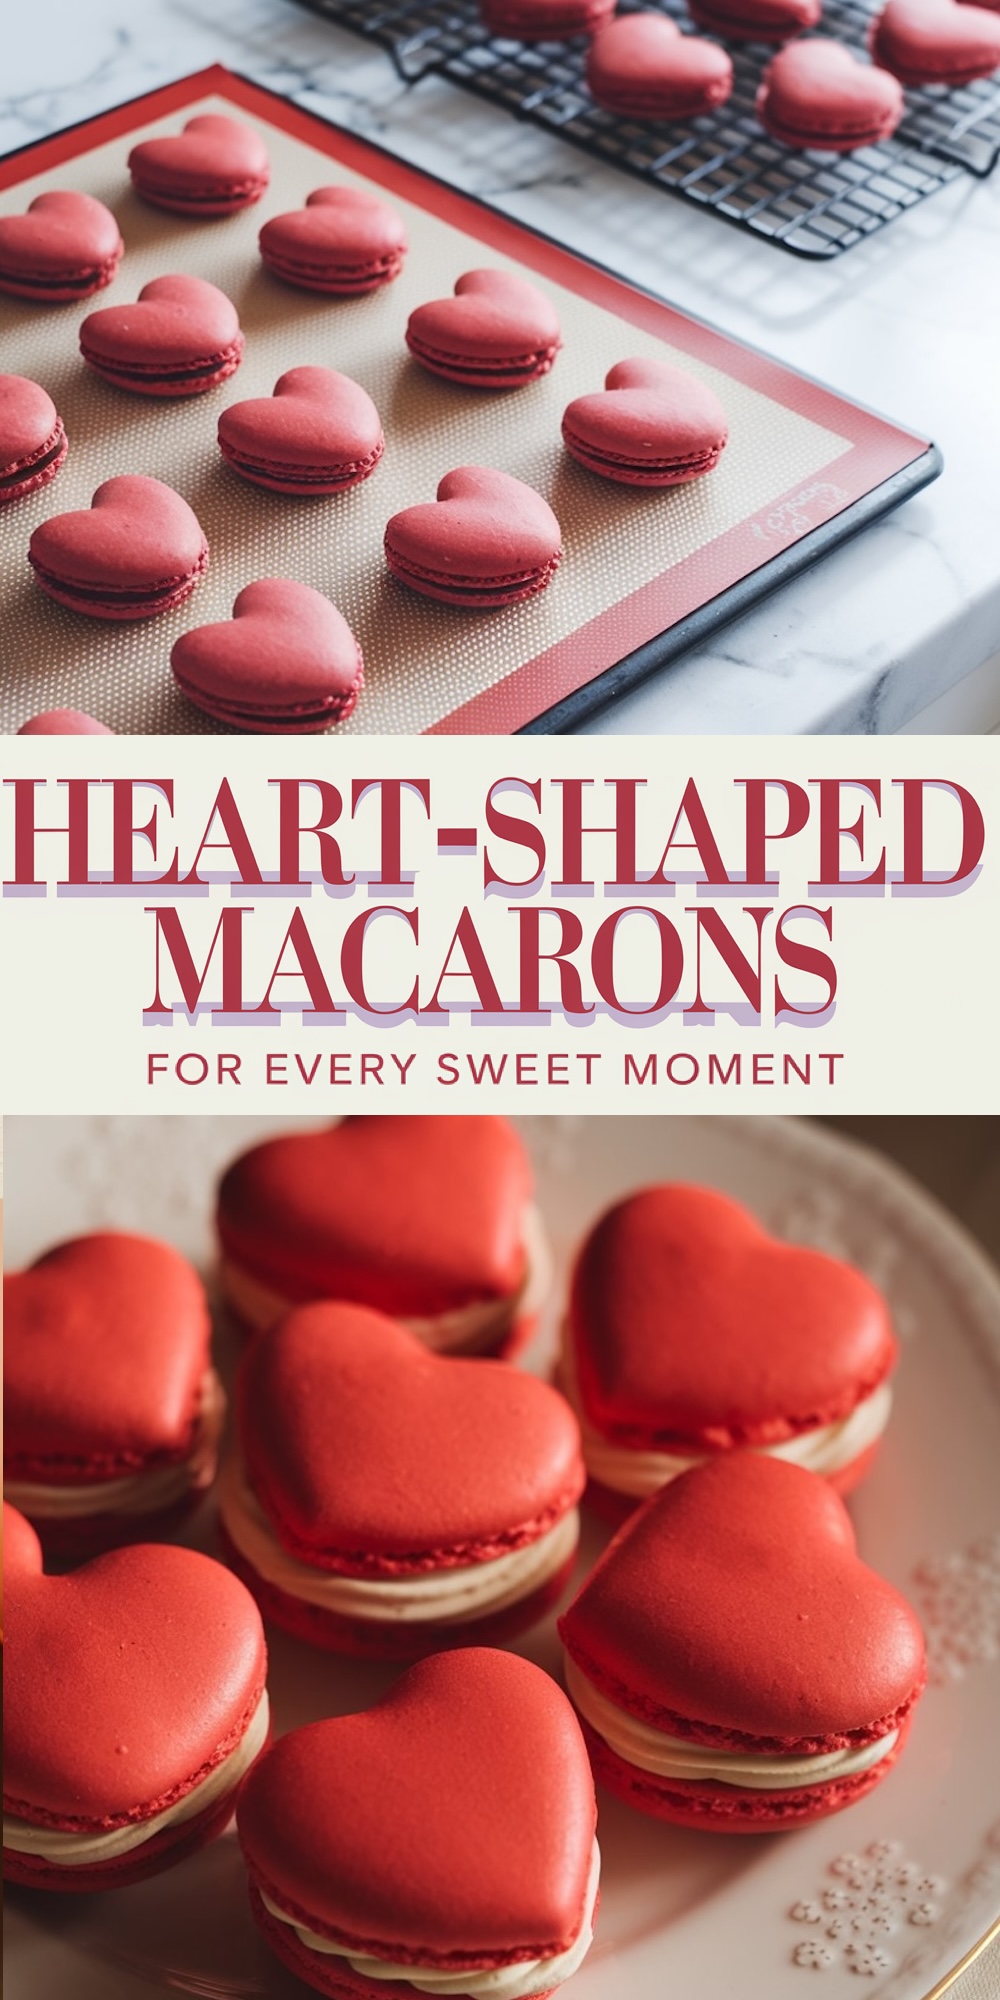
Shaping Heart Designs on the Baking Sheets
I line baking sheets with parchment paper, sometimes slipping a faint heart template underneath as a guide. I hold the piping bag at a slight angle, then pipe a “V” shape that forms the top curves of the heart.
I find it helpful to practice a few hearts on an extra sheet first. Once the shells rest on the tray, I tap the sheets firmly on the counter. That step knocks out any trapped air bubbles. After piping, I let them sit uncovered until a slight skin forms on top, which can take 30 to 40 minutes. This waiting period promotes the formation of the classic “feet” at the base of each macaron.
Allowing Macaron Shells to Rest and Baking Them Gently
I recall a time I rushed that resting step, and my macarons cracked in the oven. That small change in timing made a huge difference in the final texture. An oven set to around 300°F (150°C) works well for even heat distribution. I place the trays on the middle rack, and I rotate them after about 10 minutes if they don’t bake evenly.
They usually need 15 to 18 minutes total. I look for a firm top and that slight ruffle at the bottom. Once done, I let them cool on the sheets, which helps them release without breaking.
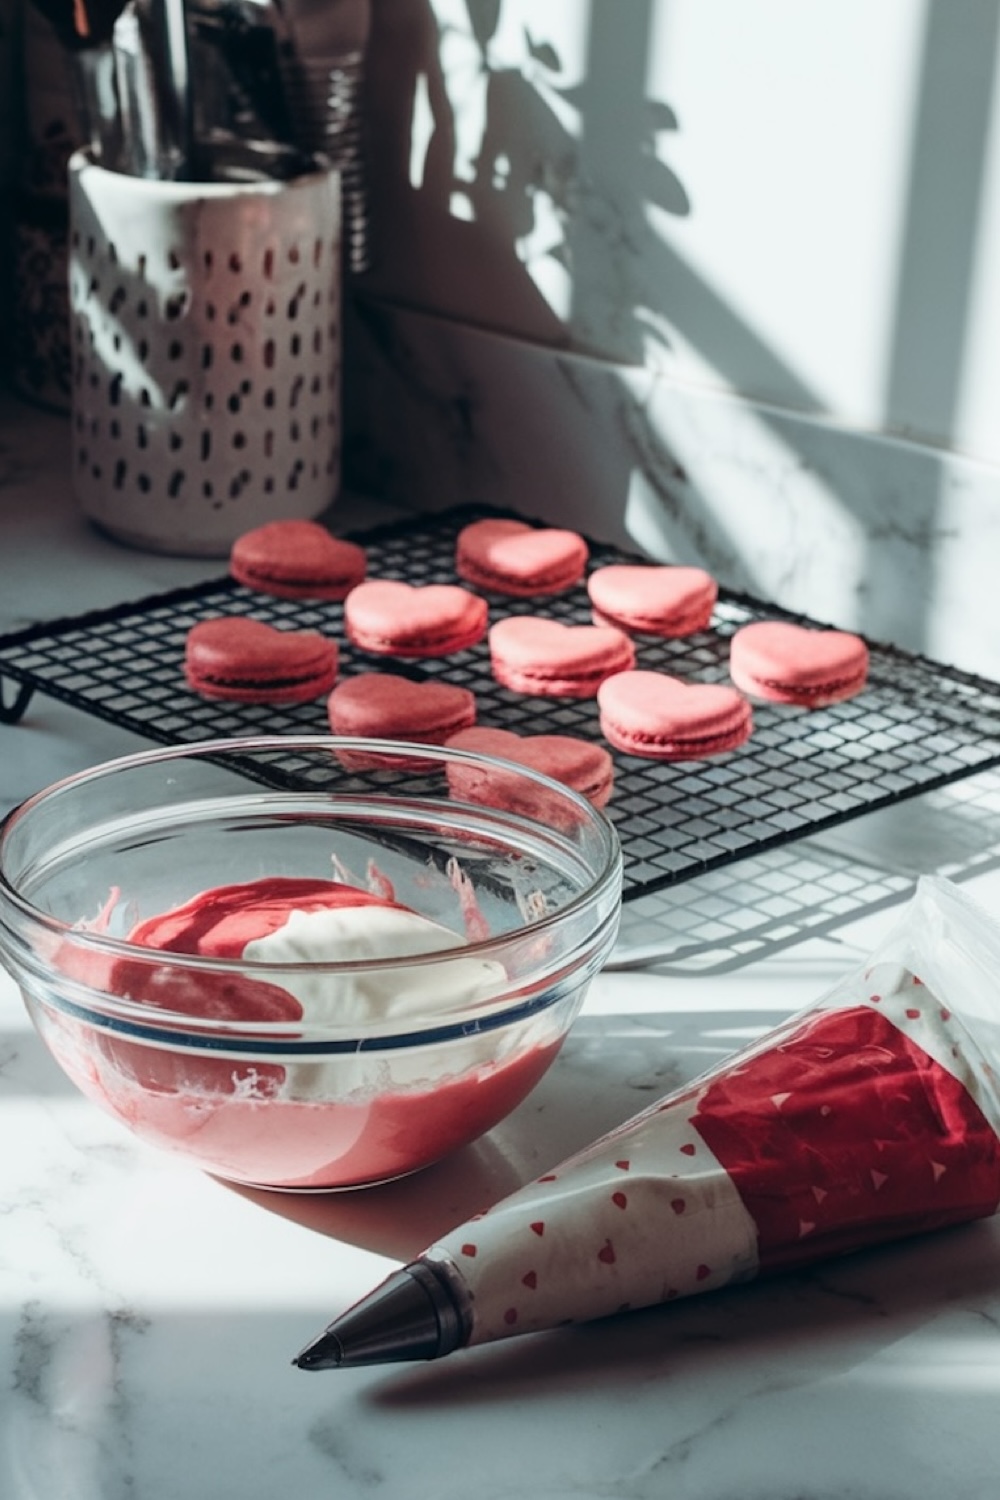
Creating a Sweet Vanilla Buttercream
Heart-shaped shells need a creamy filling that complements their crisp edges. I soften unsalted butter first, then cream it with a mixer until it’s light. Powdered sugar goes in gradually, and I add a touch of vanilla extract to bring out a soft fragrance. A spoonful of heavy cream loosens it to a spreadable consistency. I love the aroma of butter and sugar blending in my mixing bowl. The entire kitchen gains a cozy smell, and I find myself remembering the warmth of my old family kitchen.
Pairing Shells and Filling for a Love-Filled Sandwich
I match shells that share similar sizes and shapes. I pipe a small swirl of vanilla buttercream on the flat side of one shell, then place another shell on top. The aim is a gentle press that seals the filling but doesn’t squeeze it out. I made that mistake on my first batch years ago and ended up with buttercream oozing everywhere. These days, I take a careful approach to keep each macaron neat. The final look reminds me of a tiny heart sandwich, sweet on the outside and creamy inside.
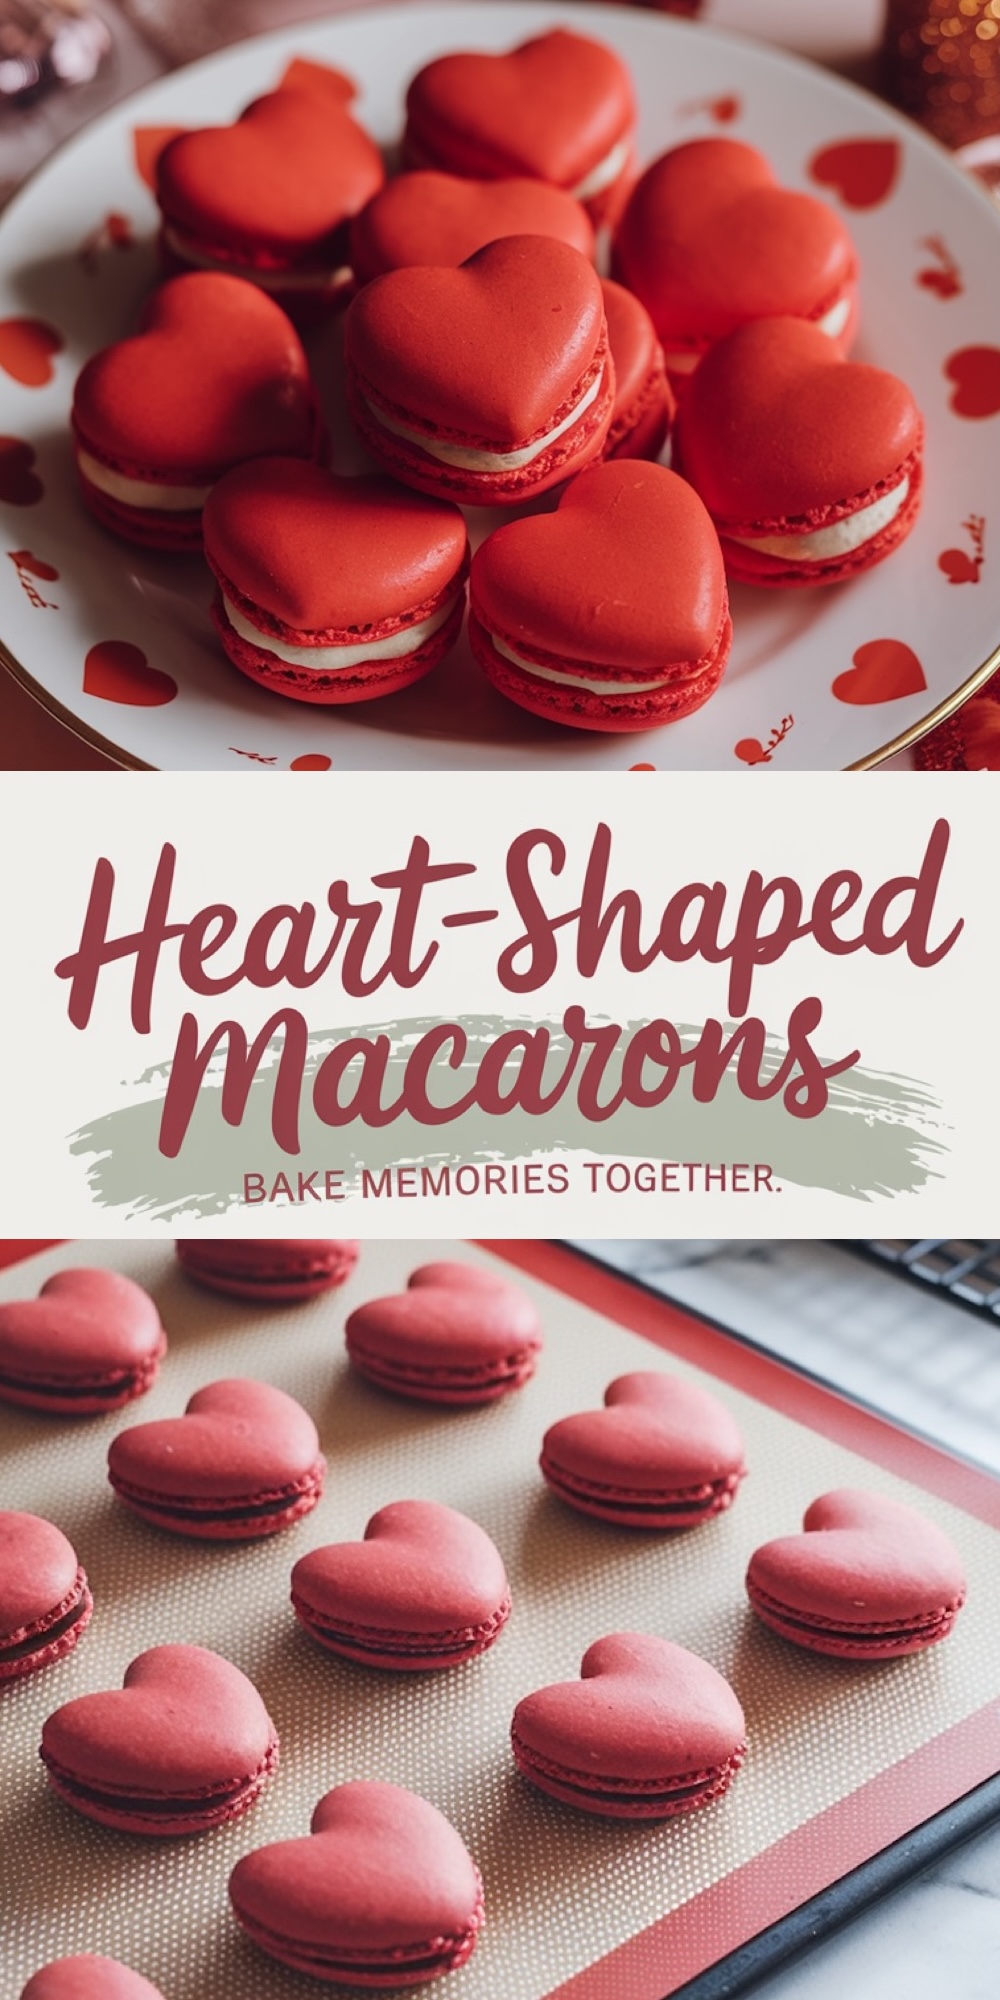
Serving and Storing These Heartfelt Treats
Heart-shaped macarons delight the eye and the taste buds. I serve them on pretty plates or package them in decorative boxes for gifts. The shells and filling benefit from a night in the refrigerator because the flavors mingle together more fully.
They keep for a few days in an airtight container. Loved ones often tell me they appreciate the effort behind every bite, which makes me proud of the care I invest in creating these sweets. A small macaron can hold a lot of love, and I see it as an edible version of a handwritten note.
My Thoughts on Spreading Joy Through Heart-Shaped Macarons
I share these heart-shaped macarons whenever I want to offer a bit of warmth to friends and family. I still imagine myself back in that Paris bakery, awestruck by the artistry behind these fragile desserts. This recipe reminds me that even simple ingredients can achieve something beautiful if you follow each stage with patience and dedication.
I hope you try them in your kitchen. Let that first taste spark your own sense of wonder. I believe every baker can succeed with practice and a desire to spread sweetness. That final bite, with its light shell and soft filling, speaks of devotion and comfort. It’s a gentle way to say, “You matter,” one heart-shaped treat at a time.
Heart-Shaped Macarons with Vanilla Buttercream Filling
Course: Cake Ideas15
servings30
minutes30
minutes130
kcalIngredients
- For the Heart-Shaped Macaron Shells
120g almond flour
200g powdered sugar
100g egg whites (at room temperature)
30g granulated sugar
1/4 tsp cream of tartar
Red or pink gel food coloring (a drop or two for a rich color)
- For the Vanilla Buttercream Filling
100g unsalted butter, softened
200g powdered sugar
1 tsp vanilla extract
1-2 tbsp heavy cream (as needed for texture)
Steps
- Step 1: Prepare the Macaron Batter
- Sift the almond flour and powdered sugar together into a large bowl. Discard any larger bits left in the sieve to ensure a smooth batter.
- In a separate bowl, whisk the egg whites on medium speed until they become frothy, then add the cream of tartar.
- Gradually add the granulated sugar, a little at a time, continuing to beat the egg whites until they form stiff, glossy peaks.
- Add gel food coloring and gently fold it into the egg whites until the color is evenly distributed.
- Sift the almond flour mixture over the whipped egg whites and fold carefully using a spatula. You’ll want to fold until the batter flows like “molten lava” and falls from the spatula in ribbons. Be careful not to overmix or undermix—aim for around 50 strokes.
Step 2: Pipe the Heart-Shaped Macarons- Line two baking sheets with parchment paper or a silicone mat. If you need guidance, you can draw small heart shapes on the back of the parchment as a template.
- Transfer the macaron batter into a piping bag fitted with a round tip.
- Pipe small heart shapes by starting at the top of the heart and squeezing out the batter in a “V” shape. Gently tap the baking sheet on the counter a few times to remove any air bubbles.
- Let the macarons rest for 30-40 minutes until they form a “skin.” When you lightly touch the tops, they should not stick to your finger.
- Step 3: Bake the Macaron Shells
- Preheat your oven to 300°F (150°C).
- Bake the macarons for 12-15 minutes, rotating the trays halfway through. The macarons are done when they have risen and developed “feet” (the frilly base).
- Allow the shells to cool completely on the baking sheets before removing them.
- Step 4: Make the Vanilla Buttercream Filling
- In a medium bowl, beat the softened butter until it’s smooth and fluffy.
- Gradually add the powdered sugar and continue beating.
- Add vanilla extract and enough heavy cream to reach a smooth, spreadable consistency.
- Transfer the buttercream into a piping bag fitted with a round or star tip.