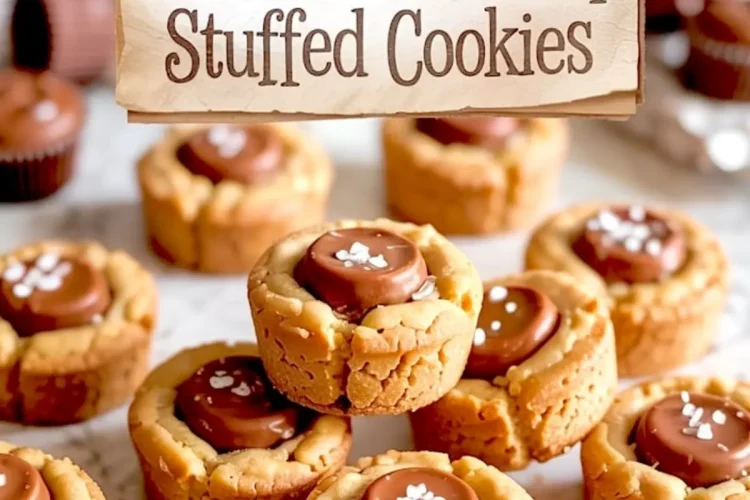
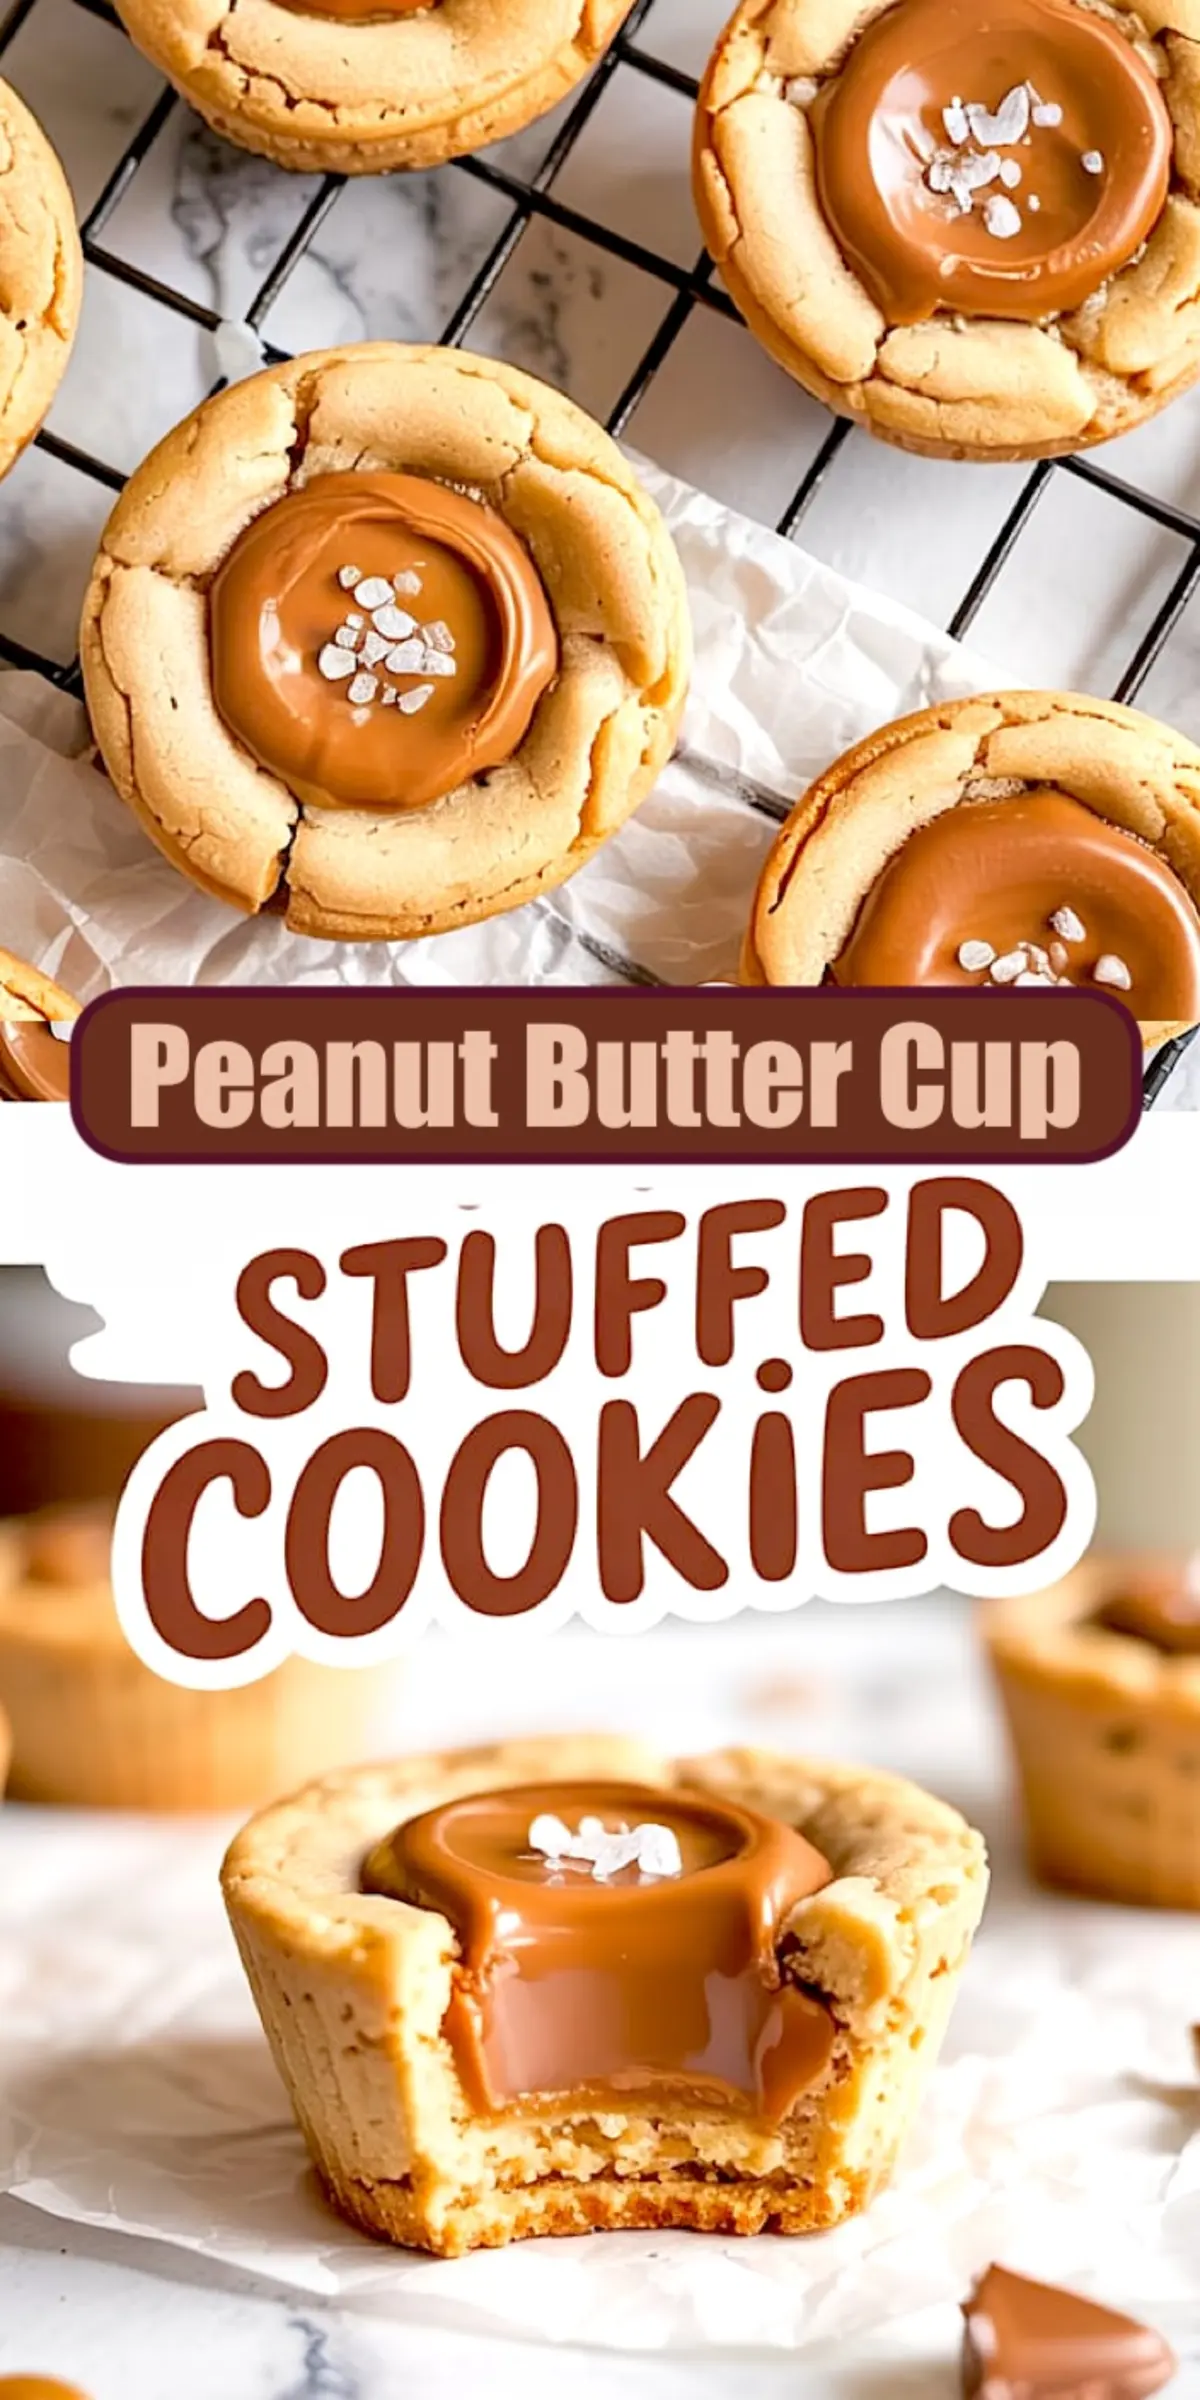
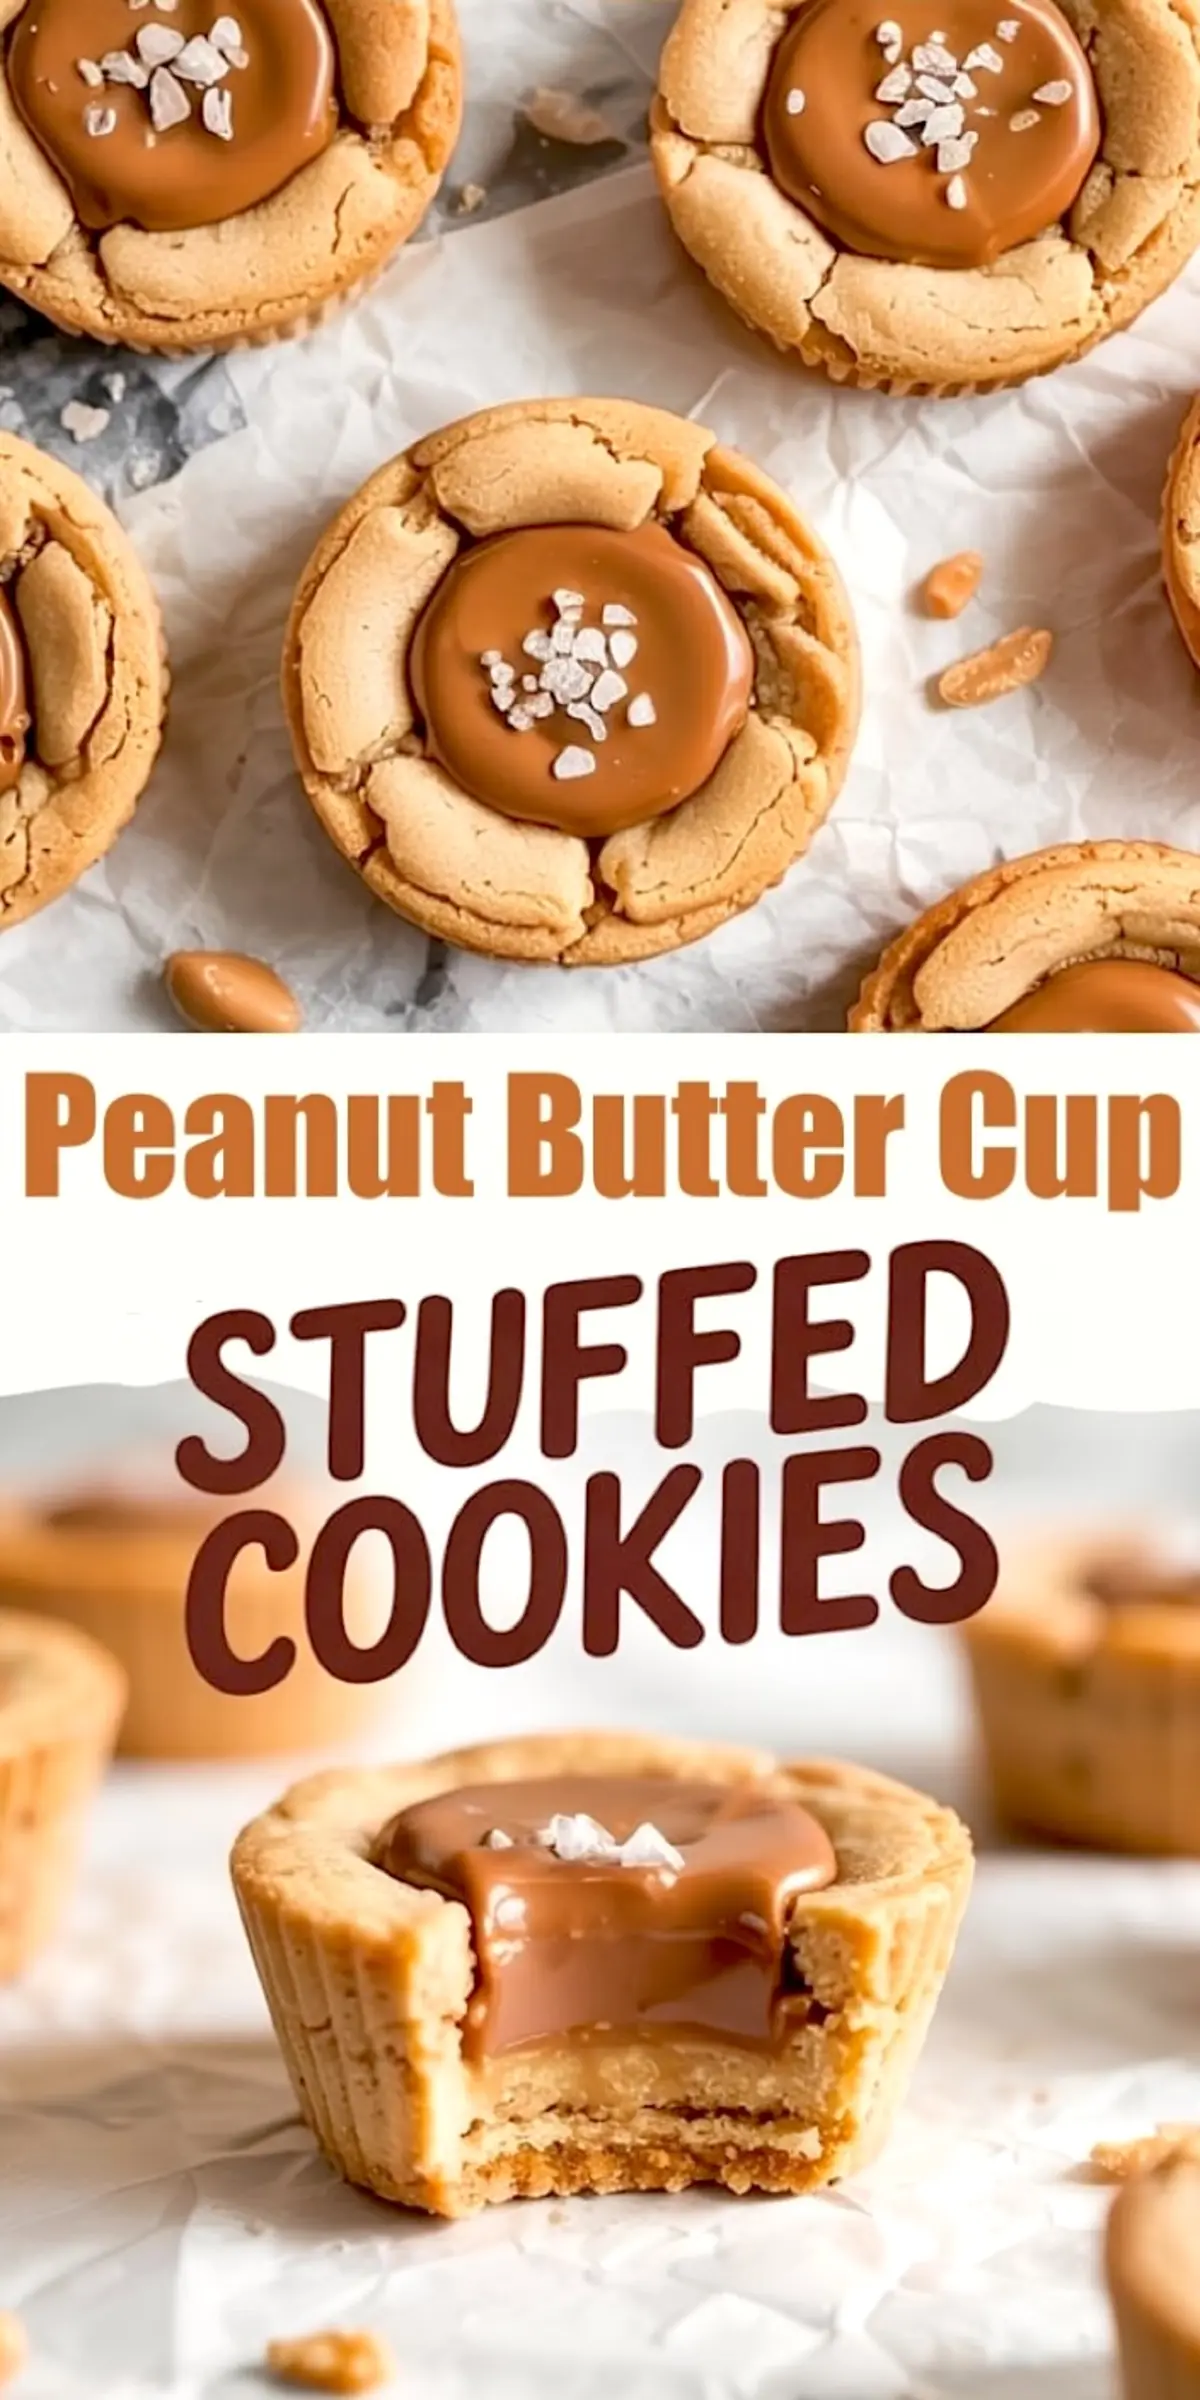
You won’t need a holiday or special event as an excuse to bake these. Mini Peanut Butter Cup Cookies belong in your regular cookie rotation. Each one hides a soft, melty chocolate center that gives way to a rich peanut butter base with just enough chew around the edges.
They look small, but they vanish fast. That’s the kind of recipe I trust in a full house or a quiet kitchen where the batch becomes breakfast. You’ll learn how to make these baked-in-a-mini-muffin-tin cookies, how to keep the centers from melting into a puddle, and why freezing the candy makes all the difference.
Following a special diet?
Every recipe on this site can be converted to gluten-free, vegan, dairy-free, keto, nut-free or egg-free with adjusted ratios so nothing falls flat.
Try the Recipe Converter →Why Mini Peanut Butter Cup Cookies Are Worth It
Most peanut butter cookie recipes stick to the classics. Flattened rounds. A criss-cross fork print. Nothing wrong with that. But these go further. They build texture around a core of chocolate, which changes how you experience the peanut butter. It’s softer. More structured. You bite through a cookie with body, not just flavor.
The mini muffin tin shapes them evenly and gives a crisp, golden edge without overbaking the center. This is key. A sheet pan won’t produce the same heat pocket.
These also freeze and reheat well. I always stash a few in the back, hidden behind the frozen peas. Just in case.
You might also like these soft-baked Peanut Butter Chocolate Chip Cookies.
Creamy Peanut Butter vs Natural Peanut Butter
I’ve tested this recipe with both. Store-bought creamy peanut butter delivers a more uniform dough. Natural peanut butter can separate or throw off the consistency unless it’s stirred very well and used quickly.
If your goal is structure, stick with creamy. The dough will hold its shape in the pan and wrap the candy in a soft, even shell. Natural peanut butter works, but results vary depending on how oily it is.
The Dough: Texture Comes from the Mix
Start with room-temperature butter. Cold butter won’t cream properly and leaves streaks in the dough. Beat it with both sugars and peanut butter until you see a pale, fluffy mixture. That change in color tells you the sugars have started to aerate the fats.
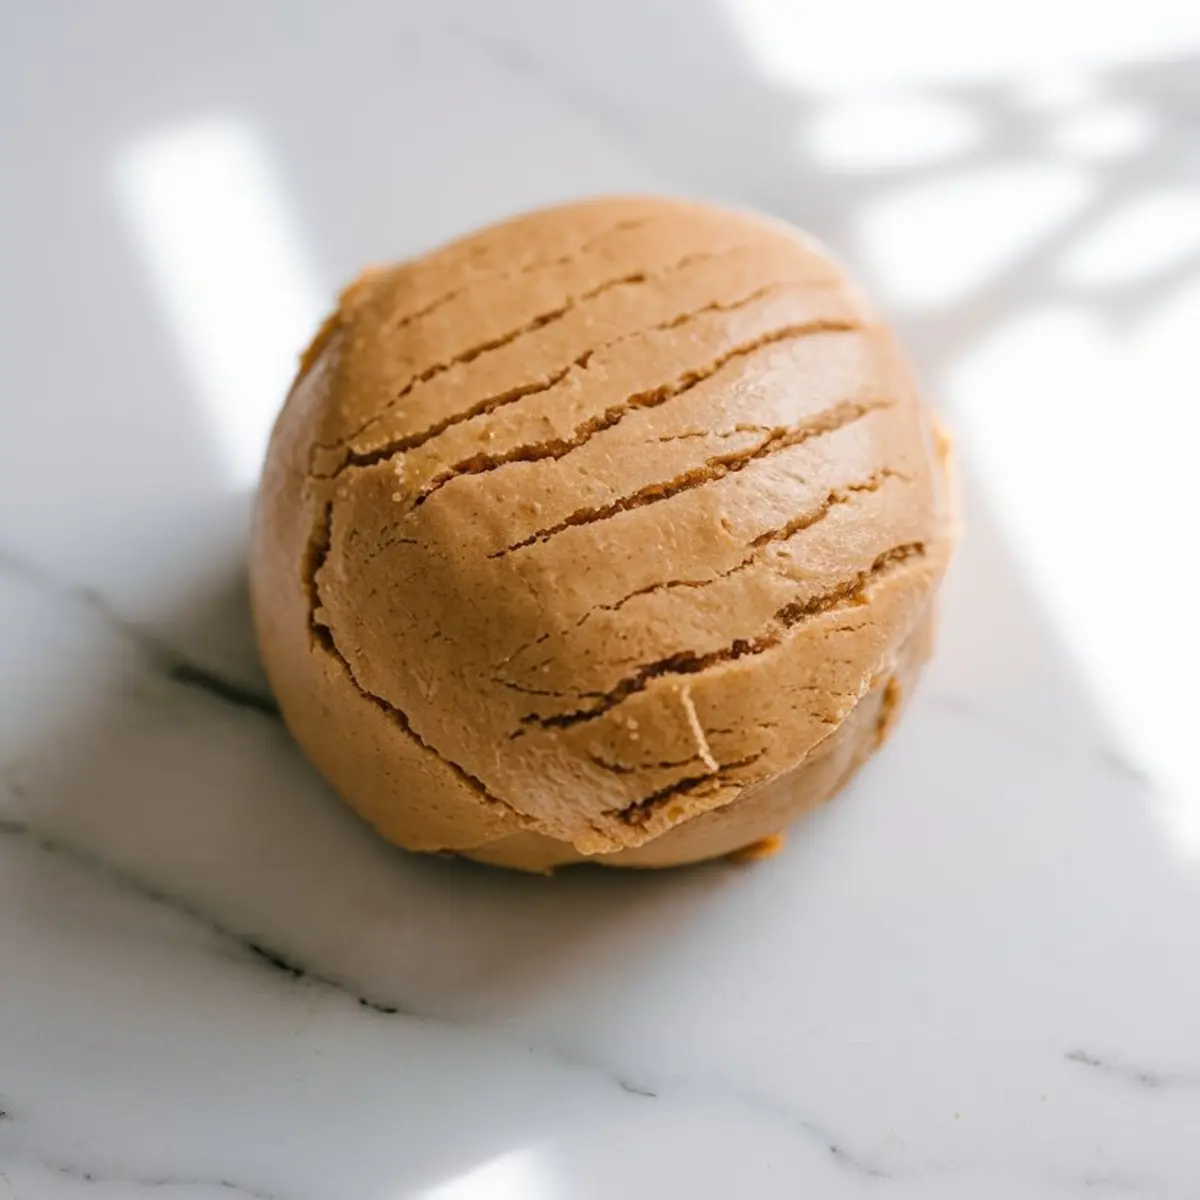
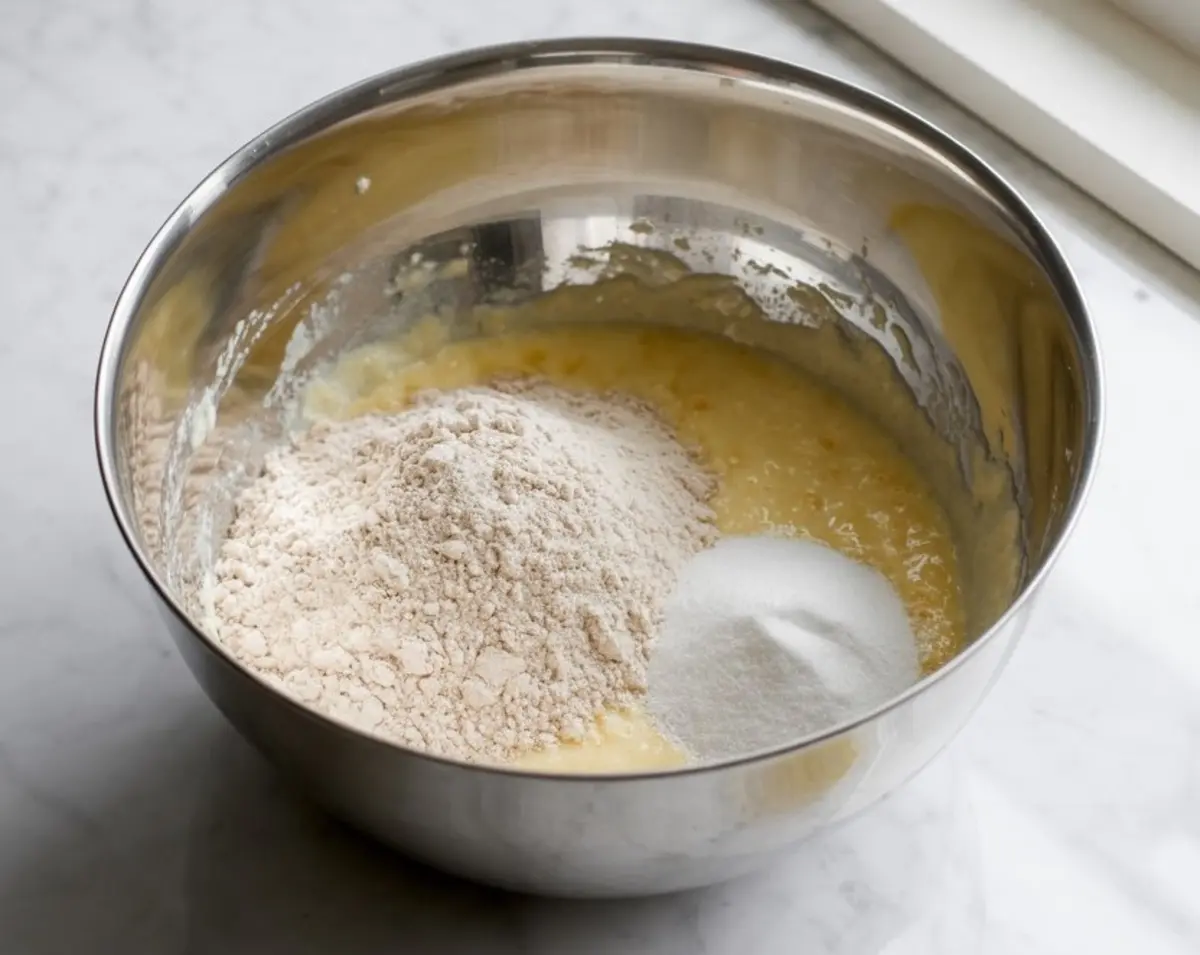
Once you add the egg and vanilla, stop to scrape the sides. Dry ingredients should go in gradually. I fold them in by hand at the end. It prevents overmixing and keeps the crumb soft.
Try this method with my Easy Peanut Butter Cookies if you want a version without the candy.
Shaping and Baking in the Mini Muffin Tin
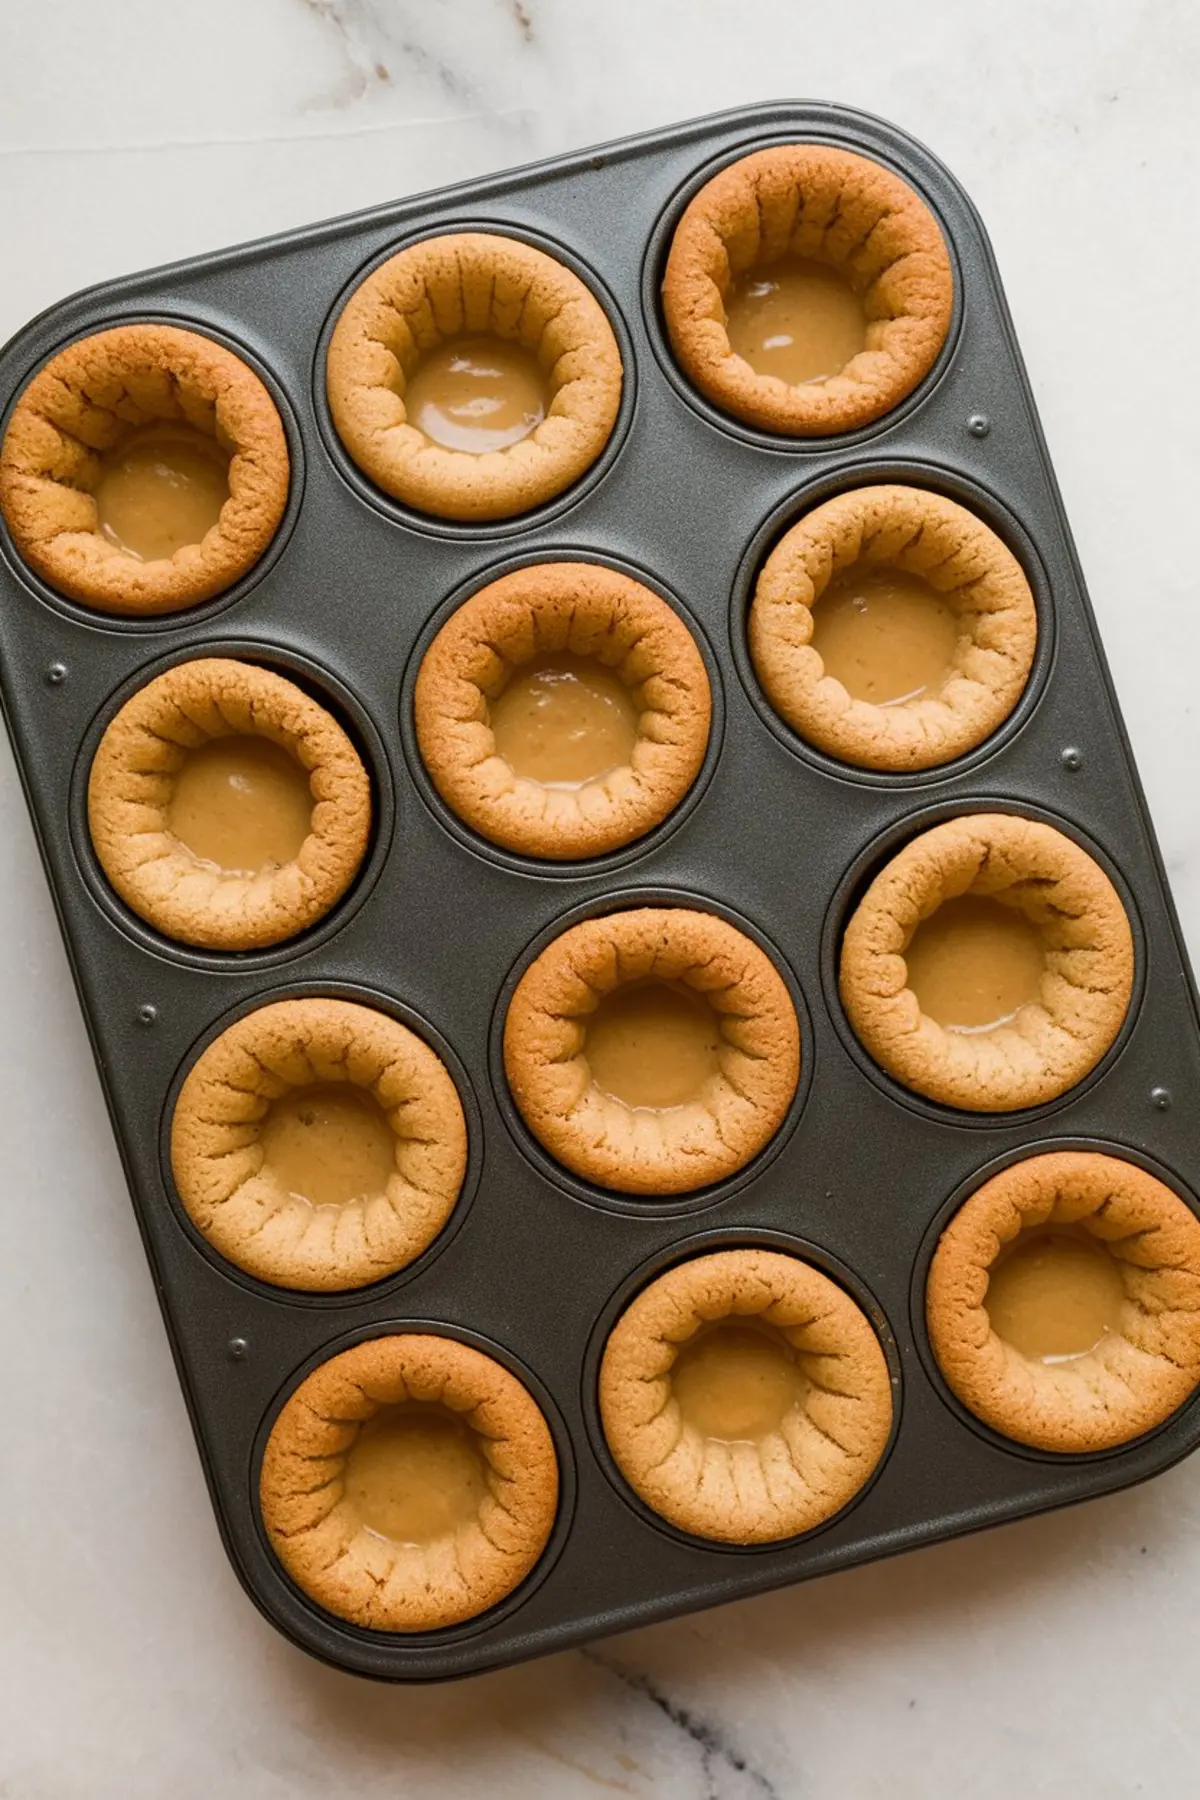
Use a small scoop or rounded tablespoon to portion the dough. I roll each into a smooth ball, then place them into a greased mini muffin tin. Press gently to make a shallow well. That indent holds the peanut butter cup in place after baking.
Bake just until the tops set and the edges turn golden. This usually takes around 9 minutes in my oven. Every oven varies slightly, so check at the 8-minute mark.
If you like this format, my Peanut Butter Blossom Cookies also use a post-bake candy press.
Adding the Peanut Butter Cups
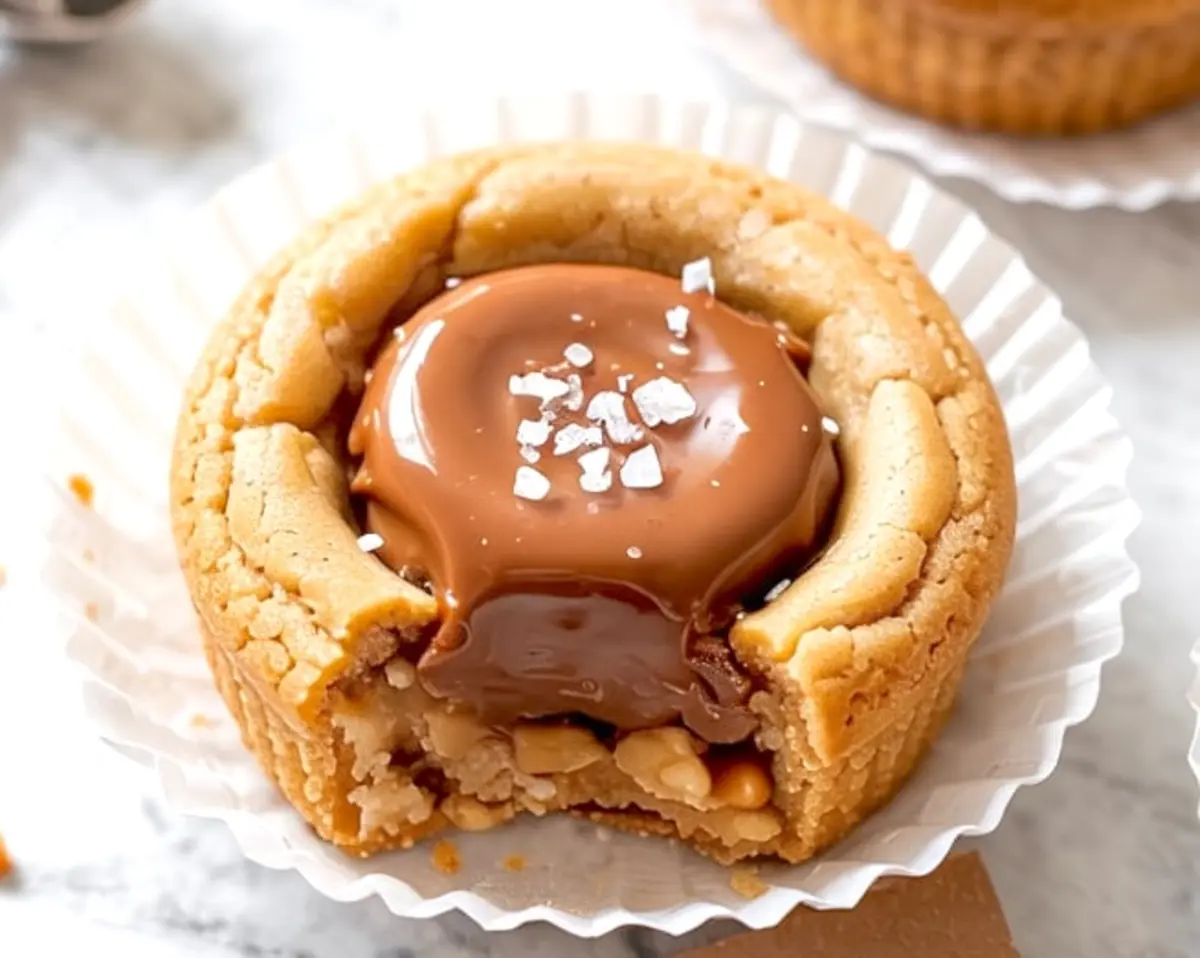
The trick is timing. Unwrap your mini peanut butter cups before the cookies go in the oven. Keep them in the freezer. This keeps them firm enough to press into the hot cookies without turning into a pool.
As soon as the pan comes out, press one cup gently into each cookie. The bottom will melt slightly into the dough, while the top stays defined. That texture contrast—fudgy in the center, slightly chewy around the edge—is what makes this recipe worth repeating.
Finish with Flaky Sea Salt
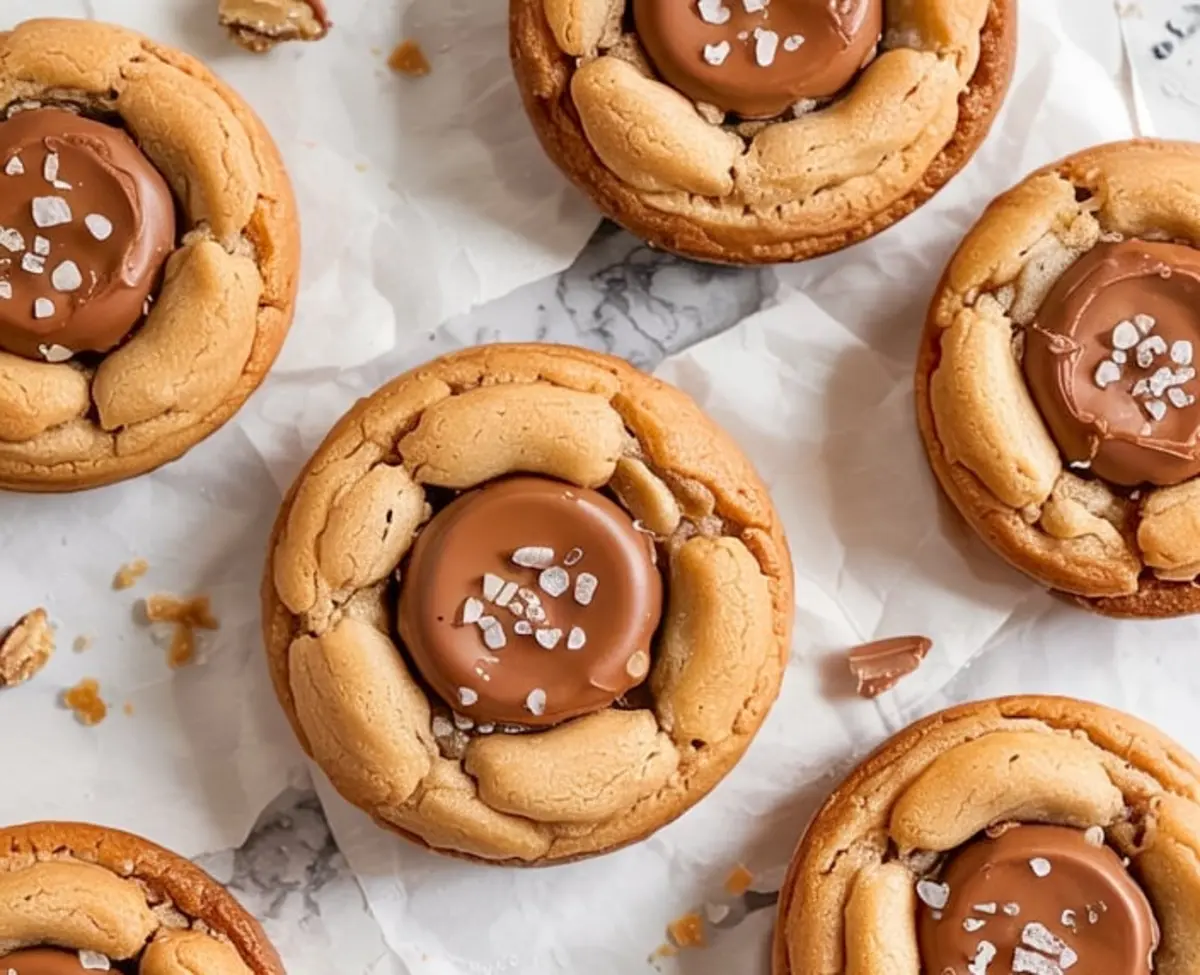
Once the cookies cool for 10 to 15 minutes in the pan, lift them out and let them finish setting on a wire rack. I always sprinkle a pinch of flaky sea salt across the tops while they’re still warm. That sharp hit offsets the sweetness and deepens the chocolate flavor.
Skip the salt if you prefer pure sweet. But I rarely do.
For a low-carb option, try my Keto Peanut Butter Cookies.
Storing and Freezing for Later
These cookies store well in an airtight container for up to four days at room temperature. After that, the texture starts to dry. If you plan to keep them longer, refrigerate or freeze in a sealed container.
I freeze mine in layers separated by parchment. You can warm them briefly in the microwave to soften the centers again. About 10 seconds does the trick.
Related Recipes to Bookmark
3 Ingredient Peanut Butter Cookies – Simple pantry bake, no mixer needed.
Peanut Butter Cup Cookies – Larger batch variation with different shaping.
Pin and Share Your Batch
You can save this recipe to your Pinterest board for easy access the next time you need a crowd-pleasing cookie with a surprise center. I’d love to hear how they turn out in your kitchen. Did you try a different candy? Add a dash of cinnamon? Share your tweaks and questions in the comments below.
Mini Peanut Butter Cup Cookies with soft centers, baked in muffin tins. Easy, rich, and freezer-friendly. A must-try cookie variation.
Mini Peanut Butter Cup Stuffed Cookies

Mini Peanut Butter Cup Stuffed Cookies combine soft peanut butter cookie dough with a hidden chocolate center. Each cookie is baked in a mini muffin tin and filled with a mini peanut butter cup while still warm, creating a soft and slightly chewy bite with a melty center. A touch of flaky sea salt adds balance and enhances the chocolate flavor.
Ingredients
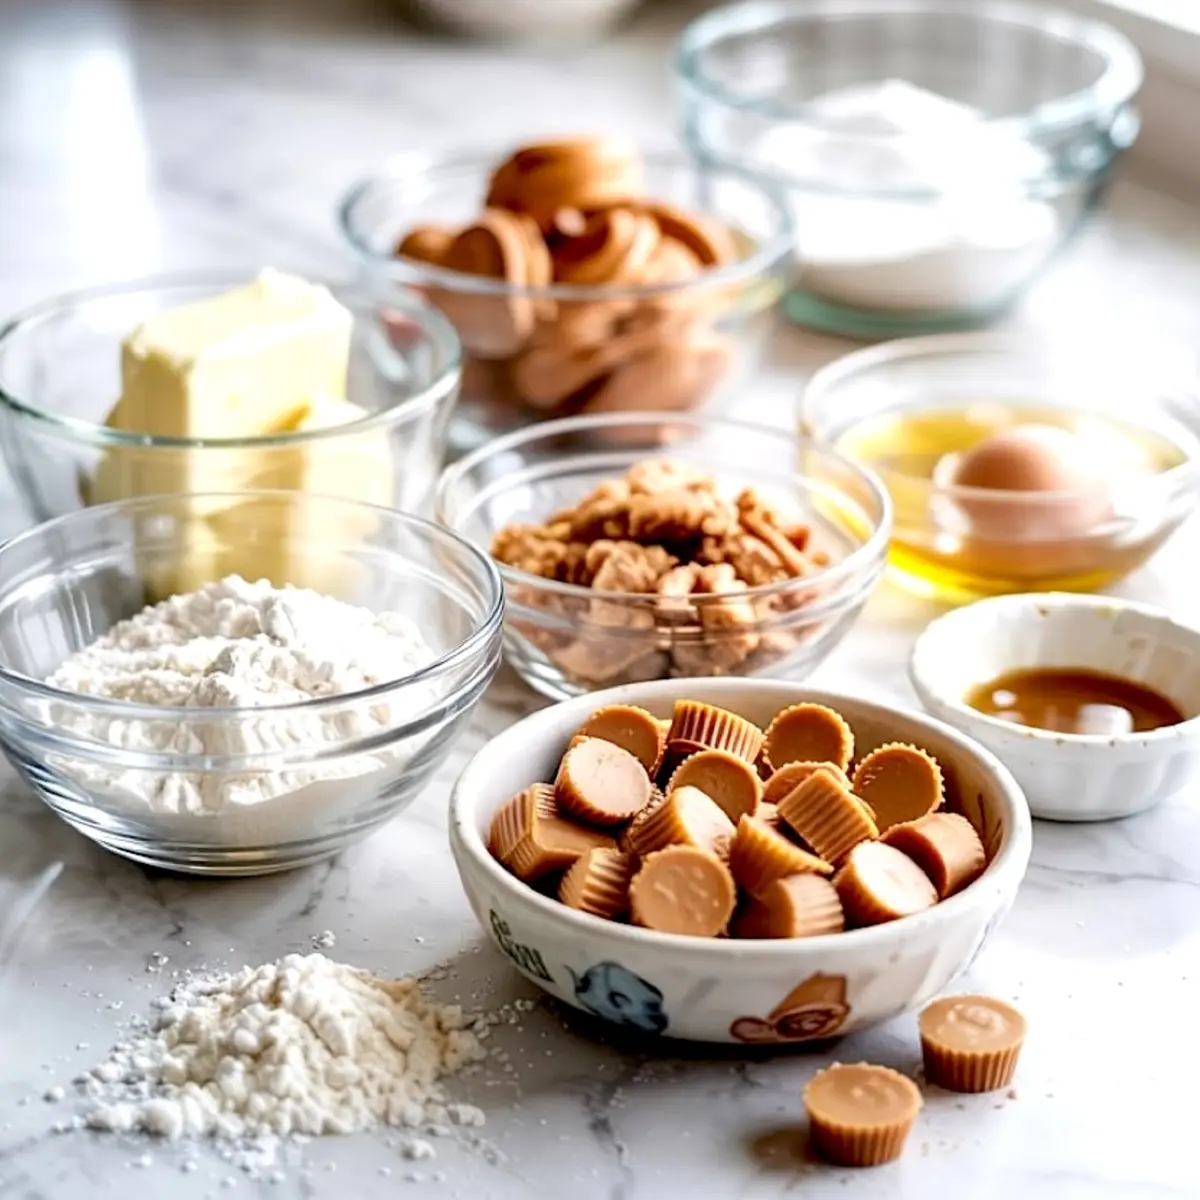
- 1/2 cup (1 stick) unsalted butter, softened
- 1/2 cup creamy peanut butter
- 1/2 cup granulated sugar
- 1/2 cup brown sugar, packed
- 1 large egg
- 1 tsp vanilla extract
- 1 1/4 cups all-purpose flour
- 1/2 tsp baking soda
- 1/4 tsp salt
- 24–30 mini peanut butter cups, unwrapped (Reese's or similar)
- Flaky sea salt, for topping (optional but recommended)
Instructions
- PREHEAT THE OVEN: Set your oven to 350°F (175°C). Lightly grease a mini muffin tin or line it with mini cupcake liners to make removal easier.
- CREAM THE FATS AND SUGARS: In a large bowl, beat the softened butter, peanut butter, granulated sugar, and brown sugar together until the mixture is light and fluffy, about 2–3 minutes. Use a hand mixer or stand mixer for best results.
- ADD EGG AND VANILLA: Mix in the egg and vanilla extract until fully incorporated into the creamed mixture.
- COMBINE DRY INGREDIENTS: In a separate bowl, whisk together the flour, baking soda, and salt. Slowly add the dry ingredients to the wet mixture, mixing just until combined. Avoid overmixing to keep the cookies tender.
- FORM THE COOKIE DOUGH: Scoop out dough using a small cookie scoop or tablespoon. Roll each portion into a ball and place it into the wells of the prepared mini muffin tin. Gently press down the center of each dough ball to create a shallow well.
- BAKE THE COOKIES: Bake for 8–10 minutes, or until the tops are set and the edges are lightly golden. Do not overbake, as the cookies will continue to set as they cool.
- INSERT THE PEANUT BUTTER CUPS: As soon as the cookies come out of the oven, immediately press one mini peanut butter cup into the center of each cookie while still hot. Allow cookies to cool in the pan for 10–15 minutes to set.
- FINISH AND COOL: Sprinkle each cookie with flaky sea salt, if using. Carefully transfer the cookies to a wire rack and let cool completely before serving or storing.
Notes
To ensure the peanut butter cups stay intact and don't melt too much, unwrap them before baking and keep them in the freezer while the cookies bake. This helps them hold their shape when pressed into the warm cookie.