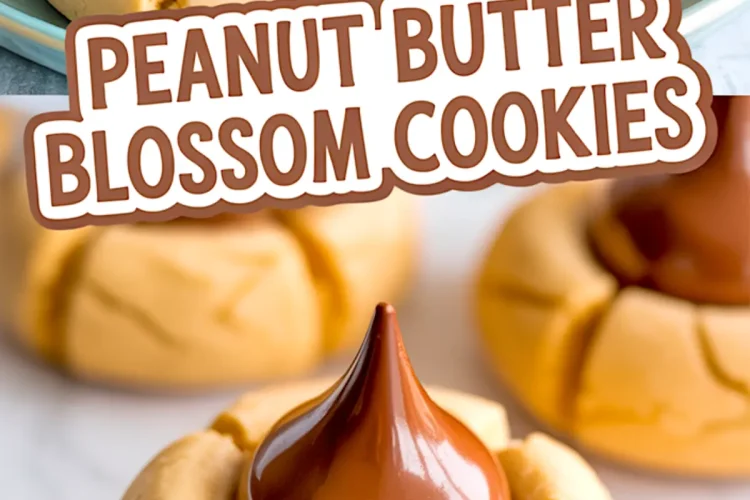
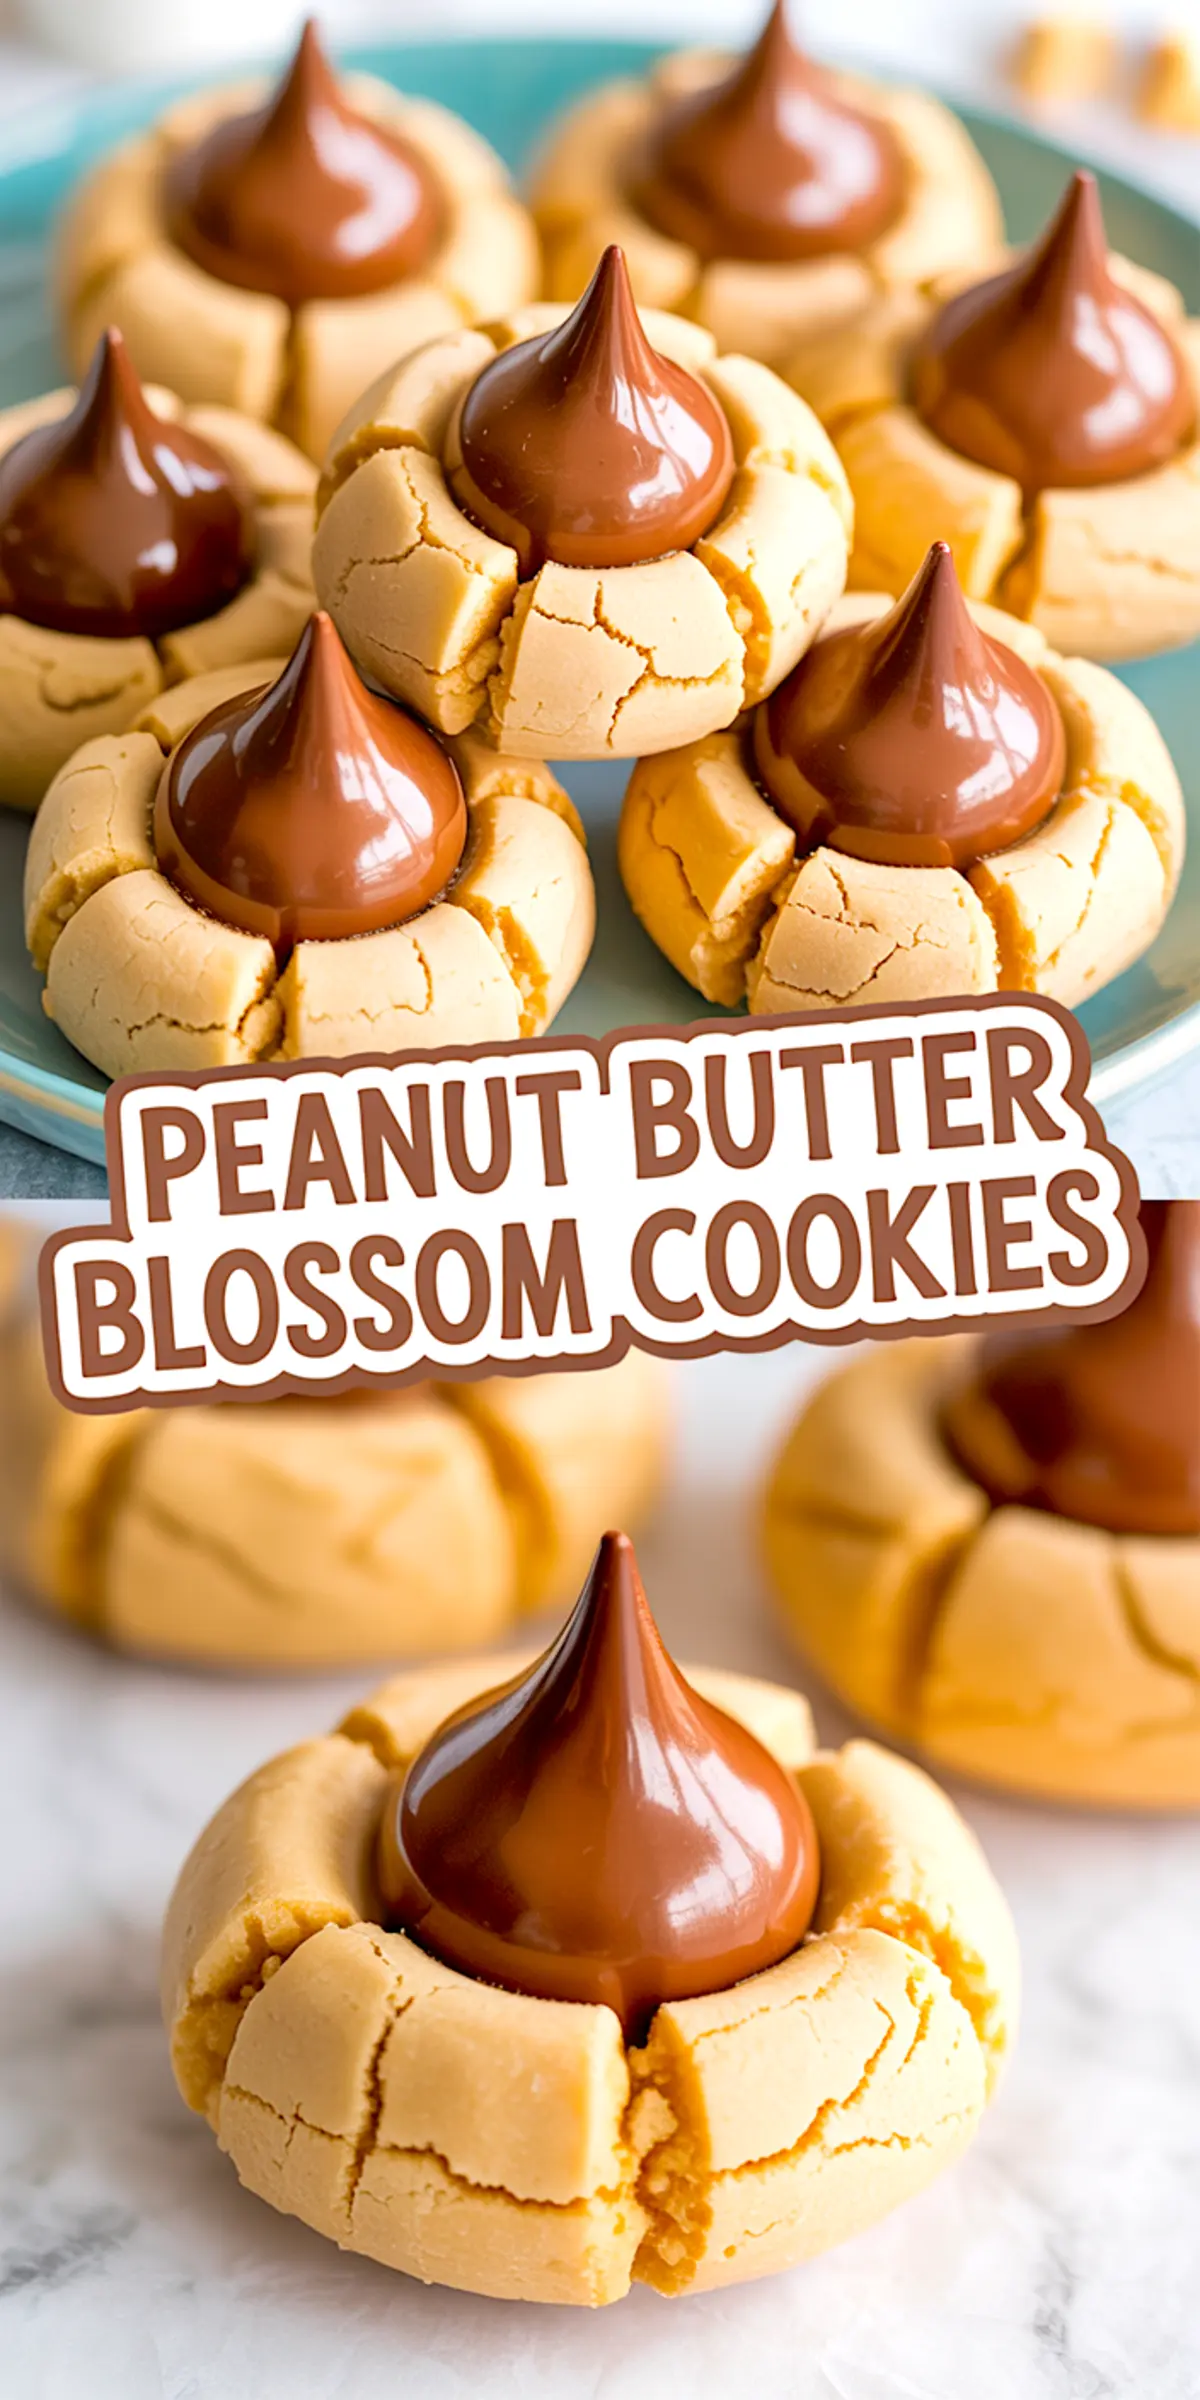
You’re here because you want more than a generic peanut butter cookie. You want that crackly sugar coating, that soft interior, and that warm chocolate kiss that sits perfectly in the center like it was meant to be there all along. These are Peanut Butter Blossom Cookies, quick to bake, reliable every time, and still the first to disappear from the dessert tray.
In this post, I’ll guide you through what makes these cookies so consistently good, how to store and serve them smartly, and a simple choice that changes the texture. This is based on how I bake them in my kitchen, with plenty of practical notes for yours.
Let’s get to it.
Following a special diet?
Every recipe on this site can be converted to gluten-free, vegan, dairy-free, keto, nut-free or egg-free with adjusted ratios so nothing falls flat.
Try the Recipe Converter →Why Peanut Butter Blossom Cookies Stay a Classic
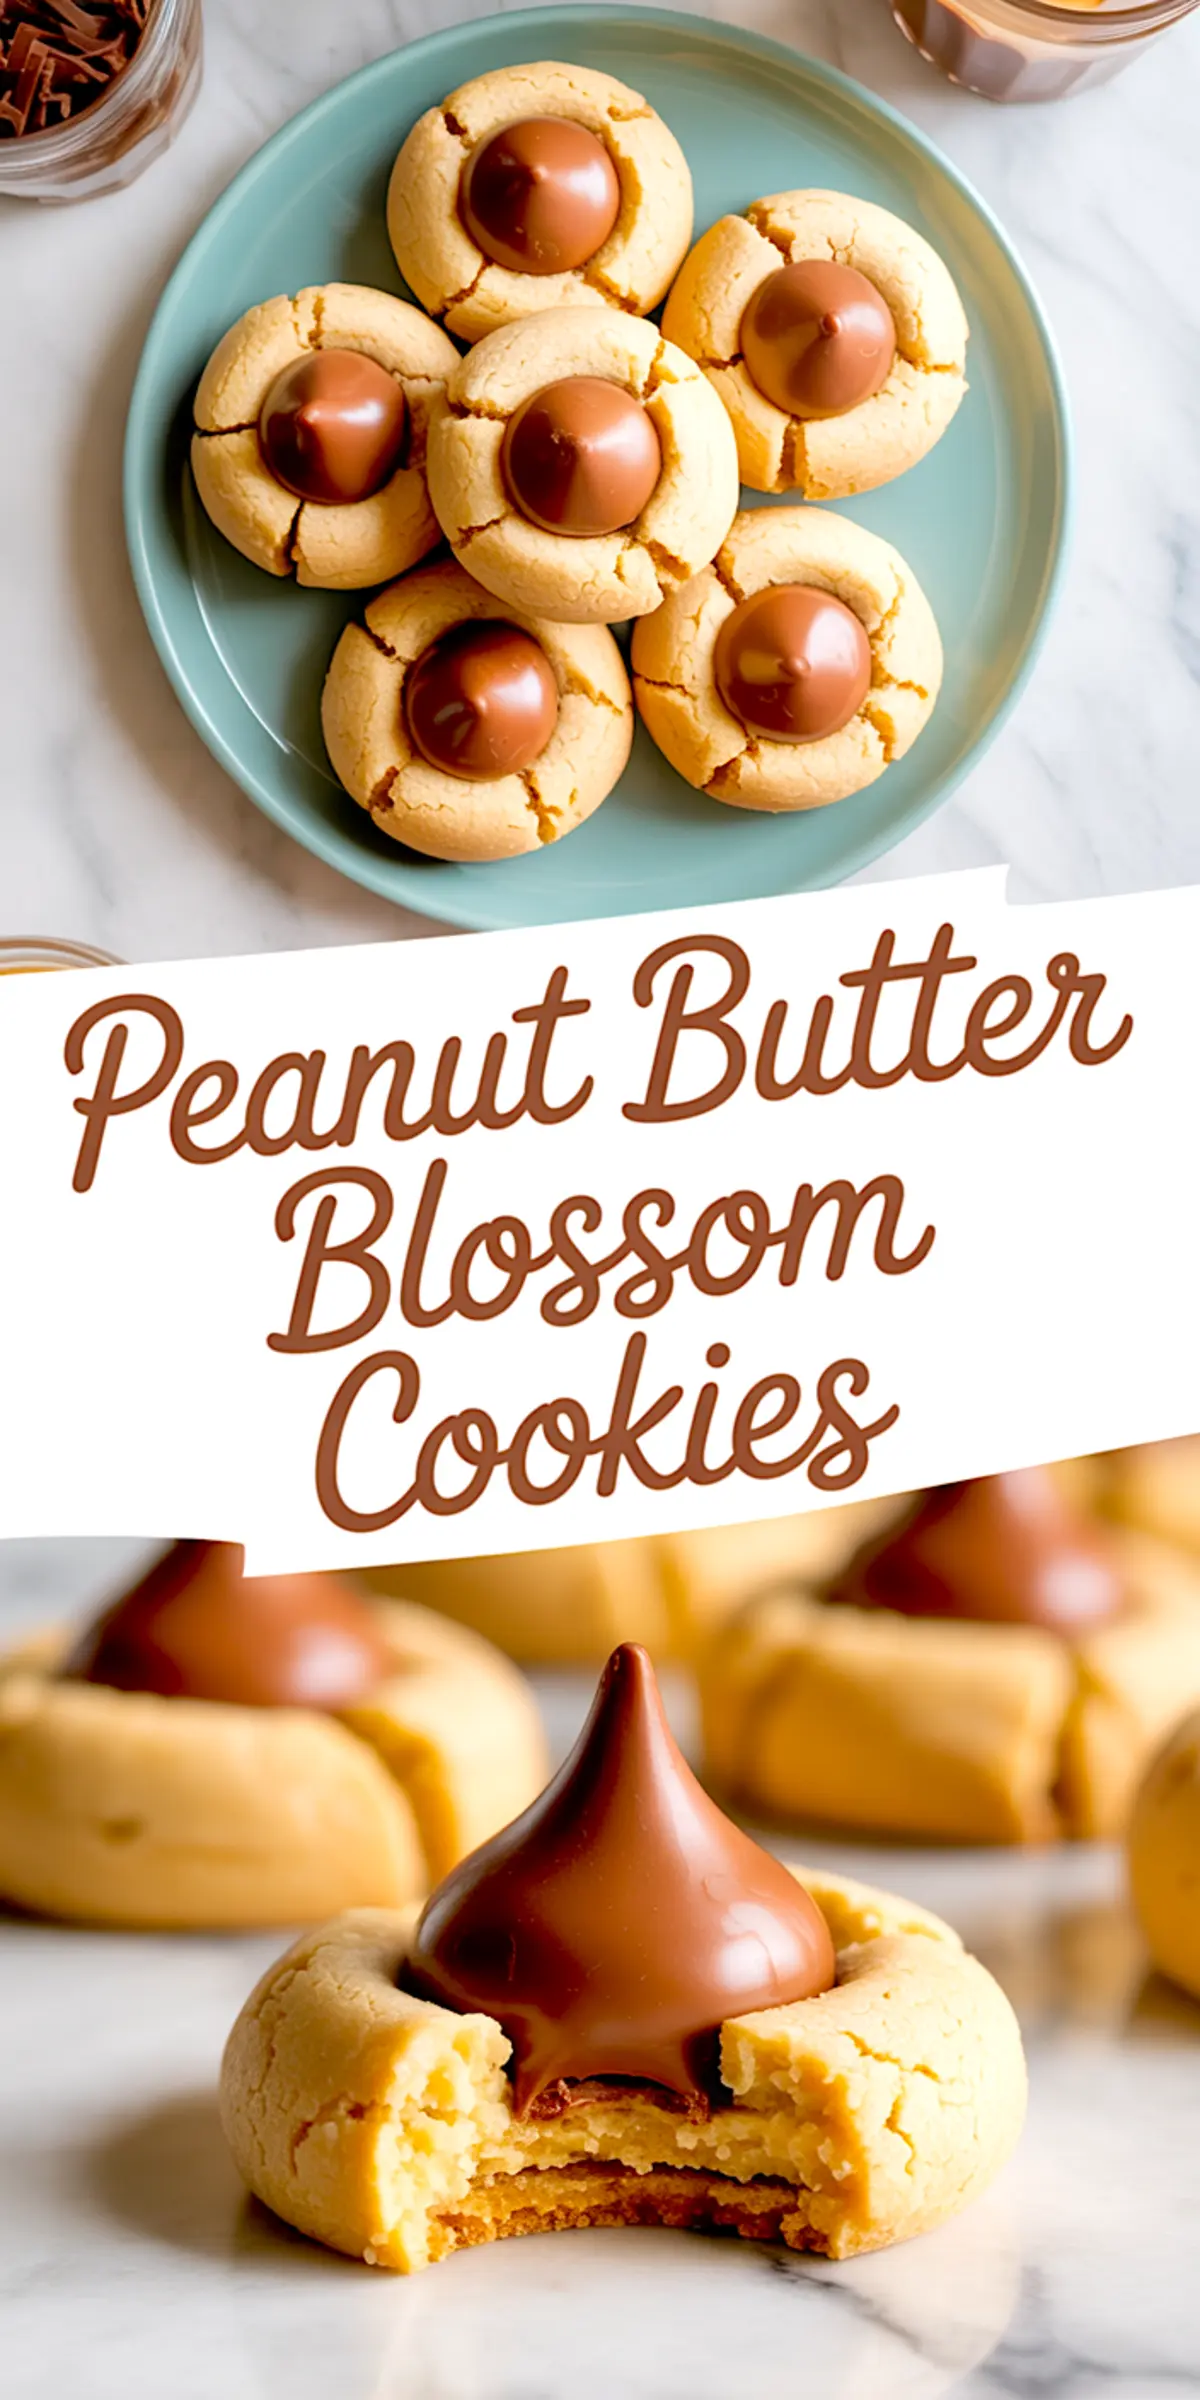
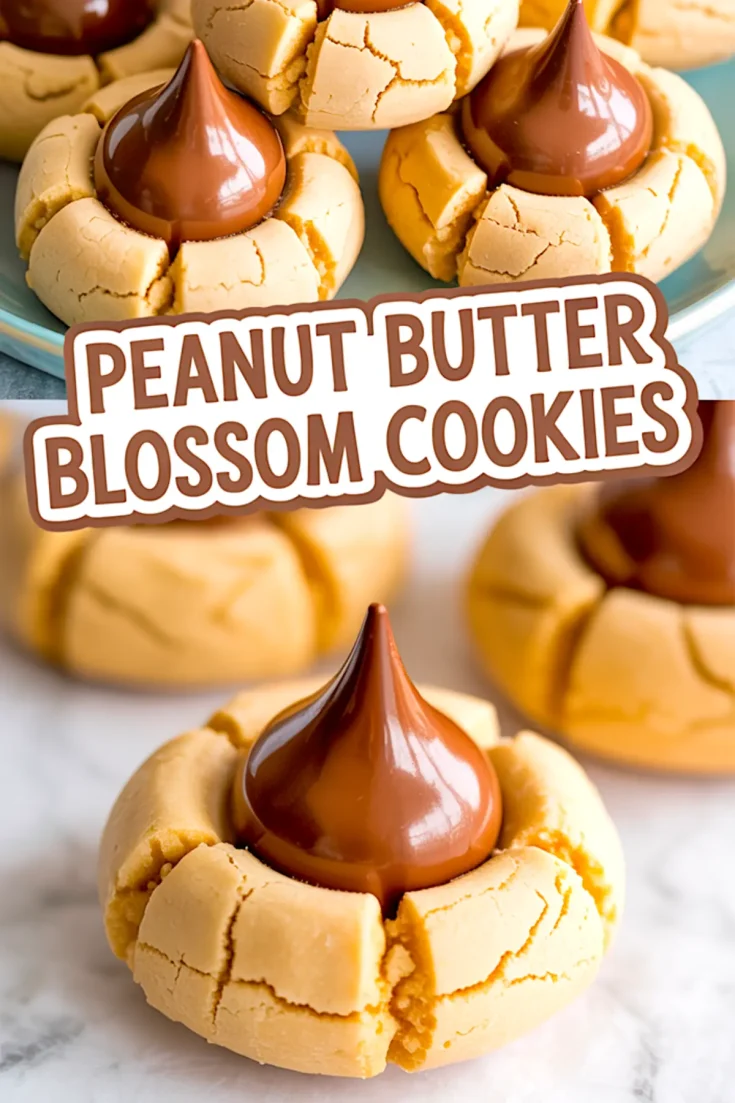
These cookies have something few others manage, a chewy, buttery base that holds shape without drying out, a sugary crust that gives way to softness, and the unmistakable nostalgia of a milk chocolate center.
I’ve baked a lot of peanut butter cookies over the years, including these Peanut Butter Chocolate Chip Cookies, but Blossom Cookies are a category of their own. The sugar coating is not just for sparkle, it gives the edges their gentle crack and faint crunch, something you lose if you skip that step.
I’ve learned that using light brown sugar in addition to white sugar makes the difference between a good cookie and one that stays soft for days. And yes, the kiss must go on while the cookie is still hot. If you wait, the center never settles in quite right.
Peanut Butter, Sugar, Butter – The Ingredients That Shape It All
Creamy peanut butter works best here. Chunky breaks the structure and throws off the shape. I’ve tested both. If you’re looking for that clean rise and soft bite, creamy wins. I prefer the classic store-bought type (like Jif or Skippy) over natural peanut butter. Natural versions separate too much and lead to spreading.
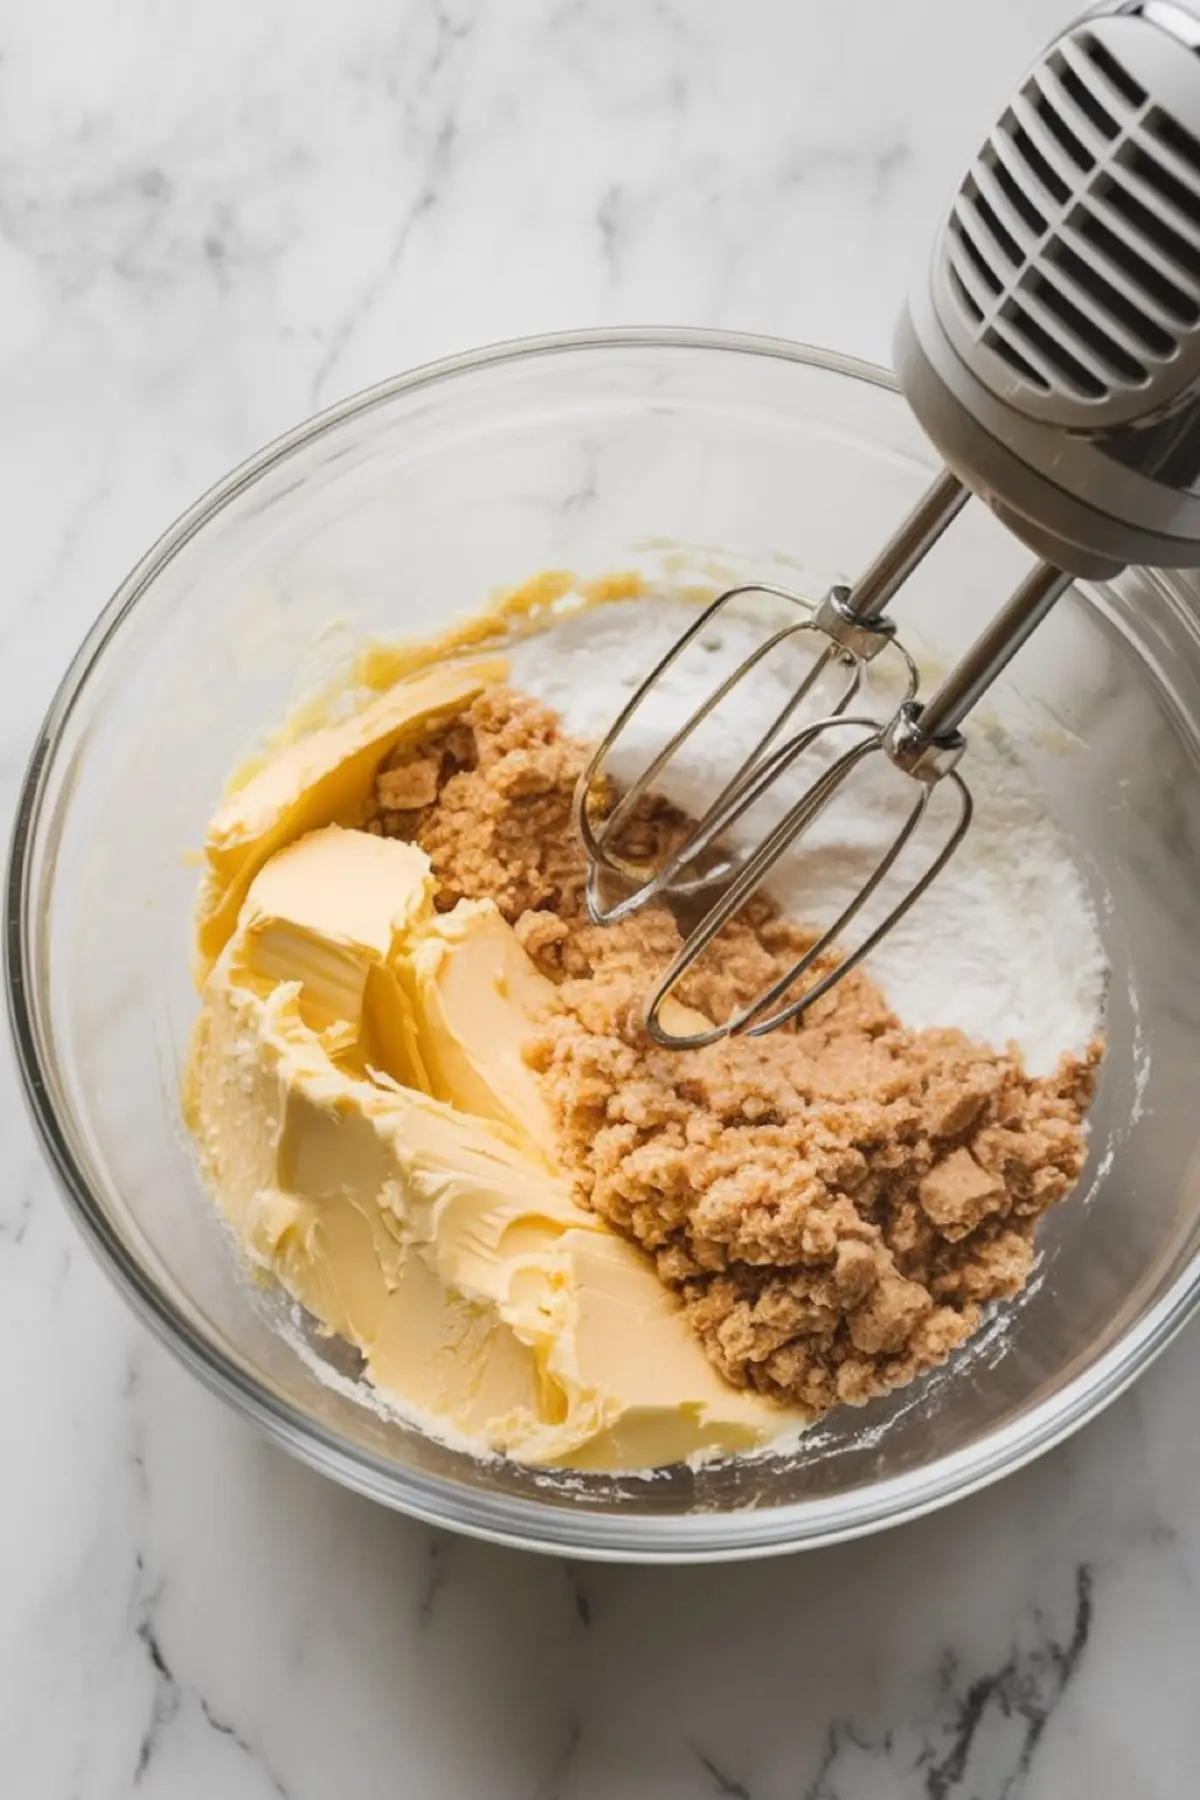
The butter must be softened—not melted. Melted butter makes cookies flat and greasy. Softened butter gives you lift and structure without overworking the dough.
You’ll use granulated sugar for sweetness and rolling, and light brown sugar for moisture. That mix supports chewiness. It also lets the chocolate sit without the base crumbling underneath.
A Quick Tip on Chocolate Kisses and Timing
Unwrap your kisses before the cookies go in the oven. I can’t count the number of times I’ve paused mid-bake to fumble with a wrapper while the cookies cooled too fast on the tray. The chocolate won’t stick or melt right unless the cookie is hot.
You’ll press the kiss into the cookie the moment it comes out. It will melt slightly, then firm up again as it cools. That process helps the kiss stay centered and lets the cookie form its signature crack around the edge.
Note: You can also make a holiday version of these with striped chocolate kisses, or swap in dark chocolate. The result will be slightly less sweet but just as satisfying.
Butter vs. Shortening: One Swap, Two Outcomes
I’ve tried these cookies using all-butter, and I’ve also tested them with half butter and half shortening. Both work, but here’s the difference:
All-butter gives you a rich, flavorful cookie that spreads slightly more and has a deeper golden color. If you prefer flavor and don’t mind a bit of spread, go all-butter. That’s my usual.
Shortening gives you a puffier cookie that holds its shape with minimal spread. If you want a taller cookie or live in a hot kitchen, a 50/50 split works well.
I’ve kept my recipe all-butter because it tastes better and still holds shape when chilled briefly before baking.
Shaping and Rolling Tips for Better Texture
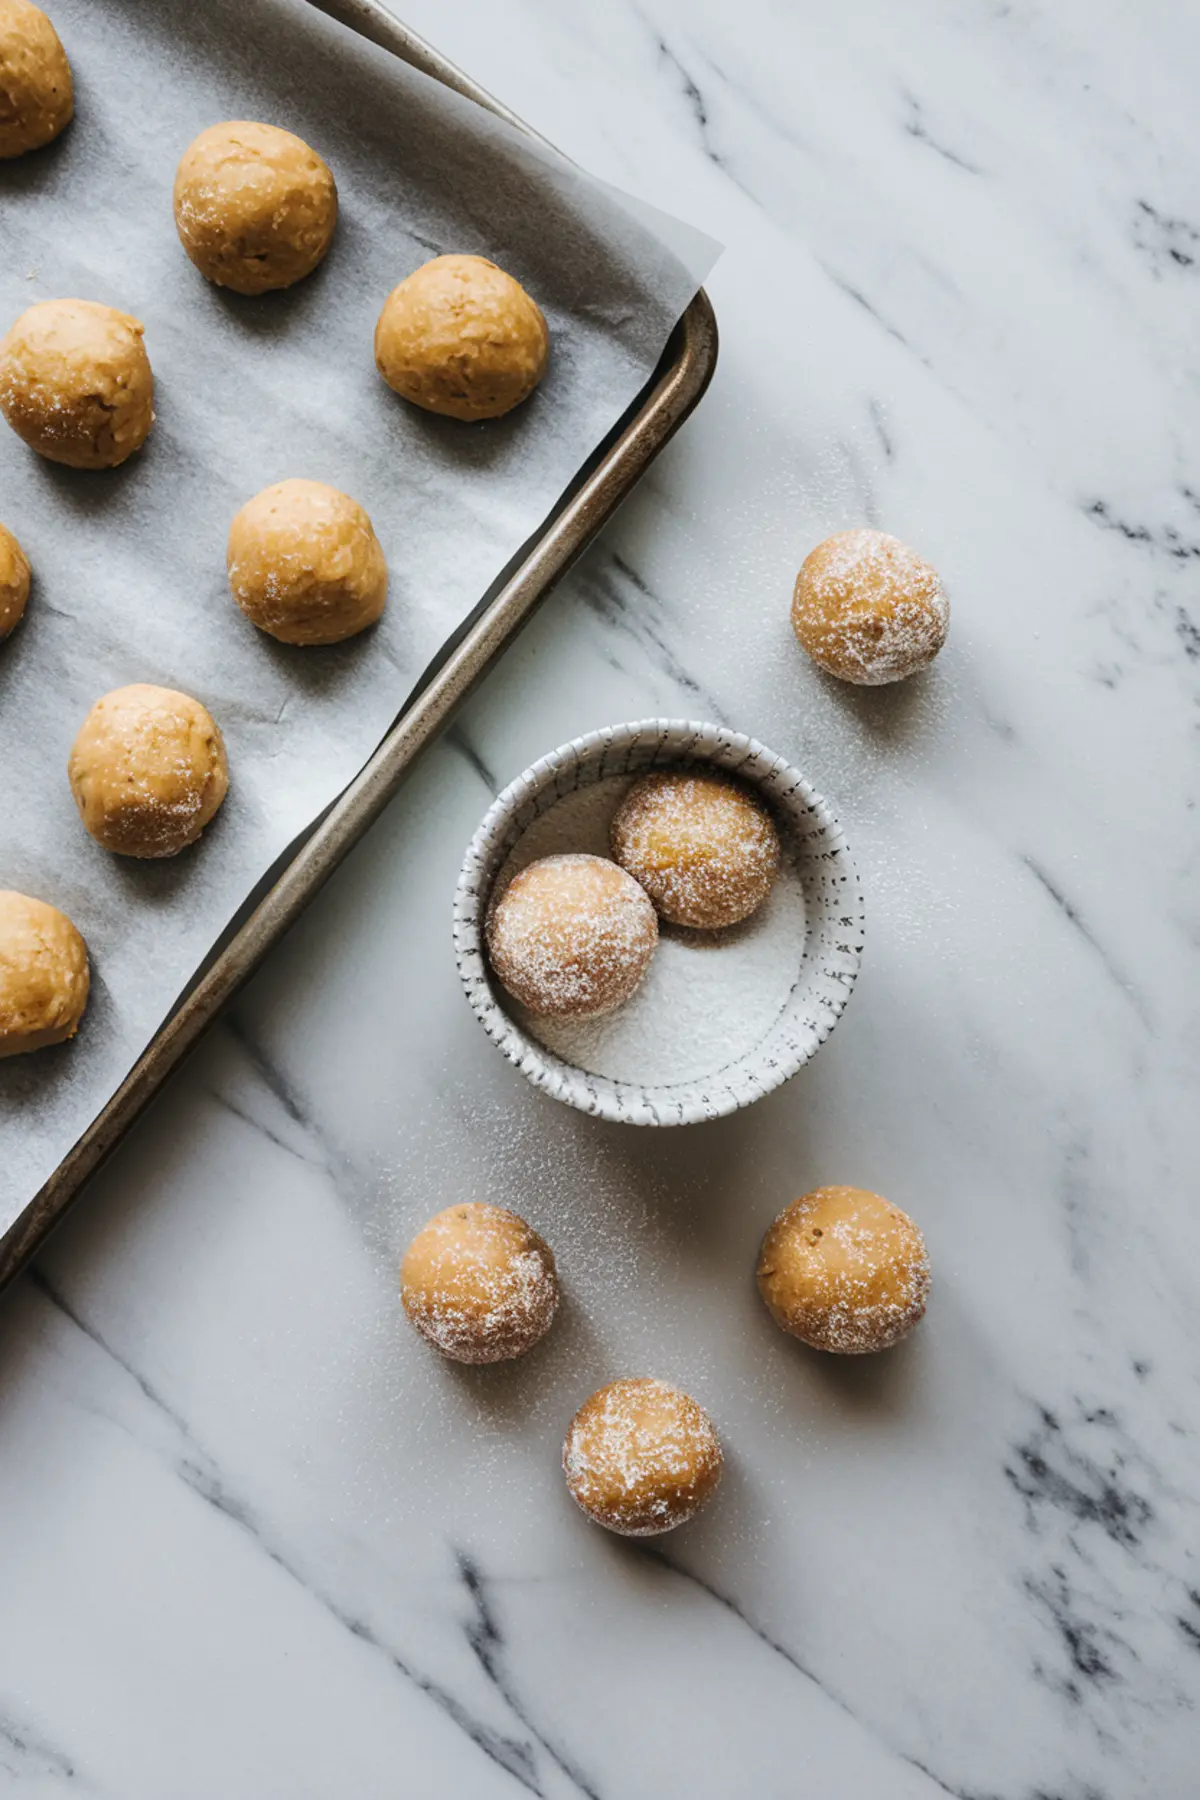
Use a tablespoon of dough per cookie and roll it gently in your palms. Don’t compact it too tightly. That light shaping helps the cookie puff in the oven rather than crack too early.
Roll the dough balls in granulated sugar right before placing them on the baking sheet. That coating won’t just make them look nice. It gives the surface a slight crunch that contrasts the soft middle.
I space the cookies two inches apart. They’ll spread a bit but not much, just enough to hold the kiss without crowding the tray.
Bake, Press, and Cool: Timing Matters
You’ll bake the cookies for 8 to 10 minutes. Look for the edges to set and the tops to puff. Don’t wait for a golden brown edge—these cookies should stay light in color with only a slight crack around the top.
Pull them from the oven while the centers are still soft. Immediately press a chocolate kiss into each one. You’ll see the cookie crack slightly, which is exactly what you want.
Let them cool for five minutes on the tray before transferring to a wire rack. That rest time keeps them from breaking apart and lets the chocolate settle.
How to Store and Serve Peanut Butter Blossoms
Once cool, these cookies store well in an airtight container for up to five days. Stack them gently between sheets of parchment if needed.
Serving Tip: If you’re planning to add them to a cookie tray, include something colorful like Strawberry Kiss Cookies or a textured cookie like Chocolate Churro Cookies to contrast the smooth peanut butter base.
You can also freeze the baked cookies without the chocolate, then add the kiss after reheating. But I’ll be honest—I usually bake them fresh. With a 25-minute total time, they’re easier than most desserts.
Peanut Butter Blossoms vs. Thumbprint Cookies
Some readers ask if these are the same as Peanut Butter Thumbprint Cookies. They aren’t. Thumbprints are usually softer and often filled after baking with jam or chocolate. Blossoms bake with nothing in the center and get their kiss post-oven. That timing creates the crack and signature look.
So while both cookies offer a center-filling style, the process and texture are different. Blossoms stay firmer and more structured—better for stacking and storing.
Save This One for Every Holiday and Beyond
This is the peanut butter cookie I always return to. It never fails. It fills the kitchen with a smell that brings people in, and it stacks up neatly in tins or on platters.
If you want something softer and more chocolate-forward, try my Chocolate Crinkle Sandwich Cookies next. But if you’re looking for that iconic sugar-dusted finish and a chocolate kiss in the center—this is the one.
📌 Save this recipe to your cookie board and come back every season.
💬 And tell me in the comments: How did yours turn out? Any questions or tweaks? I’d love to hear how you bake yours.
Peanut Butter Blossom Cookies Recipe
A soft and chewy peanut butter cookie is rolled in sugar, baked until golden, and finished with a warm milk chocolate kiss pressed into the center. These nostalgic cookies are quick to make and consistently delicious.
Ingredients
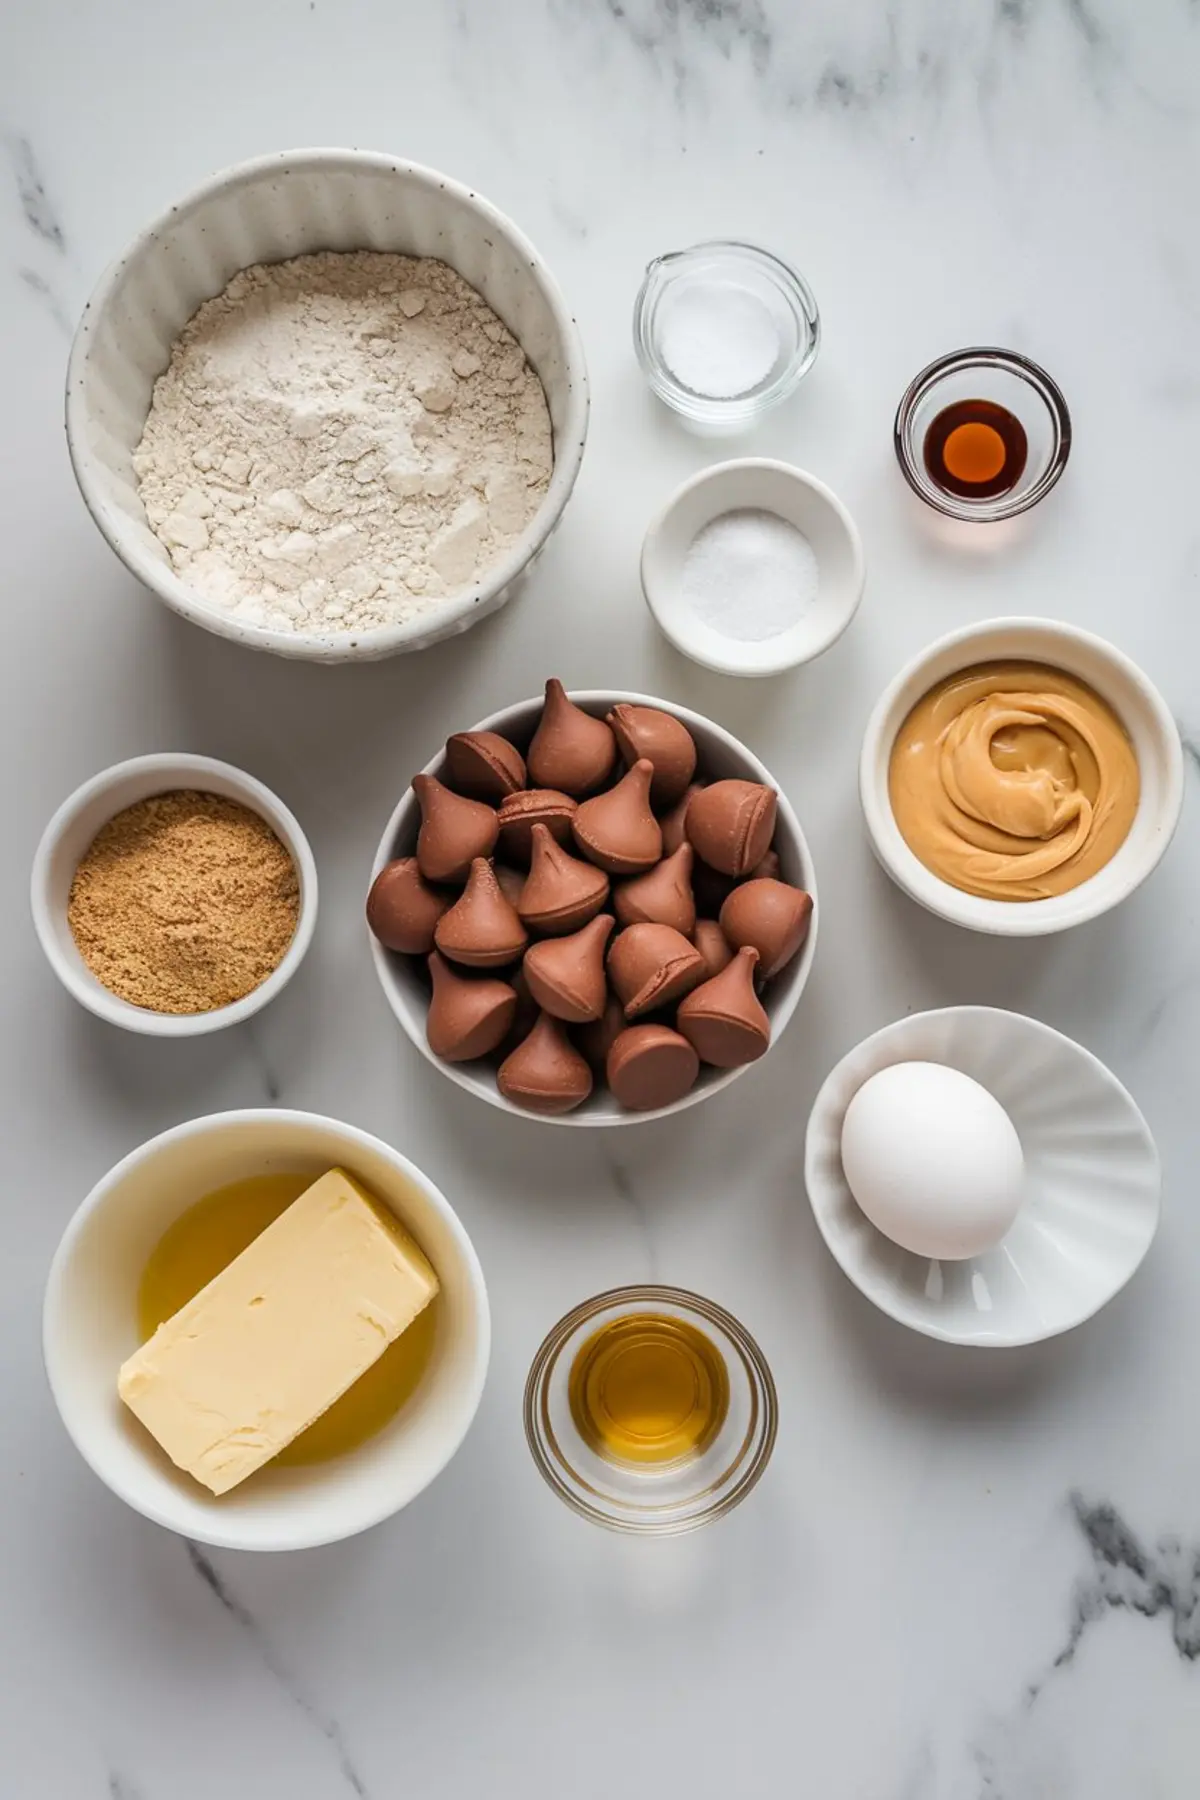
- 1 ¾ cups all-purpose flour
- ½ teaspoon baking soda
- ½ teaspoon salt
- ½ cup unsalted butter, softened
- ½ cup granulated sugar, plus more for rolling
- ½ cup packed light brown sugar
- 1 large egg
- ¾ cup creamy peanut butter
- 1 teaspoon vanilla extract
- About 24 milk chocolate kisses, unwrapped
Instructions
- PREHEAT THE OVEN: Preheat your oven to 375°F (190°C) and line a baking sheet with parchment paper or a silicone baking mat.
- WHISK DRY INGREDIENTS: In a medium bowl, whisk together the flour, baking soda, and salt until evenly combined. Set aside.
- CREAM BUTTER AND SUGARS: In a large mixing bowl, beat the softened butter, granulated sugar, and brown sugar on medium speed for about 2 minutes until light and fluffy.
- ADD PEANUT BUTTER, EGG, AND VANILLA: Mix in the peanut butter, egg, and vanilla extract until smooth and fully incorporated.
- COMBINE DRY AND WET INGREDIENTS: Gradually add the dry ingredients to the wet mixture, mixing on low speed just until the dough comes together. Do not overmix.
- SHAPE AND ROLL DOUGH: Scoop tablespoon-sized portions of dough and roll them into balls with your hands. Roll each ball in granulated sugar to coat.
- ARRANGE ON BAKING SHEET: Place the sugar-coated dough balls on the prepared baking sheet, spacing them about 2 inches apart.
- BAKE THE COOKIES: Bake for 8 to 10 minutes, until the cookies are puffed and the edges are just beginning to crack. The centers should remain soft.
- ADD CHOCOLATE KISSES: Immediately press one chocolate kiss into the center of each cookie right after removing them from the oven. The cookies will crack slightly around the edges as the chocolate settles.
- COOL THE COOKIES: Allow the cookies to cool on the baking sheet for 5 minutes, then transfer them to a wire rack to cool completely and let the chocolate set.
Notes
For best results, unwrap the chocolate kisses before baking so they’re ready to press into the warm cookies immediately. Store in an airtight container at room temperature for up to 5 days.
Nutrition Information
Yield
24Serving Size
1Amount Per Serving Calories 171Total Fat 9gSaturated Fat 4gTrans Fat 0gUnsaturated Fat 4gCholesterol 19mgSodium 117mgCarbohydrates 19gFiber 1gSugar 11gProtein 3g