
These peanut butter cup cookies are something out of the wildest fantasies of a chocolate-and-peanut-butter lover, but it gets even better: in the heart of every cookie, there’s a miniature peanut butter cup nestled inside the soft, warm cookie dough. This is one of those fun tricks that allow you to get a good bite into a gooey peanut butter center without having the candy on top.
A Story of Warm Memories and Peanut Butter Delight
I remember being a young child and feeling so lucky when small chocolate peanut butter cups would appear in my lunchbox. Mom knew just how much I enjoyed the classic pairings of the chocolate and nutty flavors, and each bit was like a little present. Years later, I came across this recipe that takes this childhood favorite to the next level by burying the peanut butter cup inside a cookie.
I fell in love with the first batch on. These peanut butter cup cookies bring me back to those moments I hold dear, filling my kitchen with the warmth of peanut butter and chocolate aromas. But the best is yet to come: these cookies hold certain surprises in every bite, acting like a cookie disguise on the outside, with the big surprise of a peanut butter cup inside.
Key Ingredients You’ll Need
Following a special diet?
Every recipe on this site can be converted to gluten-free, vegan, dairy-free, keto, nut-free or egg-free with adjusted ratios so nothing falls flat.
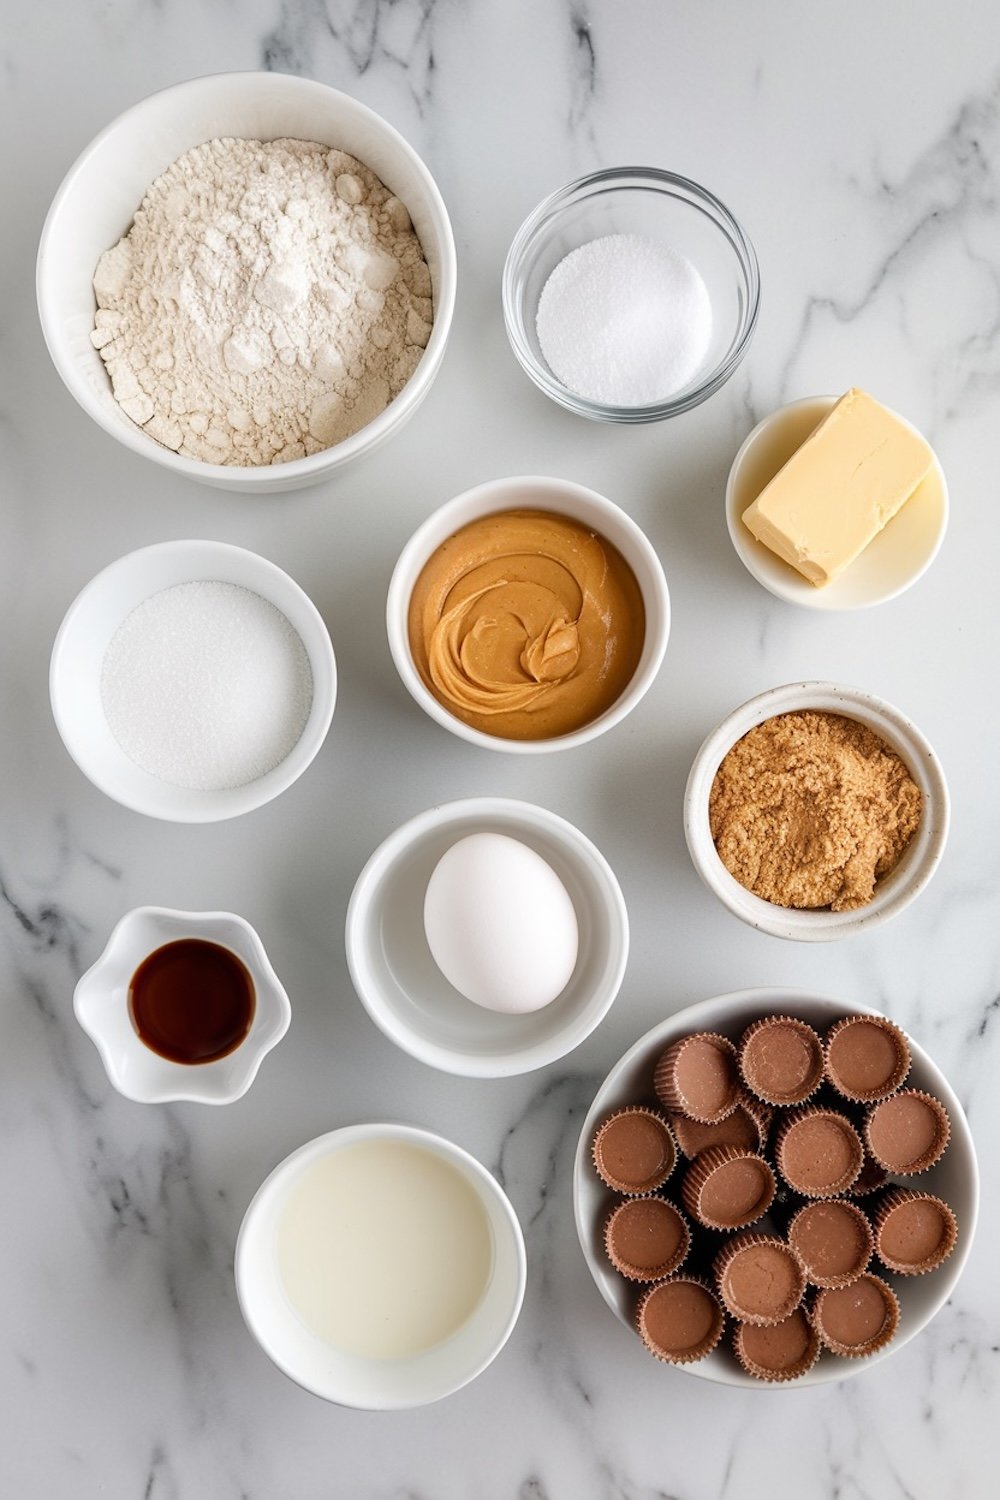
Try the Recipe Converter →For these cookies, you’ll need a few pantry staples that bring out a perfect mix of peanut butter and chocolate flavors.
- All-purpose flour provides the structure for these cookies, making them soft yet sturdy enough to hold the peanut butter cup in place.
- Creamy peanut butter ensures a smooth, rich peanut flavor throughout each cookie.
- Granulated and brown sugar contribute to the cookie’s chewy texture and add a touch of caramel undertone.
- Unsalted butter keeps the dough soft, while a touch of milk helps everything blend smoothly.
- Mini peanut butter cups are the star of this recipe! Look for the unwrapped, bite-sized versions for easy preparation.
Preparing the Cookie Dough
But this cookie dough is simple, yet important to get just right for that soft and chewy feel. Begin by whisking together your dry ingredients-flour, baking soda, and salt-in a separate bowl. This is to ensure your baking soda and salt will be well incorporated into the dough so the cookies rise uniform.
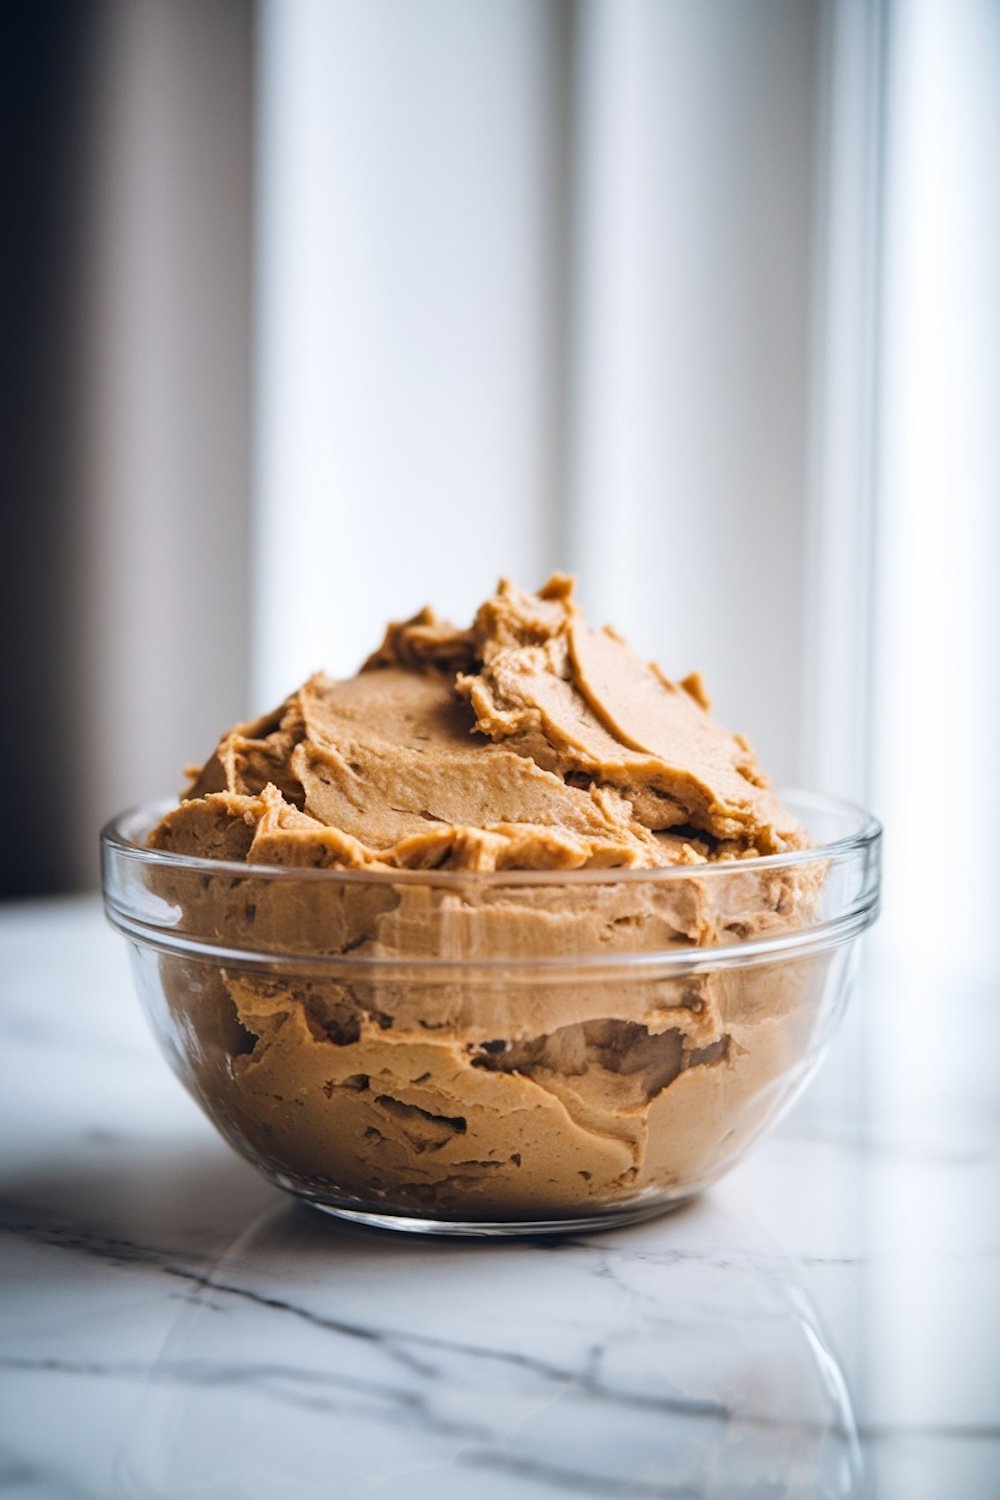
Add the softened butter to a larger bowl and beat in with the peanut butter and sugars until the mixture is light and fluffy. So now, the creaming process not only incorporates air for a light texture, but it also helps in dissolving the sugars. Once you add the egg, vanilla, and a splash of milk, the dough should be smooth and fragrant with peanut butter goodness.
Then fold in the dry ingredients until just combined. Take a lot of care not to overmix, or the cookies will be either dense or tough.
Shaping and Baking for a Perfectly Encased Peanut Butter Cup Center
- Prepare the Dough and Candy: Make sure your dough is thoroughly mixed and ready, and your peanut butter cups are unwrapped and set aside. It’s also helpful to chill the peanut butter cups in the fridge for a few minutes before starting. This prevents them from melting too quickly as you work with the dough.
- Portion and Flatten the Dough: Scoop about a tablespoon of dough, then gently flatten it into a disk about 1/4-inch thick. You want enough dough to fully encase the peanut butter cup without it poking through.
- Wrap the Peanut Butter Cup: Place a peanut butter cup in the center of the dough disk. Carefully fold the edges of the dough up and around the candy, gently pressing and shaping the dough so that it fully covers the peanut butter cup on all sides. You should end up with a small ball of dough with the candy hidden completely inside.
- Shape for a Smooth Finish: Roll the dough ball gently between your hands to ensure an even, round shape. This step gives you that smooth, domed cookie look after baking.
- Bake Until Lightly Golden: Place each dough ball on a parchment-lined baking sheet, leaving space between each one as they will spread slightly. Bake at 350°F (175°C) for about 10-12 minutes, just until the edges are lightly golden. The cookies will still look soft and a bit puffy in the center, but they’ll firm up as they cool. Avoid overbaking to keep the center soft and gooey.
- Cool on the Baking Sheet: Let the cookies rest on the baking sheet for about 5 minutes to set. Then, transfer them to a wire rack to cool completely. This cooling step ensures the peanut butter cup inside stays in place, creating that beautiful, filled cookie effect.
Why This Method Works
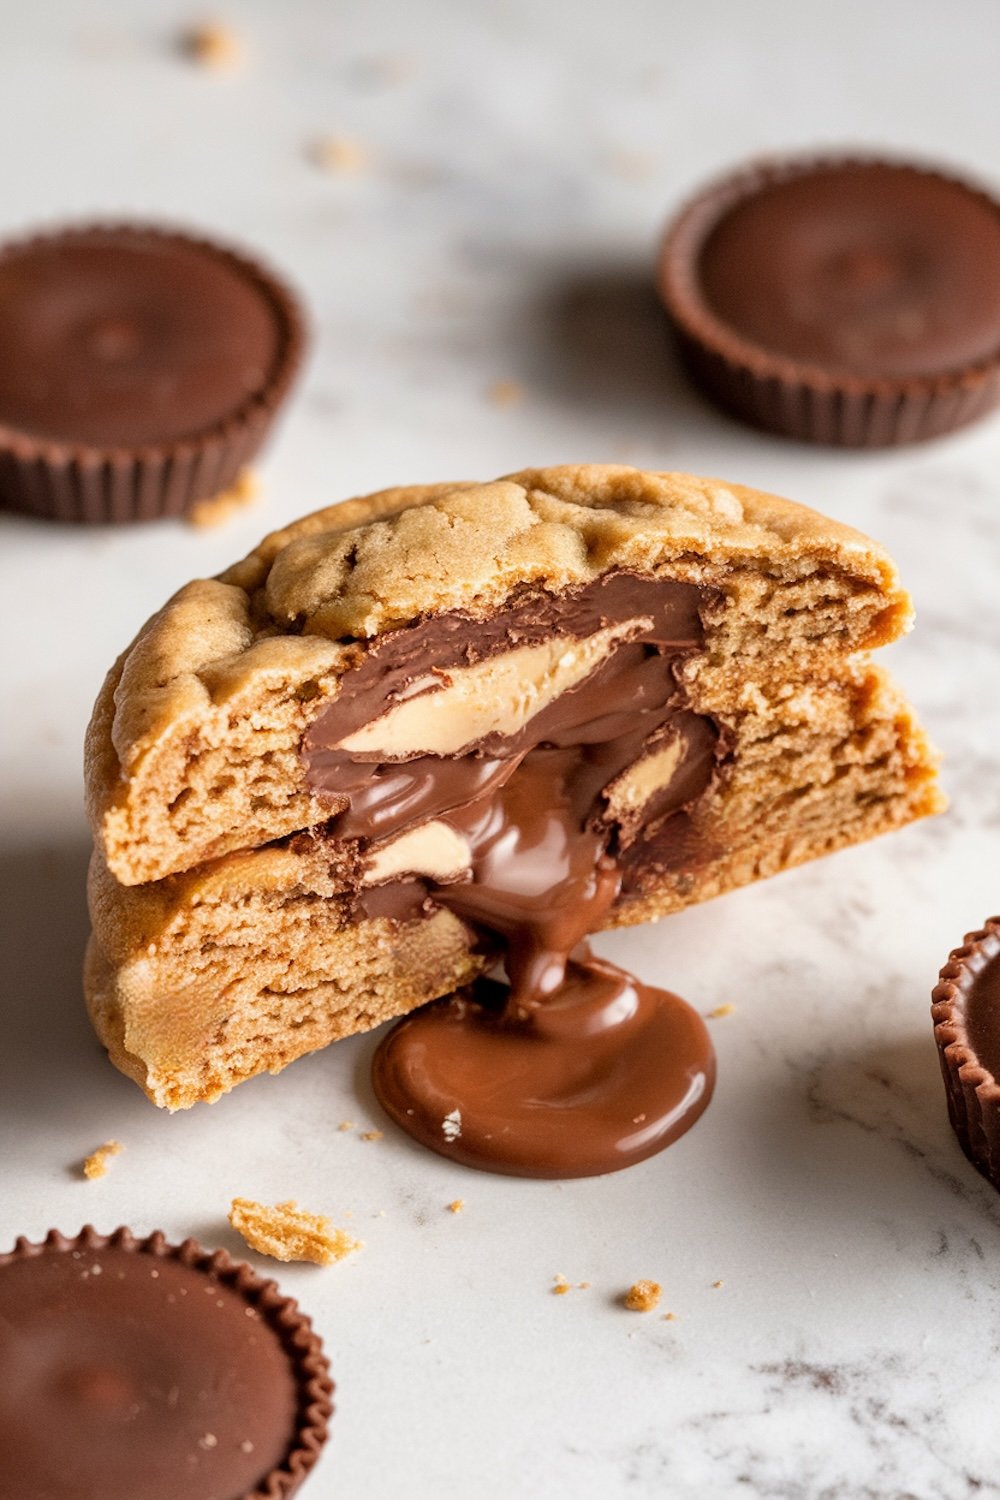
You want to fully wrap the cookie dough around the peanut butter cup so that when it’s baked, it’s just one seamless soft cookie that has this chocolate-peanut butter center inside. Enclosing the dough keeps the peanut butter cup from melting out, and it’s picture-perfect; looking just like the photo here, every bite a surprise, releasing the velvet peanut butter cup wrapped up in a tender cookie shell.
Two Ways to Make Peanut Butter Cup Cookies: Hidden vs. Visible Center
The best thing about this recipe: It’s really versatile. And whether you’d like the peanut butter cup hidden inside the cookie, as it is in our main recipe, or placed atop for a more traditional look, is up to you. Here’s how to do both:
1. Hidden Center Method (As Shown in the Pictures)
Our main recipe, which we follow, makes this “hidden center” effect where you place the peanut butter cup inside the wrapped dough to make that great surprise when you’re taking a bite. It’s just ideal for lovers of a little mystery in their cookies-you get a smooth, rounded cookie on the outside, with the peanut butter cup inside.
These are easily made by flattening a portion of dough, placing a peanut butter cup in the middle of it then wrapping dough all around, baking as usual. These will be soft cookies, filled, but with no candy visible on the surface.
2. Visible Center Method
If you like the cookies to look more traditional- with a peanut butter cup on top-you can do things a little different. You wont wrap dough around the peanut butter cup at all, but take each candy and press it into the top of the dough ball after the cookies have baked.
To make this version: Shape your dough into balls and bake on a lined baking sheet as usual. When the cookies come out of the oven immediately press a peanut butter cup onto the top of each cookie, letting the heat of the cookie melt the candy slightly and adhere it to the cookie. This is a really striking cookie because the peanut butter cup is visible on top.
Which Method Should You Use?
Of course, both are delicious and maintain that undeniable chocolate-peanut butter taste, but the two offer something different. Some people might prefer the buried center just because it is so great to have a little surprise inside with the look of a smooth, classic cookie. A visible center, on the other hand, makes a very bold statement with a nice fat peanut butter cup just sitting right there atop the chocolate perfection.
Dessert Information
- Servings: 24 cookies
- Prep Time: 30 minutes
- Cooking Time: 10-12 minutes per batch
- Calories: Approximately 300 kcal per cookie
Bonus Tips for Perfect Peanut Butter Cup Cookies
Here are some expert tips to help you perfect both the hidden and visible center versions of these cookies:
- Chill the Peanut Butter Cups: No matter which method you choose, chilling the peanut butter cups in the fridge before baking can help keep them from melting too quickly. This is especially helpful if you’re using the hidden center method, as it prevents the candy from softening too much while you’re wrapping it in dough.
- Use Room Temperature Dough for Wrapping: When creating the hidden center version, make sure your cookie dough is at room temperature. This will make it easier to shape and wrap around the peanut butter cup. Cold dough can crack when you try to enclose the candy.
- Avoid Overbaking: Both versions of these cookies should come out of the oven looking slightly underdone in the center, with only the edges lightly golden. They’ll continue to firm up as they cool, giving you that soft, chewy texture. Overbaking will make the cookies dry and hard, so keep a close eye on them!
- Press Gently for the Visible Center Method: For the visible center version, press the peanut butter cup into each cookie immediately after they come out of the oven. The warmth of the cookie will soften the candy just enough for it to stick securely on top. Press down just until it’s set—too much pressure can cause the cookie to break apart or the candy to lose its shape.
- Experiment with Cookie Thickness: If you’re trying the hidden center method, you can experiment with slightly thicker or thinner dough around the peanut butter cup. A thicker dough wrap will make for a softer, chewier cookie around the candy, while a thinner wrap gives you a bit more chocolatey, peanut-buttery surprise with each bite. Just make sure there’s enough dough to fully enclose the candy.
- Get Creative with Presentation: For a festive touch, consider adding a drizzle of melted chocolate or a dusting of powdered sugar on top of the visible center cookies. It’s an easy way to elevate their look, making them perfect for holidays or gift-giving.
With these tips, you’ll have beautiful, bakery-style peanut butter cup cookies every time, no matter which method you choose!
Creative Serving Suggestions
These peanut butter cup cookies are perfect for any occasion, from holiday cookie exchanges to movie nights at home. For an extra-special touch:
- Drizzle with Chocolate: Melt some chocolate and drizzle it over the top for a pretty, polished finish.
- Dust with Powdered Sugar: Give the cookies a gentle dusting of powdered sugar for a classic holiday look.
- Serve Warm with Ice Cream: These cookies are wonderful when slightly warm and served with a scoop of vanilla ice cream. The contrast between warm and cold is unforgettable!
Now Over to You
I really hope this recipe will give you at least as much coziness and nostalgia as it gives me, because there is just something magic in a cookie with a little treasure inside, and this melting in your mouth is just divine. If you try this recipe, please share your thoughts in comments! Were they served warm with ice cream, or did you top them with something a little different and make them your own?
Save this if you love it, to your favorite dessert board so you can find it for your next baking day!

PEANUT BUTTER CUP COOKIES RECIPE
Course: Cookies24
servings30
minutes40
minutes300
kcalIngredients
1 3/4 cups all-purpose flour
1/2 teaspoon baking soda
1/4 teaspoon salt
1/2 cup unsalted butter, softened
1/2 cup creamy peanut butter
1/2 cup granulated sugar
1/2 cup packed brown sugar
1 large egg
1 teaspoon vanilla extract
2 tablespoons milk
24 mini peanut butter cups, unwrapped
Steps
- Preheat oven to 350°F (175°C). Lightly grease a mini muffin pan or use paper liners.
- In a medium bowl, whisk together the flour, baking soda, and salt. Set aside.
- In a large mixing bowl, cream the butter, peanut butter, granulated sugar, and brown sugar together until smooth and fluffy, about 2 minutes.
- Beat in the egg, vanilla extract, and milk until fully combined.
- Gradually add the dry ingredients to the wet ingredients and mix until just combined. Do not overmix.
- Scoop about 1 tablespoon of dough into each mini muffin cup. Press the dough down gently to form a base for the peanut butter cup.
- Bake for 10-12 minutes, or until the edges are lightly golden but the center is still soft.
- Remove from the oven and immediately press a mini peanut butter cup into the center of each cookie while they are still warm. Let the cookies cool in the pan for about 10 minutes, then transfer to a wire rack to cool completely.
Your recipe title and ingredients seem to say cookies, but the instructions refer to cupcakes? Did something get mixed up on your instructions? These sound great! Thanks!
Thanks for pointing that out! You were right—there was a mix-up, but it’s all fixed now. Hope you enjoy the recipe! 😊
Sorry-still confused. You bake these in a mini muffin cup? The cookies in the picture look flat like they were baked on a cookie sheet. Thanks!
Did you get a response by chance? I’m getting ready to make these and want to know if I need to a muffin pan. Thank! 🍪
Hi MNichols! Great question! These cookies are indeed baked in a mini muffin pan. The pan helps give them that perfect “cup” shape, which holds the mini peanut butter cups securely. Without the pan, the dough would spread and bake like a regular cookie. I can see how the picture might look a little deceiving since pressing the peanut butter cup into the cookie while it’s warm causes them to flatten slightly. Hope this clears things up! Let me know if you have any other questions. 😊
Hi Cynthia! Sorry for the delay in answering your question. Yes, you’ll definitely need a mini muffin pan for this recipe to get the proper “cup” shape. If you bake them on a cookie sheet, they’ll turn out flat like regular cookies, so the peanut butter cups won’t sit as snugly in the middle. Let me know if you give the recipe a try—I’d love to hear how they turn out for you!