As the holiday season draws near, there is a sense of anticipation in the air, with almost every home smelling of fresh-baked goods to bring in more warmth and cheer. Among all the types of delightful festive treats, one outstanding biscuit is the Candy Cane Cookies that are both delightful in taste and charmingly appealing to the eyes.
These peppermint Christmas cookies will be a perfect mix of nostalgia and festivity with their buttery texture and refreshing peppermint essence, not to mention the stunning candy cane decoration. This will work great for gatherings, giving away as gifts, or indulging in with a hot cup of cocoa on a cold winter night.

Following a special diet?
Every recipe on this site can be converted to gluten-free, vegan, dairy-free, keto, nut-free or egg-free with adjusted ratios so nothing falls flat.
Try the Recipe Converter →The Story Behind the Recipe
One thing that I will consider special is baking during the holidays. Growing up, I could hardly wait for the day my mother pulled out her box of cookie cutters, with each representing another shape, another taste, and another time of year.
But my favorite had to be one candy cane cutter, which didn’t just mean different flavors of Christmas but a time to share sweet delights with family and friends. It thus became one of those wait-for rituals: rolling the dough, cutting out shapes, icing the cookies.
All this was a process filled with peals of laughter and telling of holidays past. As we were decorating these biscuits, together, together-our kitchen used to become a winter wonderland.
Nowadays, as a grown-up, the tradition goes on, making memories with my family, baking these Peppermint Candy Cane Biscuits every December.
They remind me of the magic of the season, the joy of being together, and sweet sharing-what is homemade.
Ingredients Overview
When baking, a lot of your outcome is determined by the quality of your ingredients. So here’s a rundown of what you’ll need for these scrumptious Peppermint Candy Cane Biscuits:.
For the Biscuits
- Unsalted Butter: Using unsalted butter allows you to control the saltiness of your cookies, ensuring a balanced flavor profile.
- Granulated Sugar: This adds sweetness and contributes to the cookies’ tender texture.
- Egg: A large egg binds the ingredients together and helps the biscuits rise.
- Peppermint Extract: This is the star ingredient, giving the cookies their signature minty flavor.
- All-Purpose Flour: Essential for structure, flour forms the bulk of the cookie dough.
- Baking Powder: This leavening agent helps the cookies rise during baking, resulting in a lighter texture.
- Salt: Just a touch enhances the overall flavor of the biscuits.
For the Icing
- Powdered Sugar: This forms the base of your icing, creating a smooth and sweet finish for the cookies.
- Milk: Used to adjust the icing’s consistency, making it spreadable and easy to work with.
- Additional Peppermint Extract: A little extra for the icing enhances the flavor and ties the decoration back to the cookie’s base.
- Red Gel Food Coloring: Essential for achieving that classic candy cane look, gel coloring provides vibrant hues without altering the icing’s texture.
Optional Toppings
- Crushed Candy Canes: These add both texture and visual appeal, making your cookies even more festive.
Preparing for Baking
Chilling the Dough
One of the most important steps in baking these biscuits is chilling the dough. After mixing the ingredients, divide the dough into two portions, shape them into discs, wrap them in plastic wrap, and place them in the refrigerator for at least an hour. This process is crucial for several reasons:
- Firming Up the Dough: Chilled dough is easier to roll out and less likely to spread during baking.
- Flavor Development: Allowing the dough to rest enhances the flavors, making the final cookies more delicious.
Shaping the Cookies
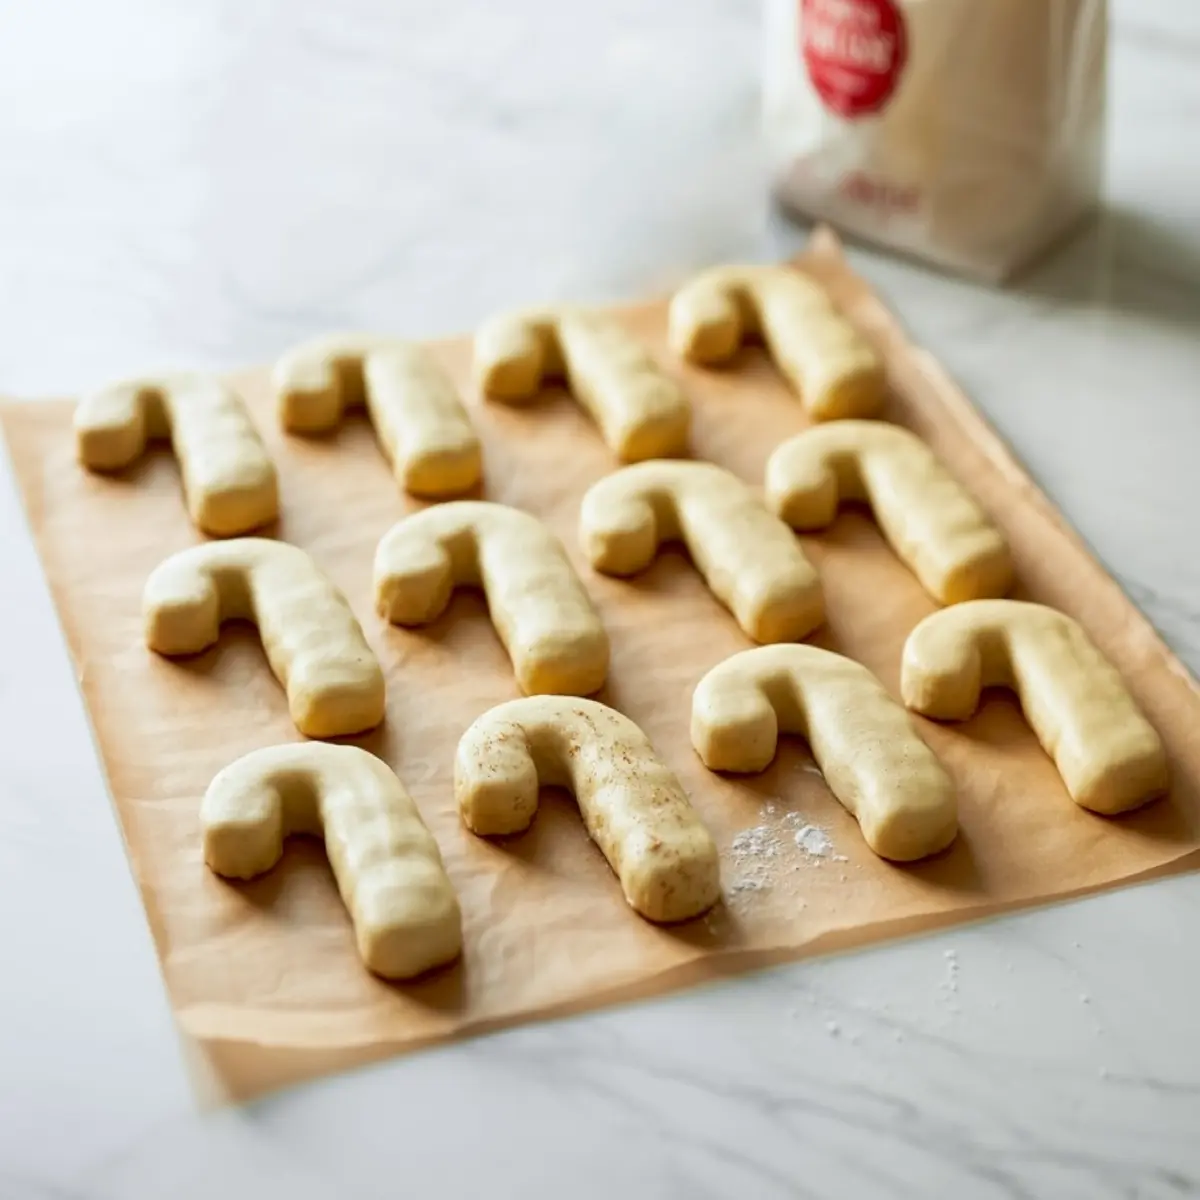
Once your dough is adequately chilled, it’s time to roll it out and cut it into shapes. Dust your workspace lightly with flour to prevent sticking. Roll out one disc of dough to about 1/4 inch thick. Using a candy cane-shaped cookie cutter, carefully cut out your biscuits and place them on a lined baking sheet. The placement should allow for some spreading, so leave about an inch between each cookie.
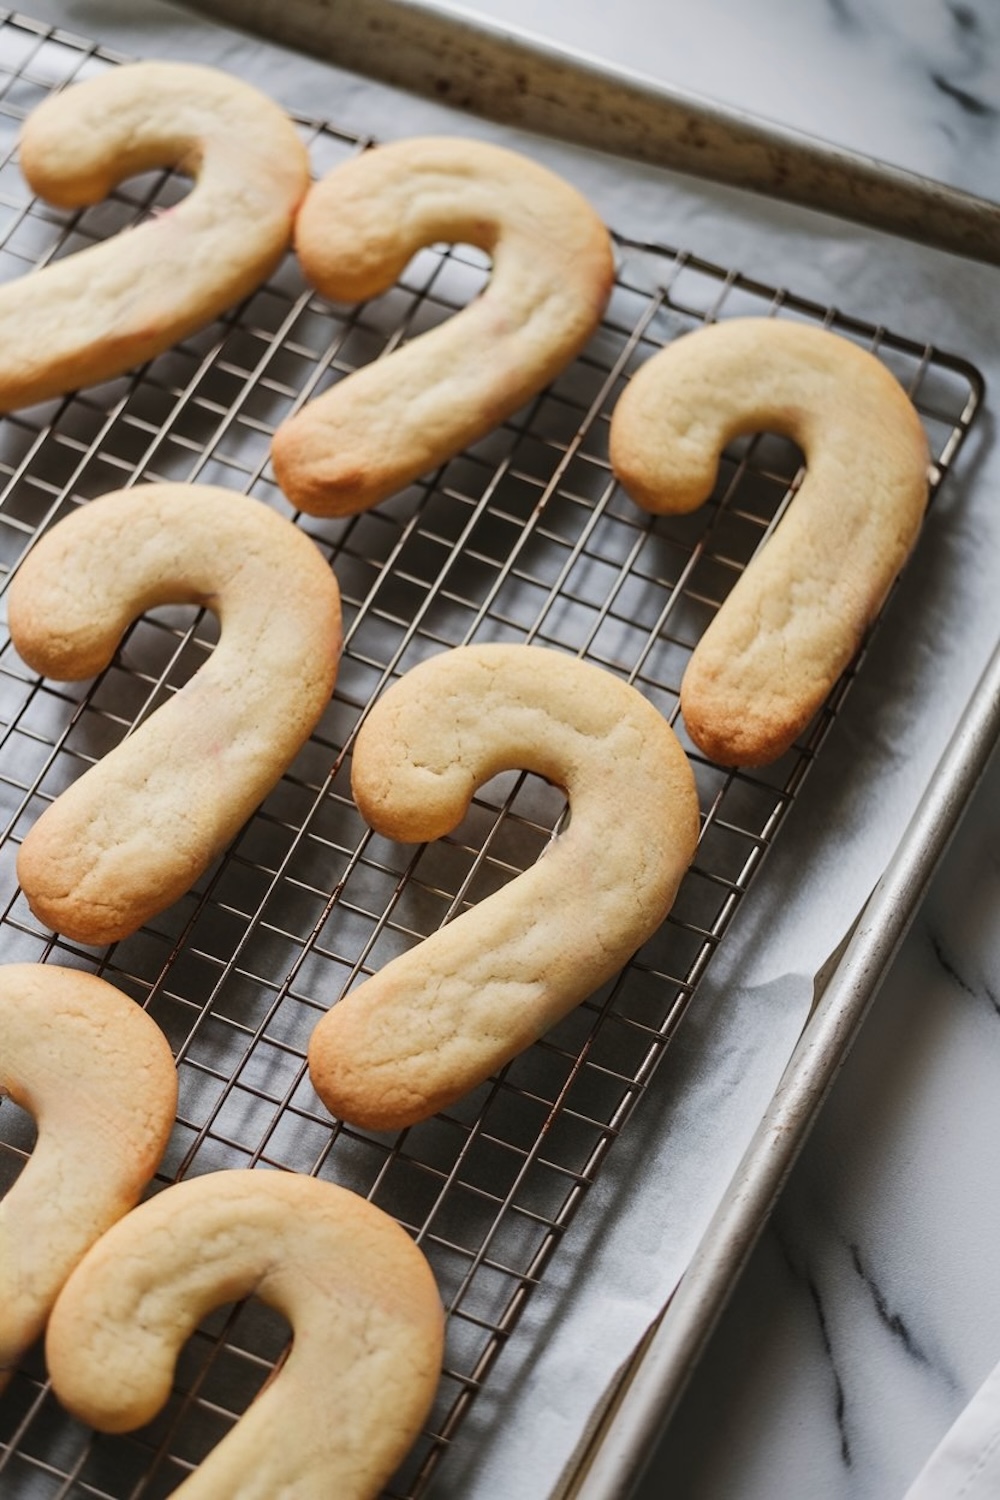
Baking and Cooling
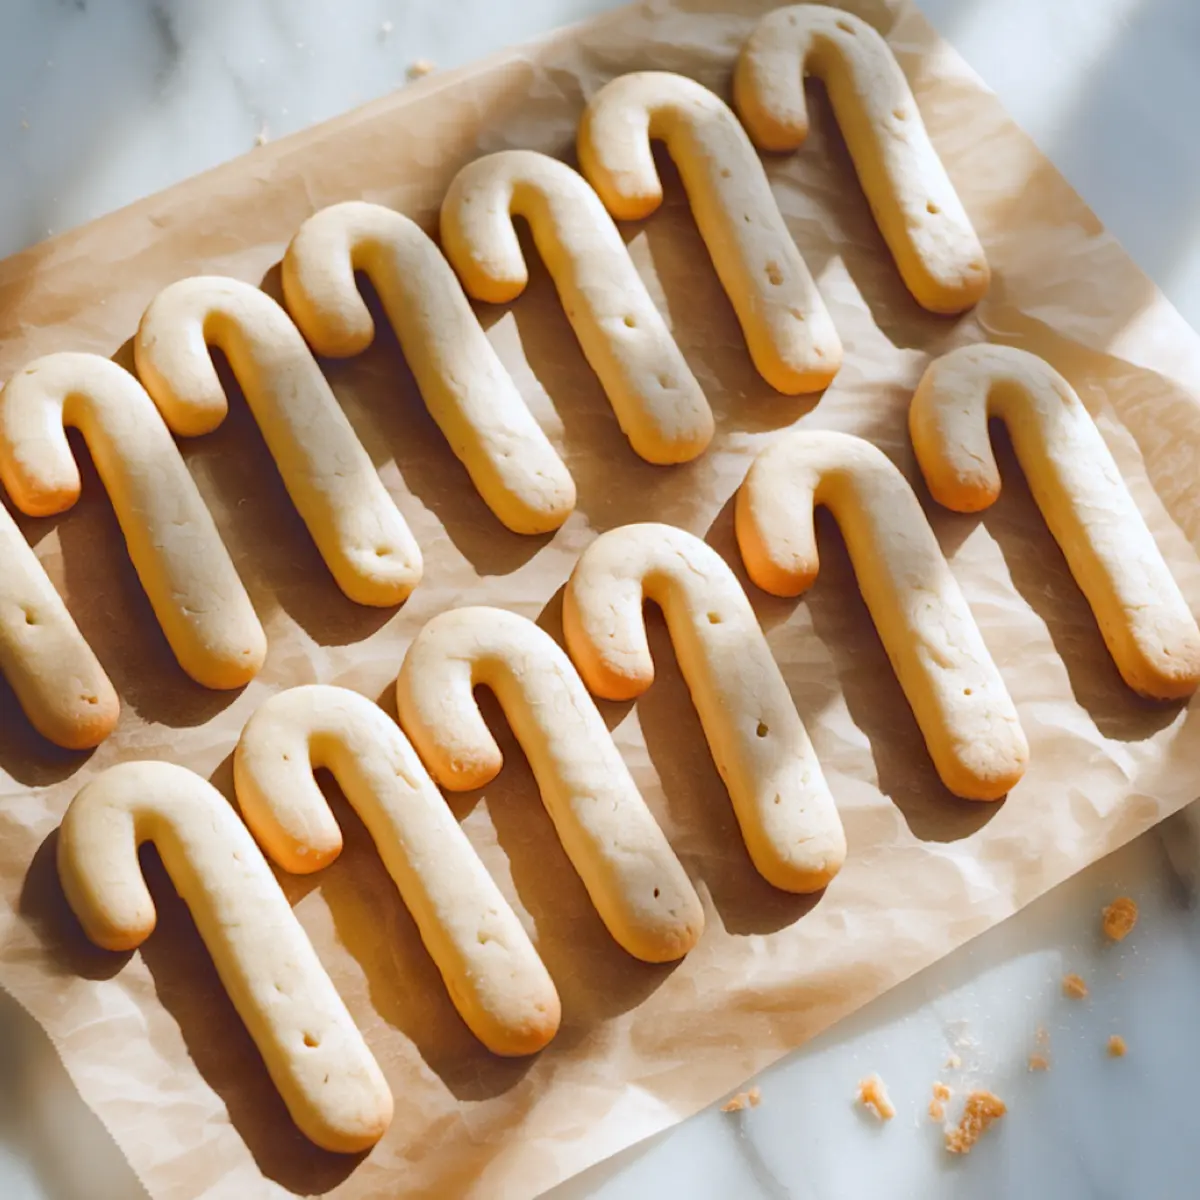
Preheat the oven to 350°F 175°C. Bake the cookies for about 10 to 12 minutes or until the edges are lightly golden. It’s gonna be important to keep an eye on ’em, ’cause baking times can vary due to different ovens.
When they are ready, take them out and, once cooled completely on a wire rack, do the needed process. This is important because decorating warm cookies may make the icing melt and run, affecting the look.
Making the Icing
While the cookies are cooling, make the icing. In a large mixing bowl combine the powdered sugar, peppermint extract and milk until smooth. You will need to start with less milk and then add more until you get a spreadable consistency.
After mixing, split the icing in half to work with one for the base layer and the other for creating the red candy cane stripes; then take the smaller half and color it with red gel food coloring until the color is achieved.
Decorating the Cookies
Now, the fun part-decorating your Peppermint Candy Cane Biscuits! First, pipe on a thin layer of white icing on top of each cookie. This is the background of your candy cane.
For the red stripes, place the colored icing into a piping bag or a plastic bag with the corner cut off. On top of each cookie, pipe a diagonal stripe on in a candy cane fashion. With a toothpick, if desired, swirl through icing to give it a bit of a swirly, blended appearance.
For an added measure of festival fun, sprinkle crushed candy cane pieces on top while the icing is still wet. This adds both texture and visual appeal.
Letting Them Set
Allow your cookies, after decorating, to sit at room temperature until the icing is completely firm, about 1 to 2 hours. Actually, it’s just a matter of waiting that will make these beautifully decorated biscuits firm to handle or give away.
Serving Suggestions
These Peppermint Candy Cane Biscuits are great for the following occasions:
- Holiday Gatherings: Serve these cookies at festive parties alongside other treats for a colorful dessert table.
- Gifts: Package them in decorative boxes or tins as homemade gifts that friends and family will cherish.
- Cookie Exchange: These are a great addition to any cookie exchange, adding a unique flavor and a beautiful aesthetic.
- Tea Time: Pair them with your favorite hot beverage for a delightful afternoon snack.
Bake these Festive Peppermint Candy Cane Cookies

…and it’s going to give way to so much more than a kitchen chore-a chance to make lasting memories and share the joy of the season.
Delicately flavored and looking so pretty, these cookies are sure to become a favorite tradition on your family’s holiday playlist.
Round up the gang and get down to some seriously pleasurable holiday baking. Let this season’s warmth fill your kitchen while you are making these delicious biscuits; again, do not keep them to yourself, share them with family and friends to bring smiles and sweet moments of their lives.
Candy Cane Cookies Recipe

Candy cane cookies twist together a buttery dough with peppermint flavor for a classic holiday look and taste. I use this candy cane cookie recipe when I want something that feels nostalgic but still stands out on the cookie tray. The dough shapes easily and holds the red-and-white swirl in the oven. These peppermint cookies come out crisp on the edges and soft in the center. I save them with my favorite festive cookies for December baking, especially when I want something pretty for gifting. They pair well with hot cocoa and always look good on a holiday dessert table. If you’re deep into Christmas baking recipes, this candy cane recipe should be on your list.
Ingredients
- FOR THE BISCUITS:
- 1 cup (225 g) unsalted butter, softened
- 1 cup (200 g) granulated sugar
- 1 large egg
- 1 ½ teaspoons peppermint extract
- 2 ½ cups (320 g) all-purpose flour
- ½ teaspoon baking powder
- ¼ teaspoon salt
- FOR THE ICING:
- 2 cups (250 g) powdered sugar
- 2–3 tablespoons milk, as needed for consistency
- ¼ teaspoon peppermint extract
- Red gel food coloring
- OPTIONAL TOPPINGS:
- Crushed candy canes
Instructions
- PREPARE THE DOUGH: Cream butter and sugar until light and fluffy, beat in egg and peppermint extract, whisk flour with baking powder and salt, then mix dry ingredients into butter mixture just until combined. Divide dough, flatten into discs, wrap, and refrigerate 1 hour.
- SHAPE AND BAKE: Heat oven to 350 °F / 175 °C and line two baking sheets with parchment. Roll one disc on a lightly floured surface to ¼ inch thickness, cut candy-cane shapes, place 1 inch apart, reroll scraps, and bake 10–12 minutes until edges are lightly golden. Cool completely on a wire rack.
- PREPARE THE ICING: Stir powdered sugar, peppermint extract, and 2 tablespoons milk until smooth, adding more milk if needed. Divide; leave the larger portion white and tint the smaller portion deep red with gel food coloring
- .DECORATE: Coat each cooled biscuit with white icing, pipe diagonal red stripes, optionally swirl with a toothpick for a blended look, and sprinkle crushed candy cane pieces while icing is wet. Let biscuits stand 1–2 hours until icing hardens.
Notes
Chilling keeps the shapes crisp; work with one dough disc at a time to maintain firmness. Store iced cookies in an airtight container for up to 1 week, or freeze un-iced biscuits for 2 months.
Nutrition Information
Yield
24Serving Size
1Amount Per Serving Calories 67Total Fat 1gSaturated Fat 1gTrans Fat 0gUnsaturated Fat 0gCholesterol 10mgSodium 46mgCarbohydrates 12gFiber 0gSugar 2gProtein 2g

Peppermint Candy Cane Biscuits Recipe
Course: Cake Ideas18
servings30
minutes10
minutes160
kcalIngredients
- For the Biscuits:
1 cup (225g) unsalted butter (softened)
1 cup (200g) granulated sugar
1 large egg
1 1/2 teaspoons peppermint extract
2 1/2 cups (320g) all-purpose flour
1/2 teaspoon baking powder
1/4 teaspoon salt
- For the Icing:
2 cups (250g) powdered sugar
2-3 tablespoons milk (adjust as needed for consistency)
1/4 teaspoon peppermint extract
Red gel food coloring
- Optional Toppings:
Crushed candy canes for added texture and festive flair
Steps
- Step 1: Prepare the Biscuit Dough
- In a large mixing bowl, cream together the softened butter and granulated sugar until light and fluffy.
- Beat in the egg and peppermint extract until well combined.
- In a separate bowl, whisk together the flour, baking powder, and salt.
- Gradually add the dry ingredients to the butter mixture, mixing until just combined. Be careful not to overmix.
- Divide the dough into two halves, flatten each half into a disc, wrap in plastic wrap, and refrigerate for at least 1 hour (this helps the dough firm up and hold its shape).
- Step 2: Shape the Cookies
- Preheat your oven to 350°F (175°C) and line two baking sheets with parchment paper.
- On a lightly floured surface, roll out one disc of dough to about 1/4-inch thickness.
- Using a candy cane-shaped cookie cutter, cut out shapes from the dough and place them on the prepared baking sheets about 1 inch apart.
- Re-roll scraps as needed and continue cutting until all dough is used.
- Bake for 10-12 minutes, or until the edges are lightly golden. Remove from the oven and let the cookies cool completely on a wire rack.
- Step 3: Prepare the Icing
- In a medium bowl, whisk together the powdered sugar, peppermint extract, and milk. Start with 2 tablespoons of milk and add more if needed to reach a smooth, spreadable consistency.
- Divide the icing into two portions, with one slightly larger portion for the white base and a smaller portion for the red stripes.
- Tint the smaller portion with red gel food coloring until you achieve a deep, candy-cane red.
- Step 4: Decorate the Cookies
- Spread a thin layer of the white icing on each cookie, covering the entire surface.
- To create the red candy cane stripes, transfer the red icing to a piping bag fitted with a fine tip or use a small plastic bag with a tiny corner snipped off.
- Pipe diagonal stripes across each cookie to mimic a candy cane pattern. If you’d like a softer, blended look, you can gently drag a toothpick through the lines to swirl the colors slightly.
- If desired, sprinkle crushed candy cane pieces on top of the icing while it’s still wet for added festive crunch.
- Allow the cookies to set at room temperature until the icing is fully hardened, approximately 1-2 hours.
Last Christmas Batches