
If you’ve ever tried making pumpkin cutout cookies and ended up with soft blobs instead of crisp shapes, you’re not alone.
This recipe solves that exact problem.
The dough holds its shape in the oven, the edges stay sharp, and the finish is smooth enough for decorating. You’ll learn how to create clean, well-defined cookies with a texture that stays tender and rich, plus a royal icing that sets fully for easy stacking or gifting.
These pumpkin sugar cookies bring together the joy of fall baking and the precision of dependable structure. The dough is simple, but the results are anything but basic.
They fit beautifully into a tray of fall baked goods or as stand-alone treats for Thanksgiving or a Halloween table.
Following a special diet?
Every recipe on this site can be converted to gluten-free, vegan, dairy-free, keto, nut-free or egg-free with adjusted ratios so nothing falls flat.
Try the Recipe Converter →Why This Dough Makes a Difference
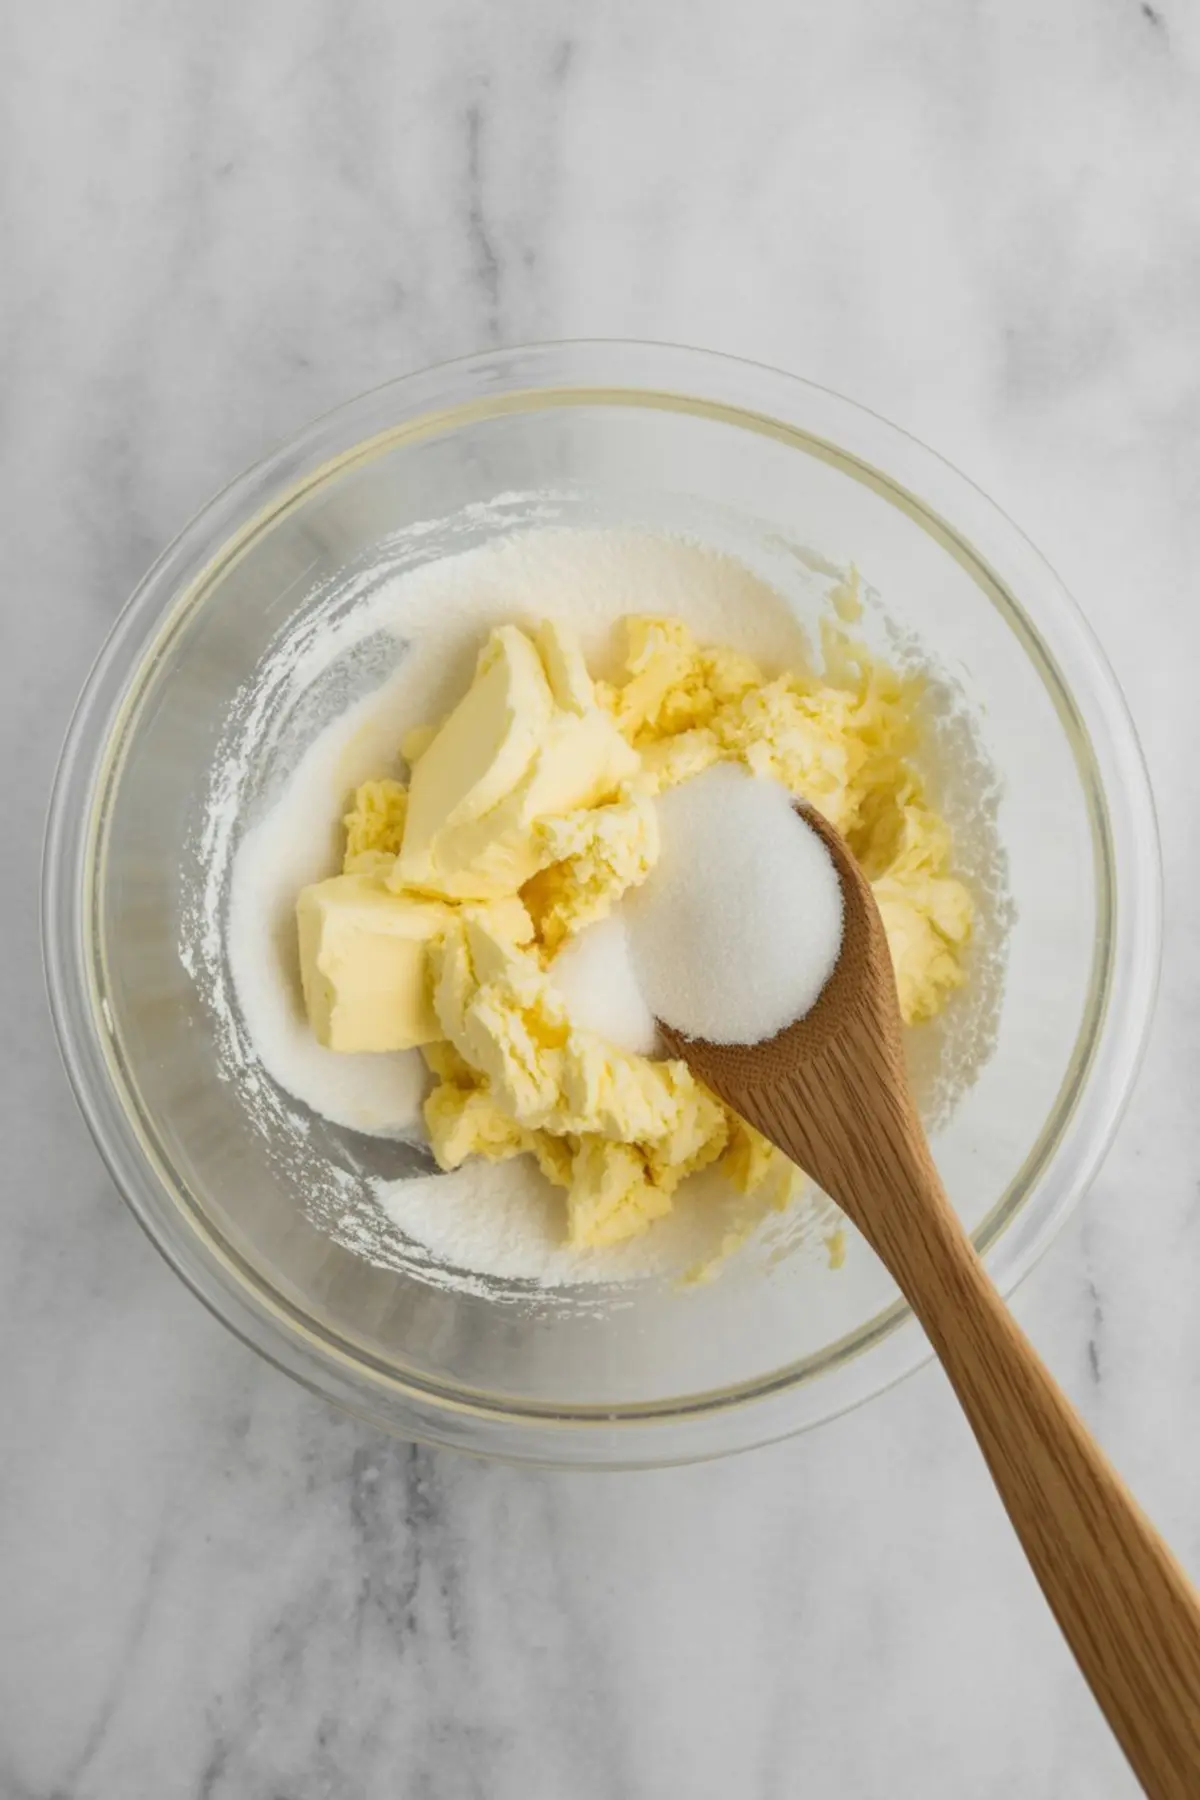
The base starts with a full cup of softened butter and blends with sugar to form a soft, fluffy mixture that lays the foundation for the texture.
This step creates structure and richness. You’ll beat the butter and sugar just until it turns pale and light—it should feel creamy, not greasy.
The addition of both vanilla and almond extract is subtle but essential. Almond brings a depth that helps these soft pumpkin cookies stand out from plain sugar cookies. I’ve tested batches with and without it, and the difference is noticeable in the final flavor.
How to Bring the Dough Together
Once you’ve added your egg and extracts, combine the dry ingredients separately. That’s where the flour, salt, and baking powder do their quiet work. Don’t skip the whisking step—it distributes the baking powder evenly and prevents uneven rise.
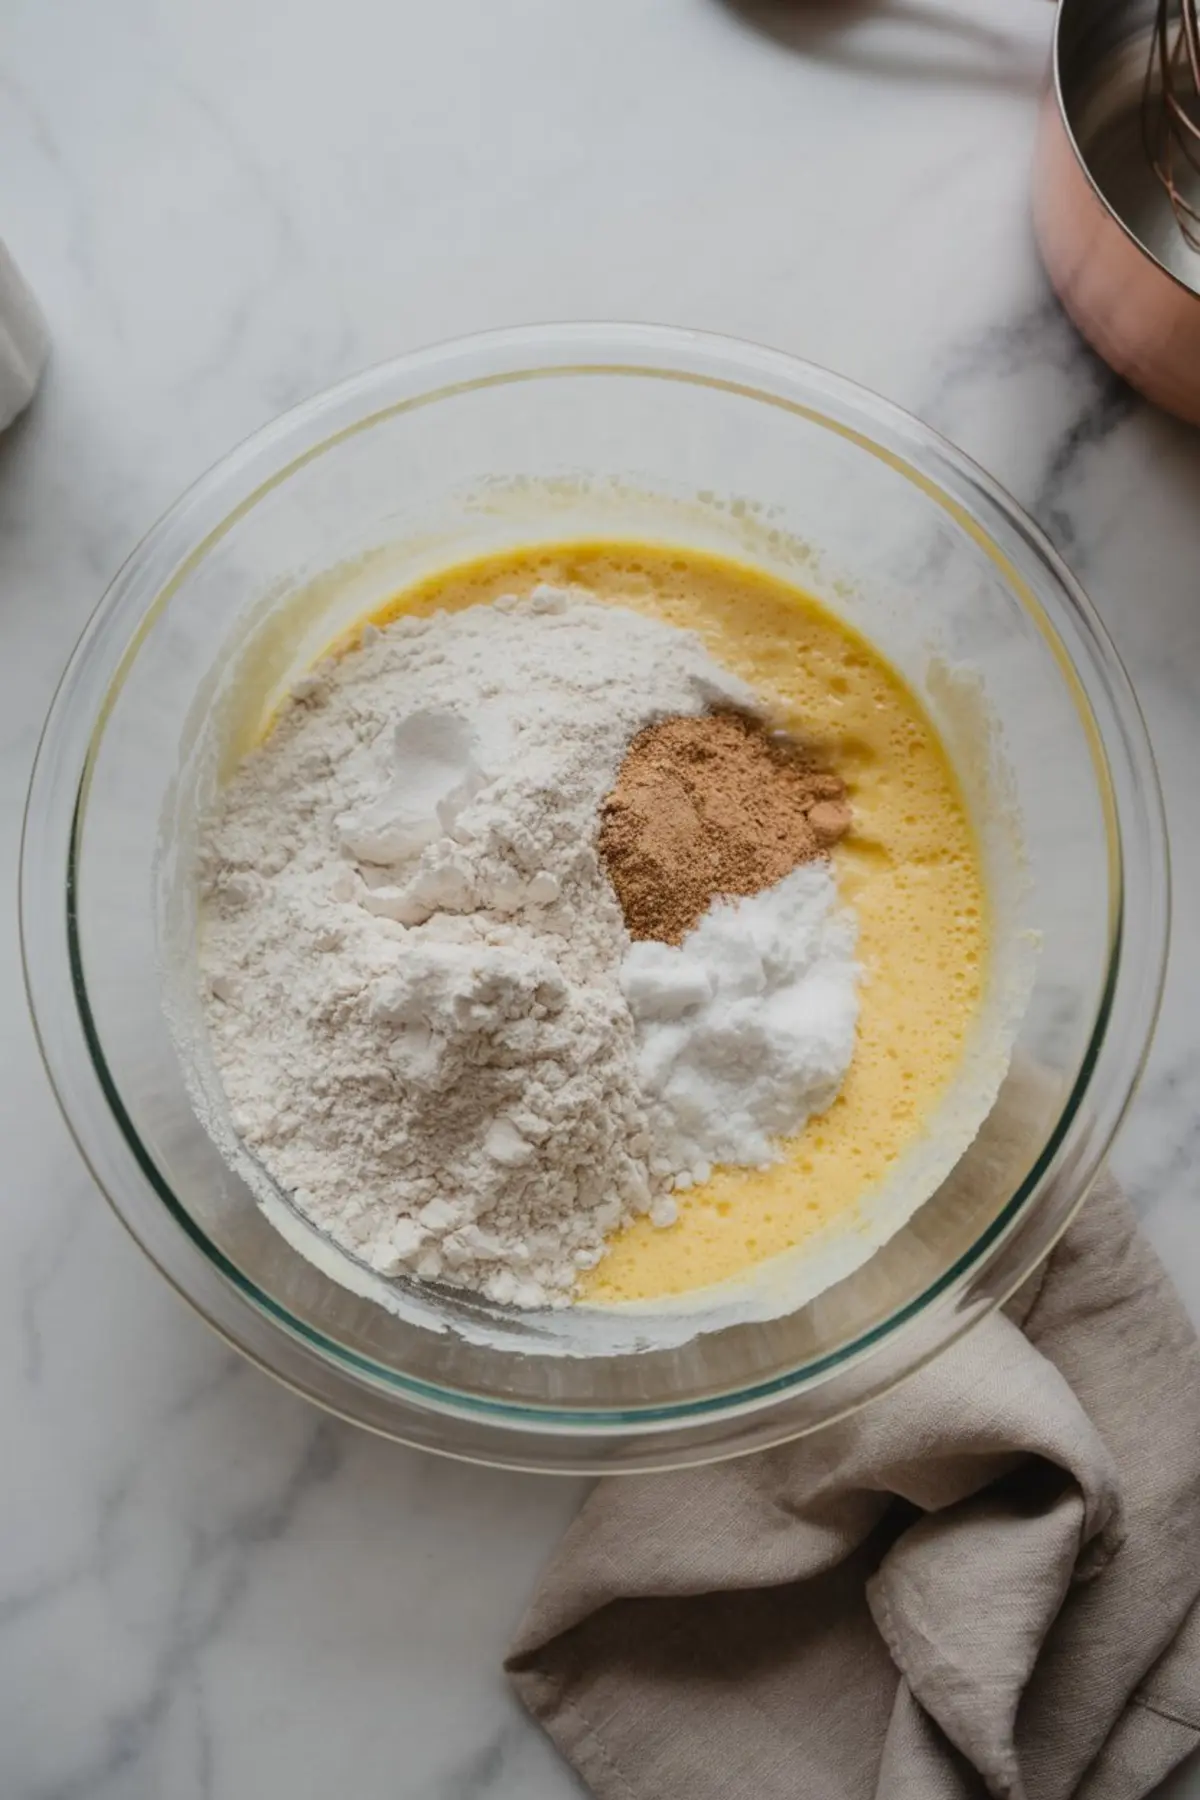
Add the dry ingredients slowly. The dough will seem crumbly at first but comes together with a few extra turns of the mixer. If it still resists, use your hands to bring it into a soft mass. It should hold together without cracking.
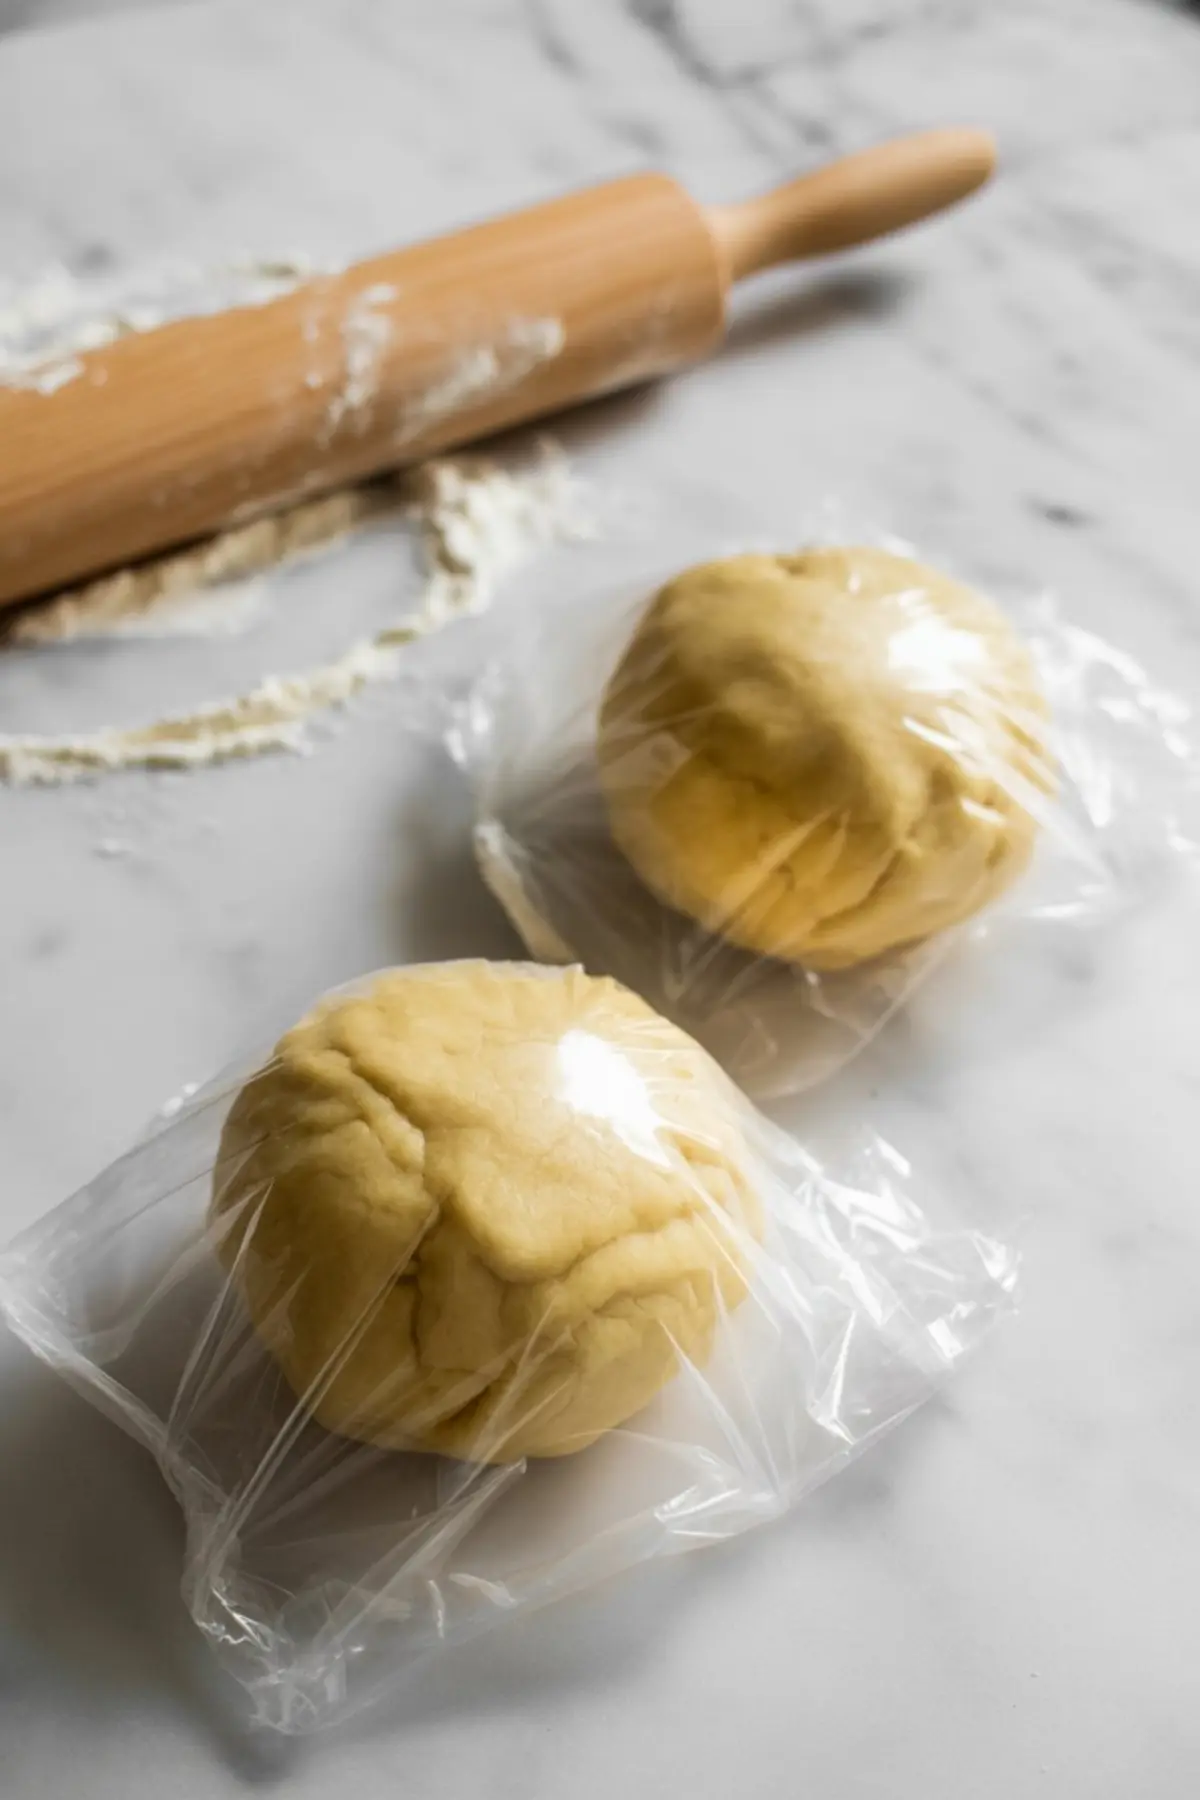
Divide it in half, shape into discs, and chill for an hour.
The chilling step matters.
This is what prevents the cookies from puffing or spreading in the oven.
Rolling and Cutting: Get Clean Shapes Every Time
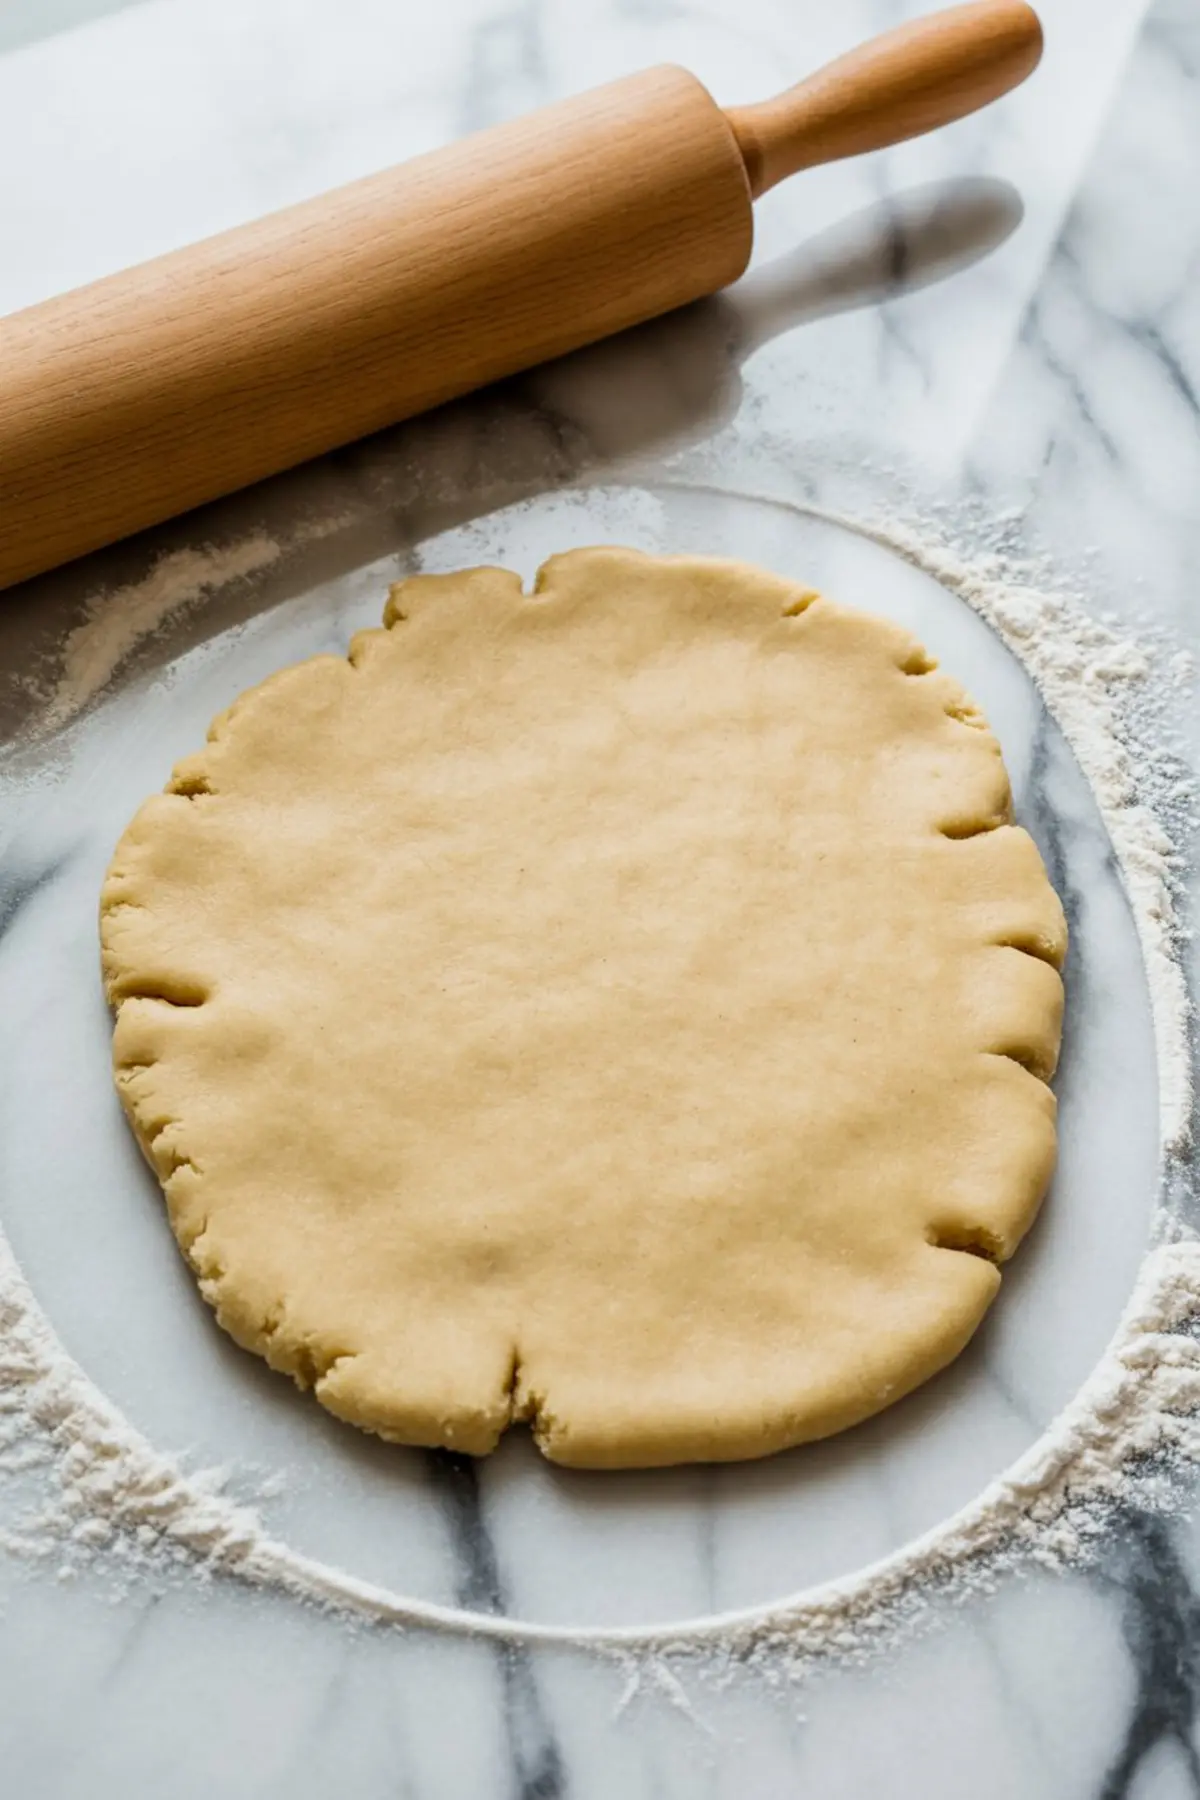
After the dough has firmed up in the fridge, take one disc out at a time.
Work on a lightly floured surface and roll it to a consistent quarter-inch thickness. Thicker dough won’t bake evenly; thinner cookies tend to overbake at the edges.
Use a sharp-edged pumpkin cookie cutter for clear outlines. Press straight down—avoid wiggling the cutter to prevent rough edges.
Transfer to a parchment-lined baking sheet. This helps with clean release and prevents browning underneath.
If you’re planning other fall sugar cookies decorated in different shapes, this same dough works well with leaves, acorns, or ghosts. You can find more ideas in these Fall Baking Recipes.
Baking Time and Texture
Bake these at 350°F for 8 to 10 minutes. Pull them just as the bottoms begin to color. They should look pale on top but feel set when lightly touched.
Let them sit for 5 minutes before moving to a cooling rack. The structure sets fully as they cool, so don’t rush this step.
Cookies will finish with crisp edges and soft, buttery centers. They’re strong enough to decorate but still tender to bite into.
I use this same method for Pumpkin Pie Cookies, and the results are consistently sturdy and smooth.
Comparing Extracts: Almond vs. More Vanilla
Some readers ask if almond extract is necessary. I’ve tried both routes.
Vanilla alone gives a warm, familiar flavor, but almond adds a sharper, more aromatic layer that makes these iced pumpkin cookies taste bakery-level.
If you’re baking for kids who prefer mild flavor, stick with vanilla. If you’re after something with a little more depth, add the almond.
You can also try this flavor combo in Pumpkin Oatmeal Cookies for a softer, spiced take.
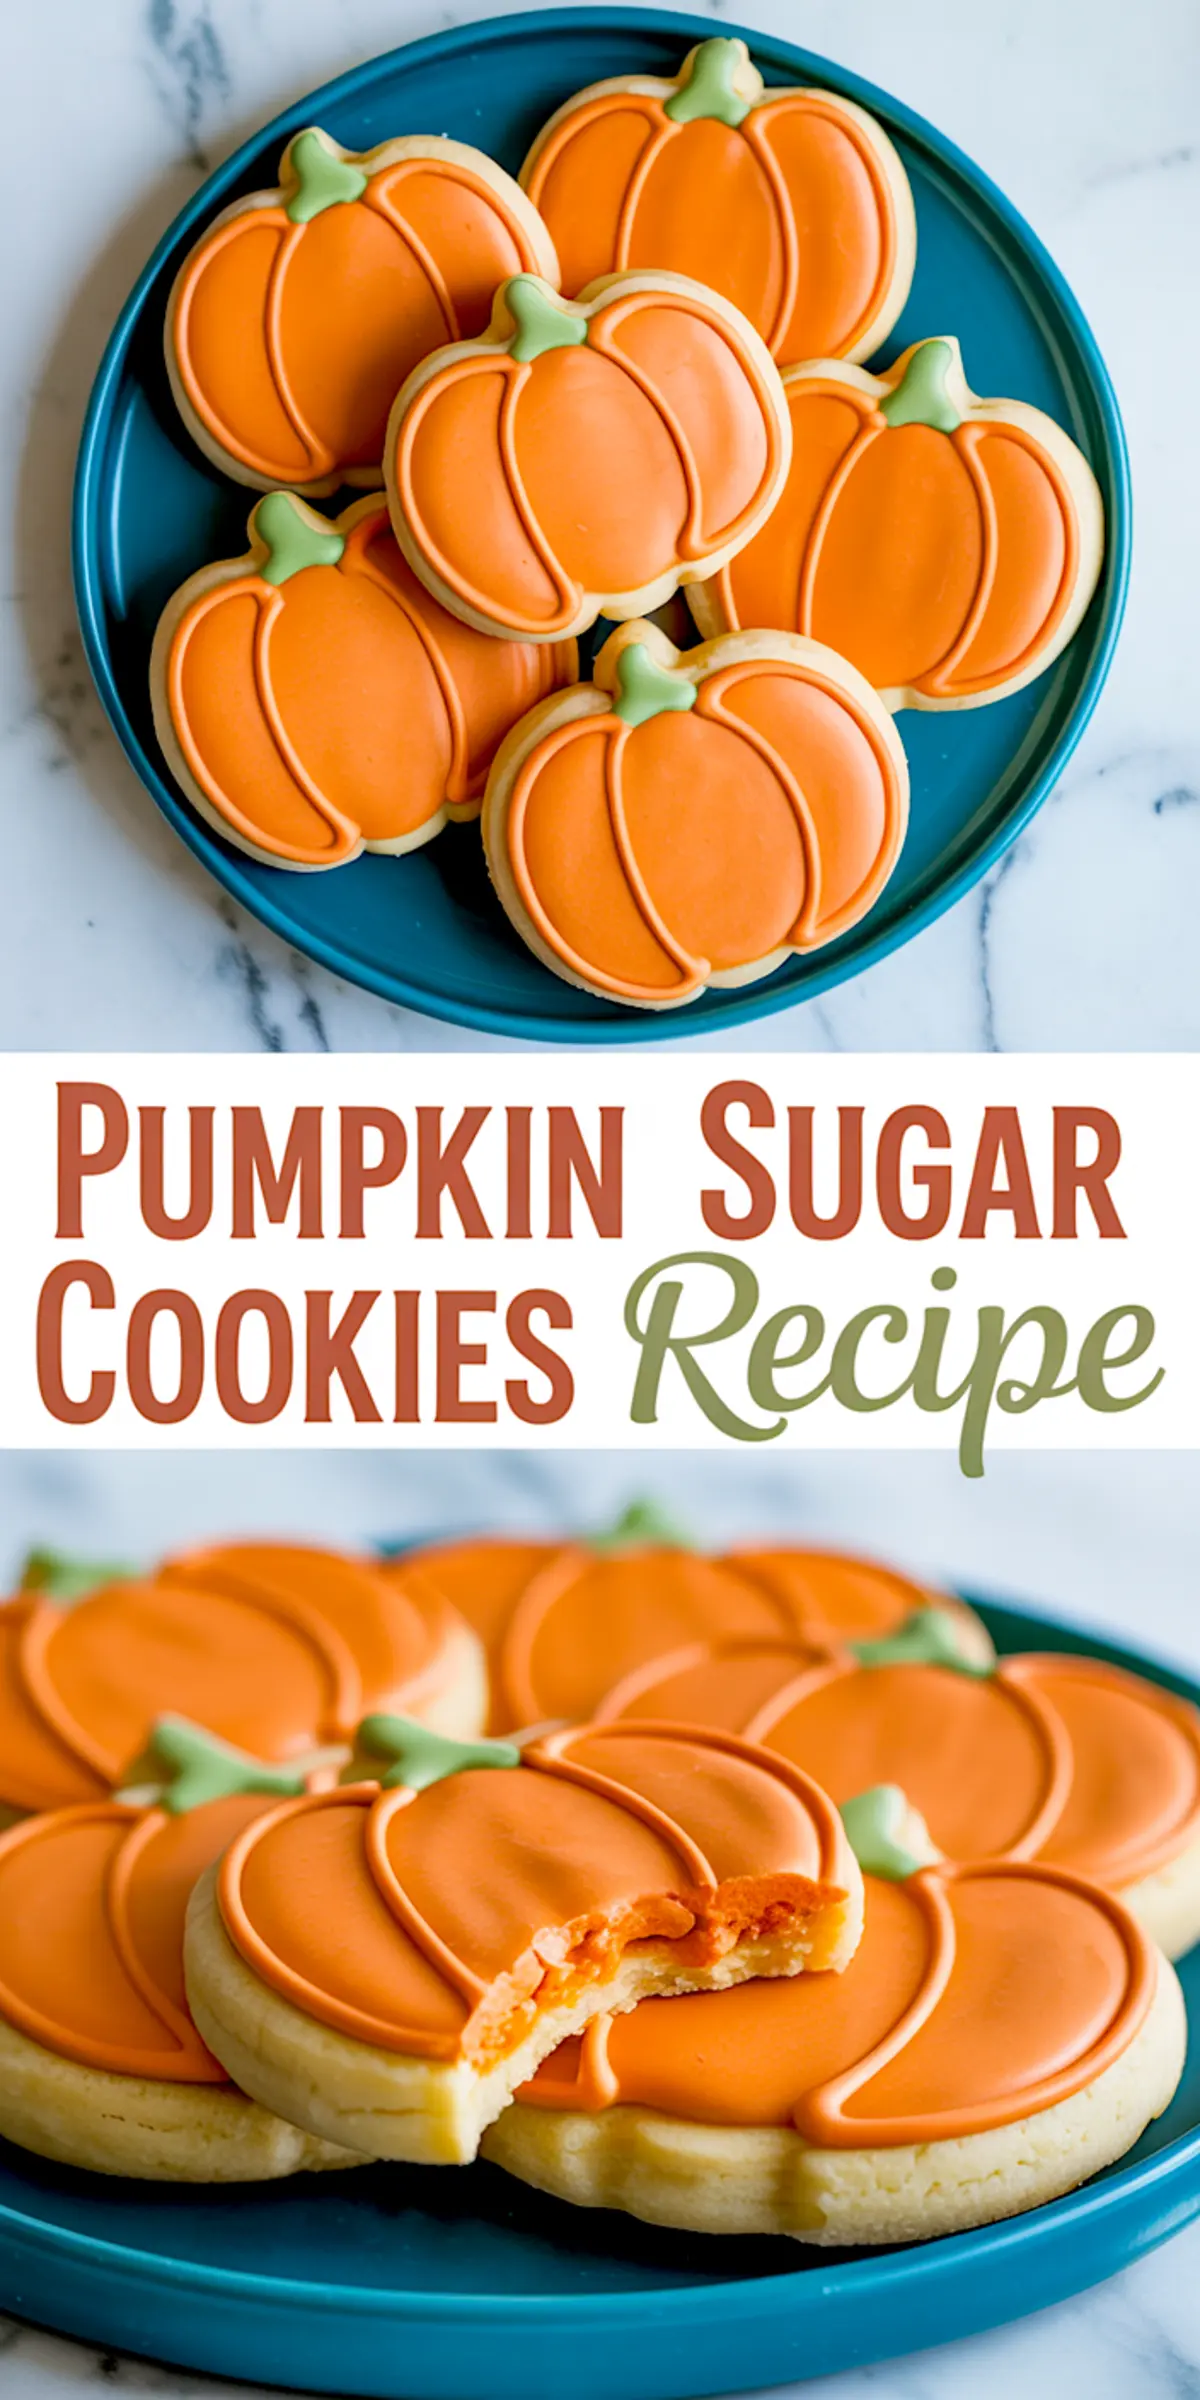
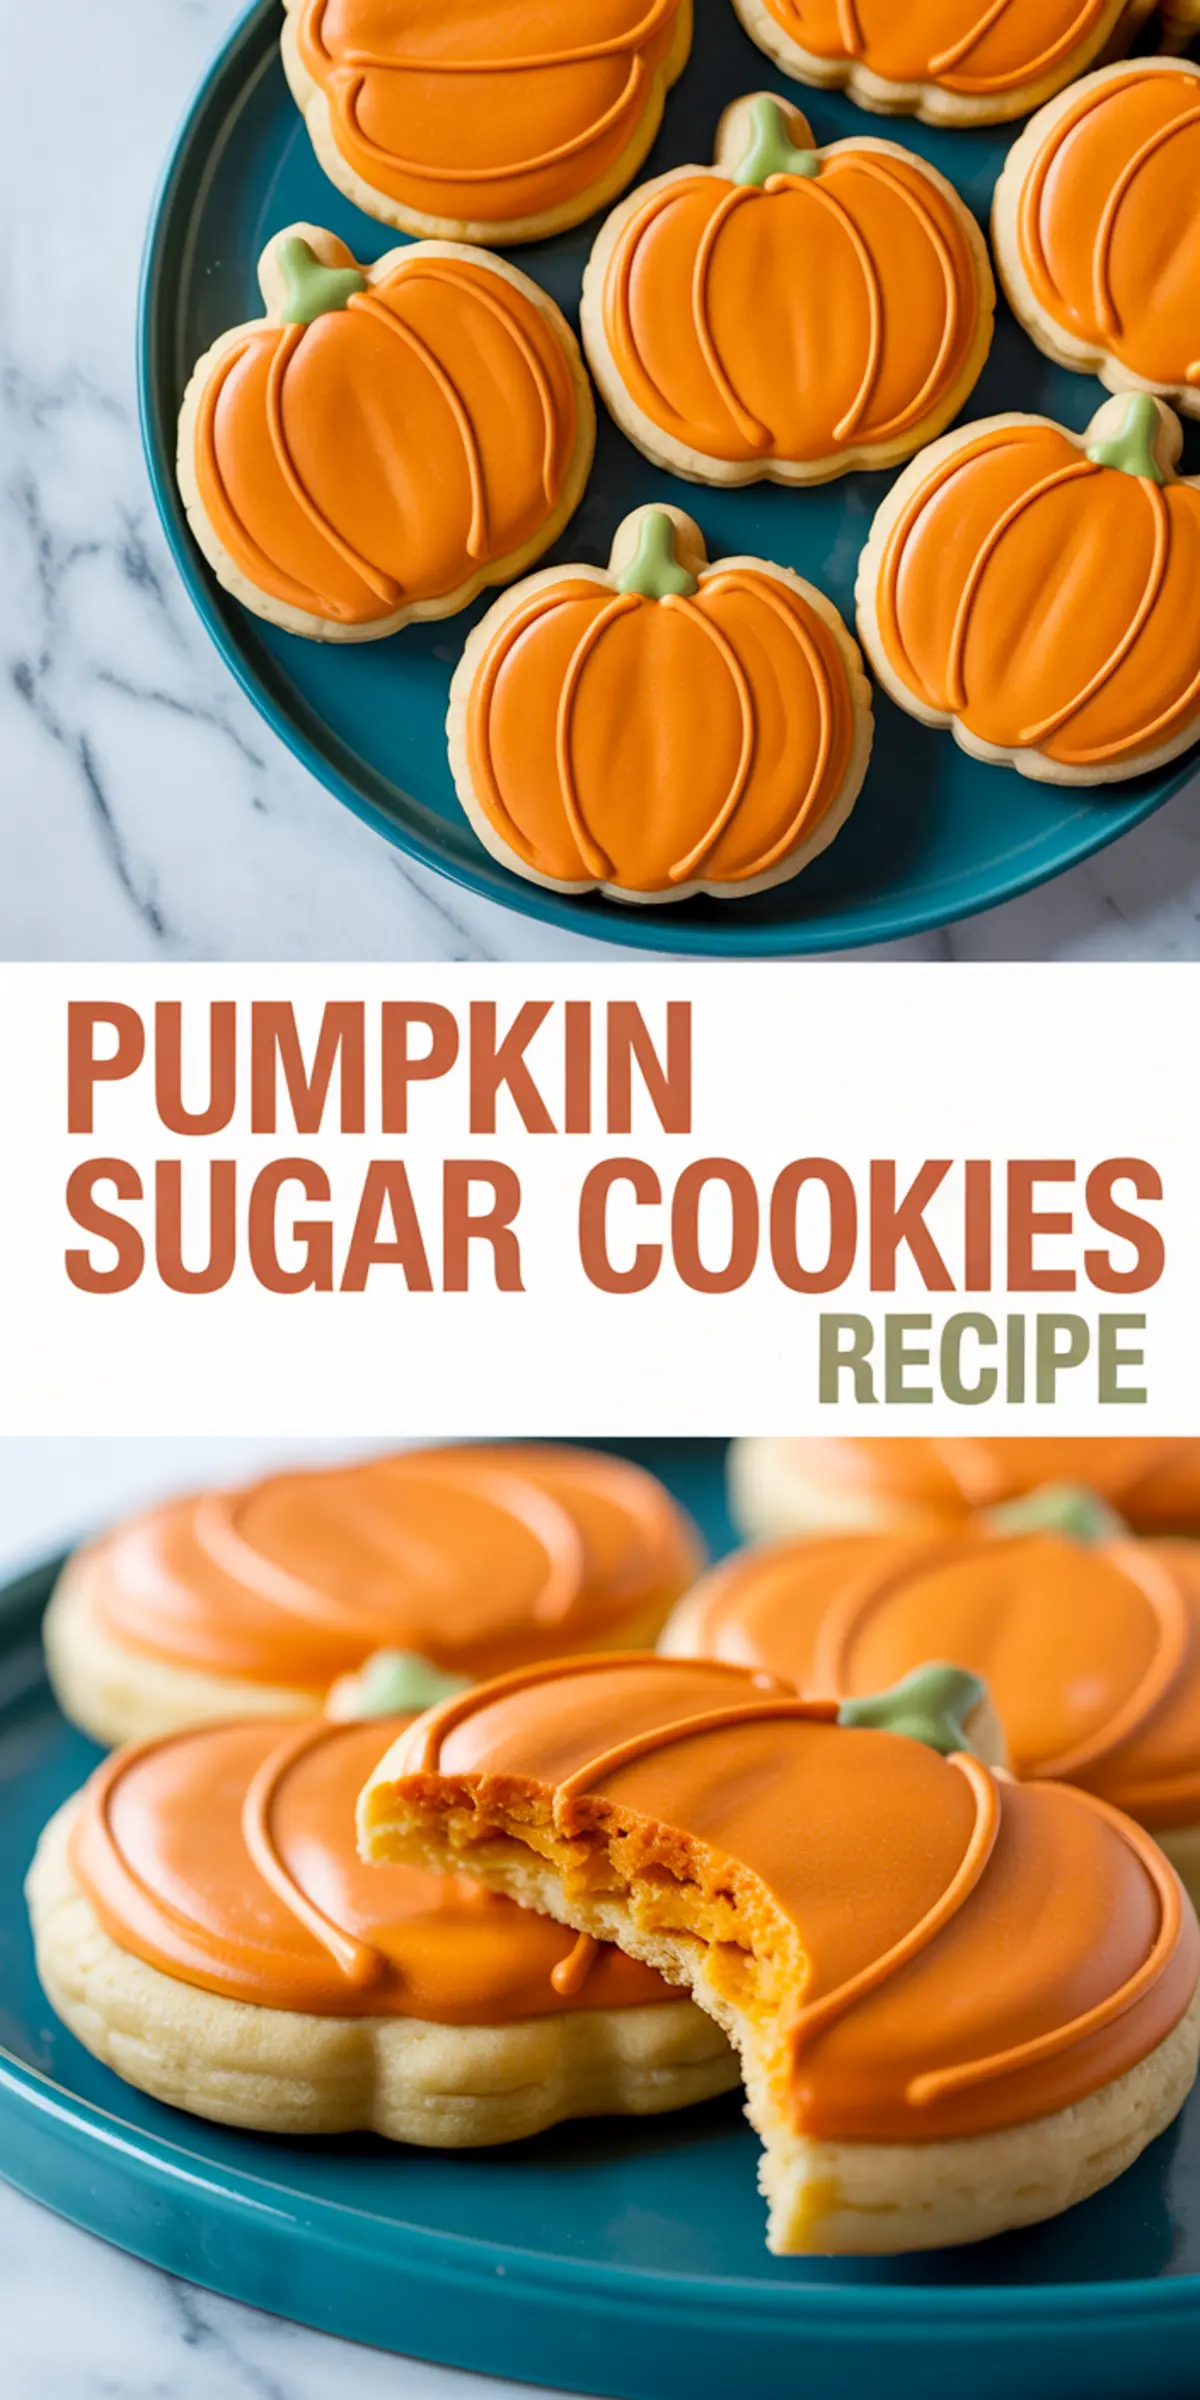
Royal Icing That Dries Smooth and Crisp
The icing needs just three main components: powdered sugar, meringue powder, and warm water. Mix it on low to avoid air bubbles.
Consistency makes the difference.
For outlines, keep the icing thick—like toothpaste. For flooding the centers, thin it slightly with warm water. It should flow but not run off the cookie.
Divide and color with gel food coloring. Orange and green work well for pumpkin themes, but you can also try muted browns and creams if you’re going for more elegant Thanksgiving sugar cookies.
The royal icing from this recipe also works beautifully on Pumpkin Spice Thumbprint Cookies, if you want to add a polished look to other shapes.
Decorating and Drying Tips
Use a #2 tip for piping clean lines. Outline first, wait a minute or two, then flood the center.
A toothpick or scribe tool helps guide the icing to the edges and remove bubbles.
Add pumpkin ridges with a slightly thicker icing once the base layer has settled. The stem can be piped on last with green icing.
Let cookies dry uncovered for 6 to 8 hours, or overnight. This gives the icing time to harden completely, which is essential if you’re stacking or wrapping these as gifts.
For more holiday-worthy shapes, try adapting this base for Fall Sugar Cookies Decorated with seasonal cutouts and icing variations.
Serving and Storage Notes
These cookies stay fresh for up to 5 days at room temperature in an airtight container.
If you want to prep ahead, the dough freezes well. Wrap tightly in plastic and freeze for up to a month. Thaw in the fridge overnight before rolling.
Icing can be stored in the fridge for a week. Just re-whip gently before using to restore its smooth texture.
They make excellent gifts, additions to cookie trays, or stand-alone centerpieces for your fall dessert table.
Save and Share
Pin this recipe to your fall baking board so you can come back to it year after year.
And if you bake these pumpkin sugar cookies, I’d love to hear how they turned out. Share your results in the comments or ask any questions if you get stuck.
Let’s keep the fall baking conversation going.
Pumpkin Sugar Cookies

These festive pumpkin sugar cookies feature a buttery, tender base and smooth royal icing. Their cheerful fall design makes them a seasonal favorite. The cookie dough holds its shape well for clean edges, and the icing dries to a crisp finish that’s ideal for decorating.
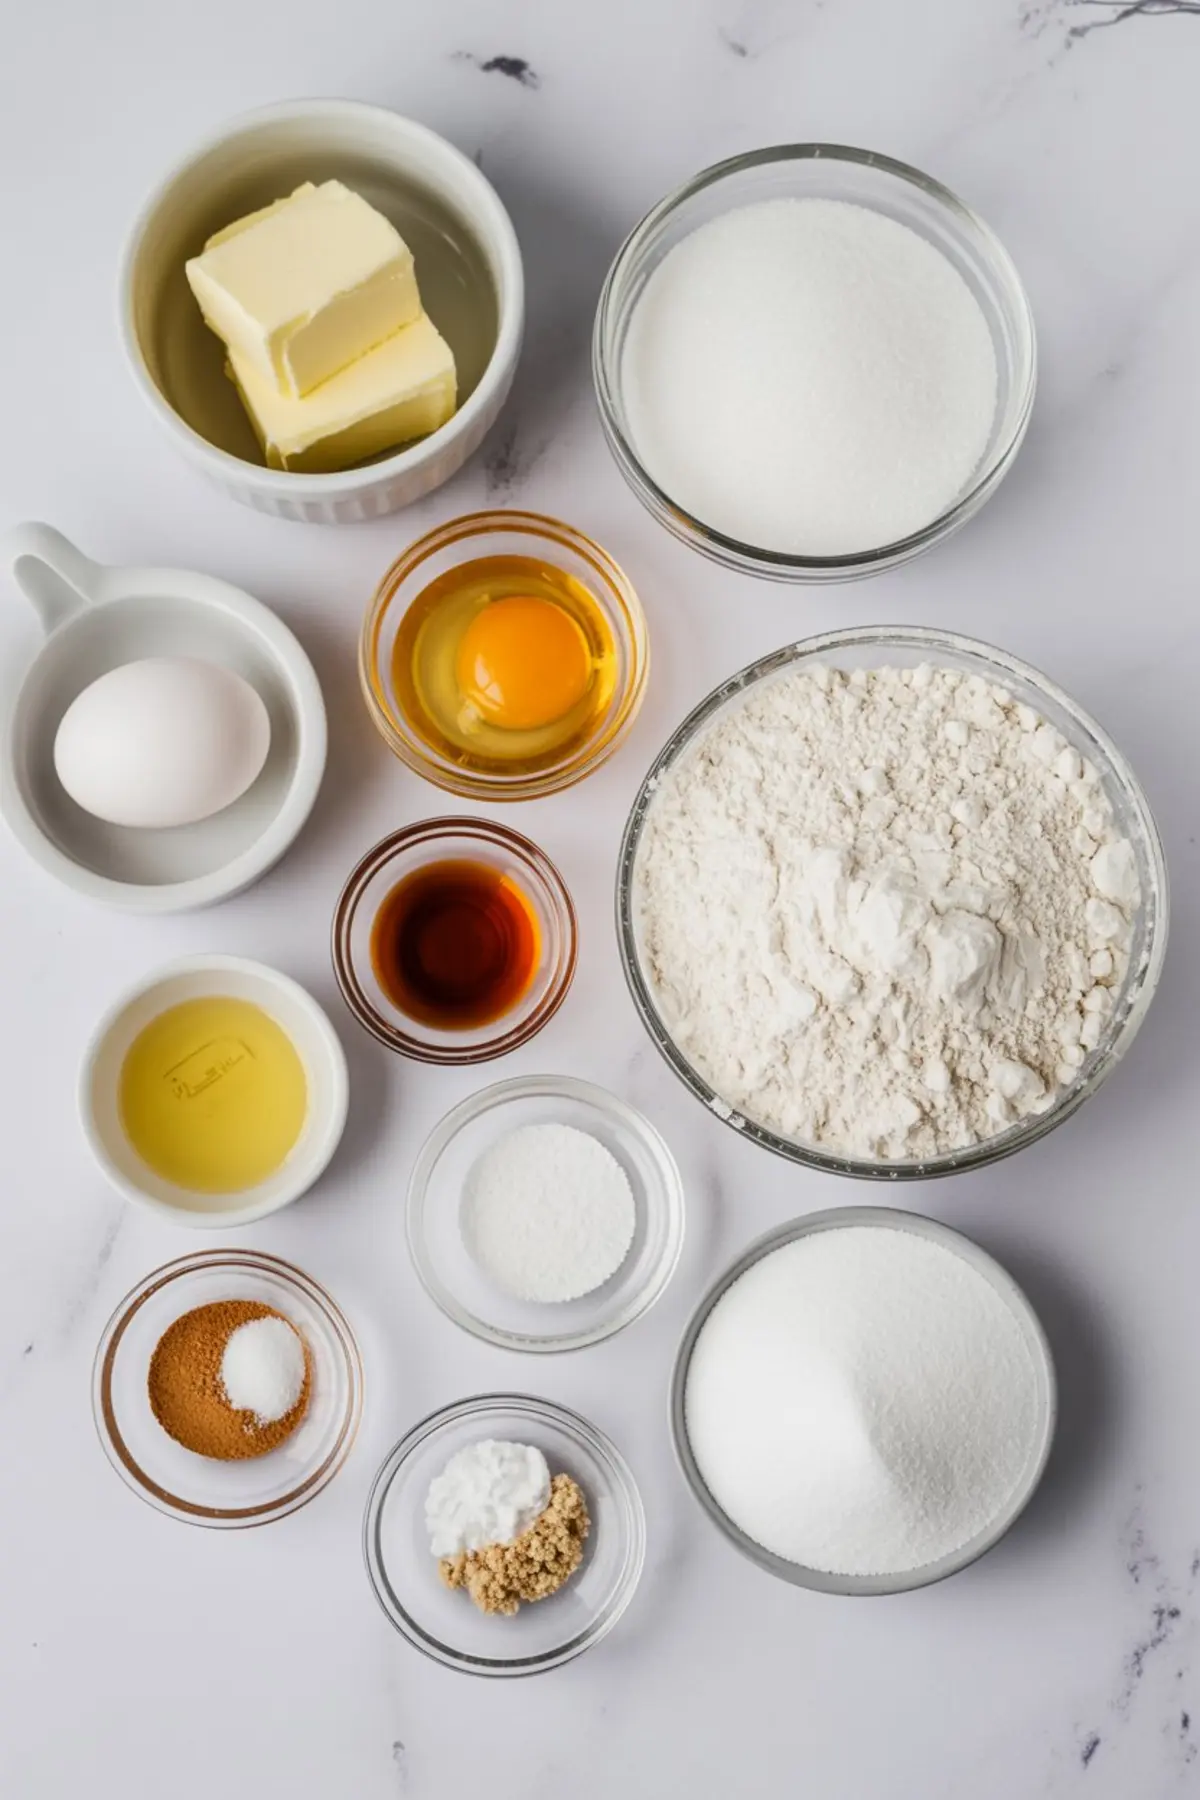
Ingredients
- For the sugar cookies:
- 1 cup (226g) unsalted butter, softened
- 1 cup (200g) granulated sugar
- 1 large egg
- 1 ½ teaspoons vanilla extract
- ½ teaspoon almond extract (optional, but recommended)
- 2 ¾ cups (345g) all-purpose flour
- ½ teaspoon baking powder
- ½ teaspoon salt
- For the royal icing:
- 4 cups (480g) powdered sugar, sifted
- 3 tablespoons meringue powder
- 5–6 tablespoons warm water (more as needed)
- Orange gel food coloring
- Green gel food coloring
Instructions
- CREAM THE BUTTER AND SUGAR: In a large mixing bowl, beat the softened butter and granulated sugar on medium speed until the mixture becomes light and fluffy, about 2 to 3 minutes.
- ADD EGG AND EXTRACTS: Mix in the egg, vanilla extract, and almond extract until fully incorporated.
- MIX DRY INGREDIENTS: In a separate bowl, whisk together the flour, baking powder, and salt. Gradually add the dry mixture to the wet ingredients and mix until a dough forms. Use your hands if needed to bring the dough together at the end.
- CHILL THE DOUGH: Divide the dough into two flat discs, wrap each in plastic wrap, and refrigerate for at least 1 hour to help the dough firm up and maintain clean cookie cutter edges during baking.
- ROLL AND CUT: Preheat the oven to 350°F (175°C). Roll out the chilled dough on a lightly floured surface to about ¼ inch thickness. Use a pumpkin-shaped cookie cutter to cut out cookies and place them onto parchment-lined baking sheets.
- BAKE: Bake the cookies for 8 to 10 minutes, or until the edges just begin to turn golden. Let them cool on the baking sheet for 5 minutes, then transfer to a wire rack to cool completely before decorating.
- MAKE THE ICING: In a stand mixer or large bowl, combine the powdered sugar, meringue powder, and 5 tablespoons of warm water. Mix on low speed for about 2 minutes, until the icing becomes thick and glossy. Add more water a teaspoon at a time if needed to reach piping consistency. For outlining, aim for a thick toothpaste-like texture; for flooding, the icing should be slightly thinner and flow smoothly.
- COLOR YOUR ICING: Divide the icing into two bowls. Add orange gel coloring to one bowl and green to the other, mixing well. Cover bowls with a damp cloth or plastic wrap to prevent the icing from drying out.
- PIPE AND FLOOD: Fit piping bags with small round tips (such as a #2 tip). Use the orange icing to pipe an outline around each cookie. Allow the outline to set for a few minutes, then flood the interior with thinned orange icing. Use a toothpick or scribe tool to guide the icing and remove air bubbles.
- ADD PUMPKIN DETAILS: Once the base layer has set slightly, pipe curved lines on each cookie to mimic pumpkin ridges. Use the green icing to pipe a small stem at the top of each pumpkin.
- LET DRY COMPLETELY: Allow the decorated cookies to dry at room temperature for 6 to 8 hours, or overnight, until the icing is fully set and hardened.
Notes
For best results, store cookies in an airtight container at room temperature for up to 5 days. Dough can be made ahead and refrigerated for up to 3 days or frozen for 1 month. Royal icing can be stored in airtight containers in the refrigerator for up to 1 week—re-whip gently before use.
Nutrition Information
Yield
24Serving Size
1Amount Per Serving Calories 72Total Fat 1gSaturated Fat 0gTrans Fat 0gUnsaturated Fat 0gCholesterol 9mgSodium 64mgCarbohydrates 14gFiber 1gSugar 3gProtein 2g