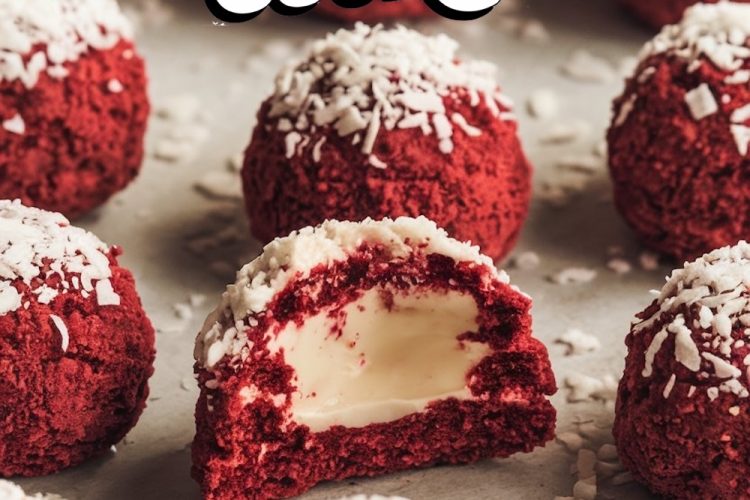
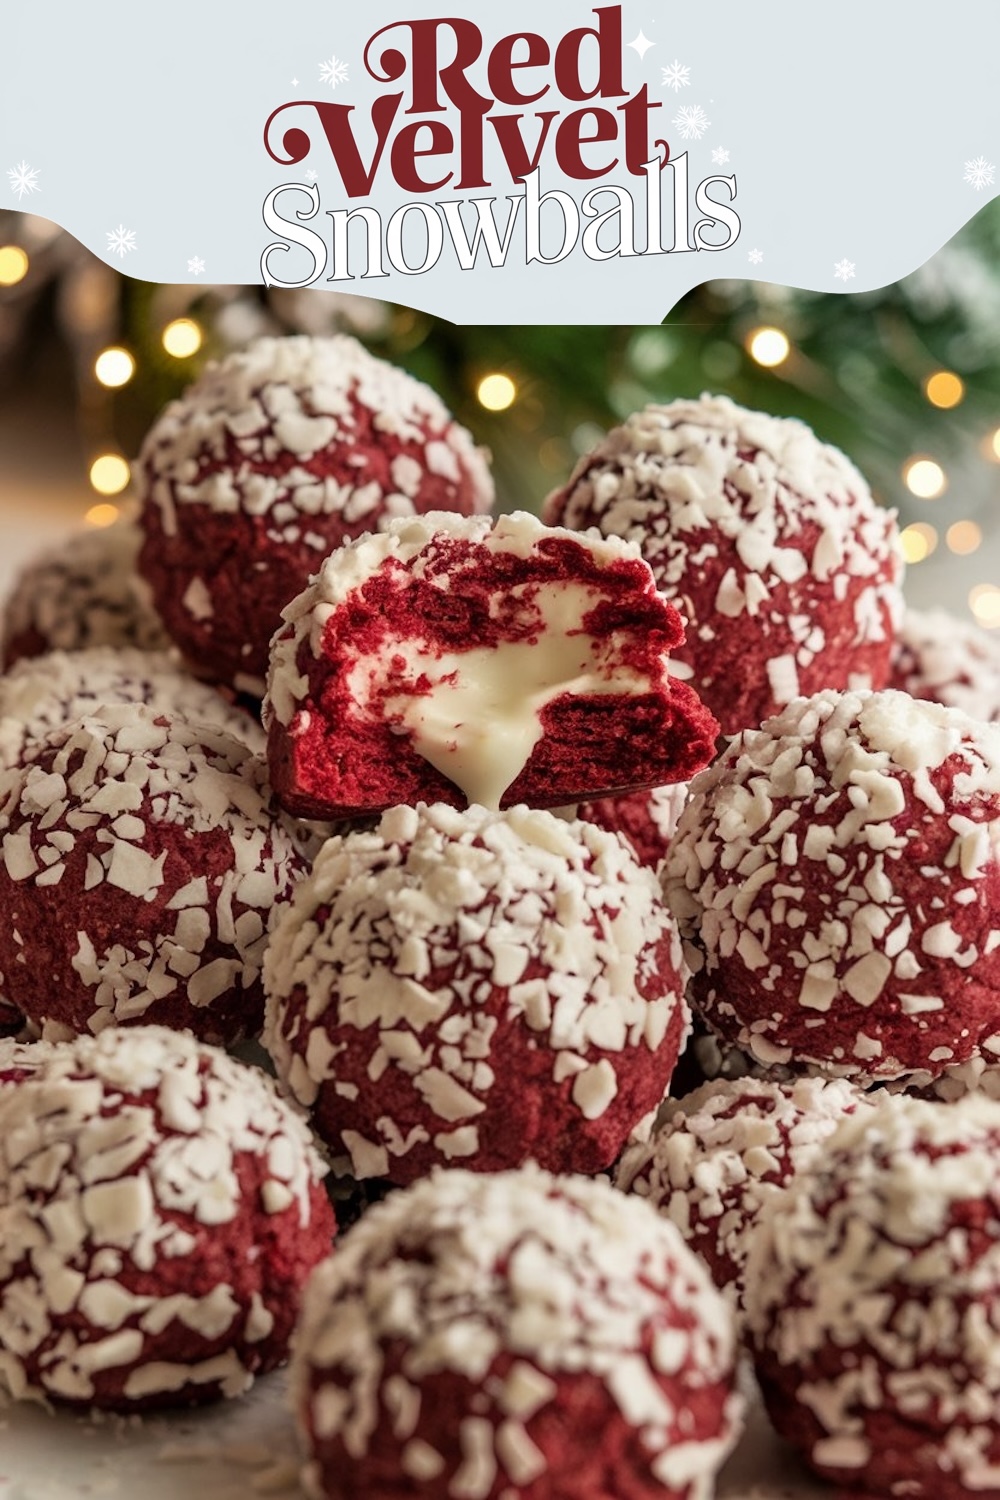
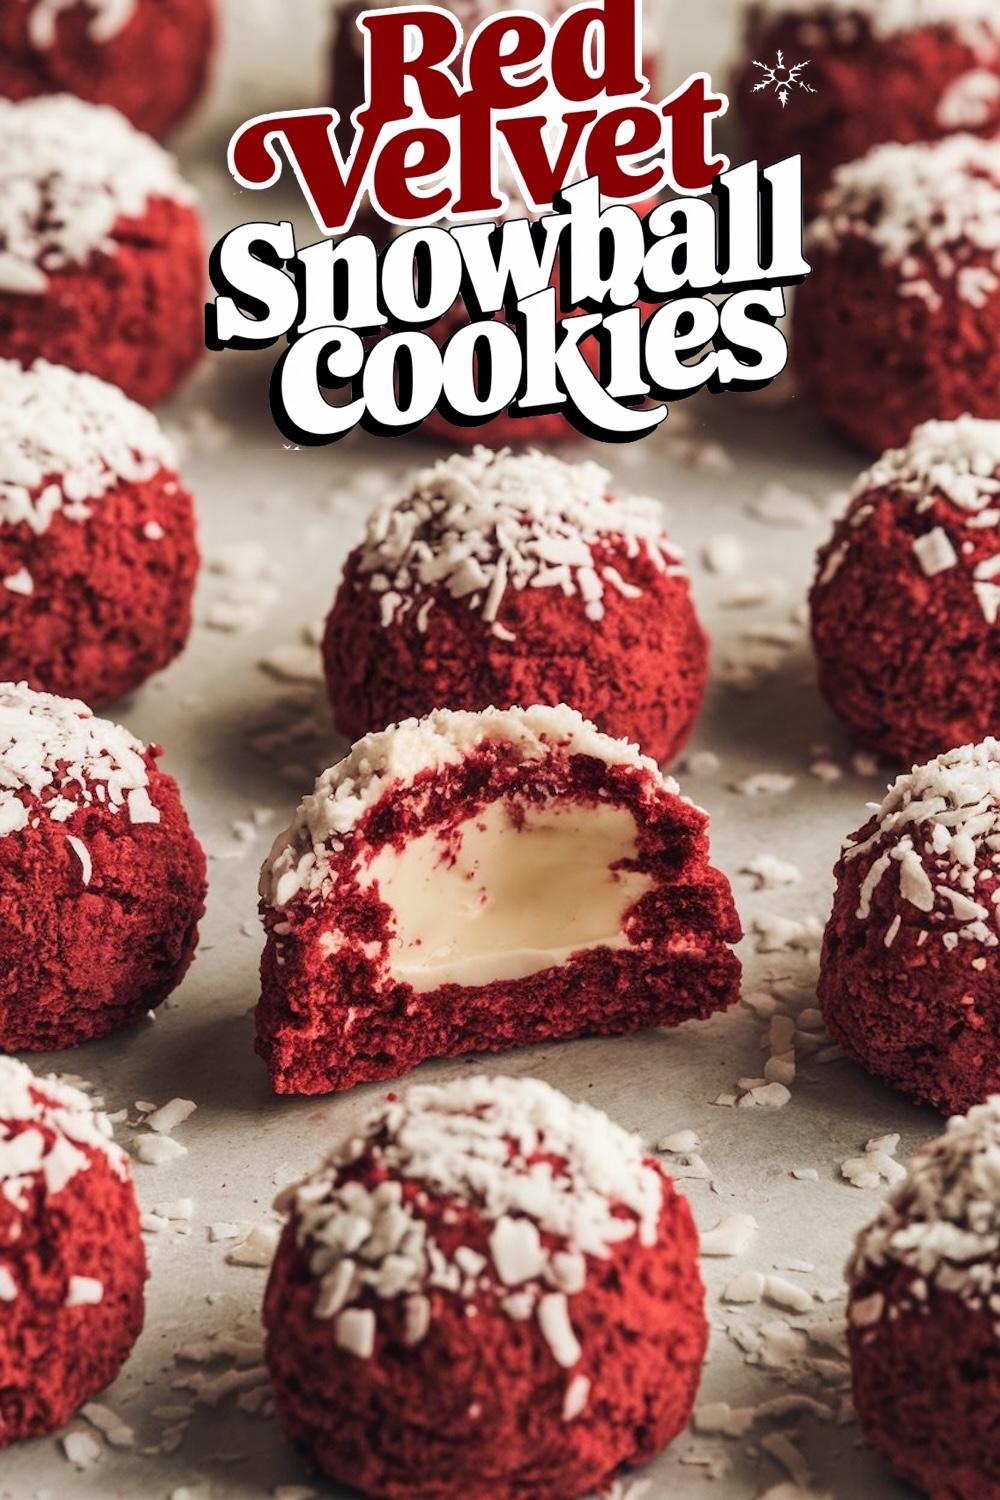
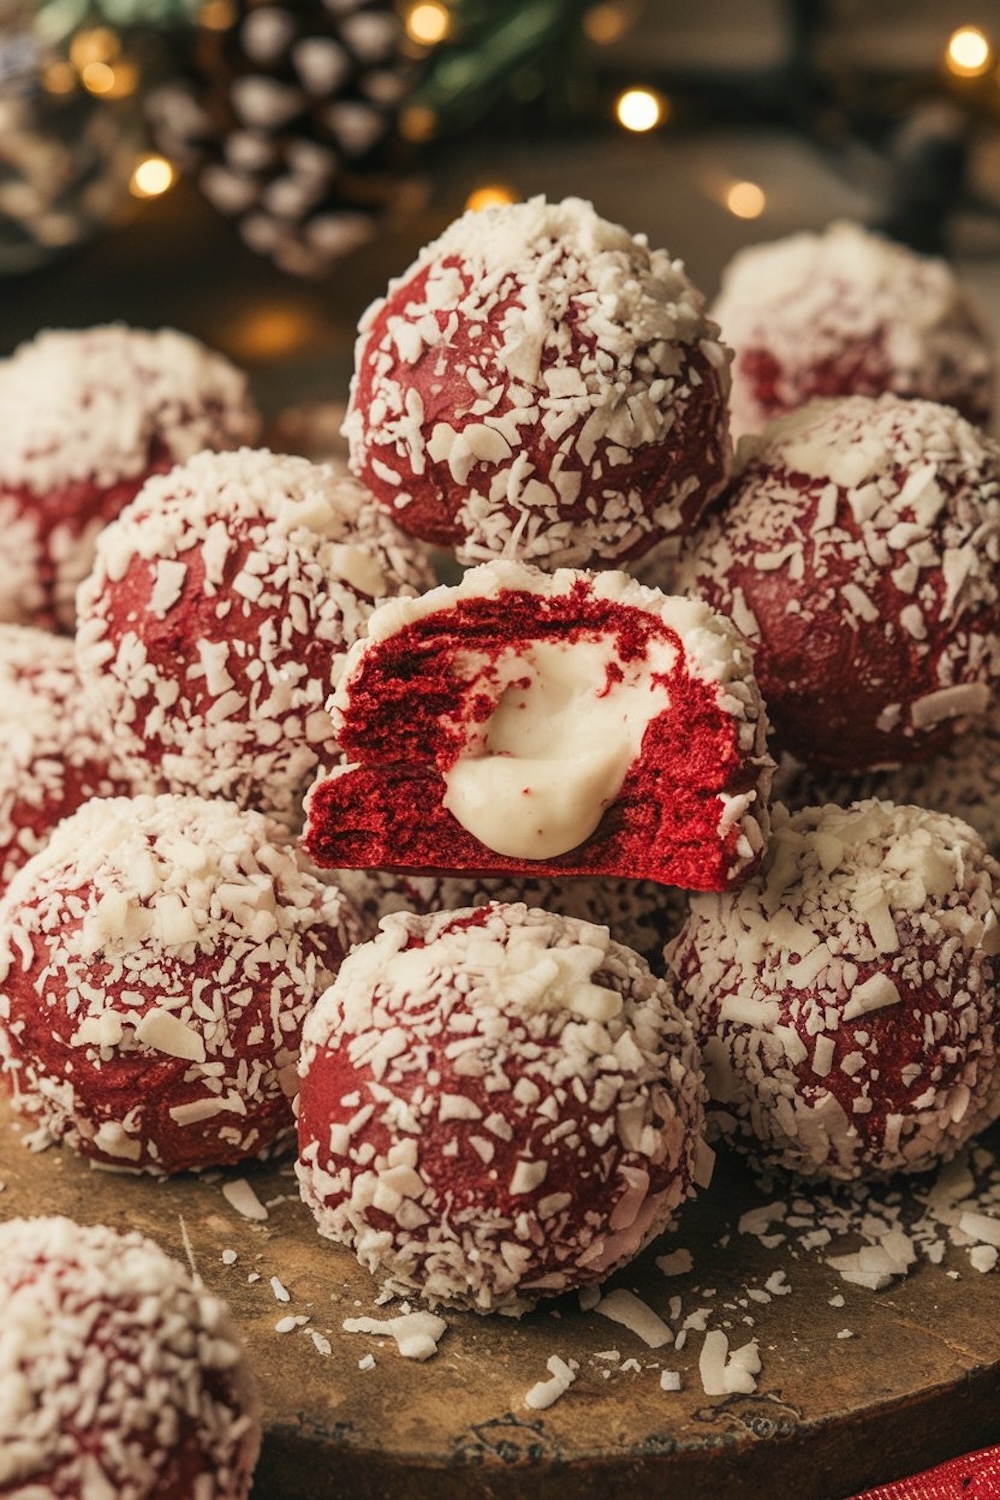
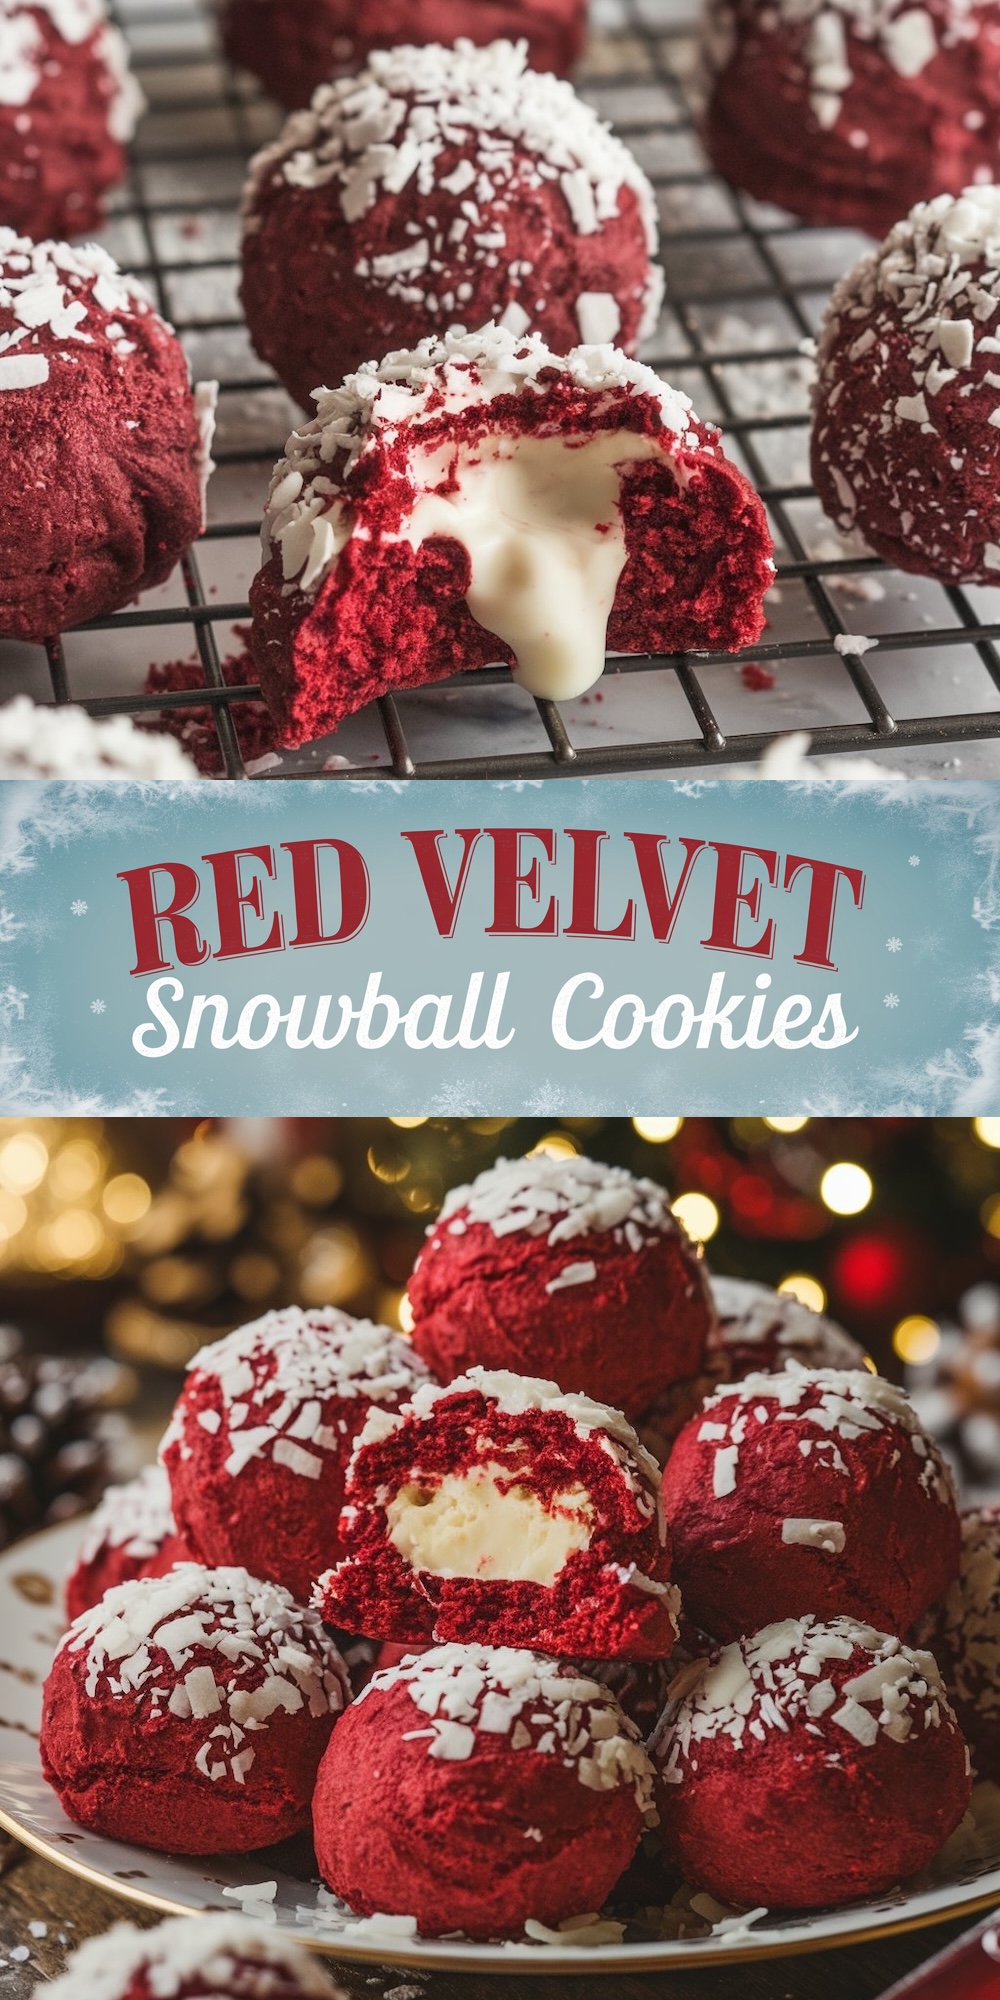
As the chill of winter starts to settle in, there’s something about warm, fresh-baked cookies that feels like a cozy hug. These Red Velvet Snowball Cookies with White Chocolate Filling are not only visually stunning with their deep red color and powdered sugar-dusted exterior, but they also offer a delightful surprise with a creamy white chocolate center.
Following a special diet?
Every recipe on this site can be converted to gluten-free, vegan, dairy-free, keto, nut-free or egg-free with adjusted ratios so nothing falls flat.
Try the Recipe Converter →A Sweet Winter Memory
When I was little, snow days were always magical. My siblings and I would bundle up in layers of clothing, ready to tackle the fresh snow outside. After hours of building snowmen and snowball fights, we’d come back indoors with rosy cheeks and icy fingers, ready for the warm treat awaiting us. My mother always had a fresh batch of cookies on the counter—a tradition that made winter feel like the most special time of the year.
As I grew older and started experimenting in the kitchen, I wanted to recreate that same sense of warmth and nostalgia in my own baking. That’s when these Red Velvet Snowball Cookies were born. They’re a fusion of my love for red velvet cake, the fun of snowball cookies, and the rich indulgence of white chocolate. Now, whenever the snow starts to fall, I whip up these cookies to bring back those cherished memories of snowy afternoons spent with family.
Why You’ll Love These Red Velvet Snowballs
These cookies have it all—rich red velvet flavor, a soft, chewy texture, and a surprise white chocolate filling that adds a creamy sweetness with each bite. The contrast of flavors and textures, from the slight crispness of the exterior coated in powdered sugar and coconut to the melty center, makes them absolutely irresistible.
Plus, their festive appearance, with that bright red hue and snow-like dusting, makes them perfect for holiday gatherings or winter cookie exchanges. They’re a guaranteed crowd-pleaser, and because they look so impressive, no one has to know how easy they are to make!

Tips for Perfecting Your Red Velvet Snowball Cookies
1. Chill the Dough for Better Handling
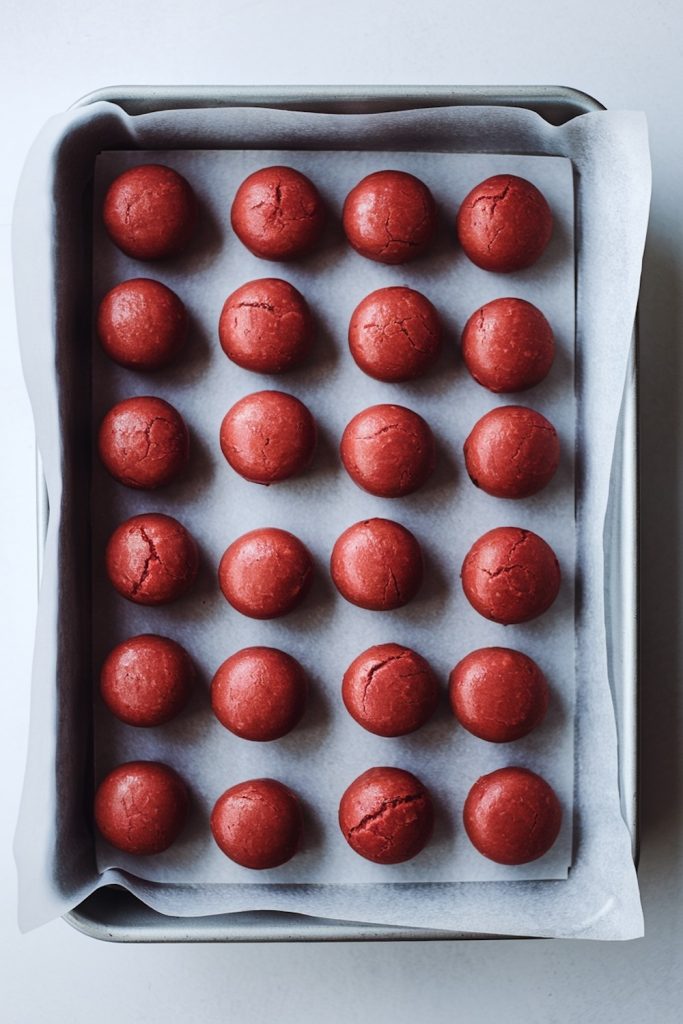
Since this dough is soft, especially after adding buttermilk, it’s important to chill it for at least 30 minutes before shaping the cookies. This will make it much easier to roll the dough into balls and create the indent for the white chocolate filling.
2. Use Gel Food Coloring for a More Vibrant Red
While liquid food coloring works fine, using gel food coloring will give your cookies a much bolder red color without altering the texture of the dough. A little goes a long way, so you won’t need more than a tablespoon to achieve that signature red velvet look.
3. Ensure the White Chocolate Filling Stays Soft
For the best result, use high-quality white chocolate chips that melt smoothly in the center. These will create that delicious, molten surprise when you bite into the cookie fresh out of the oven. To maintain the softness, store leftover cookies in an airtight container at room temperature rather than the fridge.
4. Coat Generously for a Snowball Effect
To truly get that snowball look, don’t skimp on the powdered sugar and shredded coconut. Roll each cookie thoroughly in the sugar before rolling in the coconut. This gives them a beautiful snowy appearance that’s both eye-catching and deliciously sweet.
Creative Ways to Serve These Cookies
These Red Velvet Snowball Cookies are delightful on their own, but if you’re feeling extra festive, here are a few ways to take them to the next level:
- Hot Cocoa Pairing: Serve these cookies alongside a steaming mug of hot cocoa topped with whipped cream. The richness of the cocoa pairs perfectly with the white chocolate filling.
- Holiday Cookie Platter: Add these to a holiday cookie assortment. Their vibrant red color will stand out beautifully against traditional sugar cookies and gingerbread men.
- Cookie Gift Boxes: Wrap these cookies in a decorative box for gifting. A festive bow and a handwritten tag will make them feel even more special.
Dear Reader: Bake and Share the Joy!
There’s something so comforting about these Red Velvet Snowball Cookies that makes them perfect for sharing. Baking for a family holiday, a cookie exchange, or just to bring some cheer to a winter day, these cookies are sure to spread joy. I hope you love baking—and eating—these cookies as much as I do. Don’t forget to leave a comment or share your own cookie memories below!
Red Velvet Snowball Cookies with White Chocolate Filling
Ingredients
- FOR THE COOKIES:
- 1½ cups all-purpose flour
- ¼ cup unsweetened cocoa powder
- 1 teaspoon baking powder
- ¼ teaspoon salt
- ½ cup unsalted butter, softened
- ¾ cup granulated sugar
- 1 large egg
- 1 teaspoon vanilla extract
- 1 tablespoon red food coloring (gel or liquid)
- ¼ cup buttermilk
- ½ cup white chocolate chips (for filling)
- sugar syrup (for coating)
- ½ cup shredded coconut (for coating)
Instructions
- PREHEAT THE OVEN: Set the oven to 350°F (175°C) and line a baking sheet with parchment paper.
- MIX DRY INGREDIENTS: In a medium bowl, whisk together the flour, cocoa powder, baking powder, and salt until fully combined.
- CREAM BUTTER AND SUGAR: In a large mixing bowl, beat the softened butter and granulated sugar on medium speed for 2–3 minutes until light and fluffy.
- ADD EGG AND COLORING: Mix in the egg, vanilla extract, and red food coloring until the batter is smooth and evenly colored.
- COMBINE WET AND DRY: Add the dry ingredients to the wet mixture in two additions, alternating with the buttermilk. Begin and end with the dry ingredients. Mix just until combined; do not overmix.
- CHILL THE DOUGH: Cover the dough and refrigerate for at least 30 minutes to firm it up for easier shaping.
- SHAPE AND FILL THE COOKIES: Scoop about 1 tablespoon of dough and roll it into a ball. Press your thumb into the center to create a small well, then place 2–3 white chocolate chips inside. Fold the dough around the filling and roll it back into a ball, sealing the chocolate completely.
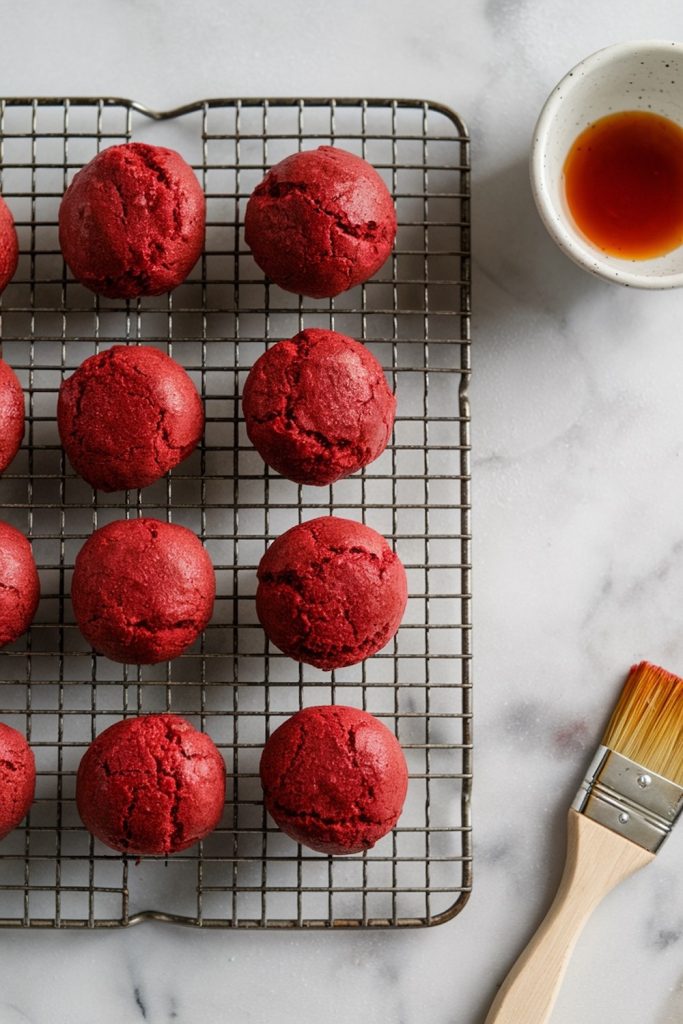
- BAKE: Place the shaped cookies on the prepared baking sheet, spacing them about 1 inch apart. Bake for 10–12 minutes, or until the edges are set. The cookies will be slightly flat on the bottom but should maintain a rounded shape.
- COAT WITH COCONUT: While still warm, brush each cookie lightly with water or a thin layer of sugar syrup. Immediately roll in shredded coconut to coat the surface. The moisture helps the coconut adhere and stay white.
- COOL AND SERVE: Let the cookies cool on the baking sheet for 5 minutes, then transfer to a wire rack. Serve warm for a melted white chocolate center, or at room temperature for a creamy texture.
Notes
Use gel food coloring for a more intense red color without thinning the dough. Seedless raspberry or strawberry jam can be substituted for white chocolate if preferred. Store cookies in an airtight container at room temperature for up to 3 days. Refresh coconut coating before serving if needed.
Nutrition Information
Yield
20Serving Size
1Amount Per Serving Calories 230Total Fat 10gSaturated Fat 6gUnsaturated Fat 3gCholesterol 24mgSodium 92mgCarbohydrates 33gFiber 2gSugar 16gProtein 4g
Lovely recipe. But your steps are out of order. Says glaze after baking, then baking. Making these for my son’s class. Will just royal icing the tops
Thank you for catching that mistake in the recipe steps, Amelia. It’s important feedback like yours that helps improve my recipes. The royal icing sounds like a delightful touch for your son’s class. I hope the cookies bring smiles all around!