I remember the first time I baked these buttercream sadnwich cookies as a teenager. My mother stood beside me, guiding my hands and cautioning me not to rush the dough. That memory stays fresh whenever I prepare a new batch, because these cookies have a light sweetness that speaks to my fondness for simple yet satisfying treats.
I learned to appreciate the soft crumb and gentle crunch in each bite. My friends always commented on their texture, which feels airy, yet fully present. I have cherished this recipe ever since, and I want to share my tips so you can taste that same comforting bite.
I often picture myself in my bright kitchen, apron dusted with flour and counters lined with cooling racks. My biggest joy arrives when I see these sandwiches stacked like tiny towers. They bring a calm feeling to the room and a happy expectation for dessert.
Following a special diet?
Every recipe on this site can be converted to gluten-free, vegan, dairy-free, keto, nut-free or egg-free with adjusted ratios so nothing falls flat.
Try the Recipe Converter →Why Buttercream Sandwich Cookies Matter
These cookies occupy a special place in many kitchens, including mine. People enjoy them for their tender crumb, created by a balanced ratio of butter to sugar. This ratio defines their melt-in-the-mouth feel. I favor how the flavor remains subtle, allowing the buttercream center to shine.
Cake aficionados sometimes compare these cookies to a mild sponge cake. The difference is in their crumbly exterior, which holds the buttercream with ease. The gentle sweetness pairs well with coffee or tea, making them a popular snack. I like to prepare them in small batches so I can keep a few for myself.
The process does not require advanced baking skills. A bit of care with the oven temperature and a watchful eye on the final minutes of baking ensures each cookie remains golden at the edges. My personal reminder is to gather fresh ingredients because fresh butter yields a richer taste.
Ingredient Highlights for Authentic Taste
People seeking an honest cookie choose unsalted butter, which forms the base of this recipe. The sugar sweetens without overpowering the mild notes of vanilla. I enjoy the addition of a quality vanilla extract for that pleasing aroma.
Sifting the powdered sugar for the buttercream removes lumps and delivers a silky texture. The choice of heavy cream or milk affects the richness of the filling. I prefer heavy cream for a smooth, spreadable consistency. I sometimes swirl food coloring into the buttercream to create a joyful display.
Salt and baking powder help regulate the texture by boosting flavor depth and controlling how the dough expands. I try not to forget them, because each small addition makes a difference in the final result. My best bakes happen when every element aligns in harmony.
Preparing the Dough for That Soft Center
I start by mixing the butter and sugar. This step aerates the butter, capturing tiny air bubbles to keep the cookies light. I grew to enjoy this rhythmic blending, as the butter transforms from stiff to creamy in mere minutes.
The egg and vanilla extract follow, rounding out the taste profile. I see it as a foundation that supports the flour, salt, and baking powder. I believe the key is gradual addition of dry ingredients. My own early mishaps with lumps taught me to proceed in smaller increments.
The dough forms quickly with gentle stirring. I recall my mom’s advice: “Don’t overwork it, or the cookies can turn dense.” I apply that tip every time, making sure I stop as soon as the flour disappears into the mix.
Rolling and Cutting for Even Shapes
I roll the dough on a lightly floured surface, aiming for about a quarter-inch thickness. My rolling pin slides back and forth with steady, moderate pressure, which ensures an even layer. I pick simple round cookie cutters for a classic shape, though seasonal cutters also fit special occasions.
The cut dough pieces line up on a baking sheet. It gives me a sense of accomplishment to see uniform circles, ready to transform into little golden discs. The dough chills out on the tray for a moment while I prepare my next round of cutting. These steps help maintain clean edges.
A quick second glance at the oven temperature avoids surprises. I always set my timer for 10 minutes, then check the color. A faint golden hue along the edges signals they need another minute or two. Baking them too long makes them crisp, which some prefer, but I enjoy a softer bite.
Crafting the Buttercream Filling
The filling begins with softened butter whipped until fluffy. Powdered sugar merges with the butter in stages, forming a smooth paste. I add vanilla extract and cream to loosen the mixture. Adjusting the cream can alter thickness, so a cautious approach works best.
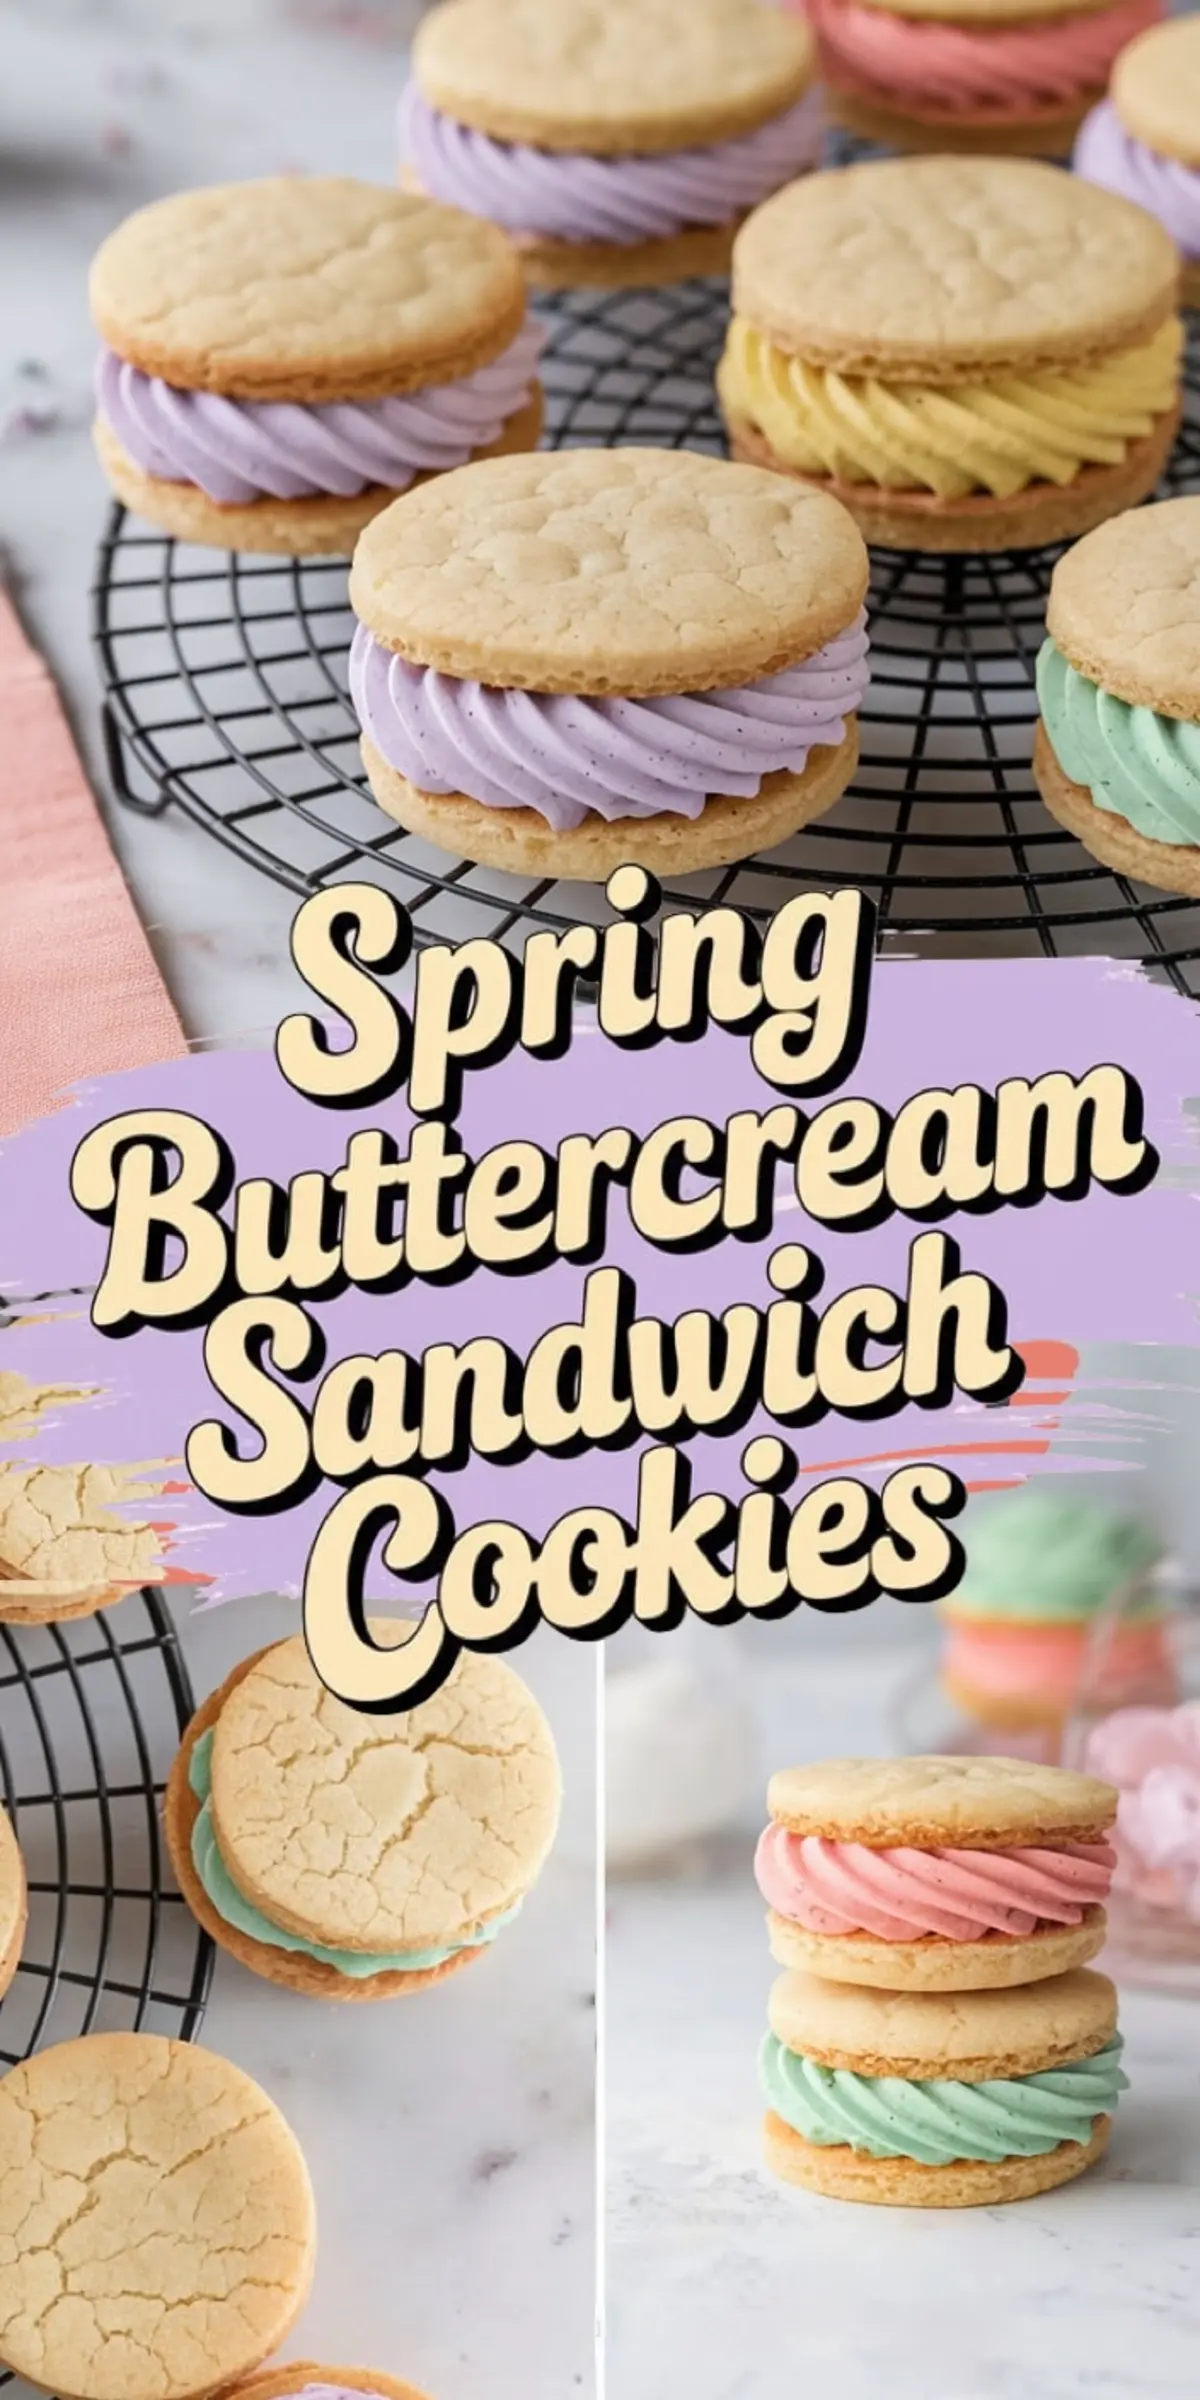
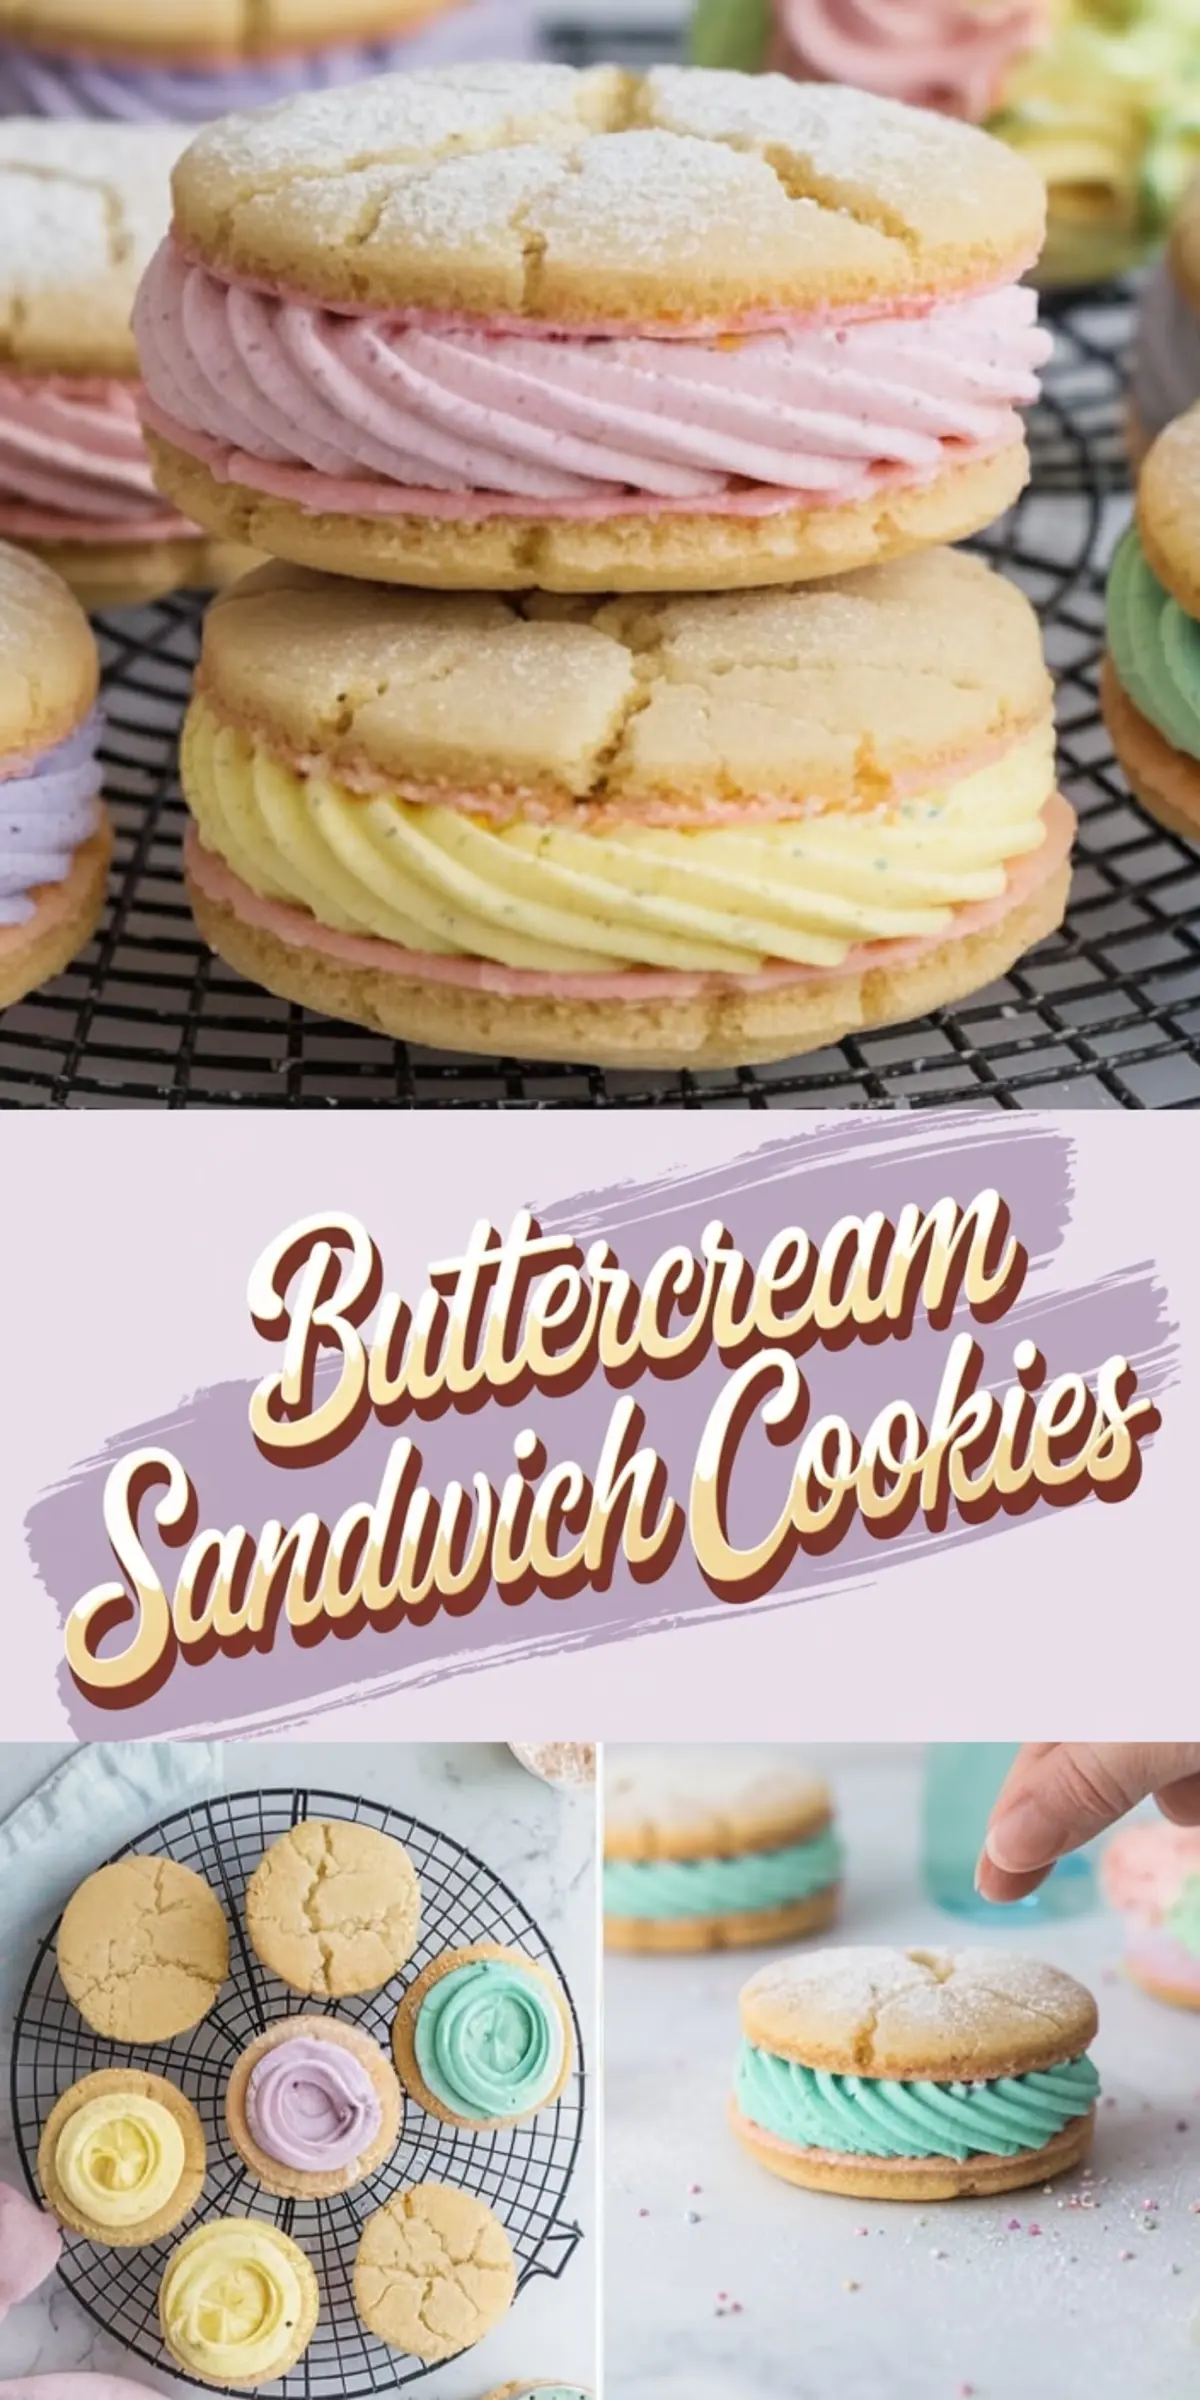
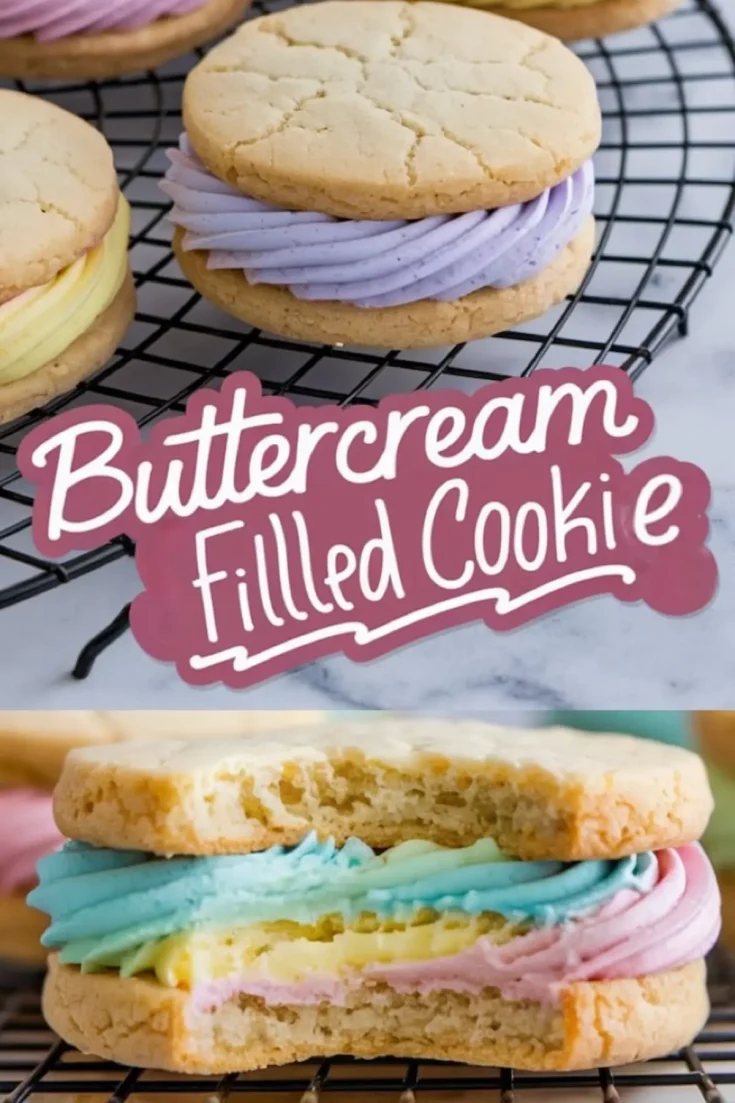
Food coloring broadens creative expression. I split the buttercream into separate bowls, then add various hues. My young nieces love vibrant pink, so I swirl pink lines next to white lines on plastic wrap, then roll it like a log. When piped, the colors blend into a swirl.
The final result can be piped into rosettes or simply spread with a butter knife. I find joy in swirling different shades to match holidays. For Easter, I sometimes pick pastel greens and yellows, reminiscent of spring blooms.
Sandwiching the Cookies
I wait until the cookies cool fully. A rush would melt the buttercream. Pairing cookies by size prevents mismatched sandwiches. A small cookie top meets a small cookie base. This neat approach pleases my sense of order.
I pipe or spread the buttercream onto one cookie, then press its partner on top. The sandwich forms with a light squeeze, which helps the filling peek out slightly. A dusting of powdered sugar, though optional, adds a simple finishing detail. My family members love that extra sweet hint.
These cookies often remind me of my Black Velvet Sandwich Cookies, which share a soft center and a decadent filling. Readers who want a bolder chocolate version can explore Black Velvet Sandwich Cookies for a similar structure with a darker tone.
Tips for Storing and Serving
I store them in an airtight container at room temperature if I plan to serve them within a few days. A sealed container keeps them from drying out. Refrigeration extends their shelf life, but I recommend bringing them back to room temperature before serving.
A single cookie can stand on its own as a quick treat. A whole plate helps celebrate birthdays, special gatherings, or random Tuesday cravings. I occasionally place them on a decorative plate next to a pitcher of cold milk.
Some folks enjoy more variety. My friend discovered a new favorite by pairing them with Carrot Cake Cookies for a spring-inspired dessert table. You can also explore my entire Cookies collection if you want to see what else sparks your taste buds.
Fun Decorating Variations
Bright sprinkles along the sides add a playful accent. Edible glitter offers a shiny appeal. My nieces once dipped the cookie edges in melted chocolate and turned them into half-moon designs, which looked artsy.
Multi-color piping methods bring new twists with each bake. I occasionally theme the buttercream colors for seasons or events. People celebrate with deep reds for Valentine’s Day or soft hues for baby showers. My personal favorite remains a swirl of pink and purple, which makes me smile every time.
Different shapes also add new life to this recipe. Heart cutouts feel charming, while star shapes look festive. A large square cutter results in bigger cookies, perfect for sharing or indulging in a bigger bite.
My Easter dessert table frequently showcases them next to my Easter dessert collection. That vibrant spread with colorful frostings sets a cheerful mood. I love hearing the chatter around the table as everyone reaches for these sweet bites.
Troubleshooting Common Issues
Overbaking remains the main risk. A watchful eye ensures a soft center and slight browning on the edges. A short cooling time prevents accidental melting of the filling, so patience pays off.
Too-stiff buttercream often indicates too little cream or an overly hot environment. I add extra cream, a teaspoon at a time, to correct dryness. My final swirl appears smoother when the consistency remains just right.
Undersized cookie cutters yield more cookies but can mean less area for the buttercream. I balance the size of the cutter with the thickness of my filling. That personal preference shapes the final product.
Closing Thoughts and Community Invitation
I hope you enjoy every mouthful of these buttercream-filled sandiwch cookies. Feel free to pin this recipe on your Pinterest board for future reference. Share your experience in the comments and mention any questions or creative spins you try. I always love hearing about your personal twists, because new ideas spark more delicious fun for everyone.
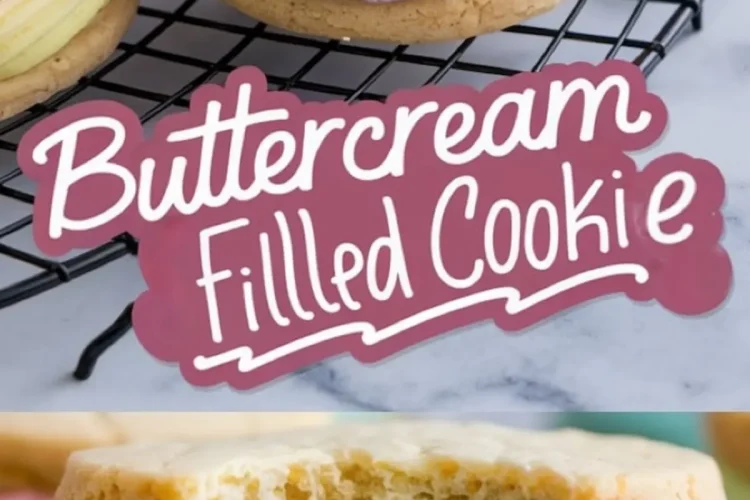
Buttercream-Filled Butter Cookies Recipe
Soft butter cookies sandwich a smooth, creamy buttercream filling. Customize the filling with classic or multi-colored swirled buttercream for a decorative touch.
Ingredients
- FOR THE BUTTER COOKIES:
- 1 cup (225g) unsalted butter, softened
- ¾ cup (150g) granulated sugar
- 1 large egg
- 2 teaspoons vanilla extract
- 2½ cups (315g) all-purpose flour
- ½ teaspoon salt
- ½ teaspoon baking powder
- FOR THE BUTTERCREAM FILLING:
- 1 cup (225g) unsalted butter, softened
- 3½ cups (440g) powdered sugar, sifted
- 2 teaspoons vanilla extract
- 3 tablespoons heavy cream or milk
- Food coloring (optional)
Instructions
- PREHEAT THE OVEN: Set the oven to 350°F (175°C) and line a baking sheet with parchment paper.
- CREAM THE BUTTER AND SUGAR: In a large bowl, beat the butter and sugar together until light and fluffy, about 2–3 minutes.
- ADD WET INGREDIENTS: Mix in the egg and vanilla extract until fully combined.
- COMBINE DRY INGREDIENTS: In a separate bowl, whisk together the flour, salt, and baking powder.
- MIX THE DOUGH: Gradually add the dry ingredients to the butter mixture, mixing until a soft dough forms.
- ROLL AND CUT: On a lightly floured surface, roll out the dough to about ¼-inch thickness. Cut out cookies using a round cutter or any desired shape, then place them on the prepared baking sheet.
- BAKE: Bake for 10–12 minutes, or until the edges are lightly golden. Let the cookies cool completely before filling.
- MAKE THE BUTTERCREAM FILLING: In a mixing bowl, beat the butter until smooth and creamy. Gradually add powdered sugar, mixing on low speed until combined. Add vanilla extract and heavy cream, then beat on medium-high speed until light and fluffy. If using food coloring, mix it in until evenly blended.
- OPTIONAL MULTI-COLOR SWIRL: Divide the buttercream into separate bowls and color each portion as desired. Lay out a piece of plastic wrap and spread each color in parallel lines. Roll up the plastic wrap into a log, twist the ends, and place it in a piping bag fitted with a large star tip.
- ASSEMBLE THE COOKIES: Pair up the cookies by matching similar sizes. Pipe or spread buttercream onto one cookie of each pair, then gently press the second cookie on top to form a sandwich.
- FINISHING TOUCH: Dust with powdered sugar if desired for an elegant presentation.
Notes
Cookies can be stored in an airtight container at room temperature for up to 3 days or refrigerated for up to a week. For longer storage, freeze unfilled cookies for up to 2 months and assemble with buttercream after thawing.
For a firmer buttercream, reduce the amount of heavy cream slightly. If the buttercream is too thick, add additional cream, one teaspoon at a time, until the desired consistency is reached.
For a neater swirl effect with multi-colored buttercream, use a large piping tip and apply even pressure while piping.
Nutrition Information
Yield
15Serving Size
1Amount Per Serving Calories 137Total Fat 5gSaturated Fat 3gTrans Fat 0gUnsaturated Fat 2gCholesterol 24mgSodium 119mgCarbohydrates 19gFiber 1gSugar 4gProtein 3g