
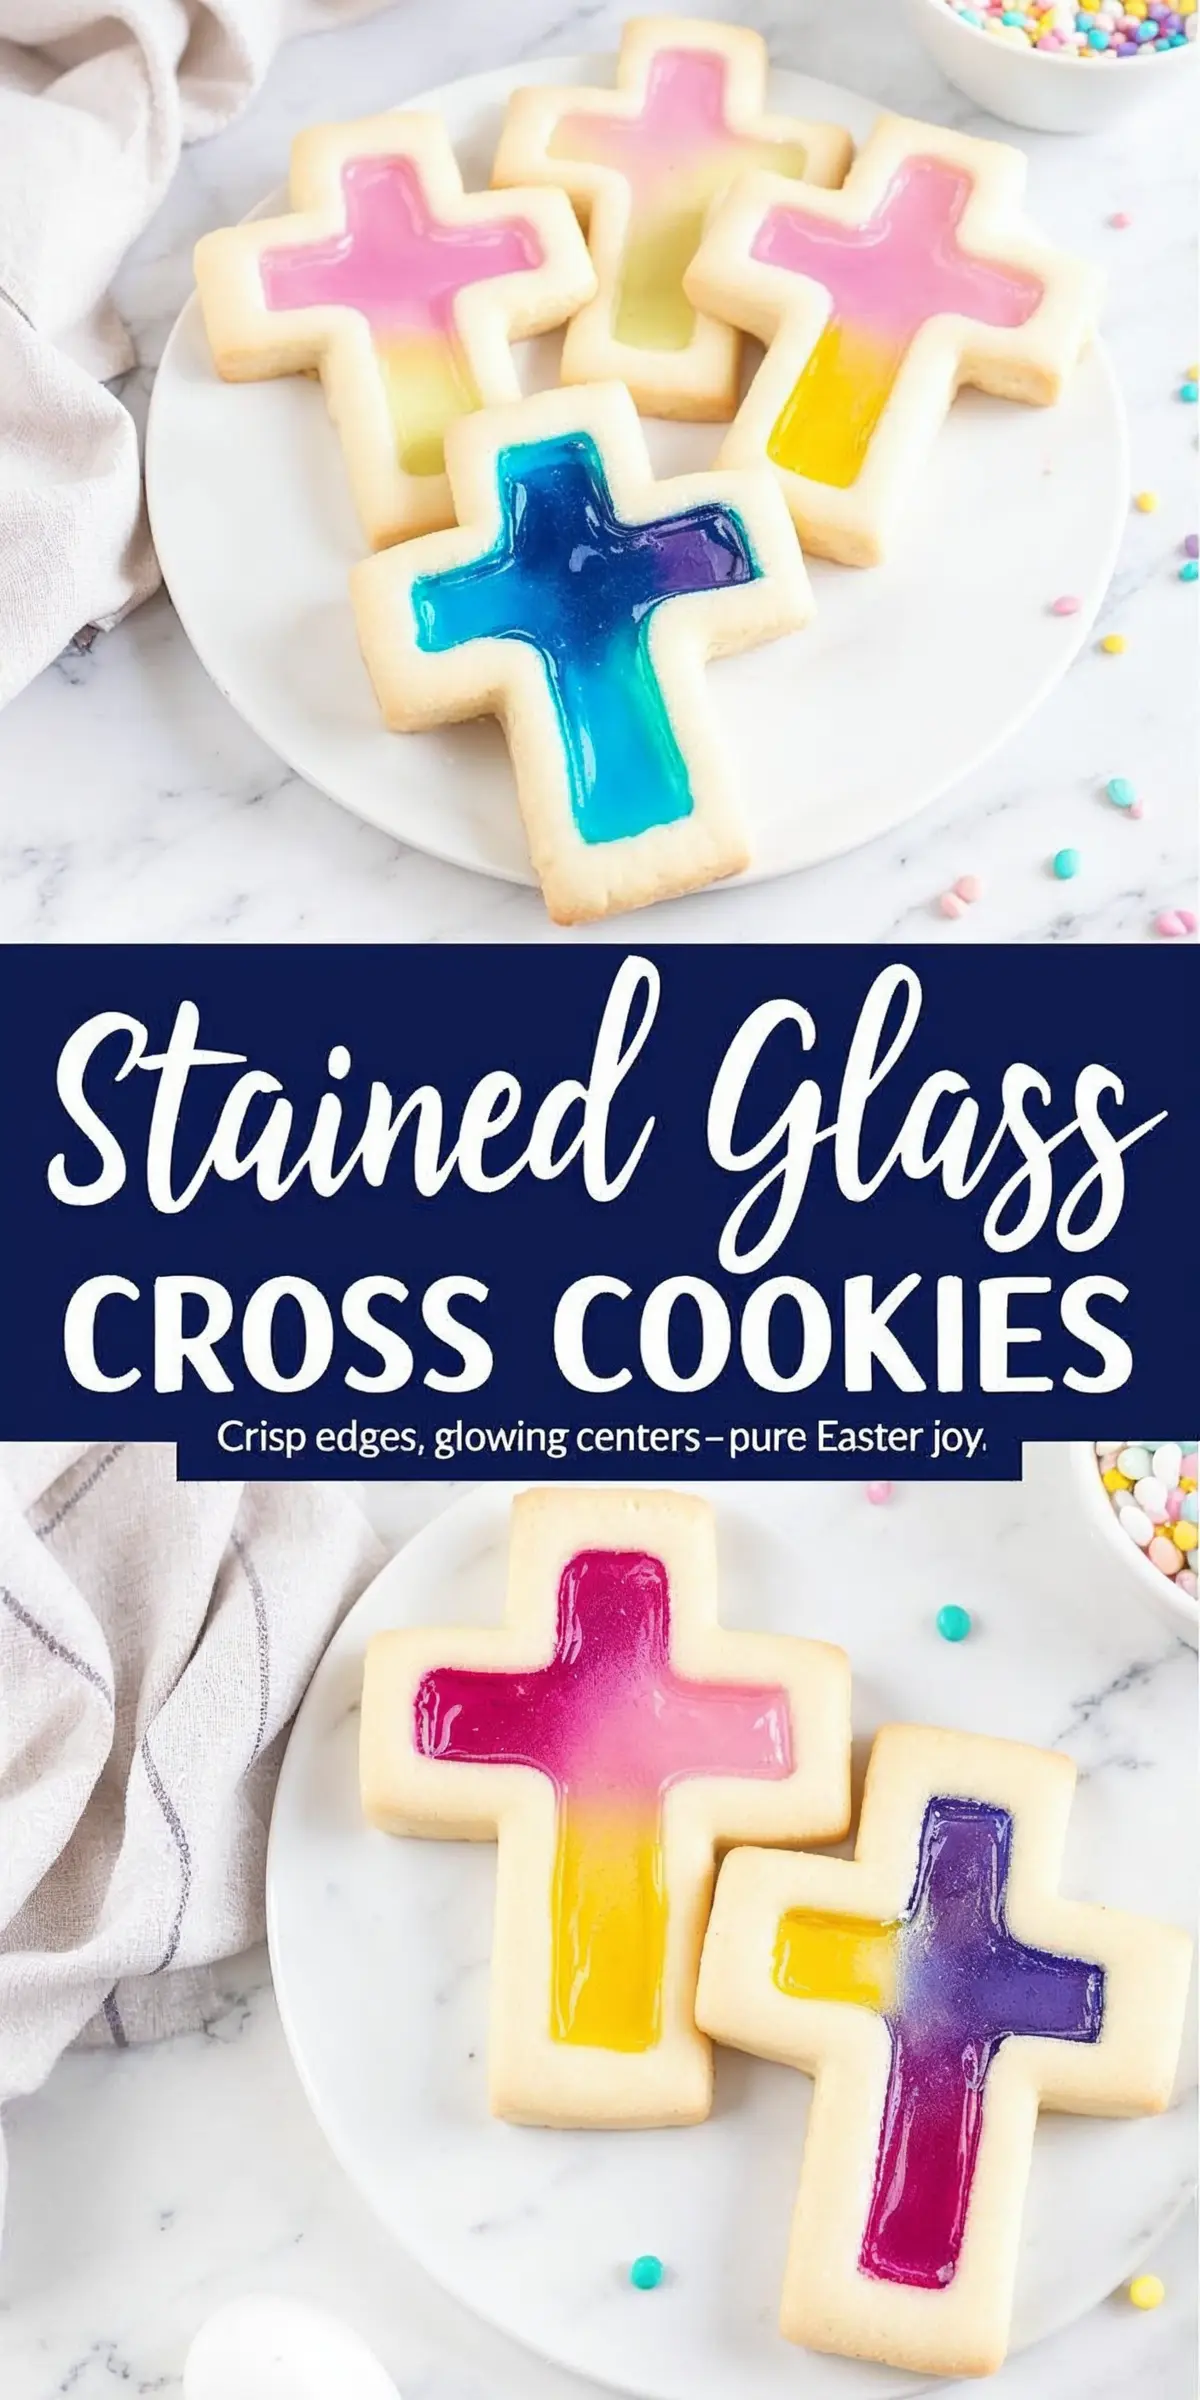
There’s something magical about cookies that look as good as they taste. Stained Glass Cross Cookies bring back childhood memories of church gatherings, where these delicate treats would catch the sunlight on the dessert table. Their buttery, crisp edges and vibrant candy centers turn a simple sugar cookie into something special. Every Easter, I make these with my family, carefully crushing the candies, rolling the dough, and watching as the oven transforms them into edible works of art.
These cookies are more than just a recipe. They symbolize celebration and tradition. The stained glass effect makes them a stunning addition to any Easter table, but the best part is how easy they are to customize. Different candy colors create unique designs, and the buttery sugar cookie base pairs beautifully with the slight tang of fruit-flavored candy. Whether you’re making them for kids or setting them out for guests, these cookies always spark conversation.

Following a special diet?
Every recipe on this site can be converted to gluten-free, vegan, dairy-free, keto, nut-free or egg-free with adjusted ratios so nothing falls flat.
Try the Recipe Converter →How to Make Stained Glass Cross Cookies from Scratch
A good sugar cookie should hold its shape without spreading, and that’s exactly what this dough does. Softened butter and sugar blend together until creamy. This step is key—it traps air in the dough, giving the cookies a delicate texture. A single egg adds richness, while vanilla and almond extracts bring out a warm, sweet aroma.
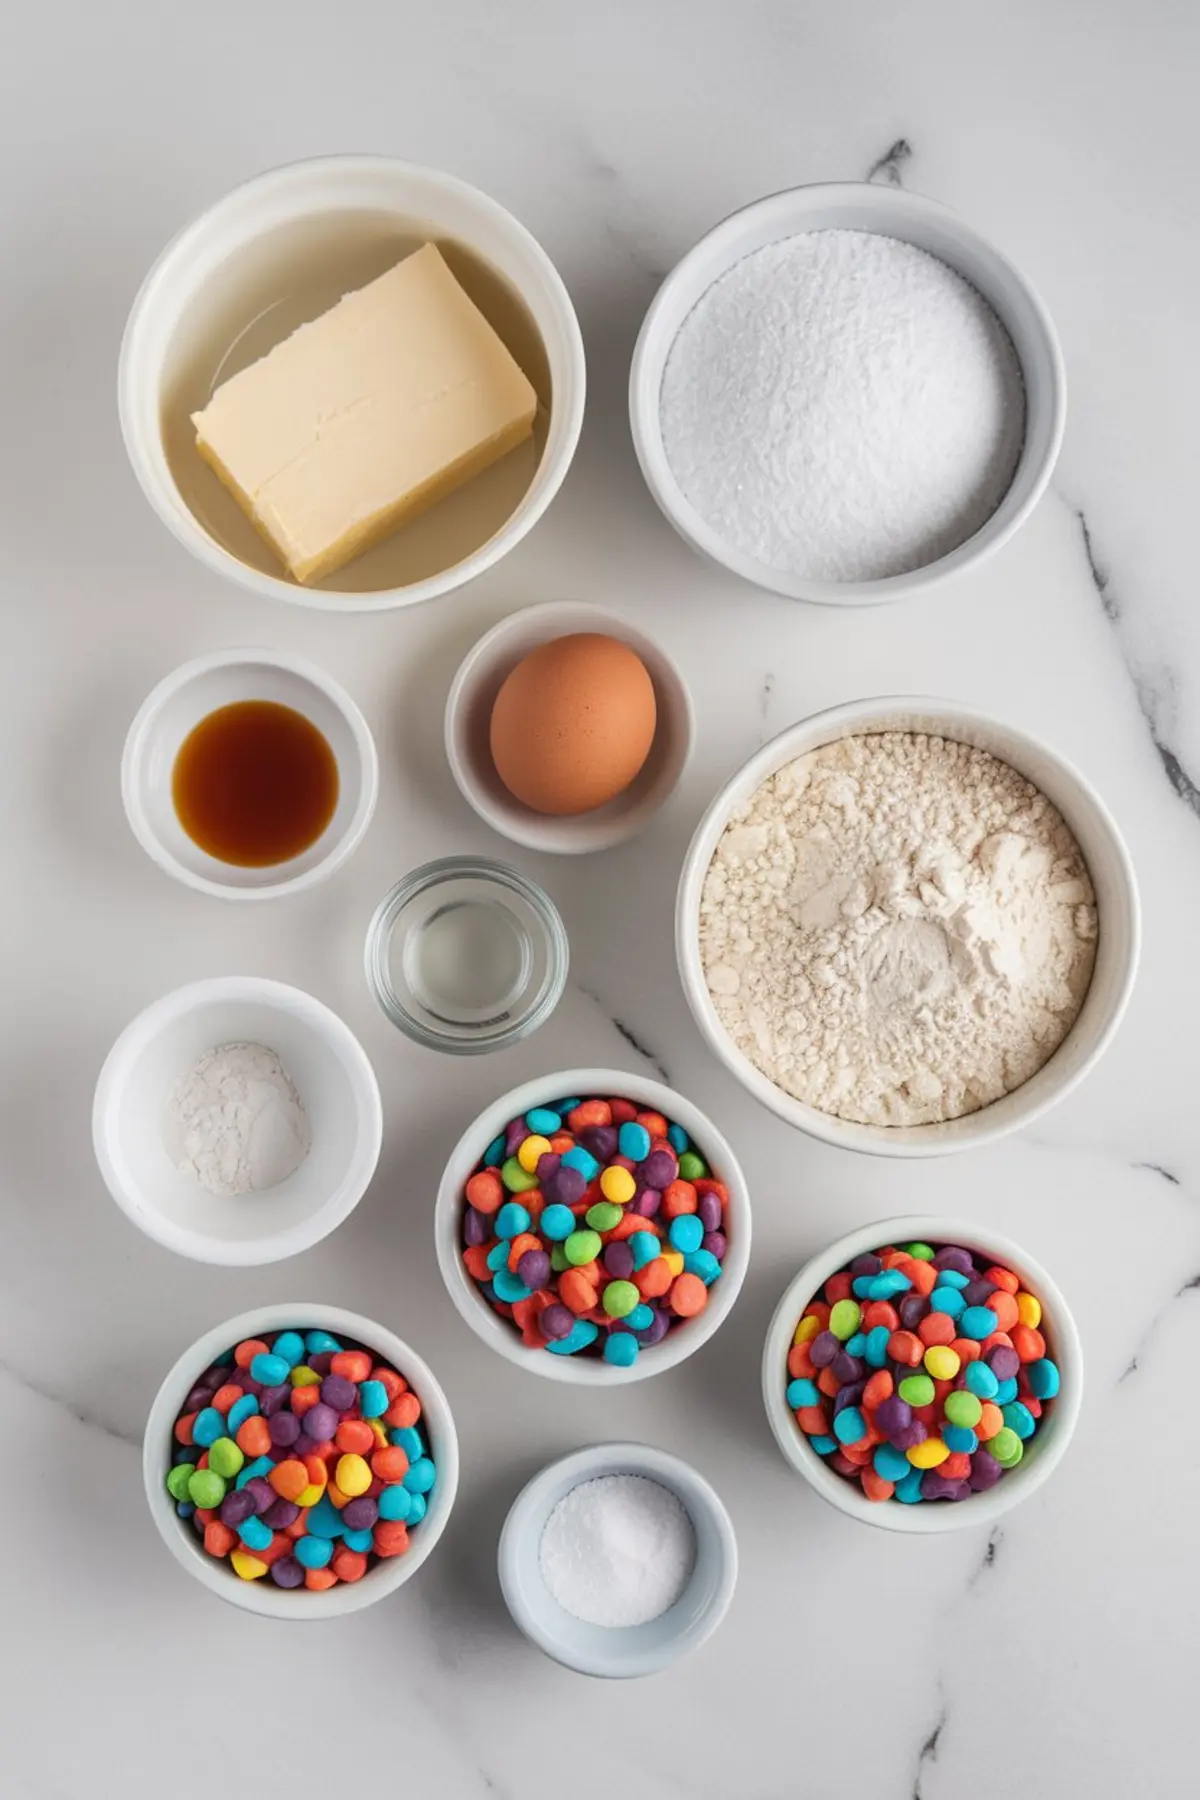
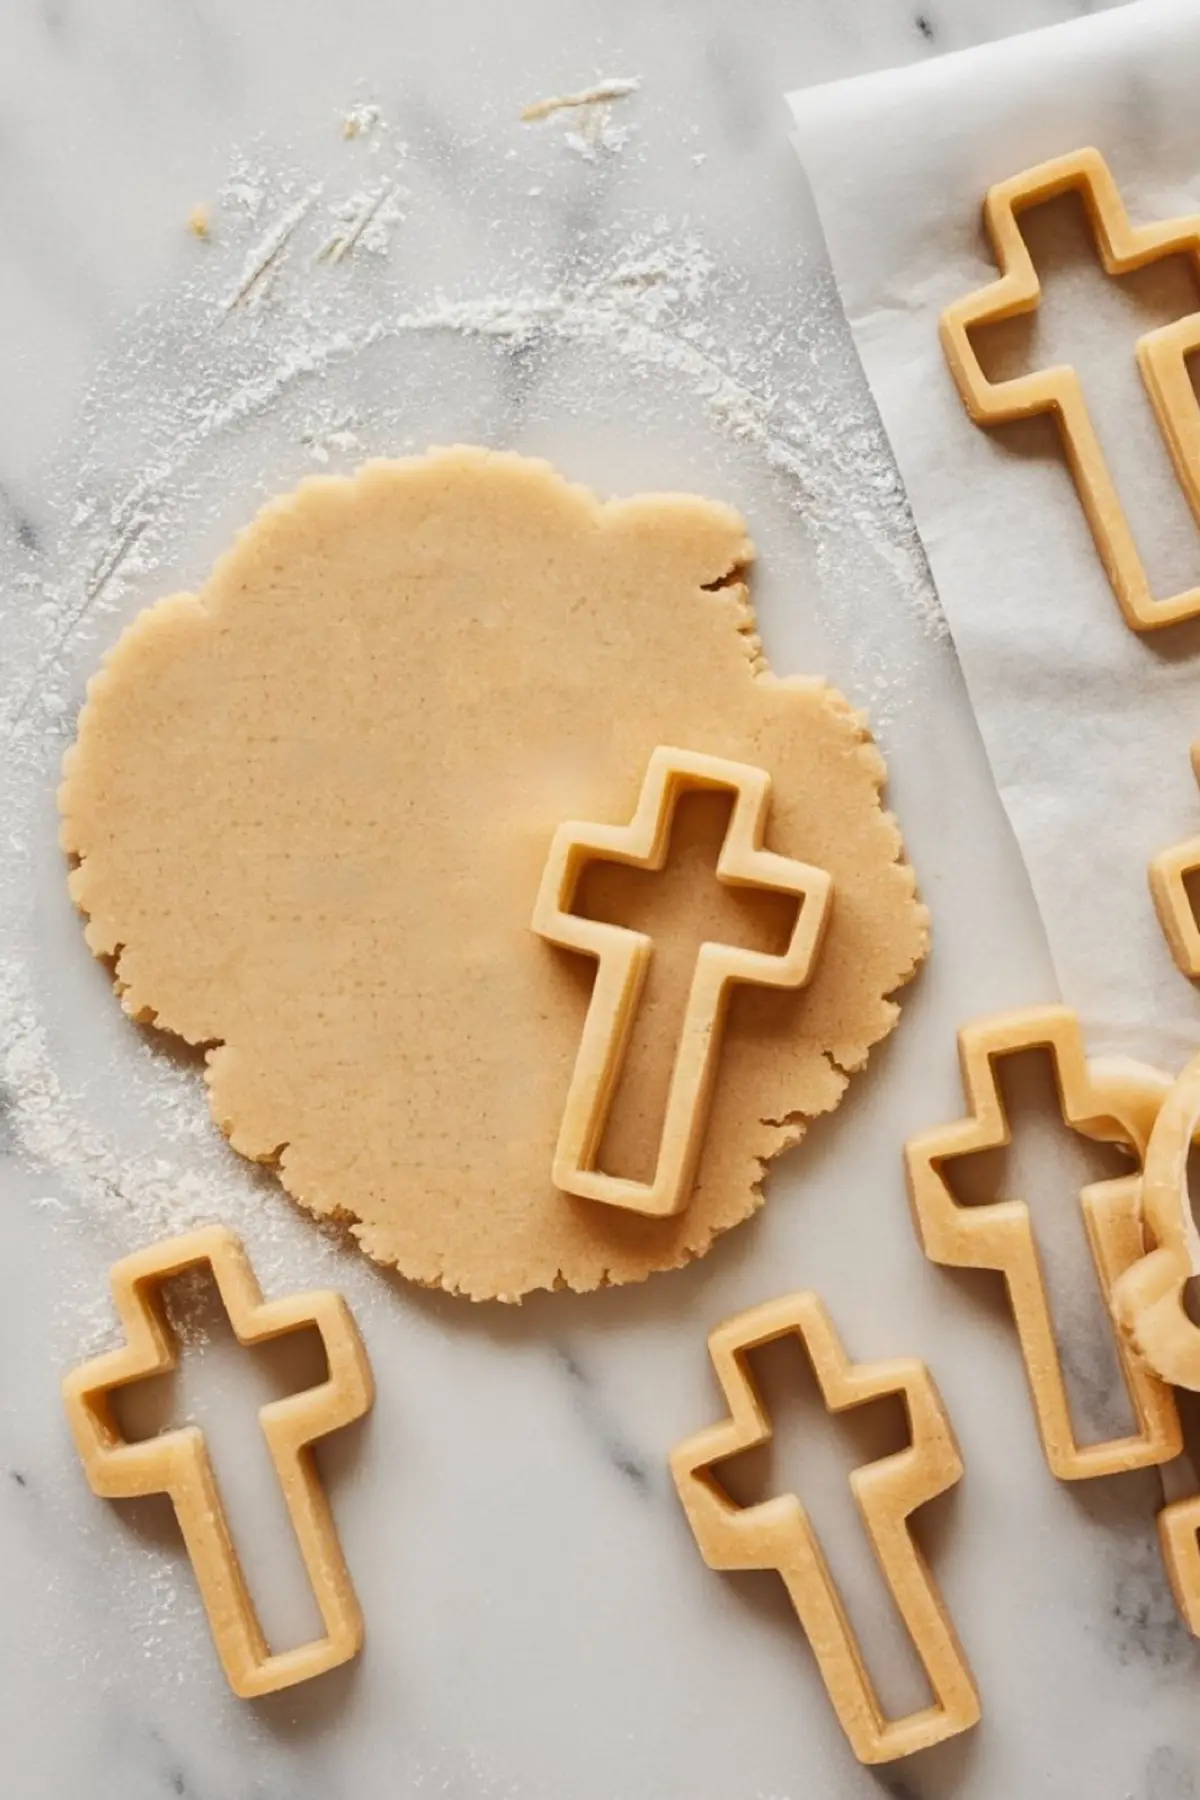
Flour, baking powder, and salt mix in gradually, creating a dough that’s easy to work with. Chilling the dough for at least 30 minutes makes rolling and cutting smoother. If the dough gets too soft, popping it back in the fridge for a few minutes keeps the shapes crisp.
Creating the Stained Glass Effect
The beauty of these cookies comes from the candy centers. Hard candies like Jolly Ranchers or Life Savers melt into glossy, translucent panels inside each cookie. Separating the candies by color and crushing them into small pieces takes a little time, but it’s worth it. A rolling pin or mallet works best for breaking them down without turning them to dust.
After rolling out the dough and cutting cross shapes, a smaller cutter removes the center to make space for the stained glass. The crushed candy fills the empty space, melting into smooth, colorful windows when baked.
Baking Tips for a Perfect Stained Glass Finish
Oven temperature matters with these cookies. A steady 350°F (175°C) ensures they bake evenly. The edges should turn lightly golden, while the candy centers melt completely without bubbling over. Overfilling the centers can cause candy to spill onto the baking sheet, so just enough to cover the cut-out area works best.
Letting the cookies cool before moving them is essential. The melted candy sets as it cools, hardening into a glossy, glass-like texture. Transferring them too soon risks breaking the delicate centers. Once fully set, they become sturdy enough to handle but still have that crisp, shatter-like effect.
Storing and Serving Ideas
These cookies keep well in an airtight container for up to a week. Layering them with parchment paper helps protect the candy centers. If making them ahead, storing them in a cool, dry place prevents humidity from softening the candy.
For an Easter dessert spread, pairing them with Christmas Stained Glass Cookies brings even more color to the table. The same stained-glass technique works beautifully in different shapes for any occasion.
A Fun Baking Project for Kids and Families
Baking these cookies is a great way to get kids involved in the kitchen. They love sorting the candies, crushing them, and watching the transformation in the oven. The process is simple but hands-on, making it a fun Easter activity.
If you enjoy experimenting with holiday cookies, you might also like Carrot Cake Cookies for a spiced, soft-baked alternative or Buttercream Sandwich Cookies for a more decadent treat.
Save This Recipe and Share Your Results
If these cookies brighten up your Easter celebration, save this recipe to your Pinterest board for later! Click the pin button to keep it handy when you’re ready to bake.
Tried this recipe? Let me know how it turned out in the comments! If you have any questions or fun variations, I’d love to hear them. Happy baking!
Stained Glass Cross Cookies Recipe

Stained Glass Cross Cookies combine buttery sugar cookies with vibrant candy centers, creating a beautiful effect. These festive treats are perfect for Easter celebrations and can be customized with different colors for a unique design.
Ingredients
- FOR THE SUGAR COOKIE DOUGH:
- 1 cup (2 sticks) unsalted butter, softened
- 1 cup granulated sugar
- 1 large egg
- 1 teaspoon vanilla extract
- 1/2 teaspoon almond extract (optional)
- 2 1/2 cups all-purpose flour
- 1/2 teaspoon baking powder
- 1/2 teaspoon salt
- FOR THE STAINED GLASS EFFECT:
- Assorted hard candies (Jolly Ranchers, Life Savers, or any translucent candy) in various colors
Instructions
- MAKE THE SUGAR COOKIE DOUGH: In a large mixing bowl, cream the butter and sugar together until light and fluffy, about 2 minutes. Add the egg, vanilla extract, and almond extract (if using), mixing until well combined. In a separate bowl, whisk together the flour, baking powder, and salt. Gradually add the dry ingredients to the wet mixture, stirring just until the dough forms. Divide the dough in half, wrap each portion in plastic wrap, and refrigerate for at least 30 minutes to help the cookies hold their shape when baked.
- PREP THE CANDY: While the dough chills, separate the hard candies by color and place each color into a separate plastic bag. Use a rolling pin or mallet to crush the candies into small pieces. Set aside.
- ROLL AND CUT THE COOKIES: Preheat the oven to 350°F (175°C) and line two baking sheets with parchment paper. On a lightly floured surface, roll out one portion of dough to about 1/4-inch thick. Use a cross-shaped cookie cutter to cut out cookies. Using a smaller cross cutter or a knife, remove the center of each cookie to create space for the "stained glass" effect.
- ADD THE STAINED GLASS EFFECT: Transfer the cookies to the prepared baking sheets, spacing them about 1 inch apart. Spoon the crushed candy into the center cut-out of each cookie, ensuring an even layer without overfilling.
- BAKE AND COOL: Bake for 10-12 minutes, or until the edges are lightly golden and the candy has fully melted. Let the cookies cool on the baking sheet for about 10 minutes before carefully transferring them to a wire rack. The candy centers will harden as they cool.
Notes
For best results, use translucent hard candies to achieve a true stained-glass effect. Avoid overfilling the cookie centers with crushed candy, as excess may spill over while baking. If the dough becomes too soft while rolling, return it to the refrigerator for a few minutes to firm up. Store cookies in an airtight container at room temperature for up to one week.
Nutrition Information
Yield
24Serving Size
1Amount Per Serving Calories 94Total Fat 1gSaturated Fat 0gTrans Fat 0gUnsaturated Fat 1gCholesterol 9mgSodium 66mgCarbohydrates 19gFiber 0gSugar 9gProtein 2g