
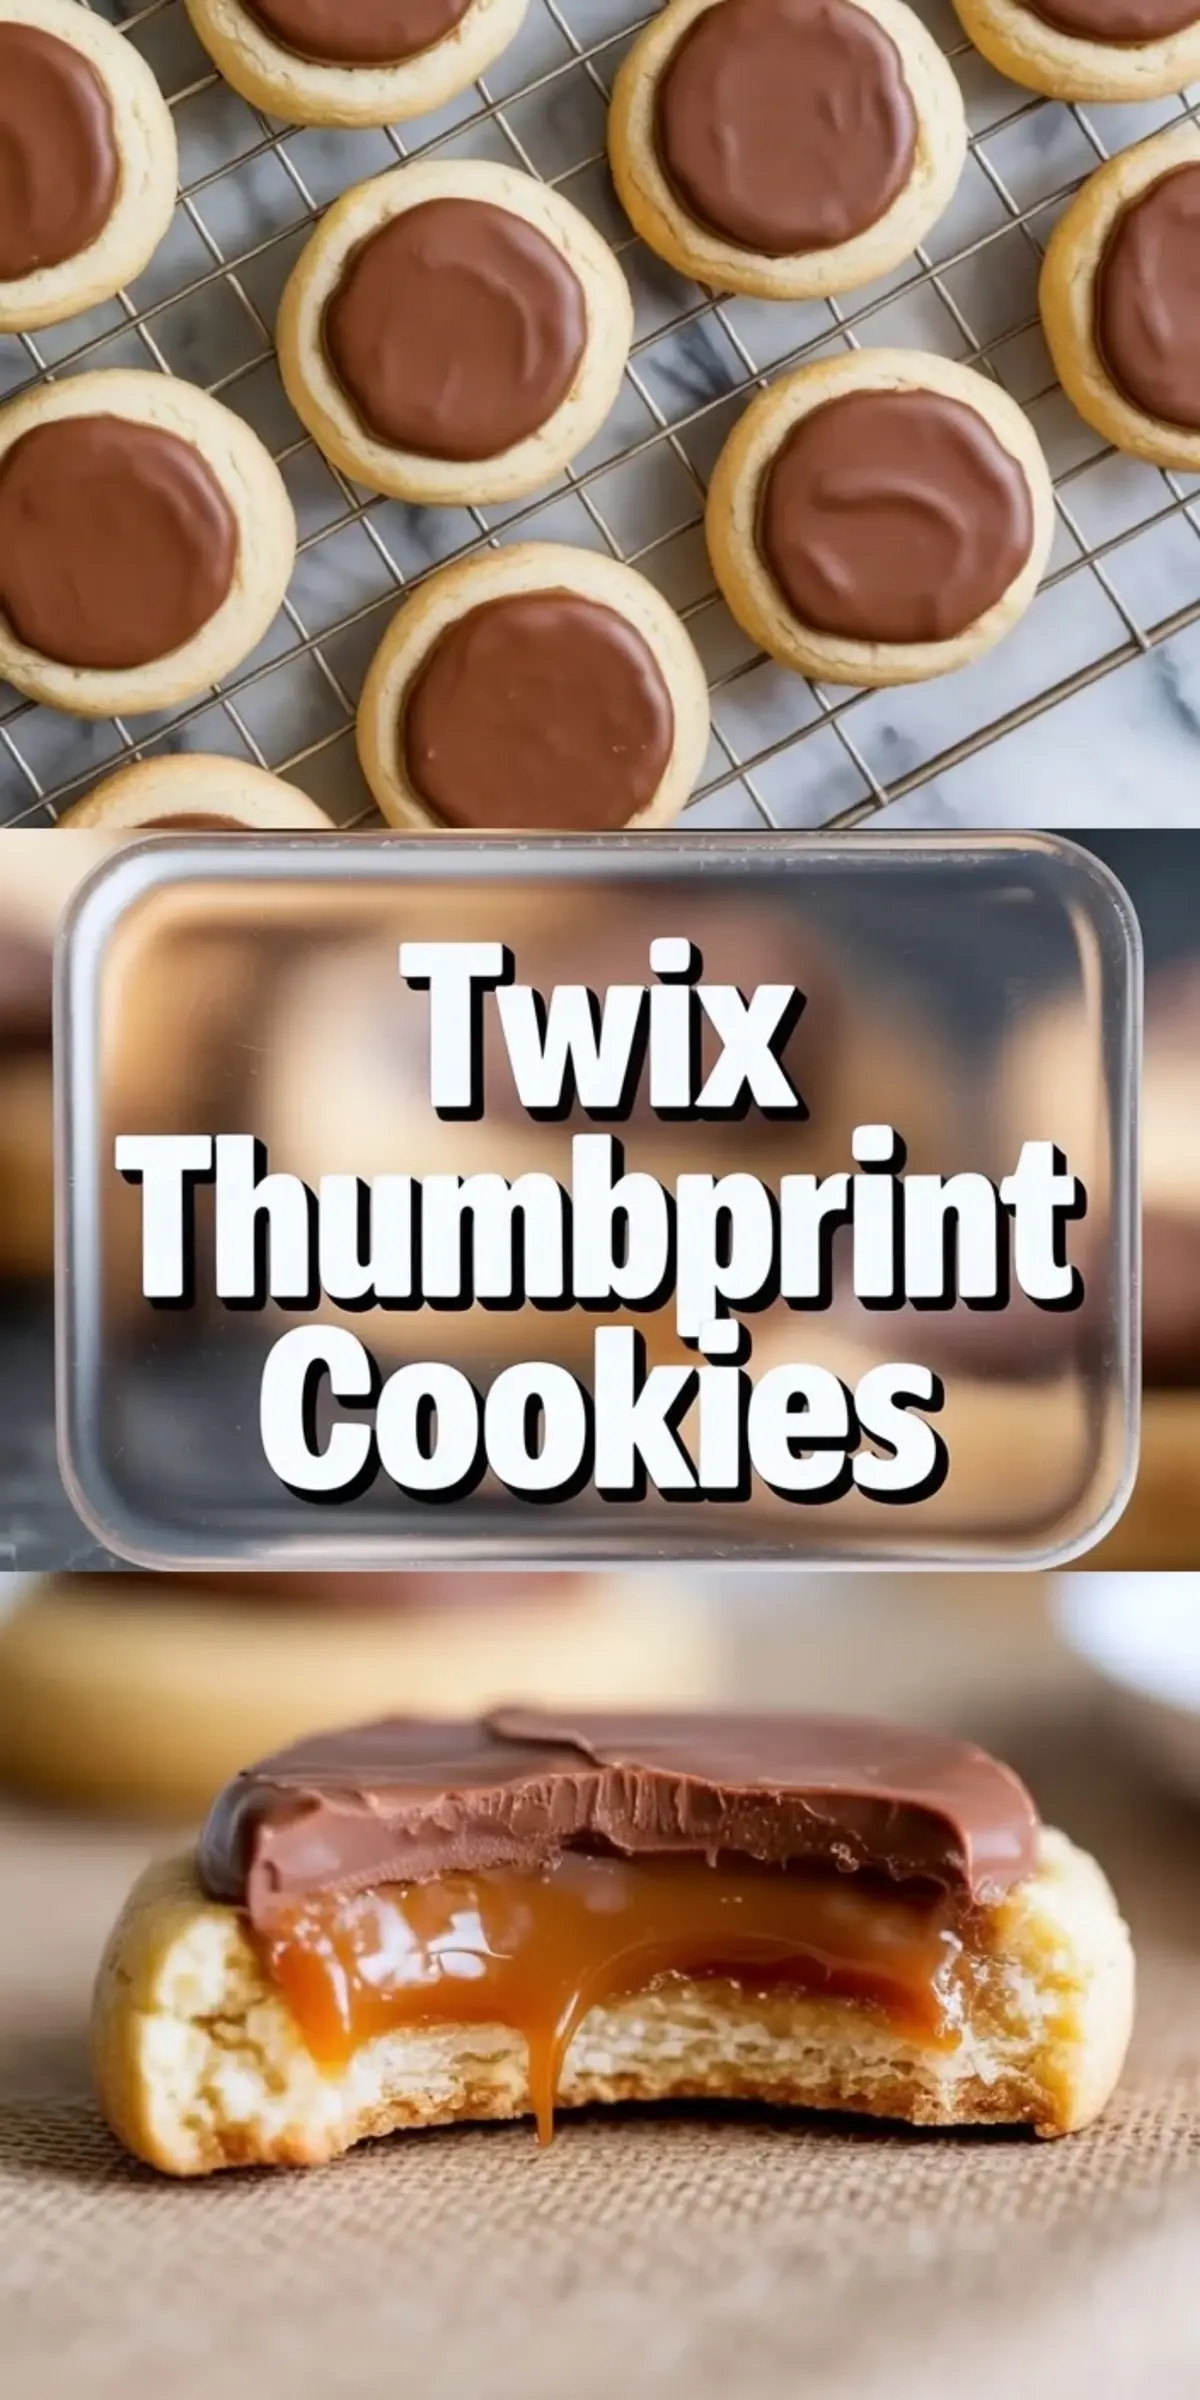
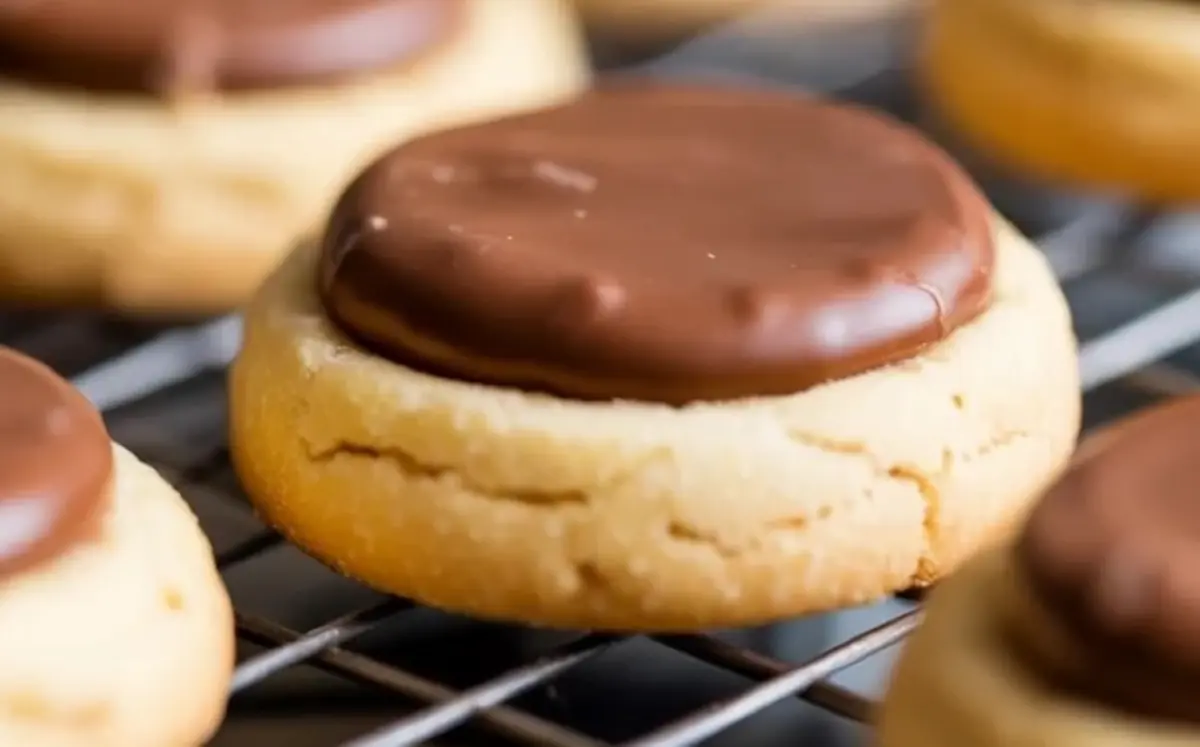
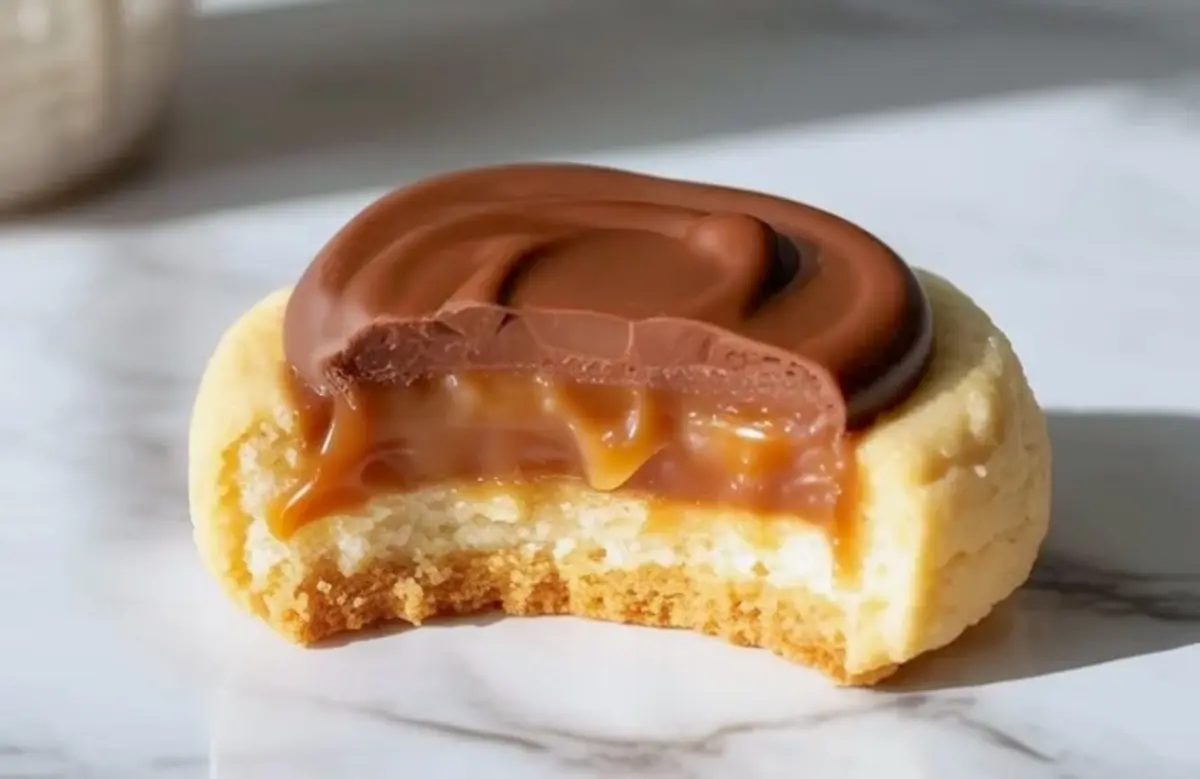
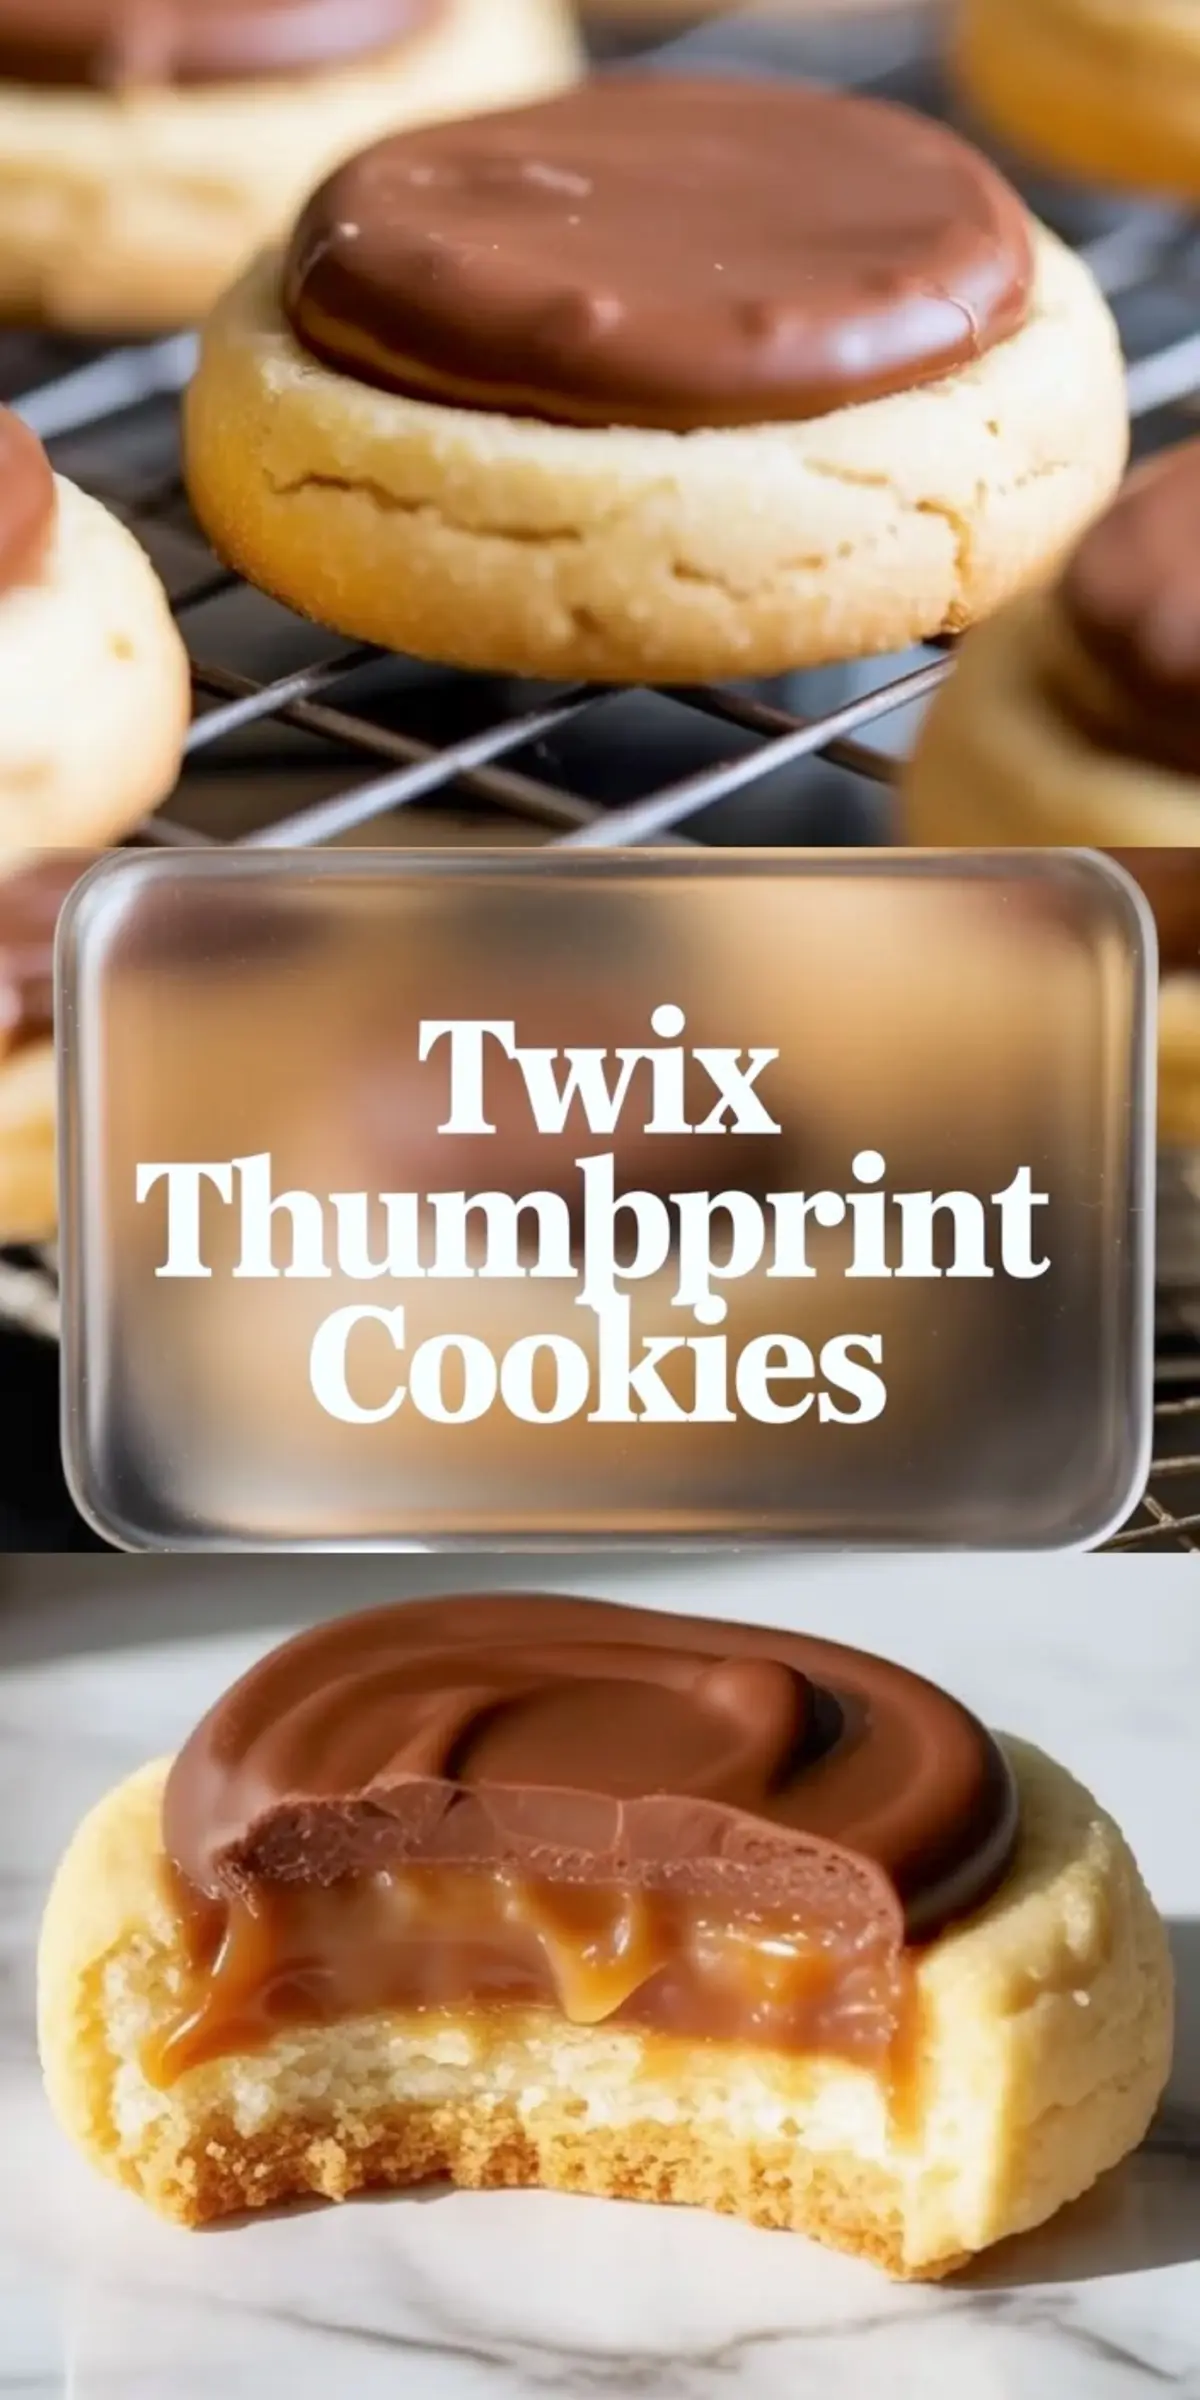
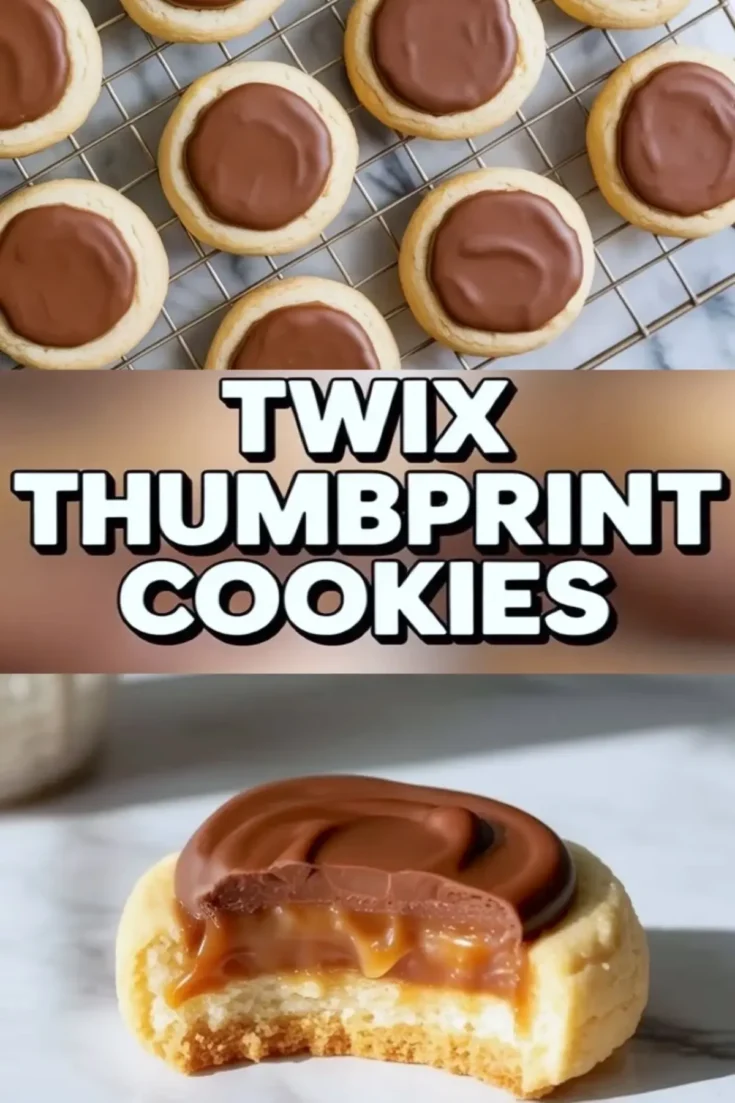
These Twix Thumbprint Cookies combine the melt-in-your-mouth texture of classic shortbread cookies with the rich flavor layering of a candy bar. Each bite delivers buttery cookie, chewy caramel, and a glossy milk chocolate topping. This thumbprint cookies recipe works well for cookie trays, candy bar desserts, and anytime you want a quick treat with familiar flavors.
This cookie depends on a strong fat-to-flour ratio. Using a full cup of unsalted butter to just two cups of flour gives the cookie its tender, crumbly bite. The dough stays soft but holds its shape when baked. That matters.
Following a special diet?
Every recipe on this site can be converted to gluten-free, vegan, dairy-free, keto, nut-free or egg-free with adjusted ratios so nothing falls flat.
Try the Recipe Converter →The thumbprint indent is more than decorative. It creates space to layer molten caramel and chocolate without compromising the structural integrity of the cookie itself. The trick is to re-press the center right after baking. The first time I skipped that step, my filling sat on top like a chocolate hat. Now I always go back in while the cookies are still hot.
I prefer a small, 1-tablespoon portion for each cookie. This keeps them bite-sized, rich, and visually polished without spreading too much.
You’ll find similar structure in my Biscoff Fudge Recipe, where texture relies just as much on timing as it does on ratio.
Ingredient Breakdown: What Each One Does
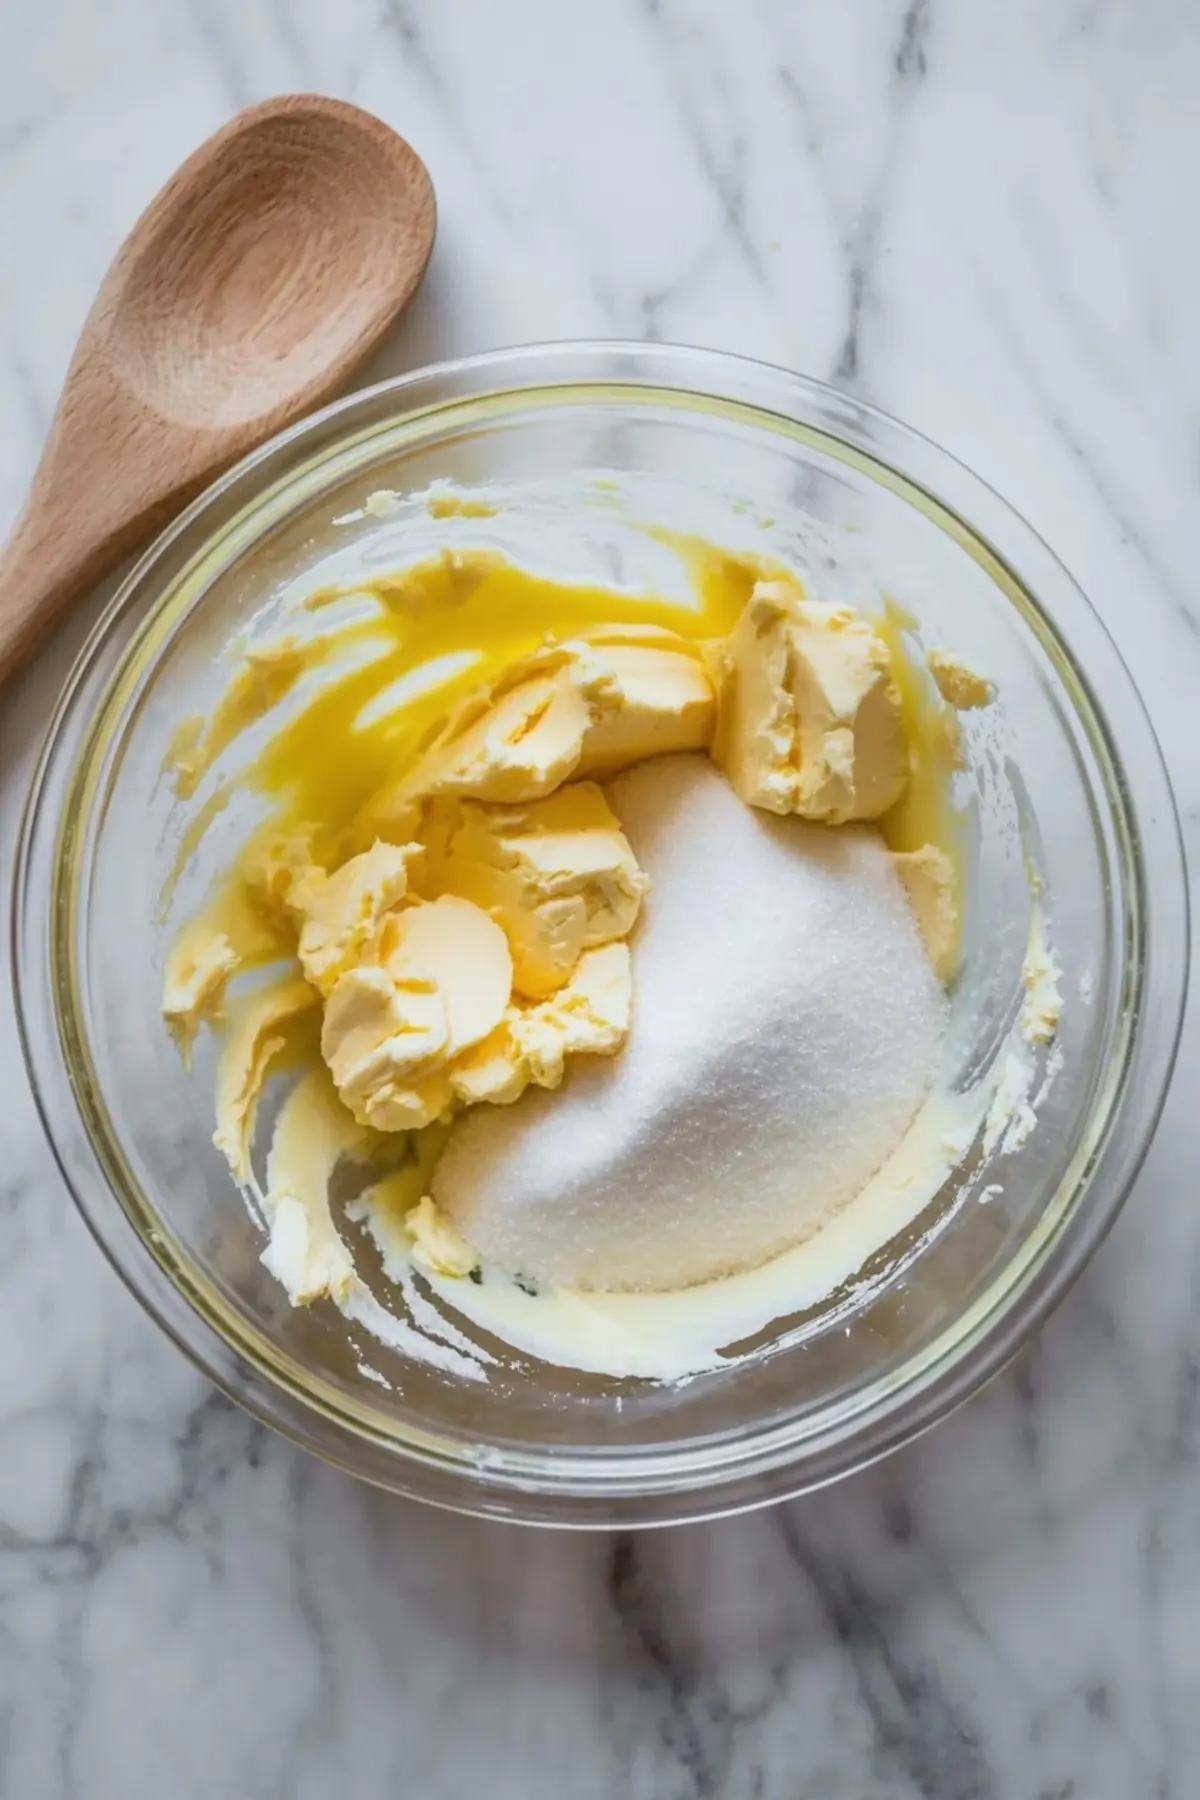
Butter forms the base. Room temperature matters here. Cold butter won’t cream properly and soft butter can collapse the cookie structure. I like to take it out 90 minutes before baking.
Granulated sugar gives just enough sweetness. It also helps the butter whip to a pale, fluffy consistency. Brown sugar would throw off the texture here, so I don’t substitute.
Vanilla extract adds warmth. A teaspoon is enough to carry the shortbread.
All-purpose flour provides the body. Sift it if clumpy. Too much flour and your dough will crack when shaped.
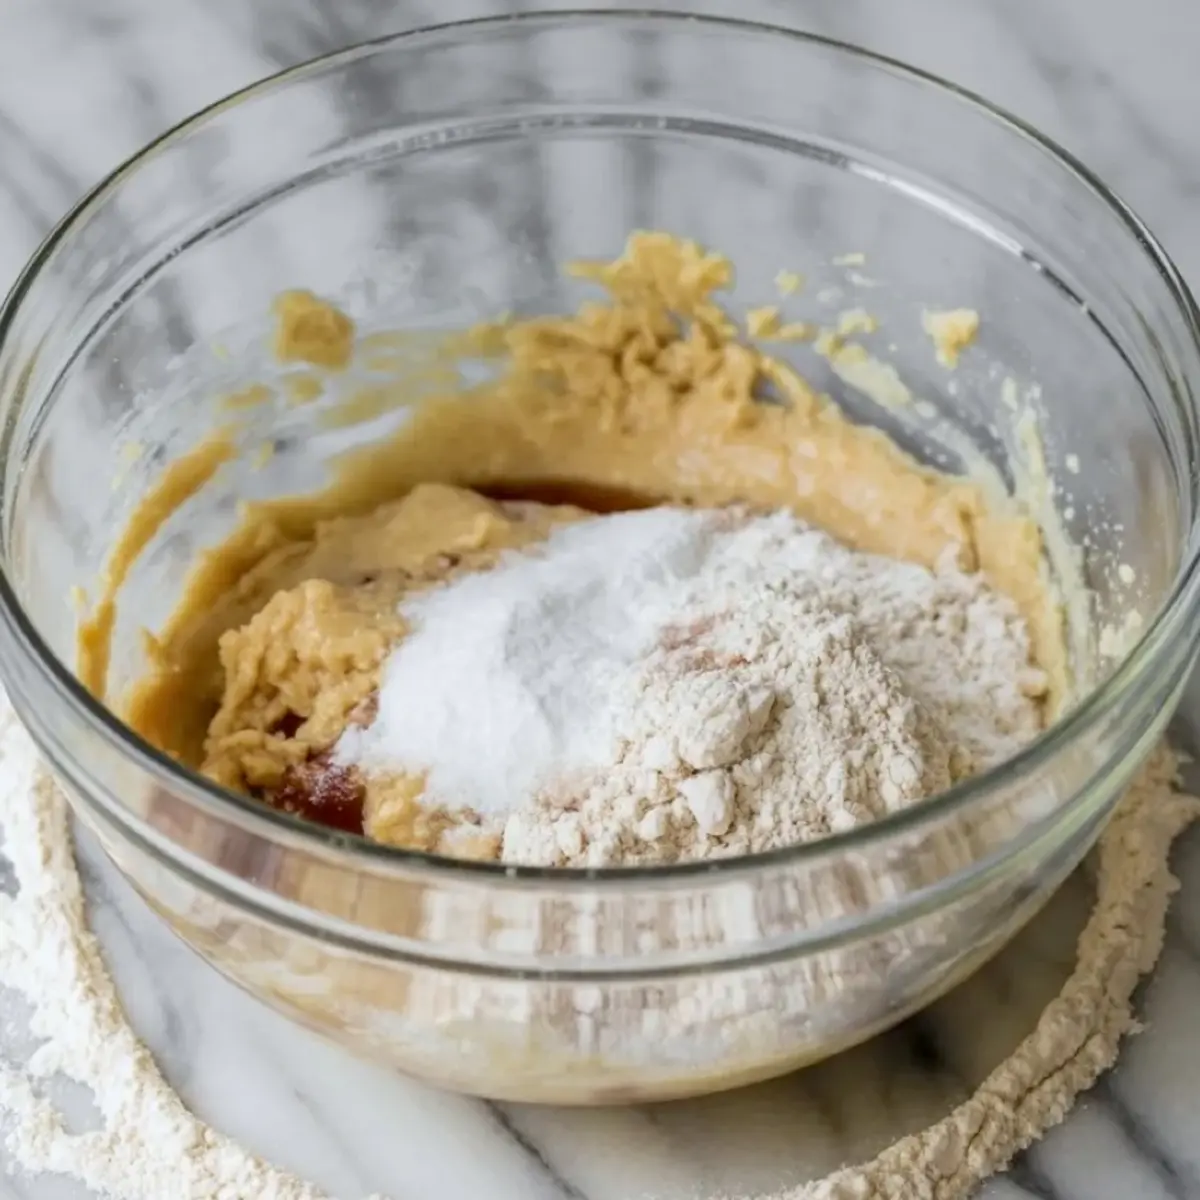
Salt balances the sweet layers.
Caramels and heavy cream melt together into a smooth, pourable center. I prefer soft caramels like Werther’s, but Kraft works. Anything too hard or grainy won’t blend well.
Milk chocolate makes the topping familiar. If you enjoy the contrast of bittersweet chocolate, you could swap it. But for that Twix cookie finish, milk chocolate keeps the flavor true. I use the same pairing in my Peanut Butter Rice Krispie Treats, which also rely on simple chocolate layering.
The Center Makes the Cookie
That caramel layer pulls everything together. It creates a chew that holds firm without being sticky.
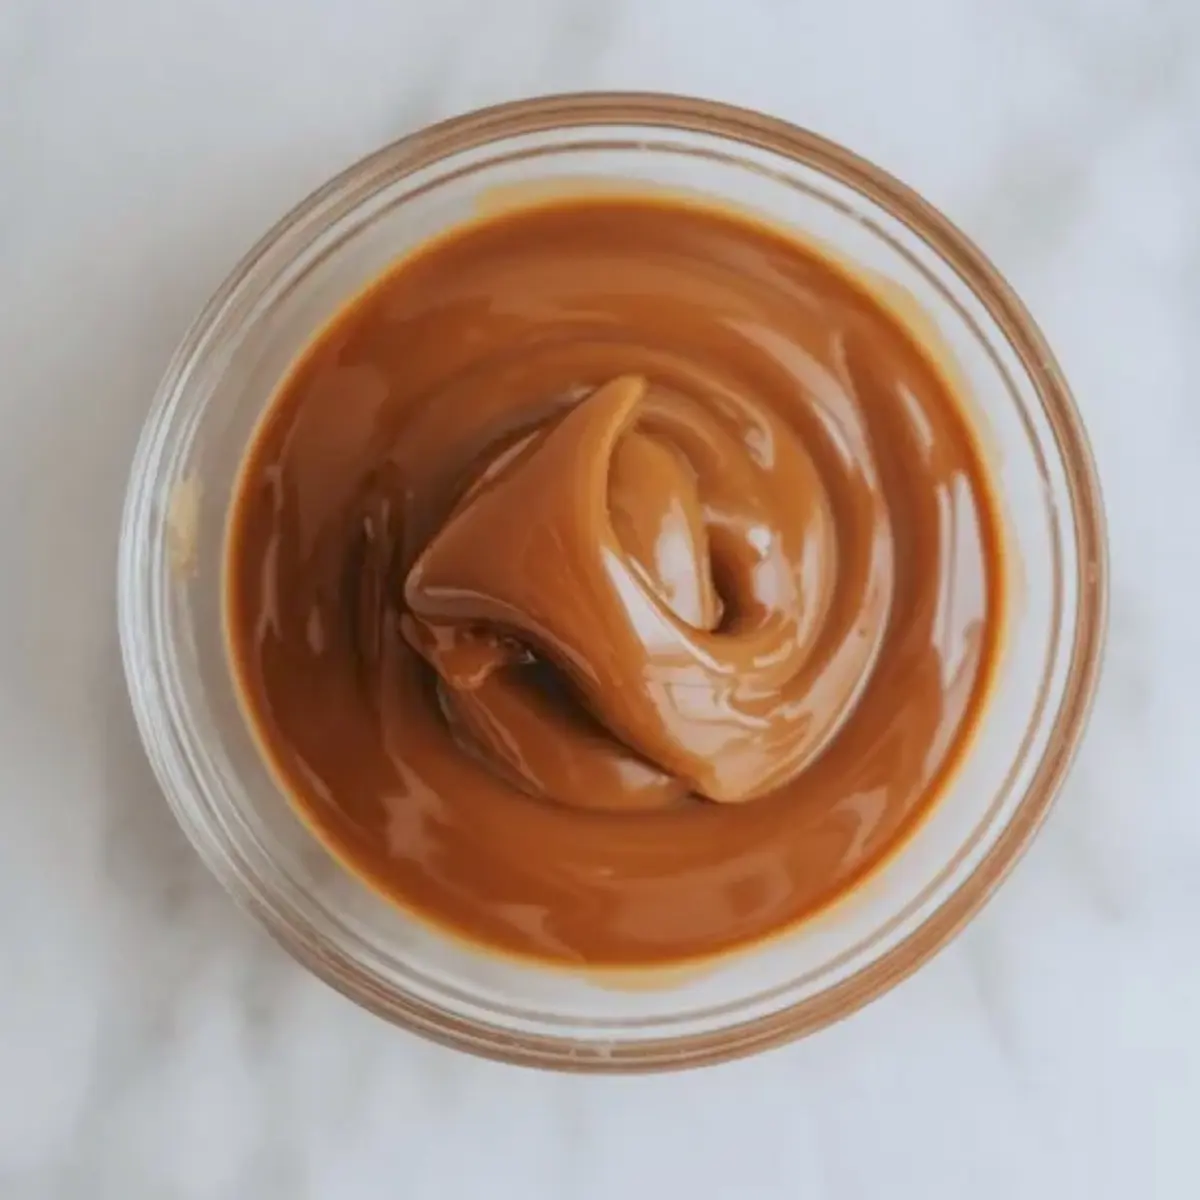
The ratio of 25 caramels to 2 tablespoons cream gives just enough fluidity to spoon the caramel cleanly, but thick enough to stay put. If it runs, the caramel wasn’t hot enough or the cookies were too warm.
Letting the caramel rest for 20 minutes helps. Don’t rush it. Otherwise the chocolate will smear and never set.
How to Build and Fill Without Breaking
Bake the cookies fully before filling. The edges should start to golden but never brown. Let them cool at least 30 minutes before adding caramel. This matters more than people realize.
I once filled them too early and the chocolate topping bloomed from residual heat. Now I always wait. If you’re impatient, place the tray near a cool window to speed it up.
The chocolate topping firms in under 10 minutes if chilled briefly. I don’t refrigerate longer than that. The shortbread can dry out. The finish should stay glossy, not chalky or hard.
You’ll notice a similar staging process in my Salted Caramel Cookies where each layer builds flavor and structure in phases.
Storage and Texture Over Time
Keep the cookies at room temperature for up to five days. Use parchment between layers to prevent sticking.
They also freeze well. Flash freeze in a single layer, then transfer to a sealed container. Defrost uncovered at room temperature. I don’t recommend microwaving, as the caramel gets rubbery.
Practical Tips That Change the Result
- Use a light-colored baking sheet for even bottoms
- Press indents again right after baking
- Use a teaspoon dipped in flour for clean centers
- Caramel must be stirred constantly while melting
- Don’t over-mix the dough after flour goes in
- Test the chocolate by spooning one—if it streaks, it needs more melt time
I use the same parchment, bowls, and method I use when making Bounty Bars, which also need precise layering and cooling.
Serving Ideas for Twix Thumbprint Cookies
Serve on holiday cookie trays with peppermint bark. Pack in small tins for edible gifts.
Add to birthday dessert boards alongside candy recipes. Stack with chocolate wafer cookies for a layered look
Pair with coffee after dinner. Serve warm with a tiny scoop of vanilla bean ice cream
Save This Recipe and Share What You Try
If these Twix Thumbprint Cookies make it into your favorites, pin this recipe so you can find it again later.
I’d love to know how yours turned out, or if you gave them a twist. Add your thoughts in the comments below. Let’s swap notes.
Twix Thumbprint Cookies Recipe
These Twix thumbprint cookies combine the buttery base of classic thumbprint cookies with gooey caramel and smooth chocolate, just like your favorite candy bar. This easy-to-make thumbprint cookies recipe is perfect for parties, holiday trays, or any time you’re craving a rich, chewy treat. Inspired by Twix cookies, this crowd-pleasing dessert blends two sweet favorites in one delicious bite. Great for fans of candy bar desserts and fun cookie recipes.
Ingredients
- FOR THE SHORTBREAD COOKIES:
- 1 cup (226g) unsalted butter, room temperature
- ½ cup (100g) granulated sugar
- 1 tsp vanilla extract
- 2 cups (250g) all-purpose flour
- ¼ tsp salt
- FOR THE CARAMEL LAYER:
- 25 soft caramels (such as Werther’s or Kraft)
- 2 tbsp heavy cream
- FOR THE CHOCOLATE TOPPING:
- 1 cup (175g) milk chocolate chips or chopped milk chocolate
- 1 tsp vegetable oil or coconut oil
Instructions
- MAKE THE COOKIE DOUGH: In a large bowl, cream the butter and sugar together using a hand mixer or stand mixer until the mixture is light and fluffy, about 2–3 minutes. Add the vanilla extract and mix to combine. Gradually add the flour and salt, mixing on low speed until just combined. The dough should be soft but not sticky.
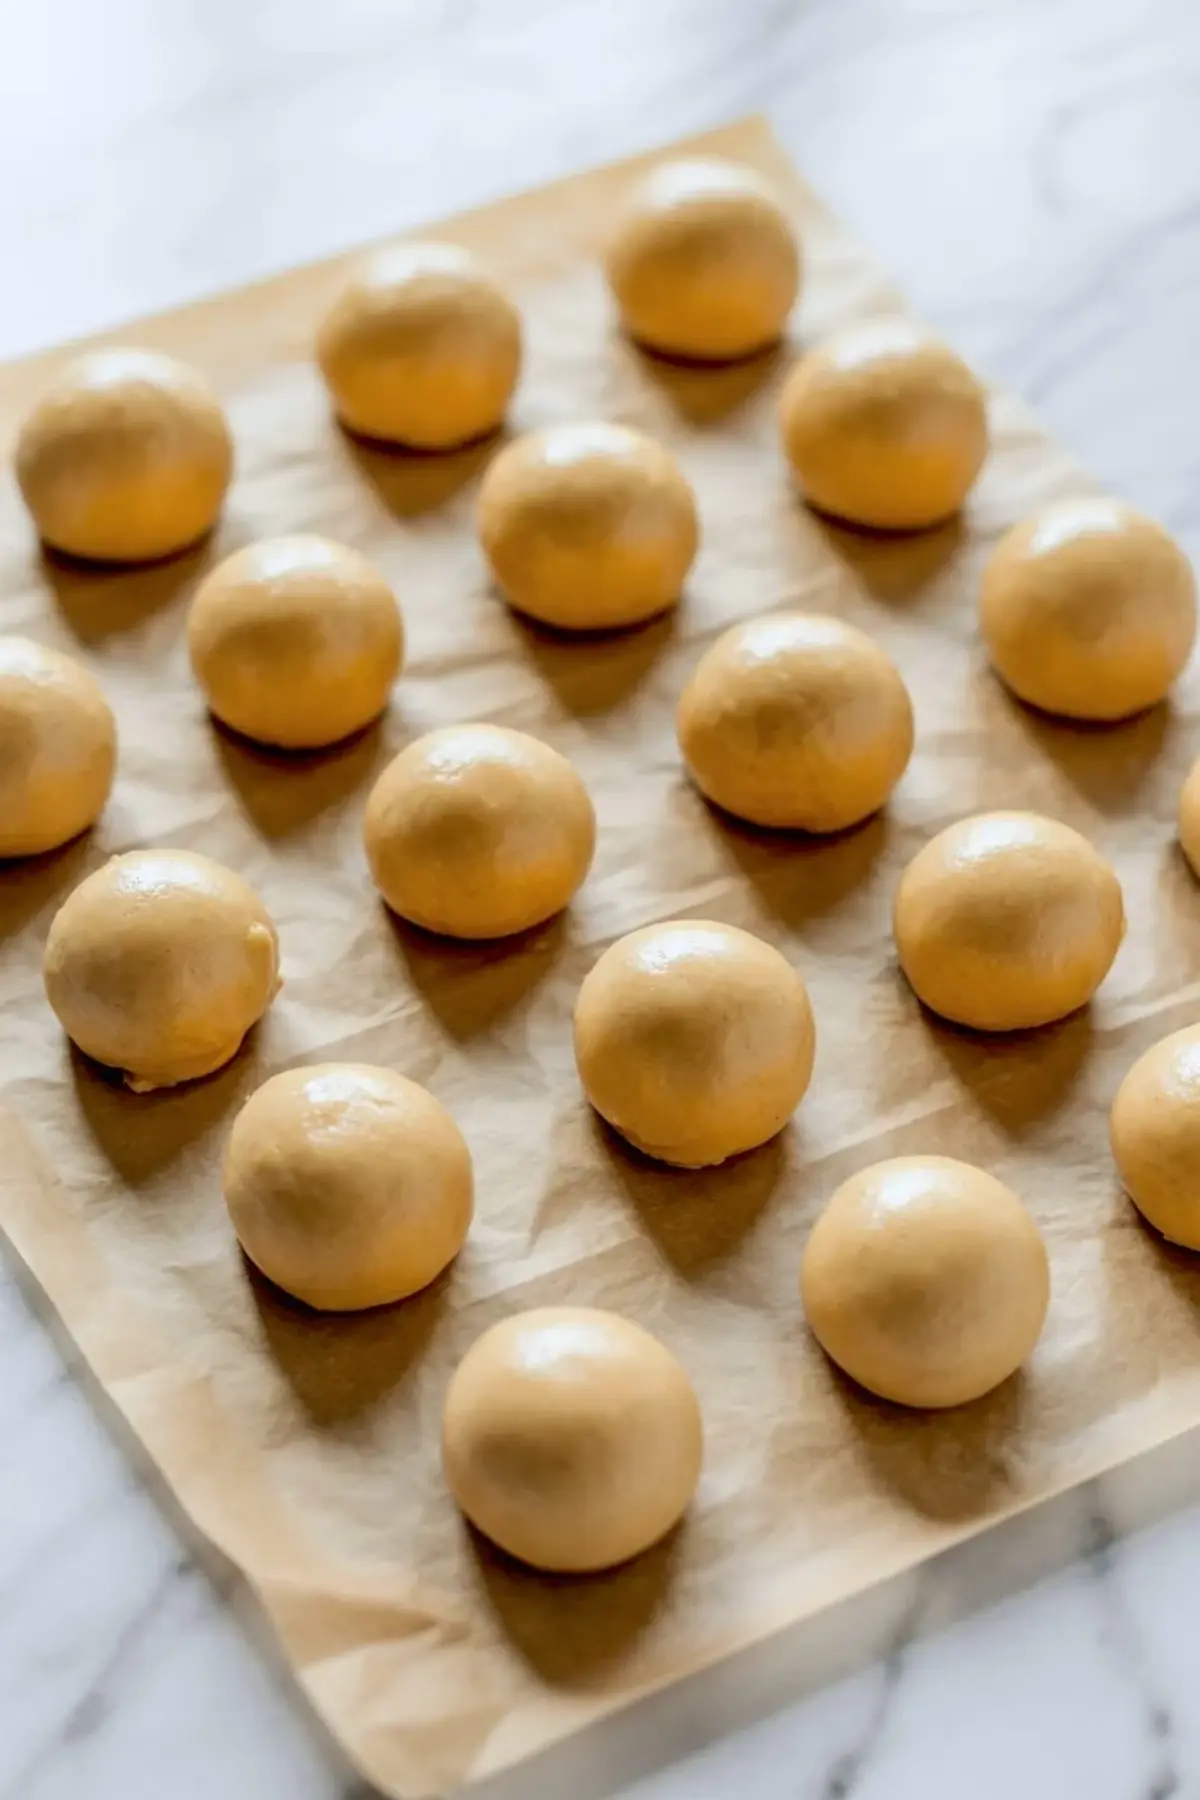
- SHAPE AND BAKE: Preheat the oven to 350°F (175°C) and line two baking sheets with parchment paper. Scoop tablespoon-sized portions of dough, roll them into balls, and place them 2 inches apart on the prepared sheets. Use your thumb or the back of a teaspoon to press an indent into the center of each ball, being careful not to press all the way through. Bake for 12–14 minutes, or until the edges begin to turn golden. If the centers puff during baking, gently press the indents again immediately after removing from the oven. Allow cookies to cool completely on the tray or a wire rack.
- ADD THE CARAMEL: In a small saucepan over low heat or in a microwave-safe bowl, melt the soft caramels with the heavy cream. Stir frequently until the mixture is completely smooth. Spoon a small amount of melted caramel into the indent of each cooled cookie. Let the caramel set at room temperature for about 15–20 minutes until it is firm but still soft to the touch.
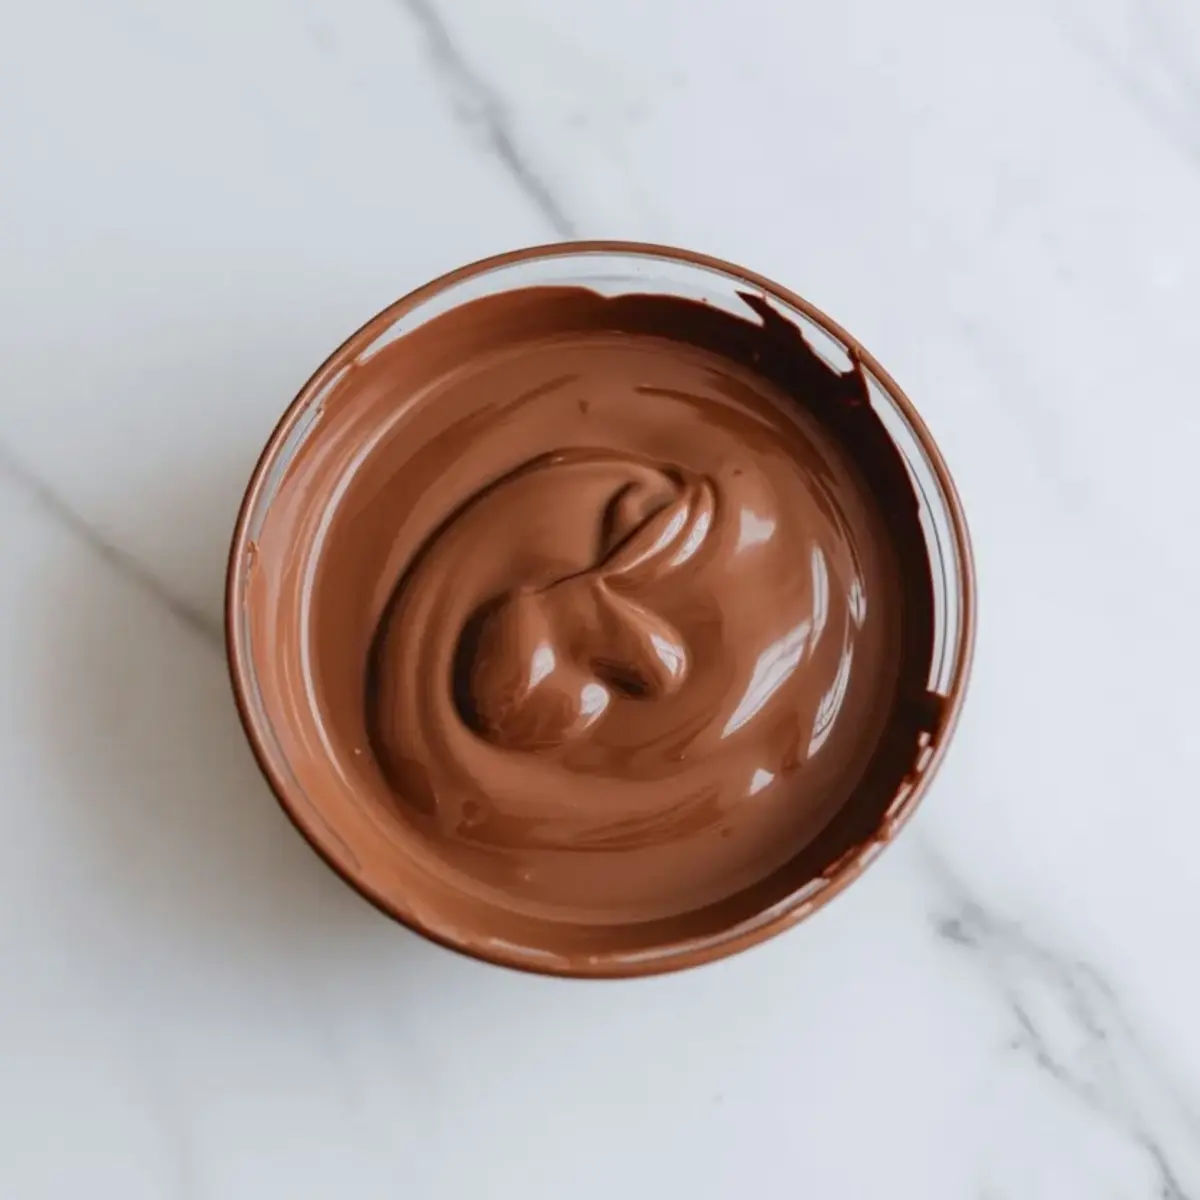
- FINISH WITH CHOCOLATE: In a microwave-safe bowl, melt the chocolate chips and oil in 30-second intervals, stirring between each until smooth and glossy. Spoon a small amount of melted chocolate over the caramel layer on each cookie and gently spread it with the back of a spoon. Let the cookies rest at room temperature or refrigerate briefly until the chocolate is fully set.
Notes
Cookies can be stored in an airtight container at room temperature for up to 5 days. If stacking, separate layers with parchment paper to prevent sticking.
Nutrition Information
Yield
24Serving Size
1Amount Per Serving Calories 276Total Fat 13gSaturated Fat 8gUnsaturated Fat 5gCholesterol 27mgSodium 58mgCarbohydrates 36gFiber 1gSugar 18gProtein 4g