
I have baked countless cupcakes in my kitchen, but pink velvet cupcakes hold a special place in my heart. A friend first requested them for a bridal shower, and I remember my excitement as I began mixing the batter.
The gentle hue brought a cheerful mood that blended well with soft floral decor, pastel ribbons, and bright laughter. That day marked the start of my fascination with these playful cupcakes. Now they appear at birthdays, casual get-togethers, and romantic celebrations, including Valentine’s Day. My enthusiasm for this recipe never fades, and I hope you enjoy it as much as I do.

Following a special diet?
Every recipe on this site can be converted to gluten-free, vegan, dairy-free, keto, nut-free or egg-free with adjusted ratios so nothing falls flat.
Try the Recipe Converter →Why Pink Velvet Cupcakes Stand Out
Pink velvet cupcakes offer a twist on traditional red velvet. The color sets them apart, and the flavor profile remains moist, light, and satisfying. I love the sweetness balanced by a hint of tang that comes from buttermilk. This recipe also includes a touch of cocoa, but the taste stays subtle. A swirl of vanilla buttercream seals the deal, creating a soft, creamy finish that always makes me smile.
These cupcakes bring joy to special moments, and they also work well with everyday cravings. I sometimes bake a batch and freeze part of them for a later treat, and they never lose their charm.
Key Ingredients for Moist Pink Velvet Cupcakes
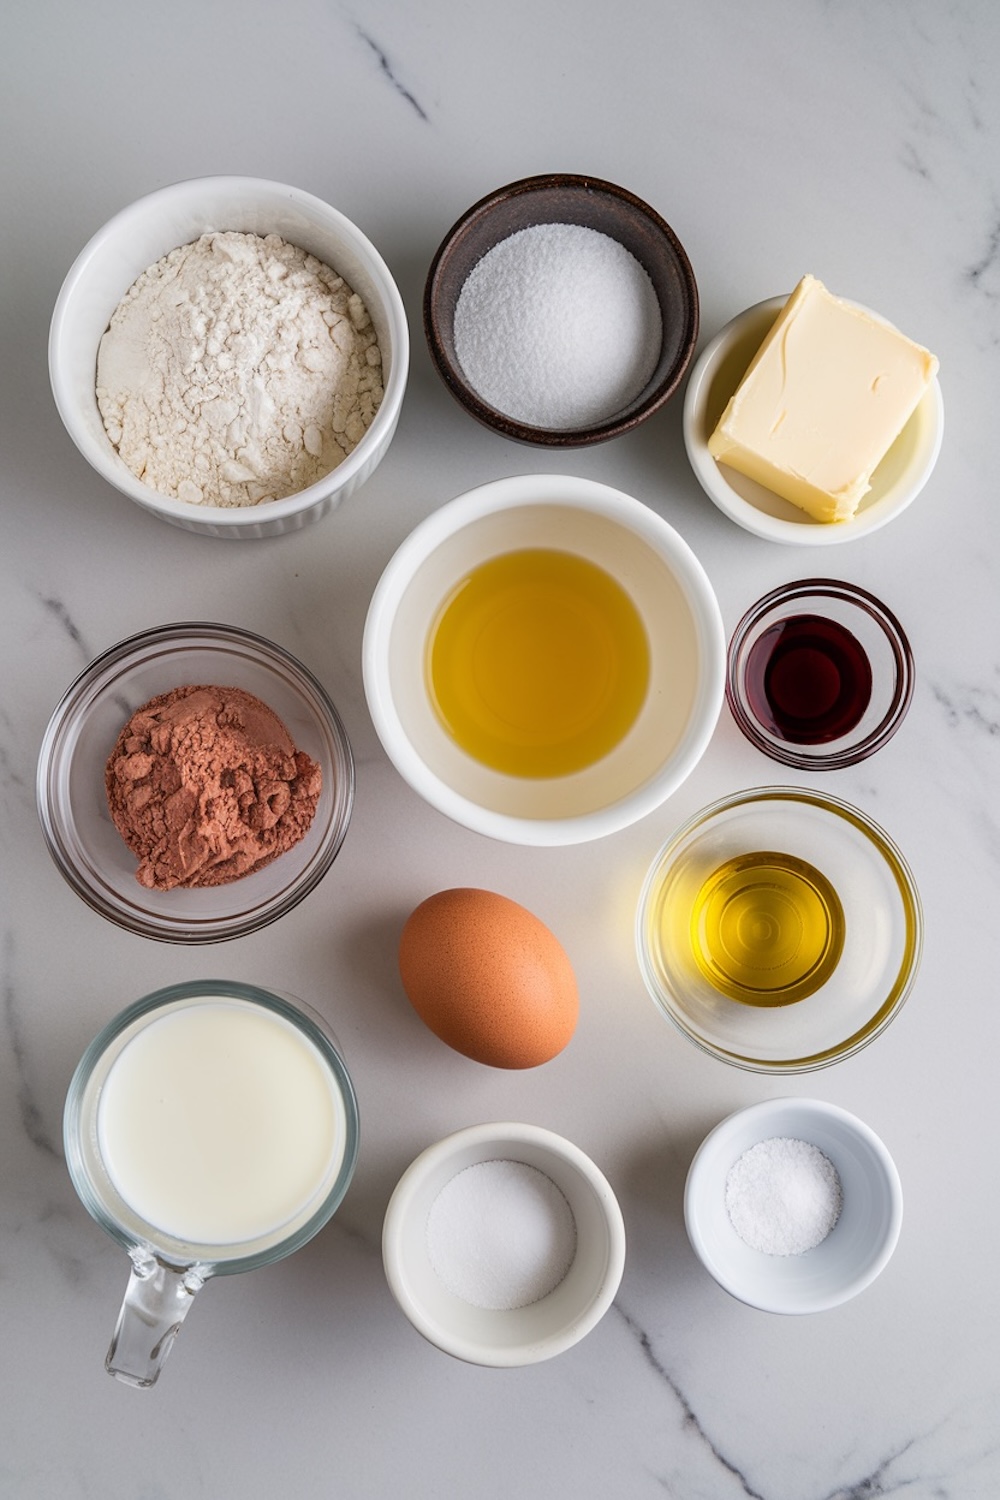
I rely on a few staples to make these cupcakes stand out. Flour and sugar provide structure and sweetness, but the real magic comes from a combination of butter, oil, and buttermilk. Butter gives a rich flavor, and oil adds lightness. Buttermilk encourages a tender crumb and offers a slight tang. Cocoa powder adds a faint depth in the background, though I keep it minimal to let the pink color shine.
Gel-based pink food coloring delivers a bold hue, and the intensity depends on how many drops you add. Vanilla extract ties everything together, making each bite smooth and comforting.
My Tried-and-True Batter Preparation Method
I begin by creaming softened butter, oil, and sugar. This step creates a soft, airy base. My arm sometimes aches if I skip the mixer, but it feels worth it for the result. Once that mixture looks pale and fluffy, I add eggs and vanilla extract.
The scent of vanilla often reminds me of childhood afternoons spent baking with my grandmother, who taught me that small details in a recipe make all the difference. After combining these ingredients, I shift focus to the dry portion. Flour, a bit of cocoa powder, baking soda, and salt get sifted together. Sifting avoids clumps and encourages an even texture in the final cupcake.
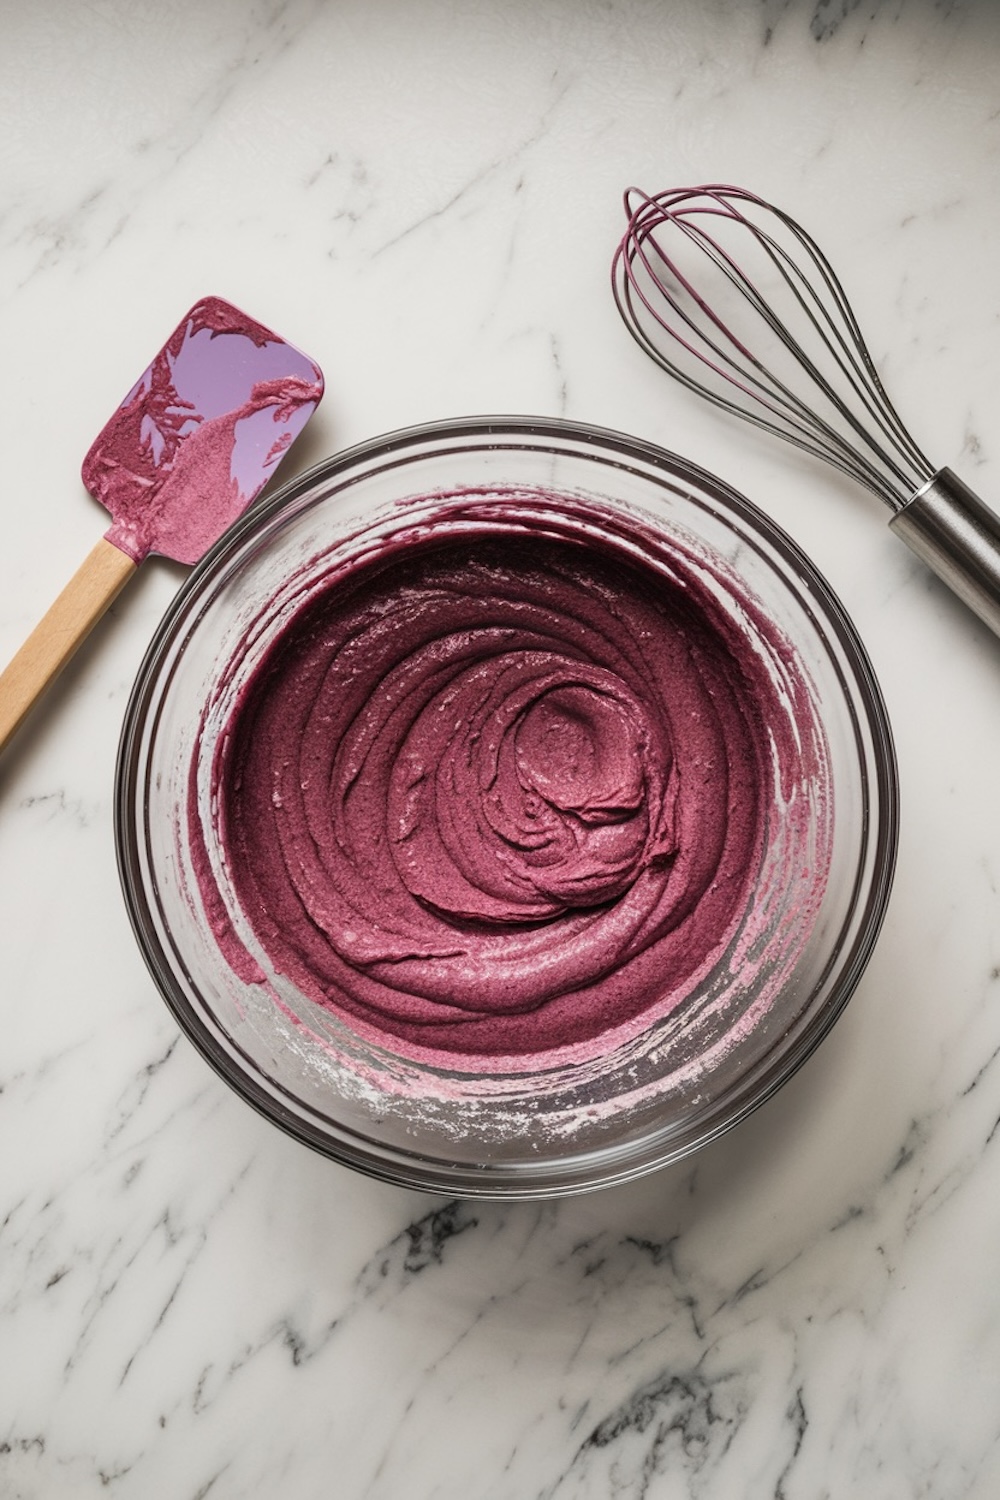
I alternate adding the dry mix with the buttermilk, stirring gently after each addition. My goal is to combine everything without overmixing, which helps prevent a dense cupcake. A splash of white vinegar meets the baking soda and sets off a slight fizz, acting as a quick leavening boost. That is the moment I add the pink food coloring, drop by drop. Some days I aim for a bright fuchsia, and other times I choose a pale blush. The choice depends on my mood or the theme of the party.
Smooth Baking and Ideal Timing
I line my cupcake tin with paper liners, then fill each about two-thirds. An ice cream scoop helps me get consistent portions, though a spoon works fine as well. My oven typically stays at 350°F (175°C). Eighteen minutes is my sweet spot for baking.
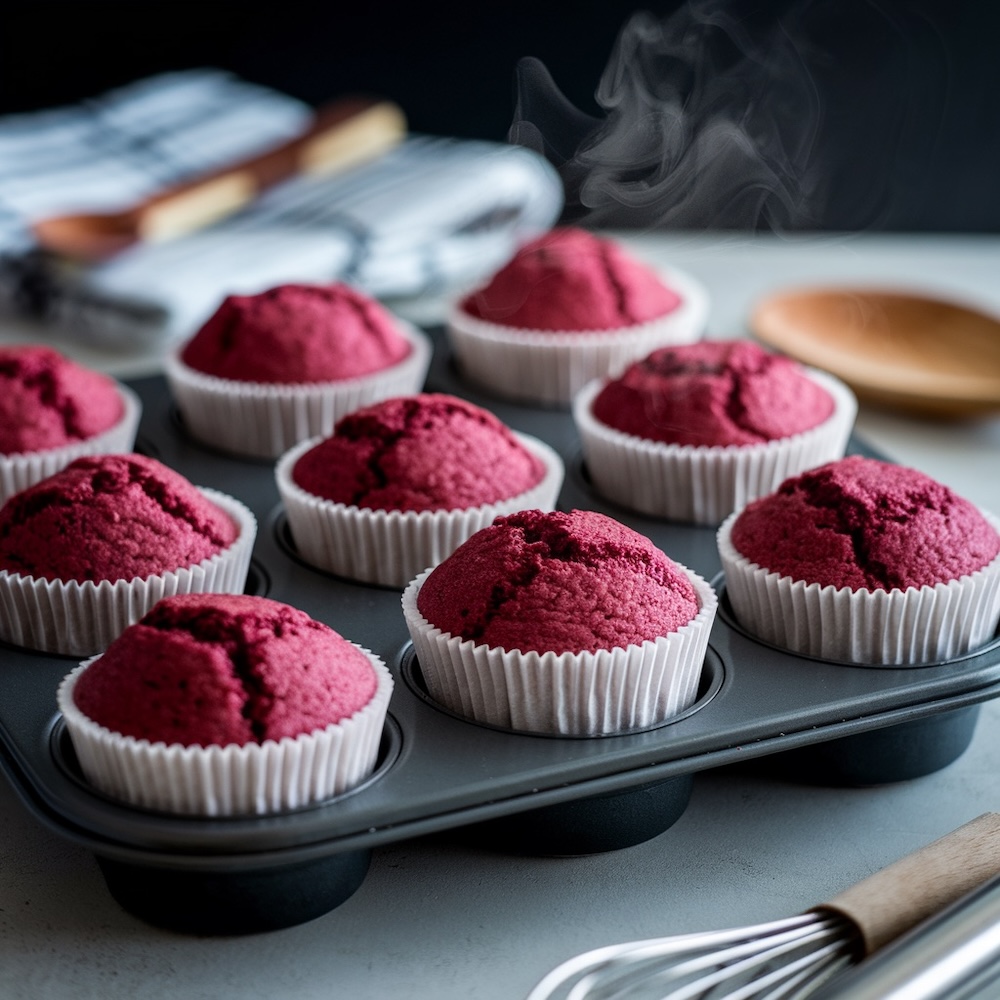
A toothpick inserted into a cupcake should come out clean, so I check at the 17-minute mark. These cupcakes rise with soft, rounded tops that beg for frosting. I find it best to cool them in the tin for a few minutes, then transfer them to a wire rack. This extra airflow helps them cool completely.
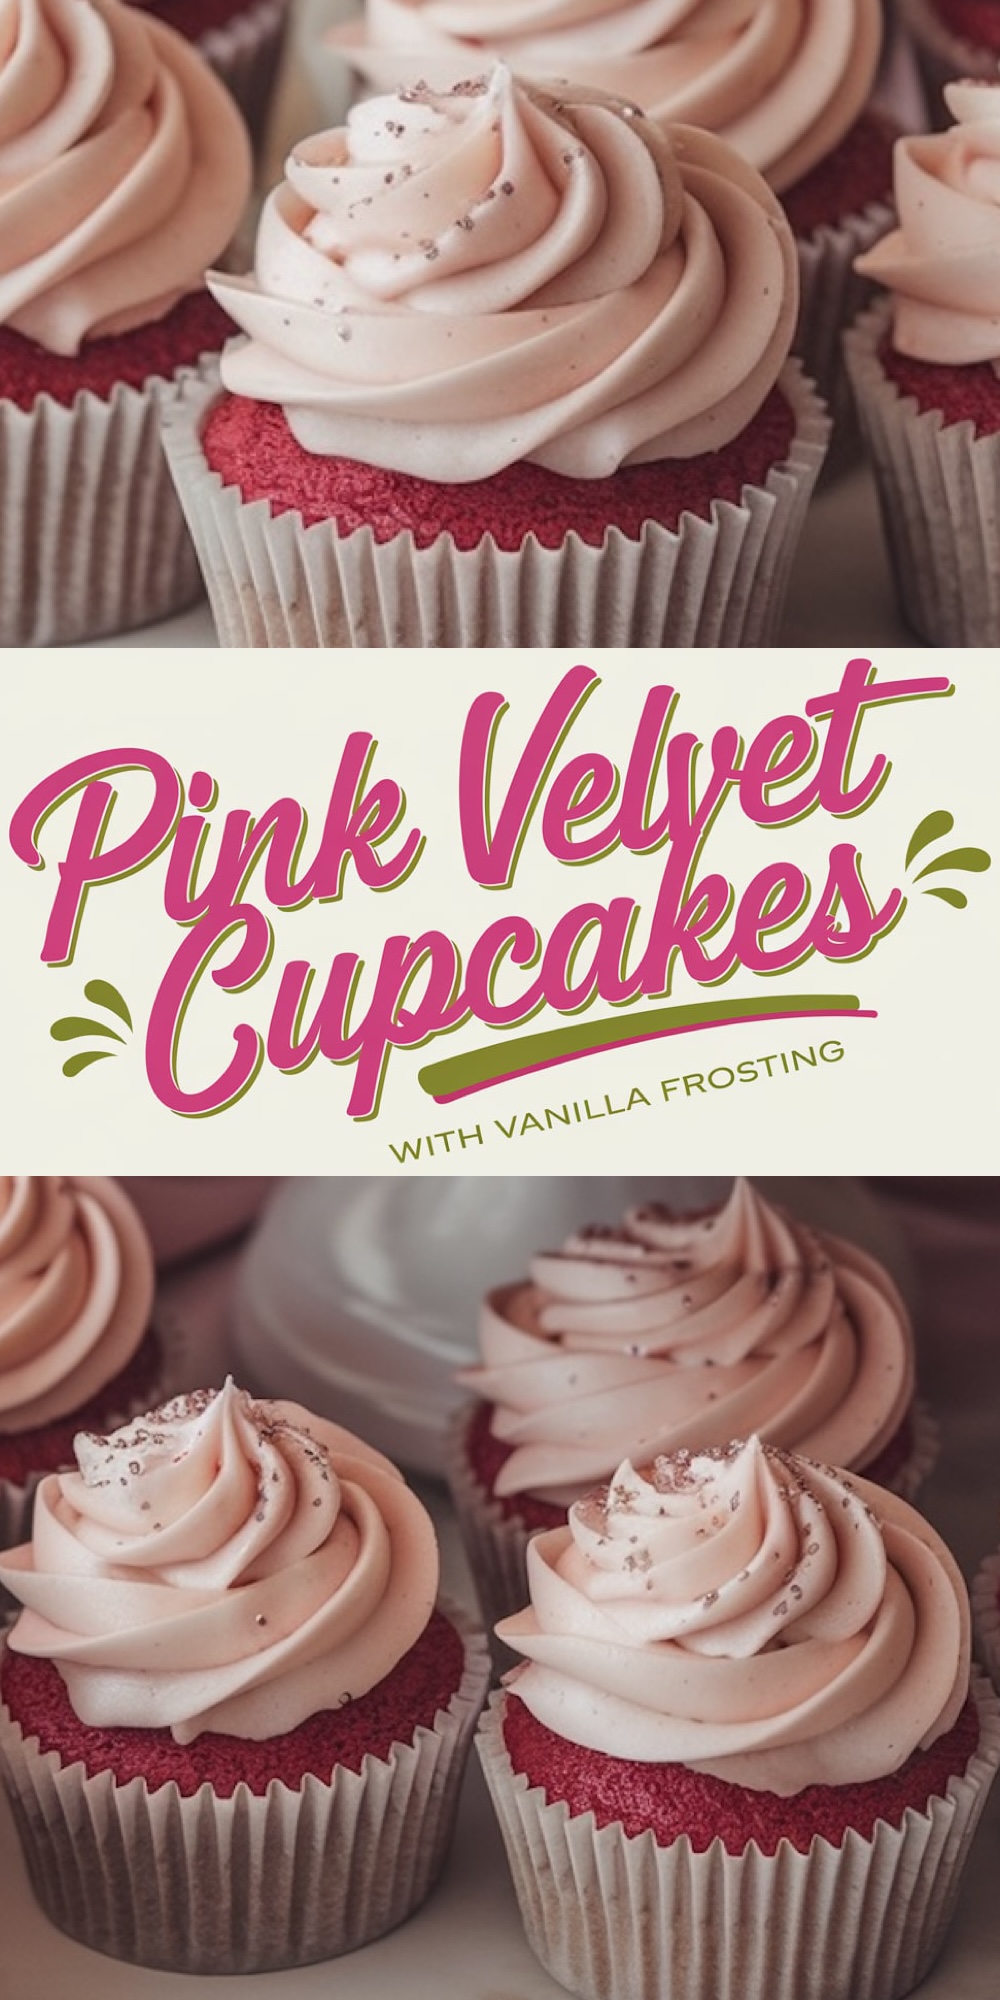
Creating a Fluffy Vanilla Buttercream
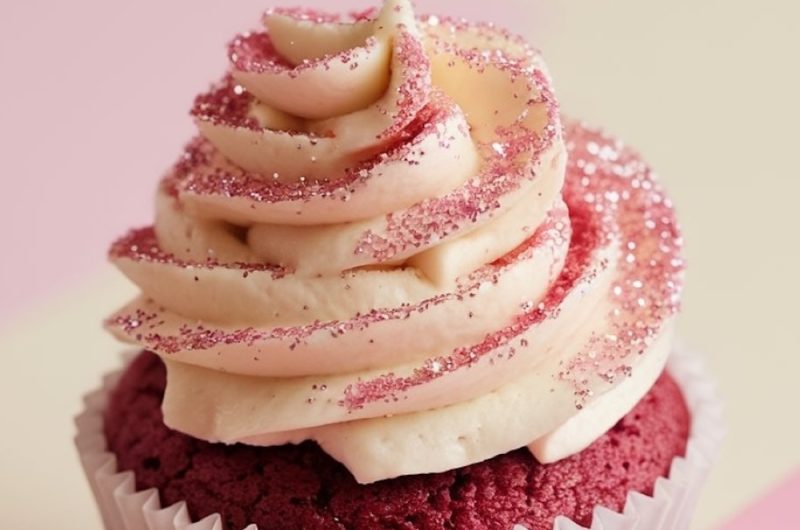
The frosting on these cupcakes matters just as much as the cake itself. I start by beating softened butter until it looks creamy and smooth. Powdered sugar goes in gradually, a small scoop at a time, to avoid a cloud of sugar drifting across my kitchen. A bit of salt and vanilla extract balance the sweetness, and heavy cream helps achieve a spreadable consistency. I let the mixer run for a couple of extra minutes. This extra step whips air into the buttercream, producing a light texture. That smooth swirl on top always gives the cupcake a polished look.
Decorating Tips and Presentation Ideas
I like to use a piping bag with a star tip for a fancy swirl, though a plain round tip or a simple offset spatula also creates an appealing look. A dusting of pink sanding sugar or edible glitter adds sparkle, and I sometimes place a small candy heart on top if I bake these for Valentine’s Day. I have lined them up on a dainty tray for an elegant display, and I have also popped them into tall cupcake boxes tied with ribbons as gifts. Each approach brings its own charm.
Valentine’s Day Inspiration

I see these cupcakes as a fun project for Valentine’s Day. They add color to a romantic dinner table and taste wonderful paired with fresh strawberries. I recall one Valentine’s Day evening when I surprised my partner with these sweet cupcakes and a simple homemade card. The bright icing and fluffy cake added an extra dose of delight to our evening. The memory still warms my heart, and I often repeat that tradition. Baking something by hand feels like a personal way to show care and affection.
A Few Tips for Success
I pull all ingredients out of the fridge about 30 minutes before I start. Room temperature butter, eggs, and buttermilk always blend better. I pay attention to mixing times. Overmixing can lead to dense cupcakes, so I stop once I see the flour disappear. If my frosting looks too stiff, I add a spoonful of cream. If it feels too runny, I add more sugar, one small spoon at a time. Little tweaks often make a big difference.
Enjoying Each Bite and Making Memories
I believe baking should spark joy. These pink velvet cupcakes manage to do that, partly due to their playful color and partly due to the sweet taste that invites a second helping. They store well in an airtight container for a couple of days, but they rarely last that long at my house.
Friends often text me pictures of their own pink velvet creations, each swirl of frosting more joyful than the last.
I find that heartwarming and keep telling them to make a quick stop at my cupcakes page for even more ideas.
Serving Suggestions and Sharing
I set these cupcakes out at baby showers, family barbecues, and small dinner parties. Light, fruity beverages pair nicely, and so does a big glass of cold milk. I also freeze plain cupcakes and frost them fresh on the day I plan to serve. That trick keeps them tasting as if they just emerged from the oven. If you have extras, package them in a lovely box with a bright ribbon. A home-baked surprise always brings delight, and pink velvet cupcakes shine as a thoughtful present.
Concluding Thoughts
I encourage you to give pink velvet cupcakes a try, especially around Valentine’s Day or whenever you crave something pretty and delicious. This recipe can brighten a Monday or grace a fancy dessert table. My friends and family know me for these cupcakes, and I feel a boost of joy each time I catch the aroma of vanilla and sugar in my kitchen.
May these cupcakes bring you and your loved ones sweet memories and happy moments.
Pink Velvet Cupcakes with Vanilla Buttercream Frosting
Course: Cake Ideas12
servings20
minutes18
minutes320
kcalIngredients
For the Pink Velvet Cupcakes
1 1/2 cups all-purpose flour1 cup granulated sugar
1/4 cup unsalted butter, softened
1/4 cup vegetable oil
1 large egg
2 tsp vanilla extract
1 tbsp unsweetened cocoa powder
1/2 cup buttermilk, at room temperature
1/2 tsp baking soda
1/2 tsp white vinegar
1/4 tsp salt
Pink food coloring (gel or liquid, as desired for color intensity)
For the Vanilla Buttercream Frosting
1 cup unsalted butter, softened4 cups powdered sugar, sifted
2 tsp vanilla extract
2-3 tbsp heavy cream or milk (adjust for consistency)
A pinch of salt
Pink sanding sugar or edible glitter for decoration
Steps
- Step 1: Prepare the Oven and Cupcake Pan
- Preheat your oven to 350°F (175°C) and line a 12-cup muffin pan with cupcake liners.
- Step 2: Make the Pink Velvet Cupcake Batter
- In a large bowl, beat together the softened butter, sugar, and vegetable oil until light and fluffy, about 2-3 minutes.
- Add the egg and vanilla extract, beating until fully incorporated.
- In a separate bowl, sift together the flour, cocoa powder, and salt.
- Add half of the dry ingredients to the wet ingredients, mixing on low speed until just combined.
- Pour in the buttermilk, followed by the remaining dry ingredients, mixing gently to avoid over-mixing.
- In a small bowl, combine the baking soda and vinegar (it will bubble up). Quickly add this mixture to the batter and mix well.
- Add pink food coloring, a few drops at a time, until you reach your desired shade of pink. Stir gently to ensure the color is evenly distributed.
- Step 3: Bake the Cupcakes
- Fill each cupcake liner about 2/3 full with batter.
- Bake in the preheated oven for 18-20 minutes, or until a toothpick inserted into the center of a cupcake comes out clean.
- Remove the cupcakes from the oven and let them cool in the pan for 5 minutes, then transfer to a wire rack to cool completely.
- Step 4: Prepare the Vanilla Buttercream Frosting
- In a large mixing bowl, beat the softened butter on high speed until creamy and smooth, about 2 minutes.
- Gradually add the powdered sugar, one cup at a time, beating on low speed until combined.
- Add the vanilla extract and a pinch of salt, then beat on medium-high speed until fully incorporated.
- Slowly add the heavy cream, one tablespoon at a time, until the frosting reaches a smooth, spreadable consistency.
- Continue beating on high speed for 2-3 minutes to make the frosting extra fluffy.
Step 5: Frost and Decorate- Using a piping bag fitted with a large star tip, pipe a generous swirl of frosting onto each cooled cupcake.
- For a touch of sparkle, sprinkle each cupcake with pink sanding sugar or edible glitter.