
I discovered Robin’s Nest Cupcakes during a casual outing with friends and felt an instant spark of inspiration. The chocolate sponge, combined with candy eggs on top, created an exciting sight that made everyone pause and admire. That memory set me on a quest to recreate these cakes in my own kitchen.
I shared my early attempts with my sister, who always encourages my baking adventures. She appreciated the playful look and loved how the creamy frosting complemented the chocolate base. Now I prepare them every spring to celebrate the new season and bring sweet joy to the table.
Following a special diet?
Every recipe on this site can be converted to gluten-free, vegan, dairy-free, keto, nut-free or egg-free with adjusted ratios so nothing falls flat.
Try the Recipe Converter →Chocolate Cupcake Base: My Go-To
I learned through trial and error that a simple mix of flour, sugar, cocoa powder, and other basic ingredients can produce a satisfying treat. A good measure of dark cocoa powder delivers a strong flavor that appeals to chocolate fans. The result is a moist interior that balances sweetness with a slight bitter edge.
My mother used to say that rich chocolate batters bring people together. She was right because even neighbors ask for an extra cupcake when they smell these baking in my kitchen. Anyone seeking a chocolate-based dessert appreciates the bold taste that emerges from this batter.
Moisture Boost with Coffee and Buttermilk
I usually rely on buttermilk for its gentle tang and ability to keep the crumb tender. Some days I substitute regular milk mixed with a little vinegar when buttermilk isn’t available. My friends report they can’t taste the vinegar, but they do notice how soft the cupcakes are.
A small splash of coffee or hot water creates the smooth texture and amps up the chocolate element. I personally prefer coffee because it deepens the cocoa essence without overpowering the recipe. People who are not coffee fans rarely sense any strong flavor once these cupcakes bake fully.
Creating the Fluffy Buttercream
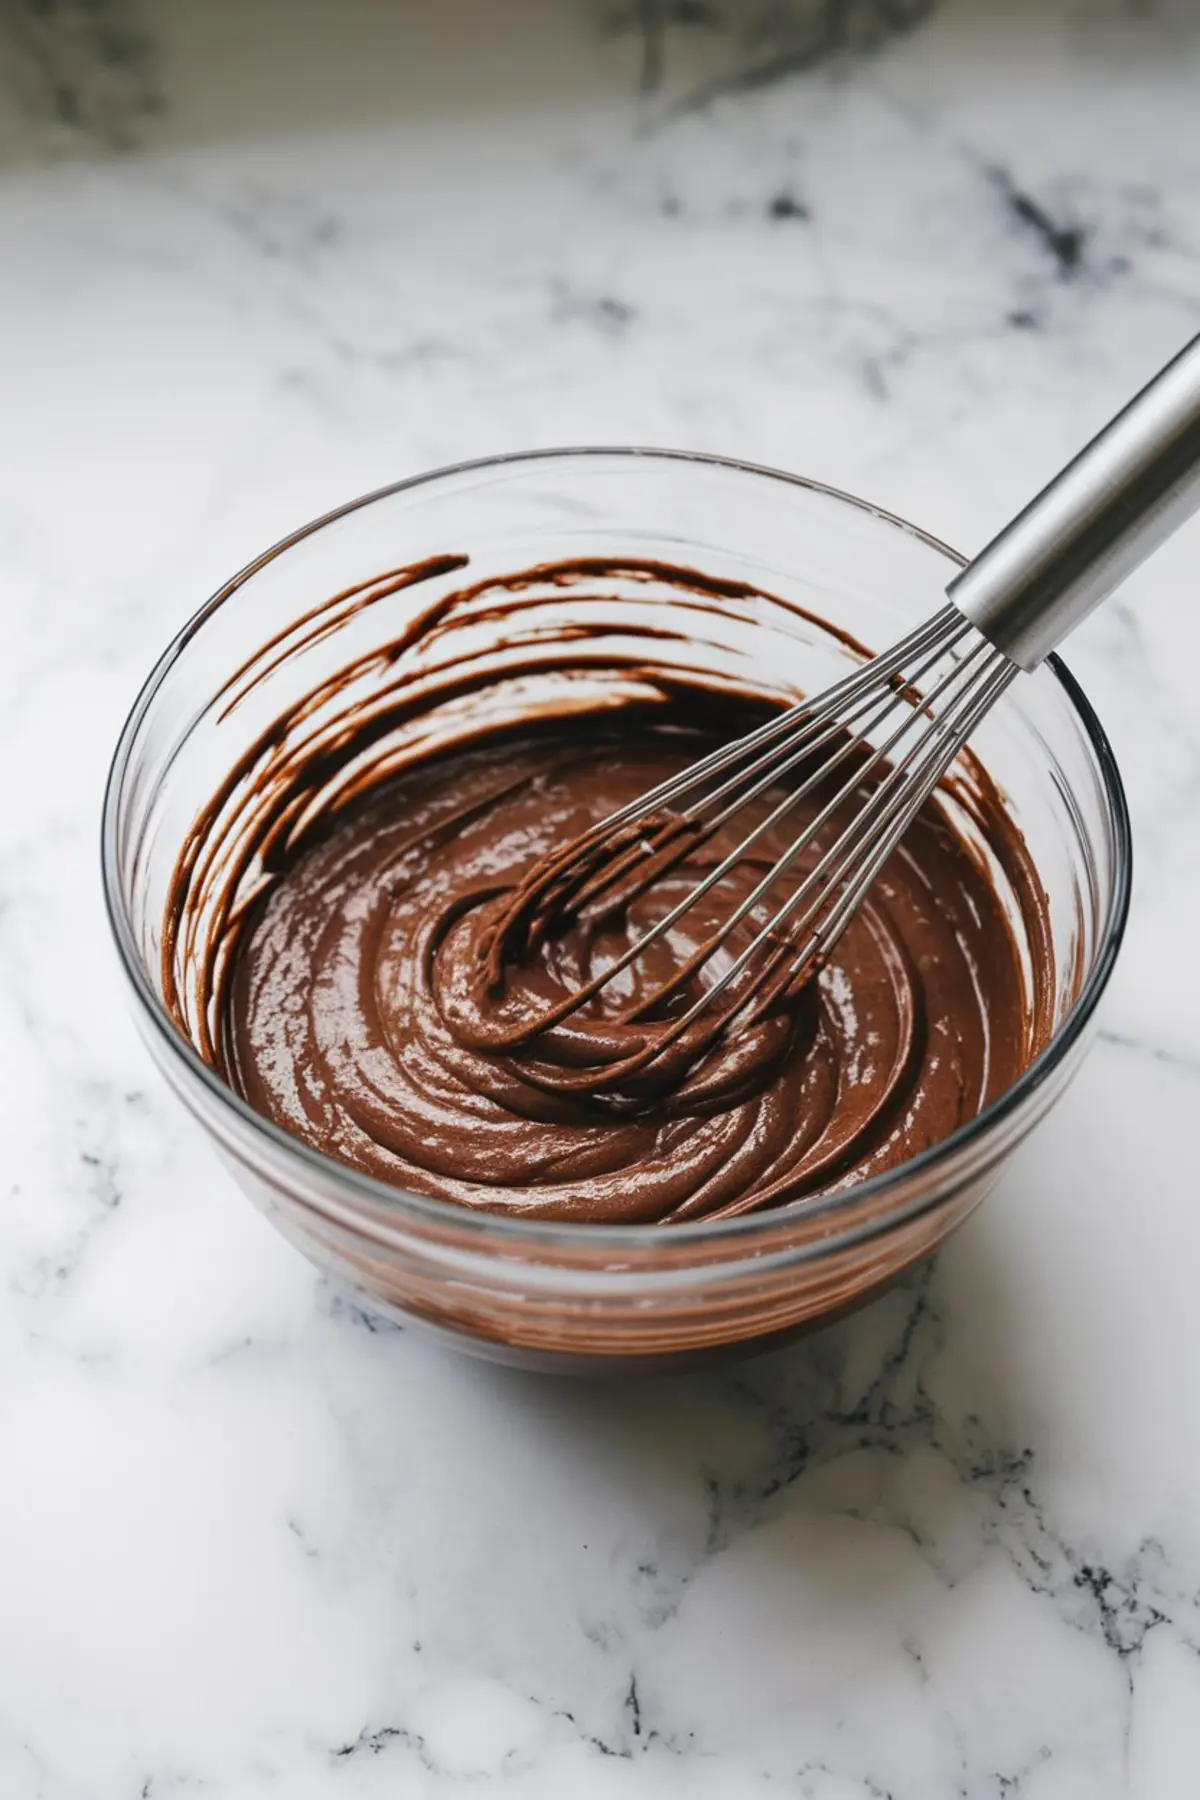
I spend extra moments whipping the softened butter so the final frosting feels airy and light. The gradual addition of powdered sugar and cocoa encourages the mixture to combine without lumps. A dash of cream and vanilla extract rounds out the frosting, making each swirl taste rich and satisfying.
My first encounter with this approach happened during a family gathering, where my aunt insisted we whip the butter on its own for a few minutes. That advice changed everything by transforming dense frosting into a luscious topping. I never skip that step now, because it leads to a texture that pipes effortlessly onto any cupcake.
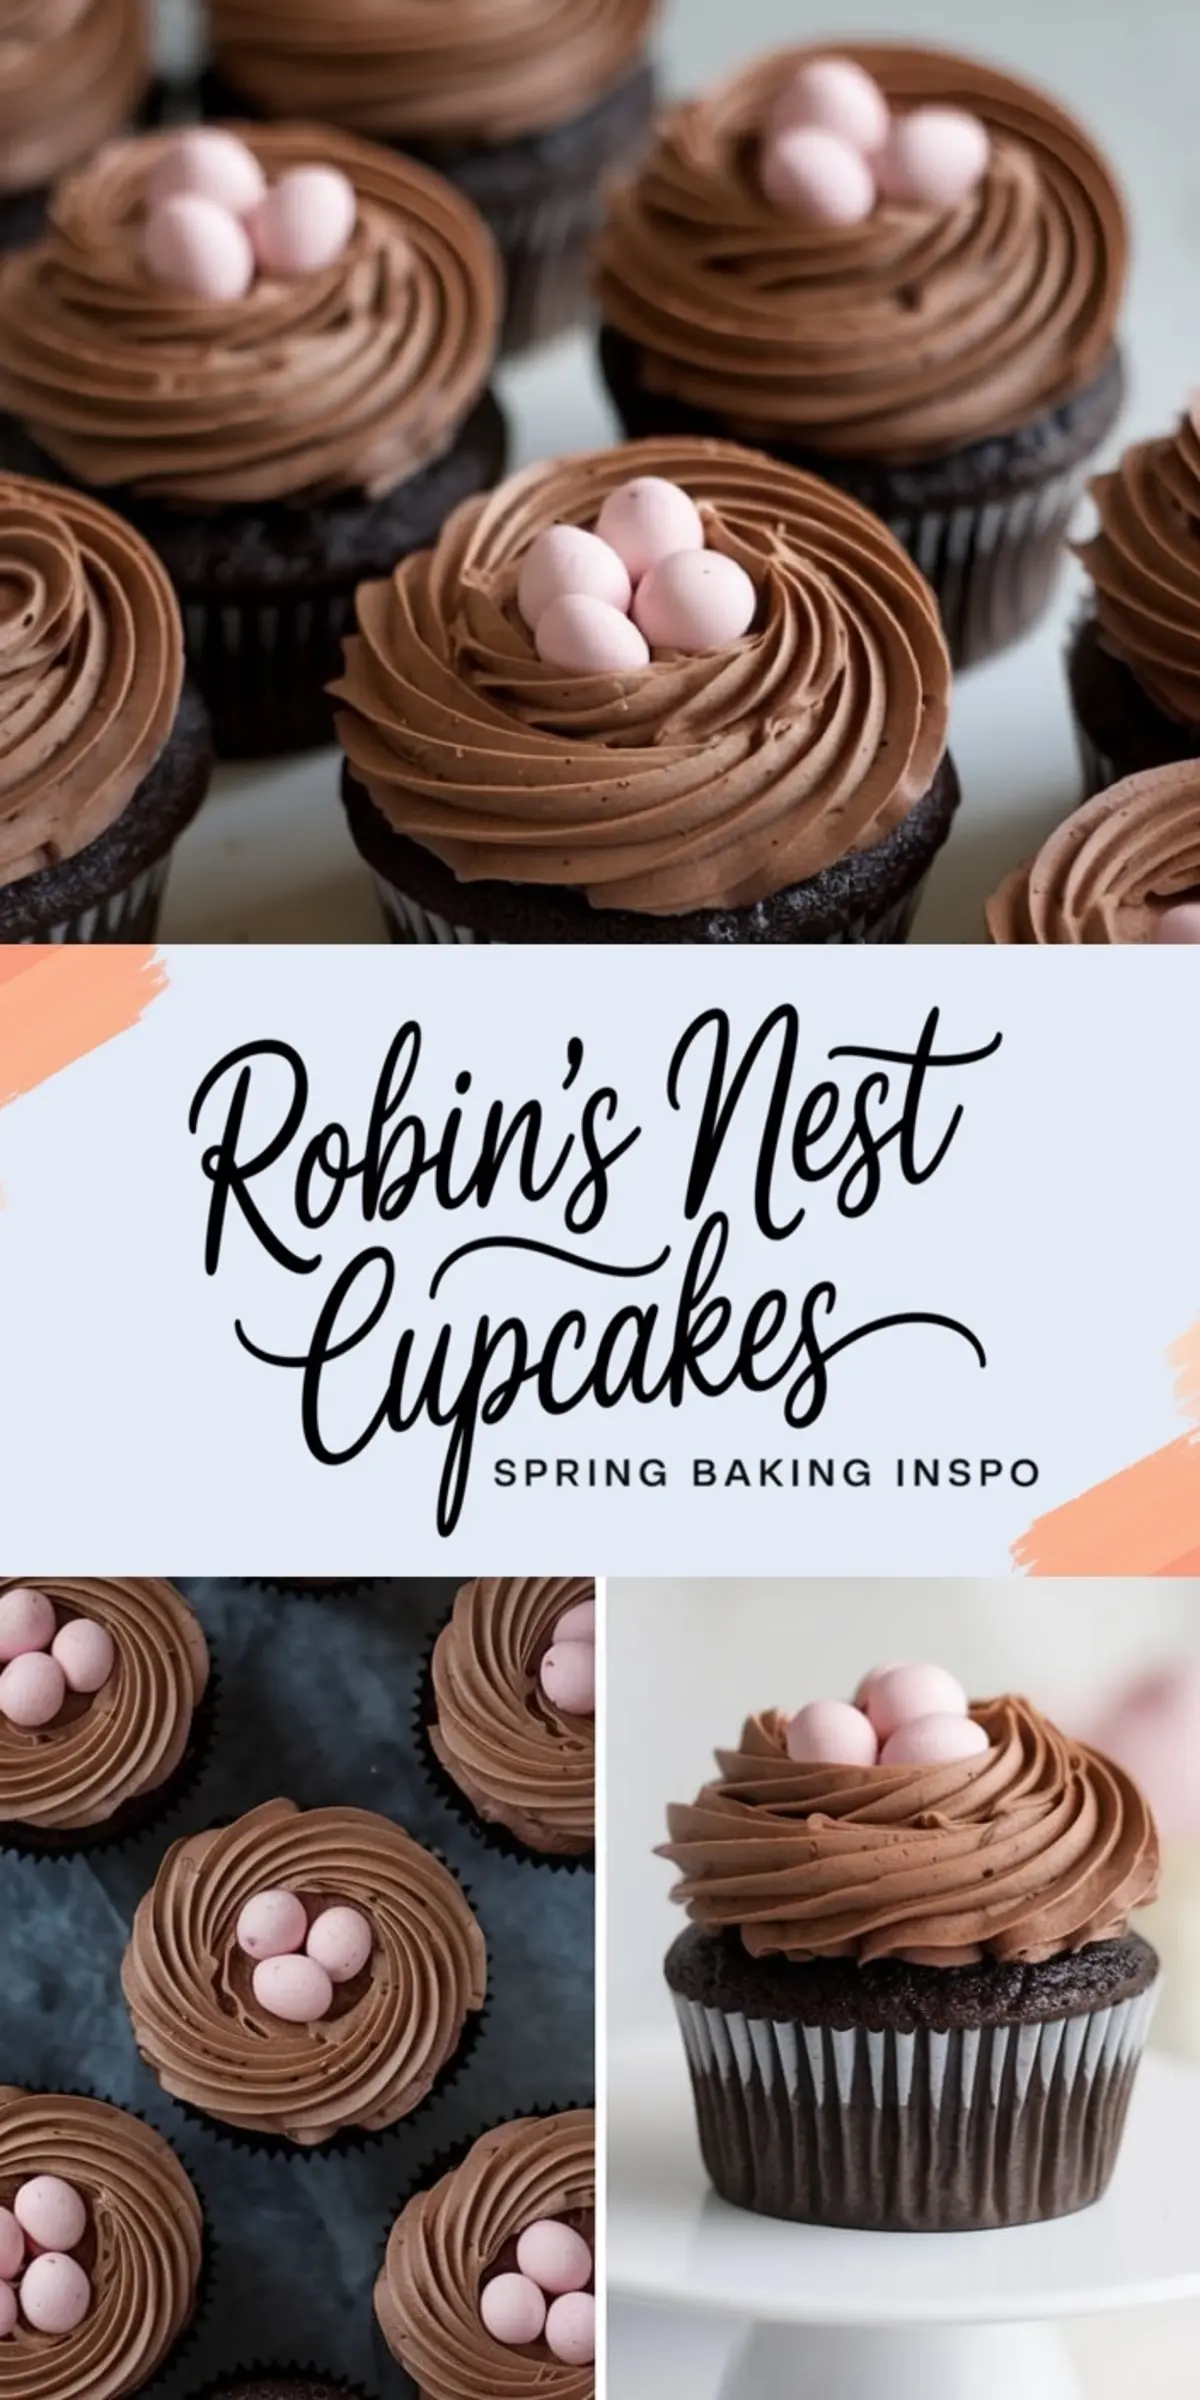
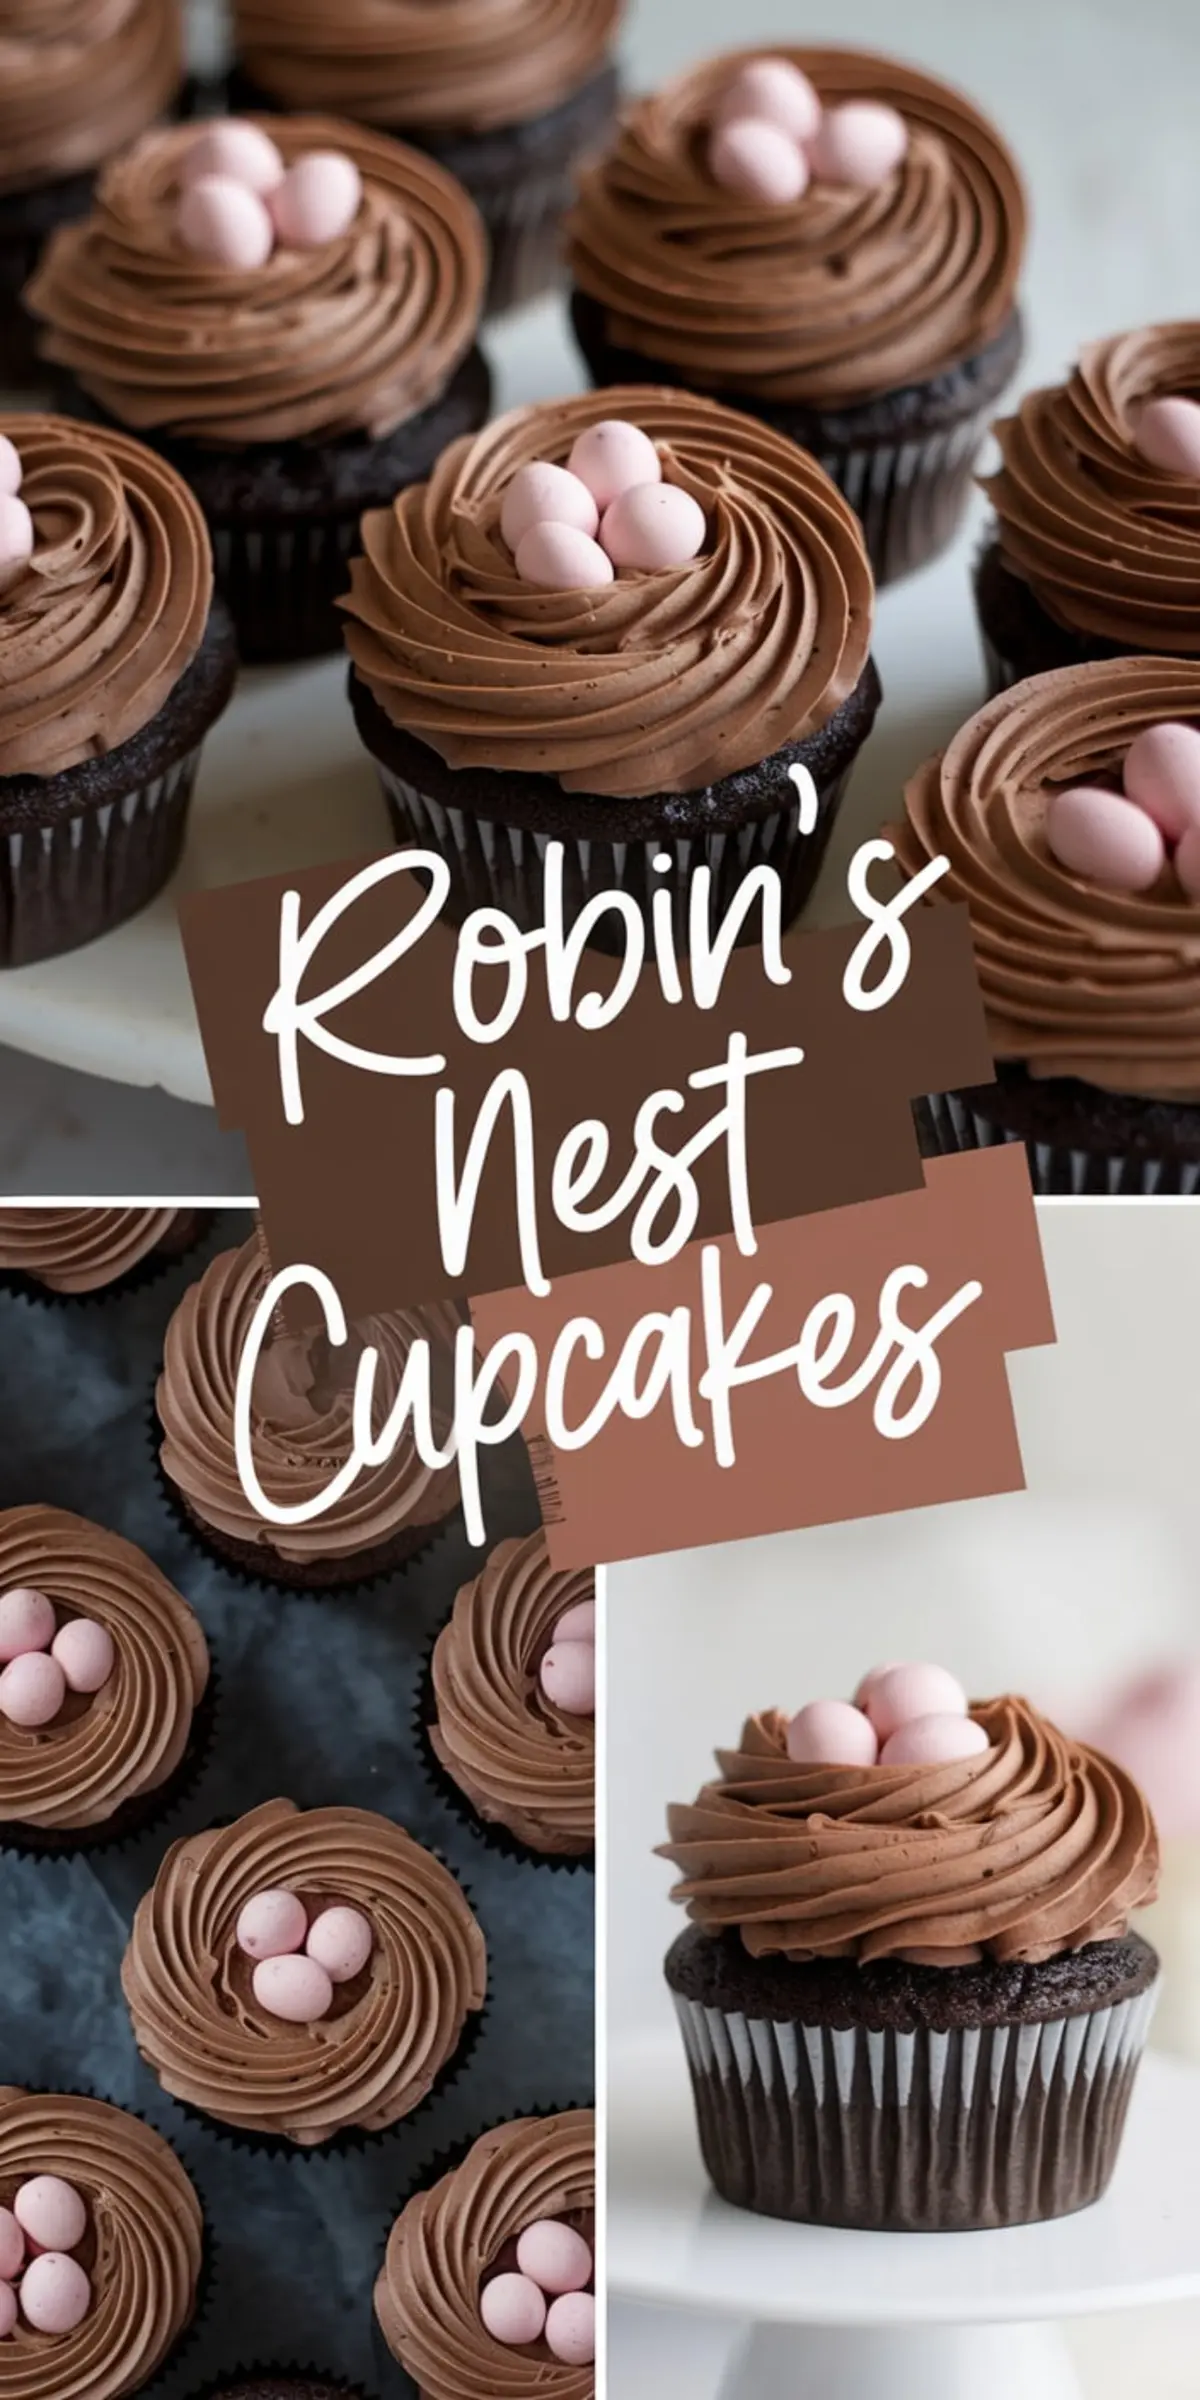
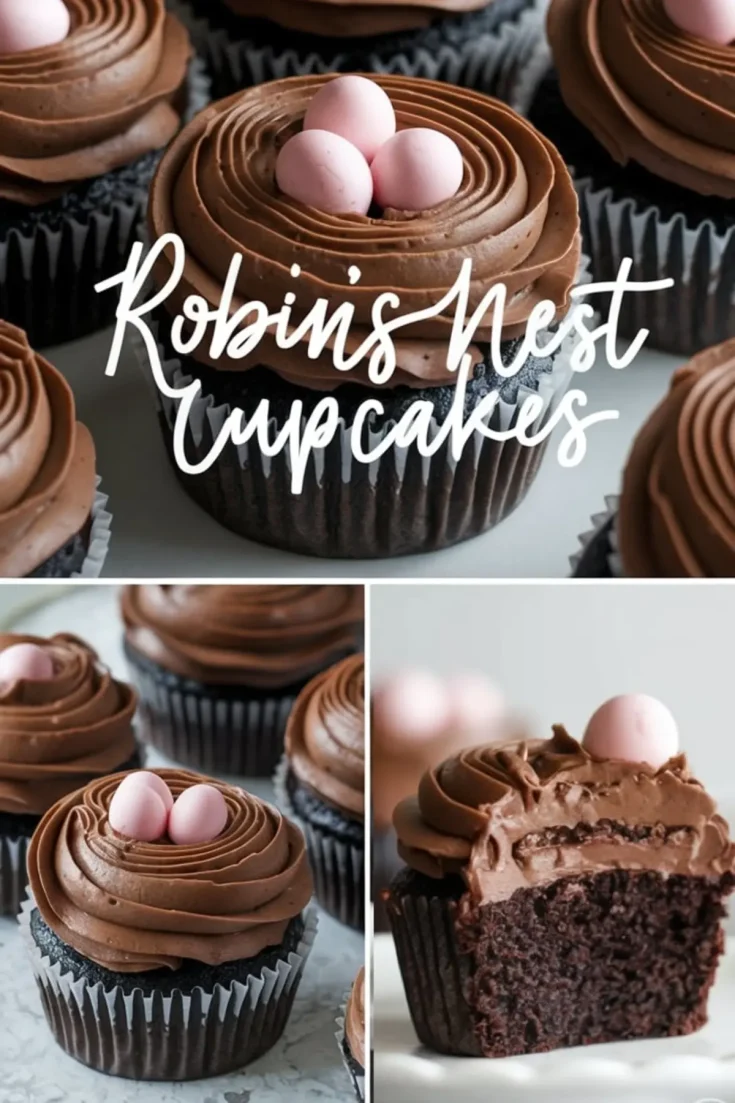
Shaping the Bird Nests
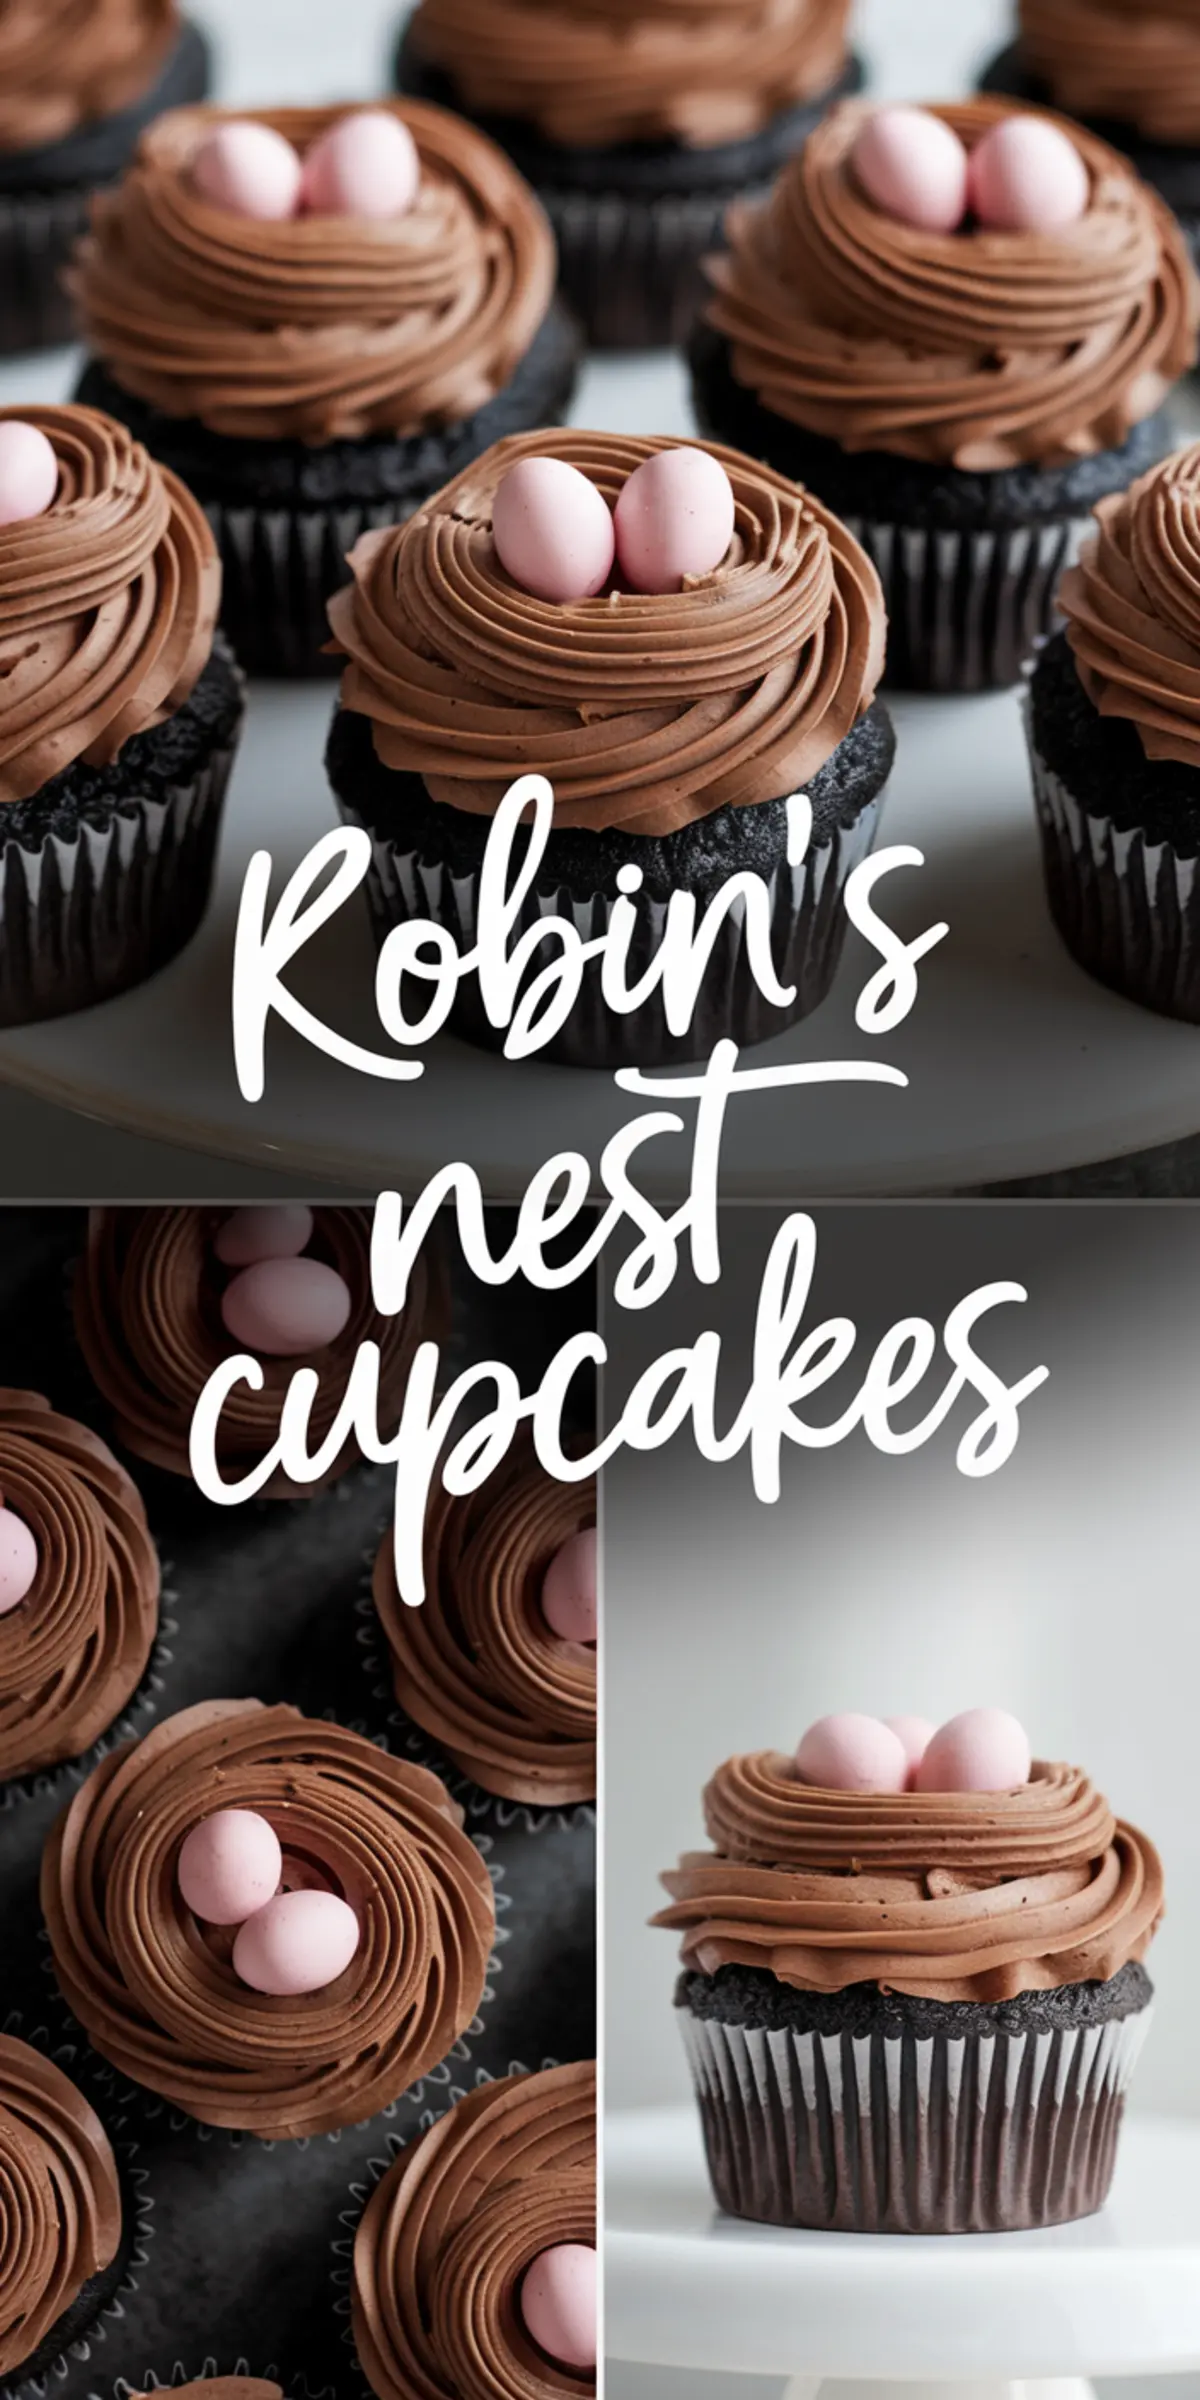
I use a large star piping tip, starting from the center of each cupcake and moving outward in a steady spiral. This technique creates a spiral foundation that I build up to form a nest appearance. My cousins always volunteer to help, and they find this step easier than it looks once they get the hang of it.
Early on, I worried that the frosting would flatten, but consistency plays a key role in maintaining the design. A thicker frosting holds each swirl and leaves a neat space in the center. That small groove becomes the perfect spot for candy eggs or any colorful garnish that suits the theme.
Candy Eggs for an Eye-Catching Finish
I look forward to placing those miniature candy eggs in the frosted nests. The pastel tones add a bright accent to the chocolate hue and make an appealing dessert presentation. Guests often chat among themselves, guessing which color egg they might get first.
Seasonal candy eggs are easy to find around spring, so I stock up and keep some on hand. Sometimes I experiment with different shades or even candy flowers for a more dramatic display. The decorative step remains the most thrilling moment before I serve these playful cupcakes.
Serving, Storing, and Sharing
I keep these cupcakes in an airtight container at room temperature if I plan to serve them soon. If they need to last longer, I set them in the refrigerator and remove them about half an hour before serving so the frosting softens. My family enjoys them most when the buttercream has that creamy texture that melts gently on the tongue.
I encourage guests to add their personal spin, like swapping the candy eggs for small chocolate birds or sprinkles. My neighbor once tried a fruity garnish, which brought a fresh twist to our usual approach. People return for second helpings, so I see little reason to store any extras after a big gathering.
Another Easter Treat to Try
I keep finding new ways to celebrate spring, and cupcakes always seem like a cheerful choice. Anyone who enjoys themed baking might want to look at my Easter Bunny Egg Cupcakes for more dessert ideas. They offer a fun style that fits well with bright decorations and happy family moments.
Pin and Chat with Me
I invite you to pin this recipe for later on your favorite board and revisit it whenever you plan a sweet surprise. Feel free to share your questions or experiences in the comments, because I’d love to hear how your cupcakes turned out. Let’s inspire each other to keep baking and smiling through every season.
Robin’s Nest Cupcakes Recipe
These Robin’s Nest Cupcakes are chocolate cupcakes topped with creamy chocolate buttercream piped to look like bird nests and decorated with candy eggs. They are a festive spring dessert and make a beautiful addition to Easter or seasonal celebrations.
Ingredients
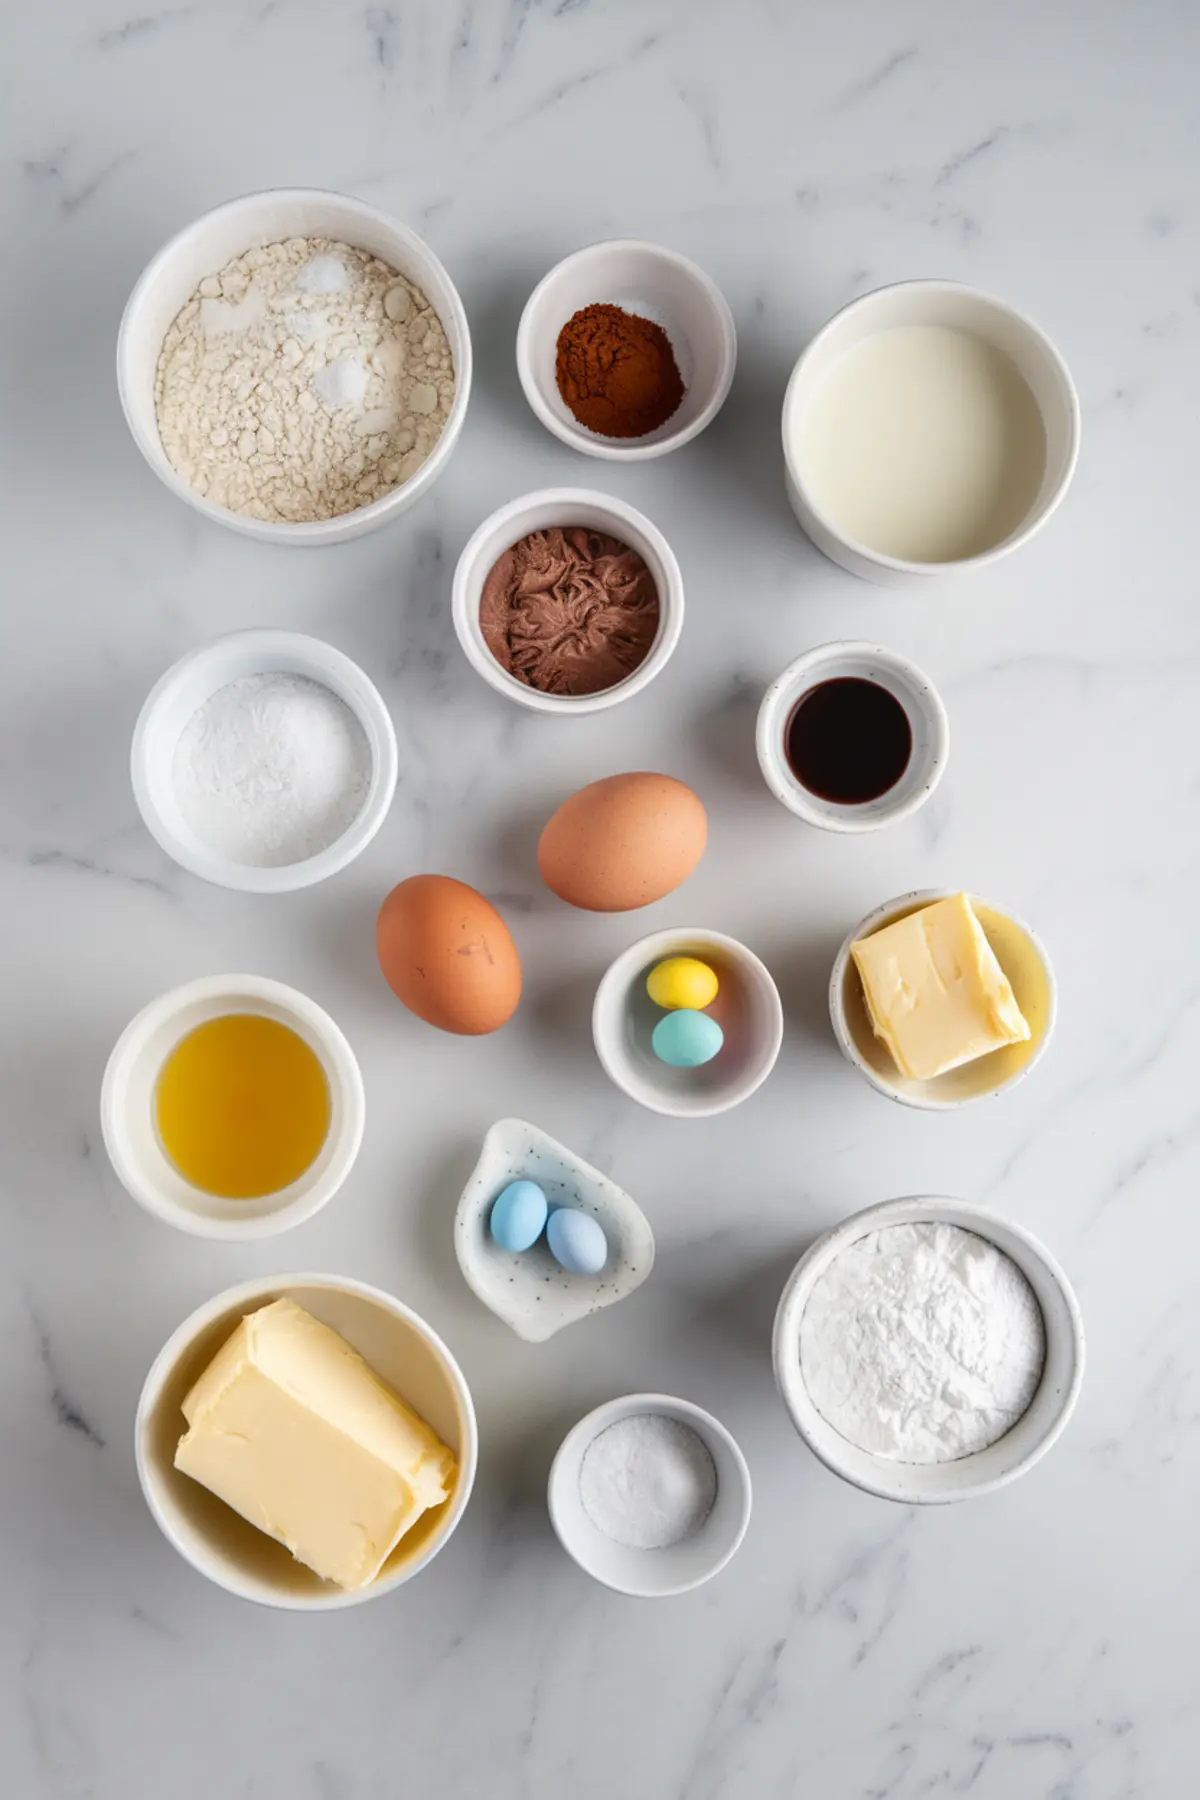
- FOR THE CHOCOLATE CUPCAKES
- 1 cup all-purpose flour
- 1 cup granulated sugar
- ½ cup unsweetened cocoa powder (high-quality dark cocoa recommended)
- 1 teaspoon baking powder
- ½ teaspoon baking soda
- ½ teaspoon salt
- ½ cup buttermilk (or milk mixed with 1 teaspoon vinegar)
- ½ cup vegetable oil
- 2 large eggs (room temperature)
- 1 teaspoon pure vanilla extract
- ½ cup hot water or hot coffee
- FOR THE CHOCOLATE BUTTERCREAM
- 1 cup (2 sticks) unsalted butter, softened
- 3 cups powdered sugar
- ½ cup unsweetened cocoa powder
- 2 tablespoons heavy cream or milk (plus more if needed for consistency)
- 1 teaspoon pure vanilla extract
- Pinch of salt
Instructions
- PREPARE THE CUPCAKES: Preheat the oven to 350°F (175°C) and line a muffin pan with 12 cupcake liners. In a large bowl, whisk together the flour, granulated sugar, cocoa powder, baking powder, baking soda, and salt until well combined.
- MIX THE WET INGREDIENTS: In a separate bowl, whisk the buttermilk, vegetable oil, eggs, and vanilla extract until smooth and fully combined.
- COMBINE WET AND DRY INGREDIENTS: Pour the wet ingredients into the dry ingredients and stir until just combined. Add the hot water or coffee and stir until the batter is smooth. The batter will be thin, which helps create moist cupcakes.
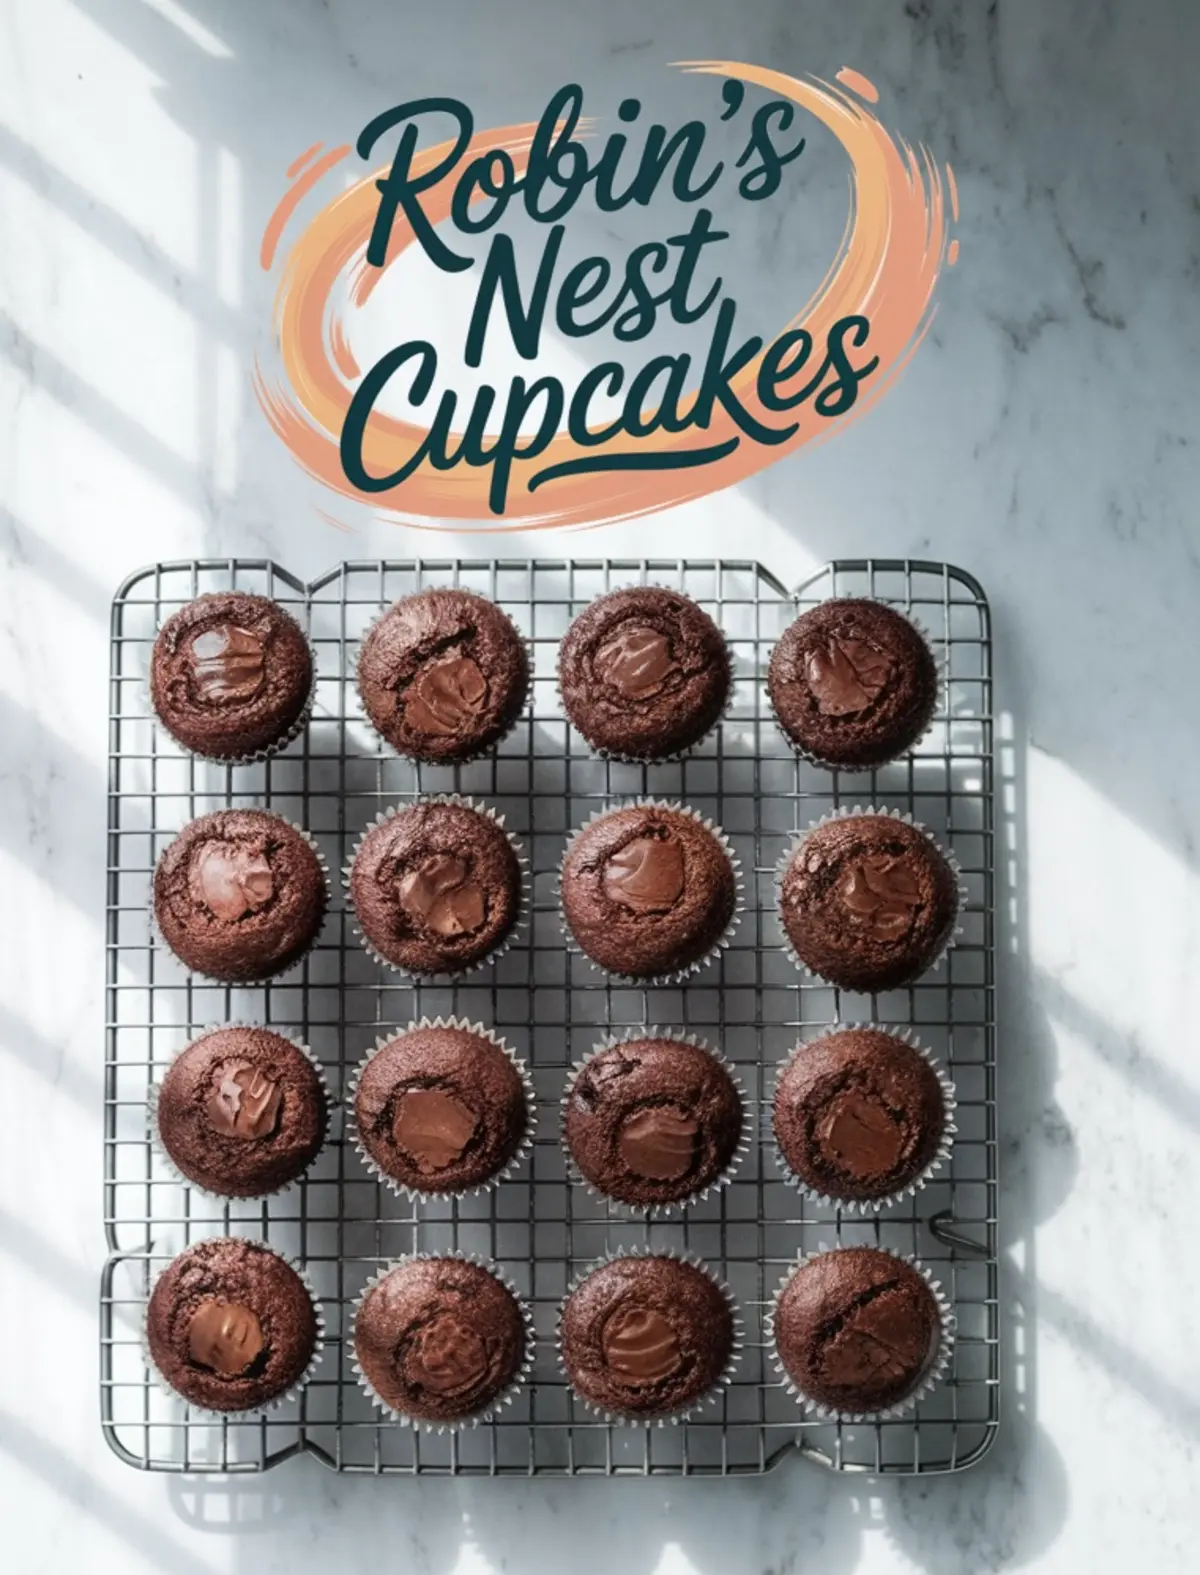
- BAKE THE CUPCAKES: Divide the batter evenly among the cupcake liners, filling each about two-thirds full. Bake for 18 to 20 minutes, or until a toothpick inserted in the center of a cupcake comes out clean. Remove from the oven and allow to cool completely on a wire rack before frosting.
- MAKE THE CHOCOLATE BUTTERCREAM: In a large bowl, beat the softened butter with an electric mixer on medium speed for about 2 minutes until light and fluffy. Gradually add the powdered sugar and cocoa powder, mixing on low speed until fully incorporated.
- FINISH THE BUTTERCREAM: Add the vanilla extract, salt, and 2 tablespoons of cream or milk. Beat the frosting on medium-high speed for 3 to 4 minutes until smooth and fluffy. If the buttercream is too thick, add more cream or milk, one teaspoon at a time, until the desired consistency is reached.
- ASSEMBLE THE NESTS: Fill a piping bag fitted with a large star or open star tip (such as Wilton 1M or 2D) with the chocolate buttercream. Starting from the center of each cooled cupcake, pipe a swirl outward and upward to form a nest shape. Repeat the swirl as needed to build height and create the appearance of a nest.
- DECORATE WITH CANDY EGGS: Place 2 to 3 mini candy eggs in the center of each buttercream nest. Press them gently to secure them in place.
Notes
For best results, ensure that all ingredients, especially eggs and buttermilk, are at room temperature before starting. This helps the batter mix evenly and creates a smoother, more consistent texture in the cupcakes. Using high-quality dark cocoa powder will give the cupcakes and buttercream a richer, deeper chocolate flavor. If you prefer a lighter chocolate taste, you can substitute with a regular unsweetened cocoa powder, but be aware that the flavor will be less intense.
When adding the hot water or coffee to the cupcake batter, do so slowly while stirring to avoid splashing. The batter will be thin after adding the liquid, which is expected and helps create a moist, tender crumb. If using coffee, choose a plain brewed coffee without added flavorings to enhance the chocolate flavor without overpowering it.
For the buttercream, be sure to beat the butter thoroughly before adding any sugar or cocoa. This step makes the buttercream light and fluffy. When adding powdered sugar and cocoa powder, do so gradually and mix on low speed to prevent them from puffing out of the bowl. After all ingredients are added, beating the buttercream on medium-high speed for several minutes creates a smooth, pipeable consistency that holds its shape when forming the nests. If the buttercream is too stiff to pipe, add more cream or milk a teaspoon at a time until you reach a soft, workable texture. If it becomes too soft, add additional powdered sugar one tablespoon at a time to stiffen it slightly.
To pipe the nests, use a large star or open star piping tip, such as Wilton 1M or 2D, for best results. Start in the center of each cupcake and pipe in a tight spiral outward, then build up a second layer around the edge to create the nest effect. You can practice on parchment paper before piping directly onto cupcakes to get comfortable with the motion.
Decorating with mini candy eggs adds a colorful and festive touch. Place 2 to 3 candy eggs in each nest and press them gently into the buttercream so they stay in place. If you’re serving these for a spring celebration like Easter, consider using a mix of pastel colors to complement other spring-themed desserts.
Store the finished cupcakes in an airtight container at room temperature for up to 2 days. If you need to store them longer, place them in the refrigerator for up to 4 days. Be aware that refrigeration can firm up the buttercream, so allow cupcakes to sit at room temperature for about 30 minutes before serving to let the frosting soften for the best texture and flavor.
Cupcakes can be made a day in advance, and the buttercream can be prepared ahead and stored in the refrigerator for up to 3 days. If making the buttercream in advance, let it come to room temperature and re-whip for a few minutes to restore its fluffy texture before piping. The candy eggs should be added just before serving if storing the cupcakes for longer periods to ensure they stay crisp and maintain their appearance.
These cupcakes are a fun and festive dessert for spring, and kids often enjoy helping with the decorating step by placing the eggs in the nests. They also make a beautiful addition to dessert tables for spring brunches, Easter gatherings, baby showers, or birthday parties.
Nutrition Information
Yield
12Serving Size
1Amount Per Serving Calories 405Total Fat 15gSaturated Fat 3gTrans Fat 0gUnsaturated Fat 10gCholesterol 42mgSodium 266mgCarbohydrates 64gFiber 2gSugar 50gProtein 5g