Hello, my fellow dessert lovers!
Ready for peachy perfection?
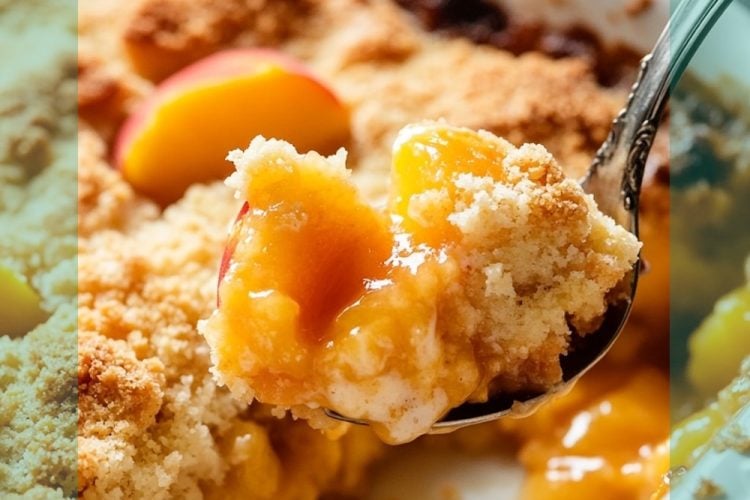
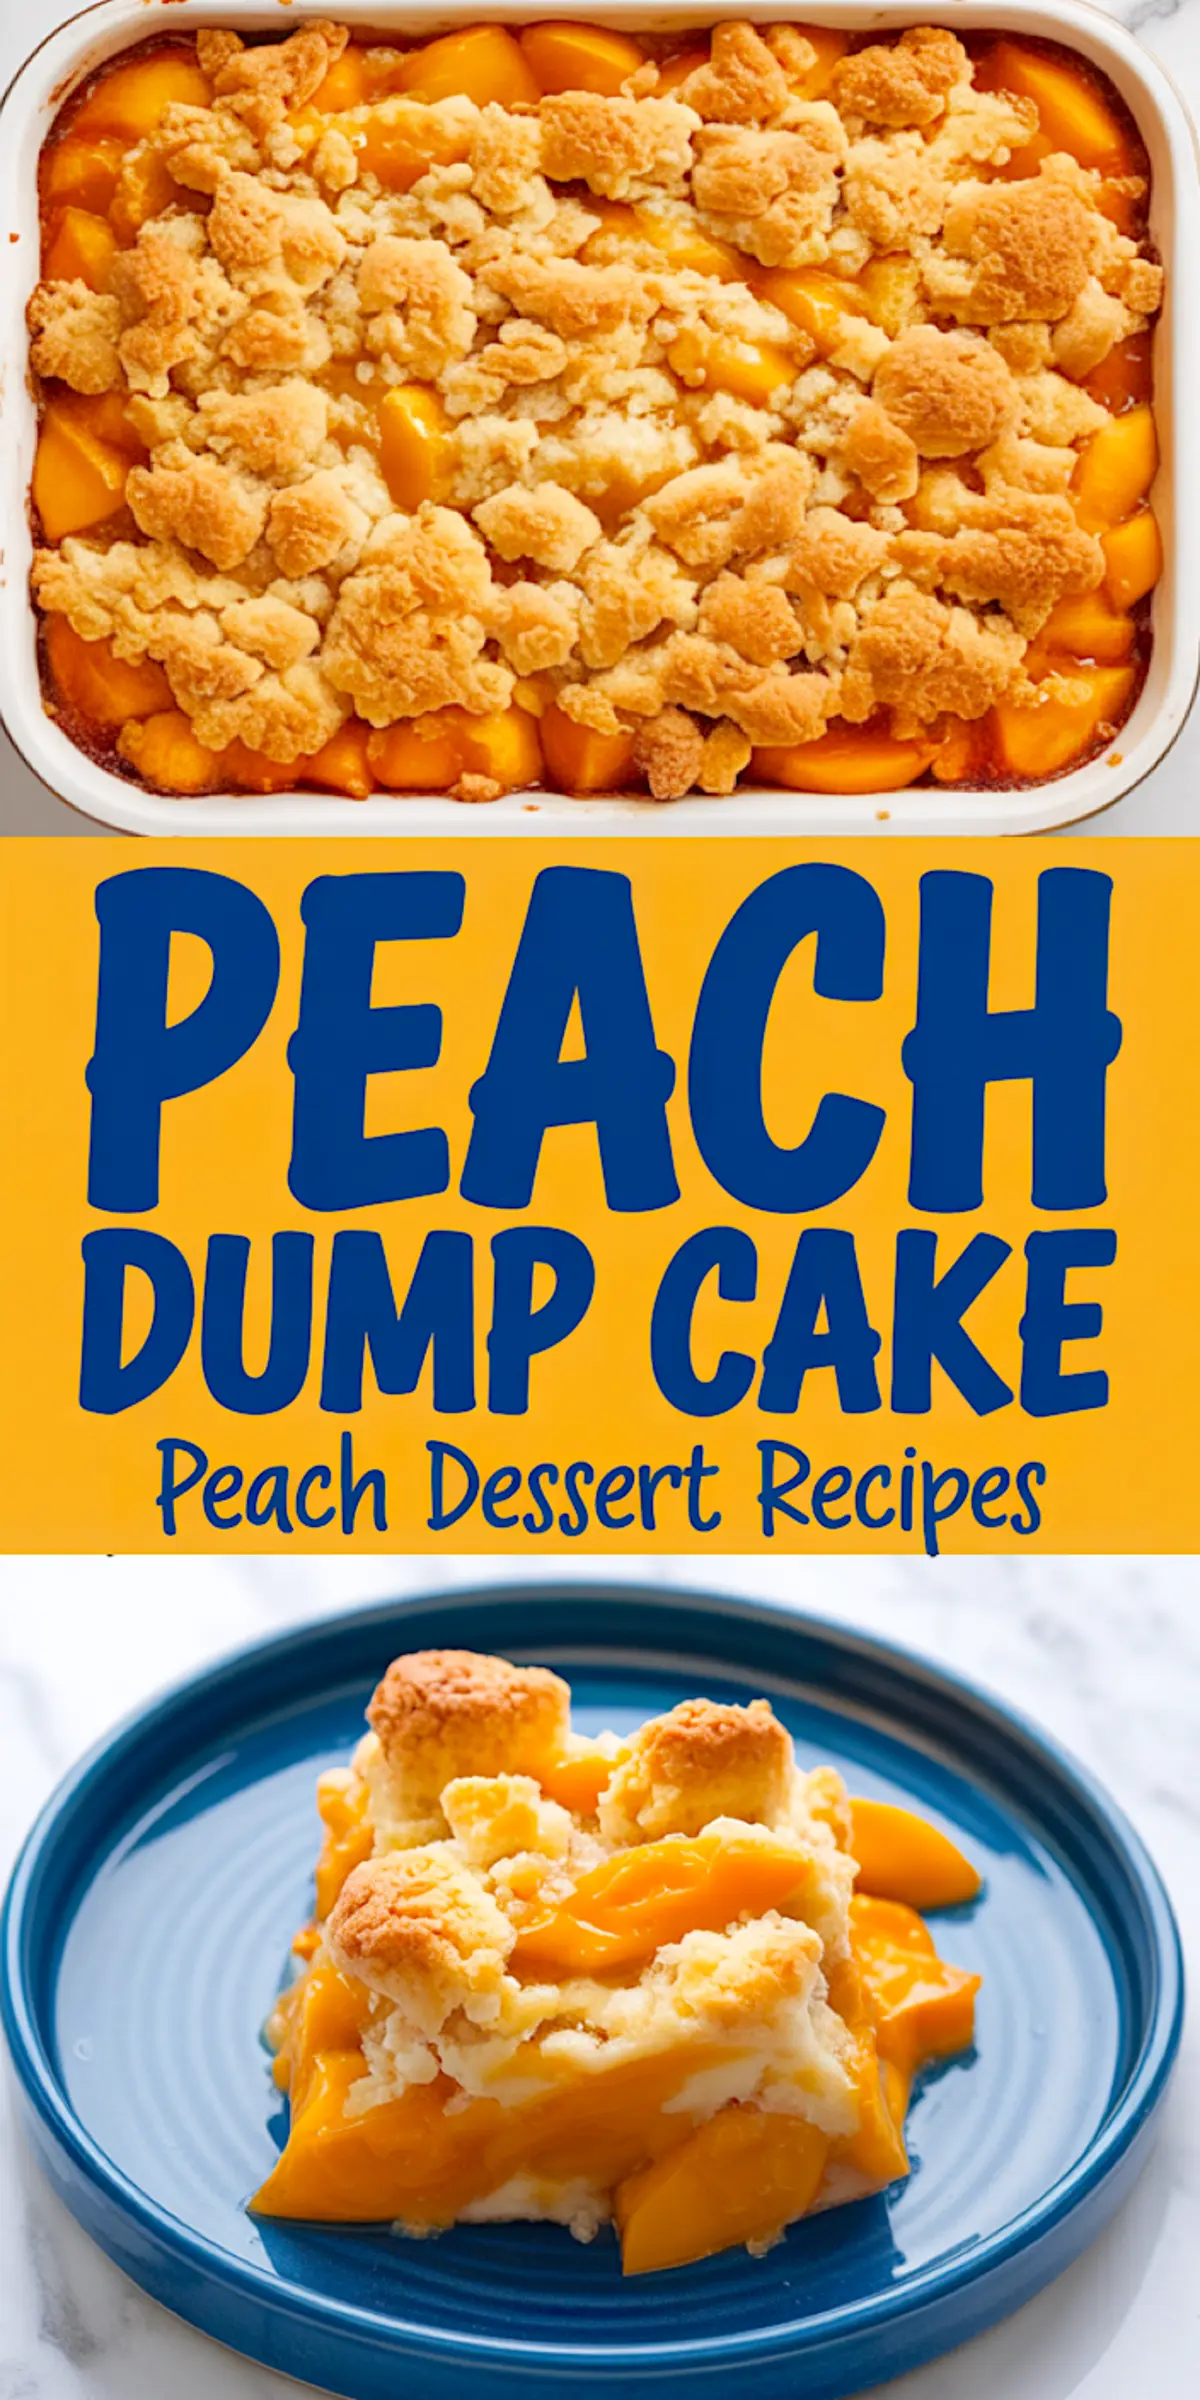
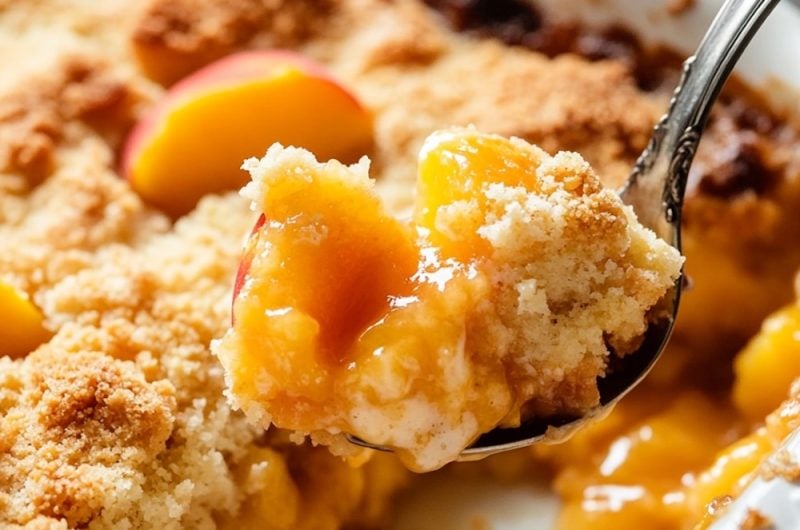
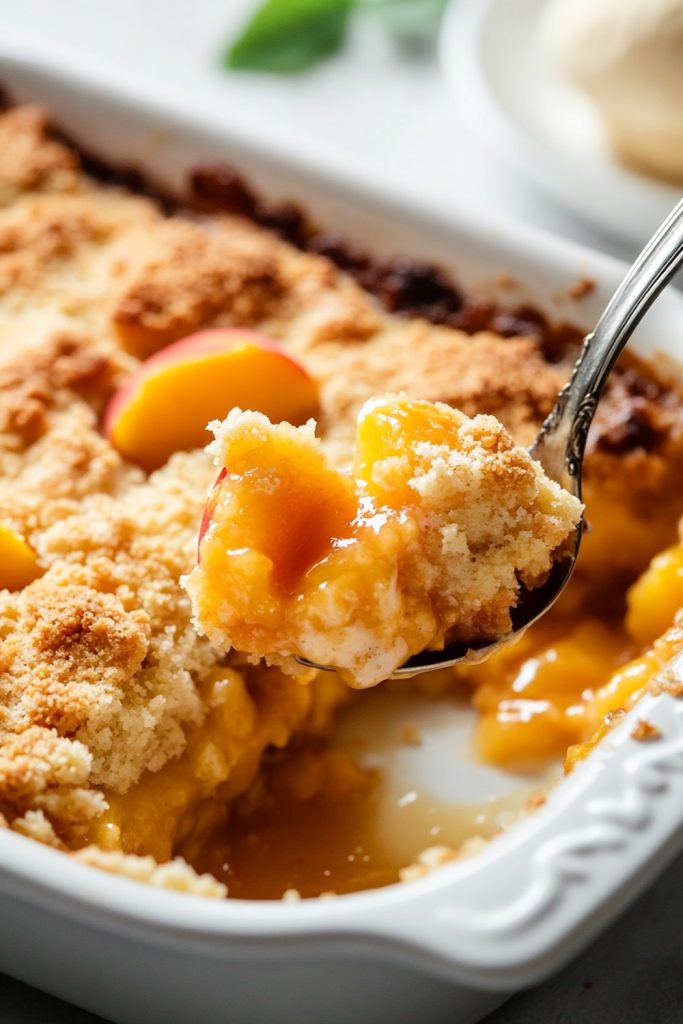
Allow me to introduce you to my absolute favorite summer dessert: Peach Dump Cake. It’s a magical, sunny slice where your taste buds will be gaily waltzing with joy. Imagine this: in a bite of warm gooeyness, you are creating the taste of peaches and buttery cake that just about melts on your tongue.
The best part?
Whipping this up is absurdly easy, great for those languid summer afternoons when a sweet craving strikes yet the thought of tackling a complicated recipe is overwhelming. Believe me, friends will vote this as your new favorite dessert in which to impress them!
Following a special diet?
Every recipe on this site can be converted to gluten-free, vegan, dairy-free, keto, nut-free or egg-free with adjusted ratios so nothing falls flat.
Try the Recipe Converter →My Experience with Peach Dump Cake
Picture this:
It was one of those sultry July afternoons, and I was at my grandma’s farmhouse surrounded by the peach trees with the boughs bowed under the fat, ripe peaches. As a kid, I spent hours climbing those trees, eating peaches until my hands became sticky and my clothes showed traces of my guiltiest pleasure. On this particular sweltering day, Grandma let me in on the secret of her famous Peach Dump Cake.
I remember standing on that rickety stool, barely tall enough to peek over the counter, as she walked me through layering all those ingredients. The sparkle in her eye when she would say, “Sometimes, the simplest things in life are the sweetest,” will be etched in my mind forever.
This day, when in the kitchen there was a heavenly smell of baked peaches and butter, I was attracted to something more than dessert; actually, I was enthralled by magic in making something scrumptious with one’s hands from scratch.
It will be many years later, but every time I am making this Peach Dump Cake, it’s going to take me right back into that sun-shiny kitchen with Grandma and me licking the spoons clean. More than a dessert, it’s a little piece of my treasured childhood – glad to share it today with you.
Storage
•Room Temperature: Best enjoyed freshly baked. Cover and store for up to 1 day.
•Refrigeration: Store in an airtight container for up to 3-4 days.
•Freezing: Wrap portions in plastic wrap, place in a freezer-safe container, and freeze for up to 2-3 months.
•Reheating: Microwave for 20-30 seconds or oven at 350°F for 10-15 minutes.
For the best experience, serve freshly baked and warm.
Emma’s Tips
Ok, now, some pro tips! First, don’t be stingy with the butter. If it looks like some of the top areas are getting a bit dry while it is baking, just add a couple more pats of butter. Nobody ever complained of too much butter, right? Just cover the cake with aluminum foil, for the last 10-15 minutes of baking, if it starts to turn brown too quickly and doesn’t appear done. It assures a nice golden top without risk of overcooking.
And here’s the game-changer: splash vanilla extract over the peaches before spooning on the cake mix. That adds this subtle depth to it that people will be begging for your secret.
Serving Suggestions
Now, how to serve a piece of heaven? While it’s undoubtedly amazing as is, I like dressing it up even better. Serve warm with a scoop of vanilla ice cream melting atop it. Or if you are really feeling fancy, make some cinnamon-spiked whipped cream.
A lovely breakfast or brunch, where it usually ends in my home with a big mug of coffee, where it tastes just as nice dolloped lavishly with Greek yogurt for that wee touch of a (bit) healthier groove. Either way, do have it warm—that’s when the real magic sets in.
Nutritional Information (approximate per serving, assuming 12 servings):
- Calories: 380
- Total Fat: 12g
- Saturated Fat: 6g
- Cholesterol: 20mg
- Sodium: 300mg
- Total Carbohydrates: 48g
- Dietary Fiber: 1g
- Sugars: 35g
- Protein: 2g
FAQ
Absolutely! This recipe works great with cherries, apples, or even a mixed berry blend.
While it’ll work, butter really gives the best flavor. If you need a non-dairy option, try coconut oil!
It’s best eaten within 2-3 days, stored covered in the refrigerator. But trust me, it never lasts that long in my house!
You can prepare it a few hours in advance and bake just before serving for the best results.
I’d really love to know how this recipe turned out for you! Did you add your own special touch to the recipe? Perhaps a secret ingredient? Please let me know what you thought in the comments. And if by chance you get a picture of your creations, be sure to tag me on Instagram. Your culinary masterpieces are always such a good sight!
Conclusion
And now, my friends; behold-yonder lieth the Peach Dump Cake in all it’s splendor!
That dessert is proof of the most spectacular results delivered by the simplest recipes. It is just perfectly fruity, with a soft yet chewy feel to it, and part cake and part cobbler-a 100% hit.
It will be great to host a summer BBQ or take in as an urgent dessert option for a potluck. Go on and try it-your taste buds will thank you. Looking for more easy, scrumptious desserts?
Be sure to pin this recipe for later. Have a great time baking, and let the sweet aroma of peaches fill your kitchen to overflowing!
PEACH DUMP CAKE
Course: Uncategorized12
servings7
minutes45
minutes380
kcalIngredients
2 (15 oz) cans of sliced peaches in heavy syrup (don’t drain!)
1 box of yellow cake mix (18.25 oz)
1/2 cup unsalted butter, cold and cut into thin slices
1/2 cup brown sugar
1 tsp ground cinnamon
1/4 tsp ground nutmeg
1/2 cup chopped pecans (optional, but highly recommended!)
Steps
- Preheat your oven to 350°F (175°C). Grab a 9×13 inch baking dish and give it a light spray with cooking oil.
- Pour those gorgeous peaches, syrup and all, into the baking dish. Spread them out evenly, making sure every inch is covered in peachy goodness.
- In a separate bowl, mix the brown sugar, cinnamon, and nutmeg. Sprinkle this mixture over the peaches. Trust me, this step takes the flavor to a whole new level!
- Now, here’s where the “dump” in dump cake comes in. Evenly sprinkle the dry cake mix over the peaches. Don’t mix it in, just let it sit on top like a cozy blanket.
- Next, arrange those thin slices of butter all over the cake mix. Try to cover as much of the mix as possible. This is what creates that irresistible buttery crust!
- If you’re using pecans (and I hope you are!), scatter them over the top. They’ll get all toasty and delicious in the oven.
- Pop that beauty into the oven and bake for about 45-50 minutes. You’re looking for a golden brown top and bubbly edges.
- Once it’s done, resist the urge to dig in immediately (I know, it’s hard!). Let it cool for about 15 minutes. This allows the flavors to meld and makes serving easier.
Made this today & it was delicious. Used peaches I froze myself instead of canned peaches, that was the only change. So easy. Definitely a keeper.
Jeanine, fantastic job using your own frozen peaches! That’s a great way to add a unique twist to the recipe. If you’re looking for another tip, try adding a sprinkle of cinnamon next time for an extra pop of flavor. Thanks for sharing your experience—it’s always inspiring to hear from someone who embraces creativity in their baking!
Made this with canned mangoes and it was delicious! Used DH pineapple cake mix and had a little crushed pineapple leftover from another recipe so added that to the mangoes. Thanks for the recipe and the inspiration for the mango dump cake.
Hi Cathy,
I love hearing how you made this your own! Canned mangoes paired with the DH pineapple cake mix sounds like such a tropical treat, and adding the crushed pineapple must have taken the flavor up a notch. That’s the beauty of recipes like this—there’s so much room for creativity, and it’s great to know it turned out delicious. Thanks for sharing your version. It’s definitely inspiring me to experiment with those combos myself!
Until the next sweet creation, stay inspired! 😊
I made this for a group of ladies at church. My peaches were in juice so I added a can of peach pie filling. About 15 mins before it was done I covered small patches of cake mix with more butter. I had shredded mine. This was delicious. I think I’m going to make it gluten free and take it to thanksgiving lunch.
That sounds wonderful, Cheryl. Using peaches in juice along with the peach pie filling must have given it a really nice depth of flavor. I like the way you added a little more butter toward the end where the mix looked dry. I’ve done that same thing before with dump cakes, and it always makes the crust turn out better. Shredding the butter is such a clever idea too since it melts so evenly.
Making it gluten free for Thanksgiving is a smart plan. I’ve had good results with Betty Crocker’s gluten free yellow cake mix in recipes like this, and it doesn’t change the flavor much at all. I think your group will enjoy it around the holiday table.