I remember my college days with fondness, especially the spring afternoons I spent trying out new cake recipes in my tiny apartment kitchen. One year, I decided to make a chick-shaped dessert for a group of friends. I had little space, but I wanted a fun twist on a classic vanilla cake.
My friends joked that I looked like I was on a mission, covered in flour and splashes of yellow frosting. That cake ended up making us laugh the entire evening, and I still smile when I see photos of that slightly lopsided creation.
Following a special diet?
Every recipe on this site can be converted to gluten-free, vegan, dairy-free, keto, nut-free or egg-free with adjusted ratios so nothing falls flat.
Try the Recipe Converter →My Easter Baking Memory
I recall my aunt visiting every Easter with her famous carrot cake, and I used to hover around, hoping she would let me try my hand at frosting swirls. She always told me to express myself in each swirl and dab of color.
Years passed, and I began adapting her tips to craft my own treats. My first serious Easter attempt was a batch of rabbit-themed cupcakes. Later, I turned to my imagination and created a bright chick cake that has now become my personal favorite. It reminds me of sunshine, new life, and fresh starts. My aunt was proud. I felt thrilled to continue a family tradition with my own take on Easter delights.
Gathering the Ingredients for a Fluffy Chick Cake
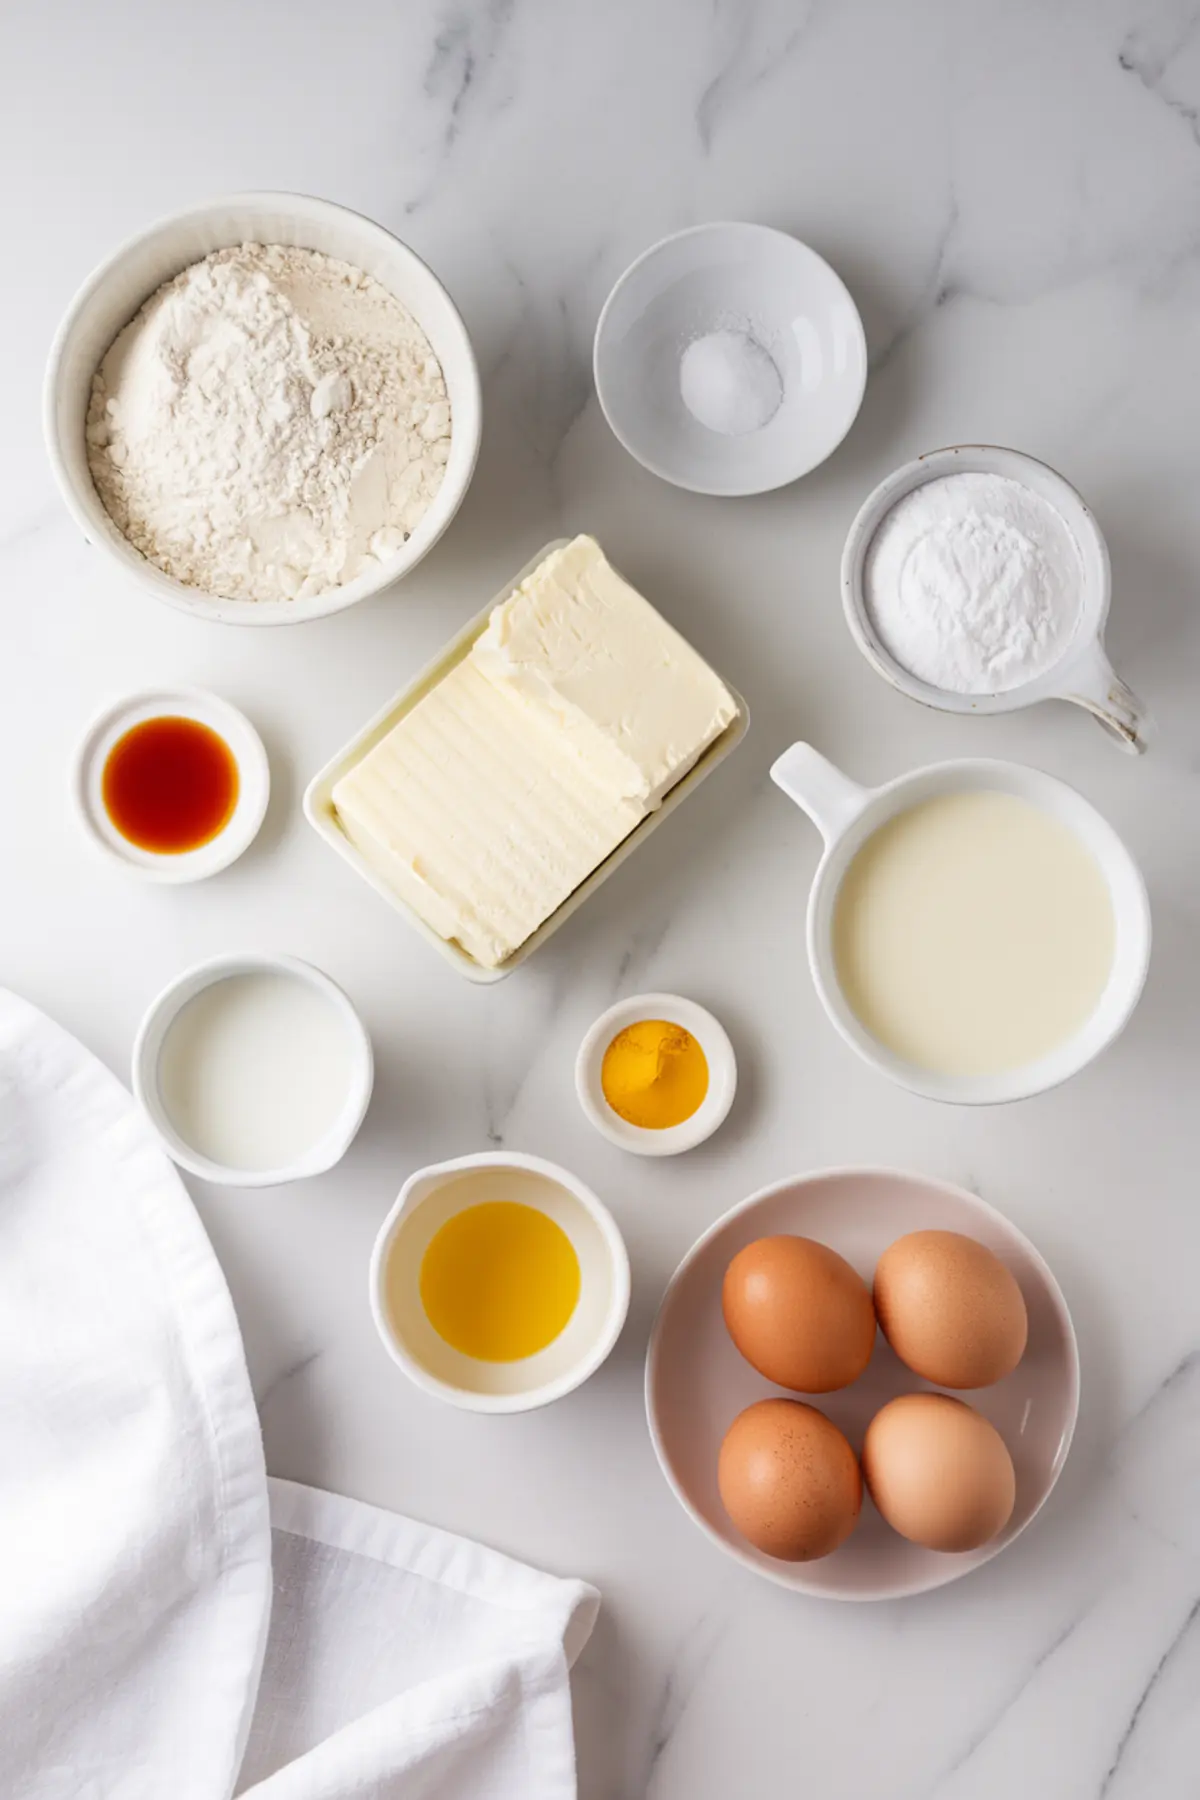
I like to keep the pantry stocked before I begin any new baking adventure. For this chick-inspired dessert, I rely on all-purpose flour, baking powder, a bit of salt, softened butter, and granulated sugar.
I keep large eggs at room temperature, which helps me achieve a smooth batter, then I stir in a splash of vanilla extract for extra warmth in flavor. A cup of whole milk completes the base. I believe in quality ingredients for a soft crumb, because each bite should feel light on the tongue.
For the frosting, I reach for unsalted butter, powdered sugar, a tablespoon of heavy cream or whole milk, and another spoonful of vanilla extract. A pinch of salt goes into the bowl as well, so the sweetness stays balanced.
The final touch involves a few drops of yellow gel food coloring. That bright yellow shade is a joy to see and matches the playful spirit of a spring table.
Creating the Soft Vanilla Layers

I turn on the oven and set it to 350°F. My kitchen feels cozy with the gentle hum of preheating. I grease two round cake pans and line them with parchment, then I whisk the flour, baking powder, and salt in one bowl.
Another bowl holds the softened butter and sugar, which I beat until they become creamy and light. I drop in the eggs, one by one, stirring carefully to blend each addition. Next, I add vanilla extract and watch the batter take on a pale, silky color.
Flour and milk go into this batter in turns. I start with a bit of the flour mixture, then a splash of milk, and keep going until everything merges into a smooth consistency. I never overmix, because I like to maintain a tender crumb.
Once the batter is ready, I pour it evenly into the pans. They bake for about 30 minutes. My nose soon catches that unmistakable aroma of fresh cake, and I test the centers with a toothpick. If it comes out dry, I know it’s time to pull out the pans and let them cool on a rack.
Mixing and Tinting the Buttercream
My favorite part involves the buttercream. I measure out the softened butter and beat it until it’s airy. Then I add the powdered sugar slowly, pausing to scrape the sides of the bowl so I don’t lose any of that sweet fluff. A spoonful of heavy cream and another dash of vanilla extract help transform this into a soft, spreadable frosting. I tip in a hint of salt to keep everything balanced.
When I add the yellow gel food coloring, I start with a few drops. I watch the frosting shift from off-white to cheery gold. I stir slowly until I achieve the brightness I want. There is something uplifting about seeing that color form in the bowl. It signals that I’m close to celebrating spring with a finished cake, and the mood in my kitchen turns festive.
Final Decoration for a Cheerful Centerpiece
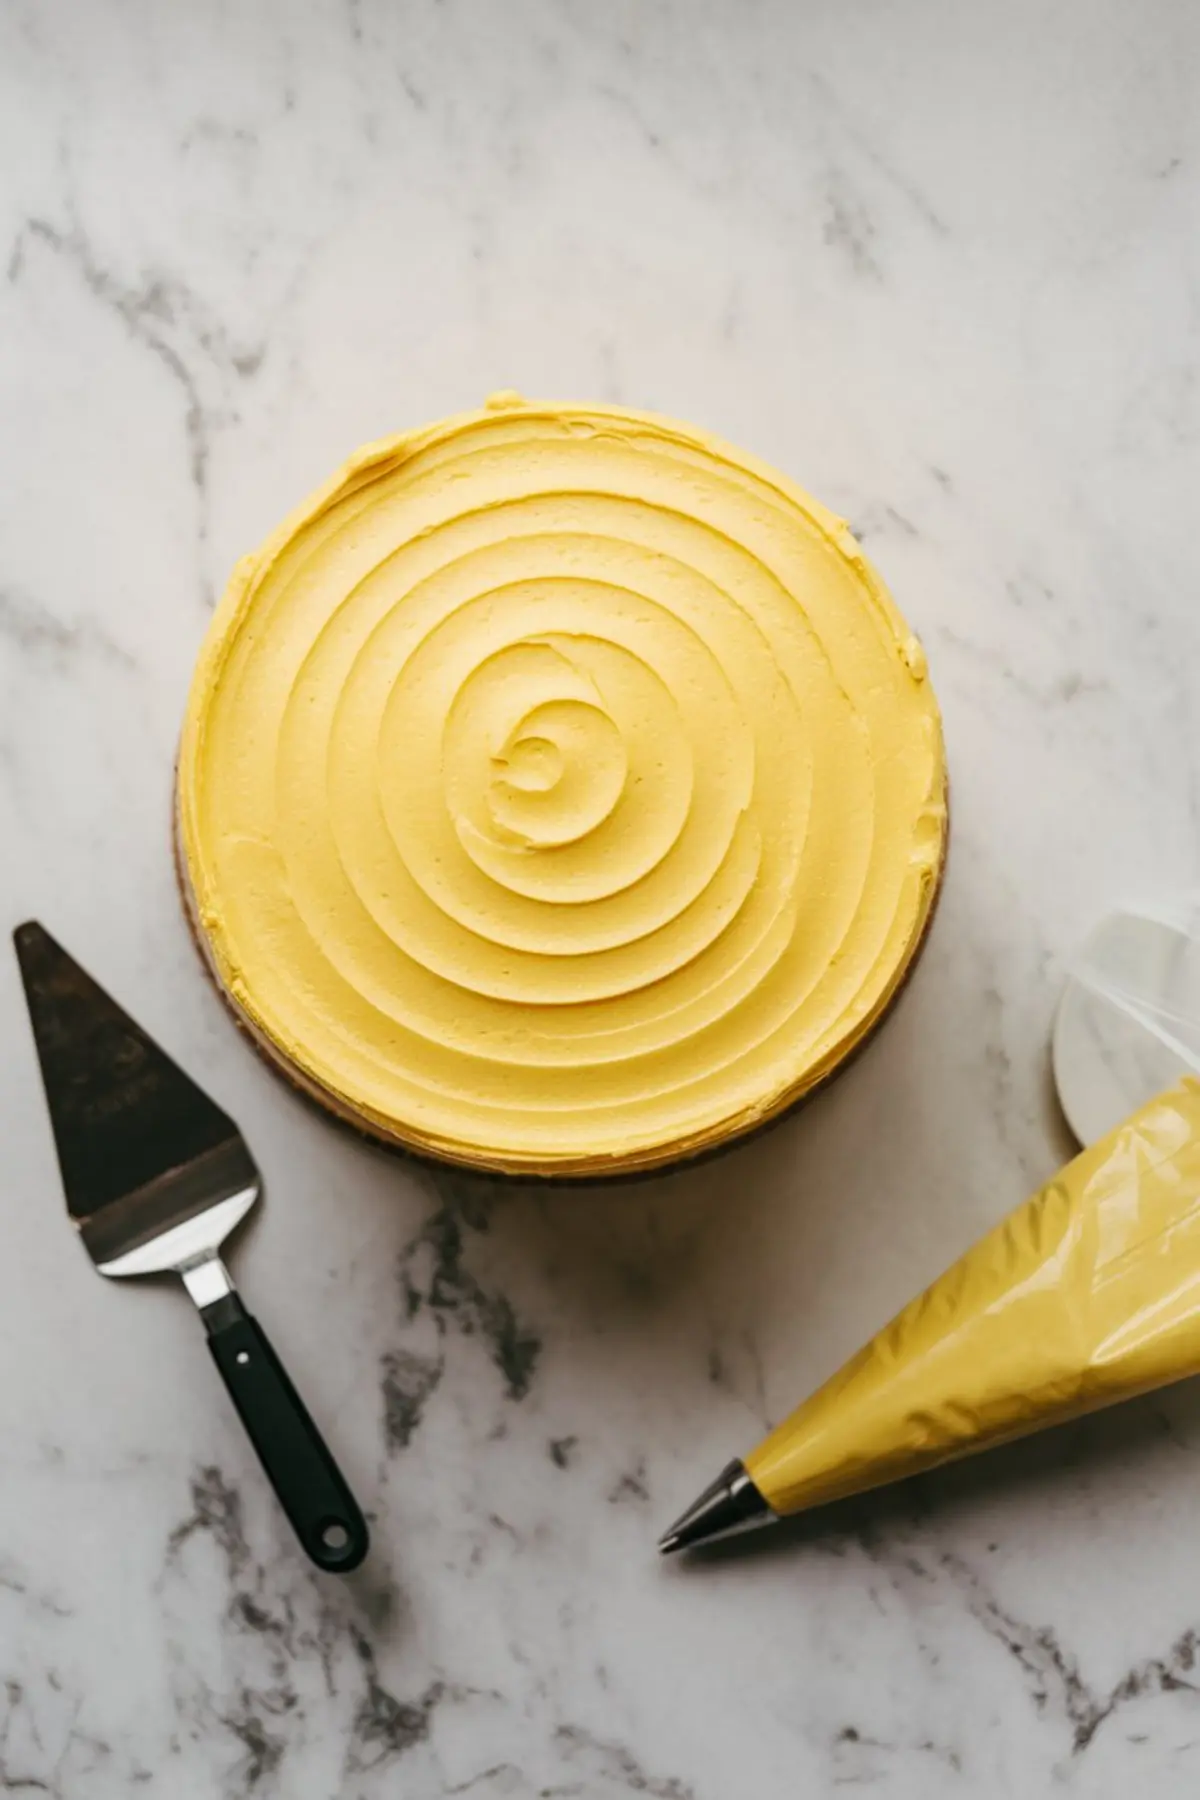
I level my cooled cake layers with a long serrated knife so they stack neatly. I place one layer on my stand, spread a swirl of yellow buttercream on top, then set the second layer over it. A gentle crumb coat seals the outside, and I chill the cake briefly to keep it stable. Soon, I coat the cake with a thicker layer of that vivid frosting.
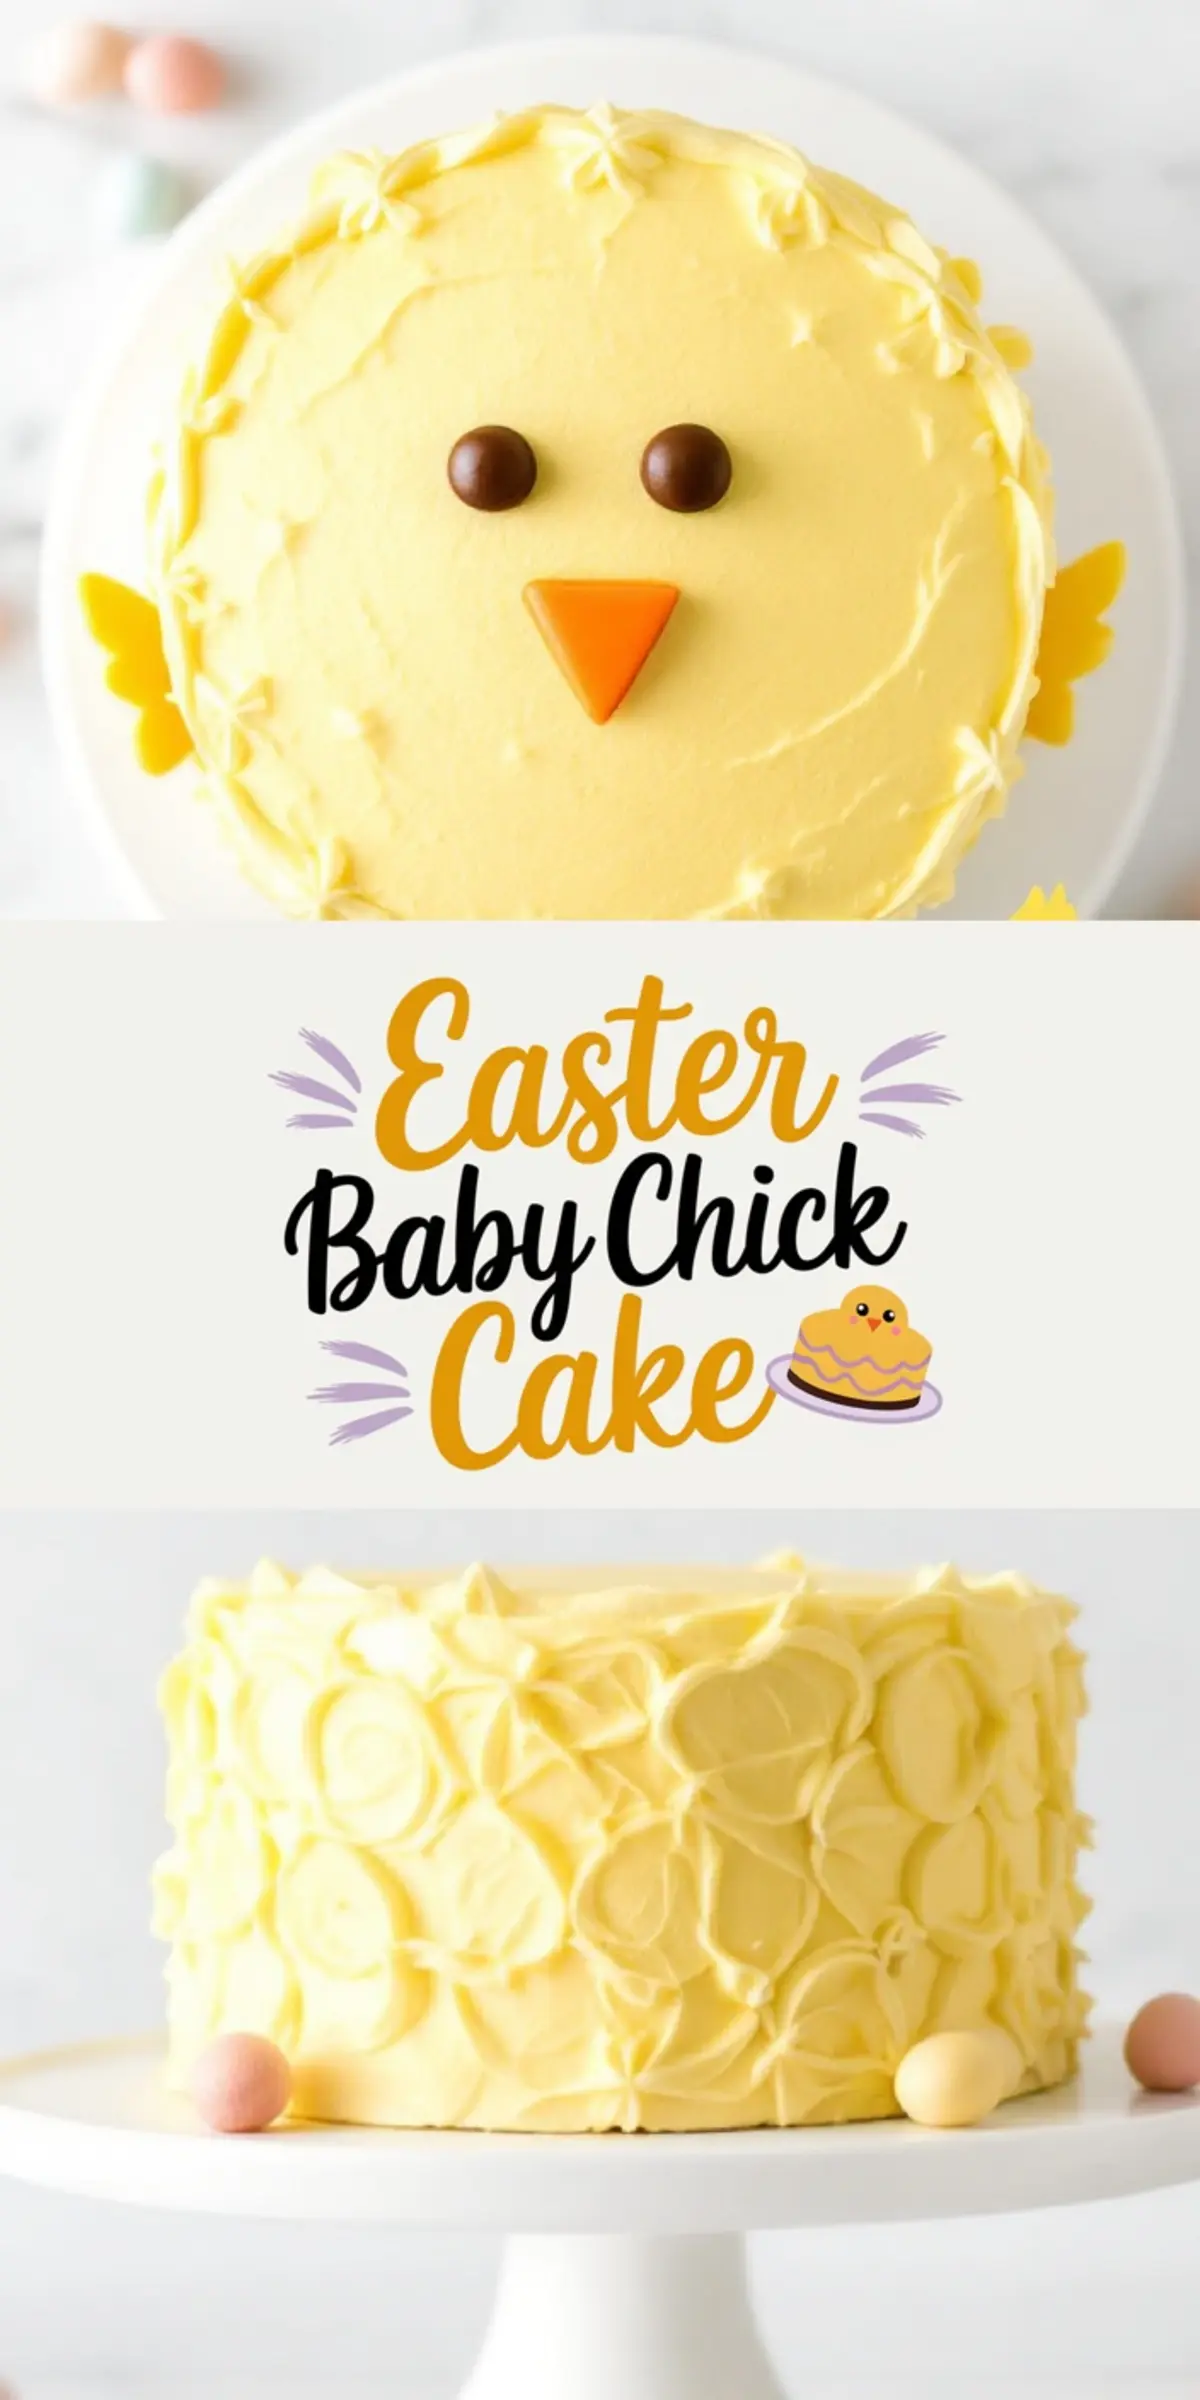
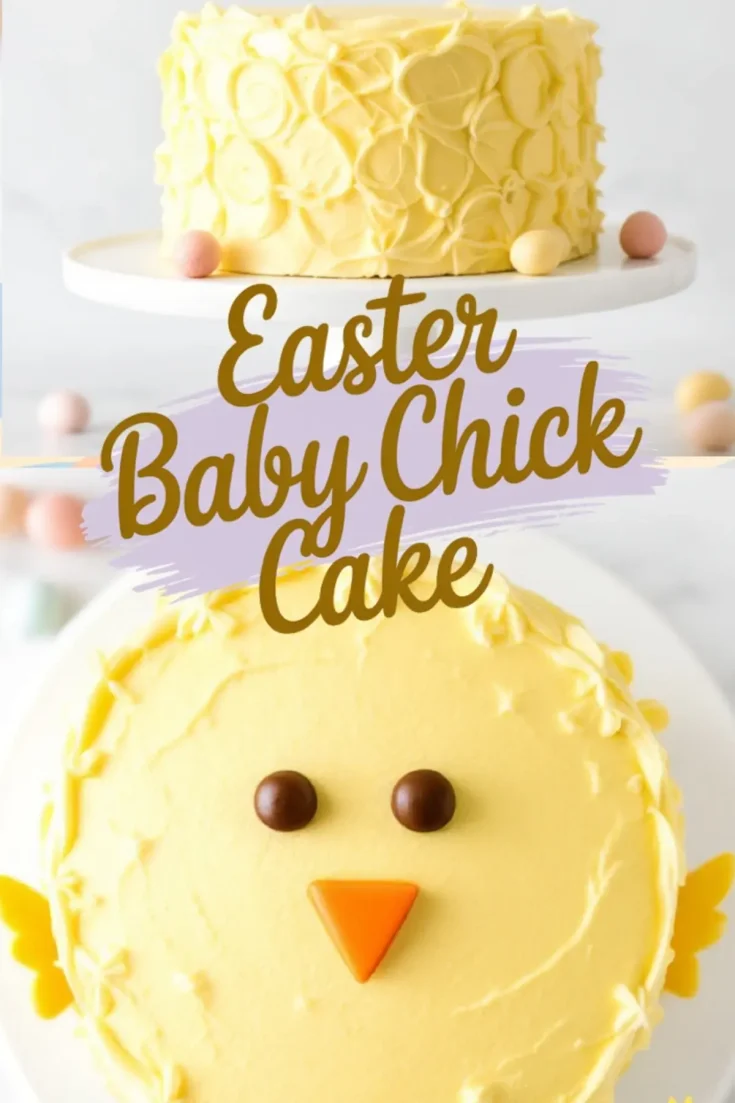
A piping bag helps me create textured swirls for a fluffy look around the edges. I attach two chocolate candies for eyes. An orange candy wedge or fondant triangle serves as the beak. I often add small wings shaped from fondant or candy melts on the sides. The result looks playful, and it draws laughter every time. Even if your final chick doesn’t appear “perfect,” the character shines in the details.
Serving and Storage Tips
This bright cake often sits on my table as part of an Easter spread. It stands out next to colorful eggs and spring decorations. I slice it into 10 or 12 portions if I’m hosting a larger group. If it doesn’t disappear on the first day, I keep it covered at room temperature for up to three days.
\I find the texture remains soft if I let the slices stand at room temperature for a bit before serving. Freezing the layers in advance works too. I once baked the cakes a week early, wrapped them, and froze them until I was ready to decorate. That saved me time on a busy holiday weekend.
More Easter Inspiration
I enjoy experimenting with other springtime treats. I once tried a colorful Watercolor Cake Roll that made my family gasp at its fun design. My neighbor swears by this Easter Bundt Cake for a classic approach to holiday baking. A friend from work found success with a Speckled Egg Cake that used dainty chocolate flecks on a pastel backdrop. I believe variety keeps the holiday dessert table exciting. You can pick one or prepare a few of these to impress everyone with a colorful assortment.
Pin This Cake and Join the Conversation
I love pinning my favorite recipes, and I hope you’ll do the same with this cheerful baby chick cake. Share it on your board for a bright touch of spring.
I look forward to hearing how your cake turns out, so leave a comment if you’d like to swap tips or share a slice of your own experience.
My table is richer with your ideas and feedback, and I’m glad we can learn from each other’s baking journeys.
Baby Chick Cake Recipe
A soft vanilla cake with creamy yellow buttercream frosting, decorated to resemble a baby chick. This Easter-themed cake is fun to make and perfect for spring celebrations.
Ingredients
- FOR THE VANILLA CAKE:
- 2 ½ cups (310g) all-purpose flour
- 2 ½ teaspoons baking powder
- ½ teaspoon salt
- 1 cup (226g) unsalted butter, softened
- 2 cups (400g) granulated sugar
- 4 large eggs
- 1 tablespoon vanilla extract
- 1 cup (240ml) whole milk
- FOR THE YELLOW BUTTERCREAM FROSTING:
- 1 ½ cups (340g) unsalted butter, softened
- 5 cups (600g) powdered sugar
- 2 tablespoons heavy cream or milk
- 1 tablespoon vanilla extract
- ¼ teaspoon salt
- Yellow gel food coloring
- FOR DECORATION:
- 2 chocolate candies (for the eyes)
- 1 orange candy (such as a candy-coated chocolate or fondant triangle for the beak)
- Yellow candy melts or fondant (for the wings)
Instructions
- PREPARE THE CAKE BATTER: Preheat the oven to 350°F (175°C). Grease and line two 8-inch round cake pans with parchment paper. In a medium bowl, whisk together the flour, baking powder, and salt. In a large bowl, beat the butter and sugar until light and fluffy, about 2-3 minutes. Add the eggs one at a time, mixing well after each addition. Stir in the vanilla extract. Alternate adding the dry ingredients and milk, beginning and ending with the dry ingredients. Mix until just combined.
- BAKE THE CAKE LAYERS: Divide the batter evenly between the prepared cake pans. Bake for 30-35 minutes, or until a toothpick inserted in the center comes out clean. Let the cakes cool in the pans for 10 minutes, then transfer them to a wire rack to cool completely.
- MAKE THE BUTTERCREAM: In a large bowl, beat the butter until smooth and creamy. Gradually add the powdered sugar, one cup at a time, mixing well after each addition. Add the vanilla extract, salt, and heavy cream. Beat for 3-5 minutes until fluffy. Add yellow gel food coloring, mixing until you achieve a bright yellow color.
- ASSEMBLE THE CAKE: Trim the cake layers if needed to make them level. Place one cake layer on a cake stand and spread a layer of buttercream on top. Place the second cake layer over it. Cover the entire cake with a smooth layer of yellow buttercream using an offset spatula.
- DECORATE THE CAKE: Use a piping bag fitted with a star tip to add small buttercream "fluff" details around the edges. Attach two chocolate candies as the eyes and an orange candy beak in the center of the cake. Shape small pieces of yellow fondant or candy melts into wings and attach them to the sides of the cake with buttercream.
Notes
For best results, ensure all ingredients are at room temperature before starting. This helps the cake batter mix evenly and creates a lighter texture. When measuring flour, use the spoon-and-level method rather than scooping directly from the bag to prevent adding too much flour, which can make the cake dense.
When creaming the butter and sugar, beat them together until the mixture becomes pale and fluffy. This step incorporates air into the batter, leading to a softer cake. Adding eggs one at a time and mixing well after each addition ensures proper emulsification, preventing the batter from curdling. Be careful not to overmix once the dry ingredients are added, as this can develop excess gluten and make the cake tough.
To check for doneness, insert a toothpick into the center of the cake. If it comes out clean or with just a few moist crumbs, the cake is ready. Let the cakes cool in the pans for about 10 minutes before transferring them to a wire rack to cool completely. Cooling the cake layers thoroughly before frosting prevents the buttercream from melting.
For the buttercream, sift the powdered sugar before adding it to the butter to avoid lumps. Beating the butter first until smooth creates a solid foundation for a fluffy, even-textured frosting. Adding the powdered sugar gradually prevents a grainy consistency. If the buttercream appears too thick, add a small amount of heavy cream or milk until the desired consistency is reached. If it becomes too thin, add more powdered sugar, a little at a time.
To achieve a smooth finish on the cake, apply a thin crumb coat first, which is a very light layer of buttercream that traps any loose crumbs. Refrigerate the cake for about 15 minutes before adding the final layer of frosting. Using an offset spatula or bench scraper helps create an even surface.
For decorating, use gel food coloring instead of liquid food coloring to achieve a vibrant yellow without altering the consistency of the buttercream. If using fondant or candy melts for the wings, gently shape them with your hands before attaching them with a small amount of buttercream. If fondant is too stiff, knead it slightly until pliable.
Store the decorated cake in an airtight container at room temperature for up to 2 days or in the refrigerator for up to 5 days. If refrigerating, let the cake come to room temperature before serving for the best texture and flavor. For longer storage, wrap the unfrosted cake layers tightly in plastic wrap and freeze for up to 2 months. Thaw them at room temperature before assembling and decorating.
This cake pairs well with additional Easter-themed decorations, such as pastel sprinkles or piped buttercream flowers. If making the cake ahead of time, you can prepare the buttercream a day in advance and store it in an airtight container at room temperature if the weather is cool or in the refrigerator if it is warm. Re-whip the buttercream before using to restore its smooth texture.
For a fun variation, try adding a little lemon or almond extract to the buttercream for extra flavor. You can also bake the cake in different shaped pans or turn it into cupcakes for individual servings.
Nutrition Information
Yield
12Serving Size
1Amount Per Serving Calories 222Total Fat 7gSaturated Fat 4gTrans Fat 0gUnsaturated Fat 3gCholesterol 76mgSodium 299mgCarbohydrates 32gFiber 1gSugar 11gProtein 6g