I remember these soft cupcakes during a spring gathering with my friends. I was a broke college student, and a small pack of pastel sprinkles made me feel fancy. My heart melted with joy when each friend reached for seconds, and that memory lives on in my kitchen.
Myself, I have baked many sweet treats over the years, but gluten-free Easter cupcakes always bring special happiness. I see bright colors, taste a gentle crumb, and feel a sense of renewal. I love the way these cupcakes remind everyone that spring stands for new beginnings.
I aim to share every detail with you, so you will feel confident about mixing the batter. My personal approach involves simple steps, and each step blends practicality with a bit of fun. I promise clarity and reassurance in each paragraph below.
Following a special diet?
Every recipe on this site can be converted to gluten-free, vegan, dairy-free, keto, nut-free or egg-free with adjusted ratios so nothing falls flat.
Try the Recipe Converter →Easter Cupcakes: My Nostalgic Introduction
These cupcakes symbolize a fresh start for me, because I remember learning how to adapt recipes for my dietary needs. My sister tested different flours, and we realized a combination with xanthan gum created the best texture. My entire family enjoyed the results, which helped them see that gluten-free does not mean flavor-free.
Soft flours and the right mix of leavening agents create a tender crumb. Butter and sugar work together to form a foundation of sweetness. Eggs add structure, while vanilla extract rounds out the taste.
My roommate used to say that the gentle aroma in our home kitchen almost made her forget about everything else. She praised the way the fragrance flowed from the oven, making the entire apartment smell warm and inviting. That feeling made me believe anyone could share these treats with pride.
Selecting Ingredients for a Fluffy Gluten-Free Result
Gluten-free all-purpose flour needs xanthan gum to assist with binding. This step ensures your cupcakes hold a steady shape and stay light. Baking powder and baking soda unite to lift the batter during baking, leading to a soft interior.
Salt adds balance and depth without overpowering the sweetness. Butter introduces a rich mouthfeel, and granulated sugar supports even browning on top. Eggs lock in moisture and help everything rise properly.
Buttermilk and a small amount of milk keep things extra tender. Vanilla extract completes the flavor profile and pairs well with just about every frosting or topping. My advice is to gather the best quality products to see a stronger final taste.
Mixing the Cupcake Batter with Care
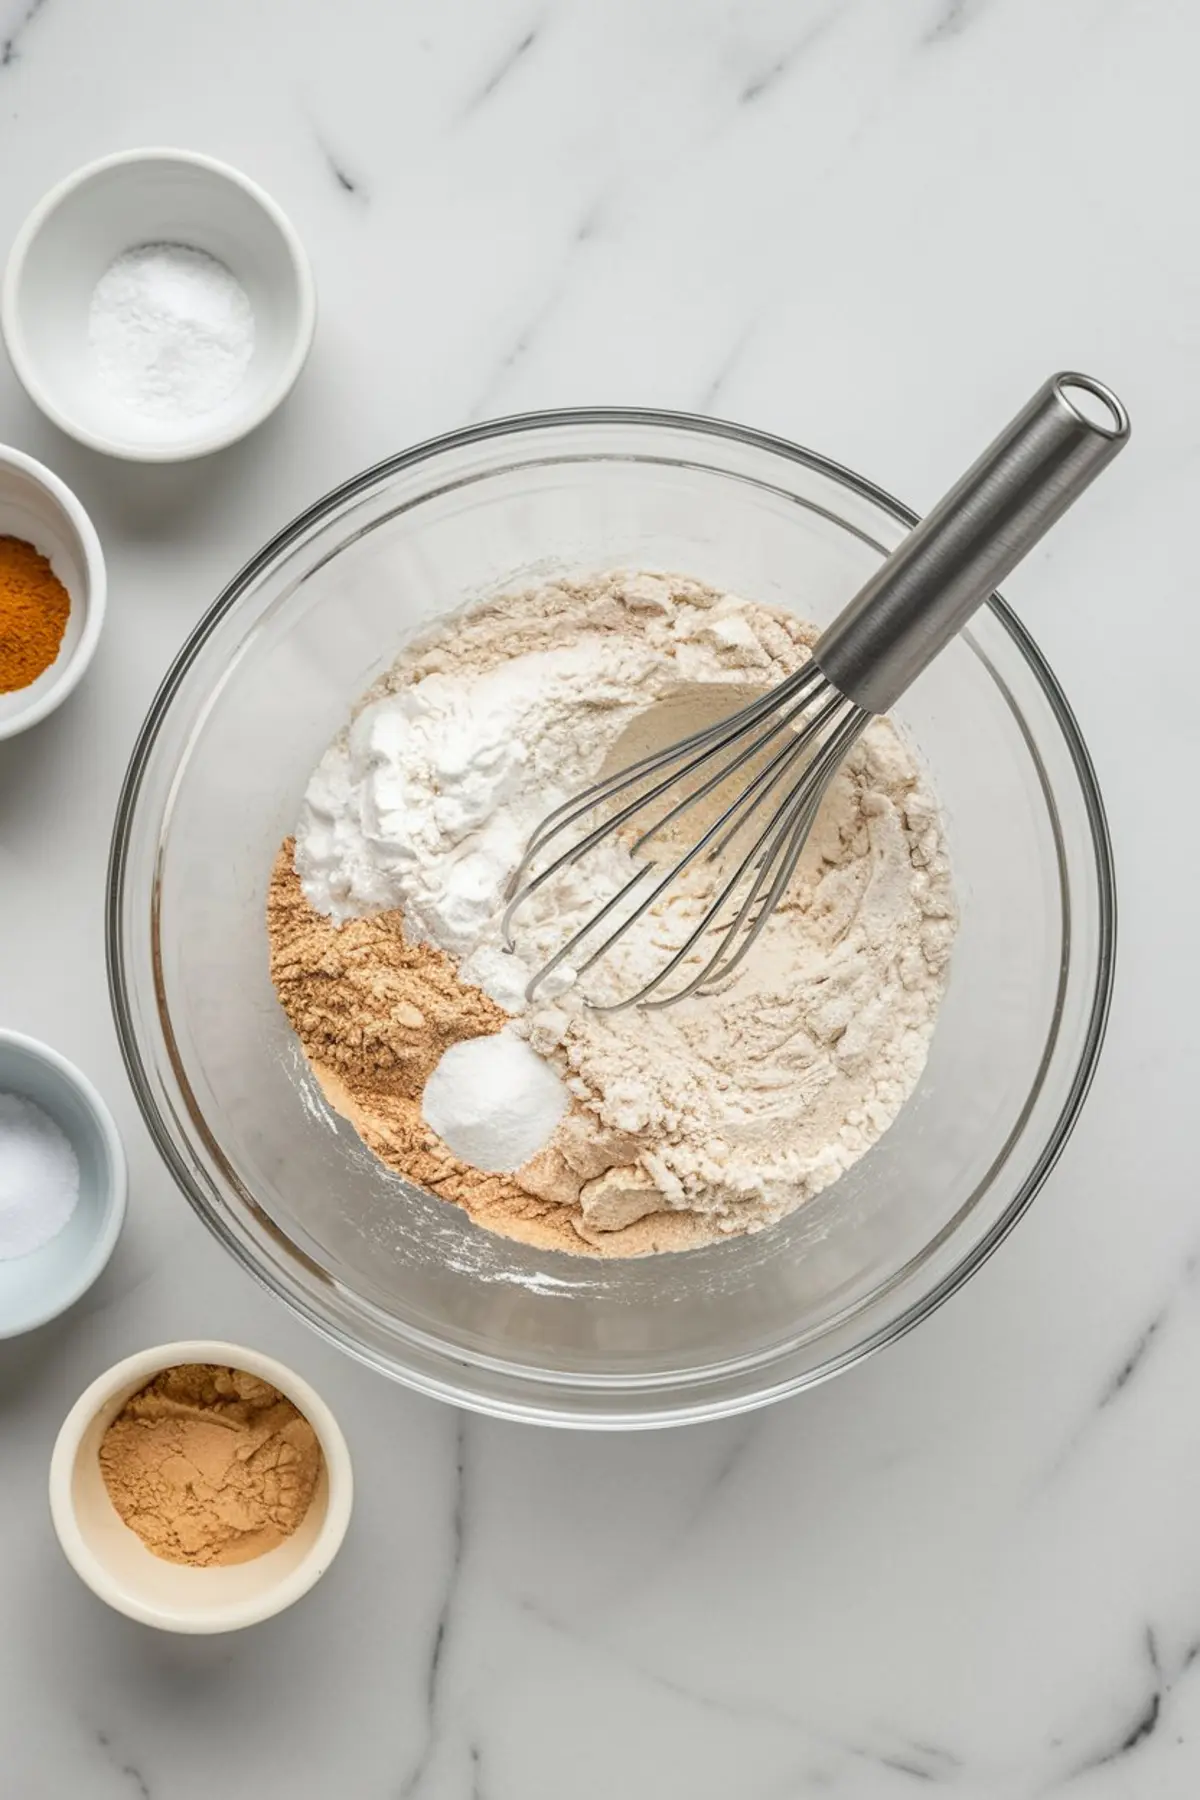
You will start by preheating the oven and lining the muffin tin with your favorite cupcake liners. This stage allows you to prepare the batter without rushing. Sifting the dry ingredients together prevents lumps in the final mix.
A hand mixer or stand mixer will cream the butter and sugar until light and airy. Add eggs, one at a time, blending thoroughly. Vanilla goes in next, ensuring a sweet aroma that echoes through your kitchen.
Pour in the buttermilk and milk in intervals, alternating with the dry blend. Keep the mixing brief, because too much stirring can lead to dense cupcakes. Stop when you see no more streaks of flour, and move quickly to divide the batter into the prepared liners.
Baking and Cooling for a Smooth Finish
Slide the tray into the oven, then wait about 18 to 22 minutes. Check by inserting a toothpick into the center. Look for a clean removal, which signals that the cupcakes are ready.
Do not leave them too long, since gluten-free batters can dry out faster than standard recipes. Remove the cupcakes and let them cool in the pan for a few minutes. Transfer them to a wire rack for a final cool-down, ensuring the texture stays light and soft.
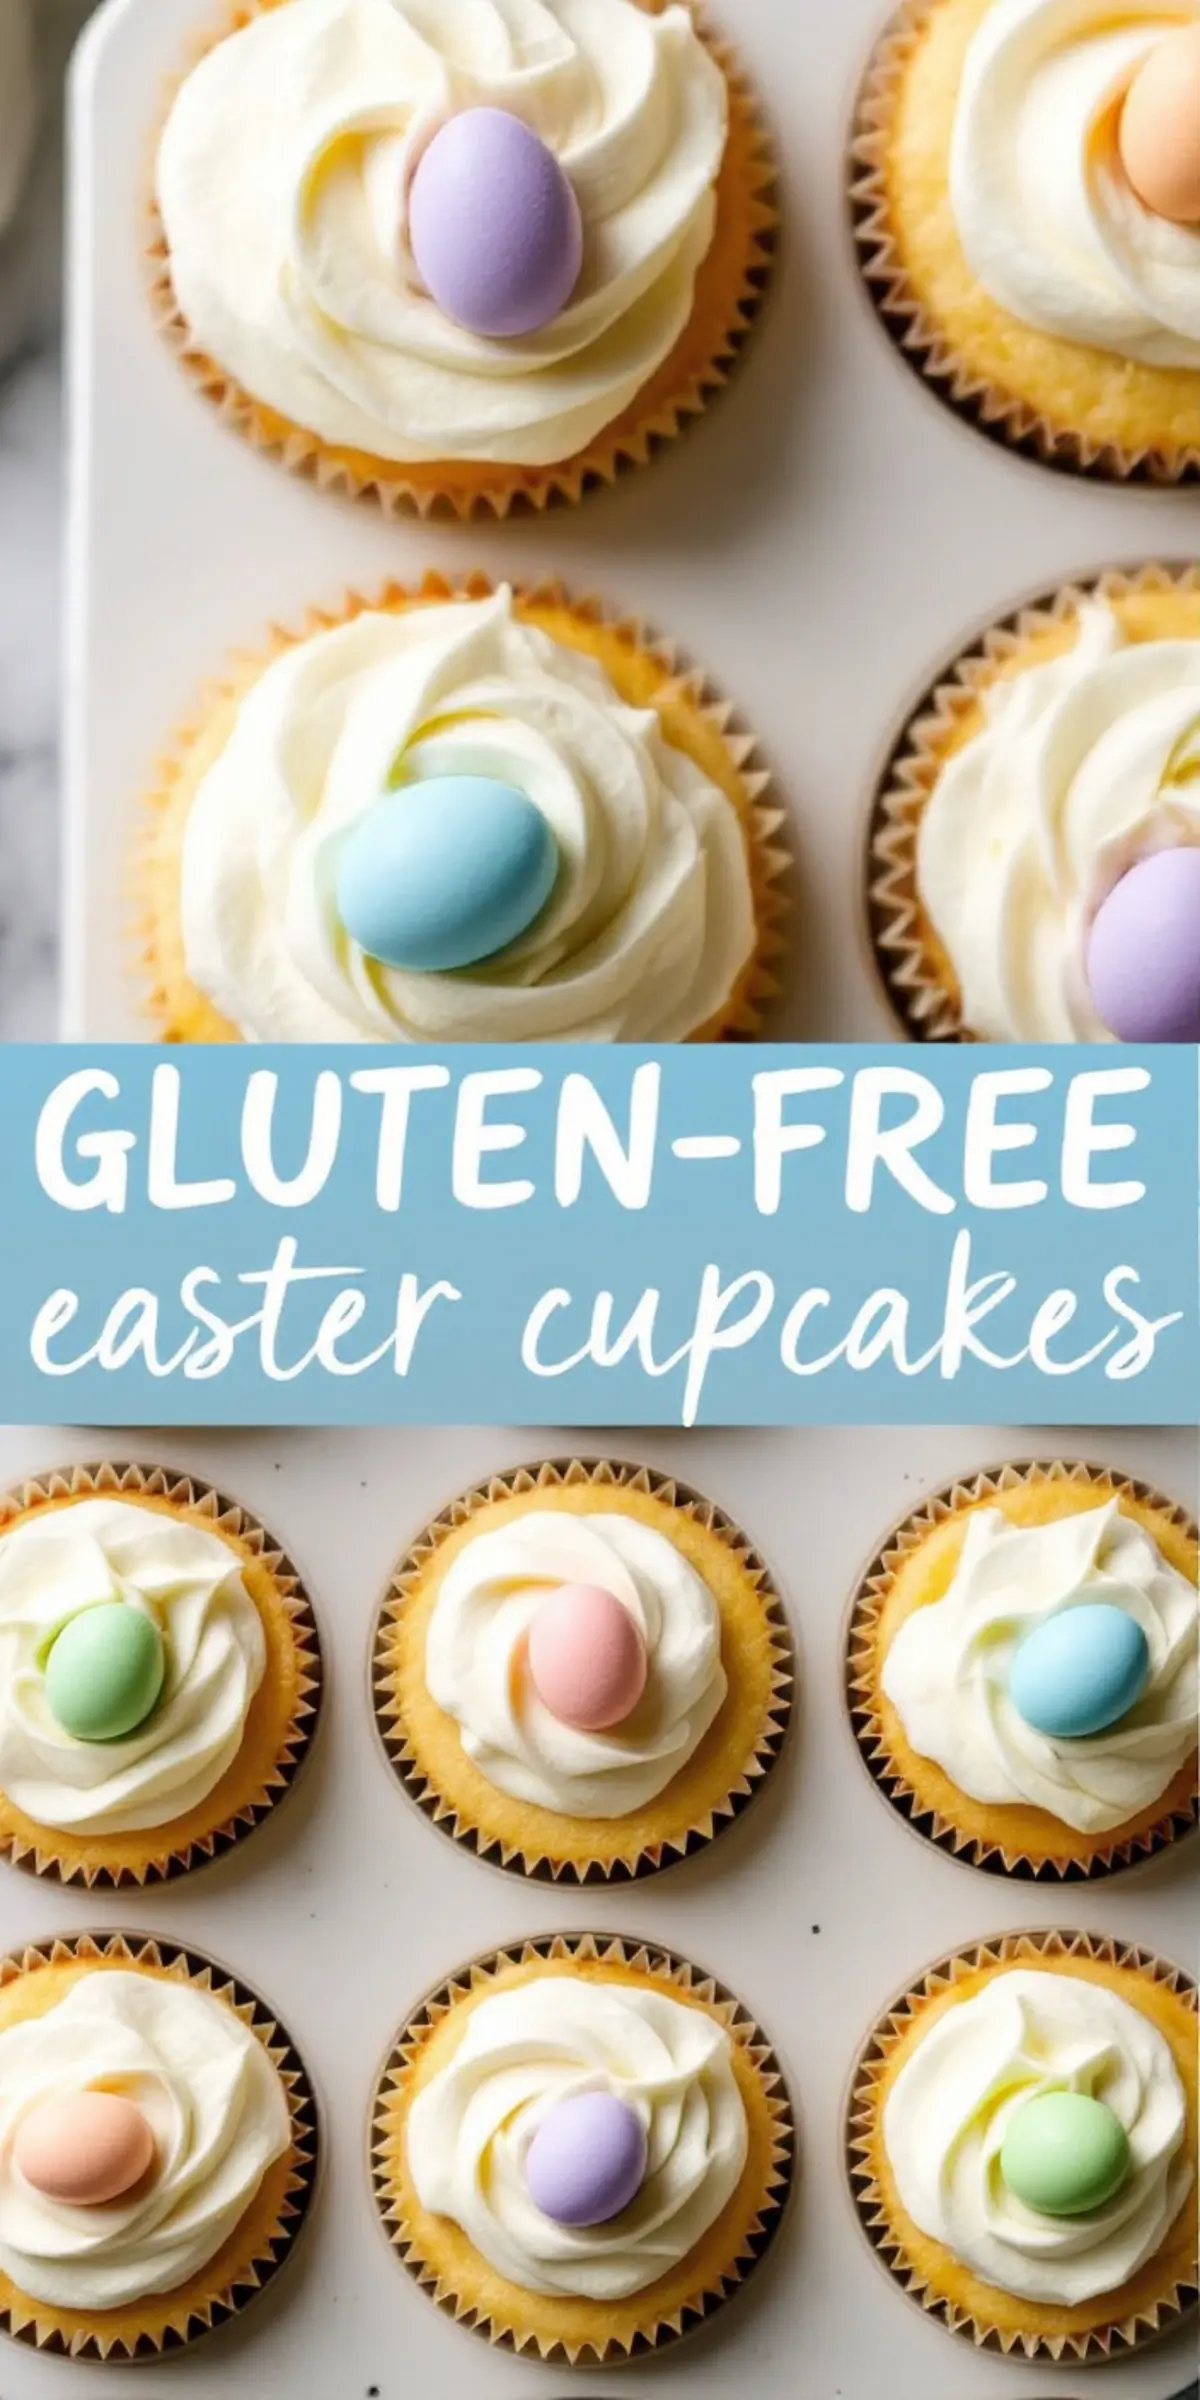
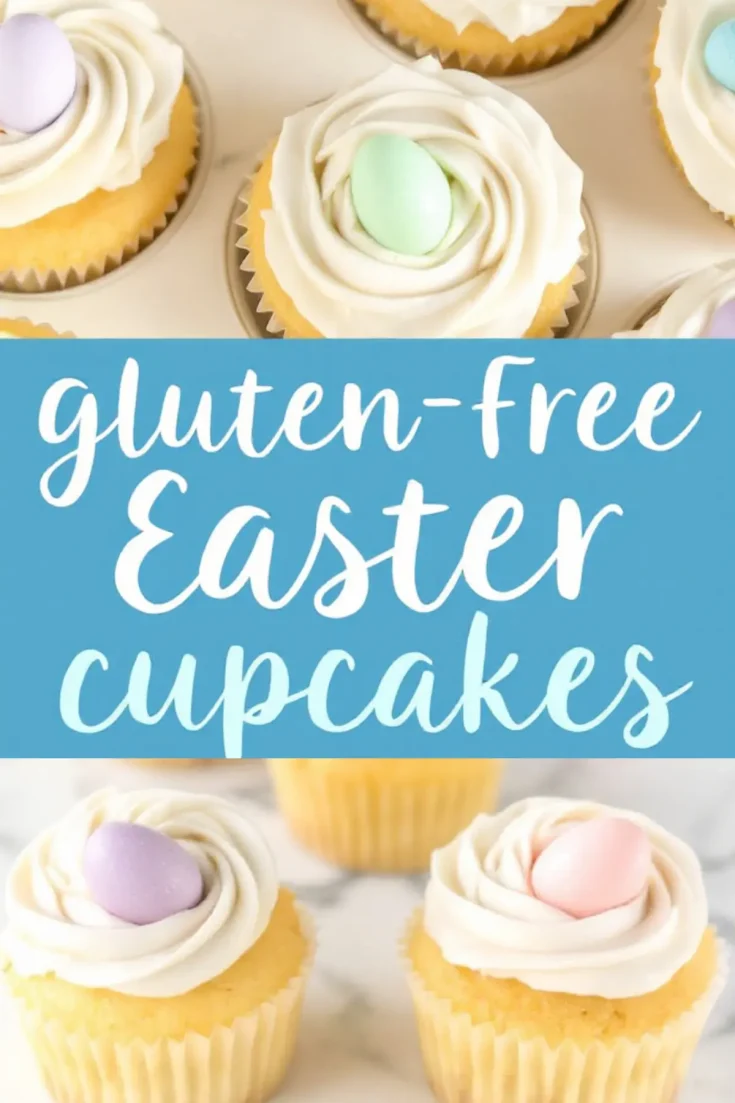
I always admire how the tops settle into a slight dome shape. That shape makes a nice base for buttercream. Take a moment to appreciate the gentle color and sweet scent that will soon fill your home.
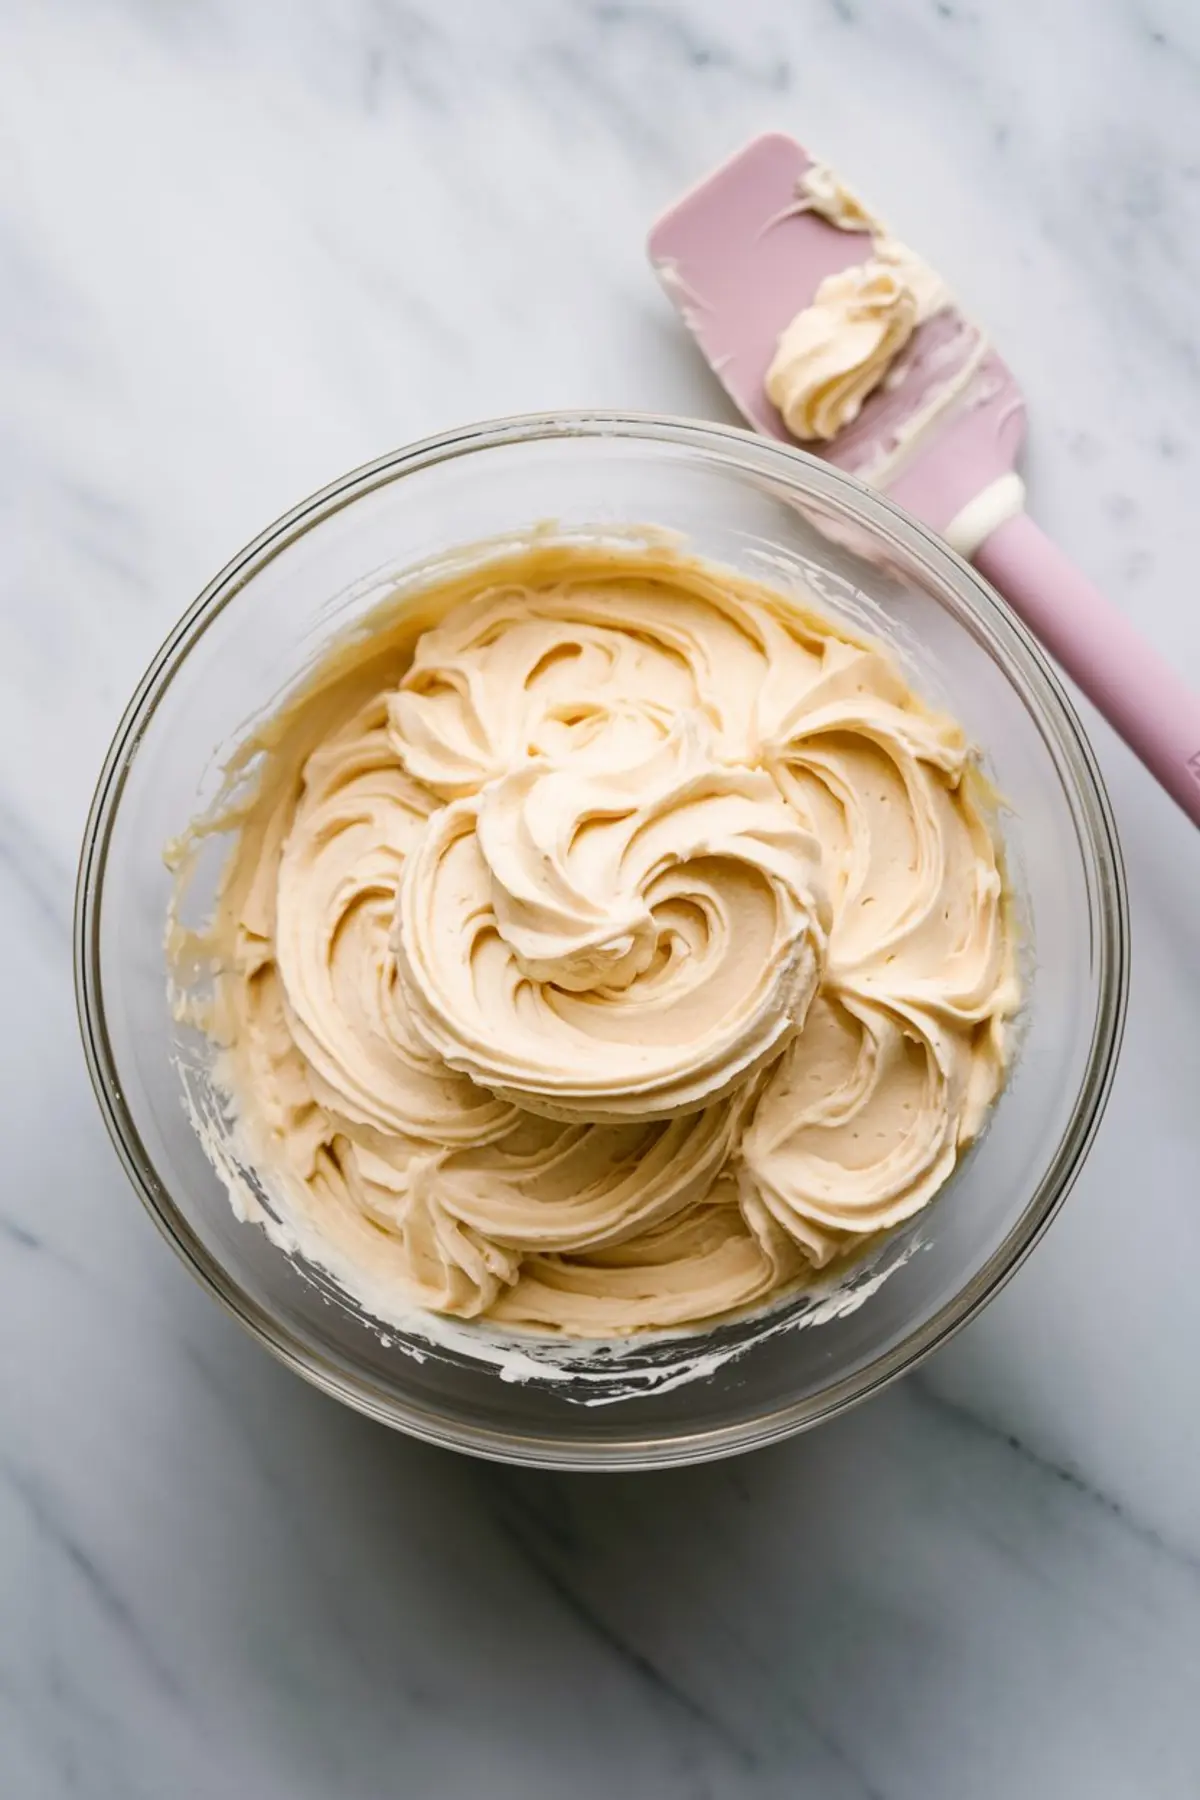
Crafting a Simple Vanilla Buttercream
Buttercream calls for softened butter that is beaten into a smooth texture. Powdered sugar goes in gradually, so the mixture stays creamy without turning gritty. A dash of vanilla extract creates a pleasing taste.
Heavy cream or milk thins the frosting to a spreadable consistency. A small pinch of salt stops the buttercream from becoming too sweet. I like to experiment with pastel food colors for a festive hue, yet leaving it white also allows the decorations to pop.
My mother taught me to adjust the frosting’s texture by adding more sugar or cream. That tip is useful if you want a thicker swirl or a lighter dollop on top. You hold the power to shape this frosting exactly how you want it.
Decorating the Cupcakes with Spring Cheer
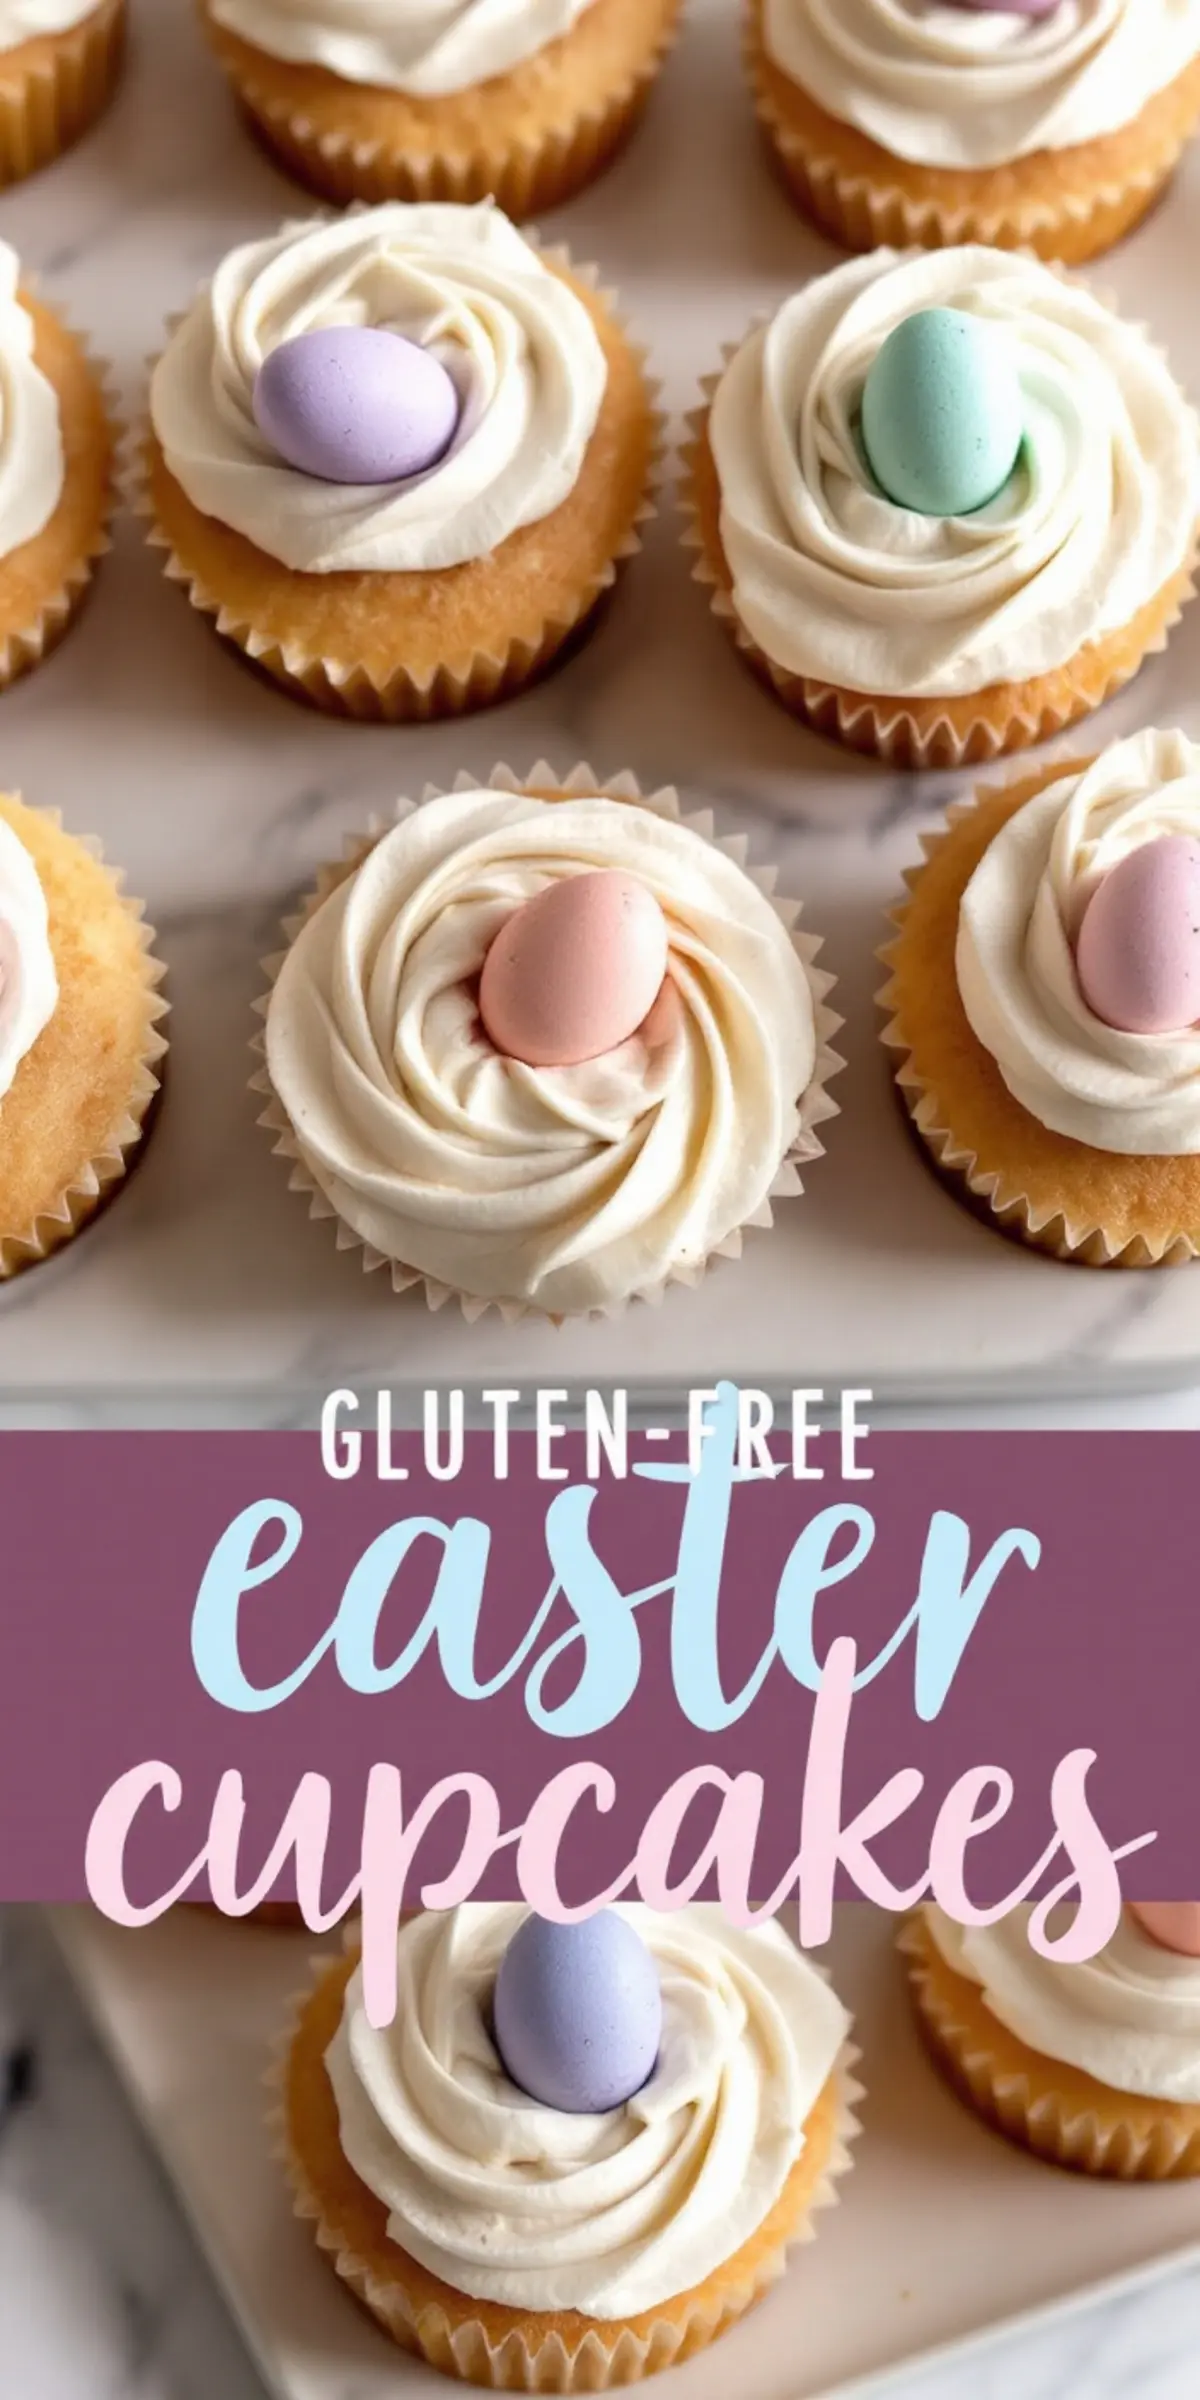
Pipe a swirl of buttercream on each cupcake. Place a mini chocolate egg into the center, pressing gently so it rests in the frosting. Sprinkle a few pastel sprinkles around for extra brightness.
These subtle details evoke a sense of celebration without fuss. Each cupcake looks like a tiny nest filled with chocolate eggs. I love seeing everyone’s reaction to these edible decorations.
If you want an extra flourish, swirl two colors of frosting in the same piping bag. That approach creates a gentle blend on top of each cupcake. My best friend adores the light pink and pale yellow combination.
Preventing Dryness and Storing Cupcakes
Keep the cupcakes in an airtight container once they have cooled and you have frosted them. I store them at room temperature if I plan to serve them soon. This method preserves their soft texture for up to two days.
Refrigeration extends their life to about five days, but you should let them reach room temperature again before digging in. I believe the full flavor emerges after they have time to rest on the counter. A quick taste test usually confirms that.
Frosting can be prepared beforehand and stored in a sealed container in the fridge. Soften it on your countertop before whipping it again. That trick comes in handy during busy weeks.
More Delightful Easter Desserts to Explore
Easter gatherings usually inspire me to bake a variety of treats. I invite you to check my Easter Cookie Cake if you crave a crunchy delight that pairs with coffee or tea. I also recommend Easter Bunny Egg Cupcakes for another fun spring idea.
My friend insists that the Carrot Cake Roll is the highlight of her holiday table. She likes how the cream cheese filling cuts through the sweet cake layer. That recipe is a handy choice if you want variety for your guests.
I enjoy seeing a dessert spread that includes different shapes, textures, and colors. Each recipe stands out, yet the collective theme adds visual appeal. That variety shows your loved ones you value their dessert preferences.
Sharing My Joy Through Baking
These cupcakes are my way of honoring spring’s fresh energy. I promise they will make your celebration table look bright and taste sweet. My personal hope is that you feel inspired to make every bite special.
You might worry about baking gluten-free if you have never tried it before. Trust that each step is straightforward, and the ingredients are easy to find in most markets. I discovered many of these tips by trial and error, and I am excited to save you time.
Keep an open mind, experiment with different sprinkles, and remember to savor the experience. That approach helps you create memories along with a wonderful dessert. I still recall the laughter and chatter as we tasted the first batch, and I want you to sense that same joy.
Final Thoughts: Pin and Comment to Grow Our Community
I hope you save this as a pin for later on your boards, so you can revisit the recipe whenever you like. I also invite you to share how your baking experience goes. Drop a comment about your modifications or any questions you have, and we can build a warm conversation together.
Connections through food often lead to lasting friendships. I cherish every comment and message that comes my way. This journey becomes sweeter when we lift each other’s skills and celebrate small wins in the kitchen.
I thank you for reading and baking with me. My heart feels glad to pass along these cupcake secrets. I look forward to hearing about your finished creations and the smiles they bring to your table.
Gluten-Free Easter Cupcakes Recipe
These gluten-free Easter cupcakes have a soft, tender crumb and a rich vanilla flavor. A smooth buttercream frosting and festive decorations make them a great choice for spring celebrations.
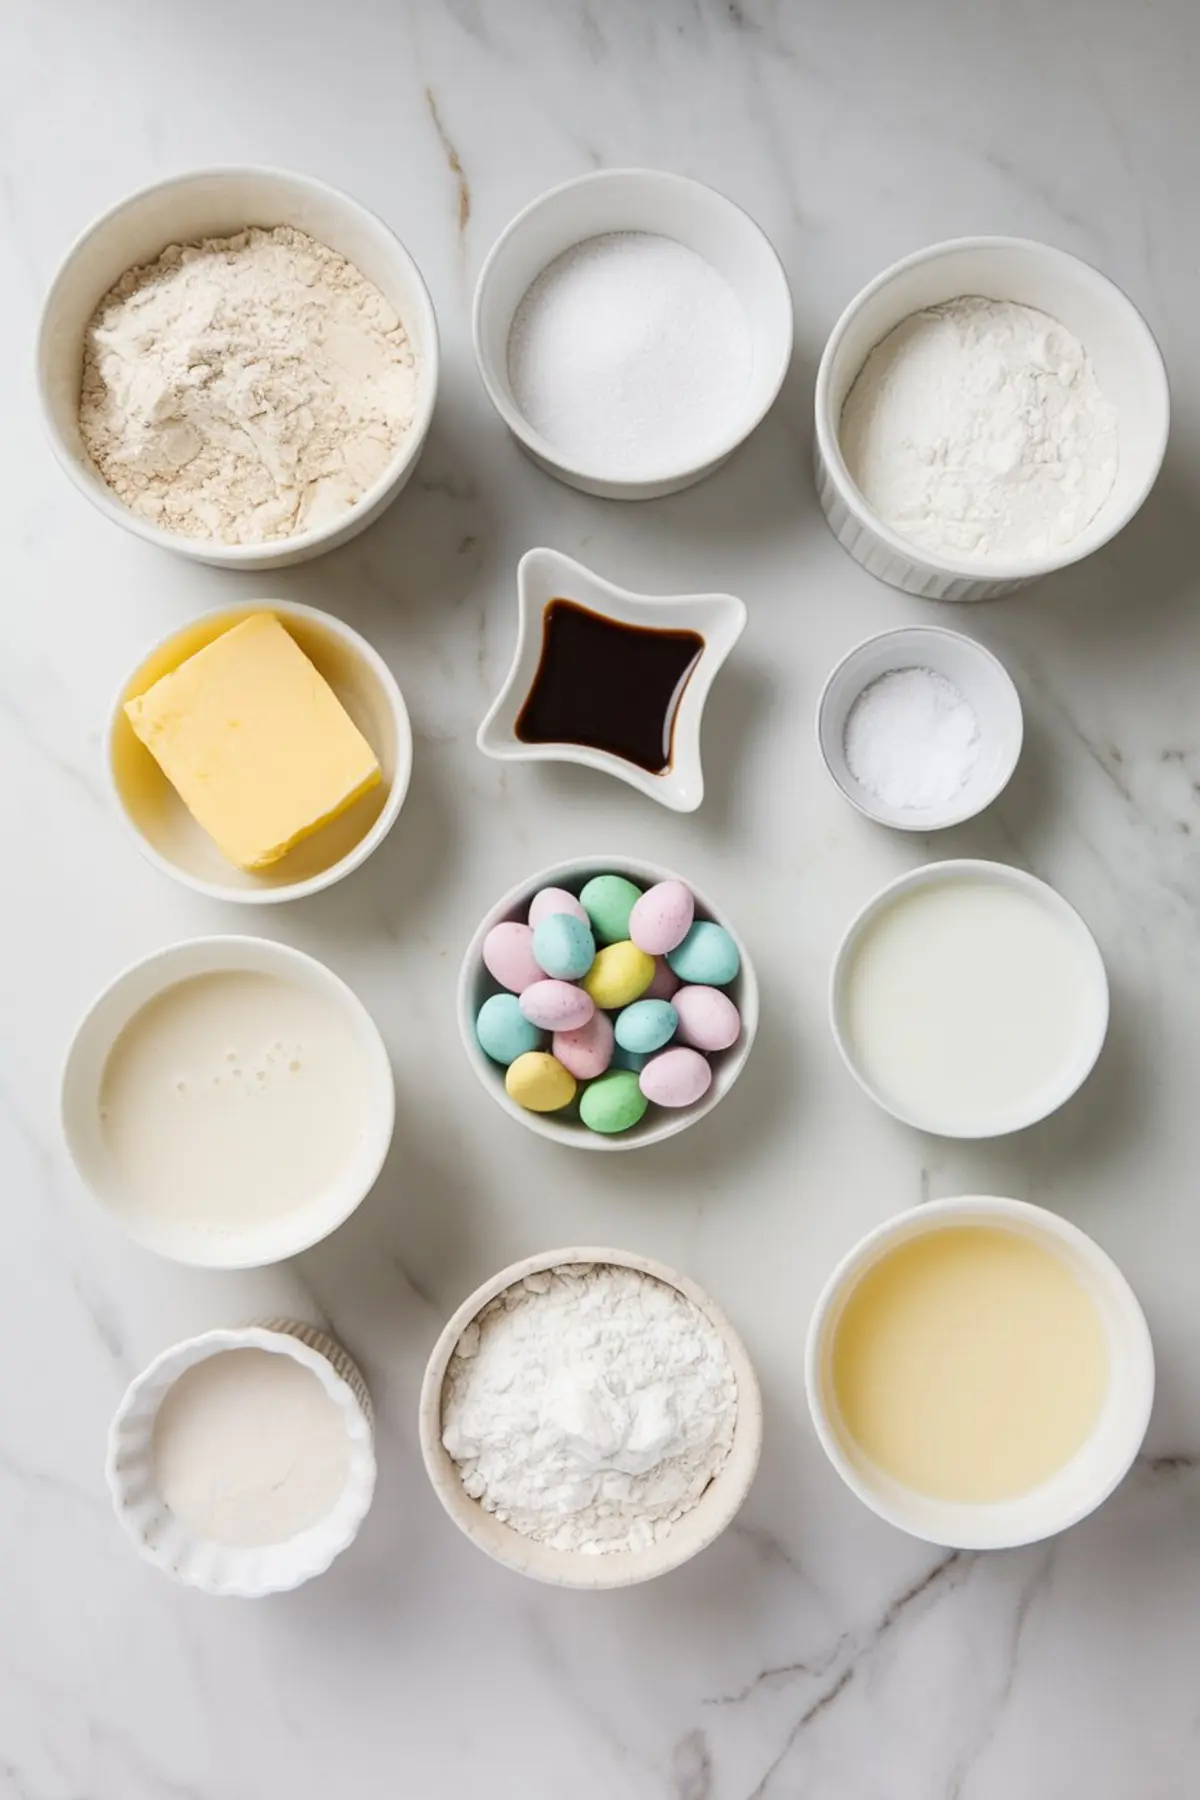
Ingredients
- FOR THE GLUTEN-FREE CUPCAKES:
- 1 ½ cups (180g) gluten-free all-purpose flour (with xanthan gum)
- 1 teaspoon baking powder
- ½ teaspoon baking soda
- ¼ teaspoon salt
- ½ cup (113g) unsalted butter, softened
- ¾ cup (150g) granulated sugar
- 2 large eggs
- 1 teaspoon vanilla extract
- ½ cup (120ml) buttermilk
- ¼ cup (60ml) milk
- FOR THE VANILLA BUTTERCREAM:
- 1 cup (226g) unsalted butter, softened
- 3 cups (360g) powdered sugar
- 2 tablespoons heavy cream or milk
- 1 teaspoon vanilla extract
- Pinch of salt
- FOR DECORATING:
- Mini candy-coated chocolate eggs (such as Cadbury Mini Eggs)
- Pastel sprinkles (optional)
Instructions
- PREPARE THE CUPCAKES: Preheat the oven to 350°F (175°C) and line a 12-cup muffin tin with cupcake liners. In a medium bowl, whisk together the gluten-free flour, baking powder, baking soda, and salt. Set aside.
- CREAM THE BUTTER AND SUGAR: In a large bowl, use a hand or stand mixer to beat the butter and sugar until light and fluffy, about 2 minutes.
- ADD EGGS AND VANILLA: Add the eggs one at a time, beating well after each addition. Mix in the vanilla extract.
- COMBINE WET AND DRY INGREDIENTS: Alternately add the dry ingredients and the buttermilk and milk mixture, beginning and ending with the dry ingredients. Mix until just combined, being careful not to overmix.
- BAKE THE CUPCAKES: Divide the batter evenly among the cupcake liners, filling each about two-thirds full. Bake for 18-22 minutes, or until a toothpick inserted in the center comes out clean. Let the cupcakes cool in the pan for 5 minutes, then transfer them to a wire rack to cool completely.
- MAKE THE BUTTERCREAM FROSTING: In a large bowl, beat the butter until creamy, about 2 minutes. Gradually add the powdered sugar, starting at low speed and increasing to medium-high until smooth.
- ADD REMAINING INGREDIENTS: Mix in the vanilla extract, heavy cream (or milk), and a pinch of salt. Beat until the frosting is light and fluffy. Adjust the consistency by adding more cream if needed to thin or more powdered sugar to thicken.
- DECORATE THE CUPCAKES: Transfer the frosting to a piping bag fitted with a large star tip. Pipe a swirl of frosting onto each cooled cupcake.
- ADD FINAL TOUCHES: Gently press a mini chocolate egg into the center of each cupcake and sprinkle with pastel sprinkles if desired.
Notes
Gluten-free all-purpose flour blends vary by brand. Ensure the blend you use contains xanthan gum, or add ½ teaspoon if it's not included.
For best results, bring all refrigerated ingredients to room temperature before mixing to ensure even blending.
Cupcakes can be stored in an airtight container at room temperature for up to 2 days or in the refrigerator for up to 5 days. Let refrigerated cupcakes come to room temperature before serving for the best texture.
Buttercream frosting can be made ahead and stored in the refrigerator for up to a week. Let it soften at room temperature and rewhip before using.