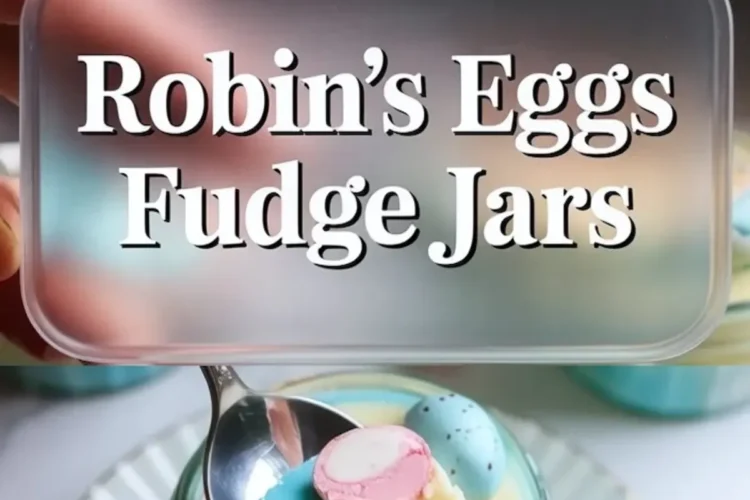
Robin Egg Fudge Jars layer creamy white chocolate fudge with crushed Robin Eggs candy for a bright spring candy fudge recipe that doubles as Easter candy fudge and mini egg fudge. This robin egg dessert borrows from classic Cadbury Egg fudge and answers how to make Easter egg fudge in a simple, giftable format that fits any list of Robin Egg recipes or fudge Easter eggs for your holiday table.
The key lies in a tight ratio of white chocolate, sweetened condensed milk, and butter that sets smooth and spoonable inside small jars. The result tastes rich and milky, with soft bite and crisp candy shells on top, which gives that contrast I always want in Easter fudge.
Following a special diet?
Every recipe on this site can be converted to gluten-free, vegan, dairy-free, keto, nut-free or egg-free with adjusted ratios so nothing falls flat.
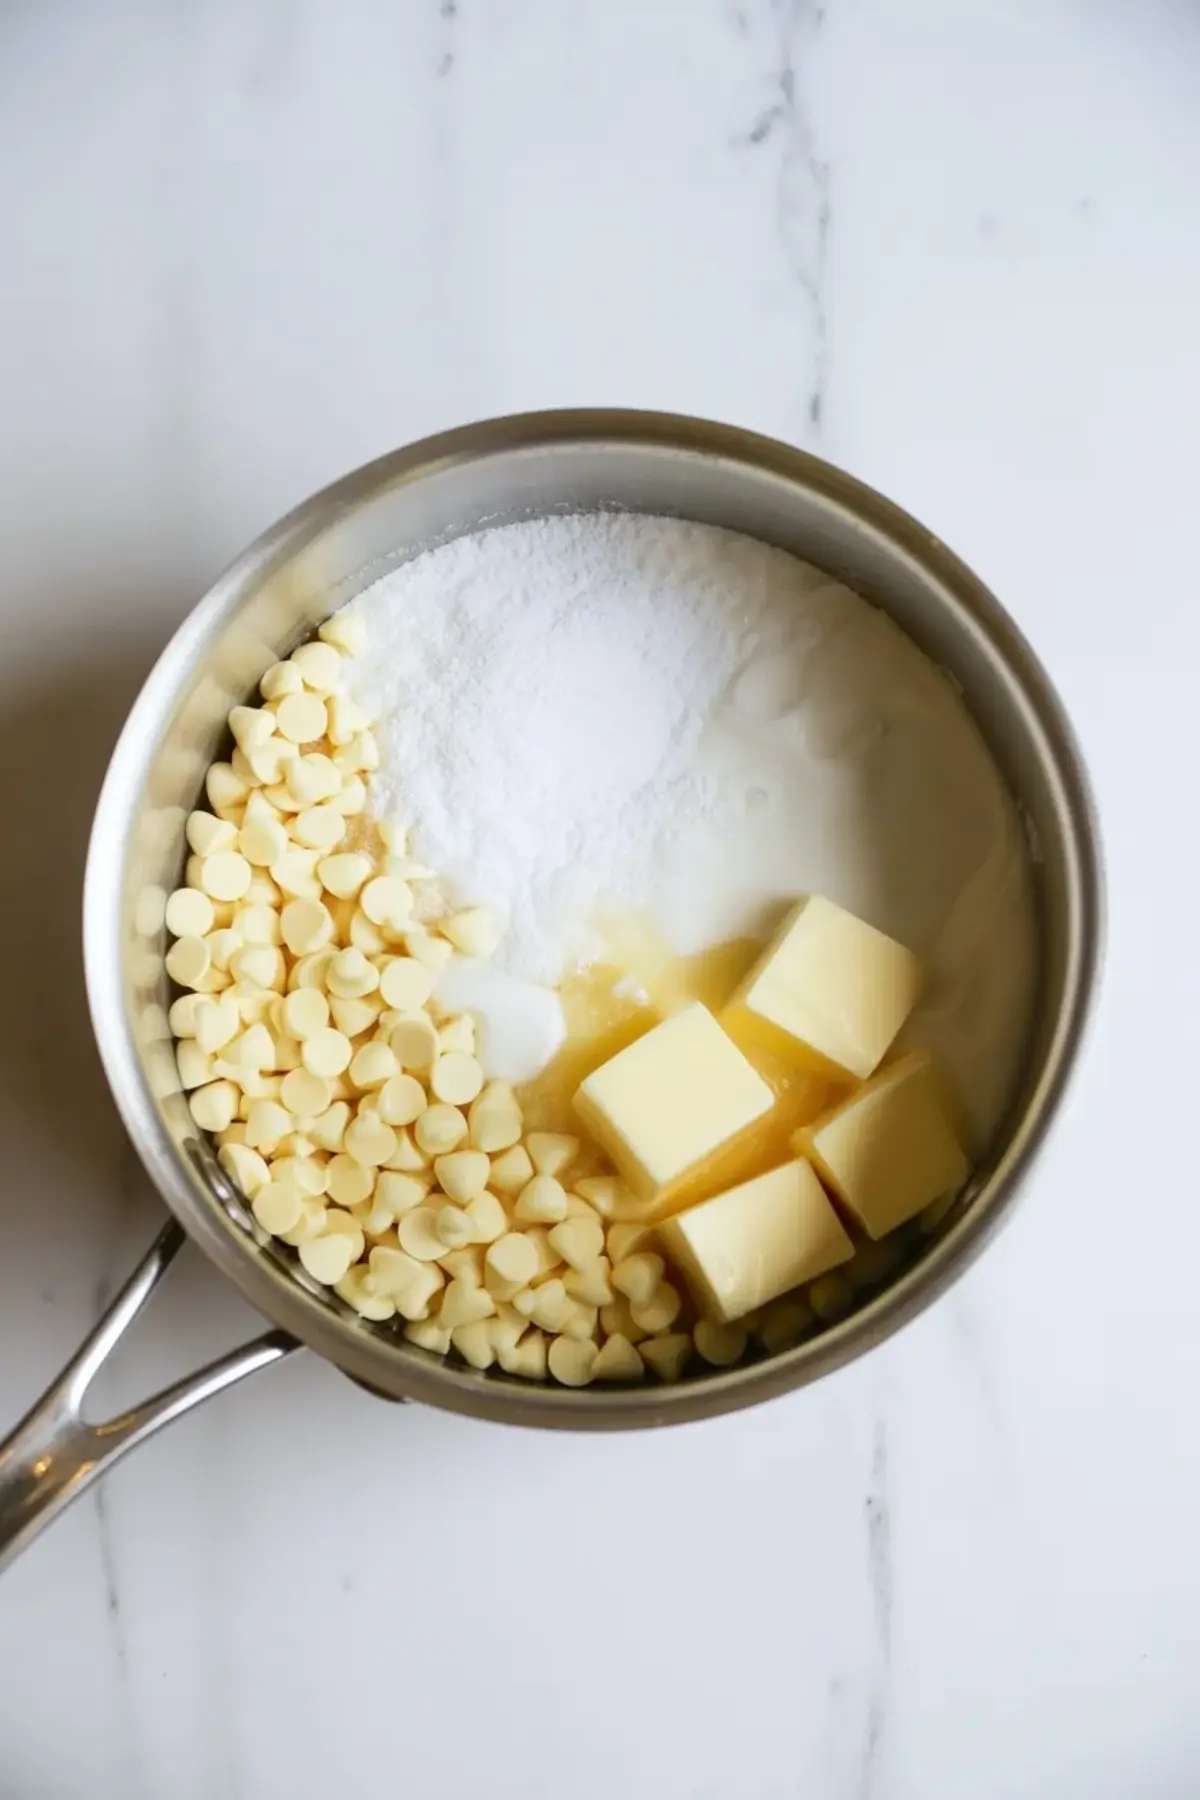
Try the Recipe Converter →The base uses 3 cups white chocolate chips to 14 ounces sweetened condensed milk with 4 tablespoons butter. That ratio creates structure without turning the fudge dense or greasy, and it sets clean after two hours of chill time.
Low heat matters. White chocolate scorches fast, so steady stirring for 5 to 7 minutes keeps the mixture glossy and thick, not grainy. A rushed batch always shows it.
What You Need and Why It Matters
White chocolate chips form the backbone of this mini egg fudge. Good quality chips melt evenly and taste creamy rather than waxy, and that flavor carries the whole jar.
Sweetened condensed milk binds everything and adds sweetness without extra sugar crystals. Unsalted butter rounds the flavor and adds shine, and a pinch of salt sharpens the sweetness so the robin eggs candy stays bright on the finish.
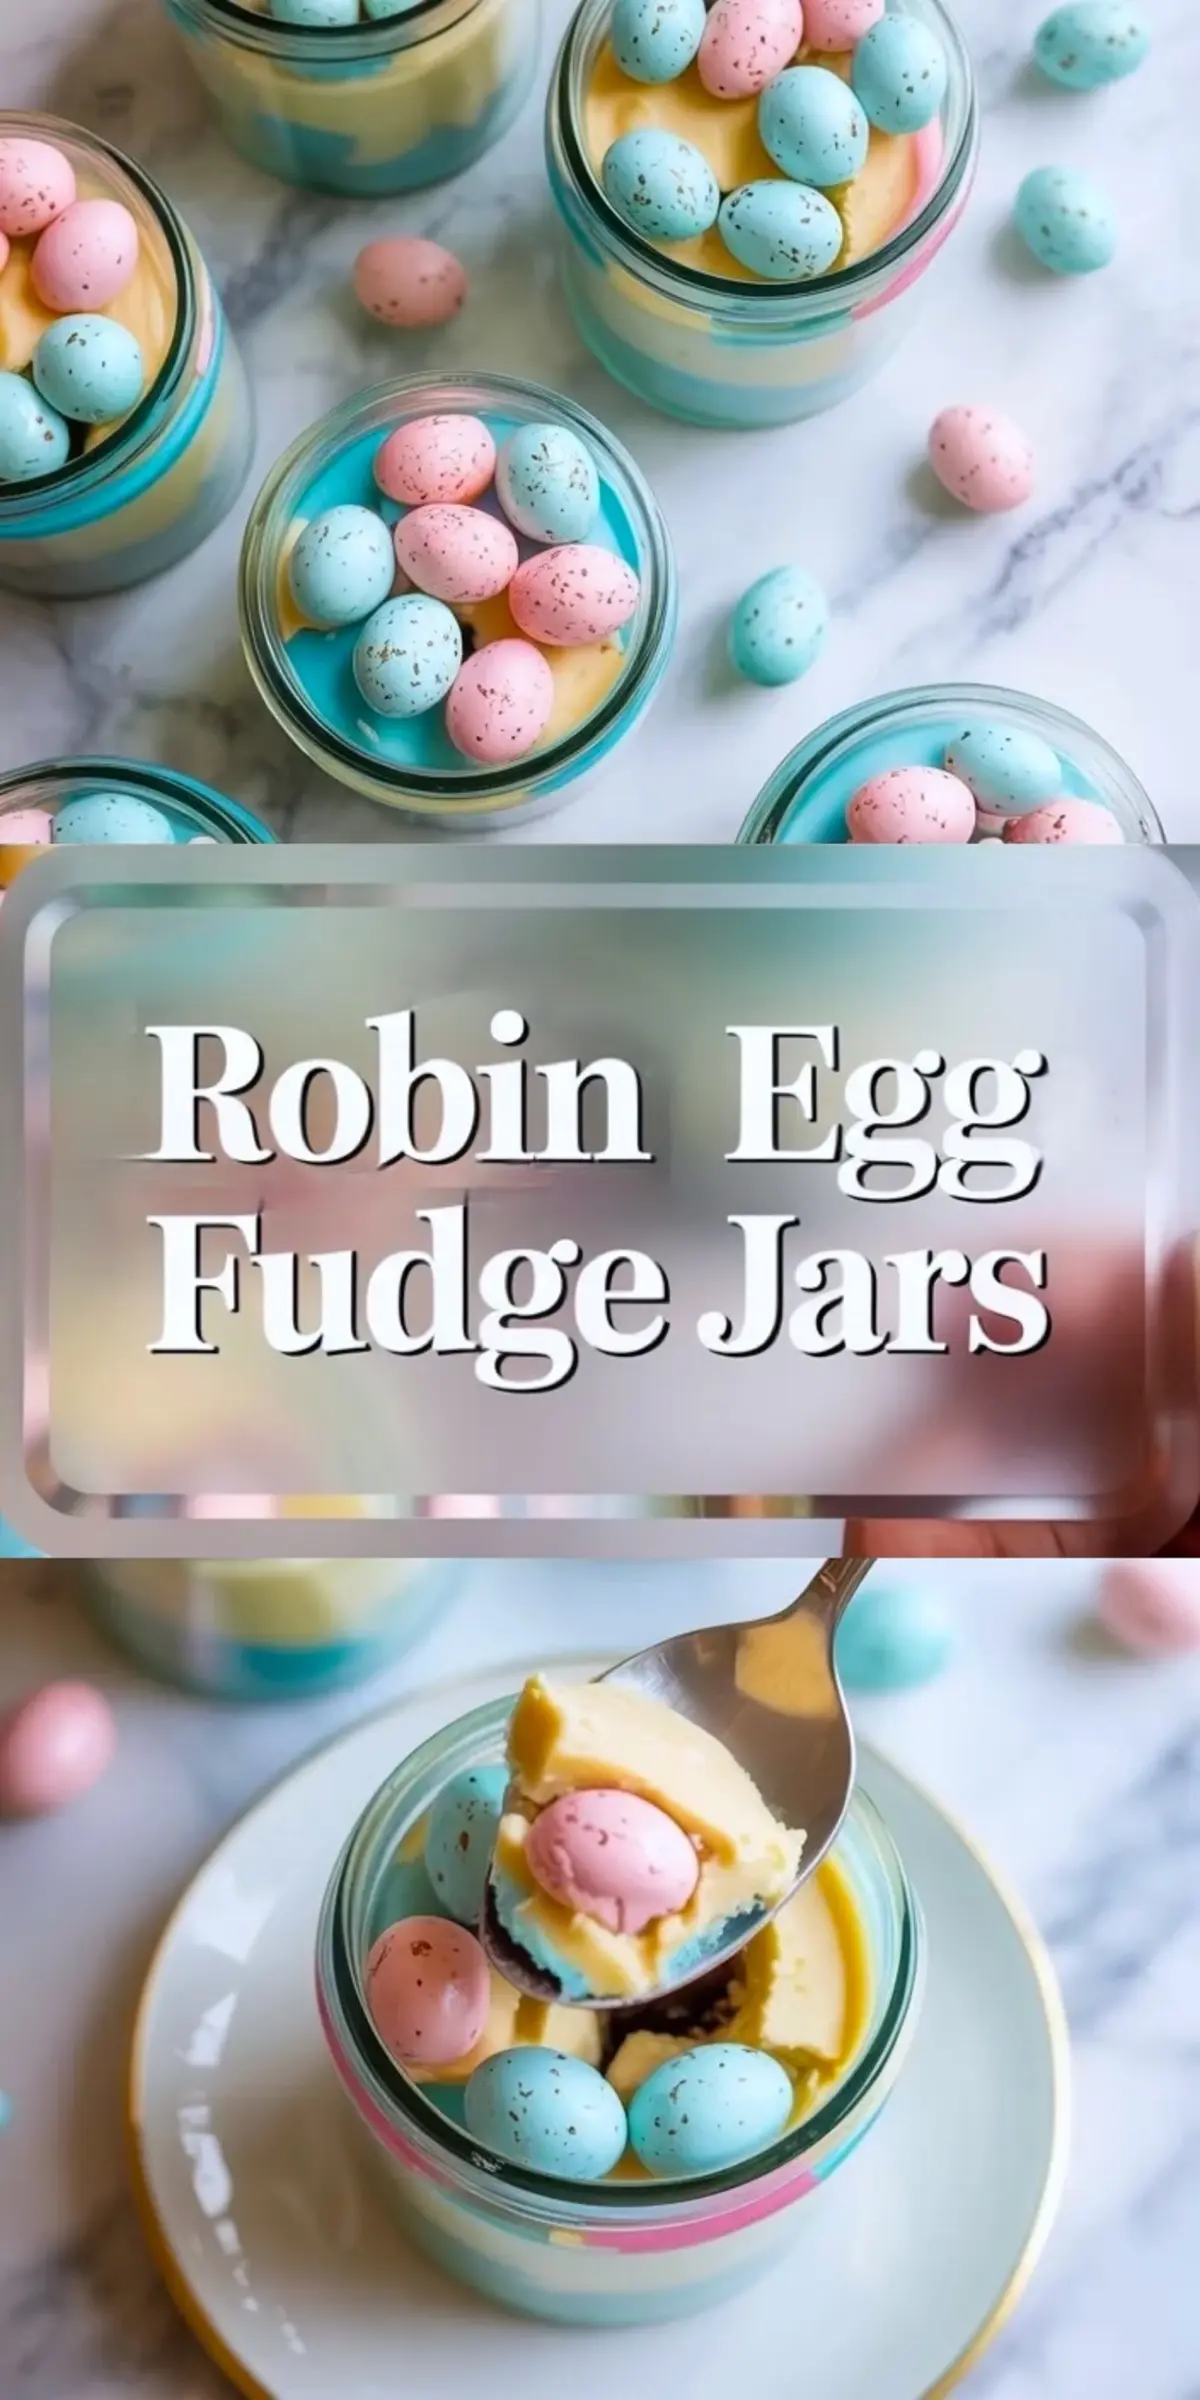
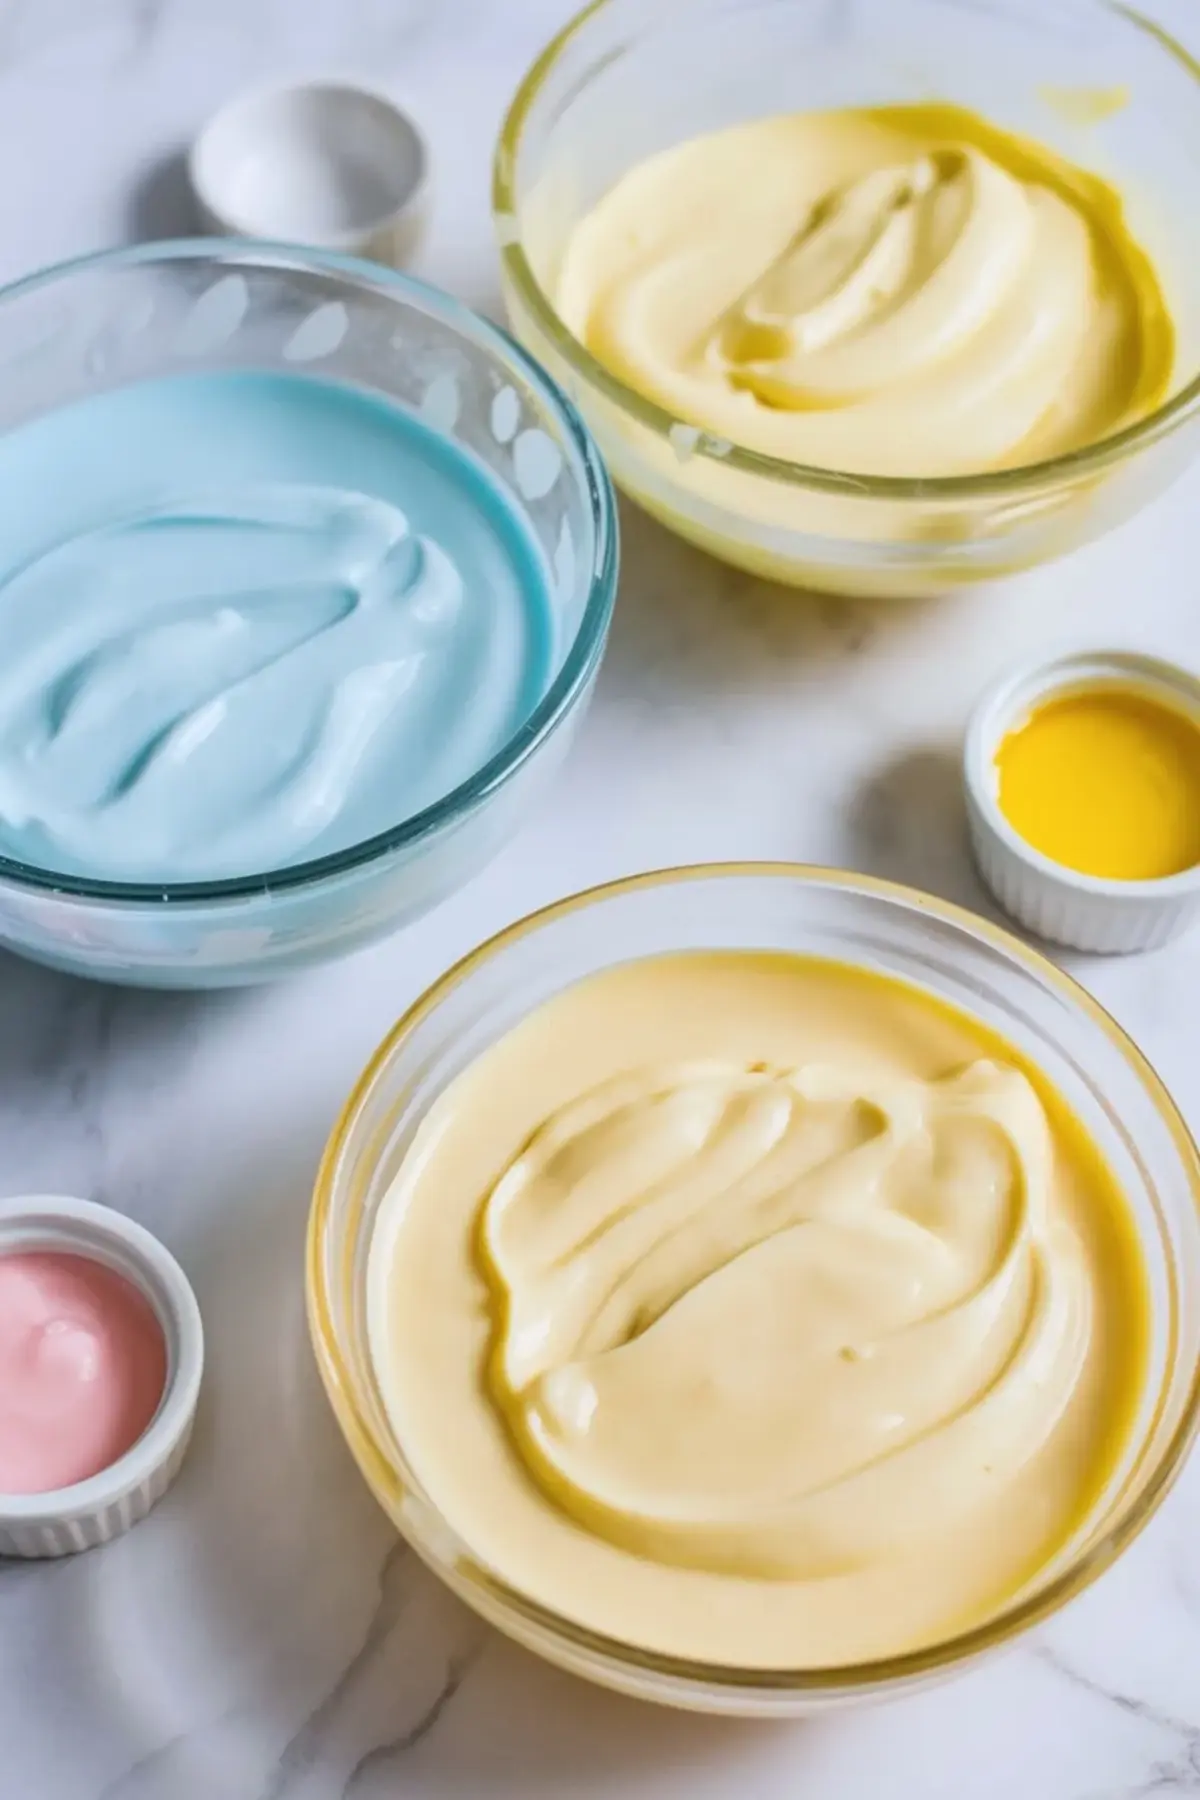
Gel food coloring gives soft blue and pastel yellow layers that echo robin eggs candy. Gel keeps the fudge thick, which helps you get clear layers instead of a loose swirl.
Key Technique Spotlight: Gentle Melting
Gentle melting controls texture. Constant scraping along the bottom of the saucepan prevents scorching, which can ruin an otherwise smooth spring candy fudge recipe.
The mixture should look glossy and thick, almost like warm frosting. A separated look points to heat that ran too high, so low heat and steady stirring bring it back together.
How To Make Robin Egg Fudge Jars
Six clean dry jars sit on a tray so the move to the refrigerator stays simple. Dry glass keeps the fudge from seizing, so a quick towel dry matters more than it sounds.
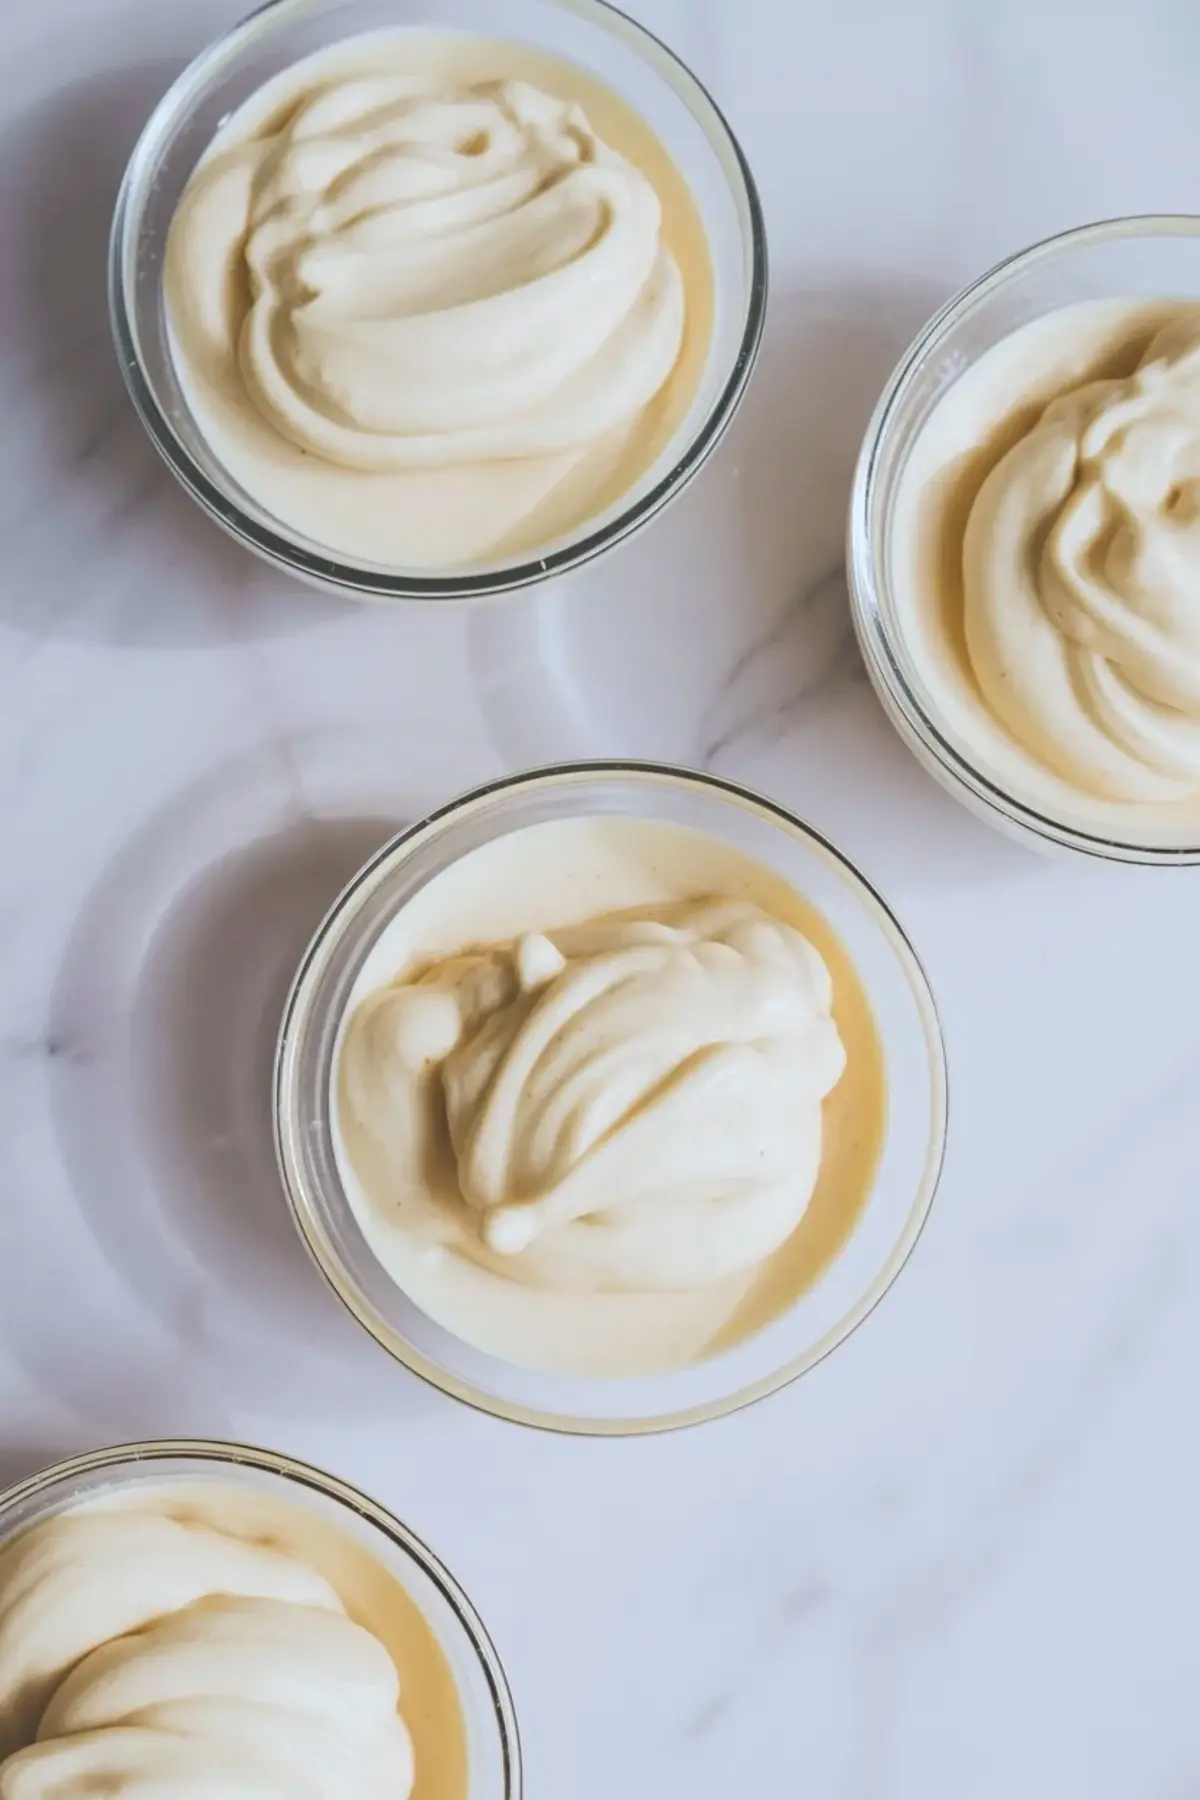
White chocolate, condensed milk, butter, and salt melt over low heat until smooth. The mixture thickens and pulls slightly from the sides of the pan, and that visual cue tells you it is ready for vanilla.
The warm fudge gets divided into bowls and colored fast. A quick pace helps because the fudge sets as it cools, and the layers look sharper when the mixture stays warm.
Each jar gets layered and smoothed with the back of a spoon. A light skewer swirl can add a soft marble look, and a gentle hand keeps the colors distinct.
Robin eggs candy gets pressed into the top while the surface stays soft. The candy should sit snug but visible, like a small nest resting on the fudge.
A related holiday dessert sits here for later planning. Easter Swirl Pie brings the same pastel energy in slice form.
How To Tell It Is Set
The fudge firms after at least two hours in the refrigerator. The surface should feel solid yet give slightly under gentle pressure, and the layers should hold their shape when you tilt the jar.
Underset fudge looks glossy and shifts in the jar. A very firm jar softens after 10 to 15 minutes at room temperature, which often tastes best.
A quick dip option helps when you need another Easter treat on the table. Simple Easter Dip keeps the theme but changes the texture.
Troubleshooting
Grainy texture usually comes from heat that ran too high. Low heat and constant stirring fix that before it starts, and a heavy bottom saucepan helps too.
Blended layers happen when the fudge cools too much between colors. A faster layering rhythm keeps the lines clean and the colors clear.
Thin fudge points to added moisture or too much coloring. Gel color and fully dry jars keep the mixture thick and steady.
A cake option can balance the candy-heavy lineup. Easter Egg Nest Cake adds a baked element with the same holiday look.
Ways To Change It
A stronger vanilla note comes from 1 1/2 teaspoons vanilla instead of 1 teaspoon. A pinch of almond extract also works, and the flavor reads like bakery fudge.
A marbled jar needs only two colors and one light swirl. A layered jar needs three portions and quick spoon work for clean stripes.
A crunchier top comes from crushing 1/4 cup of robin eggs candy and sprinkling it over the pressed candies. A smoother top comes from using whole candies only.
A pudding-style Easter treat can round out the dessert table. Easter Dirt Cake brings a softer spoon dessert next to the fudge jars.
Storage & Practical Tips
The jars hold best in the refrigerator with lids on for up to 5 days. The candy stays crispest in the first two days, then softens slightly, which some people actually prefer.
The freezer works for longer storage. A tight lid and a wrap layer prevent freezer smell, and a slow thaw in the refrigerator keeps the texture smooth.
A silicone spatula scrapes the pan clean and keeps the fudge from scorching. A low heat setting keeps the melt steady and keeps the texture smooth.
Small jars help the layers look sharp. A small spoon and quick smoothing keep the stripes clean without mixing the colors.
Gel color should get added in tiny amounts. A toothpick dip gives better control than squeezing straight from the tube.
How To Serve It
Each jar can go straight from the fridge to the table. A 10 minute rest gives a softer bite, and a small spoon makes it feel like a plated dessert even at a casual table.
Gift jars travel best when you keep them chilled until the last moment. A ribbon and a tiny tag turn them into a simple holiday gift.
Save This Recipe
A spot on your Easter board keeps this idea ready for the season. A saved pin helps later when you want a quick batch of Cadbury egg fudge style treats in jars.
A comment helps me help you. Your questions and your candy color ideas make the next batch better for everyone.
Robin Egg Fudge Jars
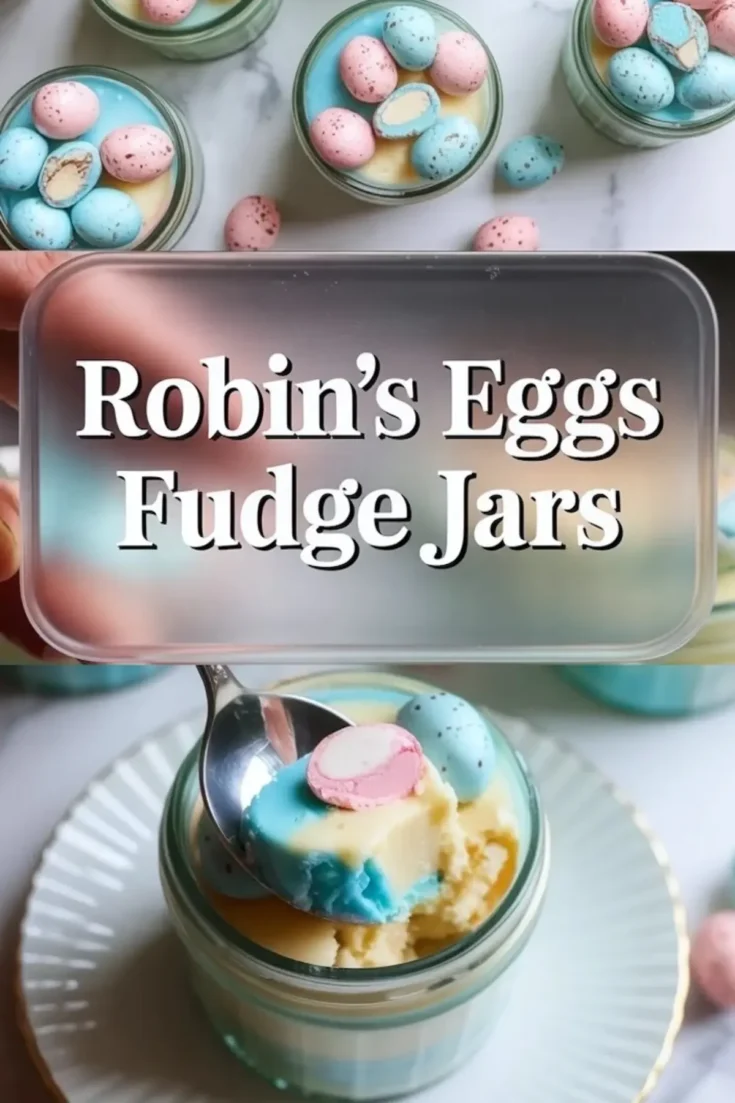
These colorful robin egg fudge jars are layered with creamy chocolate fudge and topped with crushed robin eggs candy for the ultimate spring treat. Inspired by classic cadbury egg fudge, this festive dessert brings fun texture and pastel charm to your holiday table. Add this to your list of easter fudge and creative robin egg recipes for the season. This mini egg fudge makes a beautiful edible gift and a standout robin egg dessert. If you’re searching for how to make easter egg fudge, this easy spring candy fudge recipe doubles as eye-catching easter candy fudge served in individual jars.
Ingredients
- FOR THE FUDGE
- 3 cups white chocolate chips
- 1 can (14 ounces) sweetened condensed milk
- 4 tablespoons unsalted butter
- 1 teaspoon pure vanilla extract
- Gel food coloring, soft blue
- Gel food coloring, pastel yellow
- Pinch of salt
- FOR THE GARNISH
- 1 1/2 cups robin’s egg candy, plus extra if desired
Instructions
PREPARE THE JARS: Arrange six clean 4- to 6-ounce glass jars on a tray to make transferring them to the refrigerator easier later. Ensure the jars are completely dry so the fudge sets properly and does not seize from added moisture.
MELT THE FUDGE BASE: Place the white chocolate chips, sweetened condensed milk, unsalted butter, and a pinch of salt into a medium saucepan set over low heat. Stir constantly with a heatproof spatula, scraping the bottom and sides of the pan to prevent scorching. Continue stirring for 5 to 7 minutes until the mixture becomes fully melted, smooth, and thick. Remove the saucepan from the heat and immediately stir in the vanilla extract until evenly incorporated.
DIVIDE AND COLOR: Quickly divide the warm fudge mixture evenly into two or three bowls, depending on how many colors you prefer. Add a small amount of soft blue gel food coloring to one bowl and stir until the color is uniform. Add pastel yellow gel coloring to another bowl and stir thoroughly. Leave one portion plain if you want a white layer. Work efficiently, as the fudge will begin to set as it cools.
LAYER THE FUDGE: Spoon one color of fudge into the bottom of each jar and gently smooth the surface with the back of a spoon. Add the next color on top, spreading carefully to create distinct layers. Continue layering until the jars are nearly full, leaving a small amount of space at the top. For a subtle marbled effect, lightly swirl the layers with a skewer, but avoid overmixing to maintain visible color contrast.
ADD THE CANDY EGGS: While the fudge remains soft, press several robin’s egg candies into the top of each jar. Arrange the candies close together so they resemble a small nest resting on the surface of the fudge. Press lightly to secure them without submerging them completely.
CHILL AND SET: Transfer the tray of jars to the refrigerator and chill for at least 2 hours, or until the fudge is firm to the touch. Once fully set, serve chilled or allow the jars to sit at room temperature for 10 to 15 minutes for a slightly softer texture.
Notes
Use high-quality white chocolate chips for the smoothest texture and best flavor.
Gel food coloring is recommended because liquid coloring can thin the fudge and affect consistency.
Store jars covered in the refrigerator for up to 5 days.
For gifting, secure lids tightly and keep refrigerated until ready to present.
Nutrition Information
Yield
6Serving Size
1Amount Per Serving Calories 1004Total Fat 49gSaturated Fat 29gUnsaturated Fat 20gCholesterol 49mgSodium 143mgCarbohydrates 140gFiber 0gSugar 116gProtein 8g