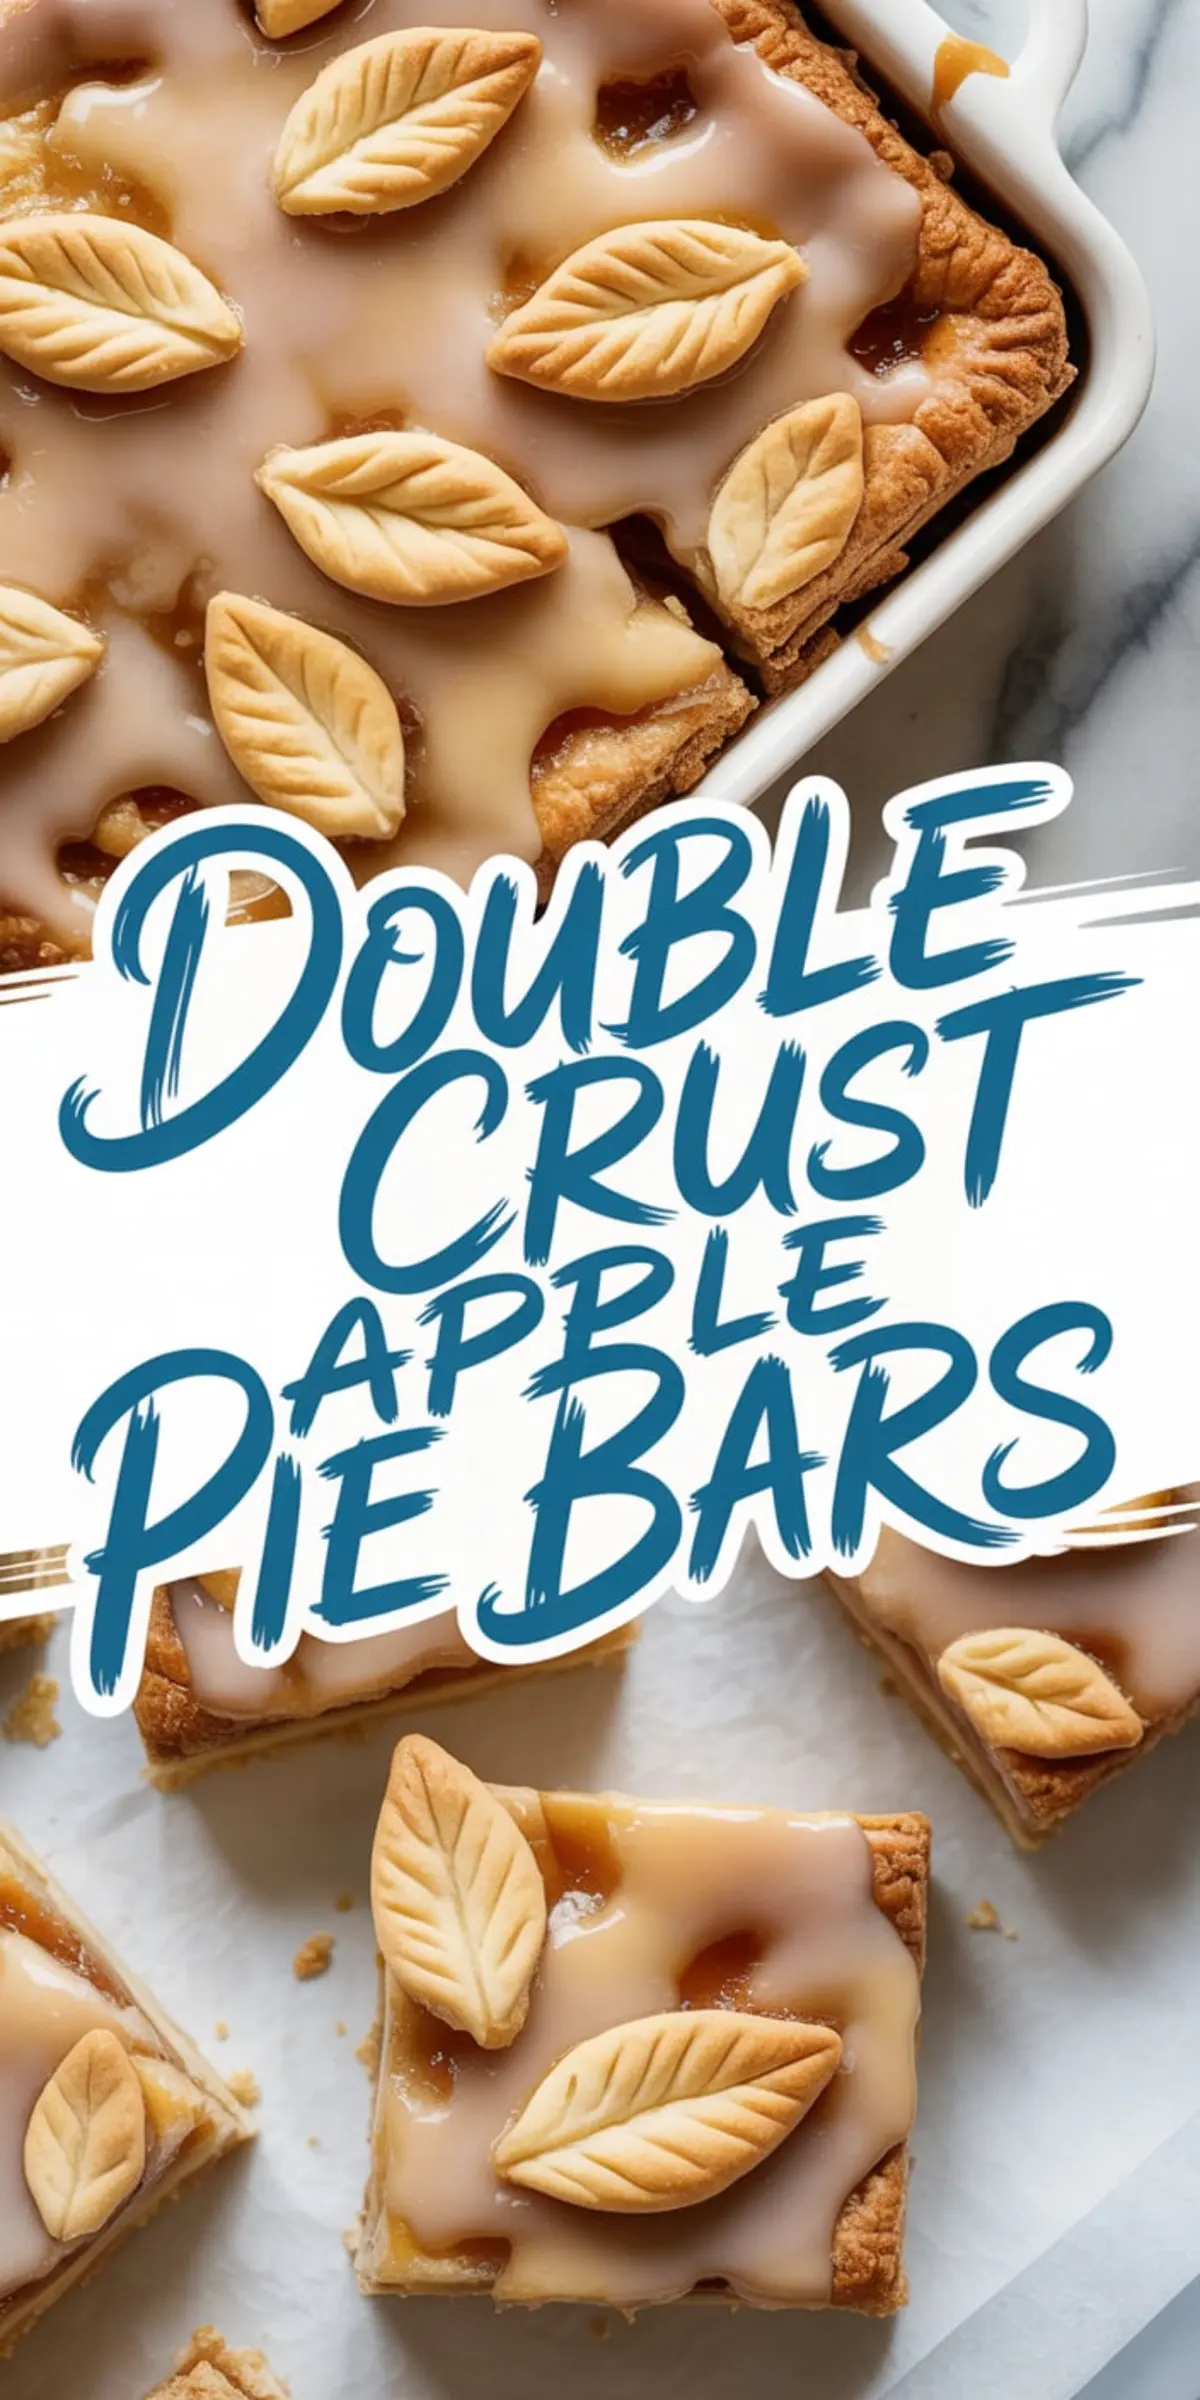
There’s something reliable about a bar dessert that holds its shape without compromising flavor. These double crust apple pie bars do exactly that. With flaky pastry on both top and bottom, they bring the same comfort as a deep-dish pie—without needing to serve it with a spoon.
You’ll learn how to get clean slices, a filling that doesn’t leak, and a crust that stays tender instead of tough. This recipe stands apart because of its structure. The double crust makes each square sturdy, while the spiced apple filling holds its shape once cooled.
That balance comes from both technique and choice of apples. And yes, you’ll also have a maple glaze option if you want a touch of sweetness without frosting-level fuss.
Following a special diet?
Every recipe on this site can be converted to gluten-free, vegan, dairy-free, keto, nut-free or egg-free with adjusted ratios so nothing falls flat.
Try the Recipe Converter →Why These Apple Pie Bars Work for Bakers of Every Level
The dough here handles well without being overly fussy. You don’t need a food processor, just cold butter and a steady hand.
It also makes sense for bakers who need a dessert that can sit out on a counter or stack neatly in a container. I’ve made these for bake sales, family reunions, and once even cut them into little diamonds for a brunch tray. No crumbling, no mess.
The filling uses a mix of Granny Smith and Honeycrisp apples. That sweet-sharp contrast helps the spices shine. If you’ve tried softer apples like Red Delicious in bar desserts, you’ll have noticed they break down too far and make the crust soggy. I’ve tested both, and firm apples win every time.
Key Ingredients That Create Flavor and Structure
This dough includes egg and cold water, which adds elasticity without softening the crust. The butter must stay cold. I always cube mine and then freeze it for five minutes before cutting it into the flour.
In my notes, I’ve tried versions with shortening, but butter brings better flavor and a golden bake. If you’ve ever made Maple Glazed Apple Pie Bars, you’ll find this dough feels familiar but adds more structure thanks to the top crust.
The filling needs a binder. Cornstarch does the work here—no runny mess. That way, you can cool the bars and lift them straight out without cracks or shifting.
How to Roll and Layer Without Tearing the Dough
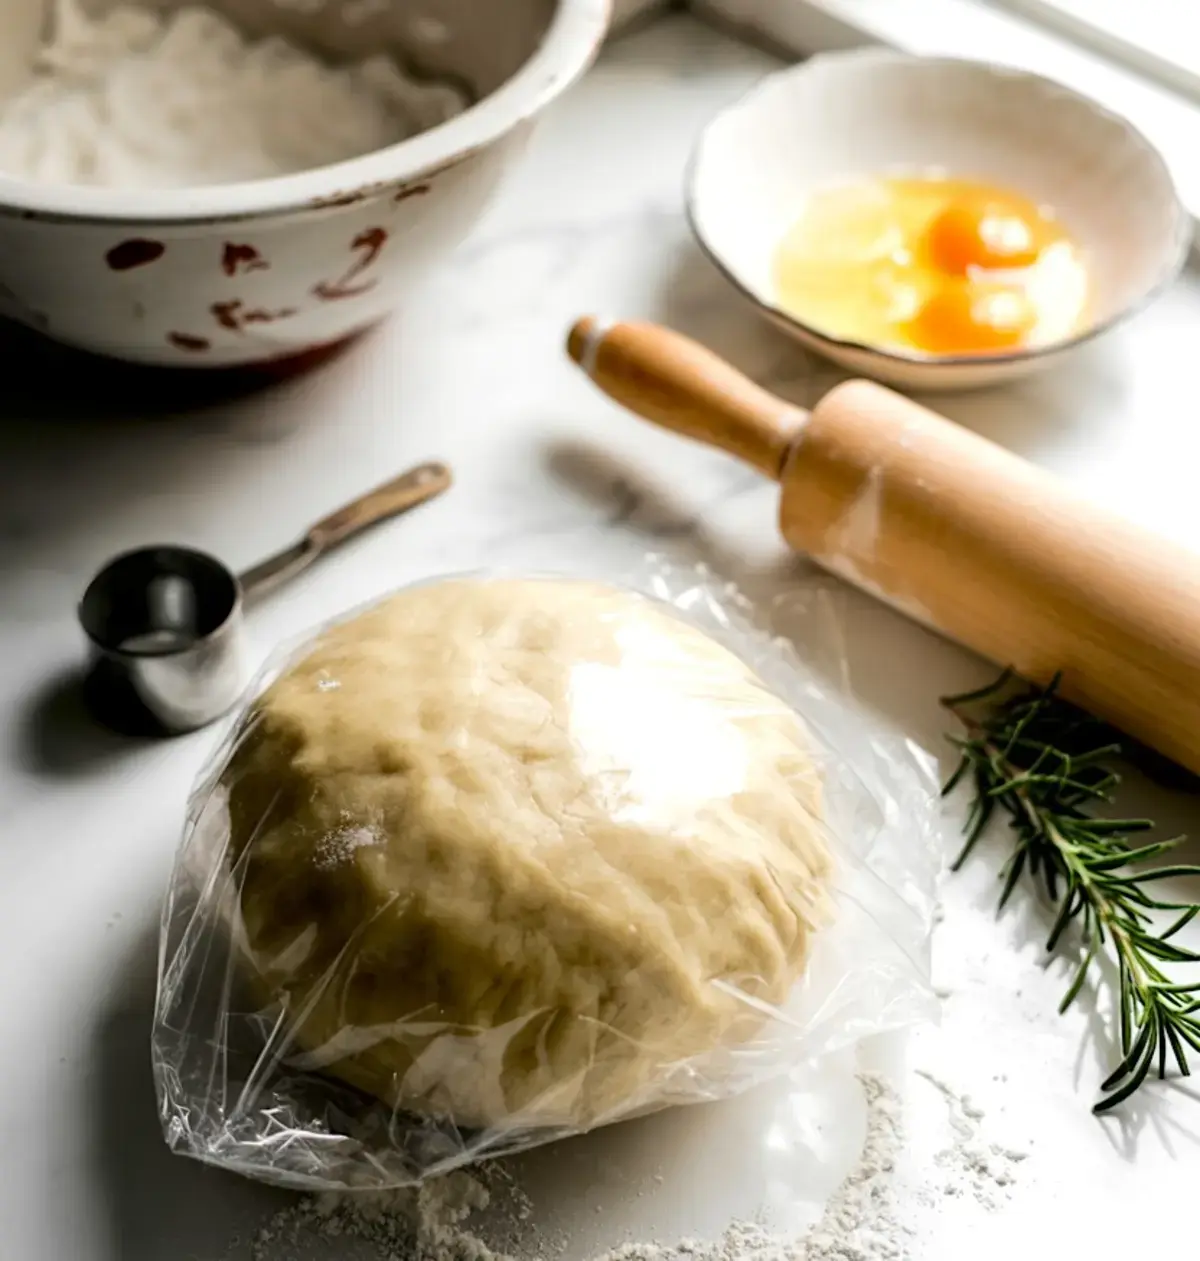
Once chilled, the dough rolls smoothly on a floured surface. You don’t need to overwork it. Roll the bottom crust large enough to go slightly up the sides of your pan. This edge catch holds the apple filling in place.
For the top, you can either go with a full crust or use cut-outs. When I bake these for fall gatherings, I cut leaves from the second dough round and layer them across the filling. For a cleaner look, though, lay the top crust flat and pinch the edges.
This step resembles what I do in my Apple Pie Cookies, just in a larger scale and with slightly less moisture in the filling.

Baking Tips That Keep Your Crust Golden, Not Burnt
Use parchment paper and let it hang over the sides. That makes lifting easier. Bake at 375°F and check at the 40-minute mark. If the top starts to brown before the apples soften, tent it with foil loosely—don’t seal it, just rest it over the bars.
Once out of the oven, cool completely before slicing. That part’s essential. Cutting too soon will drag the apples and cause tearing. Give it at least an hour to set.
You’ll find a similar baking rhythm in my Apple Turnovers With Puff Pastry, though these bars need a bit longer to firm up due to the thicker layers.
Maple Glaze: Optional but Worth the Drizzle
If you want something closer to caramel apple bars without actually making caramel, whisk together powdered sugar, maple syrup, and a bit of milk. The glaze should pour easily but still sit thick enough not to run off the sides.
I usually make it while the bars cool. Stir in a pinch of salt. That’s a small step that pulls the sweetness into balance. Let the glaze set before slicing or stacking.
Storage, Serving, and Make-Ahead Tips
These bars hold up better than many other Apple Dessert Recipes. You can make them a day in advance and glaze the next morning.
I store them in a container with parchment between layers. They’ll keep on the counter for two days or in the fridge for five. Glaze just before serving if appearance matters.
For serving, I slice them into rectangles for a clean edge, or squares if I’m boxing them for gifting. They’re sturdy enough to travel, which I can’t say for most pies. That’s a quality I appreciate—especially during busy baking seasons where trays shift and stack.
Related Recipes Worth Trying
Want something creamier? Try these Apple Pie Cheesecake Bars.
Looking for a bite-sized version with a soft center? These Apple Pie Cookies use the same apple-spice profile in a handheld cookie.
Need a rustic approach with fruit-forward finish? The Maple Glazed Apple Pie Bars skip the top crust and lean into simplicity.
Or, for something flakier with puff pastry layers, Apple Turnovers offer a quick alternative with fewer steps.
Final Thoughts and Reader Invitation
I return to these double crust apple pie bars every year once the evenings turn cooler and apples start piling up in the kitchen. They deliver consistency, flavor, and ease—three things I value in a repeat recipe.
Pin this one to your board for holiday trays, bake sales, or anytime you’ve got too many apples and need a smart way to use them.
And if you bake a batch, I’d love to hear how they turn out. Drop a comment below if you have any questions or swaps. Let’s keep learning from each other.
Double Crust Apple Pie Bars
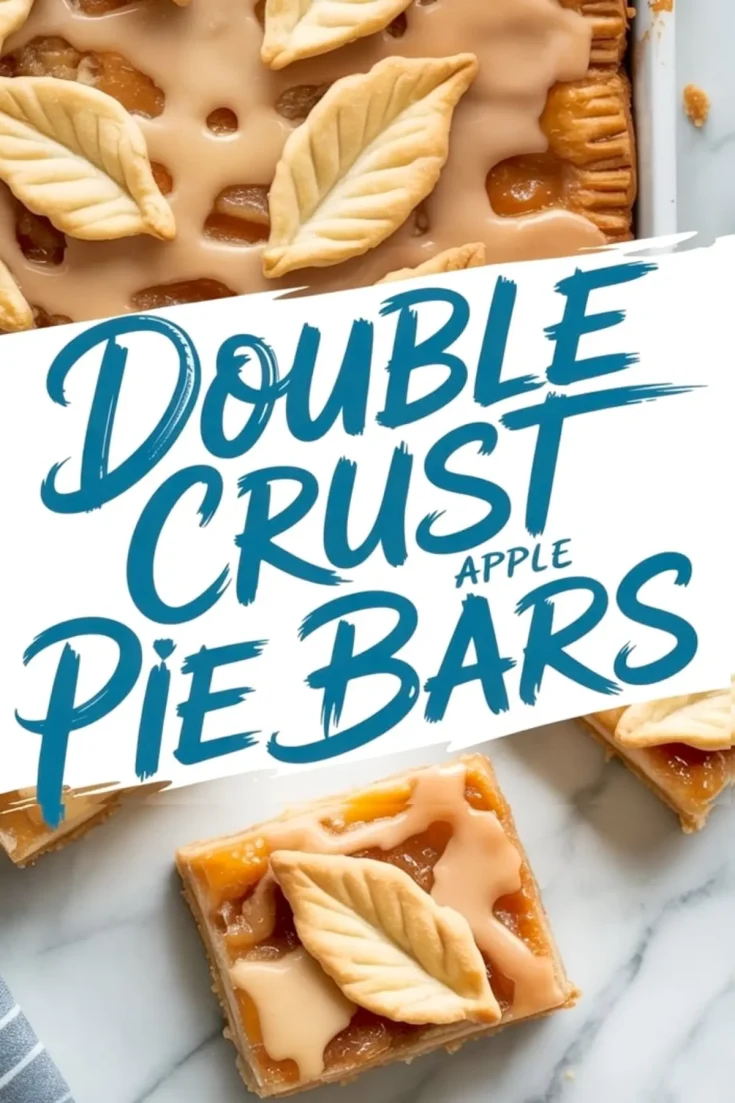
A buttery double-crust apple pie bar brings all the comfort of classic apple pie in an easy-to-slice, easy-to-serve format. A spiced apple filling is tucked between two layers of flaky homemade pastry, with an optional maple glaze drizzled on top. The top crust can be left whole or decorated with cut-out pastry shapes for a charming finish. These bars hold their shape well, making them great for gatherings or make-ahead treats.
Ingredients
- FOR THE CRUST (TOP AND BOTTOM):
- 3 cups all-purpose flour
- 1 tablespoon granulated sugar
- 1 teaspoon salt
- 1 cup (2 sticks) unsalted butter, cold and cubed
- 1 large egg
- 6–8 tablespoons ice water
- FOR THE APPLE FILLING:
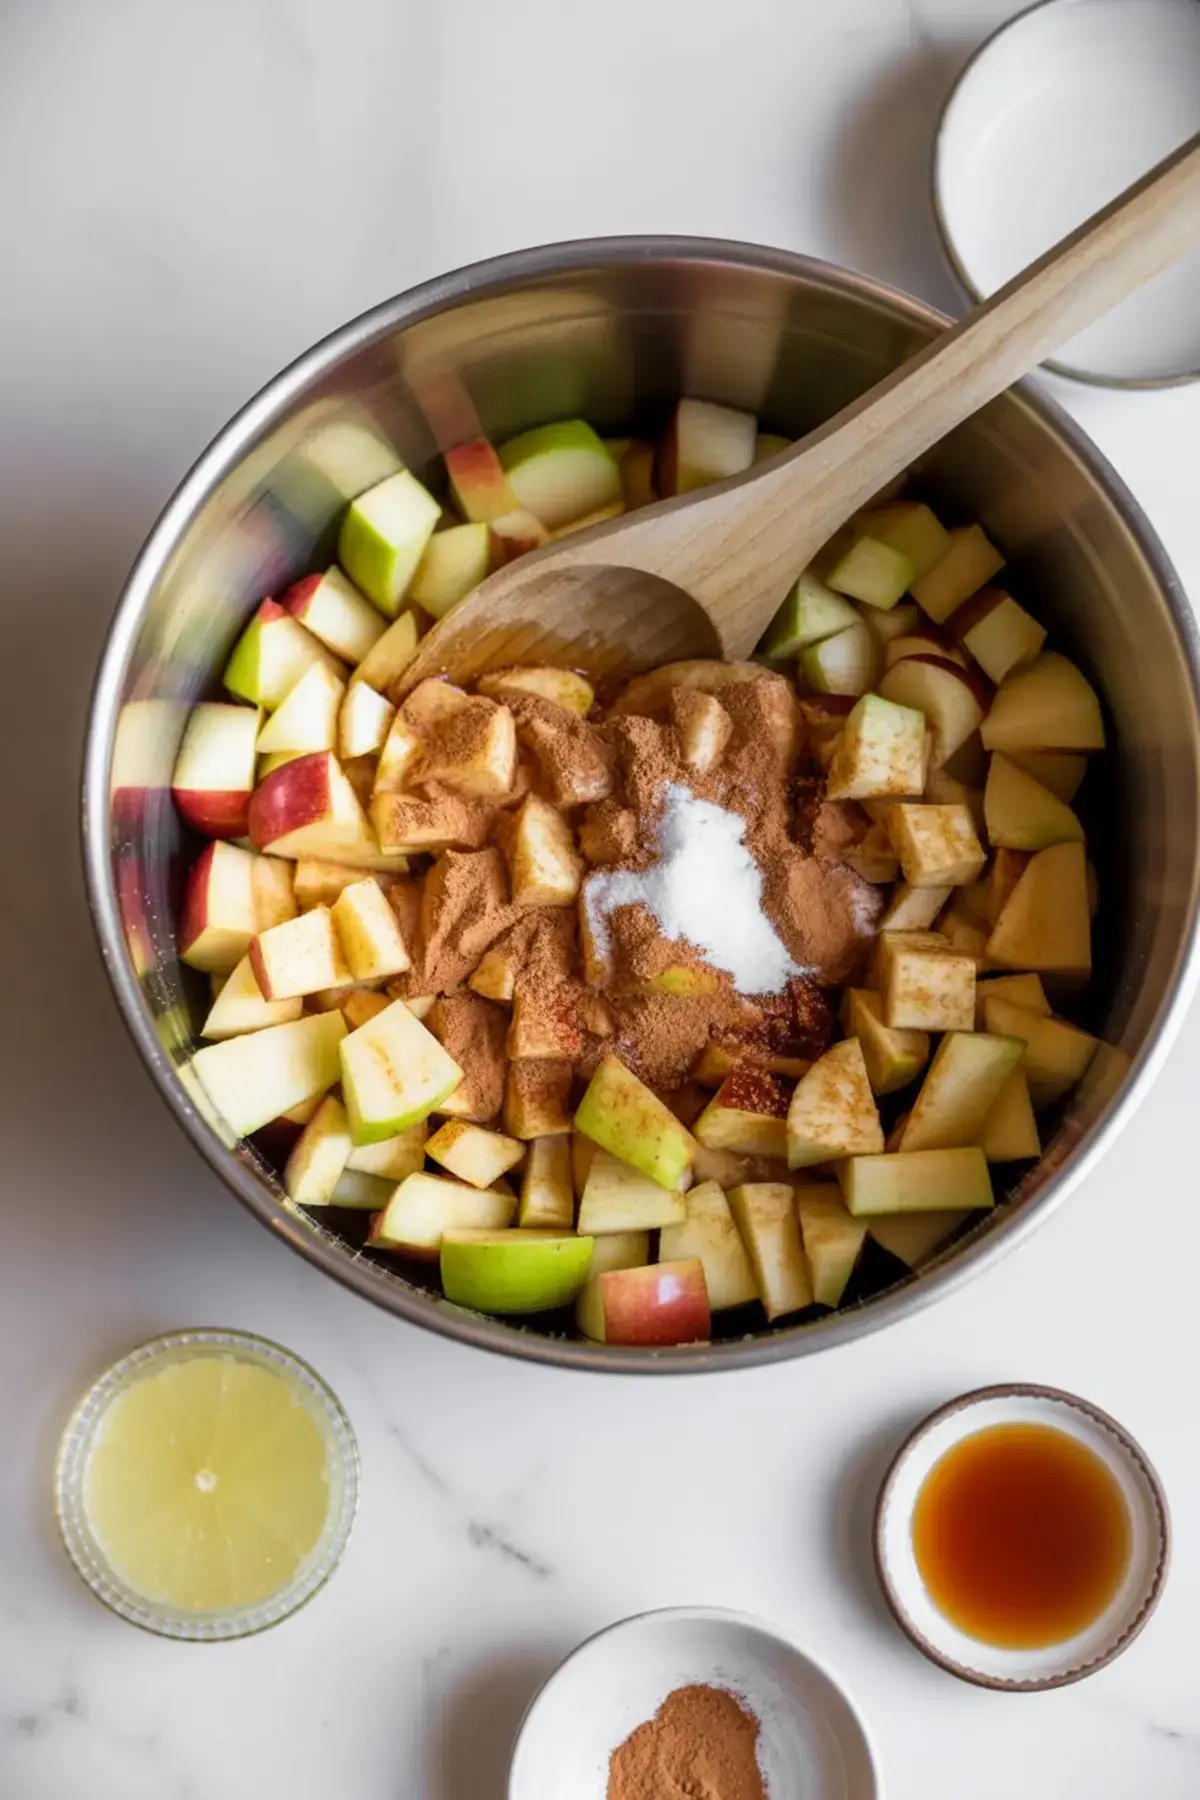
- 6 cups peeled, cored, and thinly sliced apples (Granny Smith + Honeycrisp recommended)
- 3/4 cup granulated sugar
- 1/4 cup light brown sugar
- 2 tablespoons cornstarch
- 1 1/2 teaspoons ground cinnamon
- 1/4 teaspoon ground nutmeg
- 1/8 teaspoon ground cloves
- 1 tablespoon lemon juice
- 1 teaspoon vanilla extract
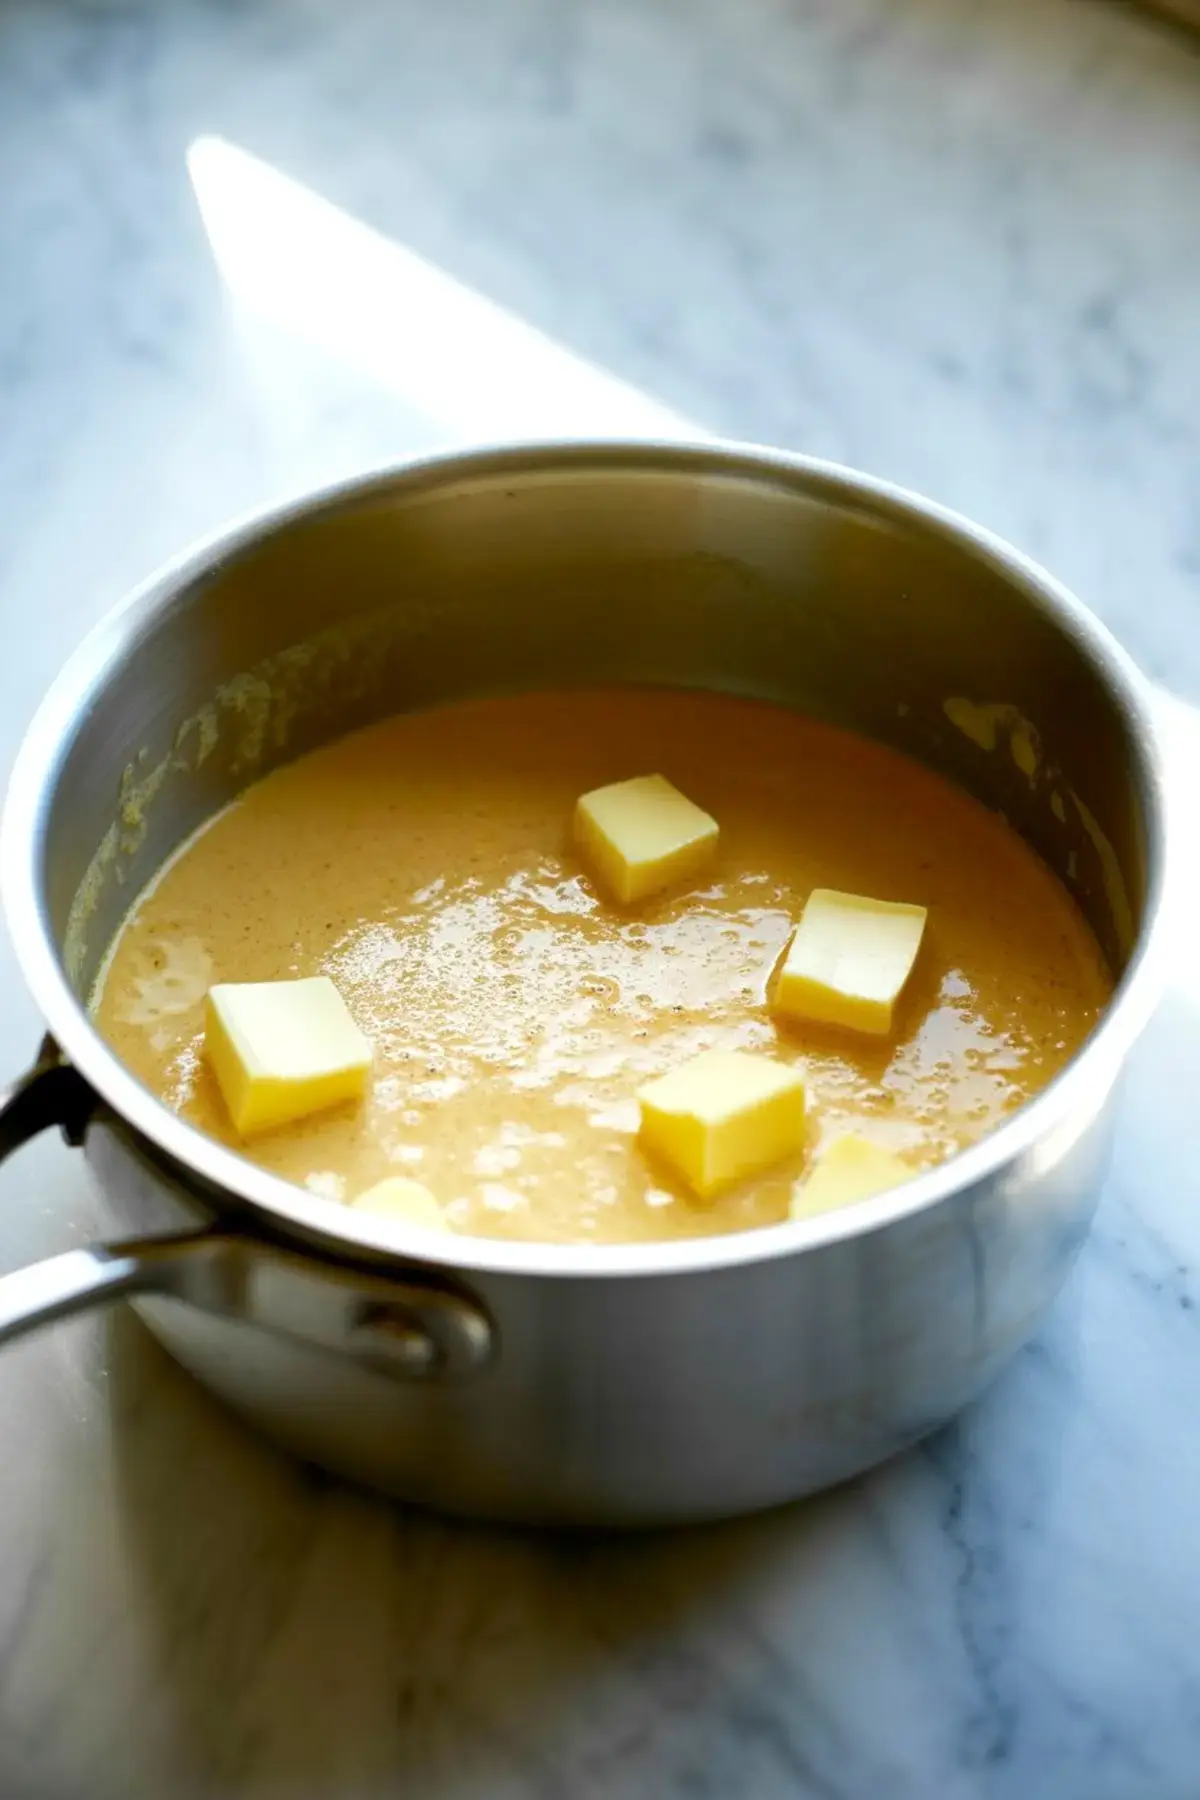
- OPTIONAL MAPLE GLAZE:
- 1 cup powdered sugar
- 2 tablespoons pure maple syrup
- 1–2 tablespoons milk or cream (adjust for consistency)
- Pinch of salt
Instructions
- MAKE THE PIE DOUGH: In a large bowl, whisk together the flour, sugar, and salt. Cut in the cold, cubed butter using a pastry cutter or your fingers until the mixture resembles coarse crumbs with pea-sized bits of butter throughout.
- ADD EGG AND WATER: In a small bowl, whisk the egg with 6 tablespoons of ice water. Gradually add this mixture to the flour, stirring just until the dough comes together. Add more water, one tablespoon at a time, if the dough is too dry.
- CHILL THE DOUGH: Divide the dough into two equal discs. Wrap each disc tightly in plastic wrap and refrigerate for at least 30 minutes to allow the gluten to relax and the butter to firm up.
- PREPARE THE FILLING: In a large bowl, combine the sliced apples with both sugars, cornstarch, cinnamon, nutmeg, cloves, lemon juice, and vanilla. Toss well and let the mixture sit while preparing the crust; this draws out excess juices and helps the flavors meld.
- PREHEAT THE OVEN: Set the oven to 375°F (190°C). Grease a 9x13-inch baking dish and line it with parchment paper, leaving overhang on the sides to lift the bars out easily once baked.
- ROLL OUT THE BOTTOM CRUST: On a floured surface, roll out one chilled dough disc to fit the bottom of the prepared pan. Press it evenly into the bottom and slightly up the sides to create a sturdy base.
- ADD THE APPLE FILLING: Spread the prepared apple mixture evenly over the bottom crust, pressing down lightly to ensure even layering.
- TOP WITH SECOND CRUST: Roll out the second dough disc. Either lay it on top as a full crust or use cookie cutters to create shapes (like leaves) and place them decoratively over the apples. Lightly press the edges to seal if using a full crust.
- BAKE THE BARS: Place the pan in the preheated oven and bake for 45–55 minutes, or until the crust is golden brown and the filling is bubbling. If the top crust begins to darken too quickly, tent it loosely with foil during the final 15 minutes of baking.
- COOL COMPLETELY: Remove the bars from the oven and allow them to cool in the pan for at least 1 hour before adding glaze or slicing. This helps the filling set and keeps the bars from falling apart.
- MAKE THE GLAZE: In a small bowl, whisk together powdered sugar, maple syrup, and 1 tablespoon of milk or cream. Add more liquid gradually until the glaze reaches a smooth, pourable consistency. Stir in a pinch of salt to balance the sweetness.
- FINISH AND SERVE: Drizzle the maple glaze over the fully cooled bars. Let the glaze set for about 10–15 minutes, then lift the bars from the pan and slice into squares or rectangles for serving.
Notes
Use a mix of tart and sweet apples for balanced flavor and texture. Dough can be made up to 2 days in advance and stored in the refrigerator. Bars keep well in an airtight container at room temperature for 2 days or refrigerated for up to 5 days. Glaze just before serving for best appearance.
Nutrition Information
Yield
18Serving Size
1Amount Per Serving Calories 201Total Fat 2gSaturated Fat 1gTrans Fat 0gUnsaturated Fat 1gCholesterol 15mgSodium 144mgCarbohydrates 43gFiber 2gSugar 25gProtein 3g