
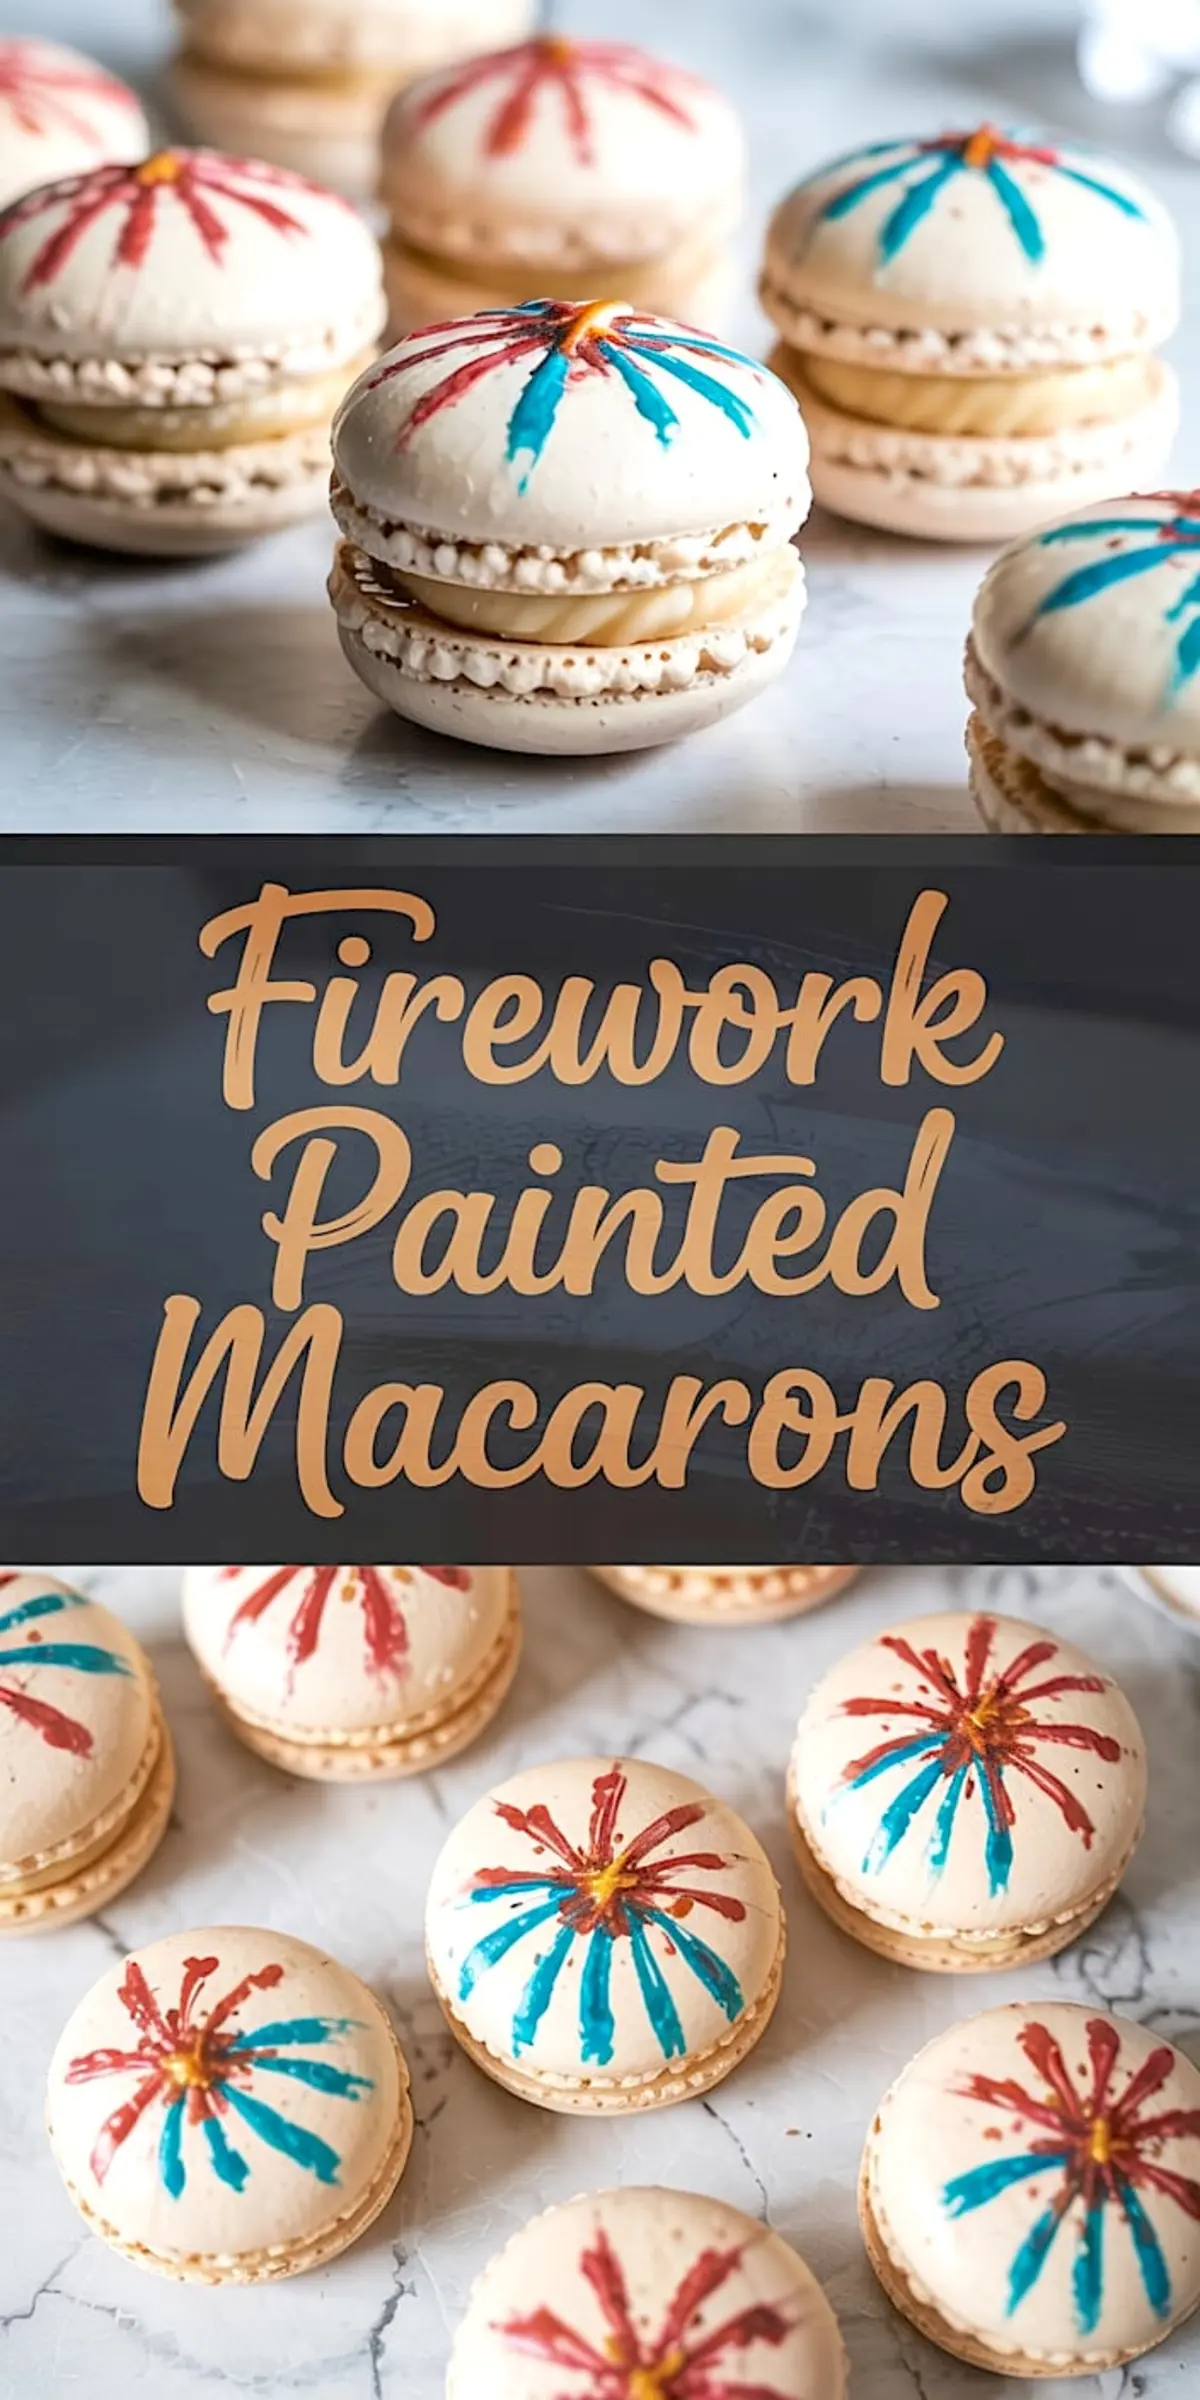
There’s something satisfying about making a dessert that stops people mid-bite. Firework Painted Macarons do exactly that. These almond meringue cookies feel light in your hand, crisp at first, then give way to a chewy center and soft vanilla buttercream. They carry flavor and elegance, but also spark joy.
What sets these apart isn’t just the texture or flavor. It’s the edible art. With a little brushwork and gel coloring, you can transform each cookie into a mini firework show.
You’ll learn exactly how to master each step, from aged egg whites to the paintable surface that won’t smudge. I’ve made these for Independence Day, New Year’s Eve, and even birthdays. And no matter the celebration, they always earn their place on the table.
Following a special diet?
Every recipe on this site can be converted to gluten-free, vegan, dairy-free, keto, nut-free or egg-free with adjusted ratios so nothing falls flat.
Try the Recipe Converter →Why These Macarons Work for Patriotic Holidays and Beyond
You don’t need pastry school to make macarons that stand tall with full feet and smooth shells. But you do need clear steps and patience.
The almond flour gives the shell a fine crumb, while the meringue builds structure and shine. When painted right, the cookies look like something you’d find in a boutique bakery.
I like to pair these with simpler red-white-blue desserts like Patriotic Mousse Cups or these 4th of July Waffle Cones for a full holiday spread.
How to Prepare the Almond Flour and Sugar for Smooth Shells
Start by sifting the almond flour and powdered sugar together, twice. No shortcuts here. Even if your flour says “finely ground,” small clumps can ruin the finish.
I’ve had the best results when I spread the sifted mixture on parchment to let it air for a few minutes before adding to the meringue. Just five minutes helps prevent overmixing during folding.
Whipping Egg Whites to the Right Stage
A clean bowl makes all the difference. I wipe mine with a bit of lemon juice to cut any grease. Whip the egg whites with a touch of cream of tartar until foamy, then slowly add granulated sugar.
It’s tempting to rush, but steady speed creates stability. I look for stiff, glossy peaks that curl slightly at the tip. That means the meringue won’t collapse under the almond flour.
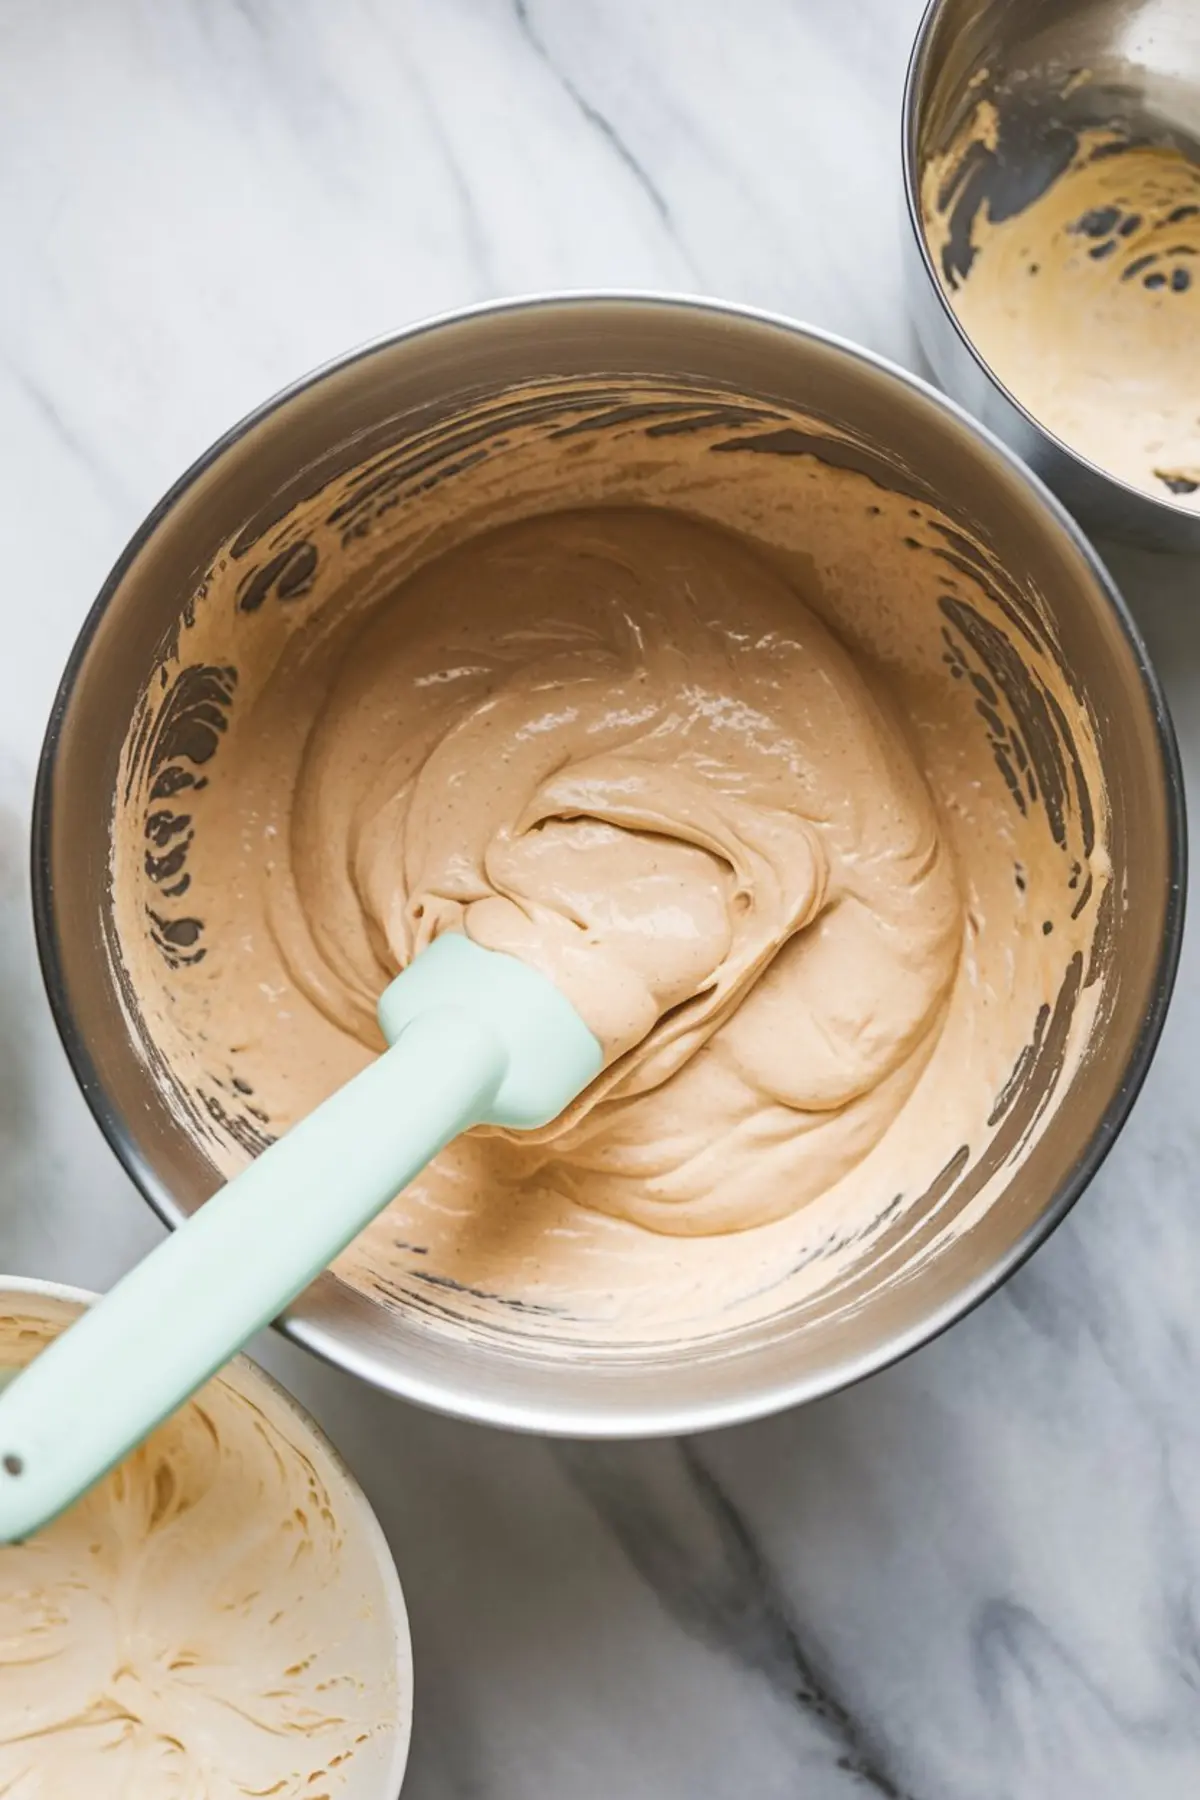
Macaronage: Folding the Batter Like a Pro
Folding is more feel than formula. You want the batter to ribbon off the spatula and melt back into the bowl within 10 seconds.
If it breaks in chunks, you haven’t mixed enough. If it flows too fast, it’s overmixed. I always test by piping a small circle onto parchment. If it holds a slight dome and flattens gently, it’s ready.
Piping, Resting, and Baking: Why Timing Matters
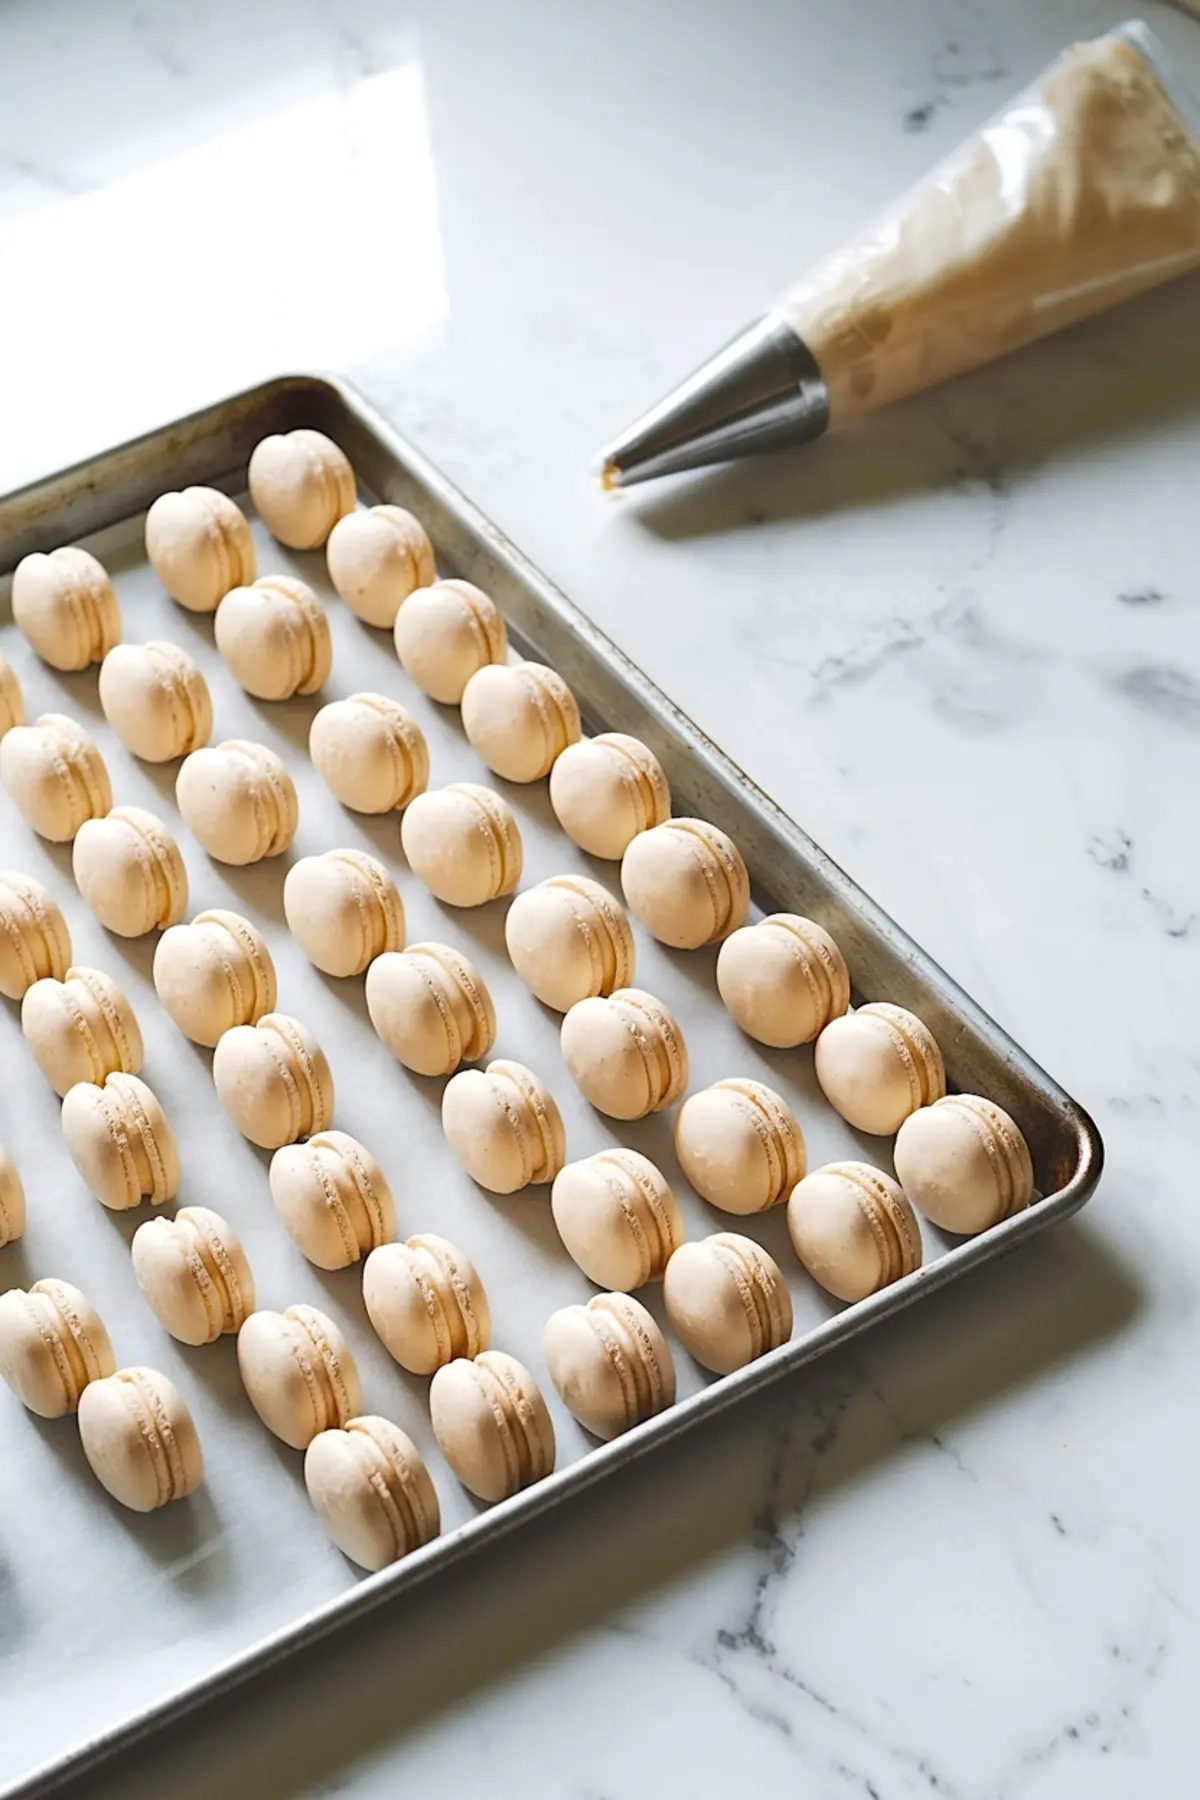
Pipe 1.5-inch rounds with even pressure and spacing. After tapping the tray to release air bubbles, let the shells rest until they form a skin. This step matters.
Without a dry surface, the tops crack in the oven. I’ve had batches ruined just by skipping this rest on humid days.
Bake at 150°C (300°F) until the shells have “feet” and set tops. Don’t open the oven early. Wait until minute 15 before checking. They should release cleanly once cooled.
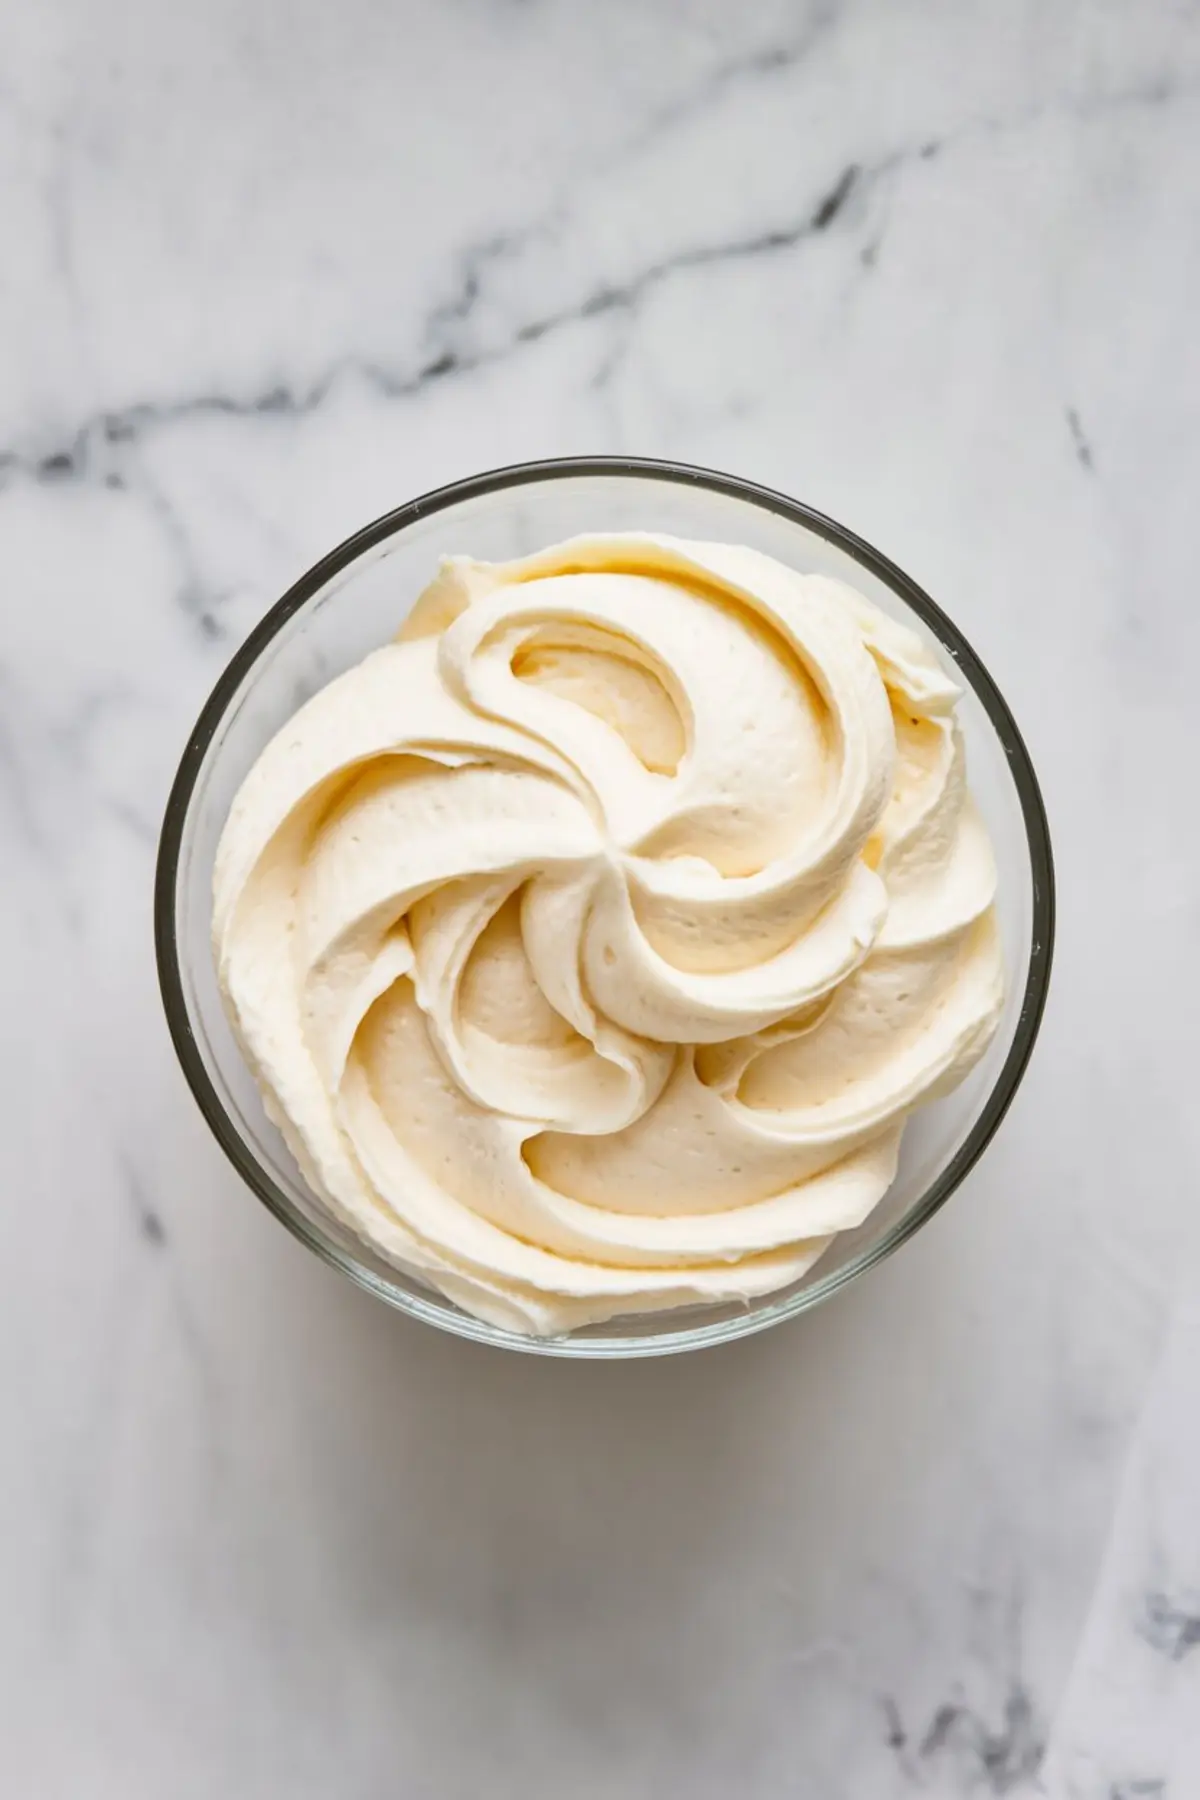
Buttercream Filling: Smooth, Not Too Sweet
Use real butter, room temperature, and don’t rush the creaming process. The powdered sugar needs time to dissolve fully. Add vanilla and salt to round out the sweetness.
If you’re out of cream, milk works fine. The buttercream should hold a peak but spread easily.
Butter vs. Shortening for the Filling:
I’ve tested both. Shortening gives stability, especially in warm weather, but lacks flavor. Butter wins on taste every time. Unless your kitchen is sweltering, stick with butter. The payoff is worth it.
Assembly and Painting Tips for Clean Results
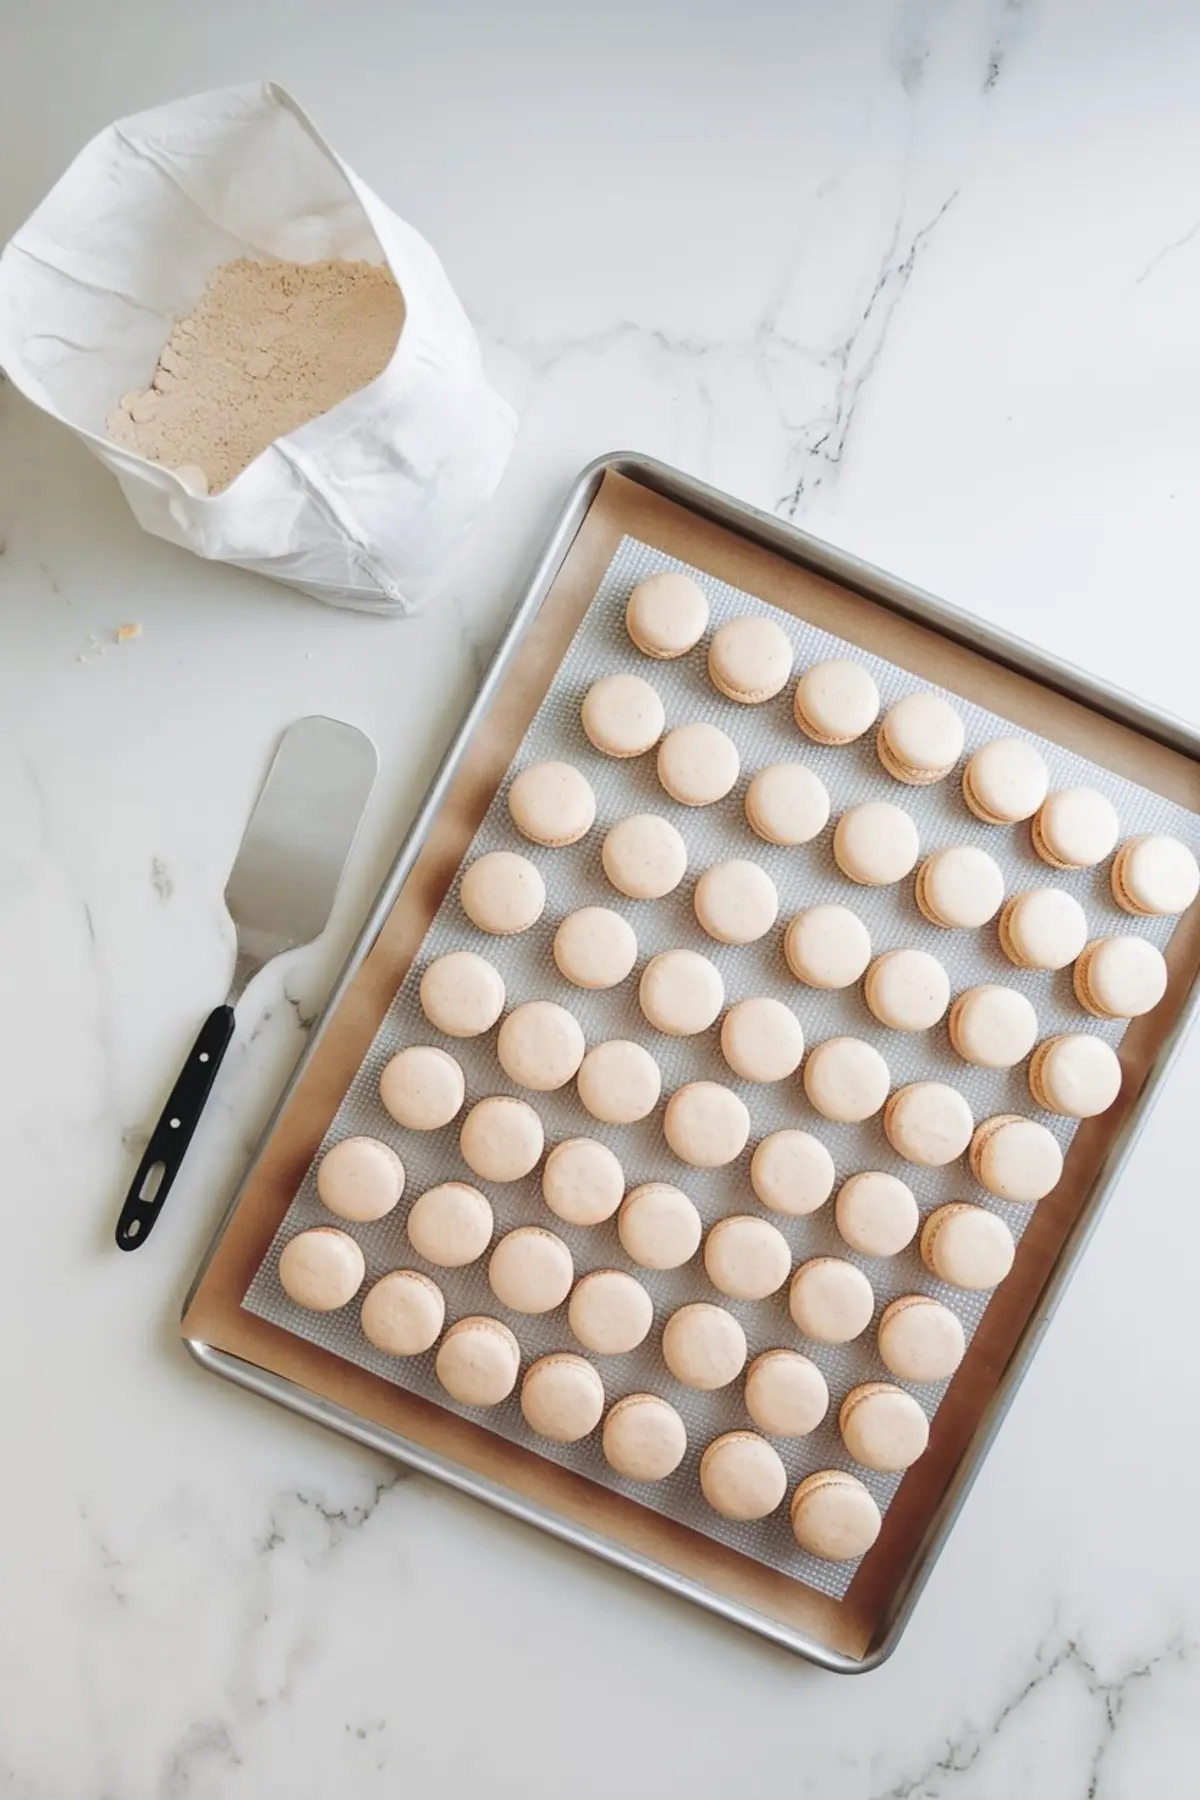
Pair the shells by size first. Then pipe the buttercream in the center and press gently to spread without spilling. The cookies need time to mature, so I store mine overnight in the fridge before painting.
For the fireworks, mix gel colors with vodka or lemon extract. Water doesn’t work here. It softens the shell and smudges the paint. Use a clean, fine-tipped brush and short outward strokes. Let dry at room temp for at least 30 minutes.
The result? Bright bursts of color that look fresh and festive.
Serving and Storage Advice You Can Trust
I serve these at room temperature. Cold macarons lose their chew. Leave them out for 20 minutes before serving if they’ve been chilled.
Store in an airtight container in the fridge for up to five days. The colors may fade slightly, but the flavor holds. Avoid freezing if painted. Condensation can blur your designs.
For serving, I like to place these beside Fireworks Sugar Cookies and Patriotic Sugar Cookies for a full dessert board. The textures and shapes balance each other out.
Almond Flour Comparison: Store-Bought vs. Homemade
I’ve tested this more times than I can count: store-bought finely ground almond flour gives far better results than grinding almonds at home.
Homemade almond meal, even when sifted, still carries moisture and uneven bits. That creates lumpy batter, fragile shells, and blotchy tops. I’ve watched batches crack or rise unevenly just from that choice.
Store-bought almond flour (look for one labeled “blanched” and “super fine”) gives consistent texture. The shells bake smooth, with feet that form cleanly, and the paint glides better across the surface.
If you’re investing time in these macarons, that flour is where it counts most. Don’t compromise there.
Final Notes and Friendly Invitation
These Firework Painted Macarons may look fancy, but they’re built on method, not mystery. If you take the steps one by one, you’ll get cookies with snap, chew, and flavor. And painting them is genuinely fun.
If you’re building a dessert table for the 4th, try pairing these with a cold drink like Patriotic Slushie or Frozen Patriotic Cheesecake. The mix of textures and color will tie the celebration together.
Pin this recipe now to your Fourth of July or celebration board so you can find it later.
Have you tried making them yet? Let me know how it went in the comments or ask your questions — I’d love to hear from you.
Firework Painted Macarons
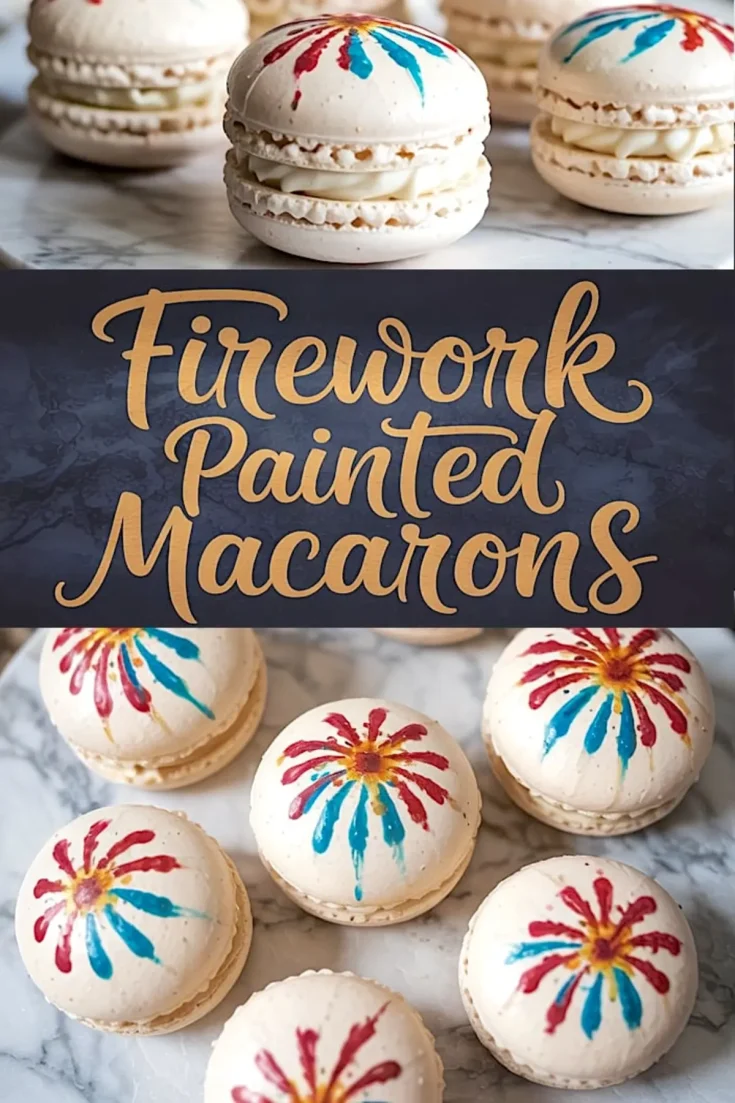
Firework Painted Macarons combine crisp almond meringue shells with creamy vanilla buttercream and hand-painted designs using vibrant food coloring. These macarons are a festive, artistic dessert choice for holidays like Independence Day or New Year's Eve. Follow each step carefully to produce macarons with a smooth shell, full feet, and vivid firework brushwork.
Ingredients
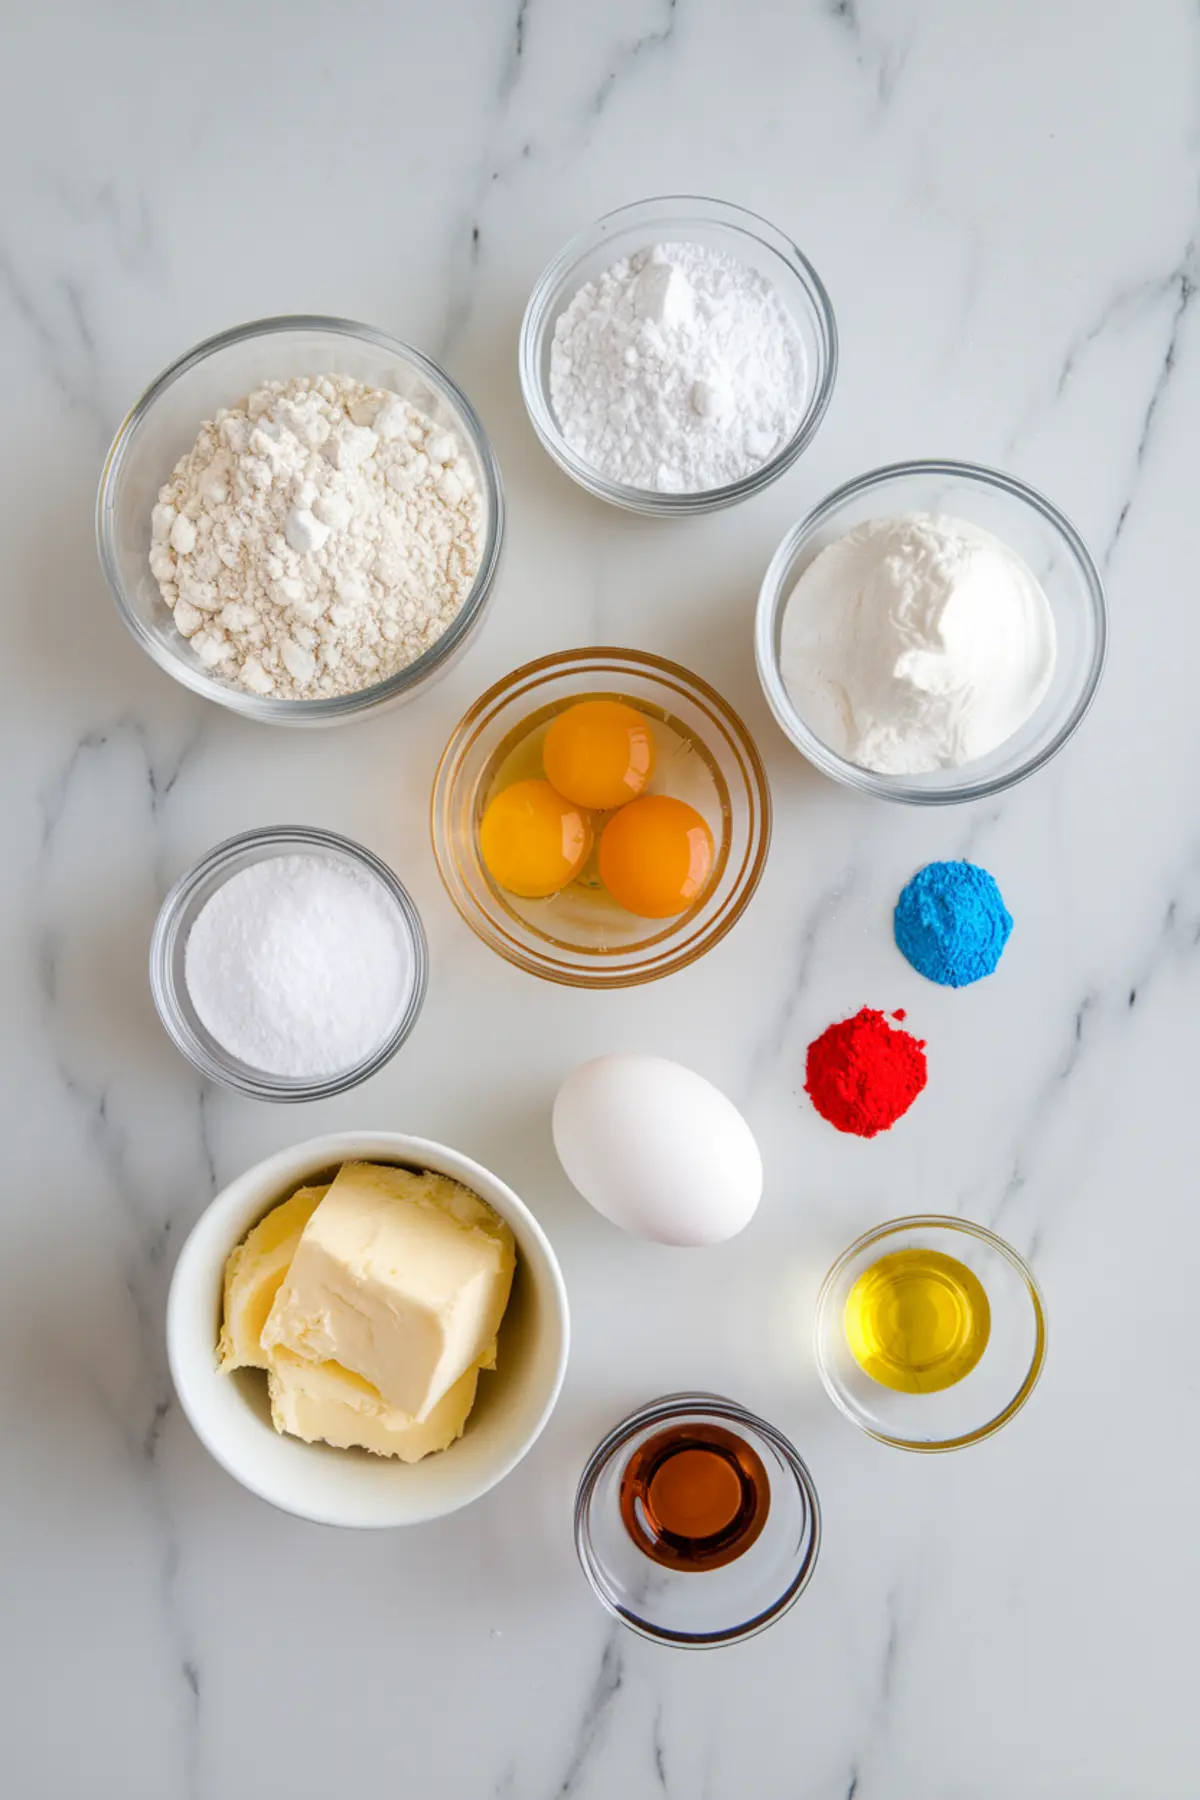
- FOR THE MACARON SHELLS:
- 100g egg whites (aged at least 24 hours in the fridge, then brought to room temp)
- 100g granulated sugar
- 100g almond flour (finely ground and sifted)
- 100g powdered sugar
- 1 tsp lemon juice or cream of tartar (optional, for stability)
- 1 tsp lemon juice or cream of tartar (optional, for stability)
- Gel food coloring for painting
- Gel food coloring for painting
- FOR THE VANILLA BUTTERCREAM FILLING:
- FOR THE VANILLA BUTTERCREAM FILLING:
- 115g unsalted butter, room temperature
- 115g unsalted butter, room temperature
- 200g powdered sugar
- 200g powdered sugar
- 1½ tsp pure vanilla extract
- 1½ tsp pure vanilla extract
- 1–2 tbsp heavy cream or milk (to adjust consistency)
- 1–2 tbsp heavy cream or milk (to adjust consistency)
- Pinch of salt
- Pinch of salt
- FOR THE FIREWORK PAINTING:
- FOR THE FIREWORK PAINTING:
- Red, blue, and yellow gel food coloring
- Red, blue, and yellow gel food coloring
- A small food-safe paintbrush
- A small food-safe paintbrush
- A few drops of vodka or clear extract (like lemon or almond) for thinning
- A few drops of vodka or clear extract (like lemon or almond) for thinning
Instructions
- PREP AND SIFT DRY INGREDIENTS: In a large bowl, sift the almond flour and powdered sugar together twice to remove any lumps and create a very fine mixture.
- WHIP THE EGG WHITES: Place room-temperature egg whites in a clean, grease-free mixing bowl. Add a pinch of salt or cream of tartar for stability. Beat on medium speed until foamy, then gradually add the granulated sugar. Increase to high speed and continue whipping until stiff, glossy peaks form, about 6–8 minutes.
- MACARONAGE (FOLDING): Add the sifted dry mixture to the meringue in three parts. Fold gently with a spatula by scraping around the bowl and through the center. The batter should flow slowly and look glossy. When lifted, it should ribbon back into the bowl and disappear within about 10 seconds.
- PIPING AND RESTING: Transfer the batter to a piping bag fitted with a round tip. Pipe 1.5-inch rounds onto a baking sheet lined with parchment paper or a silicone mat. Tap the tray firmly on the counter to release any air bubbles. Let the shells rest for 30–60 minutes until a dry skin forms on the surface and they no longer stick to your finger when touched lightly.
- BAKING: Preheat the oven to 150°C (300°F). Bake the macarons for 15–18 minutes until they have developed feet and the tops are set without browning. Allow them to cool completely on the tray before attempting to remove.
- MAKING THE FILLING: In a mixing bowl, beat the butter until light and creamy. Gradually add the powdered sugar, then mix in the vanilla extract and salt. Add cream or milk 1 tablespoon at a time until the frosting reaches a smooth and pipeable consistency.
- ASSEMBLE THE MACARONS: Match similar-sized shells into pairs. Pipe a small dollop of buttercream in the center of one shell and gently press the second shell on top to form a sandwich. Repeat with all remaining shells and filling.
- PAINTING THE FIREWORKS: Mix each gel food coloring with a few drops of vodka or clear extract to create a paint-like consistency. Using a clean, food-safe brush, paint short, outward strokes from the center of each shell to create a firework burst. Allow the designs to dry completely before serving or storing the macarons.
Notes
Store the assembled macarons in an airtight container in the refrigerator for up to 5 days. For best texture, bring them to room temperature before serving. Painted designs may fade slightly over time if exposed to moisture.
Nutrition Information
Yield
20Serving Size
1Amount Per Serving Calories 116Total Fat 6gSaturated Fat 3gTrans Fat 0gUnsaturated Fat 3gCholesterol 14mgSodium 15mgCarbohydrates 13gFiber 0gSugar 13gProtein 1g