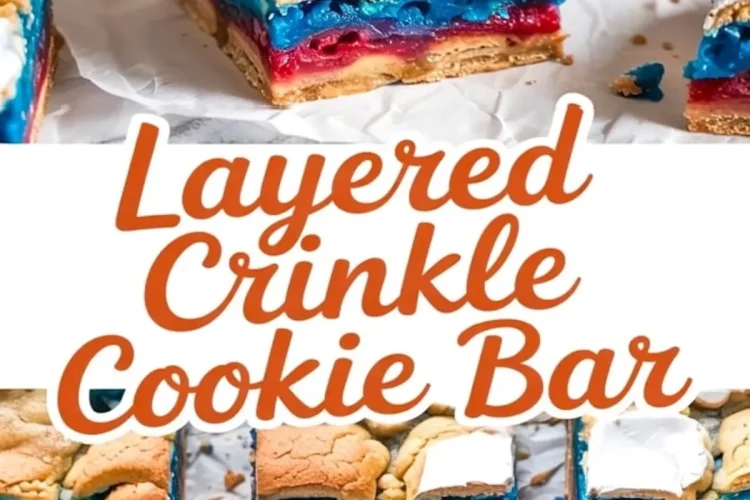
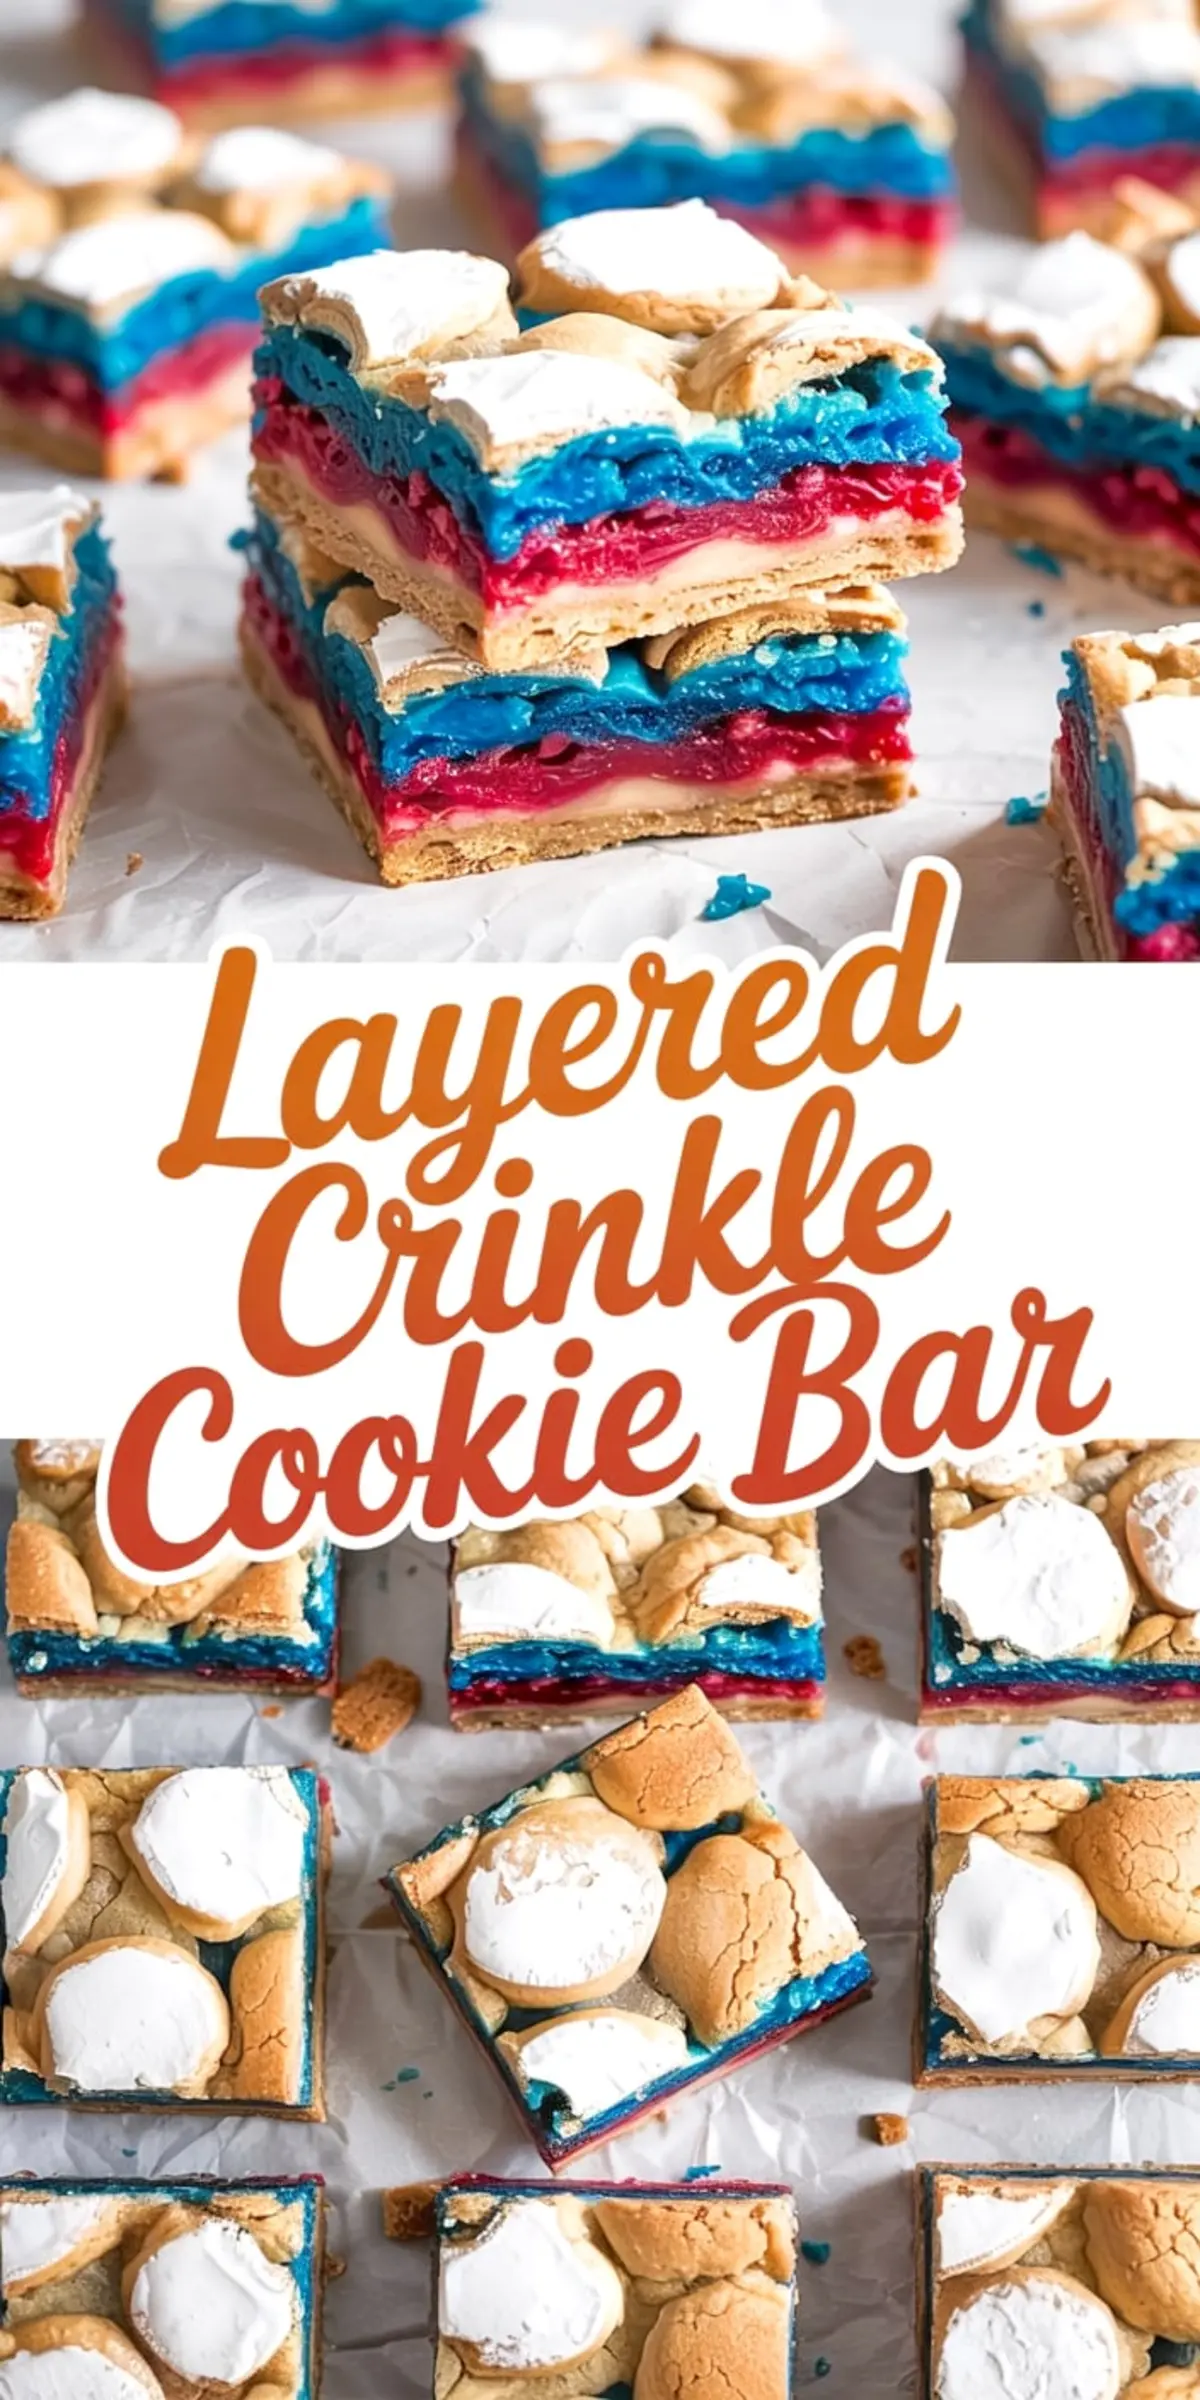
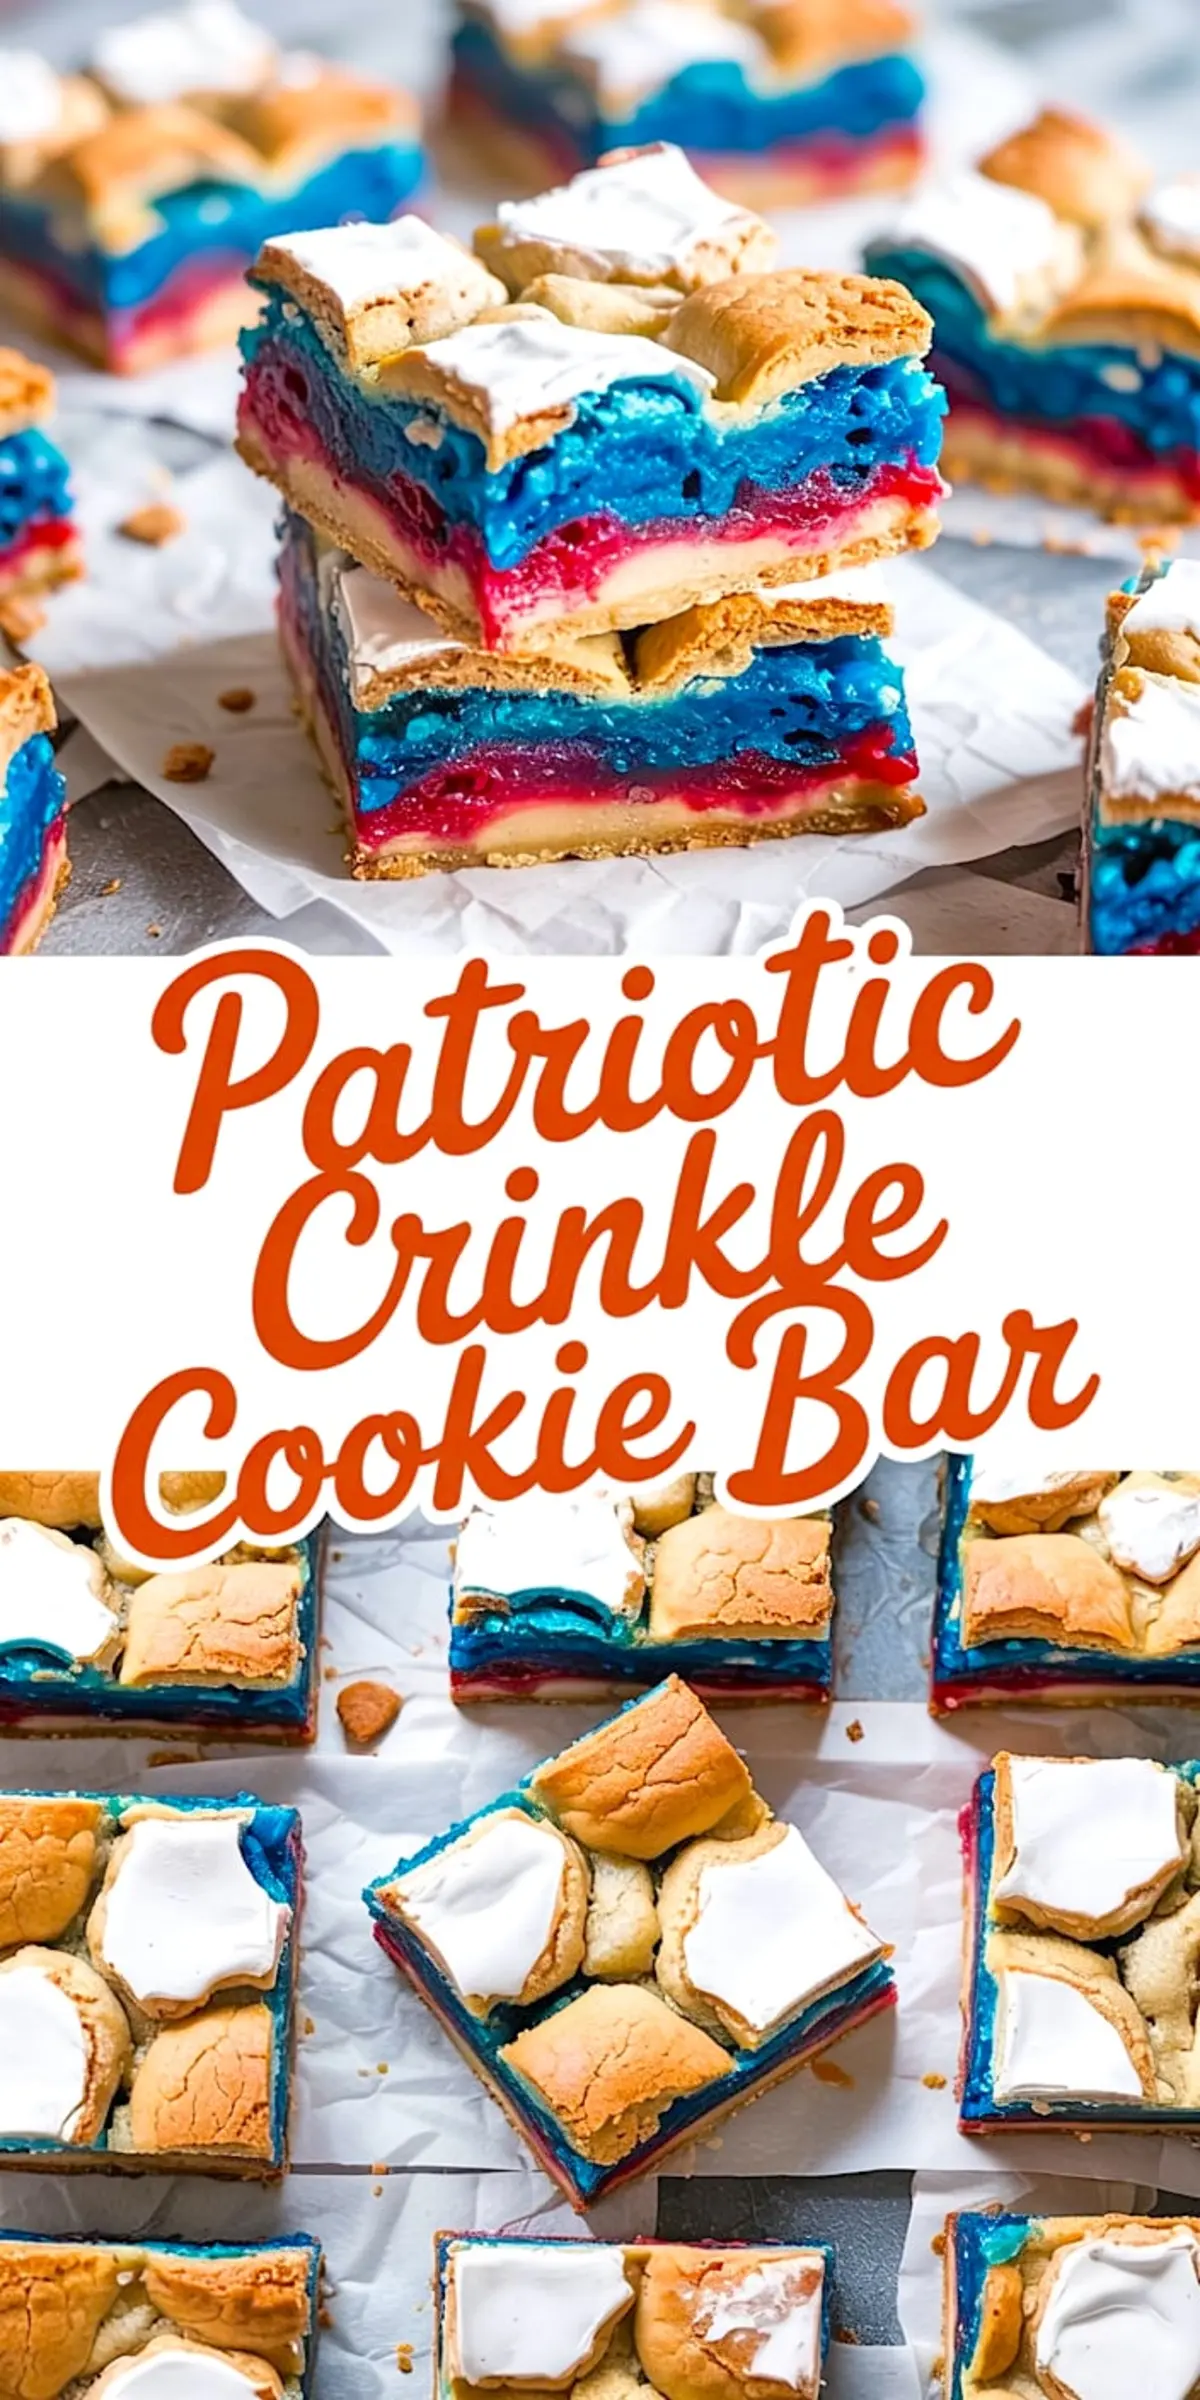
These cookie bars don’t just show up at the party. They hold their shape, shine with color, and bring that nostalgic combo of chewy dough, creamy cheesecake, and toasted marshmallow all in one bite. If you’ve ever wanted a Fourth of July dessert that cuts clean and tastes like a summer memory, this is the one to trust.
I’ve made a lot of layered desserts over the years. Some collapse. Some bleed colors. But these stay stacked, structured, and bright after baking and cooling. That’s thanks to the dough texture, the layering method, and a bit of fridge time at the end. Let me walk you through how I do it.
Following a special diet?
Every recipe on this site can be converted to gluten-free, vegan, dairy-free, keto, nut-free or egg-free with adjusted ratios so nothing falls flat.
Try the Recipe Converter →Red, White, and Blue Cookie Bars with Cheesecake Filling
There’s something comforting about using cookie dough as a base. It bakes solid, but softens just enough under a cheesecake layer. Then comes the fun, coloring, pressing, topping. If you like order and creativity in equal measure, this recipe satisfies both.
The red and blue layers don’t swirl. They sit proudly, layered with intention. That’s what makes the final cut so striking. The crinkle effect happens on top, with torn pieces of plain dough creating golden spots between puffs of marshmallow. You get that toasted look without needing a torch.
I’ve tested this recipe with both liquid and gel food coloring. The liquid kind made the dough slack. The color was weak, and the dough needed extra flour to hold shape. Stick with gel. It gives you brightness without sacrificing structure.
Ingredients for Patriotic Cookie Bars
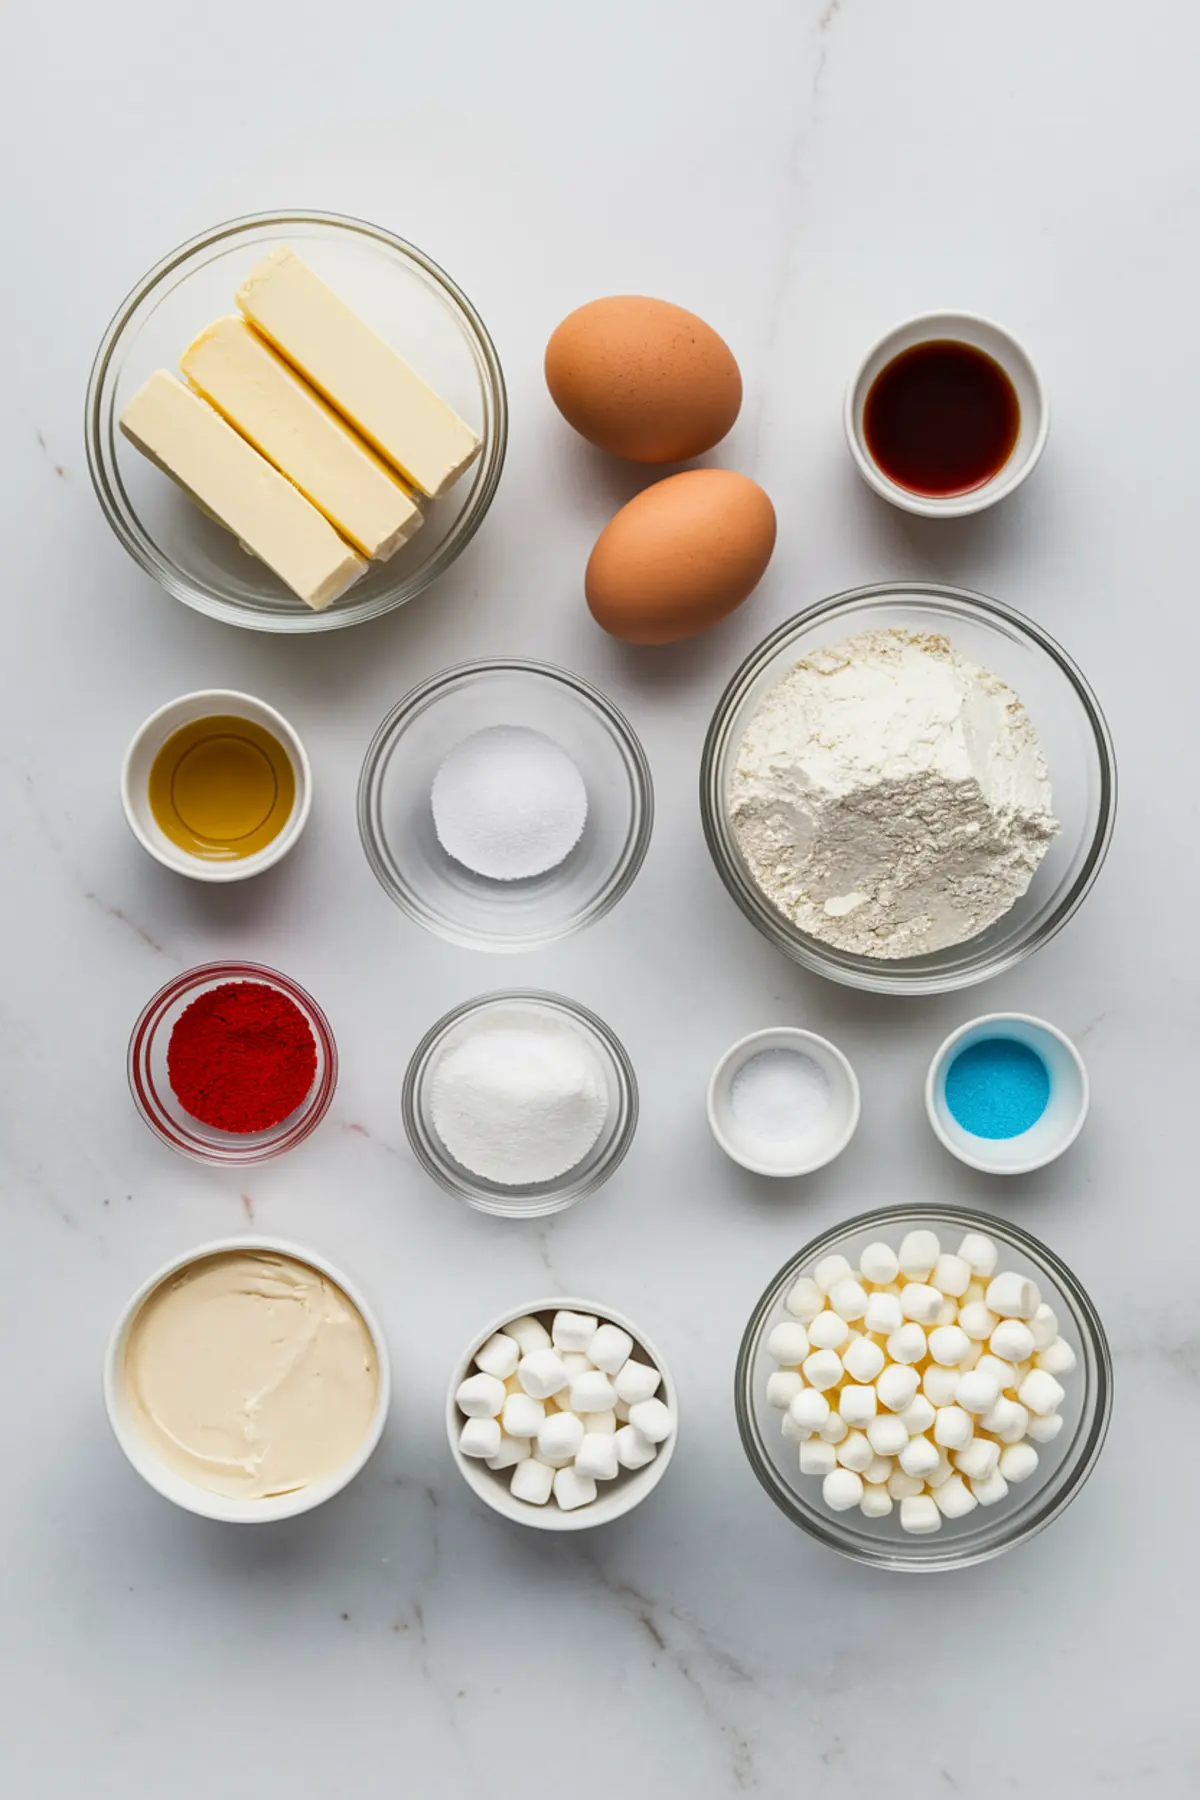
Your dough needs butter, sugar, eggs, vanilla, and a classic mix of flour, soda, and salt. You’ll separate that into three bowls: one stays plain, the others go red and blue. Don’t try to shortcut this by swirling colors together. They’ll bake into a muddy mess.
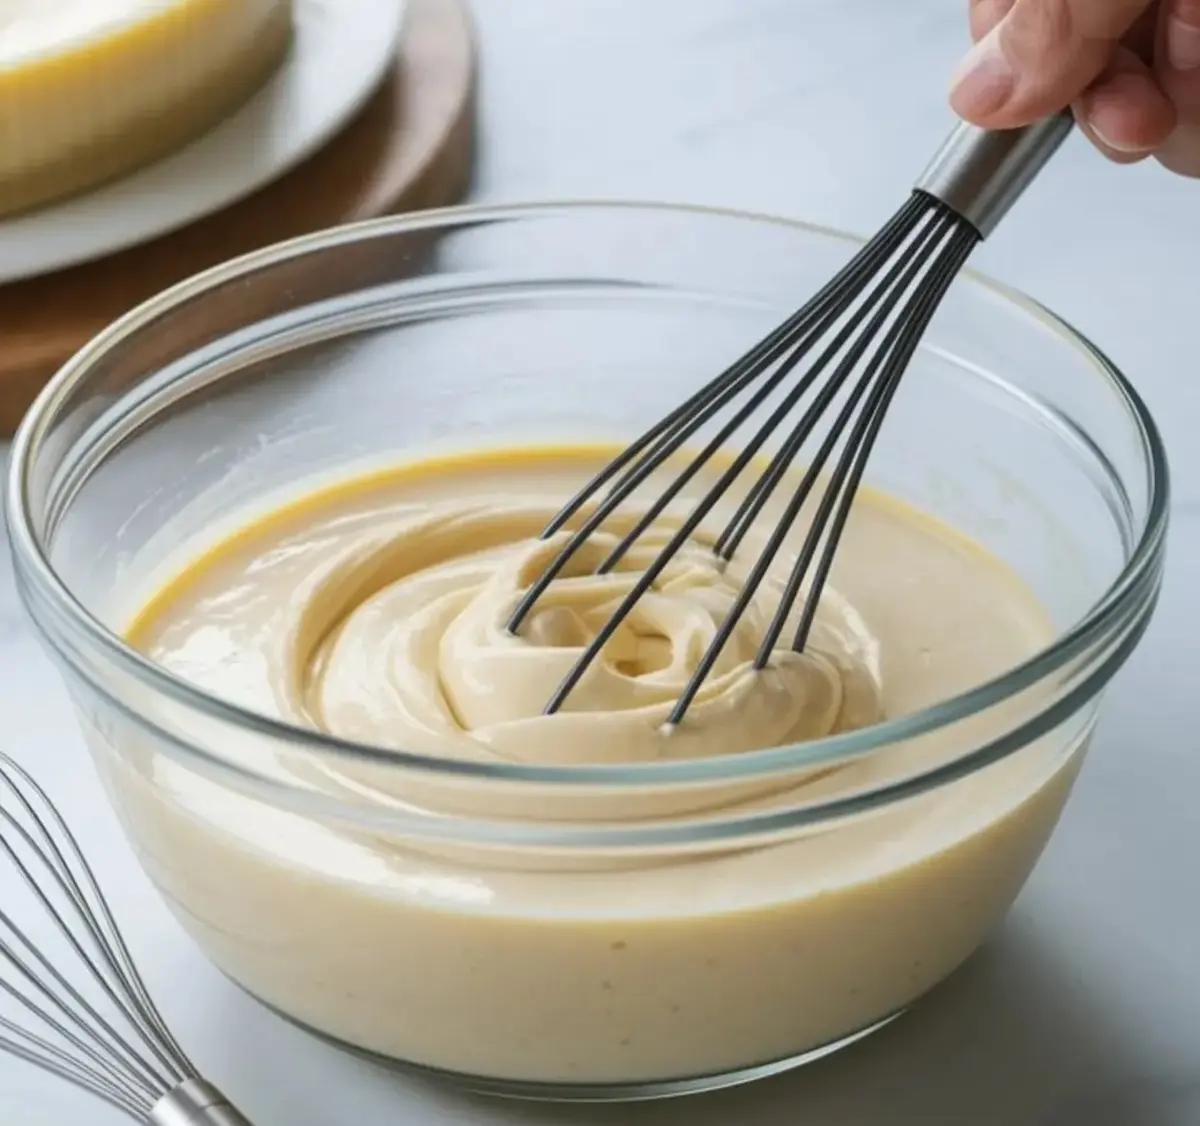
For the middle layer, a simple cream cheese filling brings contrast. I don’t add lemon or anything extra here. The vanilla gives it just enough lift. The sweetness stays subtle, which balances out the sugar in the dough.
The top is where the texture builds. Mini marshmallows puff and toast during baking. You can add white chocolate chips if you want a smoother bite at the edge. I’ve used both, and I lean toward a mix of marshmallow and a few chips. The chips melt down, but the marshmallows hold their shape.
How to Layer Cookie Dough Without Bleeding Colors
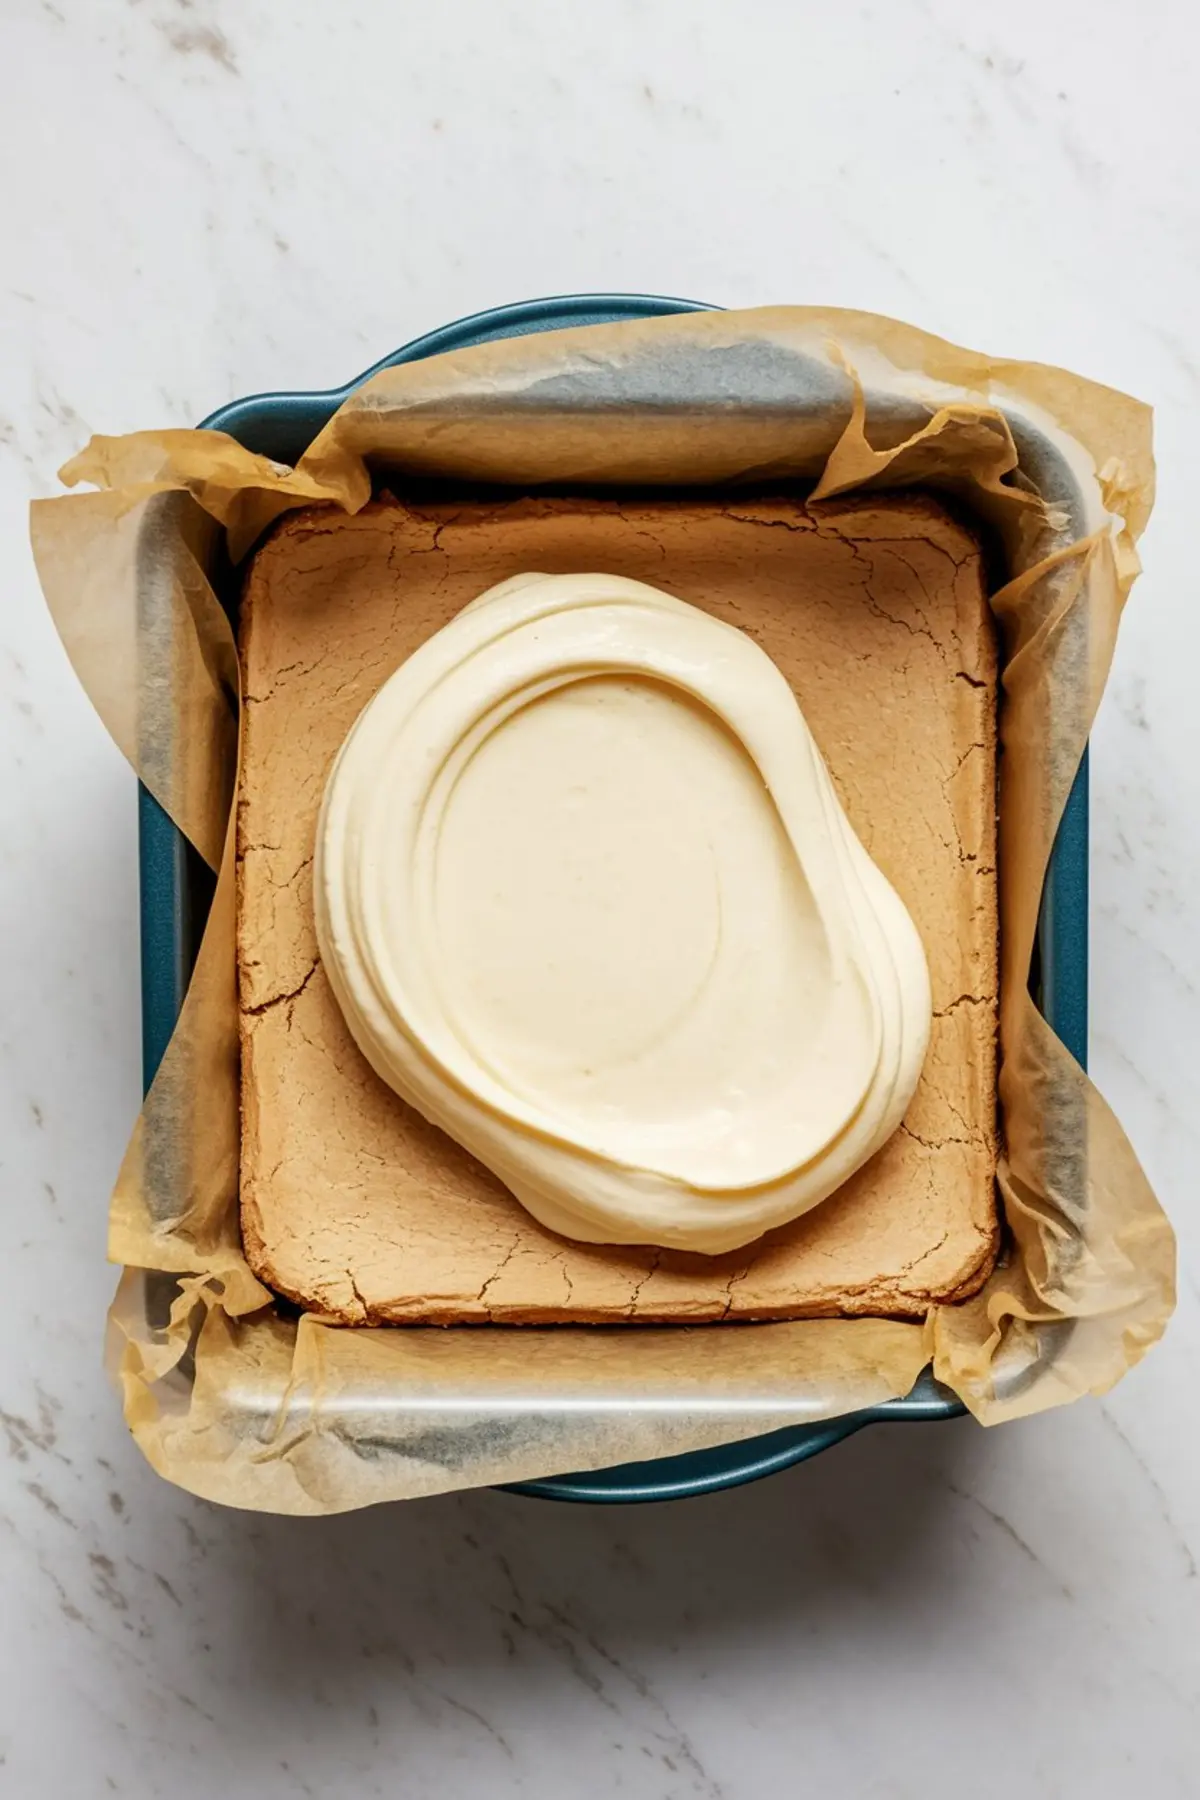
Start with the plain dough. Press it firmly and evenly into your parchment-lined pan. This sets the foundation. Don’t rush this part. Uneven dough causes cracks later when slicing.
The cream cheese filling comes next. Pour it gently and use an offset spatula if you have one. Avoid pressing or shaking the pan. You want that clean separation.
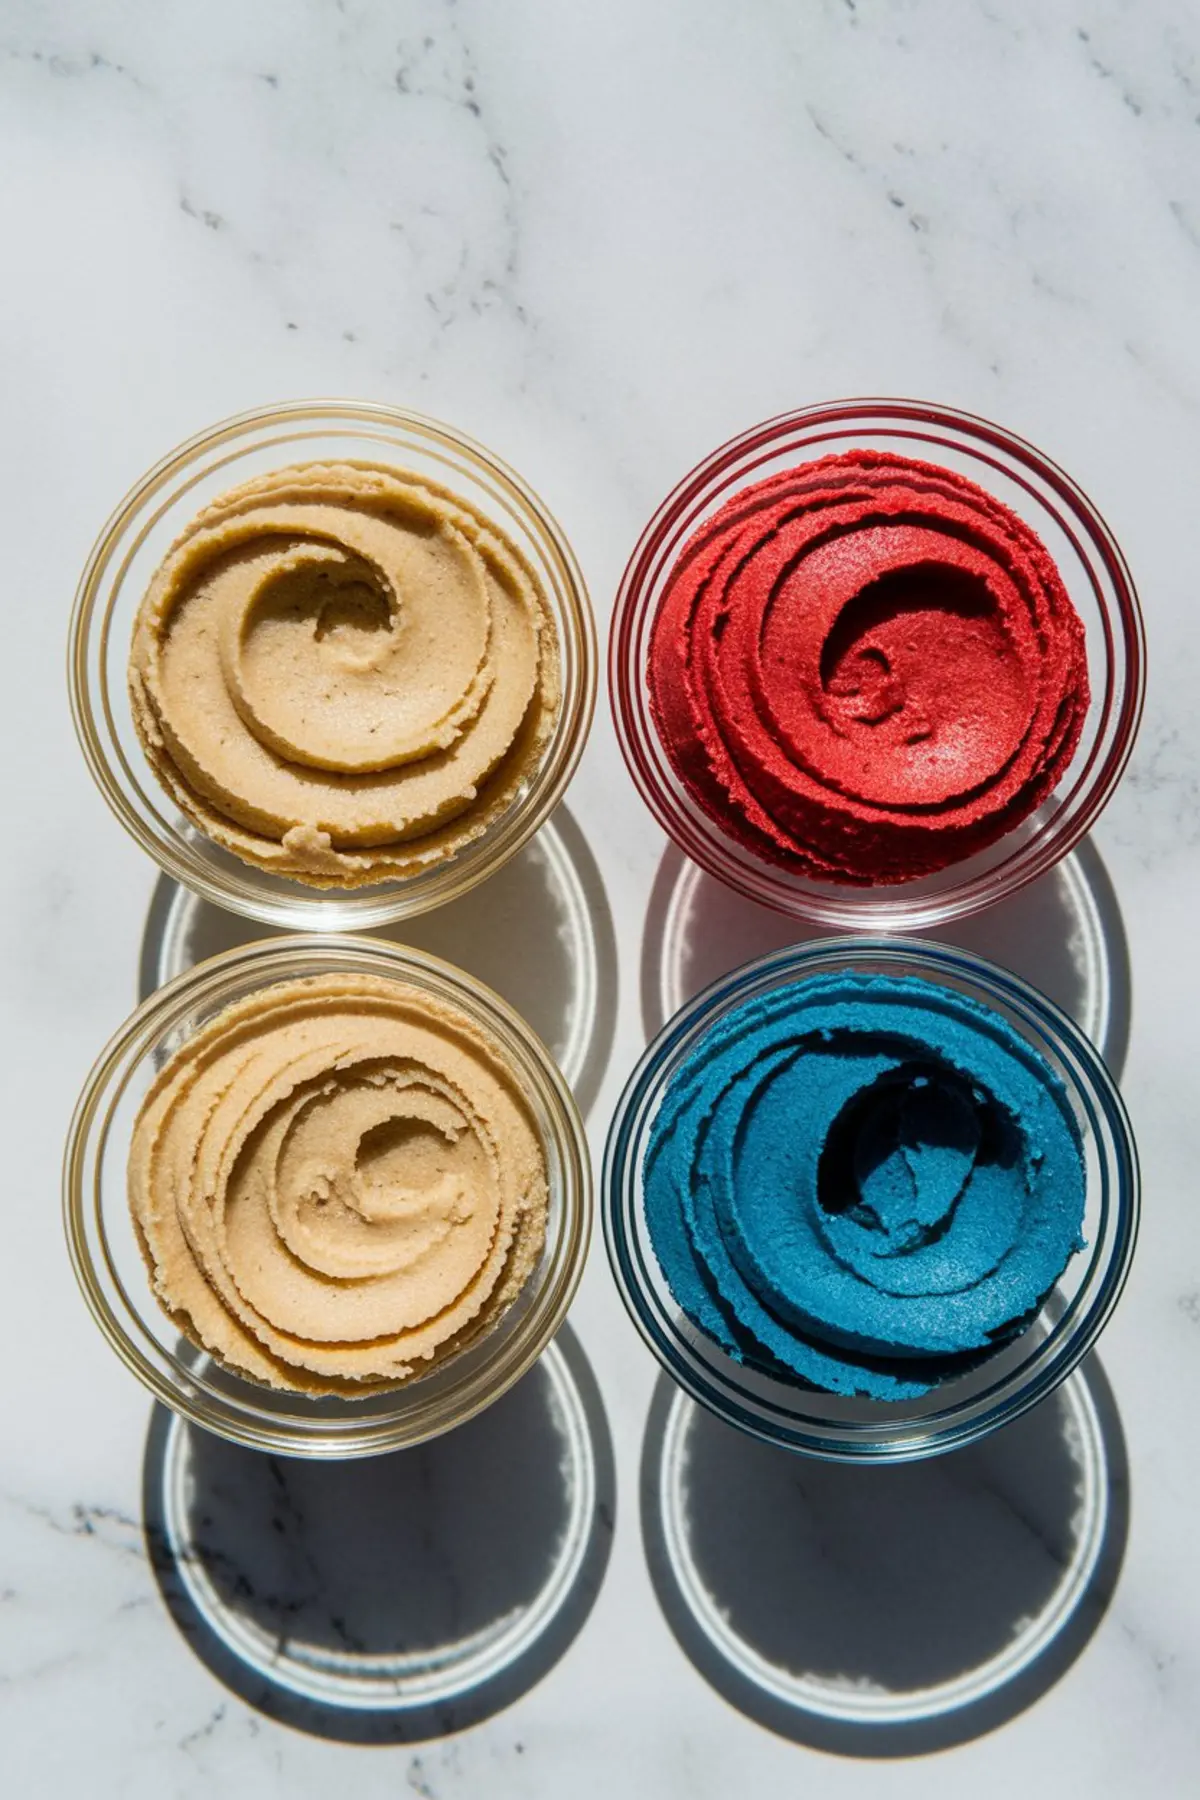
Red dough goes on in spoonfuls. Dot it around, then flatten slightly with your fingertips. Blue goes last. Repeat the same process—dot and flatten without mixing. Keep colors from merging. Think patchwork quilt, not watercolor painting.
I always save a handful of plain dough for the top. Those golden spots on top add both texture and contrast. Then scatter the marshmallows. No need to press them in. They’ll settle during baking.
Tip: Chilling the pan before baking helps the layers hold their lines. Even 15 minutes in the fridge makes a difference.
Patriotic Desserts for the Summer Table
These cookie bars work well alongside other red, white, and blue desserts. If you’re planning a spread, I suggest pairing them with my Patriotic Poke Cake or the Firework Crinkle Cookies. If you’re hosting outdoors, Patriotic Berry Cheesecake Salad holds well on the table and gives a lighter fruit option.
Want more visual variety? Try the Red White and Blue Meringues or a chilled Patriotic Lasagna Dessert. They keep the color theme going without doubling up textures.
Final Tips Before You Bake
Don’t skip the cooling step. Warm bars will slide and tear. Patience earns you that clean, triple-layer look. You can even make these a day ahead. They hold their shape well and store beautifully in the fridge.
If you cut too early, the cheesecake layer can smear. A cold knife helps. Wipe it clean between cuts for best results.
Quick Tips Recap:
• Use gel food coloring for bold layers
• Line your pan for easy lifting and slicing
• Chill before cutting to keep layers defined
• Metal pans bake more evenly than glass
I hope this recipe adds a bold, colorful option to your summer table. If you try it, I’d love to hear how it turned out. Leave a comment below or tag me if you share it.
And don’t forget to Pin this recipe for later. The red, white, and blue layers bake clean and cheerful, just like summer should feel.
Patriotic Layered Crinkle Cookie Bars
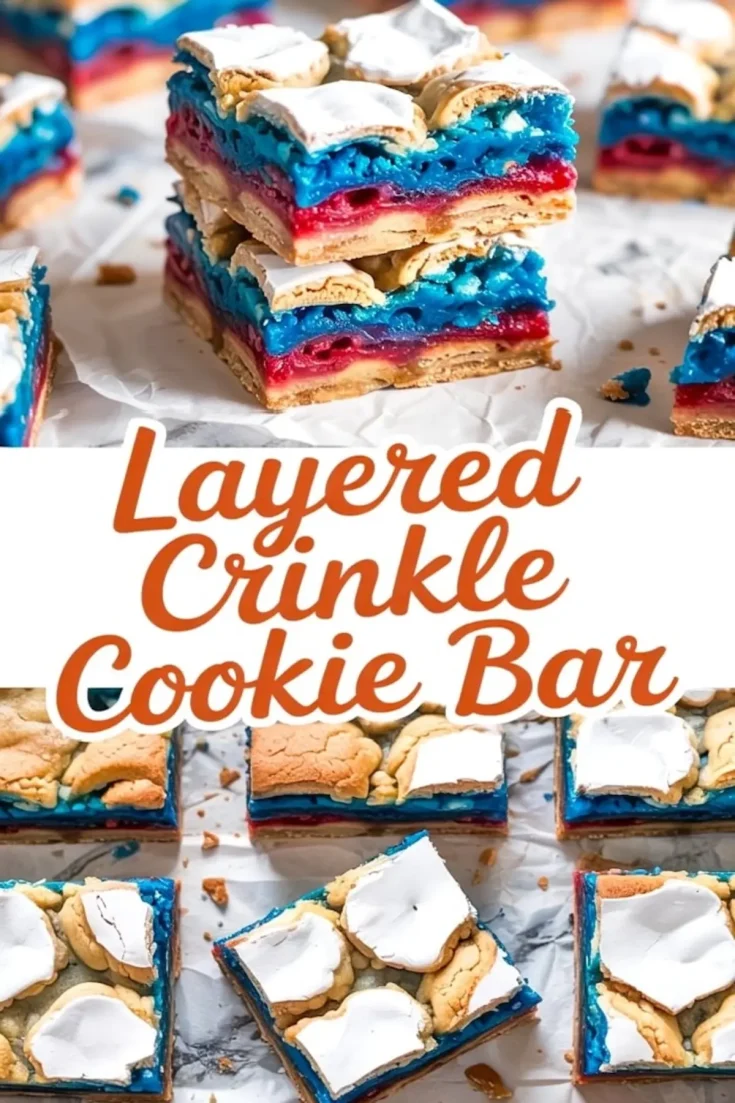
These cookie bars combine soft layers of red, white, and blue cookie dough with a creamy cheesecake center and a toasted marshmallow topping. They hold their bold colors and defined layers after baking, making them a standout choice for patriotic holidays or colorful gatherings. Each bite delivers a chewy base, a smooth middle, and a sweet, lightly crisped top.
Ingredients
- For the Cookie Dough Base and Layers:
- 1 cup (2 sticks) unsalted butter, softened
- 1 ¼ cups granulated sugar
- 2 large eggs
- 2 teaspoons vanilla extract
- 2 ¾ cups all-purpose flour
- 1 teaspoon baking soda
- ½ teaspoon salt
- Red gel food coloring
- Blue gel food coloring
- FOR THE CHEESECAKE LAYER:
- 8 oz cream cheese, softened
- ¼ cup granulated sugar
- 1 large egg
- ½ teaspoon vanilla extract
- FOR THE MARSHMALLOW CRINKLE TOPPING:
- 1 ½ cups mini marshmallows (or chopped large ones)
- Optional: ½ cup white chocolate chips
Instructions
- MAKE THE COOKIE DOUGH: In a large mixing bowl, cream together the softened butter and granulated sugar until light and fluffy, about 2 to 3 minutes. Add the eggs one at a time, mixing well after each addition, then stir in the vanilla extract.
- COMBINE DRY INGREDIENTS: In a separate bowl, whisk together the all-purpose flour, baking soda, and salt. Gradually mix the dry ingredients into the wet mixture until a smooth dough forms.
- DIVIDE AND COLOR THE DOUGH: Separate the dough evenly into three portions. Leave one plain for the base layer. Color one portion with red gel food coloring and the other with blue gel food coloring. Mix until colors are fully blended.
- PREPARE THE CHEESECAKE LAYER: In a small bowl, beat the cream cheese, granulated sugar, egg, and vanilla extract until smooth and pourable. Set aside.
- ASSEMBLE THE LAYERS: Preheat the oven to 350°F (175°C). Line a 9x13-inch baking dish with parchment paper, leaving some overhang for lifting later. Press the plain cookie dough evenly into the bottom of the pan to form a solid base.
- ADD CHEESECAKE MIXTURE: Carefully pour the cheesecake mixture over the cookie base, spreading it gently to create an even layer without disturbing the base dough.
- LAYER THE RED DOUGH: Drop small spoonfuls of the red dough over the cheesecake layer. Lightly press it to spread it into an even layer across the pan.
- LAYER THE BLUE DOUGH: Repeat the process with the blue dough, gently pressing it over the red layer without mixing the colors.
- ADD CRINKLE TOP AND TOPPINGS: Scatter small bits of the reserved plain dough over the surface to create golden crinkle spots. Evenly distribute mini marshmallows across the top, and add white chocolate chips if using.
- BAKE THE BARS: Bake for 32 to 38 minutes, or until the top is golden, marshmallows are puffed and lightly toasted, and a toothpick inserted in the center comes out with a few moist crumbs.
- COOL AND CHILL: Let the bars cool completely in the pan. For clean slicing, transfer the pan to the refrigerator and chill for 1 to 2 hours before cutting into squares.
Notes
Use gel food coloring for vibrant colors without altering dough consistency. Chilling before slicing helps maintain clean layers and sharp edges. Store leftovers covered in the refrigerator for up to 5 days.
Nutrition Information
Yield
24Serving Size
1Amount Per Serving Calories 201Total Fat 7gSaturated Fat 4gTrans Fat 0gUnsaturated Fat 3gCholesterol 38mgSodium 172mgCarbohydrates 31gFiber 0gSugar 19gProtein 3g