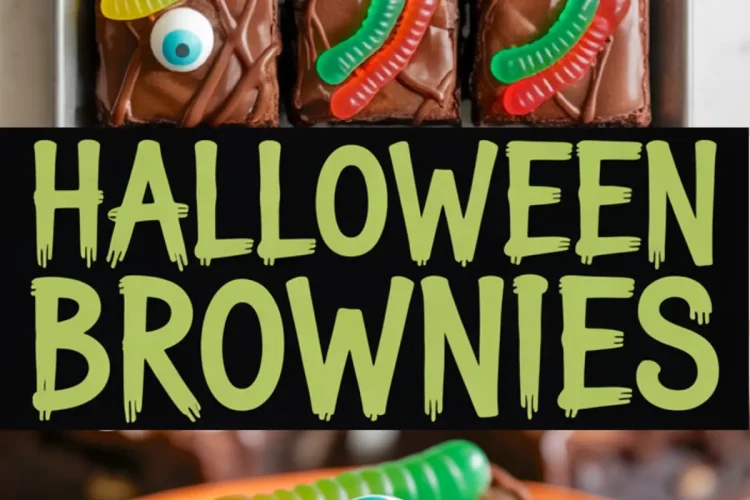
The first time I baked these Halloween brownies, I wasn’t aiming to impress. I wanted something fun, something quick—something that made the kids laugh. What I didn’t expect was how fast they disappeared. Grown-ups leaned in just as eagerly, lifting brownies topped with candy eyes and gummy worms like they were examining rare specimens.
This recipe isn’t just about looks. The brownie base is dense, fudgy, and dark, with enough cocoa to keep it grounded. Then comes the silly fun. You’ll melt chocolate, pipe wobbly spiderwebs, and press in decorations that turn each square into its own spooky treat. This is the kind of dessert that makes you pause before biting then smile after you do.
You’ll learn how to get clean cuts, how to avoid streaky chocolate, and how to make sure the decorations hold firm. You’ll also see a simple method that gives bakery-quality texture without requiring a mixer. These brownies hit both Halloween dessert ideas and fall treat cravings right on target.
Following a special diet?
Every recipe on this site can be converted to gluten-free, vegan, dairy-free, keto, nut-free or egg-free with adjusted ratios so nothing falls flat.
Try the Recipe Converter →These Halloween Brownies Work Well for Parties
The base of this recipe holds its shape without becoming dry. That’s the starting point for any good Halloween brownie idea. The brownies stay soft at room temperature, but they also chill well if you want to prep ahead.
They carry themselves well on a dessert table. The color contrast between the dark cocoa and bright toppings gives you that “spooky desserts” effect without needing artificial dyes.
You can slice them small for younger kids or large for party trays. I’ve brought them to school events, potlucks, and family dinners. They always get picked before anything else on the plate.
For another party-ready idea that plays with texture and color, these Halloween Dirt Cups also go quickly and are fun to assemble with little helpers.
Making the Brownie Base Rich and Fudgy Without Being Overly Sweet
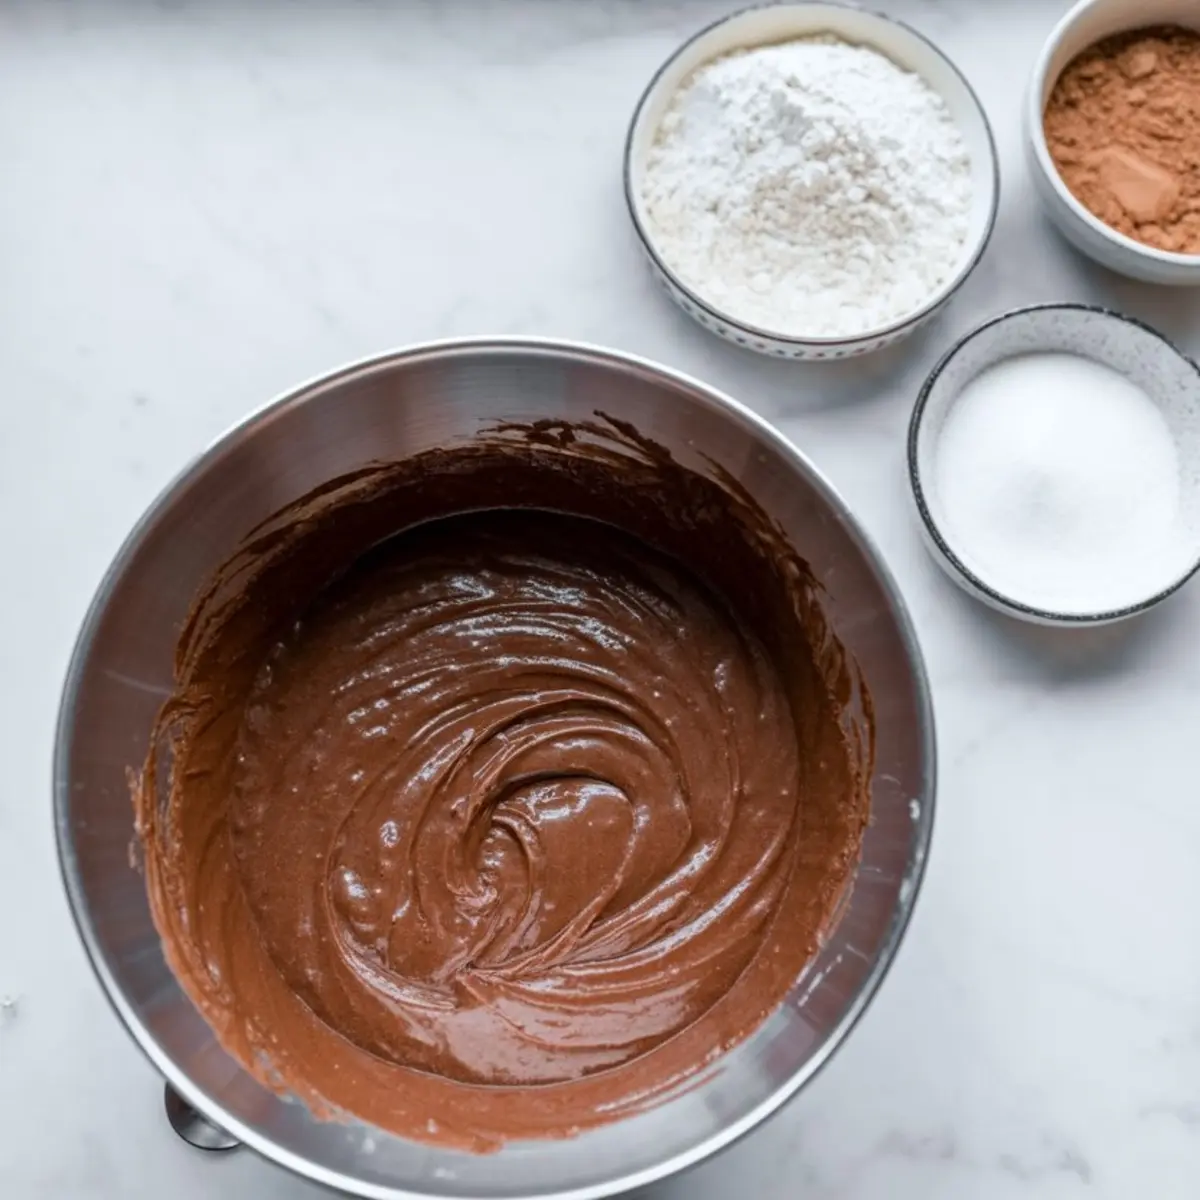
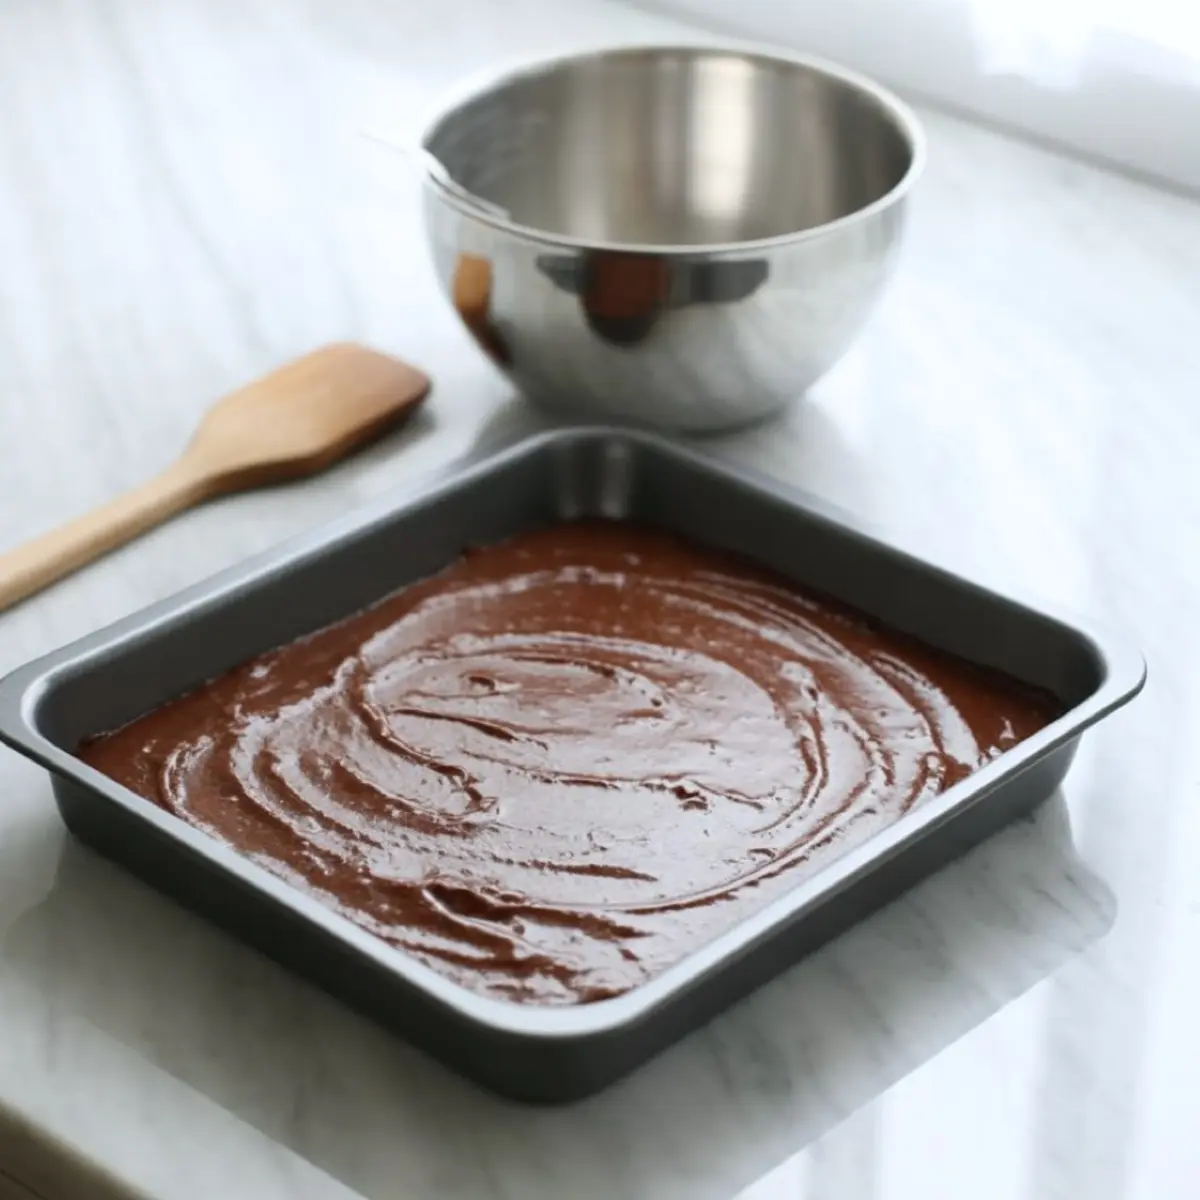
Start by melting the butter fully before whisking in the sugar and cocoa powder. This gives the base its deep color and chewy texture. Use natural cocoa for a richer flavor, or Dutch-processed if you want a smoother finish.
Add the eggs one at a time, and don’t rush. Each addition builds gloss and structure. If the batter doesn’t look thick and shiny after the eggs go in, keep stirring slowly. It’ll get there.
Once the dry ingredients go in, switch to a spatula and fold gently. This step prevents overmixing, which could make the brownies tough.
I’ve tested this same base using melted chocolate in place of part of the cocoa. It did create a softer center, but it lost some of the stability needed for decorating. For this kind of spooky brownie, I always return to cocoa—it holds best, especially under the weight of toppings.
This same approach—simple batter, firm cut, rich bite is one I also use in my Spooky Cake when I want clean slices and strong visual contrast.
Piping the Spiderwebs Without a Piping Bag
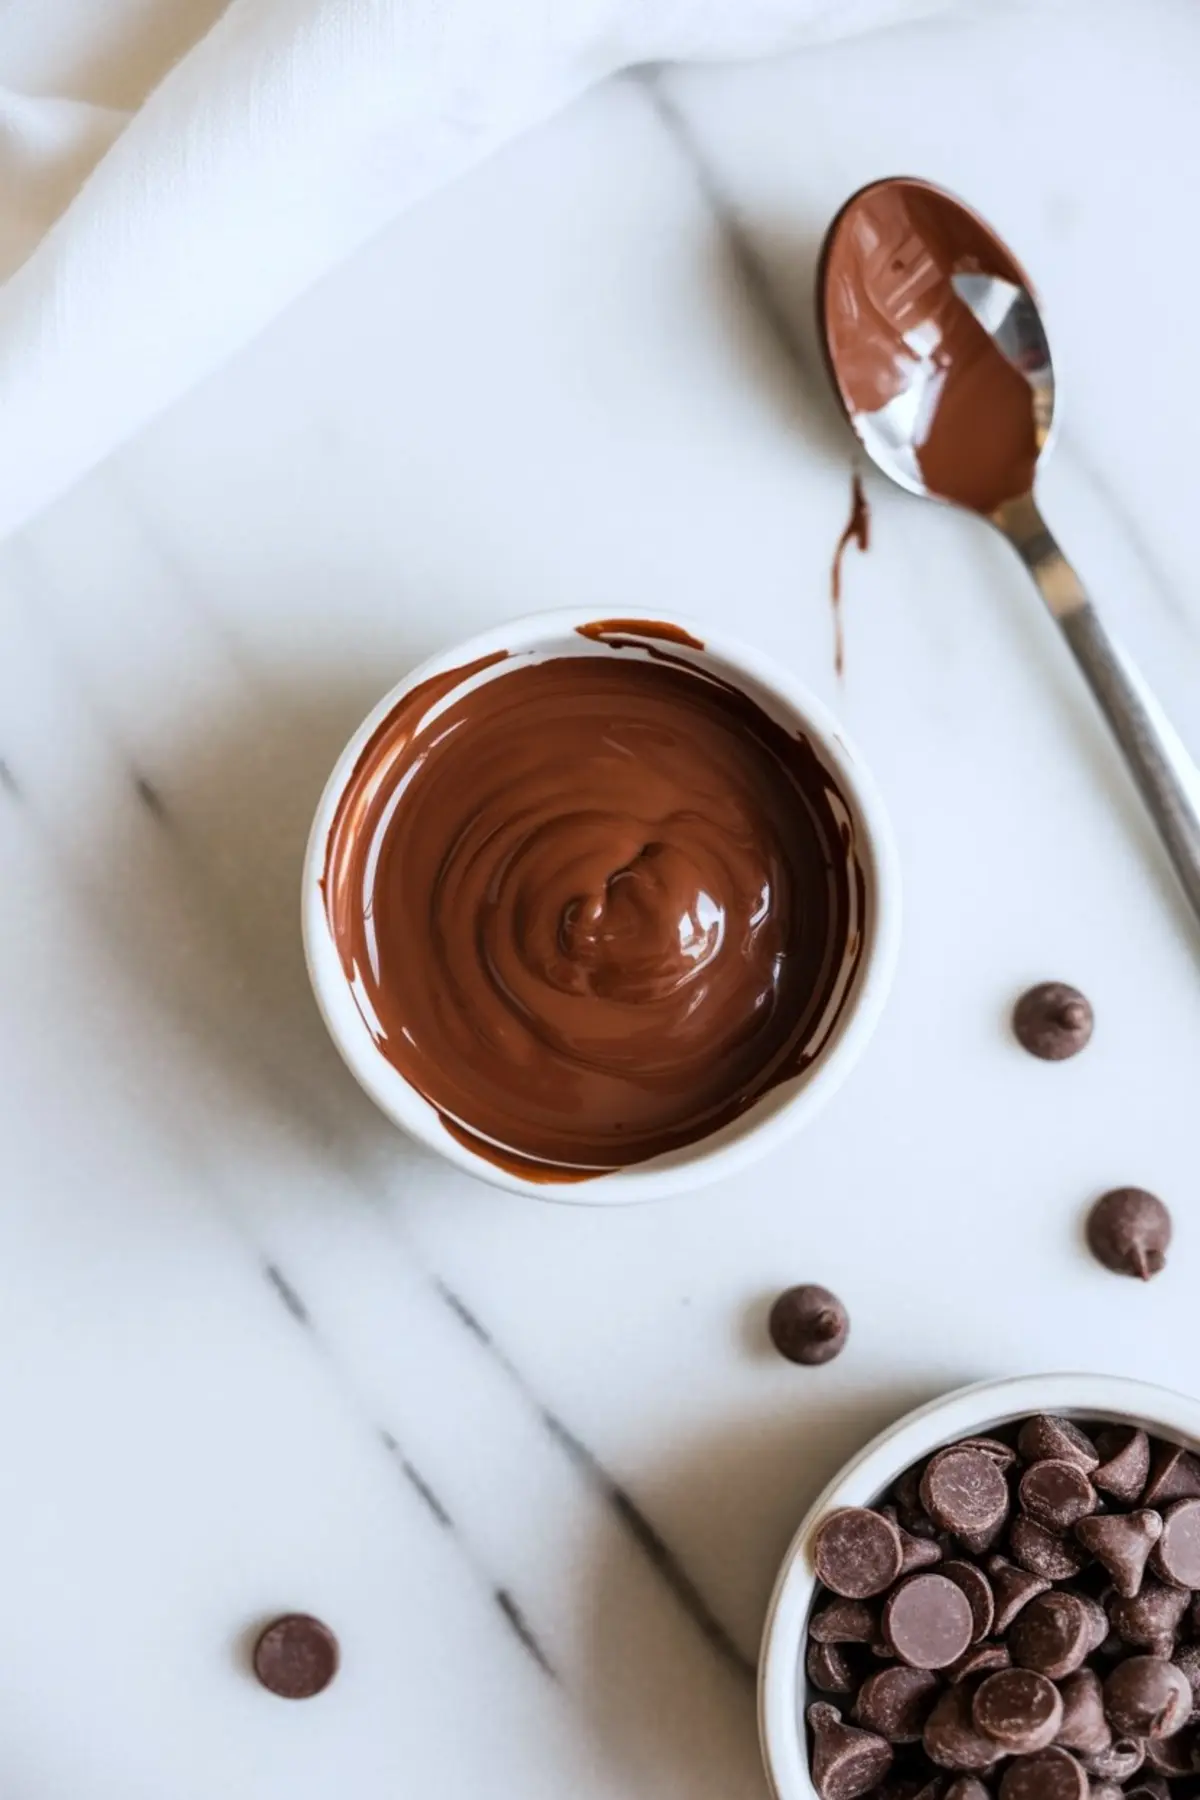
Once the brownies cool, you’ll melt the chocolate chips with oil. That small addition makes the chocolate easier to work with and prevents it from setting too quickly.
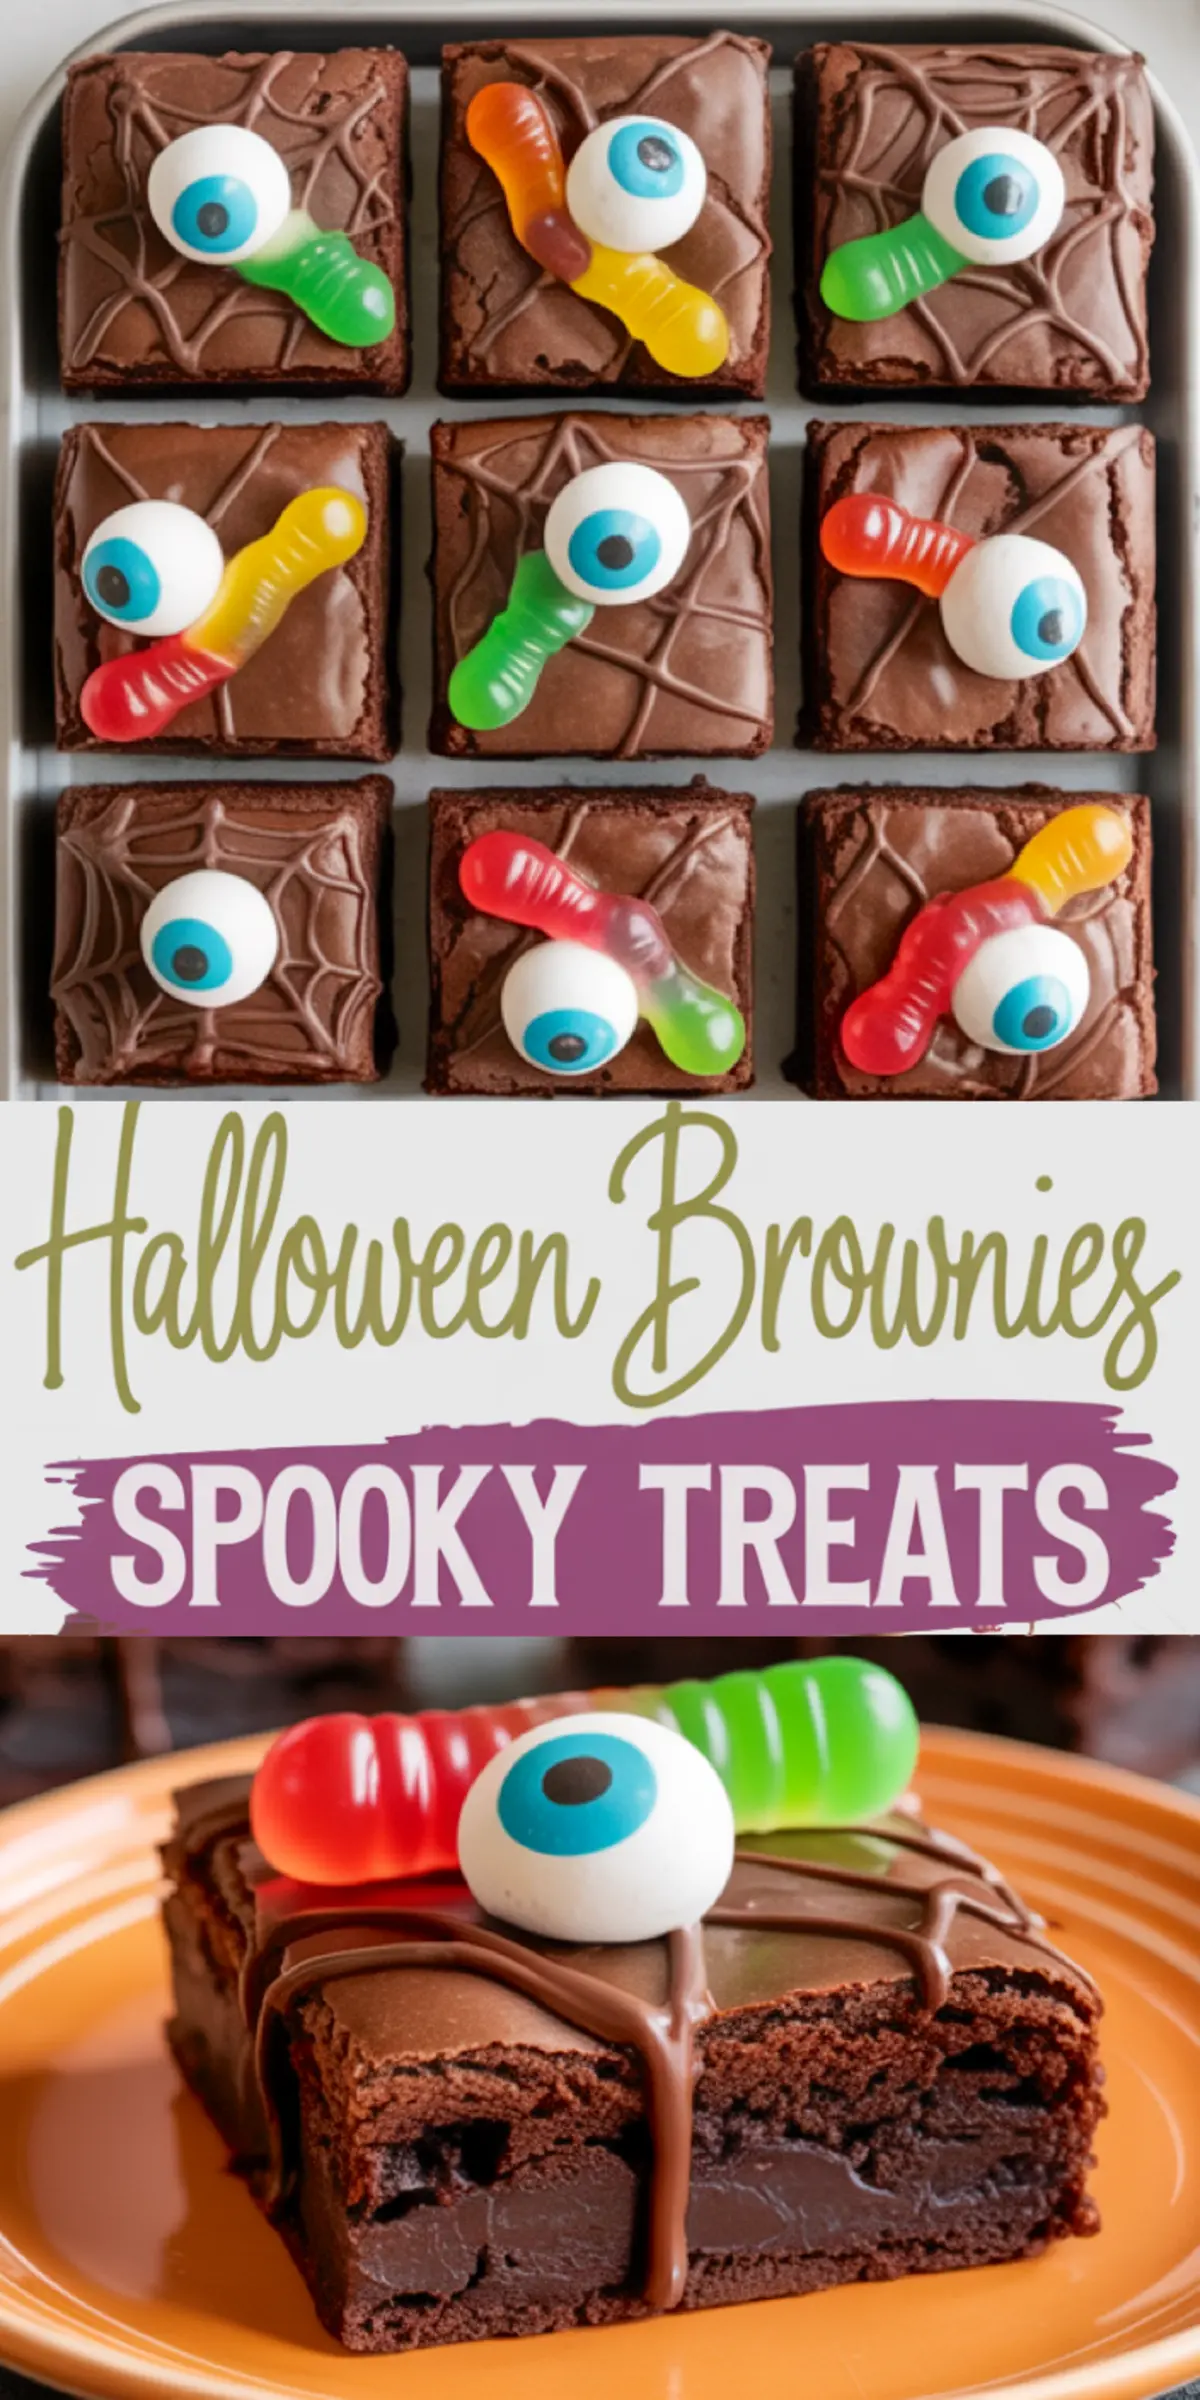
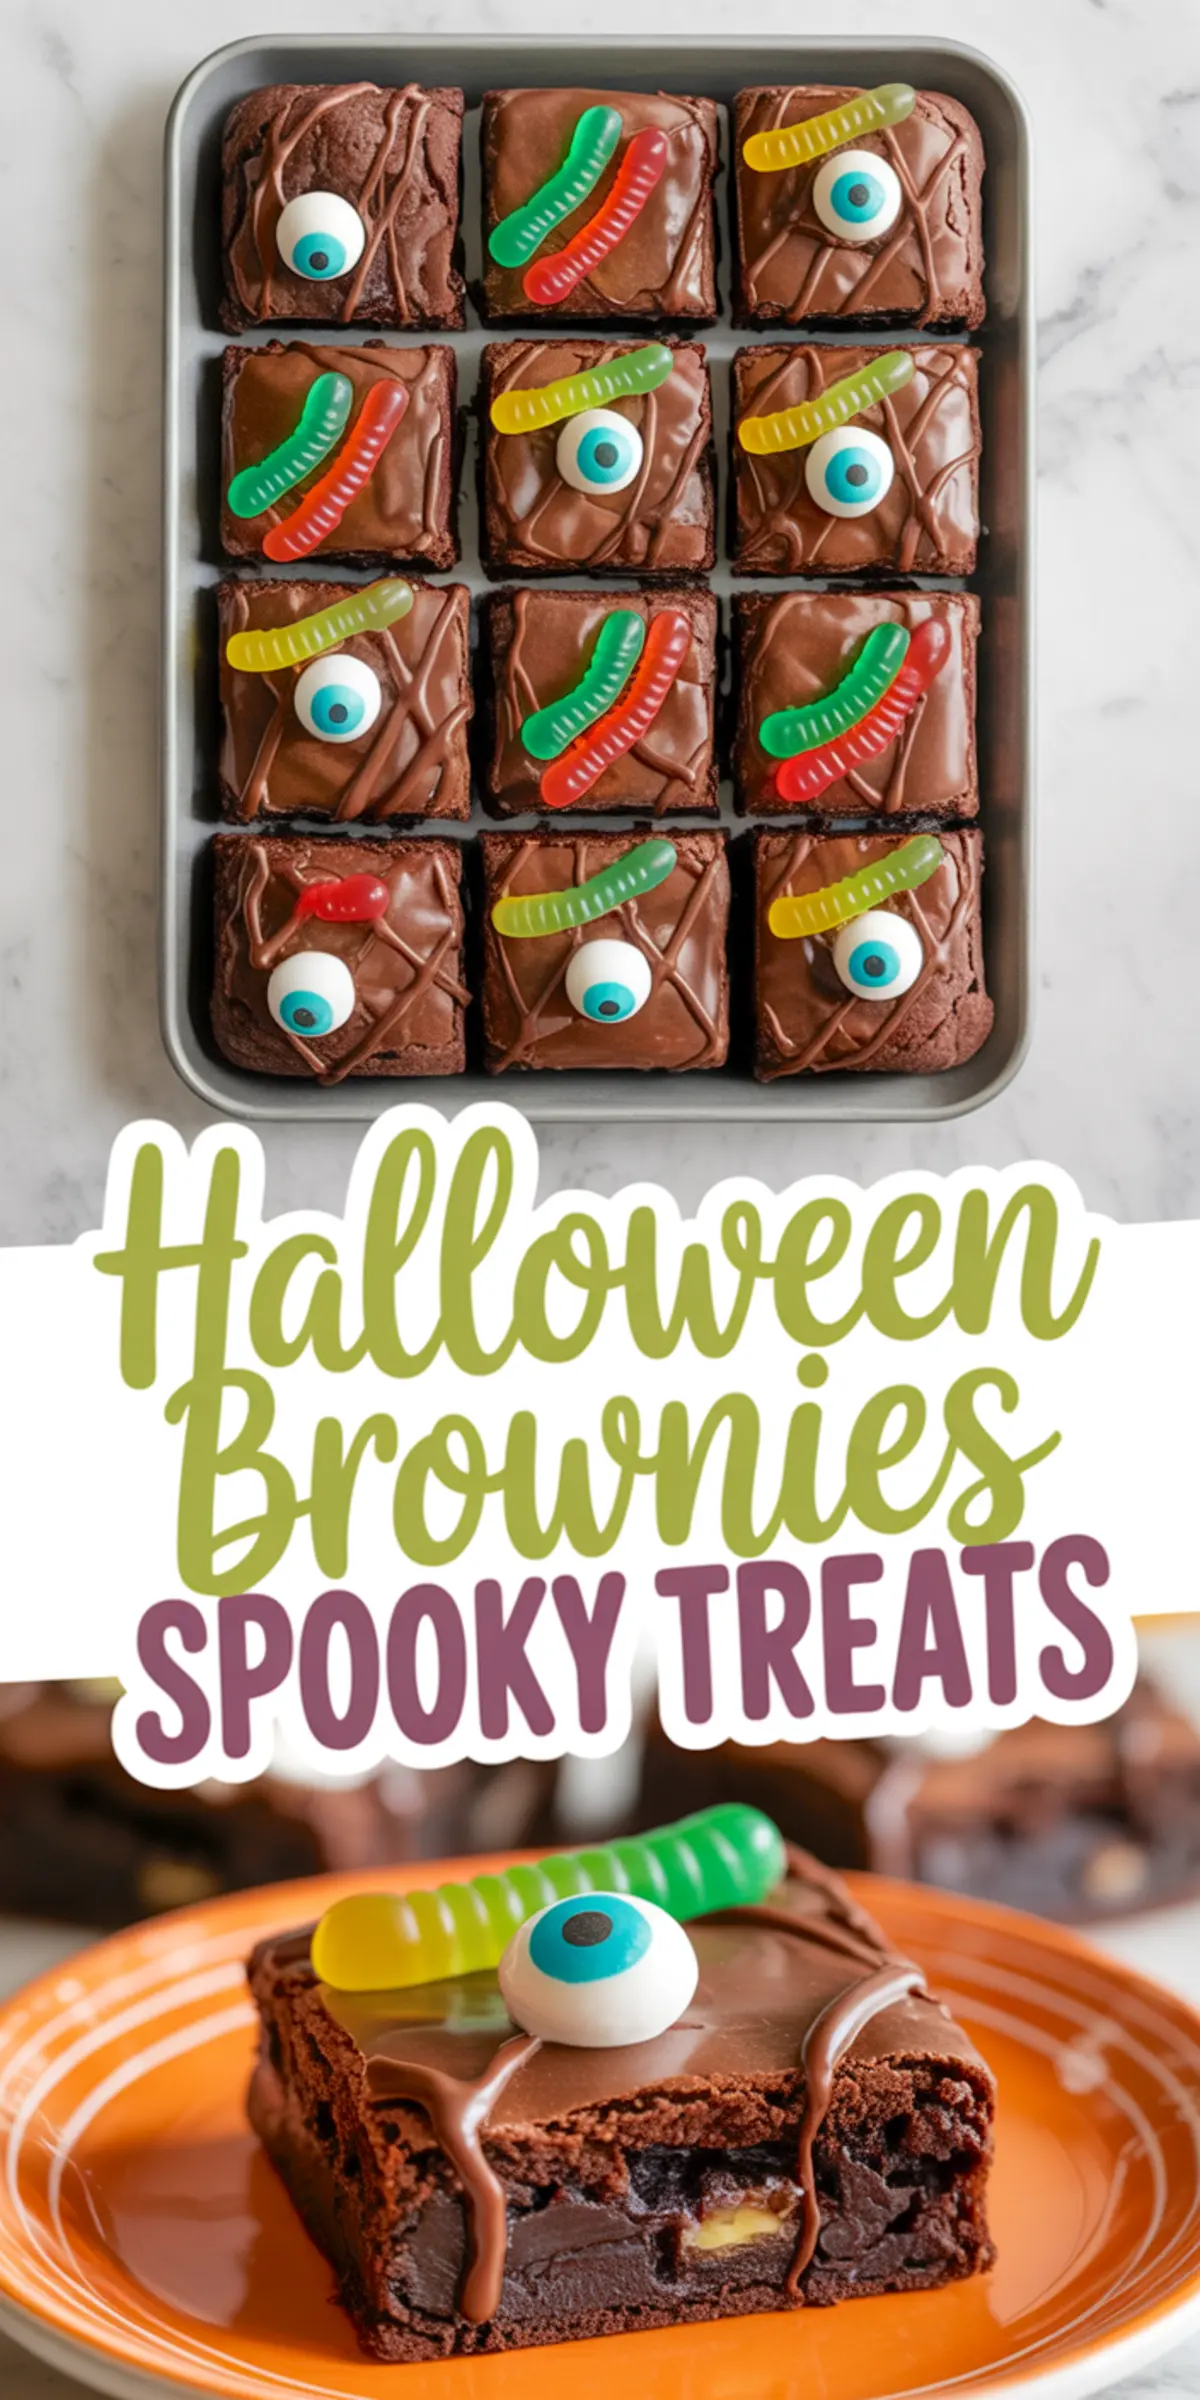
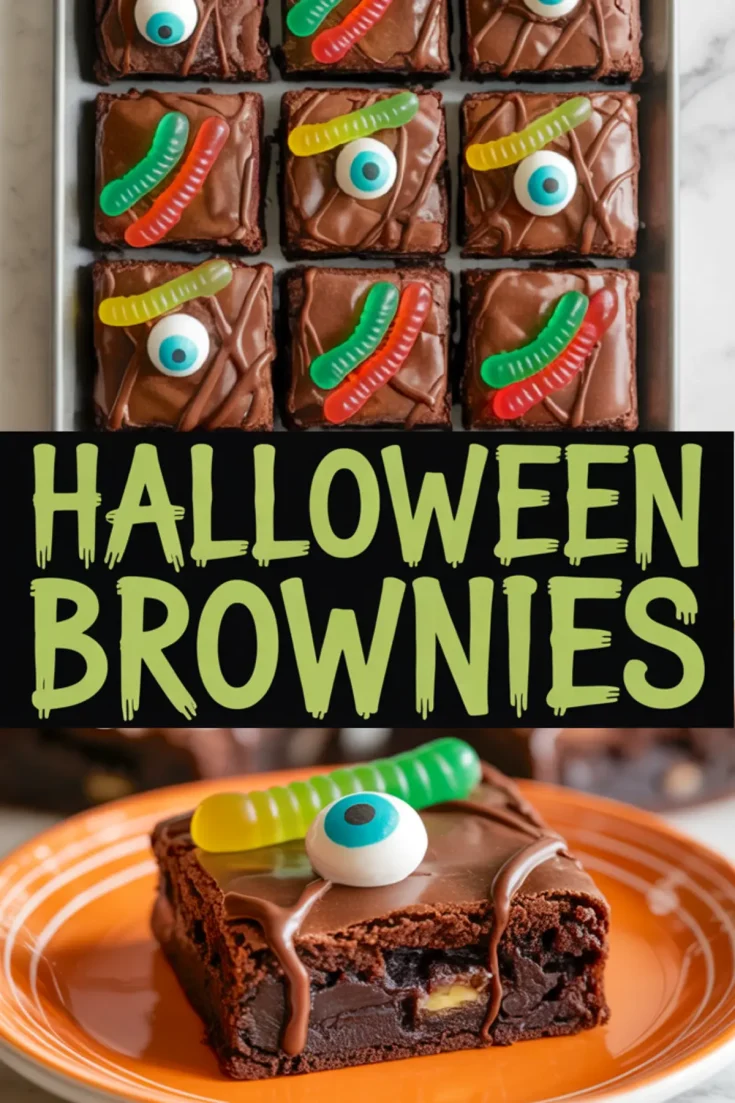
You don’t need a piping bag. A zip-top sandwich bag works just fine. Fill one corner, snip a tiny hole, and start drawing circles and lines. Keep it loose. Webs aren’t meant to be perfect. In fact, uneven designs look better—they catch the light and feel handmade.
If you’re decorating with kids, let them do the webs first. Then step in to tidy a few lines if you want. But even the wonky ones look good once the candy goes on.
For inspiration on decorating with character, these Halloween Macarons show how much personality comes from simple shapes and careful placement.
Placing the Eyeballs and Gummy Worms for Maximum Effect
While the chocolate is still soft, press in one candy eyeball near the center of each square. Then tuck a gummy worm next to it. I like to have the worm curling off the side or peeking under the brownie edge.
The chill step is worth it. Set the tray in the fridge for ten minutes. That short rest sets the chocolate enough to keep everything in place, especially if you’re stacking the brownies later.
If you want to add more texture or color, you could press in crushed cookies or colored sprinkles—but I’ve found the clean look of eyes and worms draws the most attention.
For those who love themed cookies, these Halloween Sugar Cookies also show how you can layer design over simple shapes without making the process too complicated.
Serving and Storage Tips That Preserve Texture and Shape
Serve these brownies at room temperature for the best flavor. The texture softens slightly and gives a smoother bite when it isn’t cold.
To store, keep them in a single layer inside an airtight container. If stacking, use wax paper between layers. The chocolate decoration holds better when kept cool, so if your kitchen is warm, move the container to the fridge.
They freeze surprisingly well. Wrap each brownie in plastic wrap, then place them in a freezer-safe box. Thaw at room temperature without unwrapping to prevent condensation from softening the top.
Brownies With Cocoa vs Brownies With Melted Chocolate: What to Choose
I’ve tried both methods many times. Melted chocolate gives a creamier finish and slightly softer texture, but it doesn’t always slice as neatly. Cocoa, on the other hand, produces sharper edges and keeps the base firmer for decorating.
For this recipe, where the top layer needs to hold detail and texture, I always go back to cocoa. It gives the spiderwebs a flat, even base and lets the candy pieces stay where you put them.
That’s the difference that makes this recipe work so well as part of your Halloween treats desserts list. It gives you the freedom to decorate without worrying about collapse or crumbs.
Make These for Your Halloween Party and Pin for Later
Halloween brownies like these offer more than decoration. They give your dessert table structure and a playful focal point that draws people in.
Pin this idea now to your Spooky Food or Fall Treats board, so it’s ready next time you need something quick and festive.
And if you try it, leave a comment below. I’d love to know if you added your own spin, made them with kids, or shared them at a gathering. Recipes like this often take on a new life once they leave the kitchen—and I’d love to hear yours.
Halloween Brownies Recipe
A rich, fudgy brownie base decorated with chocolate spiderwebs, gummy worms, and candy eyeballs for a playful Halloween treat that’s as fun to make as it is to eat.
Ingredients
- FOR THE BROWNIES
- 1 cup (2 sticks) unsalted butter
- 2 cups granulated sugar
- 1 cup unsweetened cocoa powder
- 1 teaspoon vanilla extract
- 4 large eggs
- 1 cup all-purpose flour
- ½ teaspoon salt
- ½ teaspoon baking powder
- FOR DECORATING
- ½ cup semisweet chocolate chips
- 1 teaspoon vegetable oil
- 12 candy eyeballs
- 12 gummy worms
Instructions
PREPARE THE PAN: Preheat oven to 350°F (175°C). Grease and line a 9x13-inch baking pan with parchment paper, leaving an overhang for easy removal.
MAKE THE BROWNIE BATTER: Melt butter in a large microwave-safe bowl. Stir in sugar and cocoa powder until combined. Add vanilla and eggs, mixing one at a time until glossy. Sift in flour, salt, and baking powder. Stir gently until just combined.
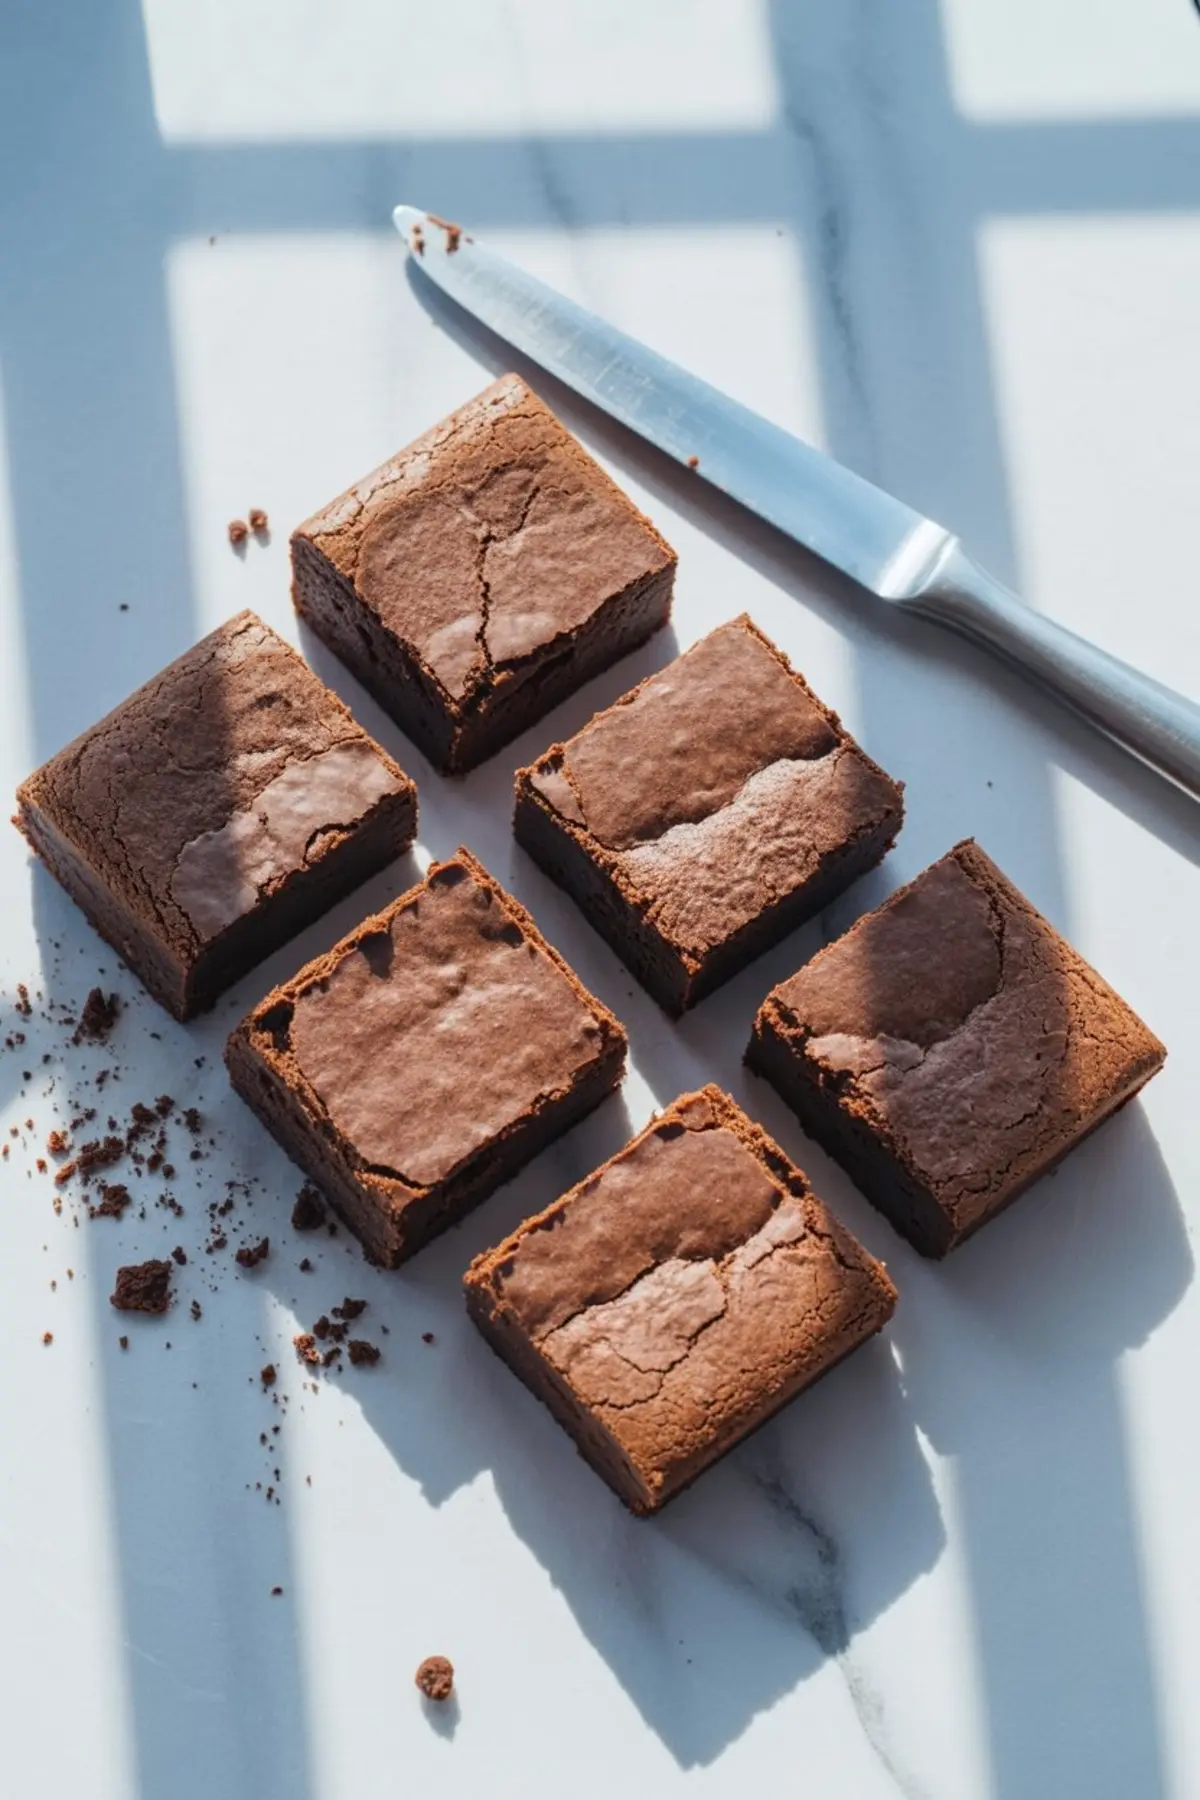
BAKE THE BROWNIES: Pour batter evenly into prepared pan. Bake for 28–32 minutes, or until a toothpick inserted in the center comes out with a few moist crumbs. Cool completely in the pan.
CUT INTO SQUARES: Lift brownies out using parchment overhang. Transfer to a cutting board and cut into 12 even squares, wiping the knife clean between cuts for neat edges.
MELT THE CHOCOLATE: Combine chocolate chips and vegetable oil in a microwave-safe bowl. Heat in 20-second intervals, stirring each time, until smooth.
CREATE SPIDERWEBS: Transfer melted chocolate to a piping bag or zip-top bag with the corner snipped. Pipe spiderweb designs onto each brownie square.
ADD THE CANDY EYEBALLS: While chocolate is still soft, press one candy eyeball onto each brownie.
ADD THE GUMMY WORMS: Place a gummy worm next to each eyeball, pressing gently so it sticks. Chill brownies in the fridge for 10 minutes to set chocolate.
Notes
Store brownies in an airtight container at room temperature for up to 3 days or in the refrigerator for up to 5 days. For longer storage, wrap individual brownies in plastic wrap and freeze in an airtight container for up to 2 months. Thaw at room temperature before serving. Decorations hold best when brownies are kept cool, so refrigerate if your kitchen is warm.
Nutrition Information
Yield
12Serving Size
1Amount Per Serving Calories 338Total Fat 7gSaturated Fat 3gTrans Fat 0gUnsaturated Fat 3gCholesterol 68mgSodium 161mgCarbohydrates 65gFiber 2gSugar 46gProtein 5g