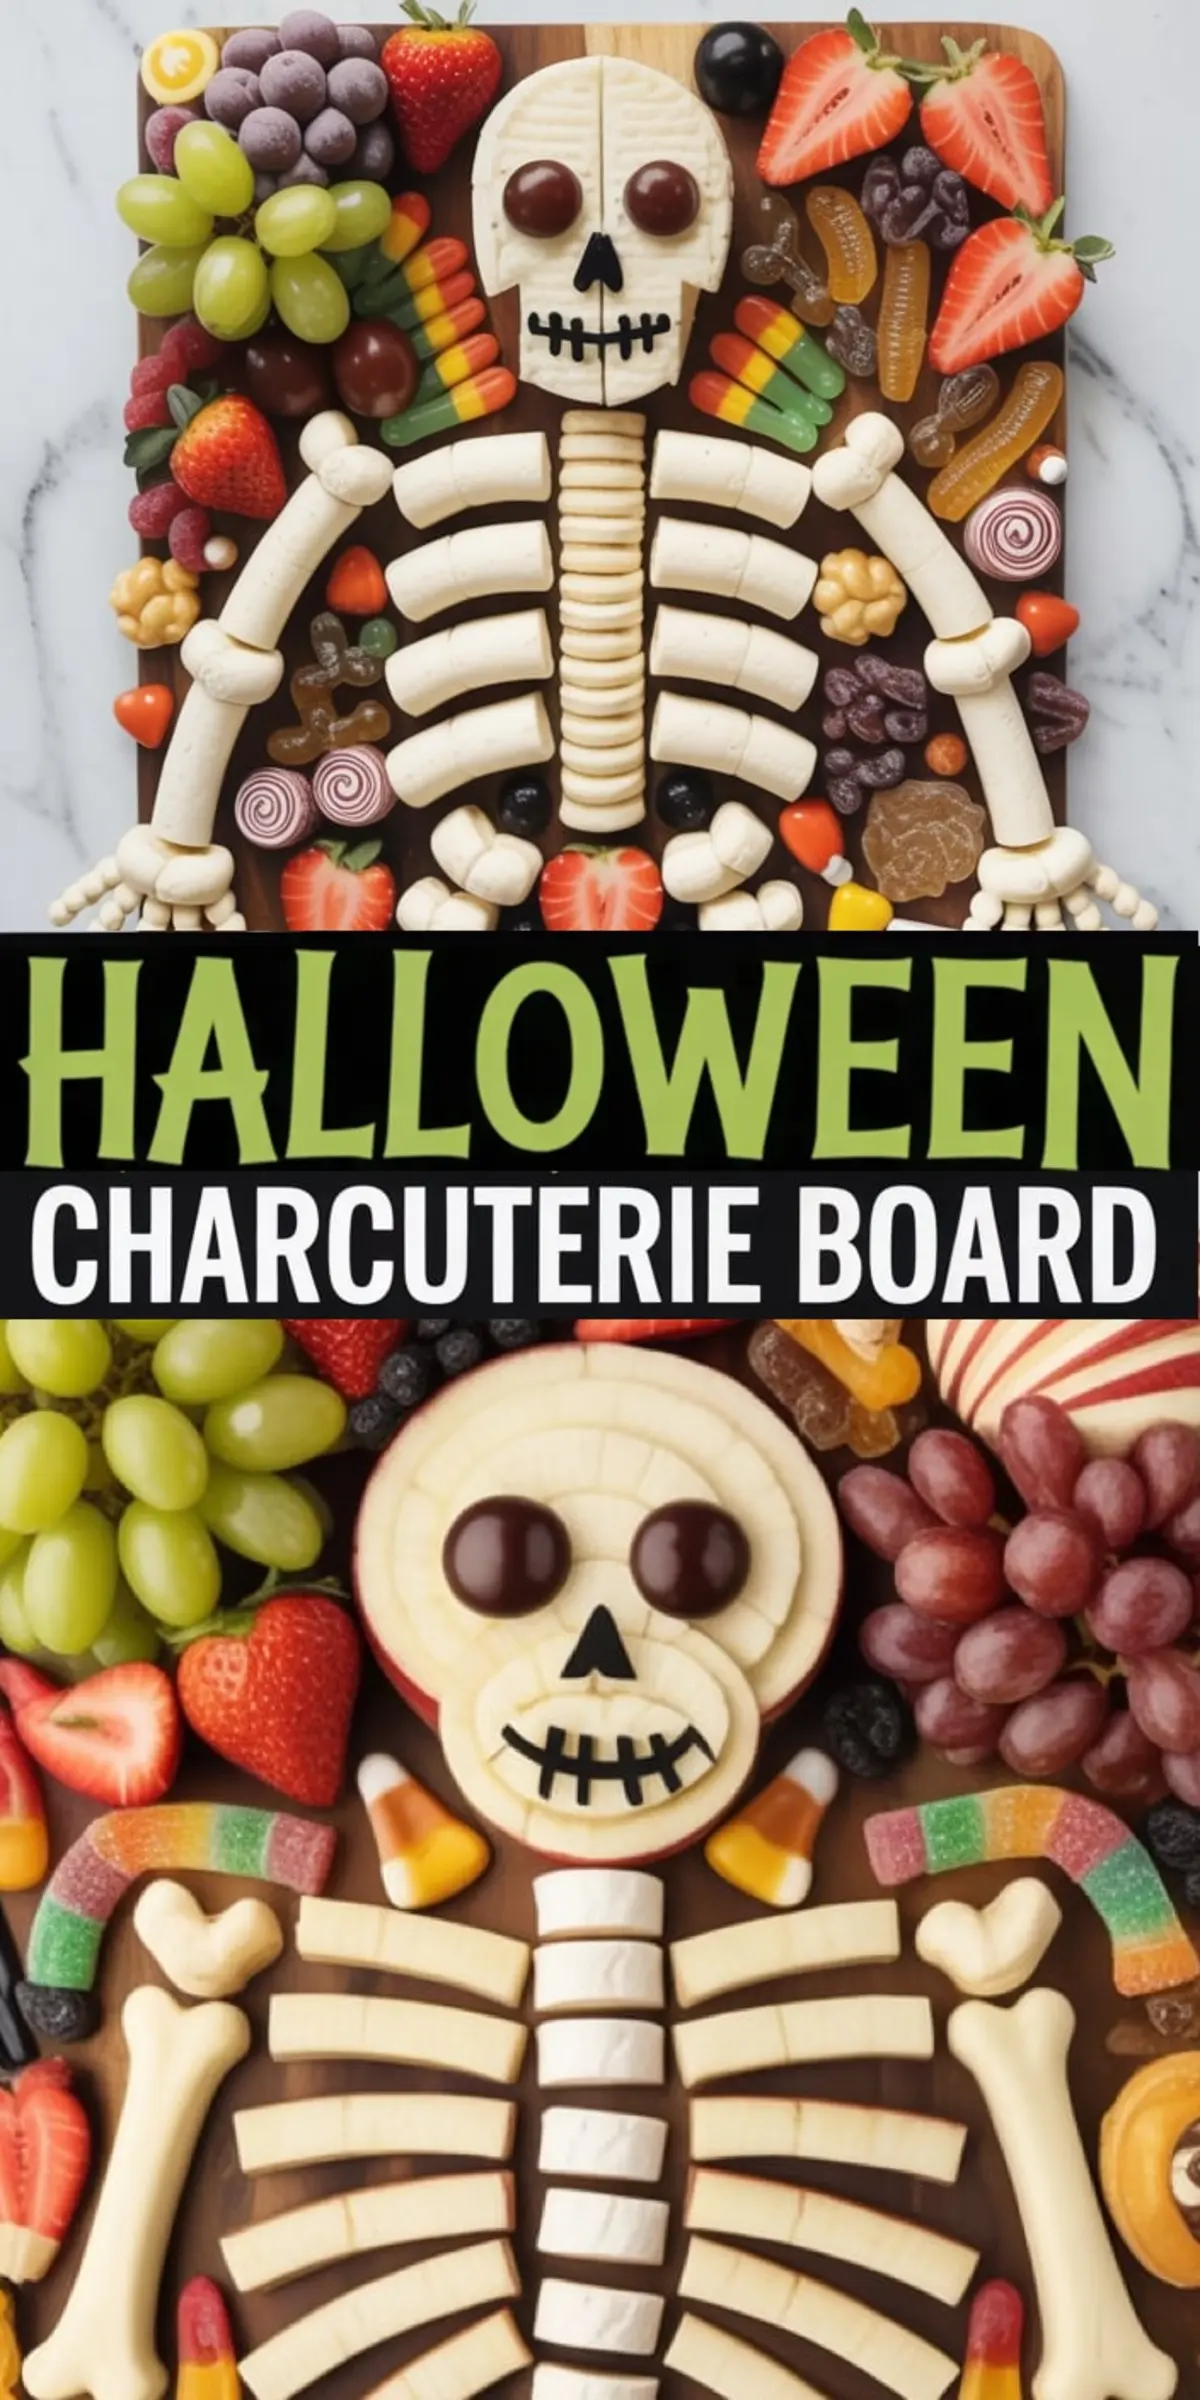
Charcuterie boards may be a familiar feature at gatherings, but there’s nothing typical about a Halloween skeleton charcuterie board.
This one doesn’t just feed your guests, it entertains them. A skull-shaped cheese wheel, marshmallow spine, and licorice-stitched smile catch the eye before anyone even reaches for a cracker. You’ll learn how to arrange this Halloween cheese board step by step, using accessible ingredients and a method you can adapt. And yes, I’ll show you how to balance sweet and savory on the same board without it looking like a mess.
You don’t need special tools, only some simple cuts, a bit of symmetry, and a good-sized board. The layout might feel like a puzzle at first. That’s normal. Just follow the structure and have fun shaping it as you go.
Start with the Skeleton Frame
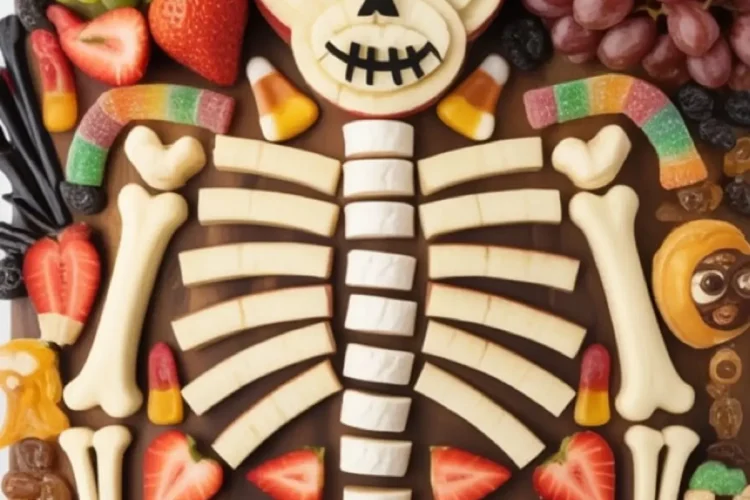
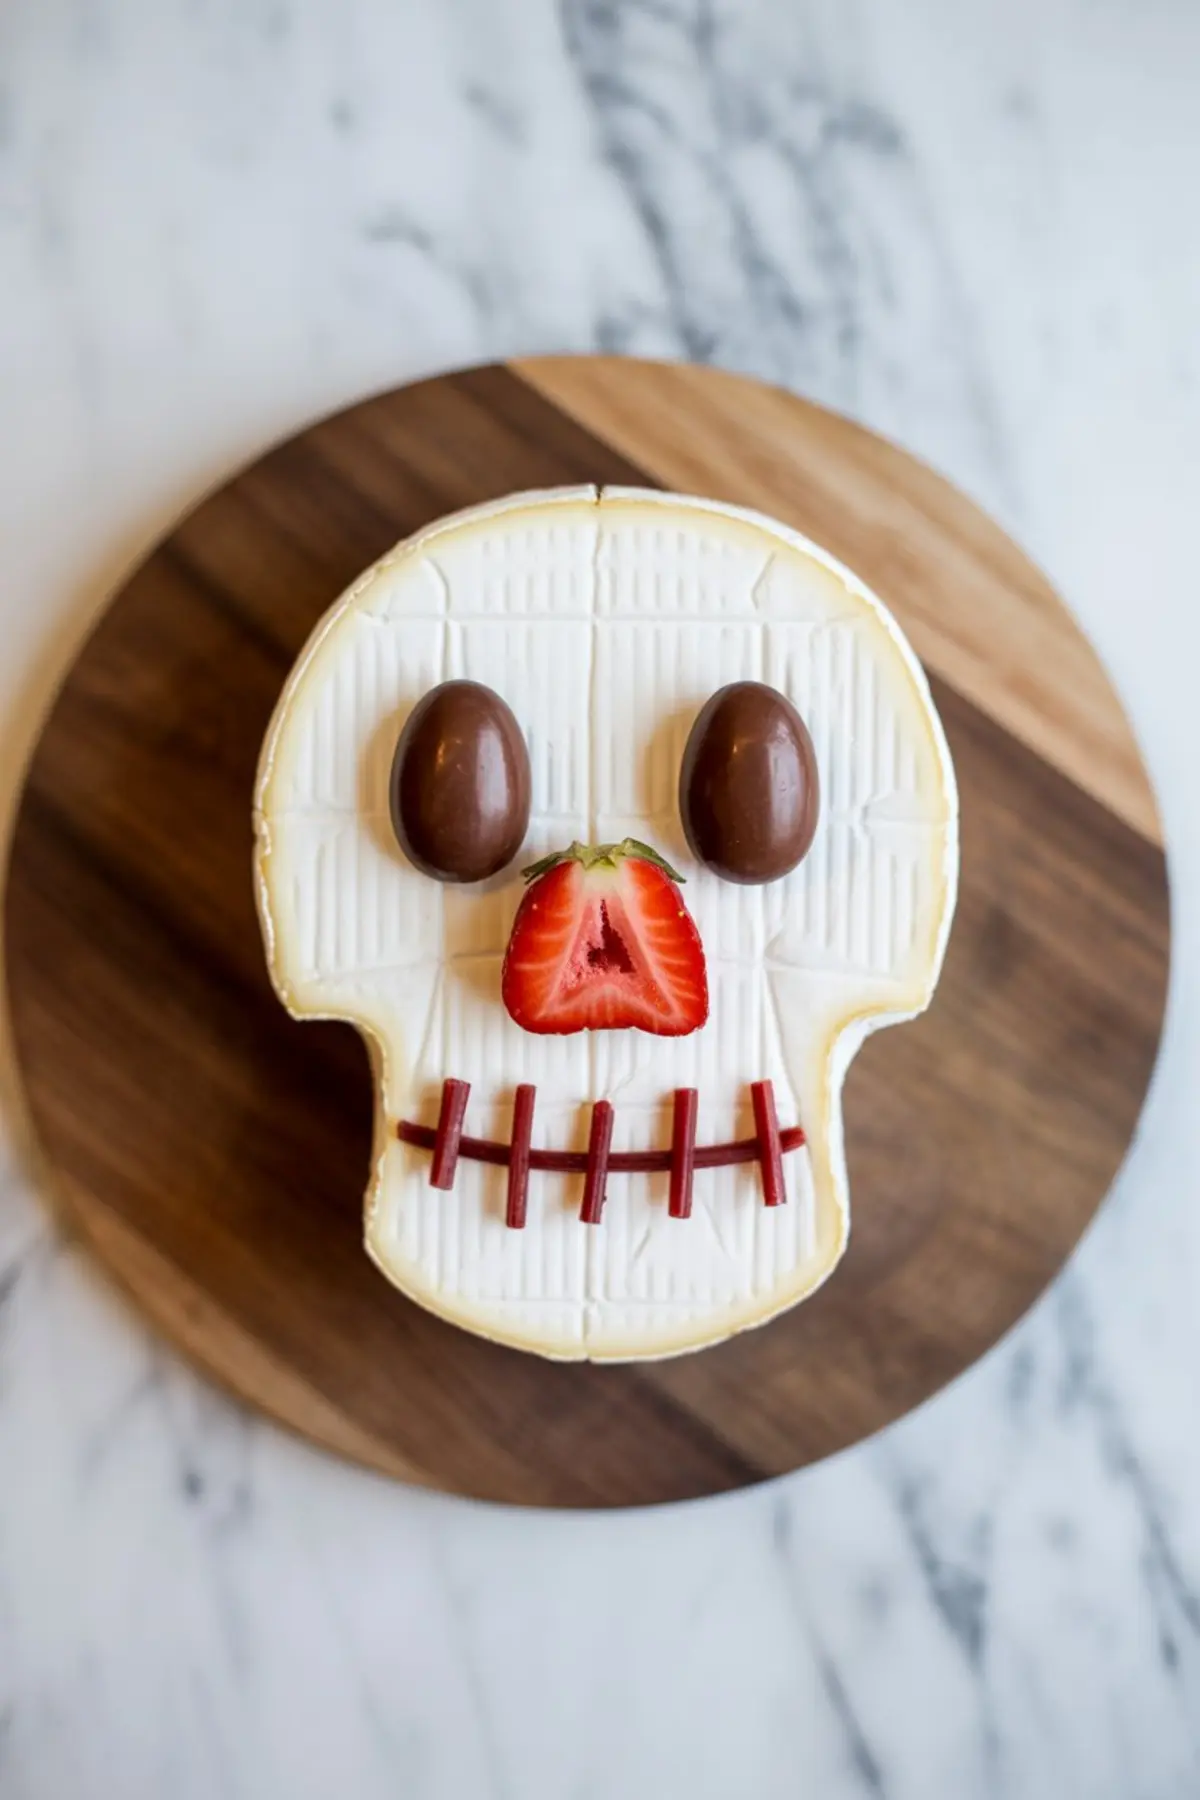
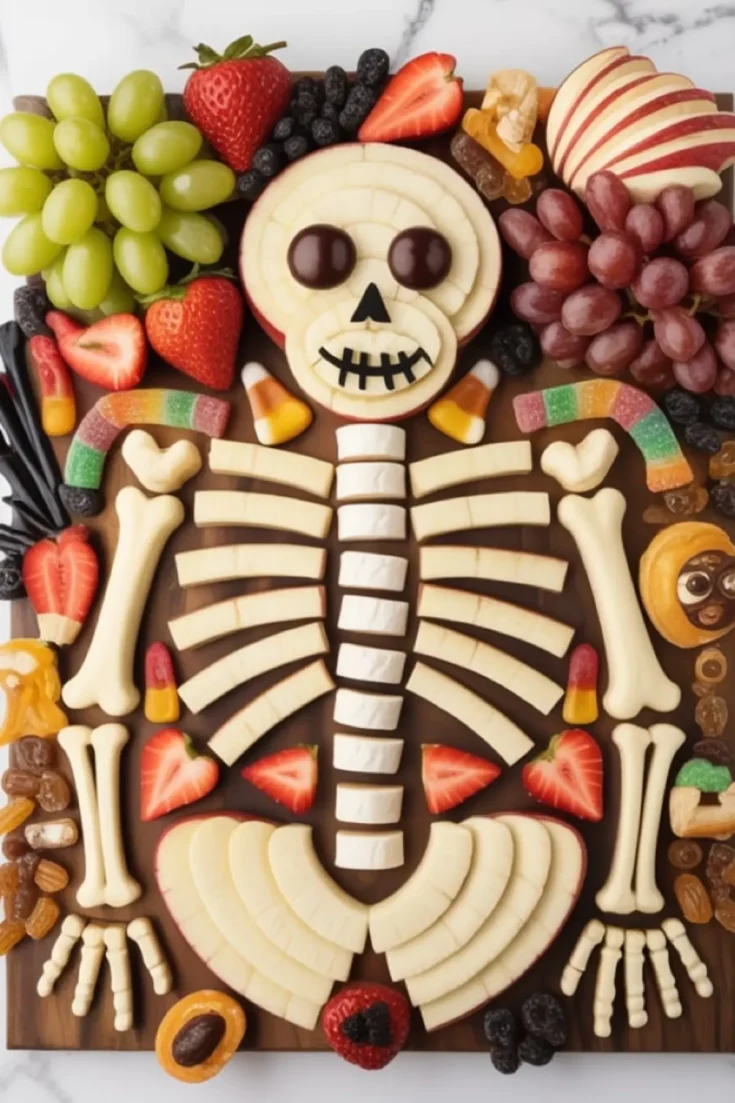
The skeleton serves as the centerpiece, and you’ll want it to be the first thing you build. I use a wheel of brie or Havarti for the skull because both hold shape but slice easily.
Slice the wheel in half for a dome effect, then set it high on the board. Add two dark chocolate almonds for eyes, and a piece of candy corn or strawberry for the nose. I use thin licorice strings to mimic the stitched grin.
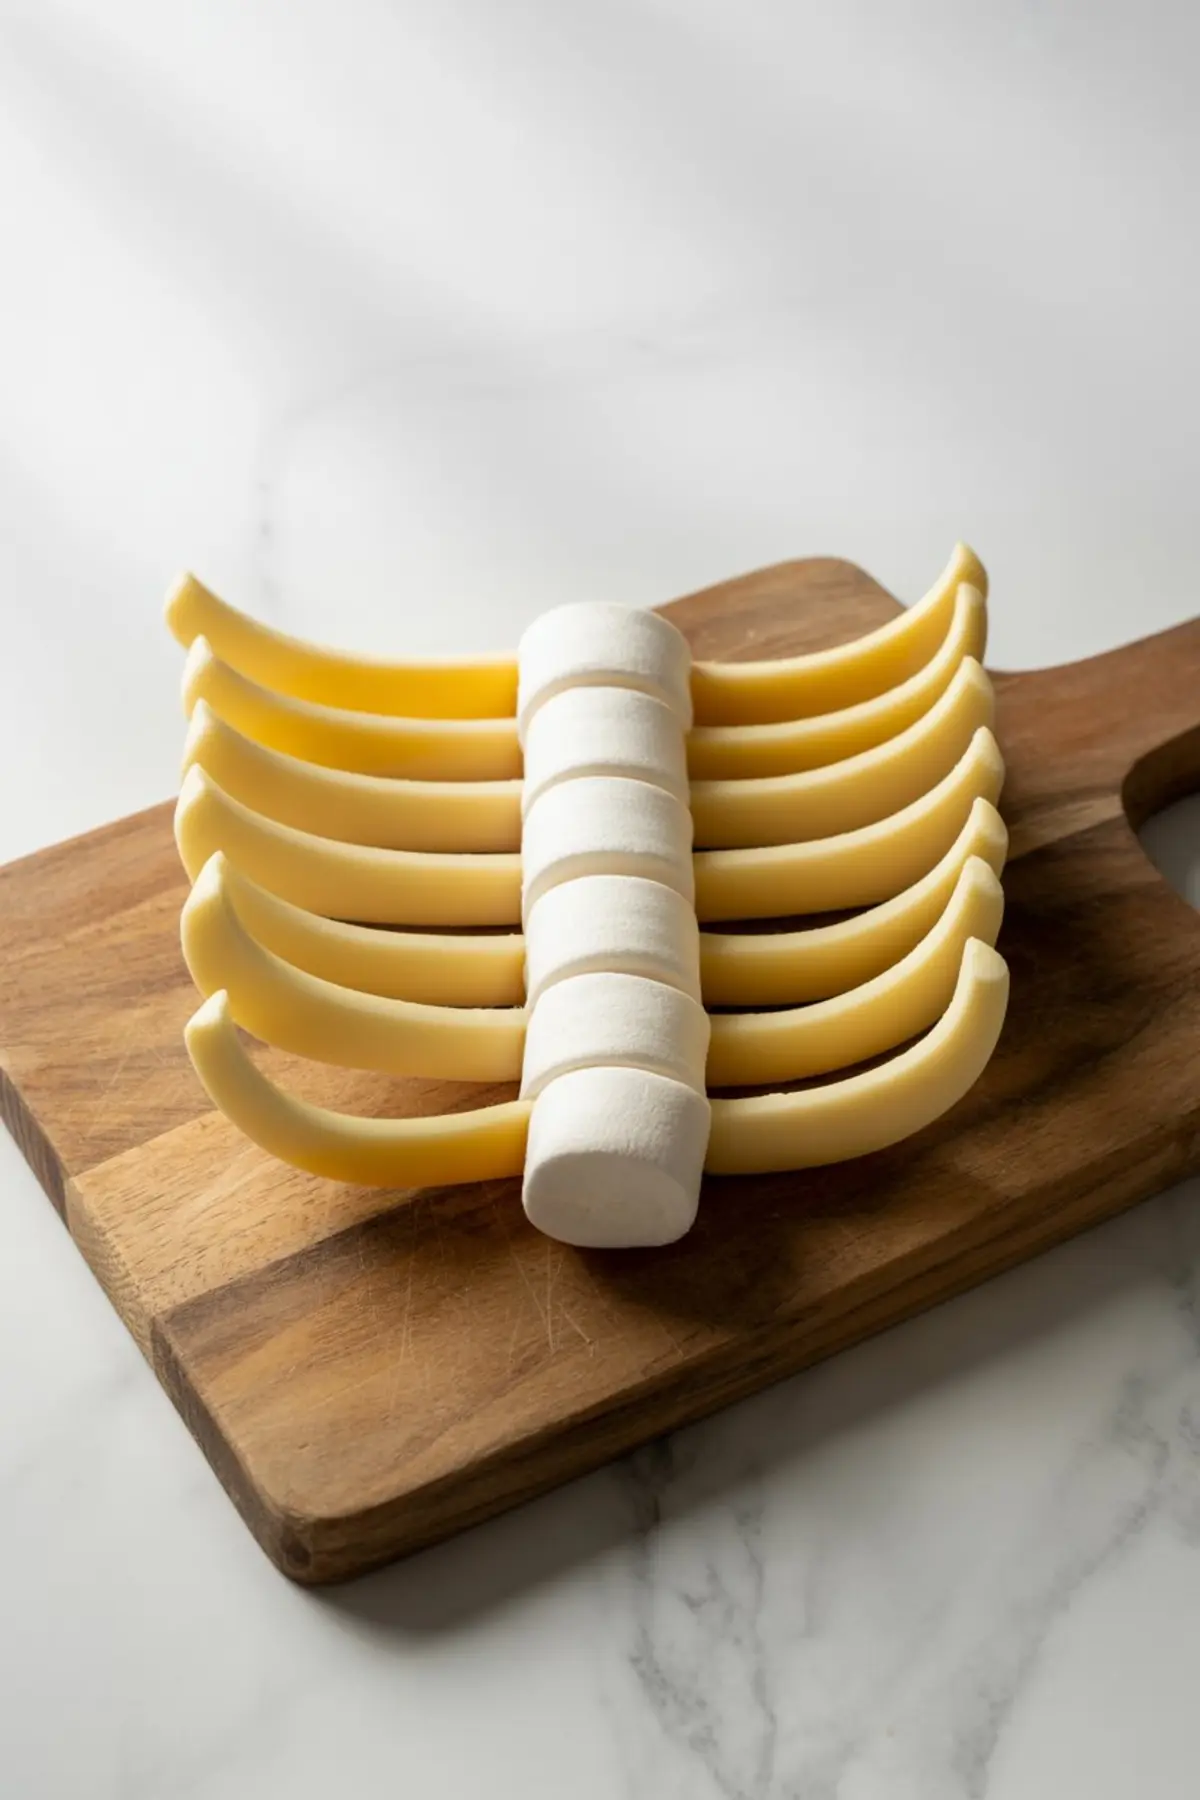
Below the skull, a short row of large marshmallows creates a clean spine. Rib bones come next. Cut mozzarella sticks or thin slices of provolone, then layer them left and right of the spine like ladder rungs. It’s easier than it sounds once you get into a rhythm.
Crafting the Limbs and Pelvis with Balance

For arms and legs, cheese sticks work best. I’ve shaped the legs using two vertical sticks for thighs, and two for the lower half. The arms should fan out slightly, but not too wide.
As for fingers and feet, you have options. Small piles of nuts work well, or you can use halved grapes, mini marshmallows, or thin candy pieces. Anything that forms a five-point shape or cluster will read well visually.
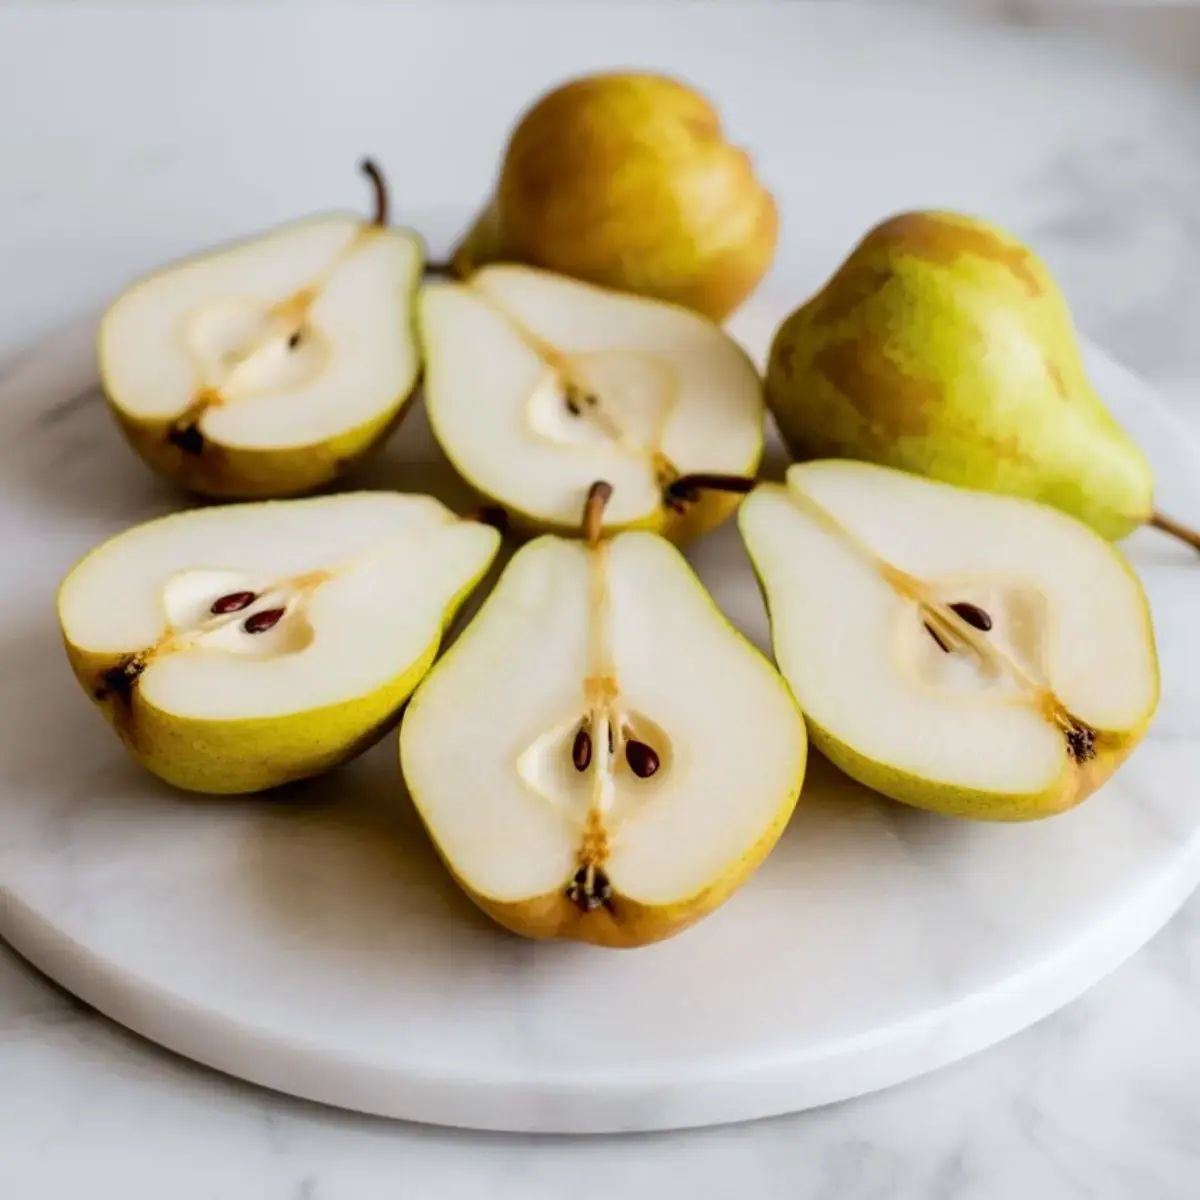
The pelvis is one of the most flexible shapes. I like to slice a pear in half and hollow it slightly. You can do the same with apples. Set the halves below the spine so they point outward just a little. That detail often draws attention.
Fill with Fruit for Color and Freshness
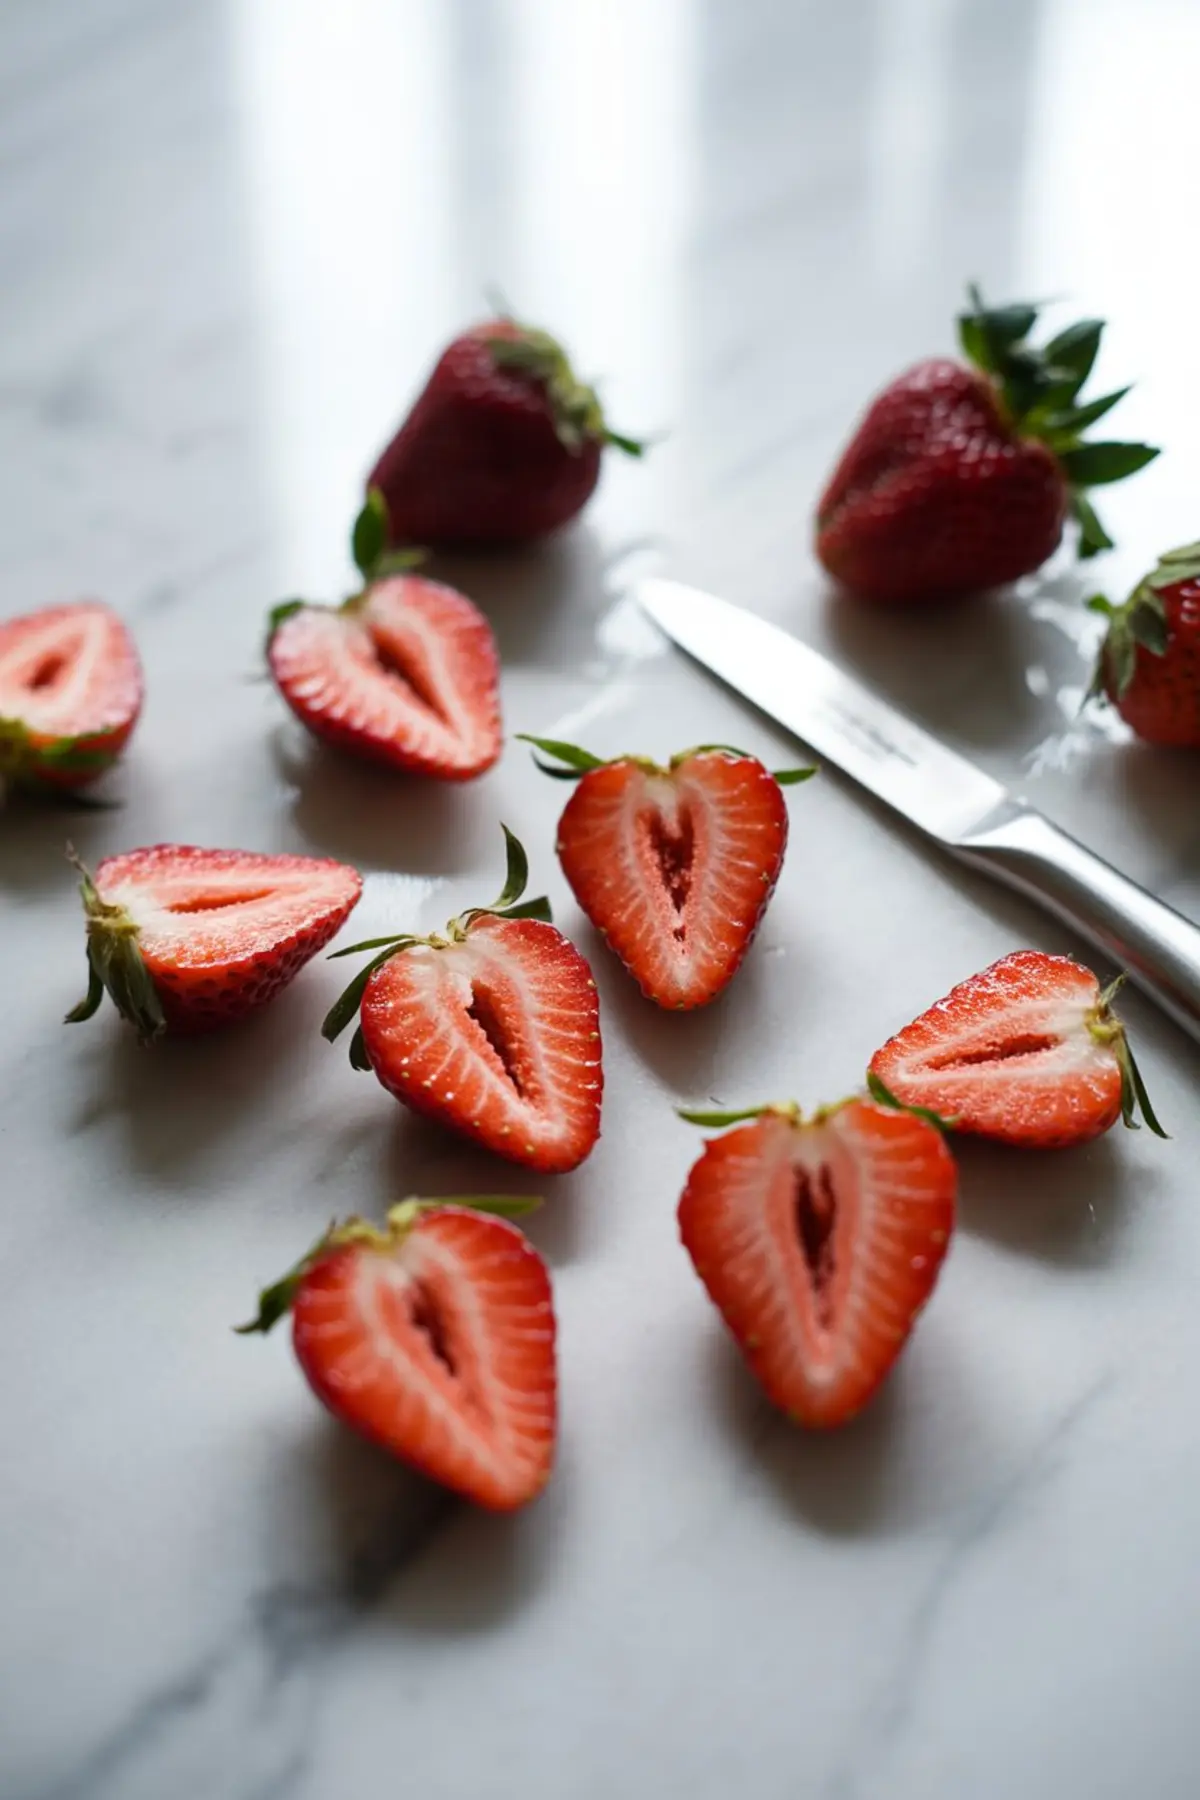
Color gives life to the Halloween food board. Red and green grapes, halved strawberries, sliced pears, and a few rounds of apple create contrast around the white skeleton.
I always place fruit before sweets or meats. It sets the tone and helps with symmetry. Try grouping blackberries or blueberries near the skull or feet to create depth. That little shadow effect matters.
To keep fruit fresh, prep just before assembly. Dry off any wet slices so they don’t slide around or soak into crackers if they touch.
Sweet or Savory? Decide Before You Scatter
This board supports two versions. One sweet, one savory. Or both, if you build in zones.
For a sweet spread, use candy corn, gummy worms, chocolates, and fruit slices. Tuck them into the fruit gaps and outline the skeleton. You can see an example of this sweet style in these Halloween Dirt Cups, which also play with spooky candy textures.
For a savory board, bring in salami slices, crackers, mixed nuts, and olives. These tuck into corners and between ribs easily. I suggest separating sweets and savories with a visible line of fruit. That keeps each area clean.
Comparison: Brie vs. Havarti for the Skull
I’ve used both brie and Havarti for the skeleton skull many times. Brie gives you a creamy texture and soft center, but tends to slump if left out too long. Havarti holds shape better, even after an hour on the table.
If your party runs long, or if you’re assembling early, Havarti is the better bet. If you love brie and can serve immediately, it adds a lovely richness. I often choose based on temperature and timing.
Add the Little Details and Build the Mood
The board isn’t finished until you step back and fill in the space. Scatter extra grapes, place nuts in small clusters, and angle some crackers to break the pattern. These casual pieces bring it to life.
To play up the Halloween charcuterie board theme, I sometimes add edible eyes or use cookie cutters on cheese slices for stars or pumpkins. That small extra work always brings smiles.
This board also pairs well with decorated treats like these Halloween strawberries, which offer an easy sweet contrast.
How to Serve and Store Your Halloween Board
Serve the skeleton board within 20 to 30 minutes of building for the best texture and appearance. The fruit holds well, but cheeses will warm up and lose structure over time.
If you must make it ahead, cover it with plastic wrap and refrigerate for up to two hours. Wait to add crackers and candies until just before serving. Moisture from fruit can soften crackers quickly.
After the party, pack leftovers by grouping fruit, cheese, and sweets separately. That way, nothing turns soggy or spoils overnight.
Related Recipes for More Halloween Fun
If you’re building a full dessert table, this spooky cake makes a dramatic companion to the board. And for something easy with impact, try these Halloween cupcakes decoration ideas. Both balance well with a large charcuterie centerpiece.
For more themed spreads, see the Halloween treats category for creative boards and snack ideas.
Final Thoughts and Friendly Reminder
You don’t need to make this board flawless. You just need to make it yours. I’ve built skeleton boards with candy legs, fruit arms, and once by accident with two skulls. It always works out.
Use the base design, then layer your own flair. Swap ingredients to match your crowd, play with color, and let your Halloween cheese board feel like a conversation starter.
Save this pin for later, and share in the comments how your version turned out. I’d love to hear if you made it sweet, savory, or something spooky in between.
Halloween Charcuterie Board
This Halloween Skeleton Charcuterie Board features a playful skeleton design made with cheeses, fruits, candies, and snacks. It’s easy to assemble and can be customized for a sweet or savory spread, making it a fun centerpiece for a Halloween party.
Ingredients
- FOR THE SKELETON STRUCTURE
- 12 mozzarella cheese sticks or string cheese
- 1 wheel of white cheese such as Havarti, Gouda, or Brie (for the skull)
- 6 large marshmallows (for the spine)
- 1-2 slices of provolone or mozzarella (for rib bones and pelvis, cut into strips or shapes)
- 2 dark chocolate almonds or olives (for eyes)
- 1 strawberry slice or candy corn (for nose)
- Licorice laces or black olives (for mouth stitching)
- FOR THE FRUITS
- 1 cup green grapes
- 1 cup red grapes
- 1 cup strawberries, halved
- 1 apple, thinly sliced
- 1 pear, thinly sliced
- ½ cup blackberries or blueberries
- FOR THE SWEETS
- ½ cup candy corn
- ½ cup gummy worms
- ½ cup assorted gummies
- ½ cup chocolate truffles or wrapped chocolates
- FOR THE SAVORY OPTION
- ½ cup pepperoni slices or salami
- ½ cup crackers
- ½ cup mixed nuts
- ½ cup olives
Instructions
PREP THE BOARD: Choose a large wooden board or serving tray. Place parchment paper on top if needed to prevent staining from fruit or candy.
CREATE THE SKULL: Slice the wheel of cheese in half to form the skull shape. Position it near the top of the board. Use two dark chocolate almonds or olives for the eyes, a strawberry slice or candy corn for the nose, and small strips of licorice or olives for the stitched mouth.
FORM THE SPINE: Lay a vertical line of marshmallows or sliced cheese cubes directly under the skull to create the spine.
BUILD THE RIBS: Cut cheese sticks or provolone slices into strips. Arrange them horizontally on each side of the spine to look like ribs.
MAKE THE ARMS: Use whole or halved cheese sticks for arms. Place one on each side, angled slightly outward. Add small candies, nuts, or sliced string cheese for fingers at the ends.
CREATE THE LEGS: Place two cheese sticks vertically from the bottom of the spine for the thighs. Add two more for the lower legs. Shape feet with small clusters of nuts, mini marshmallows, or fruit.
ADD THE PELVIS: Cut a pear or apple in half and remove the seeds to create two hollow halves. Place at the base of the spine to resemble hip bones.
FILL IN WITH FRUIT: Arrange grapes, strawberries, apple slices, pear slices, and blackberries around the skeleton to give color and balance.
ADD SWEETS OR SAVORY ITEMS: For a sweet version, scatter candy corn, gummy worms, and assorted gummies between the fruit. For a savory version, place crackers, olives, nuts, and cured meats in the gaps around the skeleton.
FINISH AND SERVE: Adjust any pieces so the skeleton looks balanced. Serve immediately or cover loosely with plastic wrap and refrigerate for up to 2 hours before serving.
Notes
Use your imagination and the products you have on hand to create the skeleton shape. You can cut different cheeses, fruits, or crackers into creative forms for the head, ribs, arms, and legs. There’s no single right way to arrange the pieces — have fun shaping the skeleton to fit your board and your style.
For variety, try mixing both sweet and savory items on the same board.
Prepare fruit just before assembling so it looks fresh and colorful.
Nutrition Information
Yield
12Serving Size
1Amount Per Serving Calories 465Total Fat 24gSaturated Fat 11gTrans Fat 0gUnsaturated Fat 11gCholesterol 55mgSodium 572mgCarbohydrates 49gFiber 3gSugar 33gProtein 16g