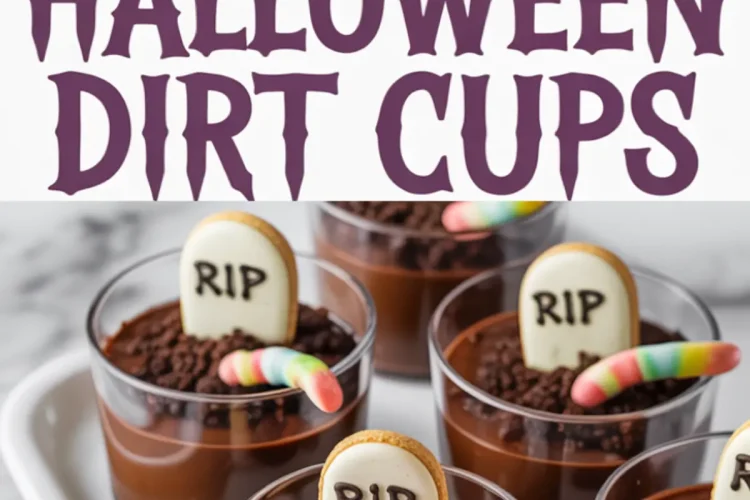
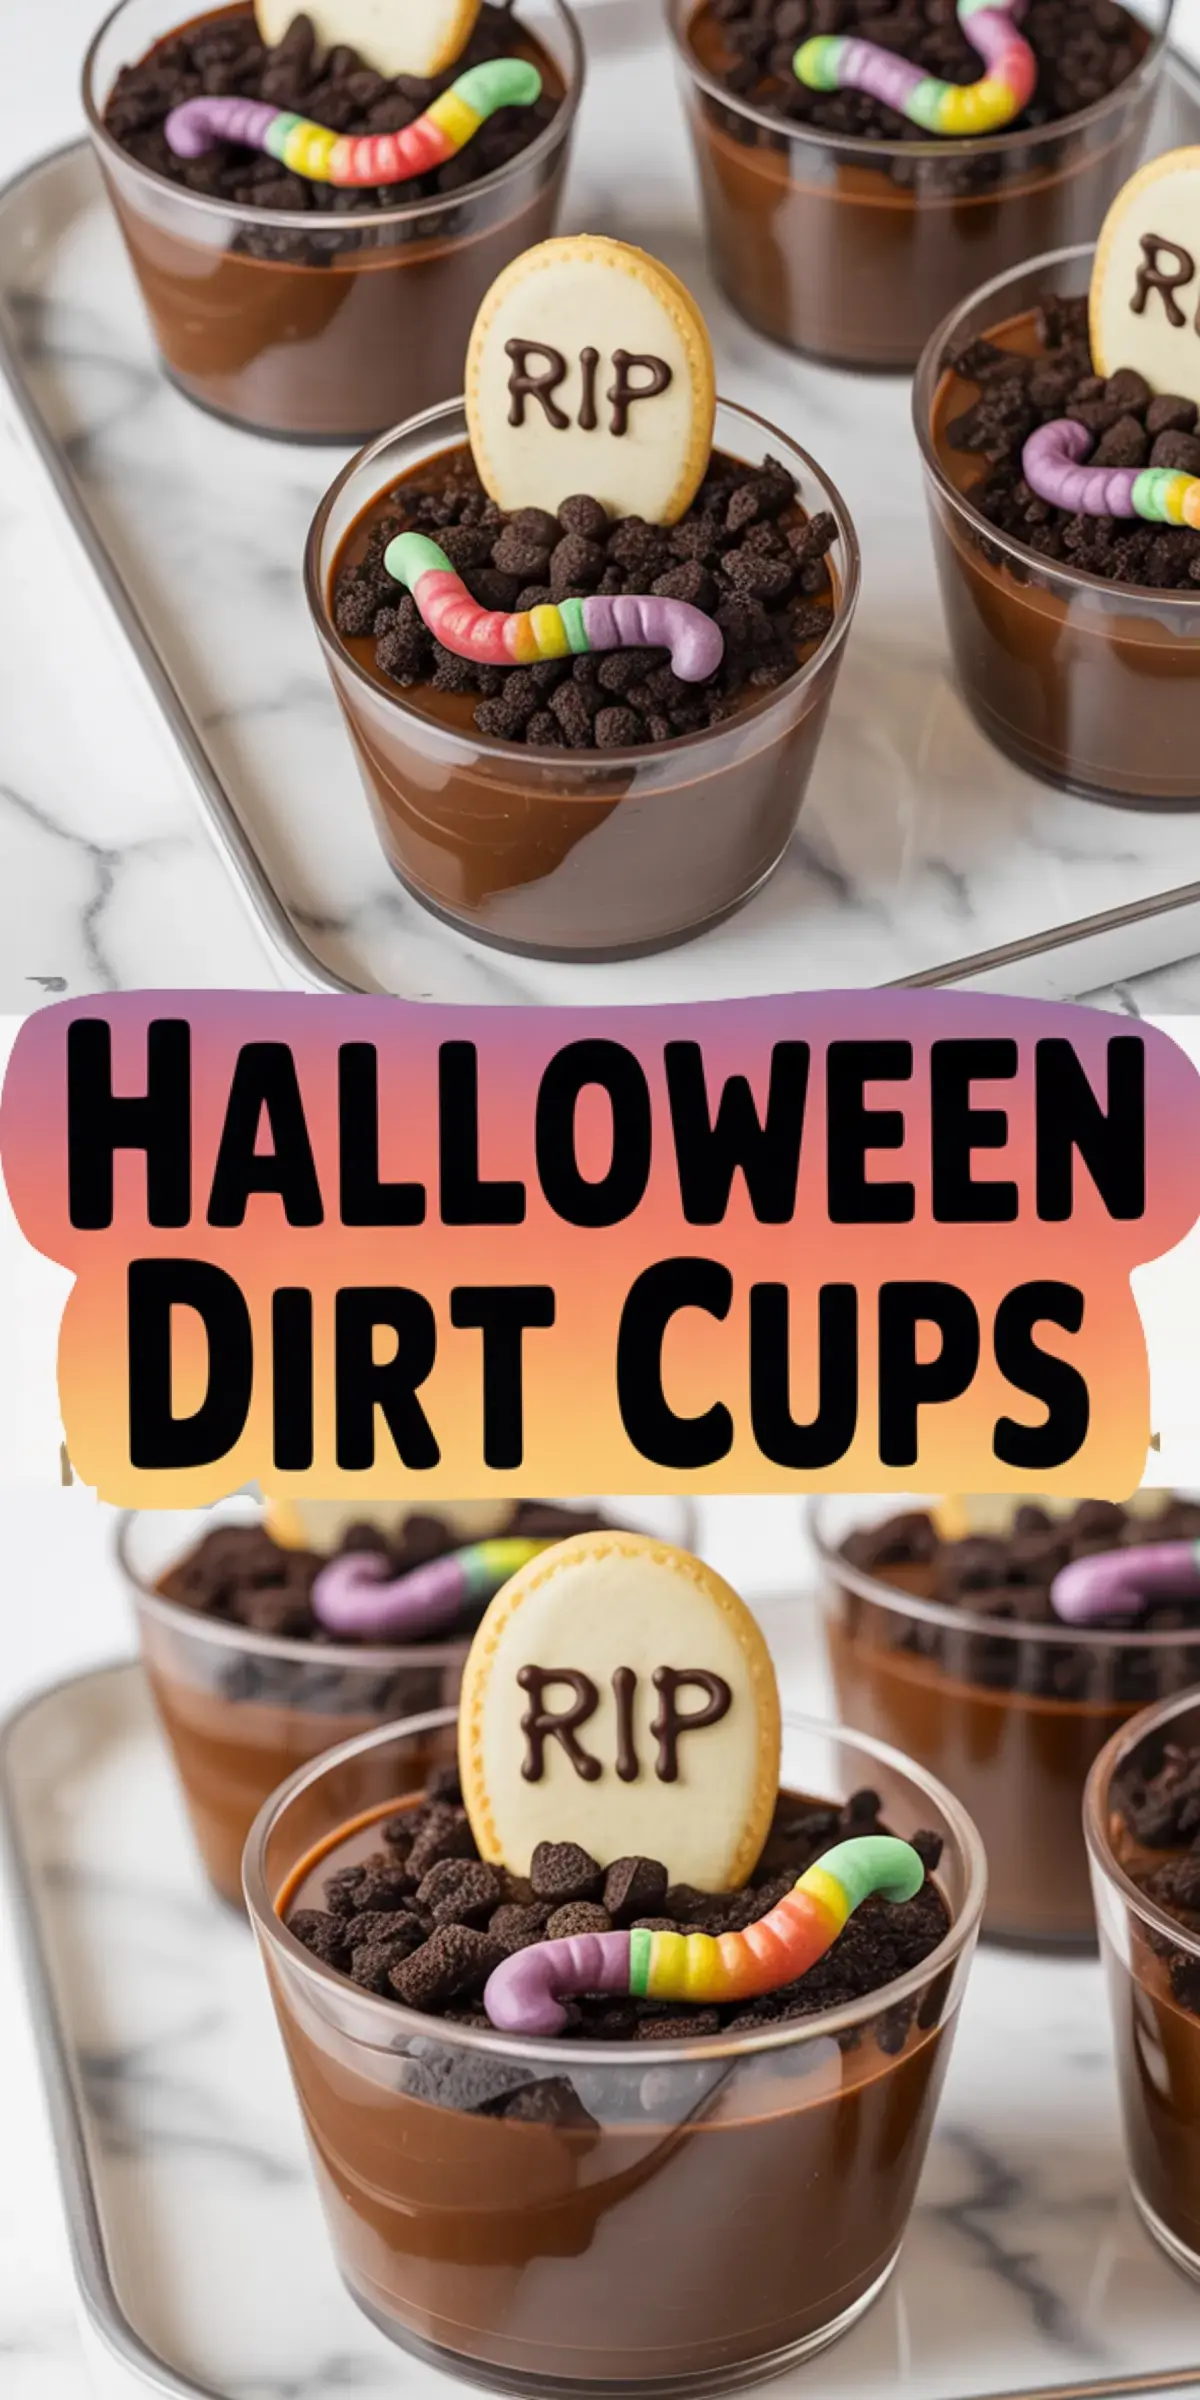
These Halloween Dirt Cups go beyond cute. They’re eaten, not left behind half-scooped and sad.
You’ll learn how to layer the pudding, cookies, and candy so the textures work together. You’ll also get a practical tip on writing “RIP” so it doesn’t smear. Most of all, you’ll leave knowing this dessert will get eaten—even at parties where sweets sit untouched.
I’ve tested this recipe for both kids and adults. The proportions, textures, and decorations have all been balanced. The result: no leftovers. That’s what you want in a Halloween party dessert.
Following a special diet?
Every recipe on this site can be converted to gluten-free, vegan, dairy-free, keto, nut-free or egg-free with adjusted ratios so nothing falls flat.
Try the Recipe Converter →Ingredients for Halloween Dirt Cups That Work Every Time
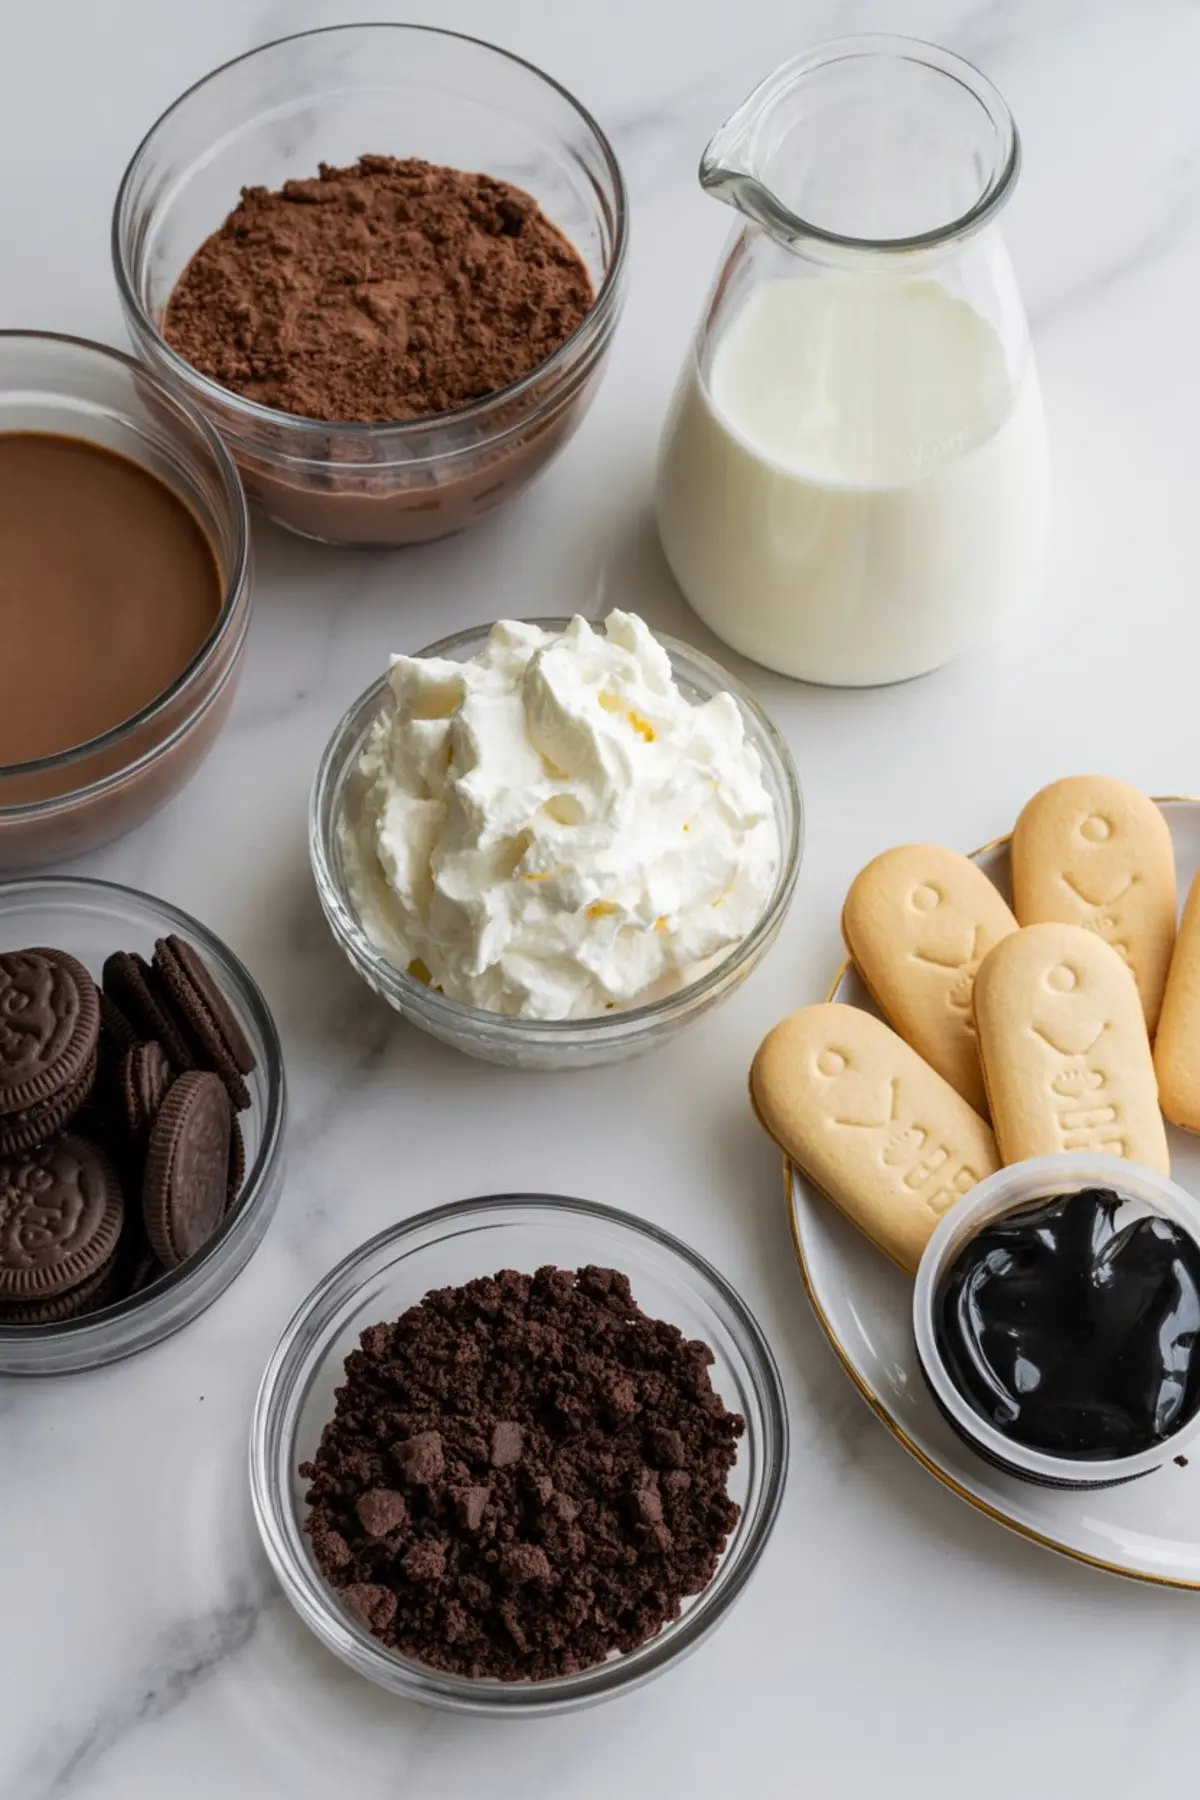
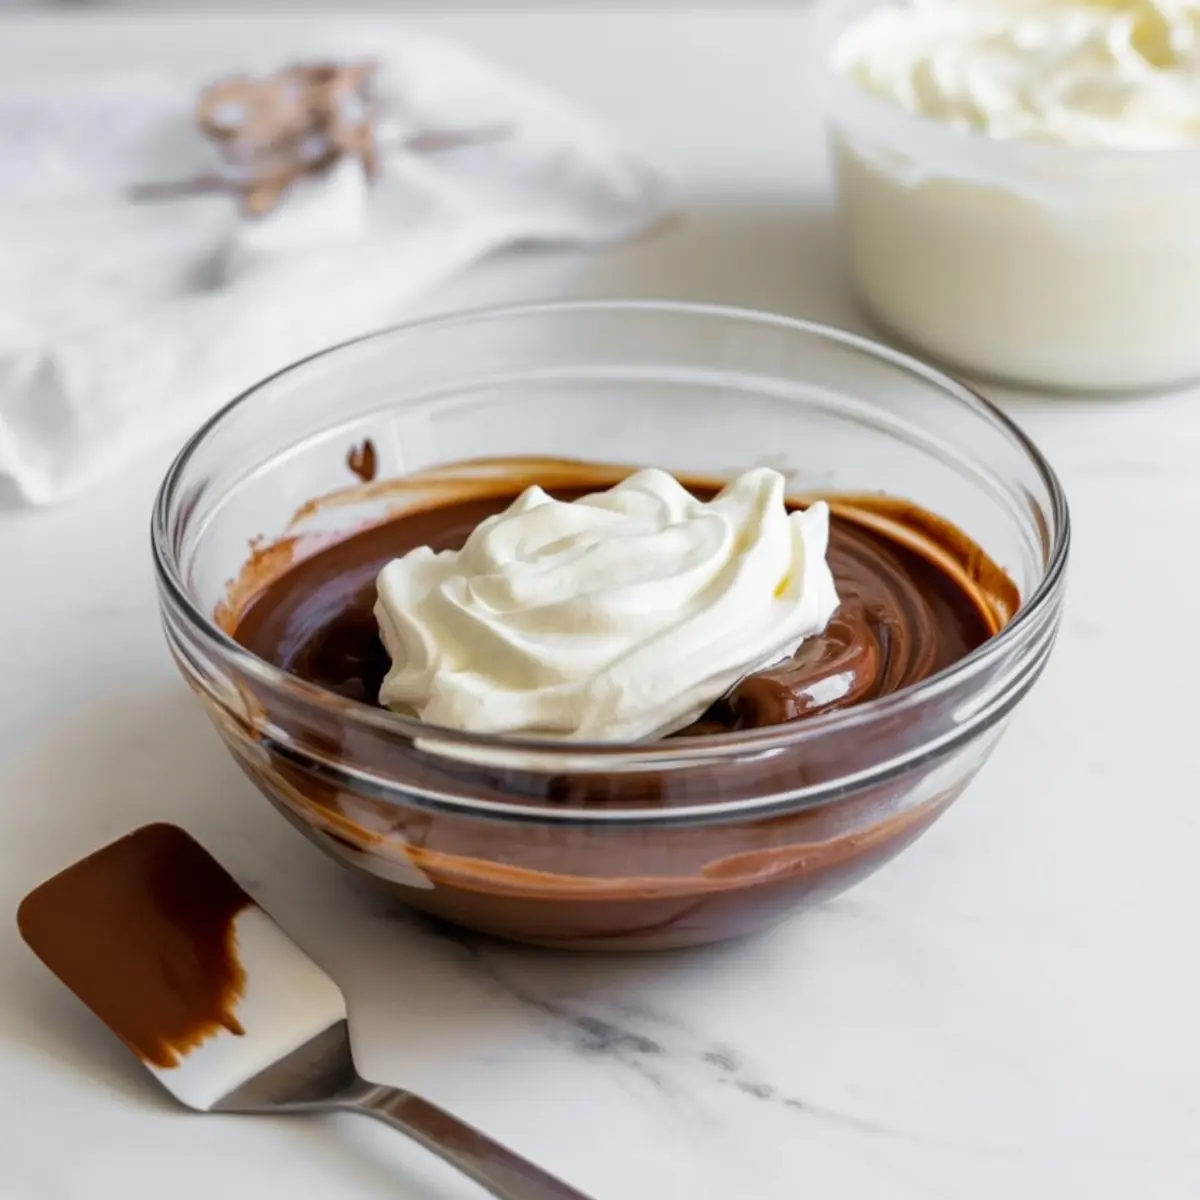
Start by preparing the chocolate pudding. I whisk the instant mix with cold milk until it thickens, then fold in thawed whipped topping. This creates a base that’s creamy but light—essential for holding the cookie crumb topping without sinking.
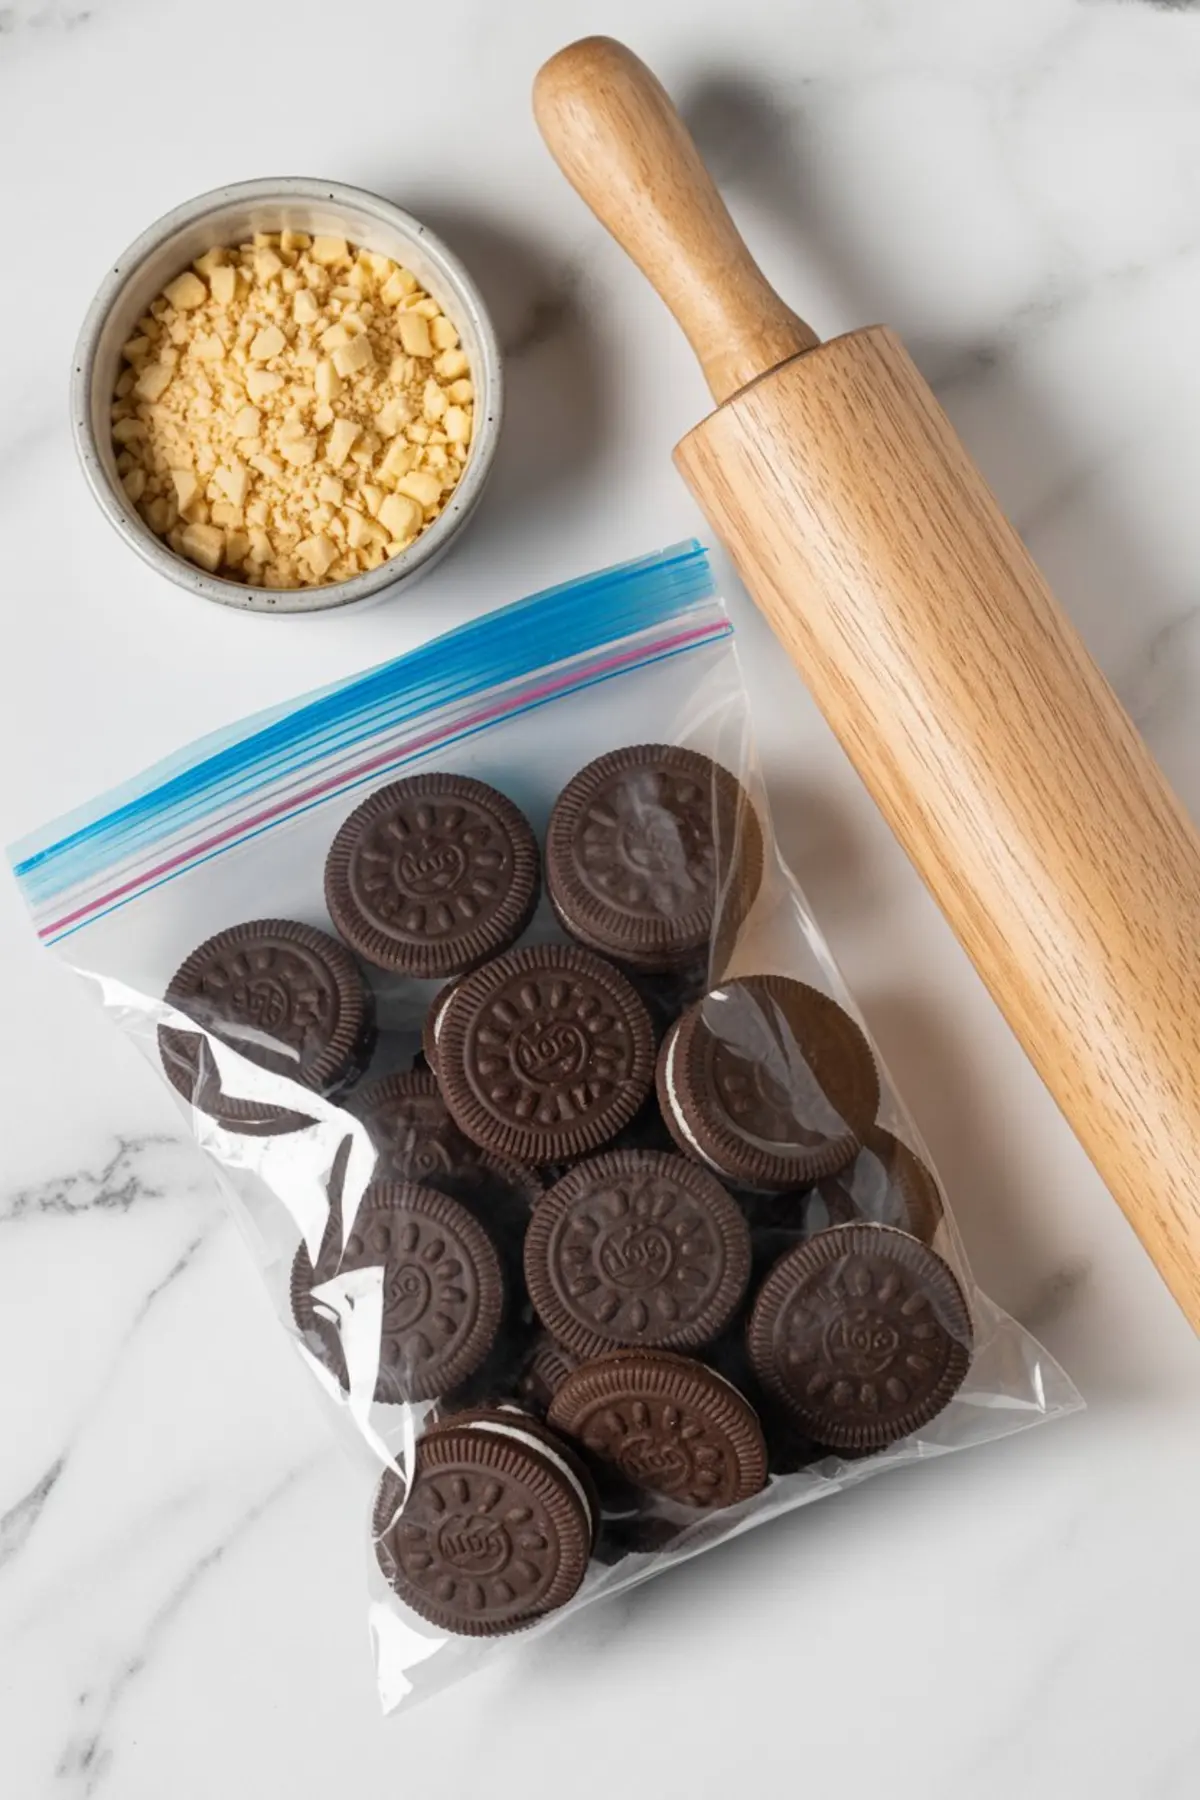
Next comes the “dirt.” I pulse chocolate sandwich cookies in a food processor until the crumbs resemble damp soil. If you’re without a processor, a zip-top bag and rolling pin will do. Just make sure the texture is even—too chunky and the topping won’t settle.
Use clear 8 oz cups so the layers show through. It gives guests a visual cue before they even grab a spoon.
Assembling the Dirt Cups Without a Mess
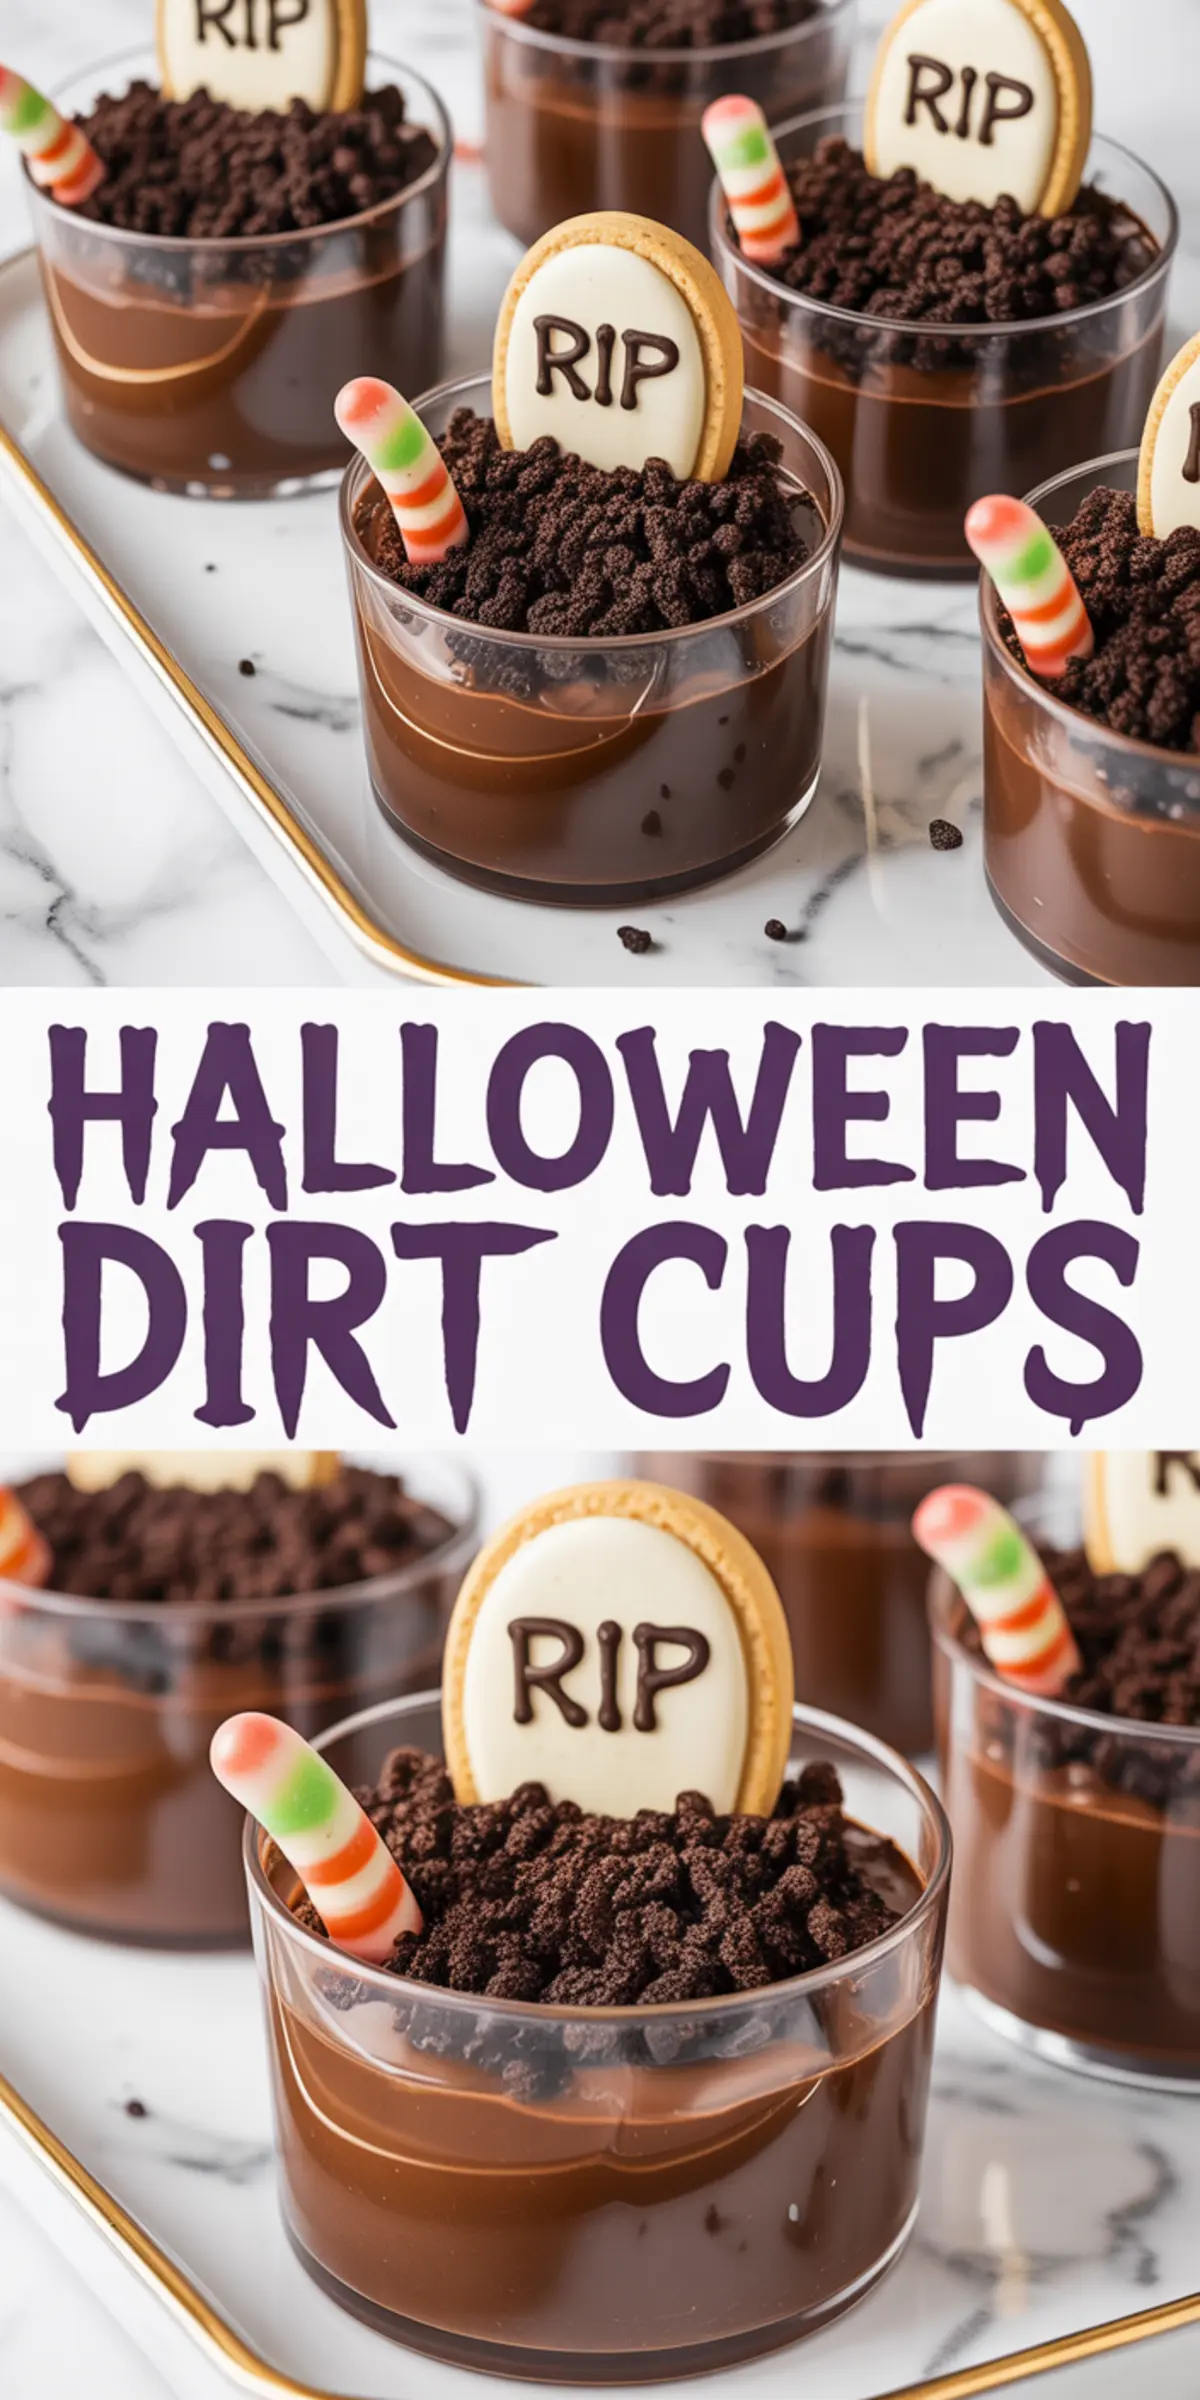
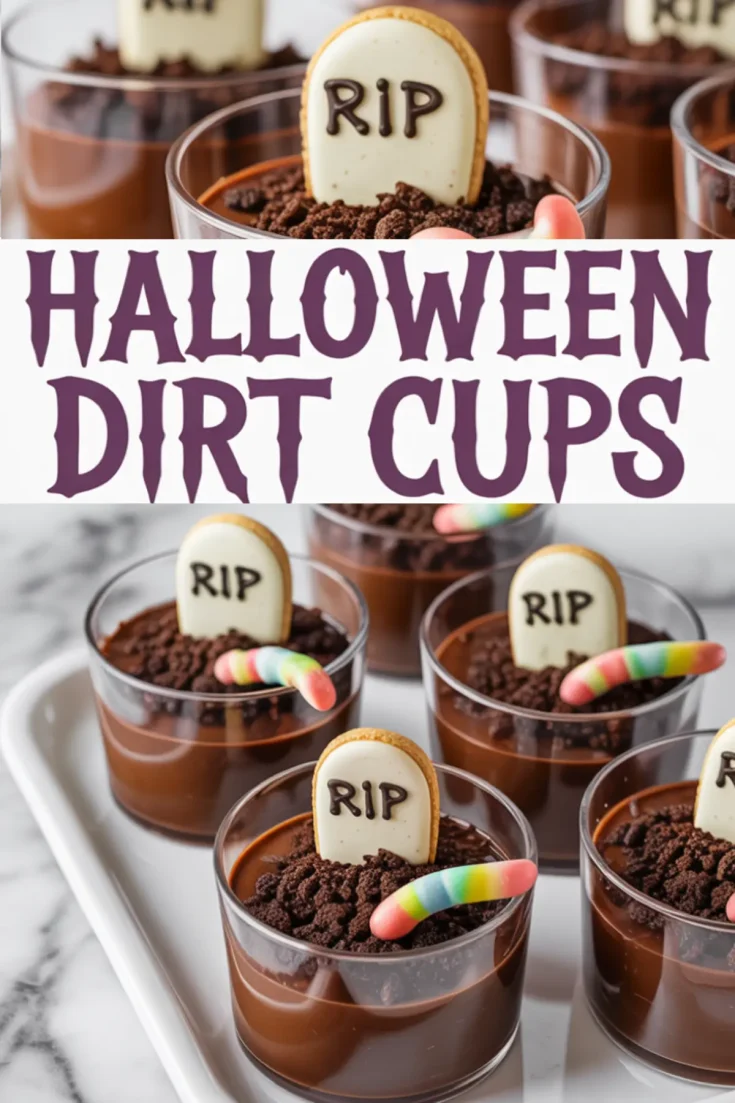
Spoon the pudding mixture into each cup, filling about three-quarters full. Add a layer of cookie crumbs on top. You want full coverage but not so thick that the spoon sinks before it scoops.
Now the fun part: decorating. Write “RIP” on oval cookies using black decorating gel or melted chocolate. In my notes, I’ve found melted chocolate holds up better when chilled, especially if you’re making these ahead.
Once the writing sets, press a cookie tombstone into each cup. Add a gummy worm or two, tucking them into the “soil” so they look like they’re crawling out. If you’re feeling extra, try adding candy pumpkins or edible grass made with green sprinkles.
Chocolate Pudding vs. Chocolate Mousse: A Useful Comparison
I’ve made dirt cups using both pudding and mousse. Pudding is easier and more stable in warm rooms. Mousse adds richness but can deflate when topped with cookies. For Halloween parties where the dessert sits out, pudding wins. It holds texture, flavor, and doesn’t weep.
This choice becomes even more important when you’re adding heavier decorations like cookie tombstones or candy toppings. Mousse tends to buckle under weight unless chilled right up to serving.
Tips for Making and Storing Halloween Dirt Pudding Cups
These dirt cups can be made the day before your party. In fact, chilling them overnight gives the flavors time to meld.
Cover loosely with plastic wrap and refrigerate. Don’t add the tombstones or gummy worms until an hour or two before serving—this keeps them from getting soggy.
If you’re looking for a Halloween dessert with similar prep-ahead flexibility, these Halloween sugar cookies also hold well overnight.
Serving Ideas for Halloween Party Desserts
I’ve used these dirt cups at both kids’ parties and adult gatherings. For kids, add candy eyes or colorful worms. For Halloween desserts for adults, I scale back the candy and add bittersweet chocolate shavings.
Another party-friendly idea: serve alongside a Halloween dip for a mix of sweet and savory.
If you’re creating a full Halloween dessert table, consider making a batch of Halloween macarons for texture contrast. They’re crisp, these are soft.
Halloween Dirt Cup Variations Worth Trying
Use white chocolate pudding and crushed golden cookies for a twist. Decorate with ghost gummies or bone sprinkles.
Zombie dirt pudding cups work well with red gel “blood” under the crumbs. You can also tint the whipped topping with green food coloring for a ghoulish hue.
If you’re already making a spooky cake, use leftover decorations here—like mini bats or edible glitter.
Final Thoughts and Community Invitation
I’ve made these Halloween dirt pudding cups for classroom parties, neighborhood get-togethers, and adult cocktail nights. They always go.
That’s what matters: you want a dessert people finish.
Try them, tweak the toppings, and tell me how they worked for you. Share in the comments or ask if something didn’t go right. Let’s make Halloween food for party desserts that people remember.
And don’t forget, save this to your Halloween Pinterest board so it’s right there when you need it.
Halloween Dirt Cups Recipe
Halloween dirt cups are fun and festive treats made with creamy chocolate pudding, crushed cookies that look like soil, gummy worms, and cookie tombstones. These no-bake desserts are easy to assemble, kid-friendly, and perfect for a Halloween party.
Ingredients
- 2 (3.9 oz) boxes instant chocolate pudding mix
- 4 cups cold milk
- 1 (8 oz) container whipped topping, thawed
- 1 package chocolate sandwich cookies (about 15 cookies), crushed into crumbs
- 8–10 gummy worms
- 8–10 oval or round cookies (such as Milano or Golden Oreos), for tombstones
- Black decorating gel or melted chocolate, for writing “RIP”
- Clear plastic cups (8 oz size)
Instructions
MAKE THE PUDDING BASE: In a large mixing bowl, whisk the pudding mix and cold milk for 2 minutes until thickened. Gently fold in the whipped topping until the mixture is smooth and fluffy.
PREPARE THE COOKIE “DIRT”: Place the chocolate sandwich cookies in a food processor and pulse until fine crumbs form. If you don’t have a food processor, place the cookies in a zip-top bag and crush them with a rolling pin until they resemble soil.
ASSEMBLE THE DIRT CUPS: Divide the pudding mixture evenly among the plastic cups, filling each about three-quarters full. Sprinkle a generous layer of cookie crumbs on top to create the “dirt.”
MAKE THE TOMBSTONES: Use black decorating gel or melted chocolate to write “RIP” on each cookie tombstone. Let the writing set for about 5 minutes to prevent smearing.
DECORATE THE CUPS: Insert one tombstone cookie into the top of each pudding cup. Add a gummy worm or two, arranging them so they peek out of the cookie crumb “soil” for a spooky effect.
CHILL BEFORE SERVING: Place the finished cups in the refrigerator for at least 30 minutes before serving to allow them to set.
Notes
The cups can be made up to one day ahead and stored in the refrigerator until ready to serve. For extra decoration, you can add candy pumpkins or use green sprinkles to mimic grass.
Nutrition Information
Yield
10Serving Size
1Amount Per Serving Calories 2492Total Fat 4gSaturated Fat 2gTrans Fat 0gUnsaturated Fat 2gCholesterol 9mgSodium 399mgCarbohydrates 608gFiber 1gSugar 362gProtein 5g