You’ll learn how to make no-bake Halloween Oreos that stay crisp, coat evenly, and hold up through party platters, trick-or-treat bags, or a full day in the lunchbox. These aren’t just dipped cookies. They’re themed desserts with character and structure.
I’ve seen too many candy-coated Oreos end up thick, lumpy, and soft from poor prep or rushed coating. These hold their clean look and crisp bite because of a few specific tricks.
Following a special diet?
Every recipe on this site can be converted to gluten-free, vegan, dairy-free, keto, nut-free or egg-free with adjusted ratios so nothing falls flat.
Try the Recipe Converter →How to Prepare Oreos for Halloween Dipping
Always start with clean, dry Oreos. Double Stuf works best. The extra cream gives the cookie a bit more surface contact, which helps the coating set evenly.
Line your trays with wax or parchment paper before anything touches chocolate. Candy melts cool quickly. If you wait to prep until after melting, your coating will clump.
Keep your eyes, gel, and piping bags near the workspace. I lay mine out like I’m setting up for cookie surgery. Everything in reach, everything ready.
Related treat idea? These Halloween Cake Pops use similar prep techniques and also benefit from early setup.
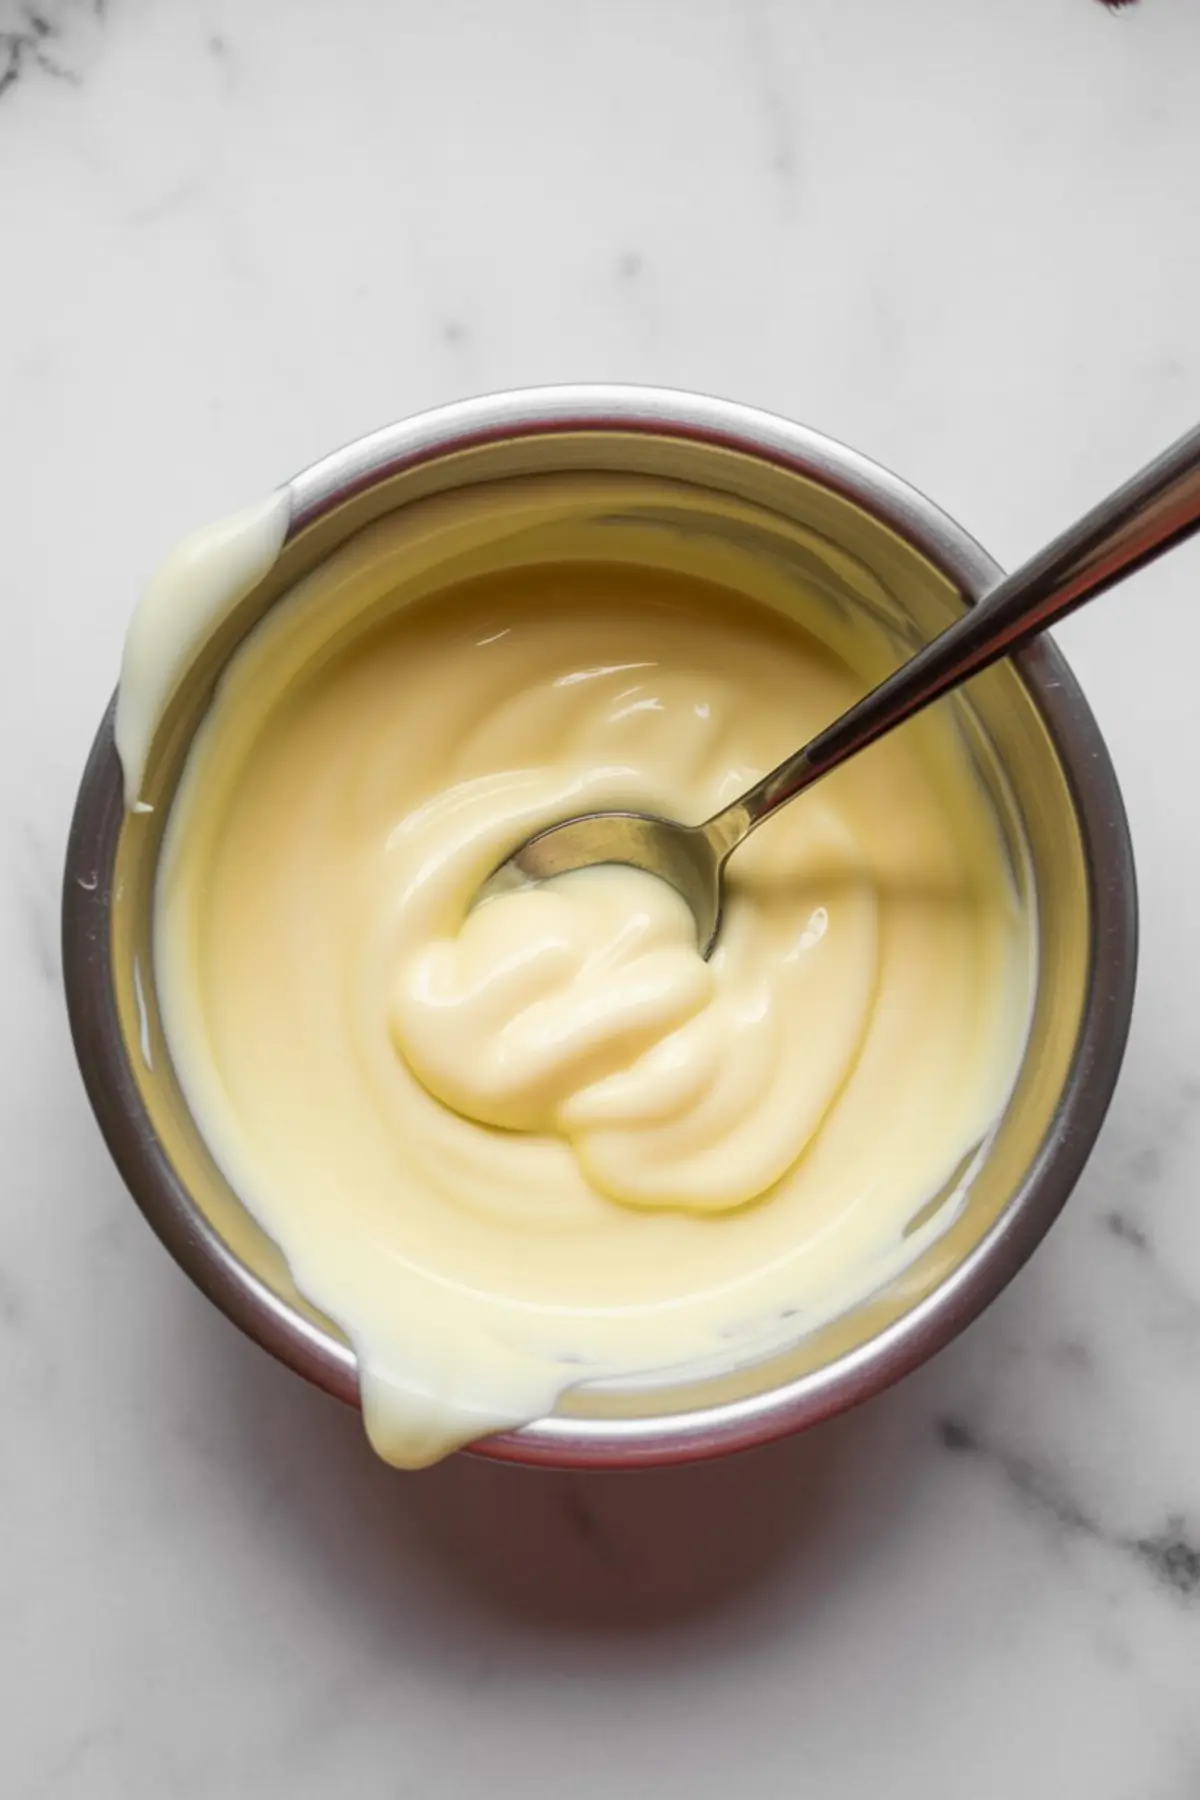
How to Melt Candy Coating Without Grainy Clumps
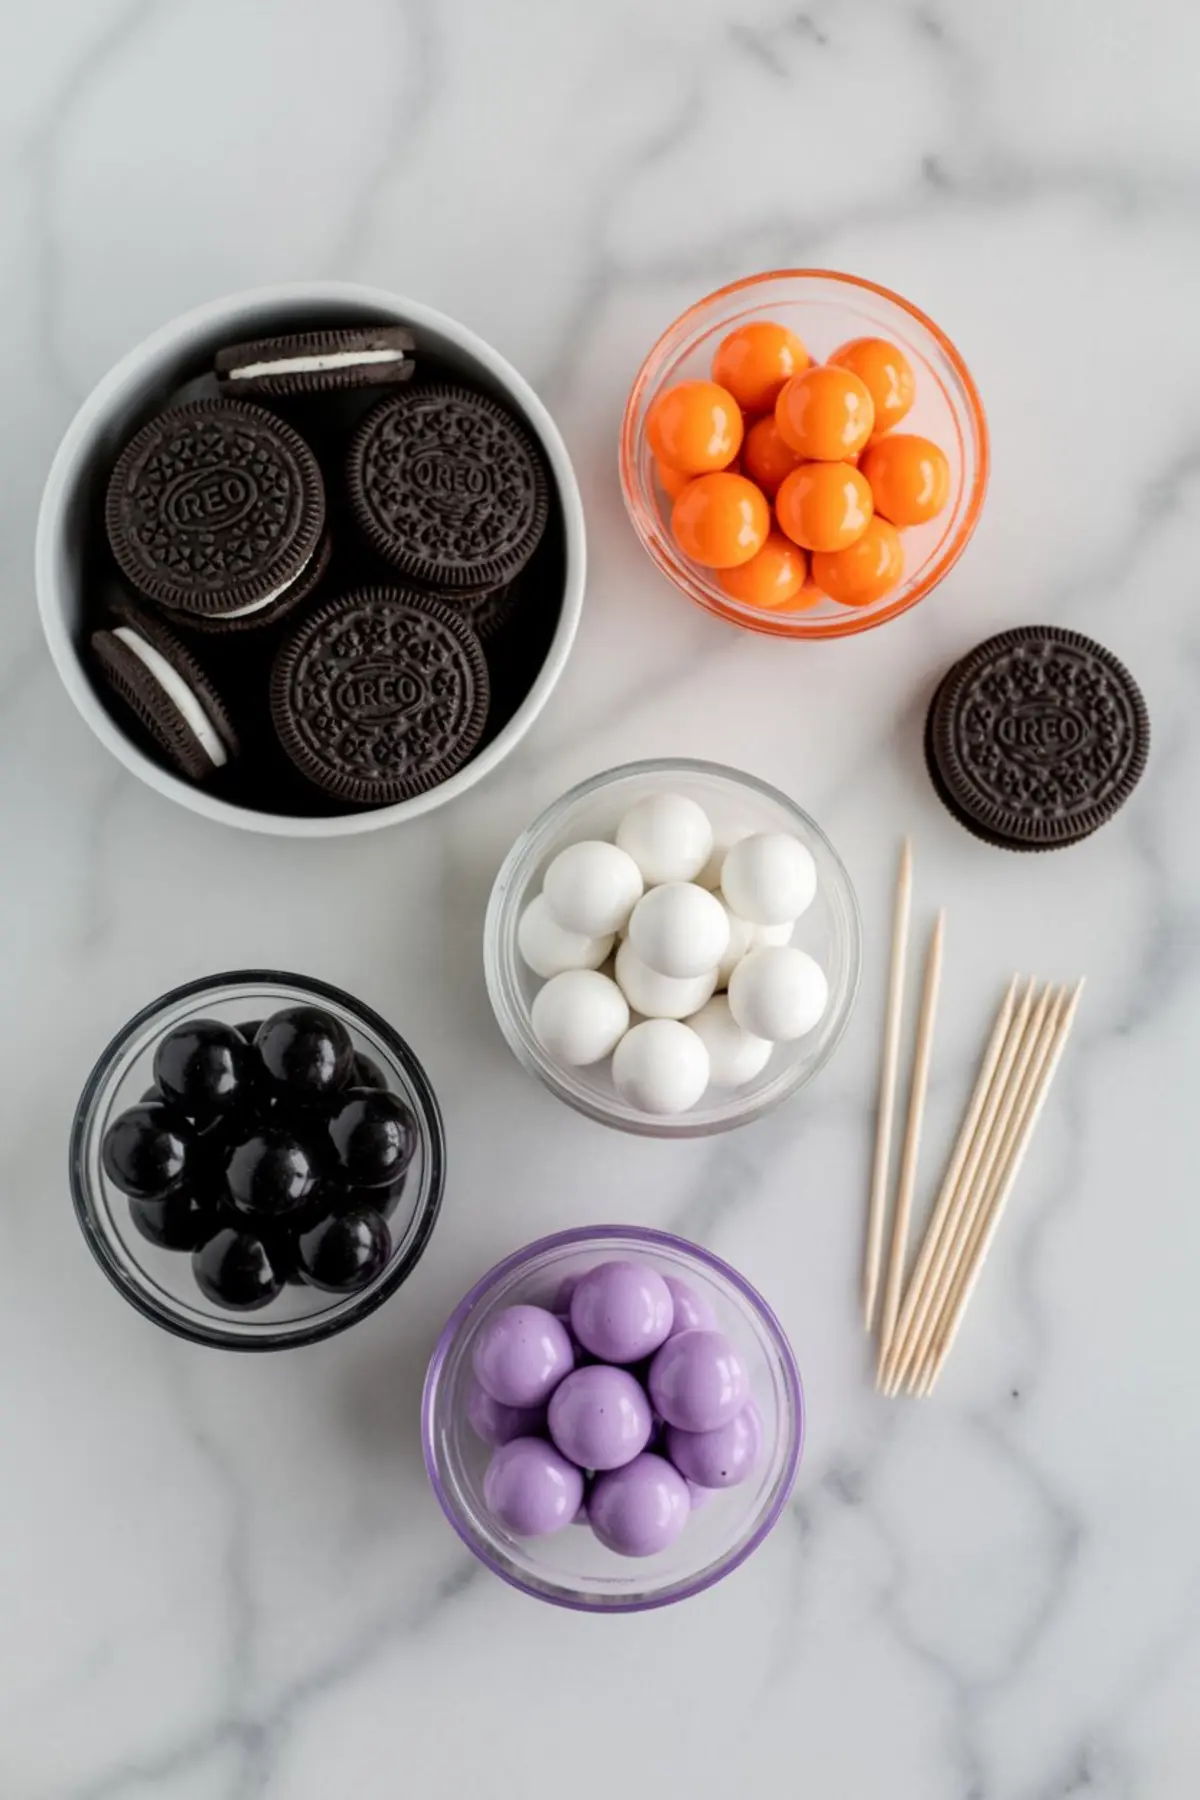
Use microwave-safe bowls, one for each color: orange, white, purple, and black or chocolate. Melt each in 30-second bursts. Stir well between each cycle. A fork works better than a spoon here. Less surface drag, better texture.
Too hot, and the candy melts seize. Too cold, and you’ll get uneven drips. Warm and fluid is what you want.
If your colors are limited, tint white melts with gel food coloring. I’ve done this often. Just avoid water-based dyes, they ruin the finish.
Need something gory for contrast? Halloween Dirt Cups make a great match with these cookies on a dessert table.
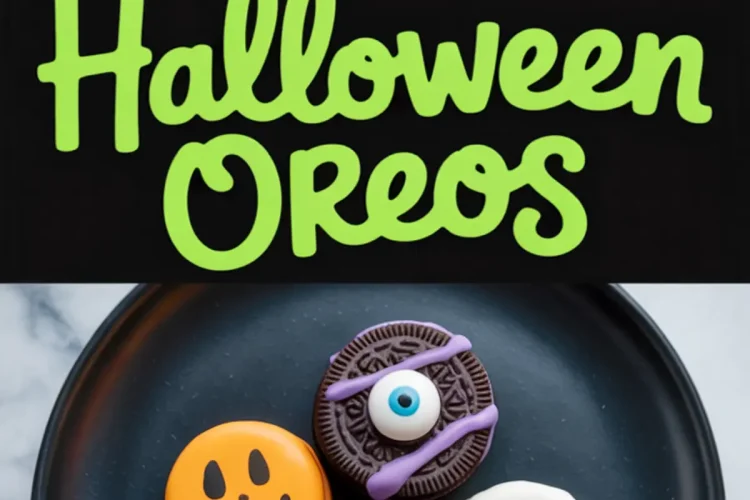
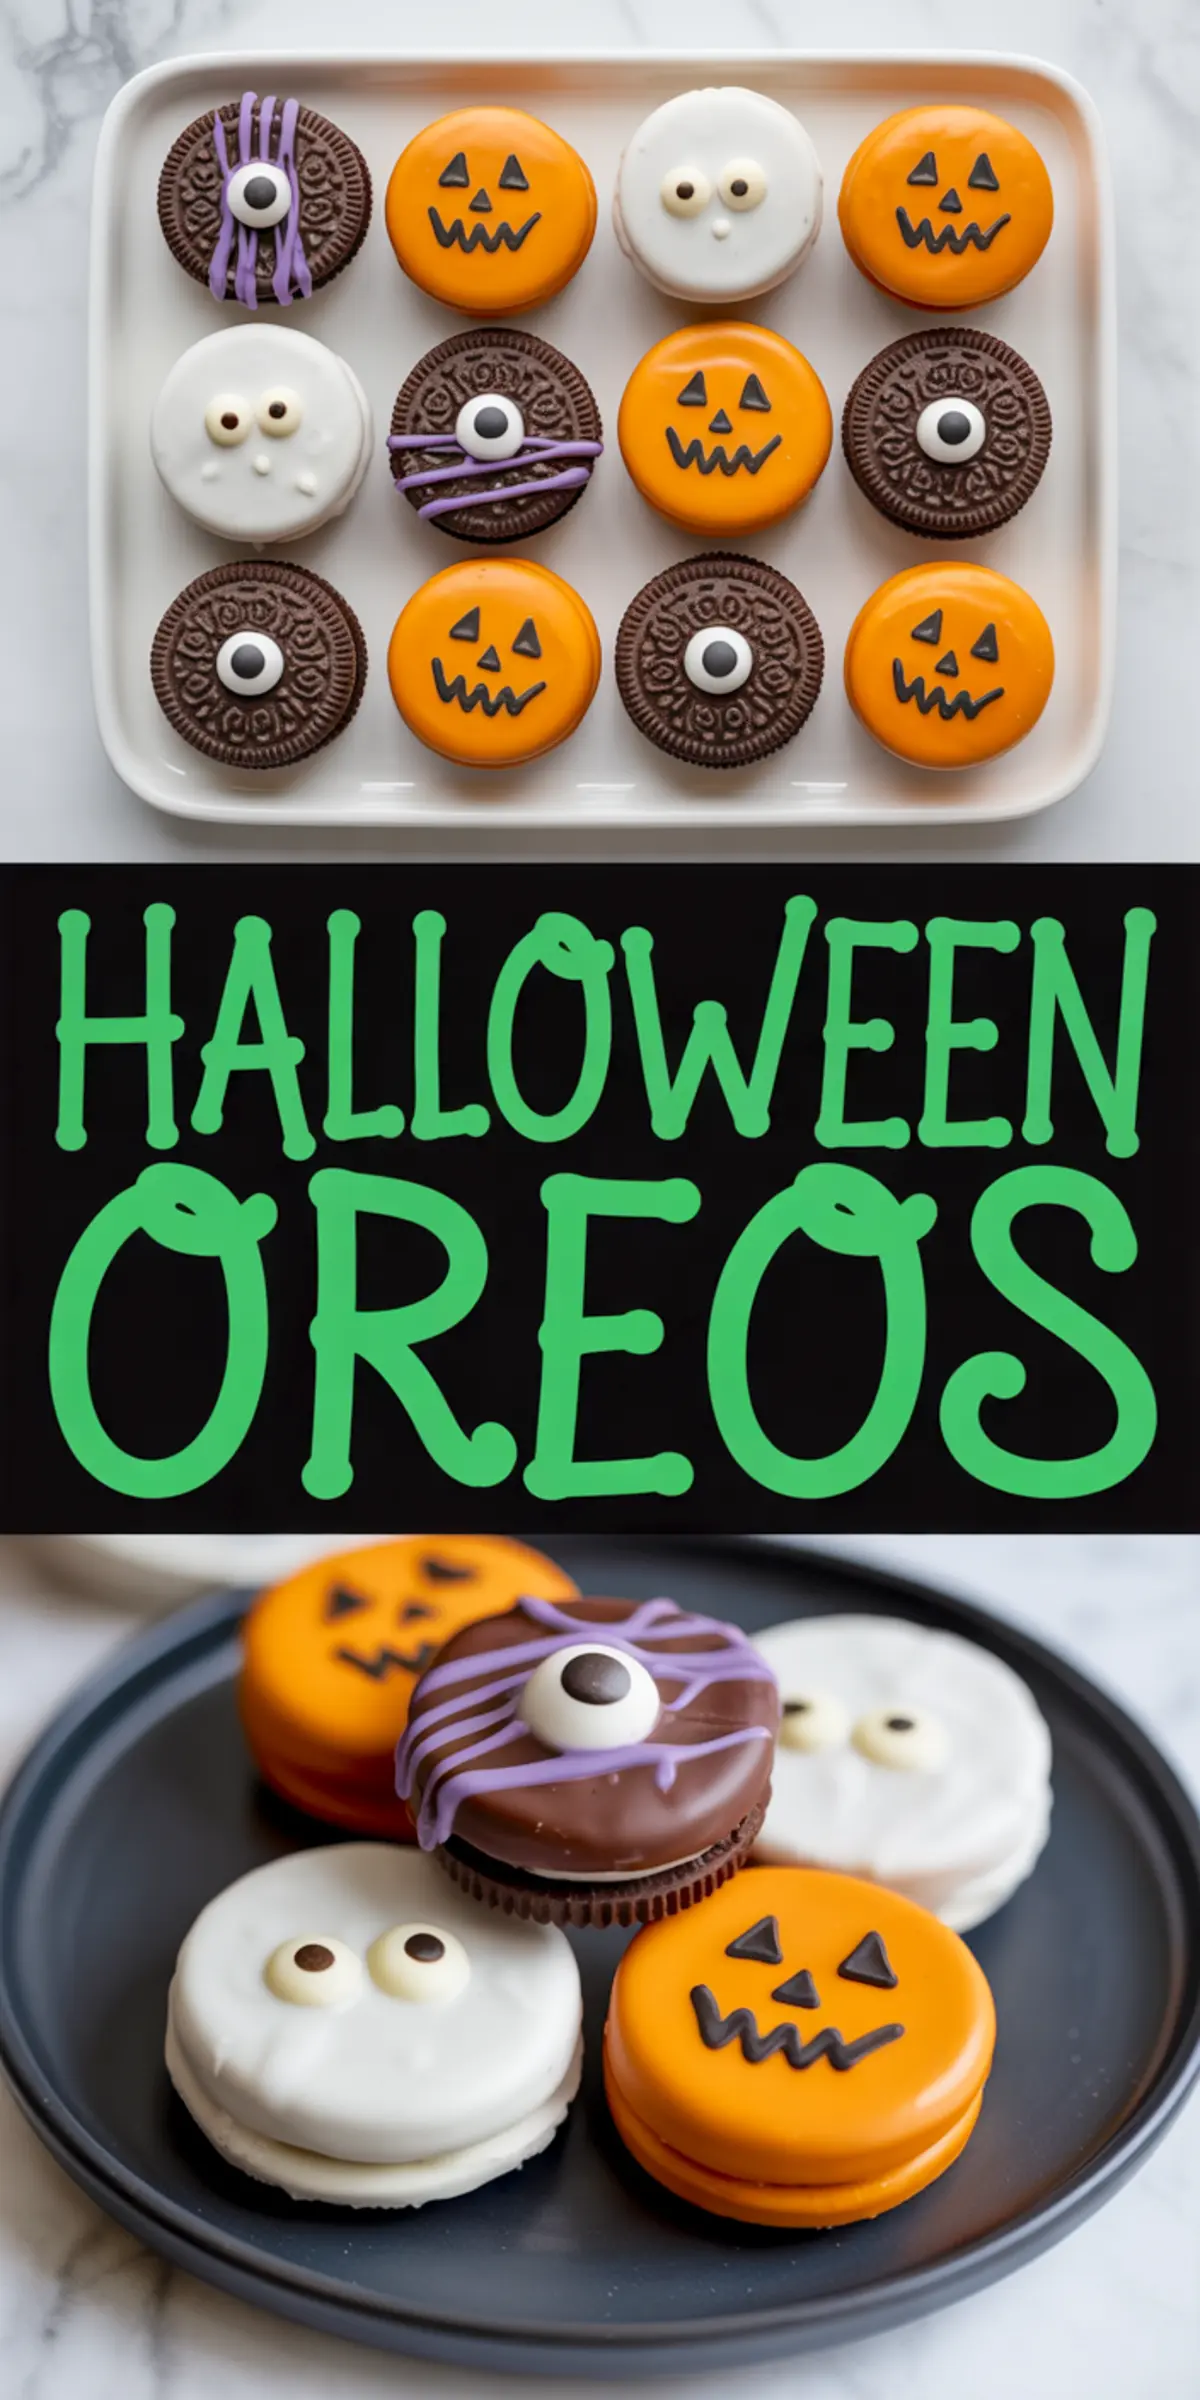
How to Make Halloween Mummy Oreo Pops That Look Sharp
Dip each Oreo into melted white candy coating. Use a fork to lift, then tap gently to shake off the excess. Don’t scrape the bottom let it drip clean.
Place them directly onto your parchment. While still wet, press in the candy eyes. Wait until semi-set, then drizzle extra coating with a piping bag to make the bandage lines.
No piping bag? Use a spoon’s edge. Drag across the surface, quick flicks. The result’s not identical, but it works. I’ve done both, depending on how much cleanup I can handle that day.
How to Create Pumpkin Oreos Without Smudging Faces
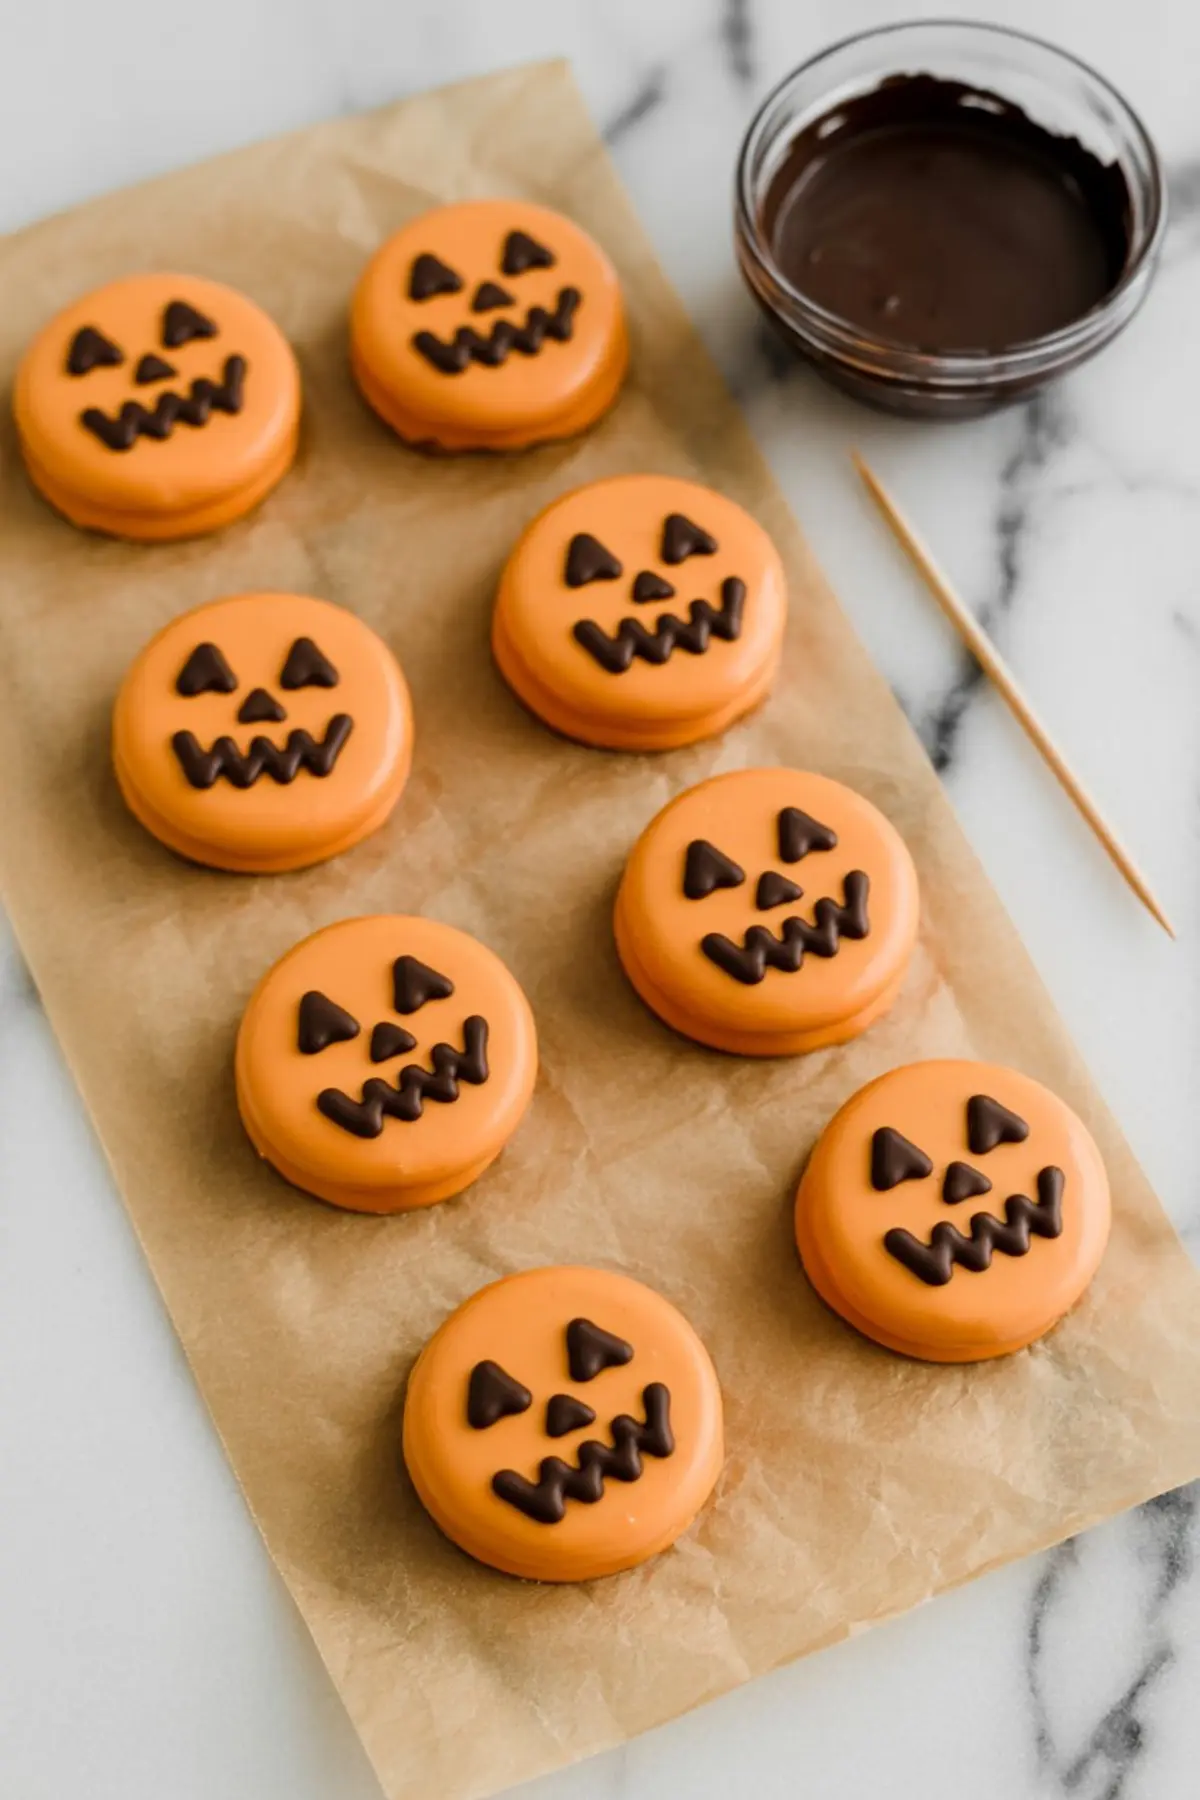
Dip in orange coating. Let them sit untouched for 10 to 15 minutes. Rushing this step leads to runny or smudged faces. Once set, use black gel or melted chocolate to draw the jack-o’-lantern designs.
I prefer melted chocolate with a fine tip. Gel can bleed over time, especially if the room’s warm. A toothpick works if that’s all you’ve got.
Want something a little more gruesome? These Halloween Finger Cookies lean into that horror element.
How to Decorate Oreo Monsters Without Overloading the Top
You can use plain Oreos or dip them in purple or chocolate coating. While the surface is soft, press in one large candy eye. That’s the feature. Then drizzle with purple coating on the diagonal.
Too much drizzle or too many eyes, and the top collapses. Less is more. I used to overload mine and they looked fine until they cracked on the tray.
If you need something to complement the monsters visually, Halloween Strawberries bring in that same playful weirdness.
One Trick That Affects Texture: Candy Melts vs. Real Chocolate
I’ve tested both, side by side. Candy melts set faster, hold color better, and stay stable at room temperature. Real chocolate tastes richer, but takes longer to firm up and often blooms unless tempered.
If you’re making these for kids’ parties or bulk trays, candy melts win. For a gourmet touch at home, you might prefer the flavor of tempered chocolate. In my notes, candy melts win nine out of ten times for clean structure and low stress.
How to Store Halloween Oreo Balls and Keep Decorations Intact
Once decorated, leave all the cookies on the tray for 30 minutes at room temperature. Refrigerate only if needed, and for no more than 10–15 minutes. Longer cold time leads to condensation when you pull them out.
Store in a single layer inside an airtight container. Wax paper between layers helps if you must stack. Keep them in a cool spot for up to five days.
Stacking too soon or before full set ruins the details. I’ve done that once. Never again.
Halloween Oreo Desserts That Actually Make an Impression
These work on party platters, but they shine most when presented with contrast. Pair a tray of Halloween Oreo Balls with Halloween Brownies for a dark-and-light setup.
If you’re building a Halloween dessert board, mix these in with dipped pretzels, small cake slices, or candy-coated popcorn. The mummies bring texture. The monsters bring height.
They also pack well in lunchboxes. Just be sure the container’s snug so they don’t shift.
Save and Share This Halloween Oreo Pops Recipe
Save this to your Halloween board so it’s ready the week before your party. If you try these, share in the comments. I’d love to hear which design you enjoyed most—or what went sideways. That’s half the fun.
You can also check out the full recipe in the card above for quick instructions.
Halloween Oreos

These Halloween Oreo treats use colorful candy melts and simple decorations to create fun, festive cookies shaped like mummies, pumpkins, and one-eyed monsters. They're easy to prepare, no baking required, and perfect for parties, lunchbox surprises, or an afternoon of Halloween fun with kids.
Ingredients
- 1 package of Oreos (Double Stuf works best for candy coating)
- 1 cup orange candy melts
- 1 cup white candy melts
- ½ cup chocolate or black candy melts
- ¼ cup purple candy melts (for monster drizzle)
- Candy eyes (various sizes)
- Black decorating gel or melted black chocolate (for pumpkin faces)
- Toothpicks or piping bags (for detailing)
- Wax or parchment paper
Instructions
- PREP YOUR WORKSPACE: Line a baking sheet with wax or parchment paper and arrange all decorations—candy eyes, decorating gel, piping bags—so they are ready to use. Candy melts begin to harden quickly once cooled, so keeping everything within easy reach is important.
- MELT YOUR CANDY COATING: In separate microwave-safe bowls, melt the orange, white, black or chocolate, and purple candy melts according to package instructions. Heat in 30-second intervals, stirring between each session, until smooth and fully melted.
- MAKE THE MUMMIES: Dip Oreos into the melted white candy coating, using a fork to lift each cookie out and gently tapping it to remove excess. Place coated cookies on the prepared parchment paper. While the coating is still wet, press two small candy eyes near the top of each cookie. Once partially set, drizzle more white coating over the surface in thin lines using a piping bag or fork to create a mummy bandage look.
- CREATE THE PUMPKINS: Dip Oreos into the melted orange candy coating and place them on the parchment paper. Let them set for 10 to 15 minutes. Once firm, use black decorating gel or melted black candy to draw jack-o'-lantern faces. A toothpick or fine piping tip helps with precise details.
- ASSEMBLE THE ONE-EYED MONSTERS: Use plain Oreos or ones dipped in purple or chocolate coating. While the coating is still soft, press one large candy eye into the center of each cookie. Drizzle melted purple candy diagonally across the surface to add texture and a spooky monster effect.
- LET EVERYTHING SET: Allow all decorated cookies to rest at room temperature for at least 30 minutes, or until fully hardened. To speed up the process, place the tray in the refrigerator for 10 to 15 minutes.
Notes
Use gel food coloring to tint white candy melts if specific colors are unavailable. Keep decorations light to avoid weighing down the cookie tops. Store finished cookies in an airtight container at room temperature for up to 5 days.
Nutrition Information
Yield
24Serving Size
1Amount Per Serving Calories 75Total Fat 1gSaturated Fat 1gTrans Fat 0gUnsaturated Fat 0gCholesterol 1mgSodium 10mgCarbohydrates 16gFiber 0gSugar 11gProtein 0g