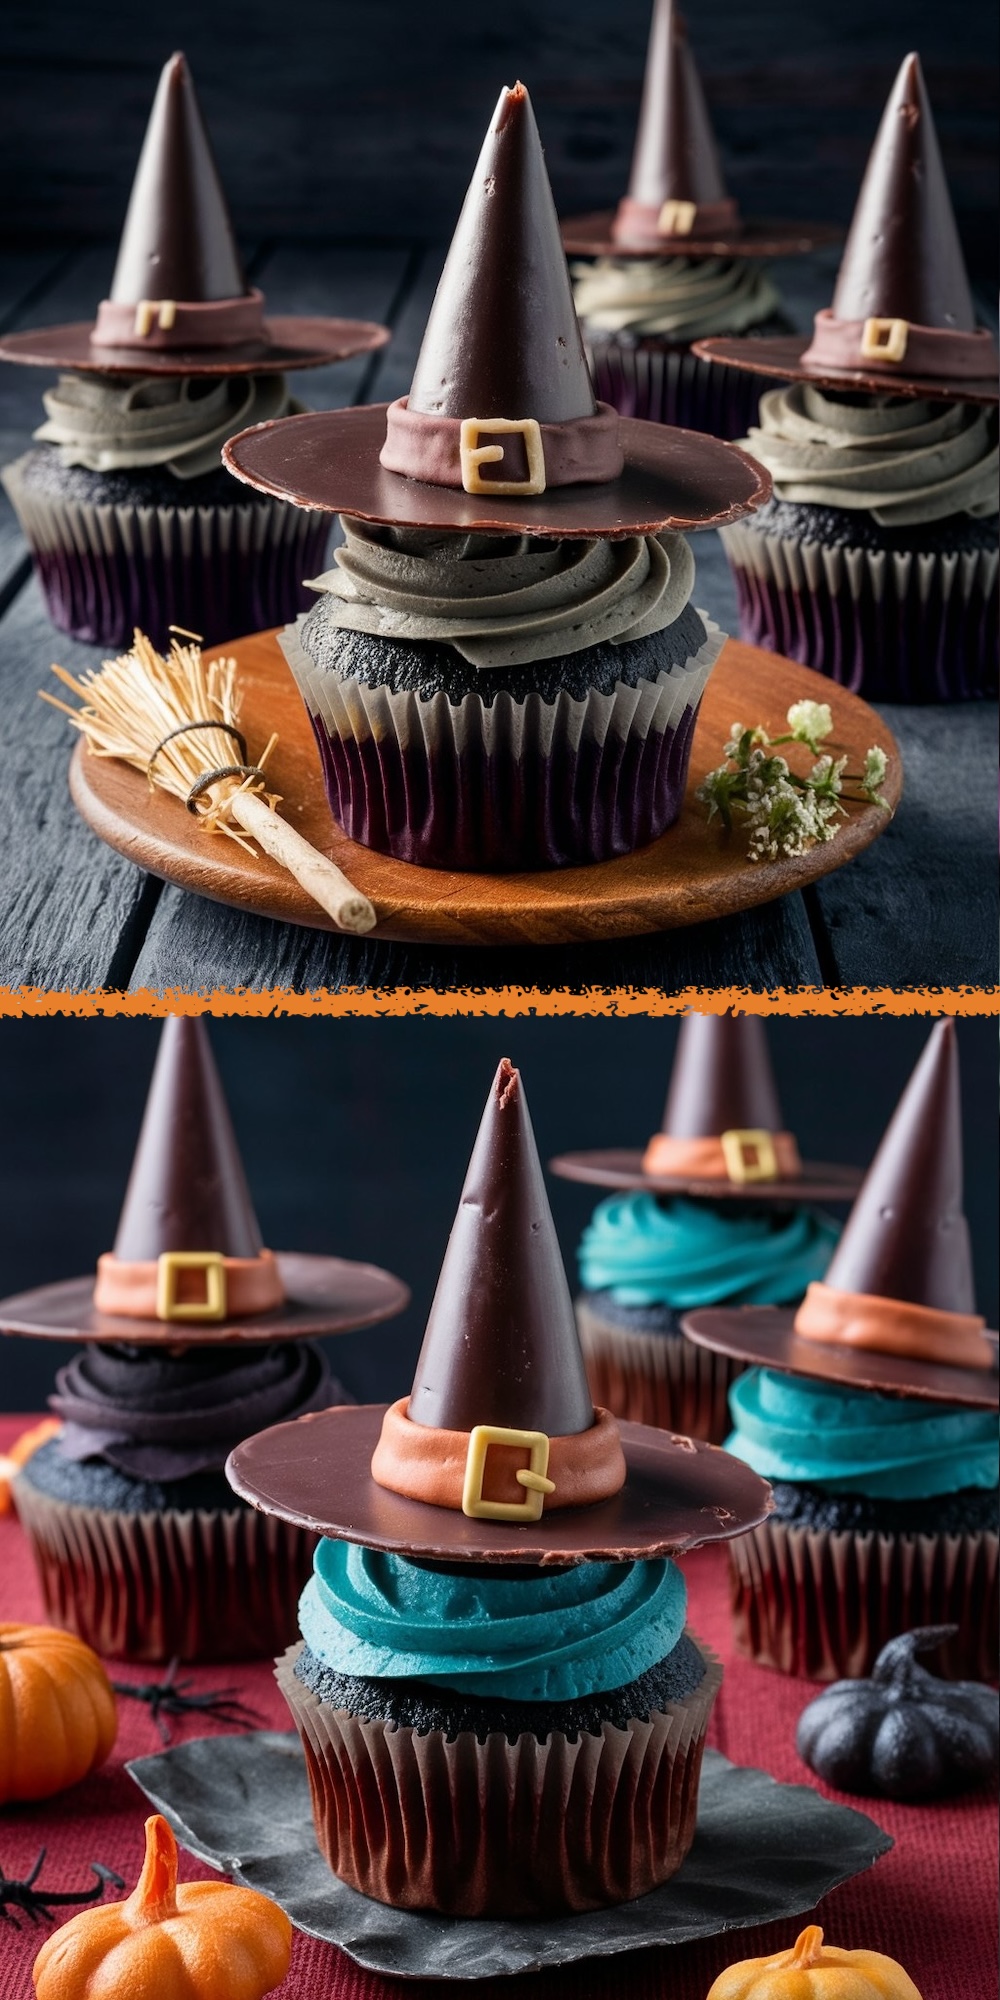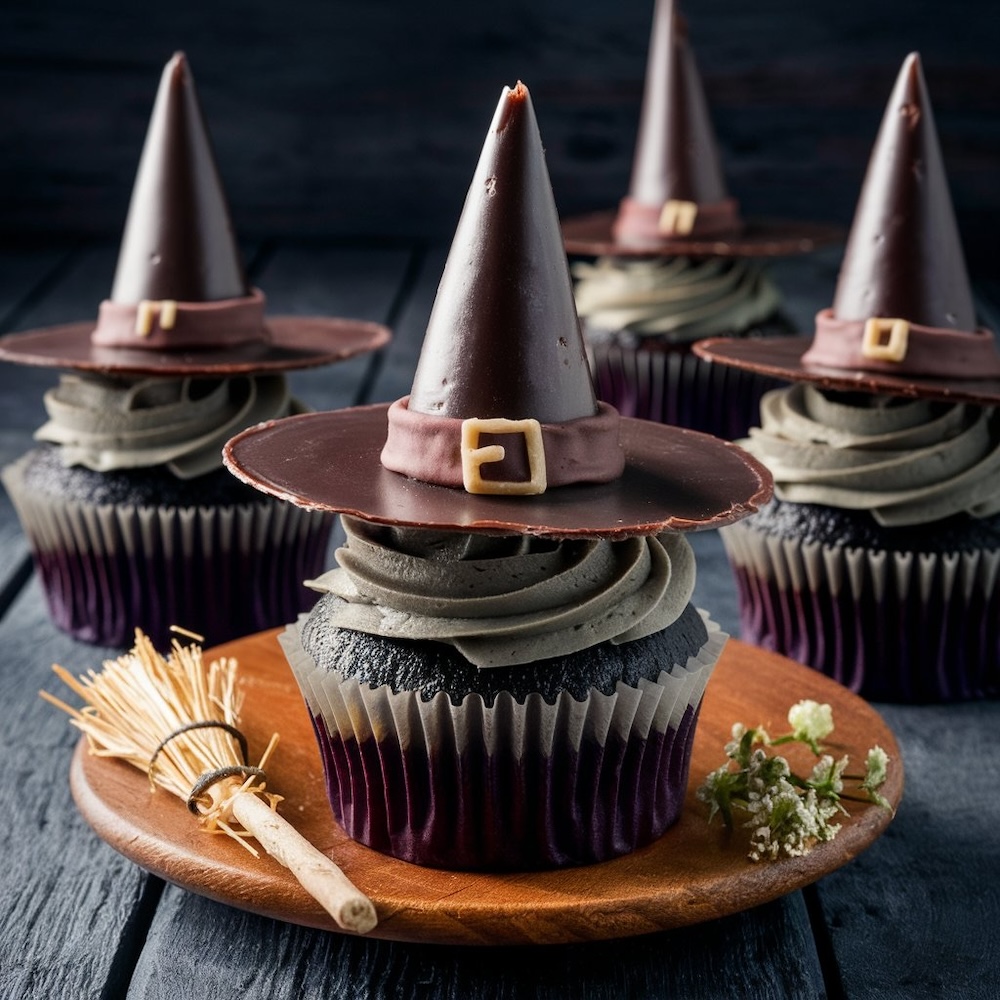
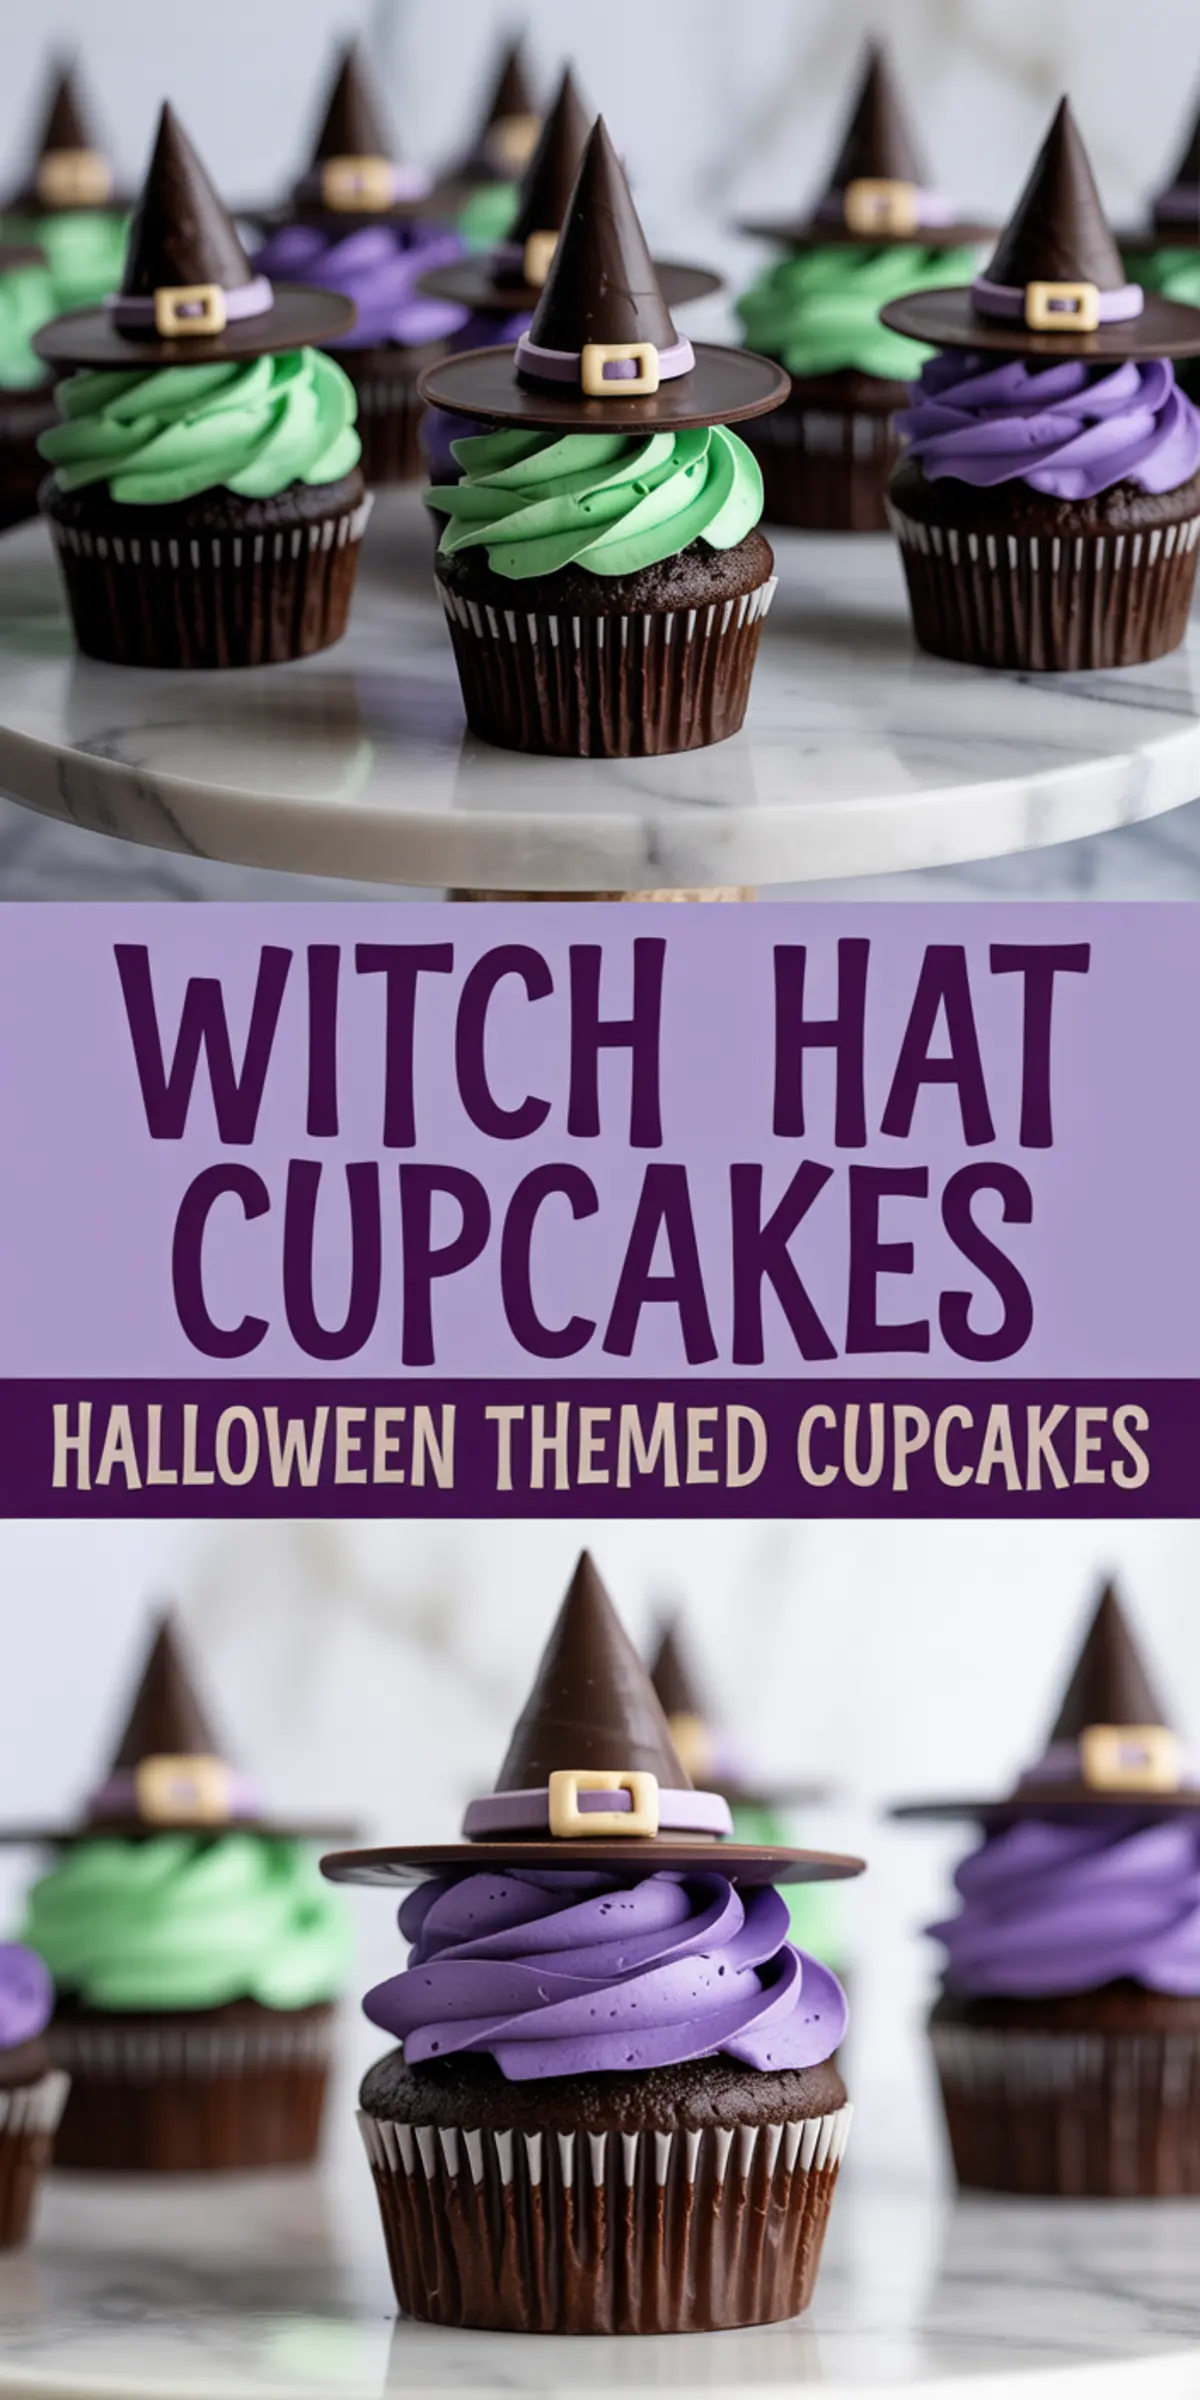
Halloween calls for desserts that do more than sit quietly on a table. They should make guests pause, smile, and lean in closer. Witch Hat Cupcakes do exactly that. Soft chocolate cake forms the base, rich frosting gives them flair, and candy witch hats sit proudly on top.
This guide will help you create cupcakes that balance flavor with decoration. You’ll learn how to bake a moist base, achieve vibrant frosting, and craft candy hats that hold their shape. Halloween themed cupcakes, Halloween mini cupcakes, and even Halloween birthday cupcakes often look the part but fall flat on taste. These avoid that pitfall.
I’ve baked countless versions of these. Over time I’ve learned which shortcuts save time and which details matter most. By the end, you’ll feel confident enough to set these out at a Halloween party and watch them disappear.
Following a special diet?
Every recipe on this site can be converted to gluten-free, vegan, dairy-free, keto, nut-free or egg-free with adjusted ratios so nothing falls flat.
Try the Recipe Converter →Ingredients That Shape the Cupcakes
The cupcake base begins with a mix of all-purpose flour and cocoa powder. Baking powder and soda lift the batter, and sugar gives balance to the cocoa.
Brown sugar adds depth, something I don’t skip anymore. Eggs, milk, and oil bring structure and moisture. Vanilla keeps the flavor warm, and boiling water thins the batter for tenderness.
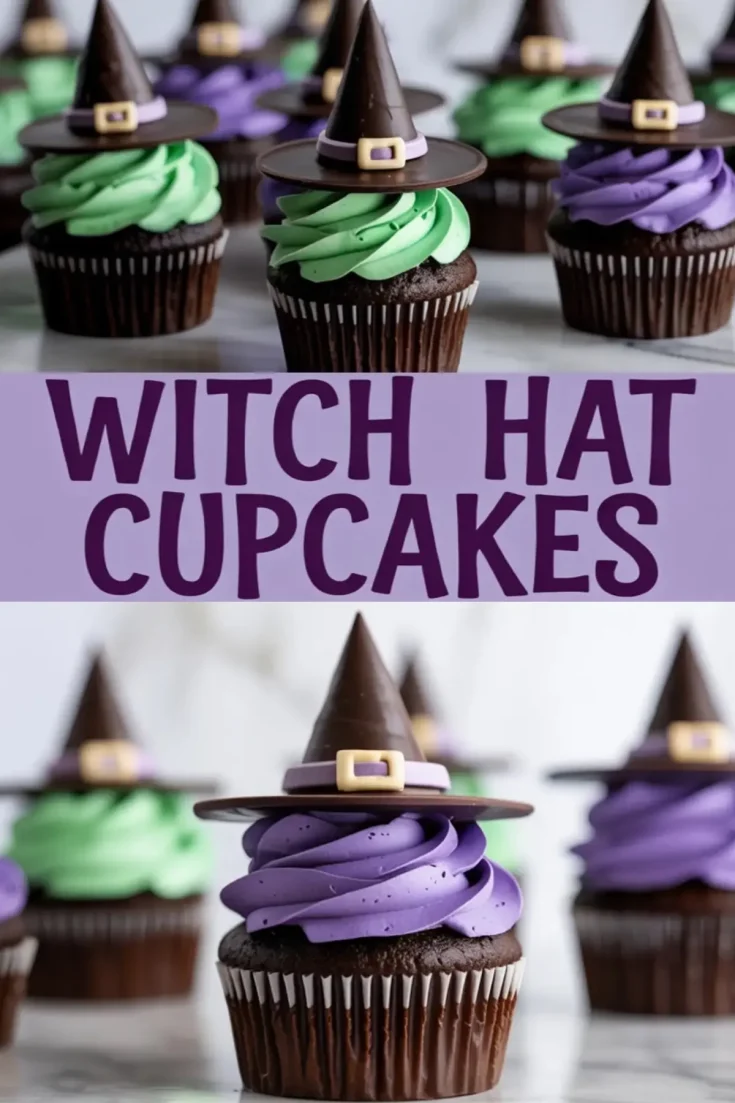
Frosting sets the stage for color. Butter, powdered sugar, cocoa, vanilla, and milk form the base. Gel coloring gives those shades of purple and green that make witch cupcakes stand out.
Food coloring can vary in strength, so add slowly. In my notes, I always remind myself to mix longer than expected. That extra minute changes frosting from thick to silky.
Candy witch hats need sugar cones, chocolate wafers, and melted chocolate. Fondant strips or colored icing finish the look. Props like broomsticks or edible glitter turn these into true witch desserts.
If you’ve already tried Halloween strawberries, you’ll know how small decorative touches lift a simple recipe into something memorable.
A Practical Ingredient Comparison
One choice makes a clear difference here: using oil versus butter in the cupcake batter. I’ve tested both. Butter gives a richer taste, but the crumb tends to be tighter.
Oil produces a softer, moister texture that lasts longer on the counter. For Halloween parties where cupcakes might sit out, I stay with oil. It keeps them tender through the evening, even after hours on a table crowded with other Halloween dip and snacks.
How to Prepare the Cupcake Batter
Start by sifting the flour, cocoa, leavening agents, and salt. Sifting feels old-fashioned, but it clears lumps and gives the batter a smoother rise.
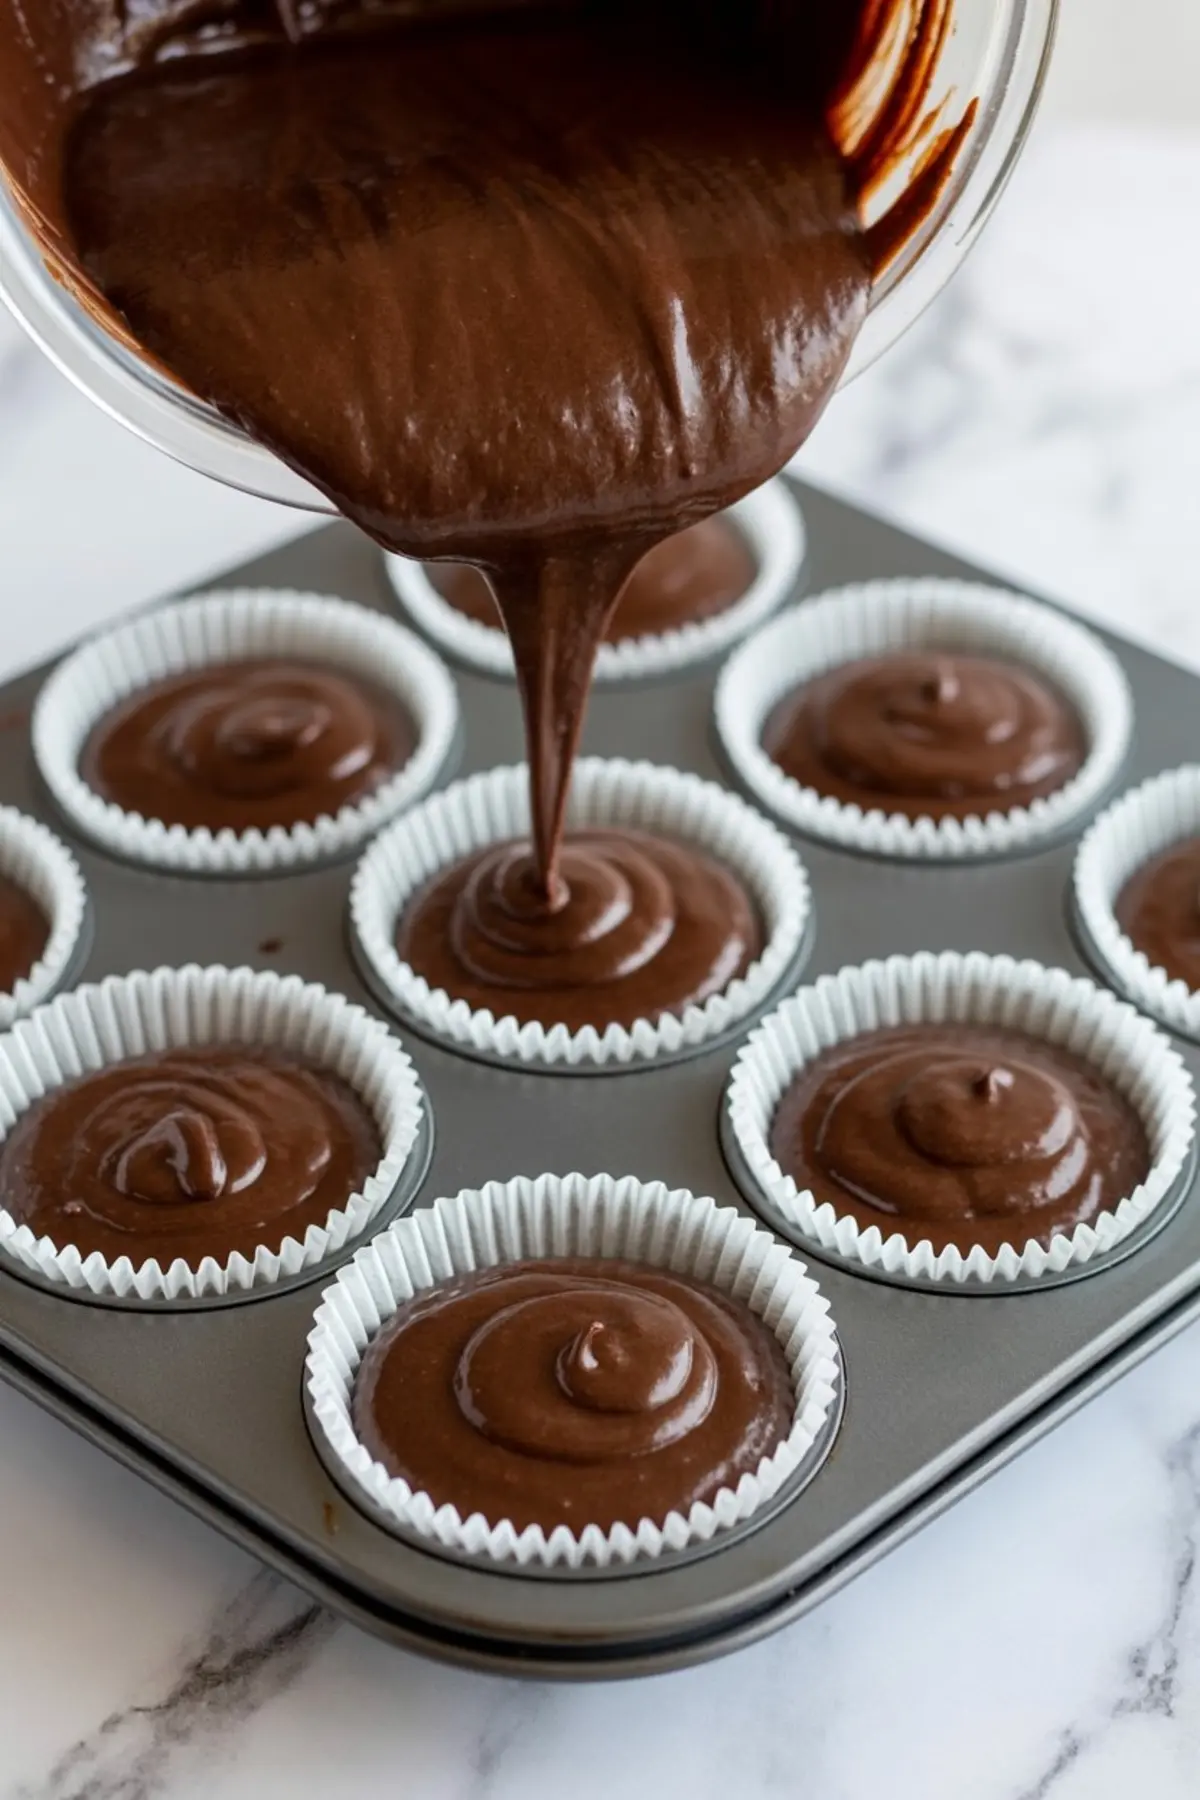
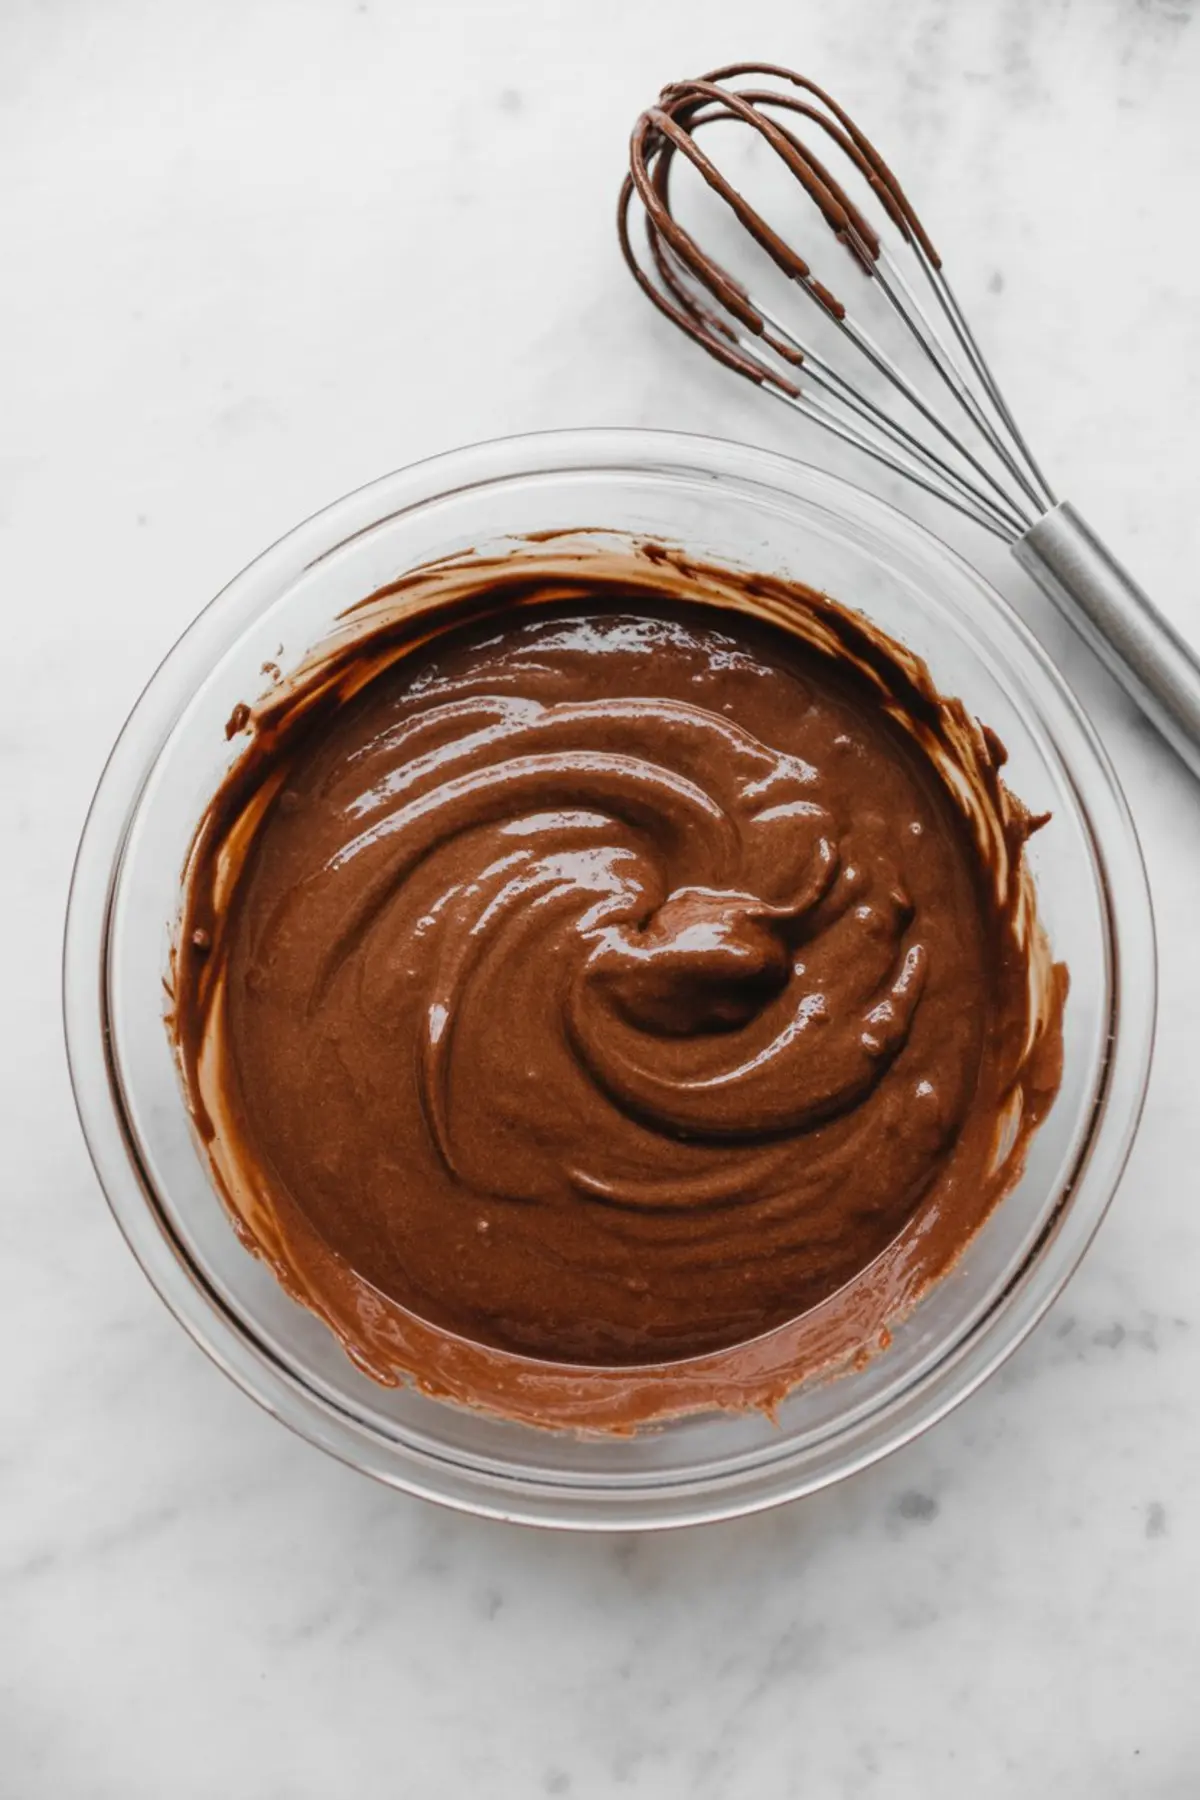
Beat together sugars and eggs, then add milk, oil, and vanilla until combined. Dry ingredients fold in gradually. Boiling water goes last, making the batter thin but glossy.
Line the cupcake tin with dark paper liners. They highlight the frosting colors later. Fill each about two-thirds full, no more. Bake until a toothpick comes out clean. Set the cakes on a wire rack to cool fully. A warm cupcake melts frosting, something I’ve learned the hard way.
Making and Coloring the Frosting
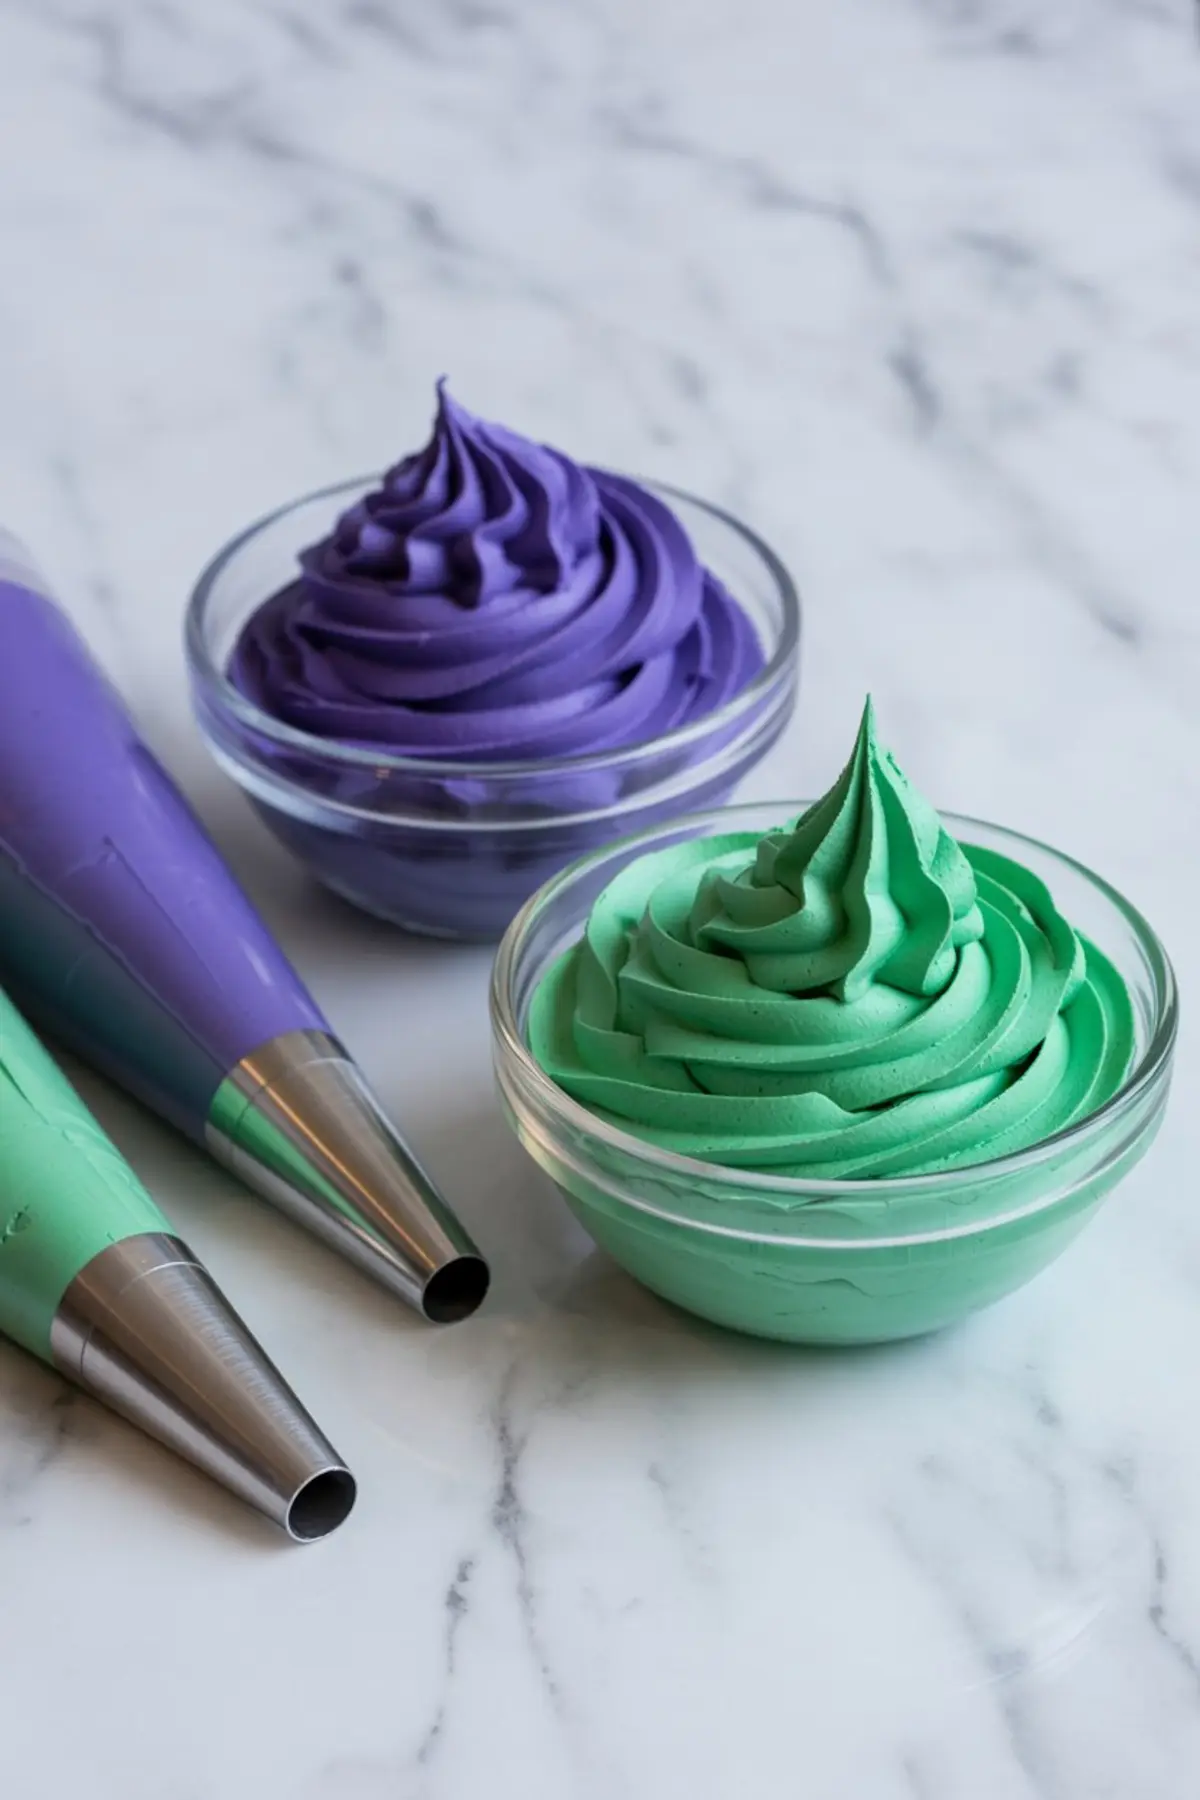
Cream the butter until pale, then beat in powdered sugar and cocoa. Add vanilla and milk, then whip at high speed until the texture loosens and lifts. A stand mixer works best, but a hand mixer with patience can do the job.
Divide the frosting into bowls. Mix in purple and green gel coloring, adjusting the shade slowly. Frosting too dark looks muddy, and too light loses the effect. Use a star piping tip for swirls. That swirl, I’ve found, makes even simple Halloween cupcakes decoration look polished.
Crafting the Witch Hats
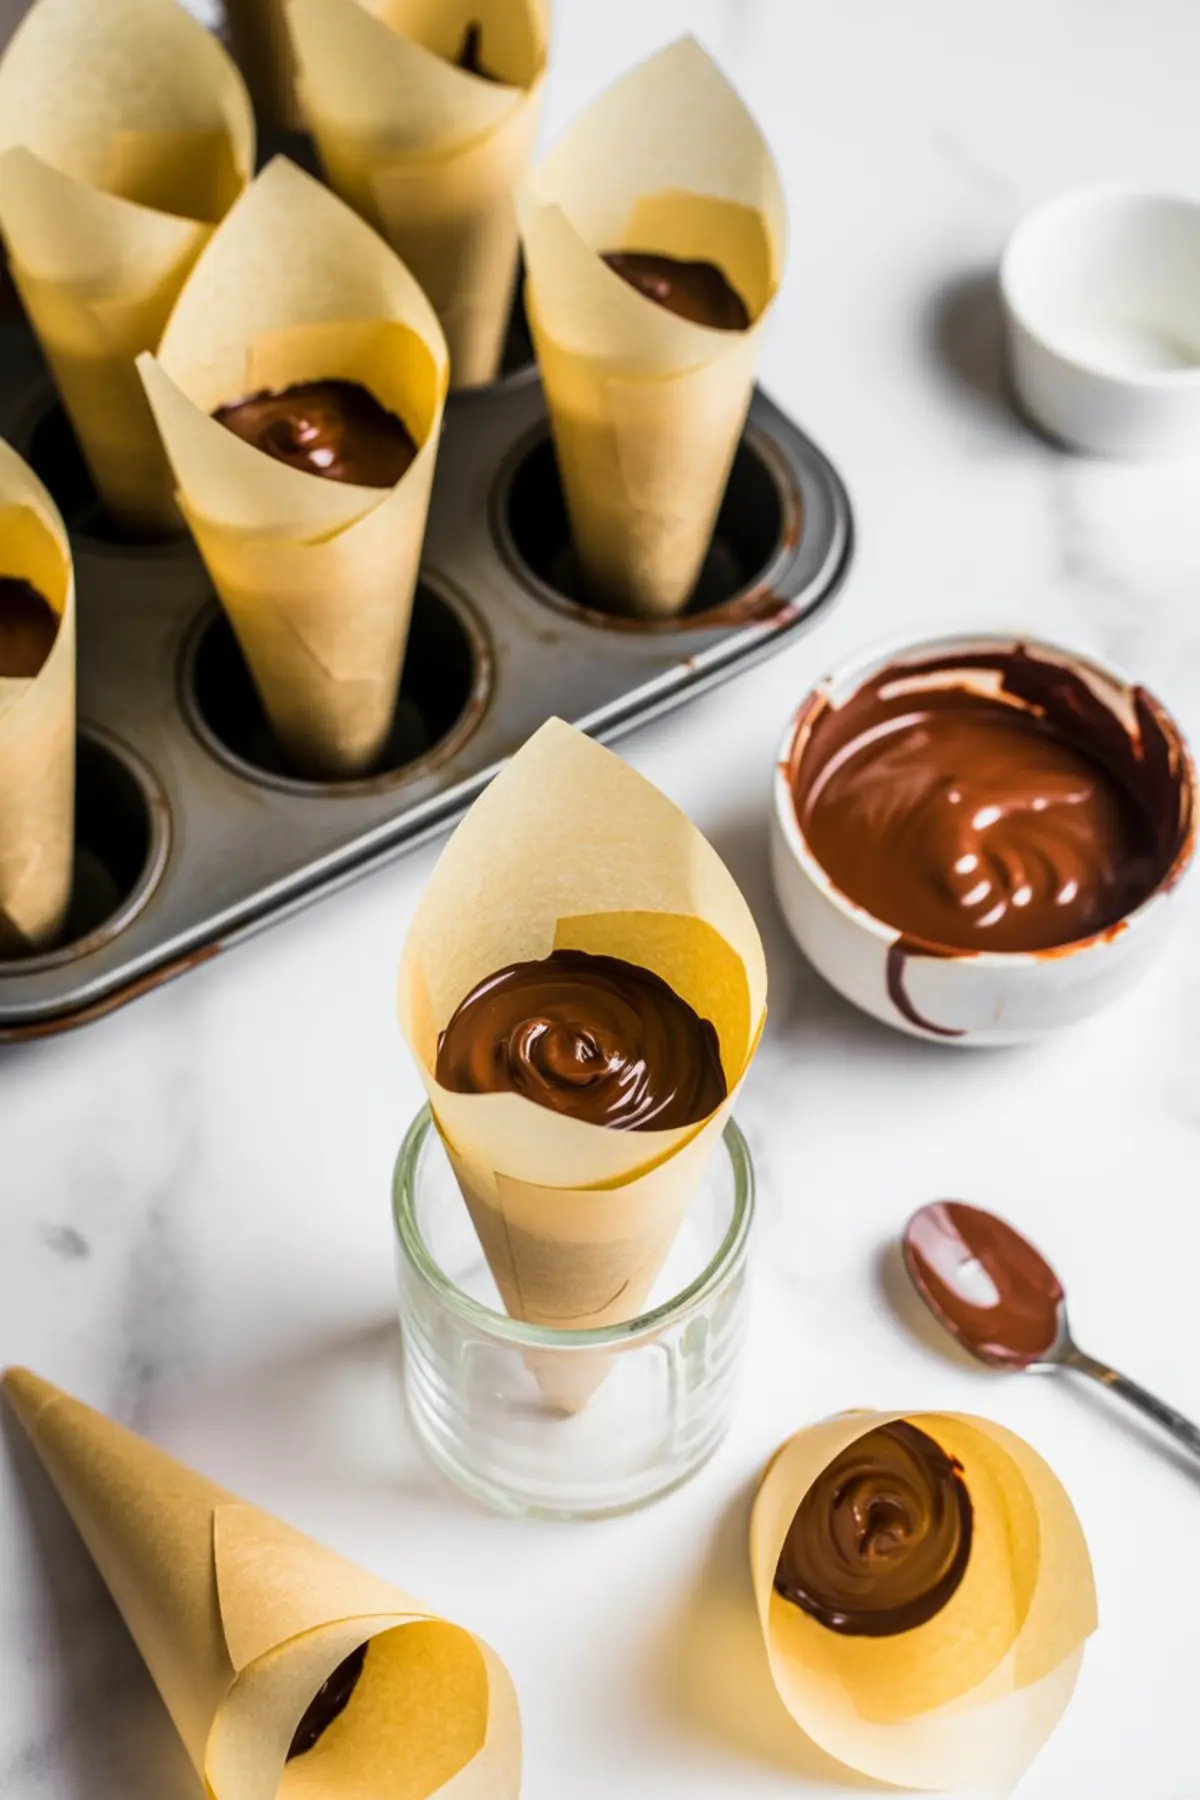
Melt chocolate in short intervals in the microwave. Dip sugar cones and let them set upright on wax paper. A brief chill in the refrigerator speeds the process. Once set, attach cones to chocolate wafer cookies with a dab of melted chocolate. This forms the brim.
Fondant strips or icing bands wrap around the base of each cone. Add small buckles in orange or yellow. The detail brings the hats to life.
For extra charm, place a broomstick prop beside the hat. I sometimes dust them with edible glitter, and children always notice the sparkle. The hats sit firmly on the frosted cupcakes, transforming them into complete witch hat cupcakes.
Serving and Storing Tips
Serve these on a flat tray lined with parchment, so hats stay upright. For larger gatherings, arrange them in tiers. They hold attention more than flat plates. I’ve served them beside Halloween finger cookies, and together they created a full witch-themed table.
Cupcakes store well at room temperature for a day. If made ahead, keep the unfrosted cakes wrapped in plastic for freshness. Frost and add hats on the day of serving. Refrigeration dries cupcakes, though the hats stay crisp. Between the two, room storage works best.
Closing Thoughts and Invitation
Halloween cupcakes witches hat style bring playfulness to any gathering. They combine chocolate cake, colorful frosting, and creative candy work. You get both taste and appearance, which makes them stand apart from many Halloween food desserts.
Save this recipe to your Halloween board for later, so you have it ready when the season comes. Share in the comments how your witch hat cupcakes turned out, or if you tried variations like bat cupcakes or hocus pocus cupcakes.
I always enjoy hearing new twists and stories from your kitchens.
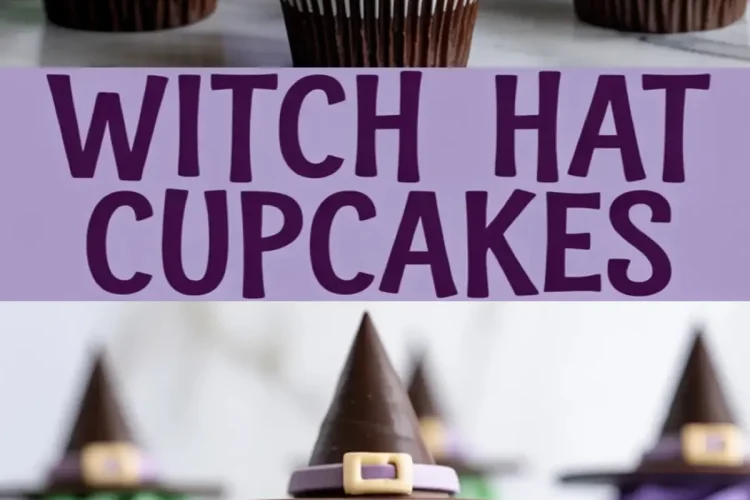
Witch Hat Cupcakes
Witch hat cupcakes are one of the most festive desserts to bake for Halloween. I top simple cupcakes with chocolate frosting, then add a cookie and sugar cone to create the classic witch hat look. Some call them Halloween cupcakes witches hat, others just witch cupcakes, but either way they’re fun, colorful, and easy to make. I’ve tried versions starting from cupcake mix for quick prep and others dressed up with candy details, and each one fits right in with Halloween baking traditions. Among spooky treats, these cupcakes stand out as playful, eye-catching, and one of the easiest Halloween cupcake ideas to bring to a party.
Ingredients
- For the Chocolate Cupcakes:
- 1 cup (200g) granulated sugar
- ¾ cup (95g) all-purpose flour
- ½ cup (45g) unsweetened cocoa powder
- 1 tsp baking powder
- ½ tsp baking soda
- ¼ tsp salt
- ½ cup (120ml) whole milk
- ¼ cup (60ml) vegetable oil
- 1 egg
- ½ tsp vanilla extract
- ½ cup (120ml) hot water
- FOR THE BUTTERCREAM FROSTING:
- 1 cup (226g) unsalted butter, room temp
- 4 cups (480g) powdered sugar, sifted
- 2–3 tbsp heavy cream or milk
- 1 tsp vanilla extract
- Gel food coloring (deep purple and bright green)
- FOR THE WITCH HAT DECORATIONS:
- Dark chocolate chips or melting chocolate
- Parchment paper
- Clear tape
- Scissors
- Small round cutters or cupcake liners
- Fondant: purple, yellow, and black
- Edible glue or water
- Small fondant tool or sharp knife
Instructions
- MAKE THE CUPCAKES: Preheat the oven to 350°F (175°C) and line a standard cupcake pan with 12 paper liners. In a large mixing bowl, whisk together the sugar, flour, cocoa powder, baking powder, baking soda, and salt until combined.
- ADD WET INGREDIENTS: Pour in the milk, oil, egg, and vanilla extract. Mix with a hand whisk or electric mixer until smooth and fully combined.
- ADD HOT WATER: Slowly stir in the hot water. The batter will be thin; continue stirring until the mixture is uniform.
- BAKE THE CUPCAKES: Divide the batter evenly among the liners, filling each about two-thirds full. Bake for 18–20 minutes, or until a toothpick inserted in the center comes out clean. Allow to cool completely before frosting.
- MAKE THE BUTTERCREAM: In a large bowl, beat the butter using a hand or stand mixer until pale and fluffy. Gradually add sifted powdered sugar, mixing on low to incorporate.
- FINISH THE BUTTERCREAM: Add the cream and vanilla, then beat on medium-high until the frosting is soft, light, and spreadable. Divide into two bowls and tint one deep purple and the other bright green using gel food coloring. Transfer each color to a piping bag fitted with a large round or star tip.
- MAKE DIY CONE MOLDS: Cut parchment paper into 6x6-inch squares. Roll each square into a tight cone (similar to a piping bag) and seal the seam and tip with clear tape. Stand the cones upright in small glasses or a muffin tin to keep them steady.
- COAT THE CONES WITH CHOCOLATE: Melt dark chocolate chips or melting chocolate in a heat-safe bowl until smooth. Spoon a small amount into each parchment cone and rotate to coat the interior evenly. Pour out any excess chocolate and let the cones stand upright to set at room temperature or in the fridge.
- REMOVE THE PAPER: Once the chocolate is fully set and firm, carefully peel away the parchment paper to reveal the chocolate cone.
- MAKE THE HAT BRIMS: Line a baking sheet with parchment paper. Use a small round cutter or the base of a cupcake liner to outline circles. Spoon melted chocolate into the center of each circle and spread into an even, thin disk. Allow to set completely until firm.
- ASSEMBLE THE WITCH HATS: Use a dab of melted chocolate to attach each chocolate cone to the center of a chocolate brim. Let them set until the pieces are firmly joined.
- DECORATE WITH FONDANT: Roll out purple fondant and cut thin strips for hat bands. Cut small yellow squares for buckles and slightly smaller black squares to layer beneath. Attach the band around each cone using edible glue or water, then press on the buckle to finish the decoration.
- ASSEMBLE THE CUPCAKES: Pipe a tall swirl of buttercream onto each cooled cupcake using either color or a mix. Gently place a finished chocolate witch hat on top of each cupcake, pressing lightly so it stays in place. Serve immediately or store in a cool place until ready to display.
Notes
Make the chocolate hats up to a day in advance and store them in a cool, dry place. Avoid humid conditions, as chocolate may bloom or soften.
Frequently Asked Questions
Q: Can I make these cupcakes in advance?
A: Yes! You can bake the cupcakes and make the witch hats a day ahead. Just store the cupcakes in an airtight container and assemble them right before serving.
Q: What can I use if I don’t have fondant?
A: You can use colored icing or even licorice strips to create the hat bands and buckles.

Q: How do I store leftover cupcakes?
A: Store the cupcakes in an airtight container at room temperature for up to three days. If your home is warm, you may want to refrigerate them, but let them come to room temperature before serving.
Q: Can I use white chocolate instead of dark chocolate?
A: Absolutely! White chocolate can add a fun, ghostly twist to the witch hats.
Q: Are there any shortcuts for decorating?
A: If you’re short on time, you can skip the fondant details and simply use colored sprinkles or icing to decorate the hats.