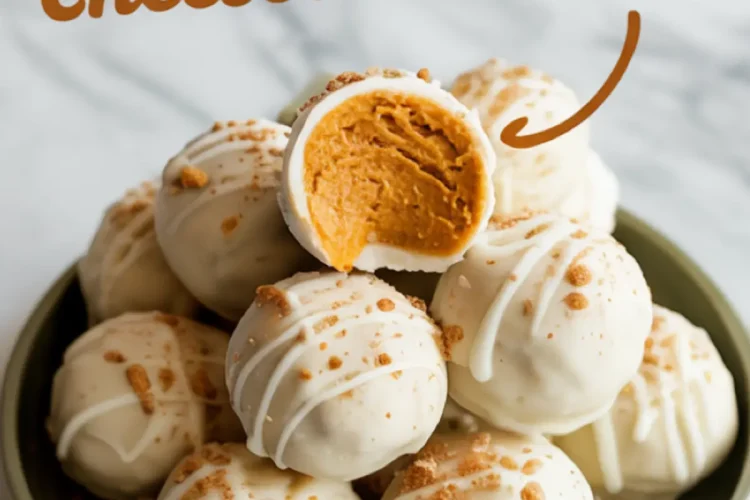
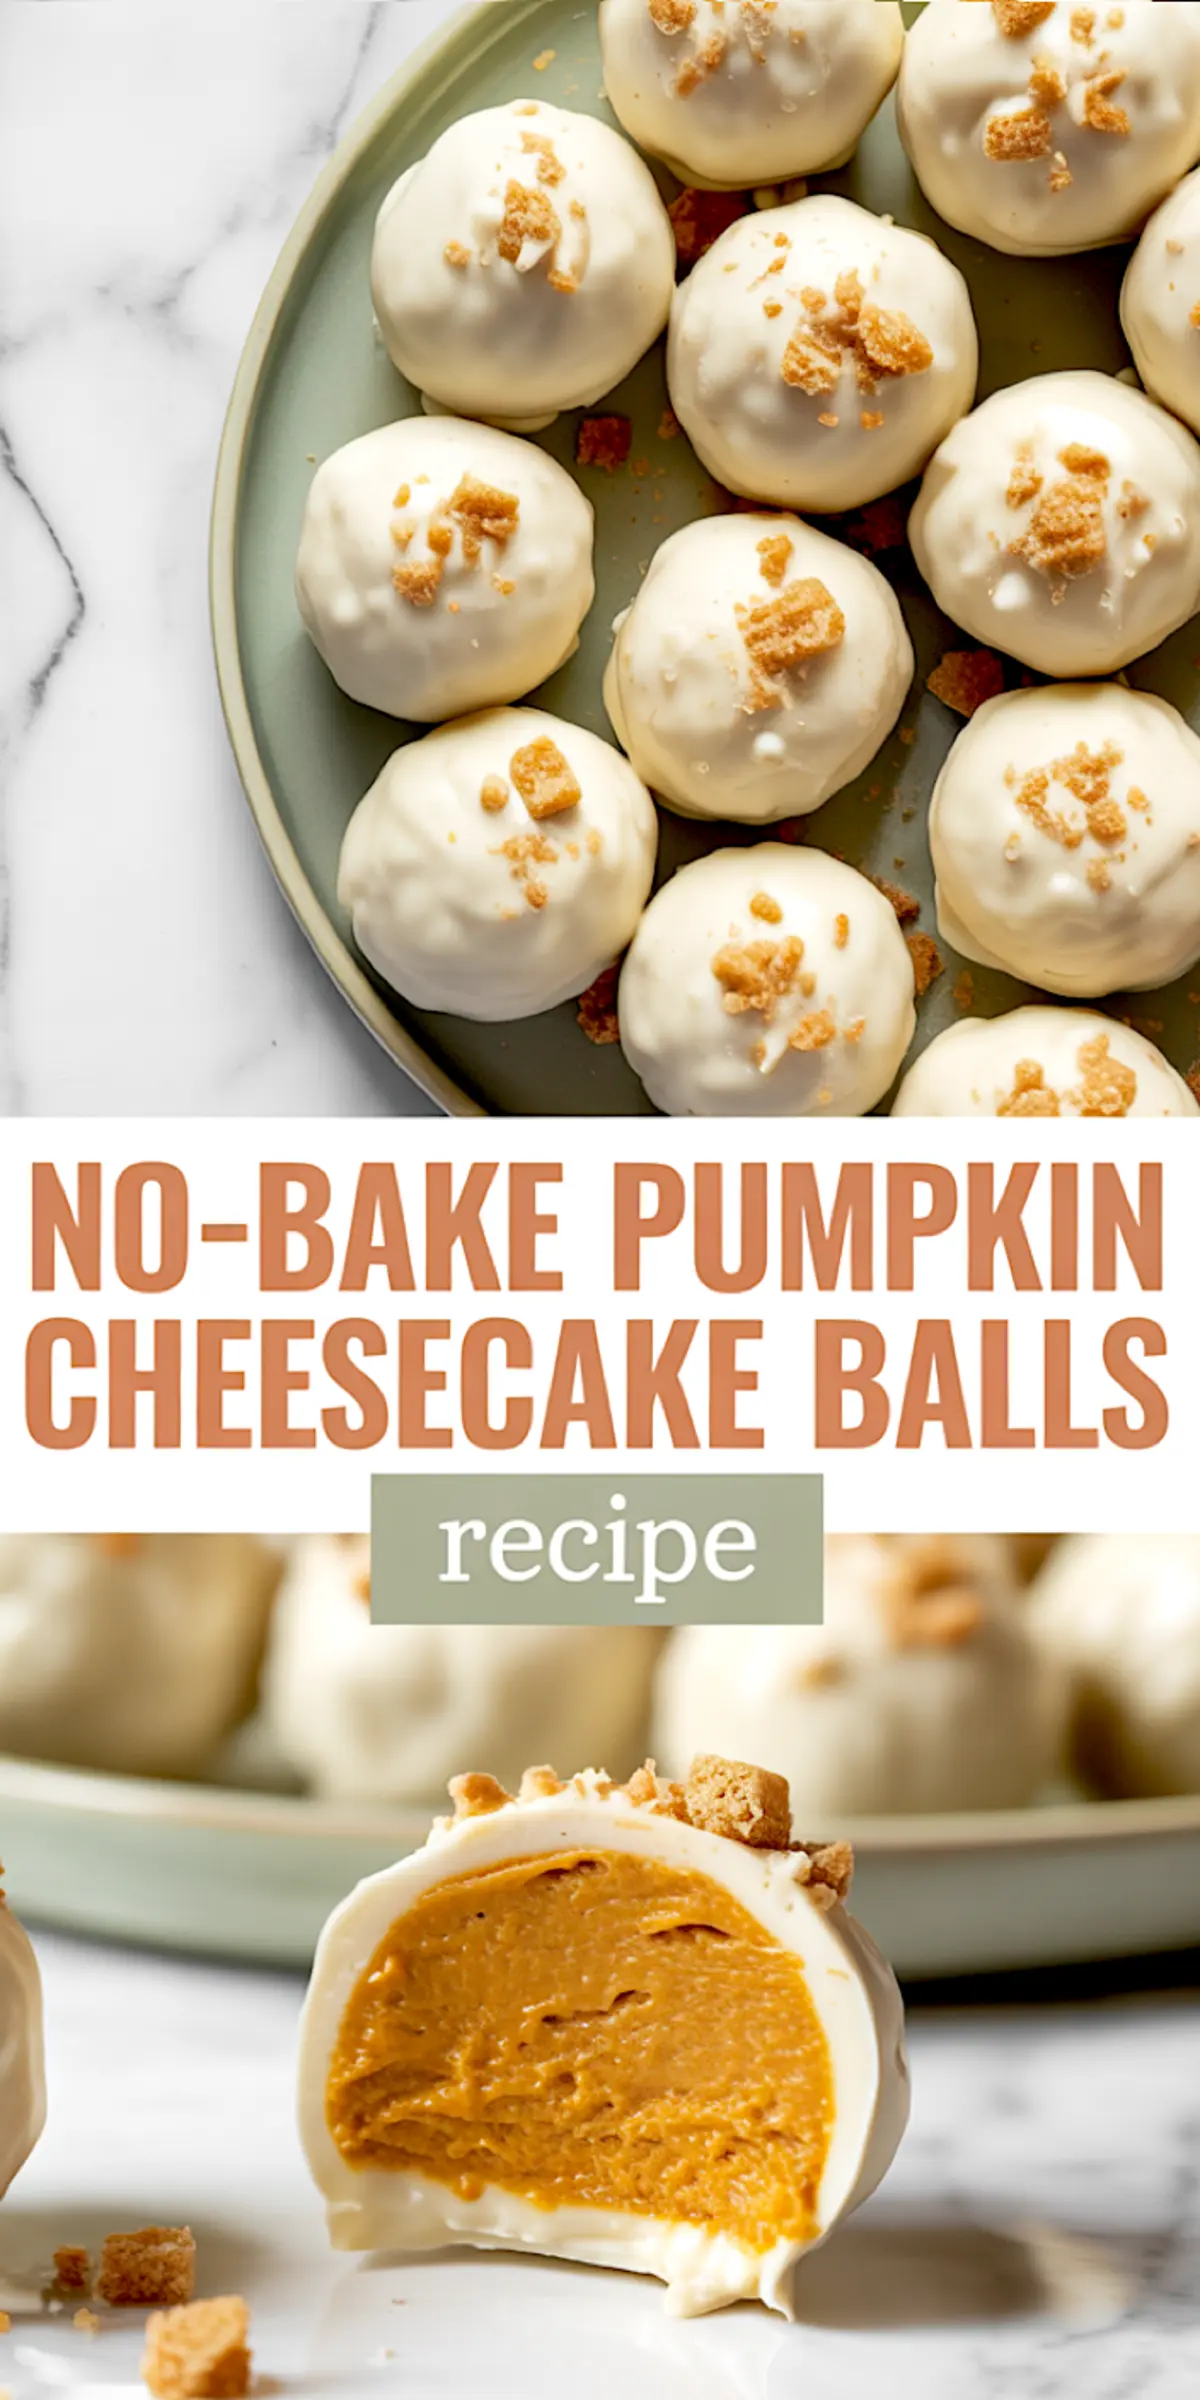
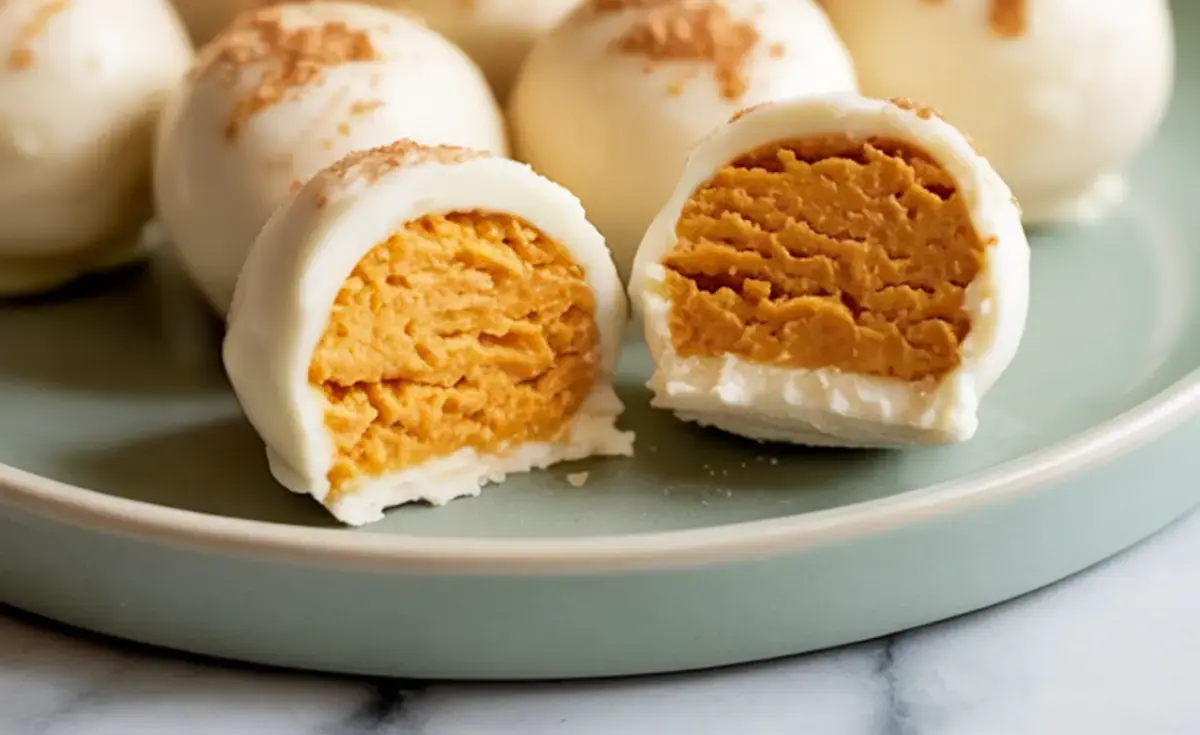
These no-bake pumpkin cheesecake truffles are easy to prep, freezer-friendly, and made with real cream cheese and graham crackers.
You’re here because you need something that actually fits your schedule.
You want dessert to be easy, but still feel finished. Seasonal, but not messy. I’ve made these no bake pumpkin cheesecake balls for office trays, last-minute potlucks, and the kind of evenings when all I want is one sweet bite after dinner. And every time, they’ve worked.
There’s no baking. No complicated steps. You’ll mix the filling in one bowl, chill it, and dip it in white chocolate. That’s it.
These pumpkin cream cheese balls keep their shape, hold well in the fridge, and freeze beautifully. If you’ve ever made a batch of cookie dough just to eat it cold by the spoonful, this recipe will feel familiar—in the best way.
Following a special diet?
Every recipe on this site can be converted to gluten-free, vegan, dairy-free, keto, nut-free or egg-free with adjusted ratios so nothing falls flat.
Try the Recipe Converter →The Ingredients
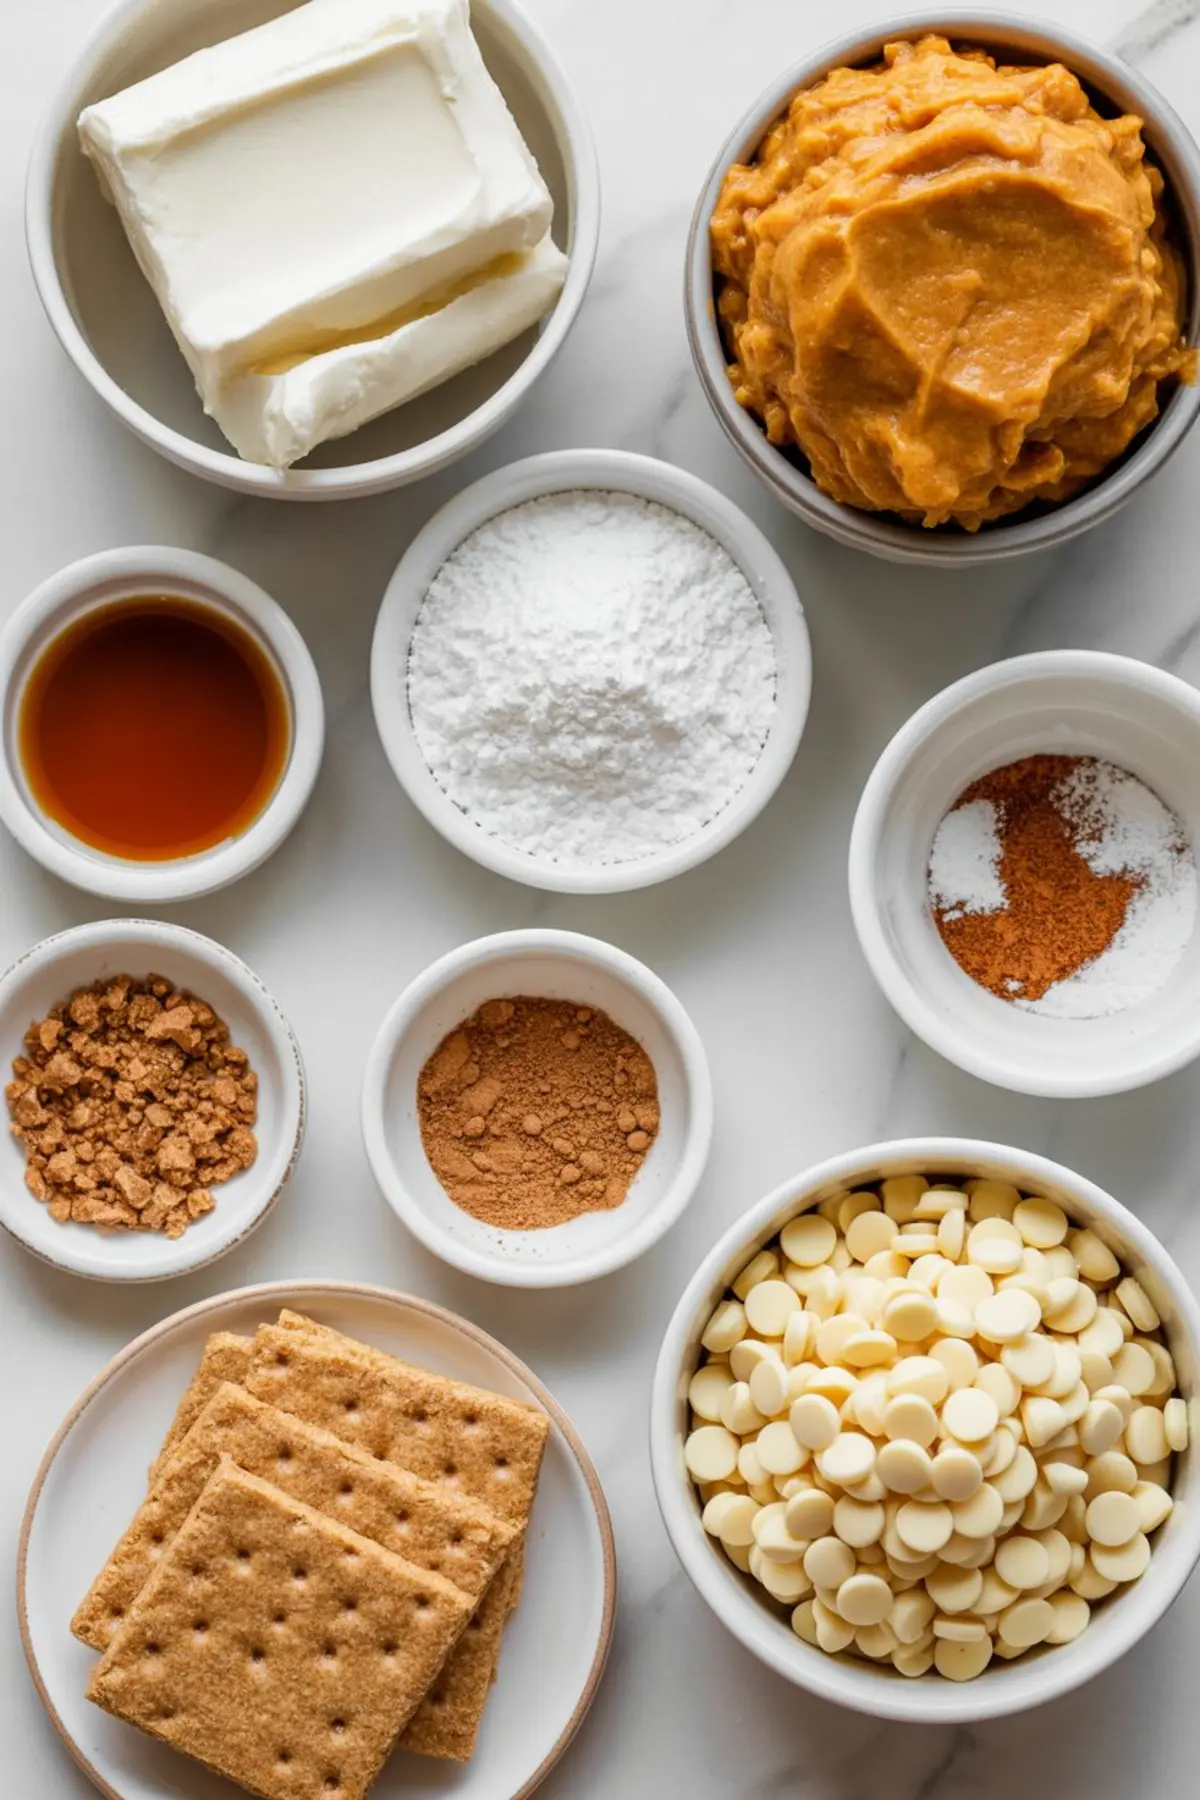
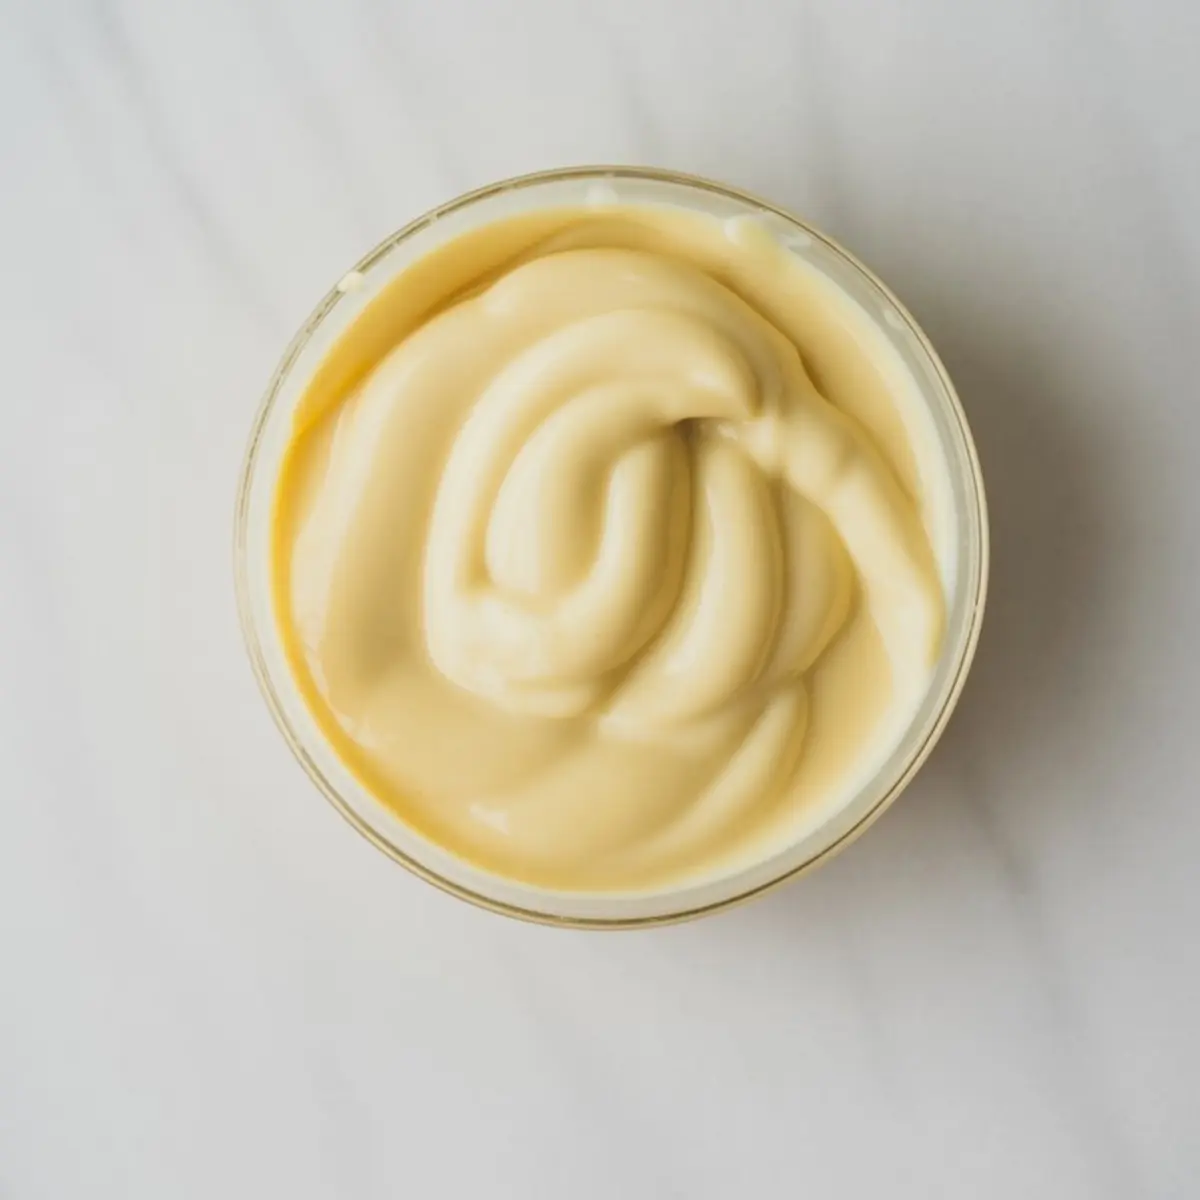
This recipe uses real cream cheese and plain pumpkin puree, not sweetened pie filling. The balance of spice, fat, and sugar is what makes them taste like cheesecake—not pumpkin pie.
I’ve found that graham cracker crumbs work better than crushed cookies. The texture stays soft inside, with just enough structure to roll. If you’ve ever made Pumpkin Pie Balls that turned out too sticky, switching to graham crumbs makes all the difference.
For coating, white candy melts are the easiest to use. They melt smoother and set firmer than regular white chocolate chips. But I’ve used both, and if you only have chocolate chips on hand, they’ll do.
👉 You can see how I used a similar base in these No-Bake Pistachio Chocolate Balls for a deeper flavor and firmer bite.
Real-World Comparison: Chocolate Chips vs Candy Melts
I’ve tested both.
White chocolate chips melt fast but seize quickly if overheated. They’re sweeter and better if you like a softer set. Candy melts, on the other hand, coat smoother and give a clean finish without refrigerating.
In my notes, I lean toward candy melts when I’m making a larger batch—especially for gifting or parties. If you’re just making a dozen for the weekend, chips are fine. Just melt in short bursts and stir often.
How to Shape, Chill, and Dip

After mixing, the filling starts off soft. It needs time to firm before rolling. One to two hours in the fridge is ideal. If you’re short on time, 30 minutes in the freezer works, but you’ll need to keep the mix covered so it doesn’t dry.
Rolling takes a little patience. If the dough sticks to your hands, rub a drop of neutral oil on your palms. I use a tablespoon-sized cookie scoop to keep the size consistent.
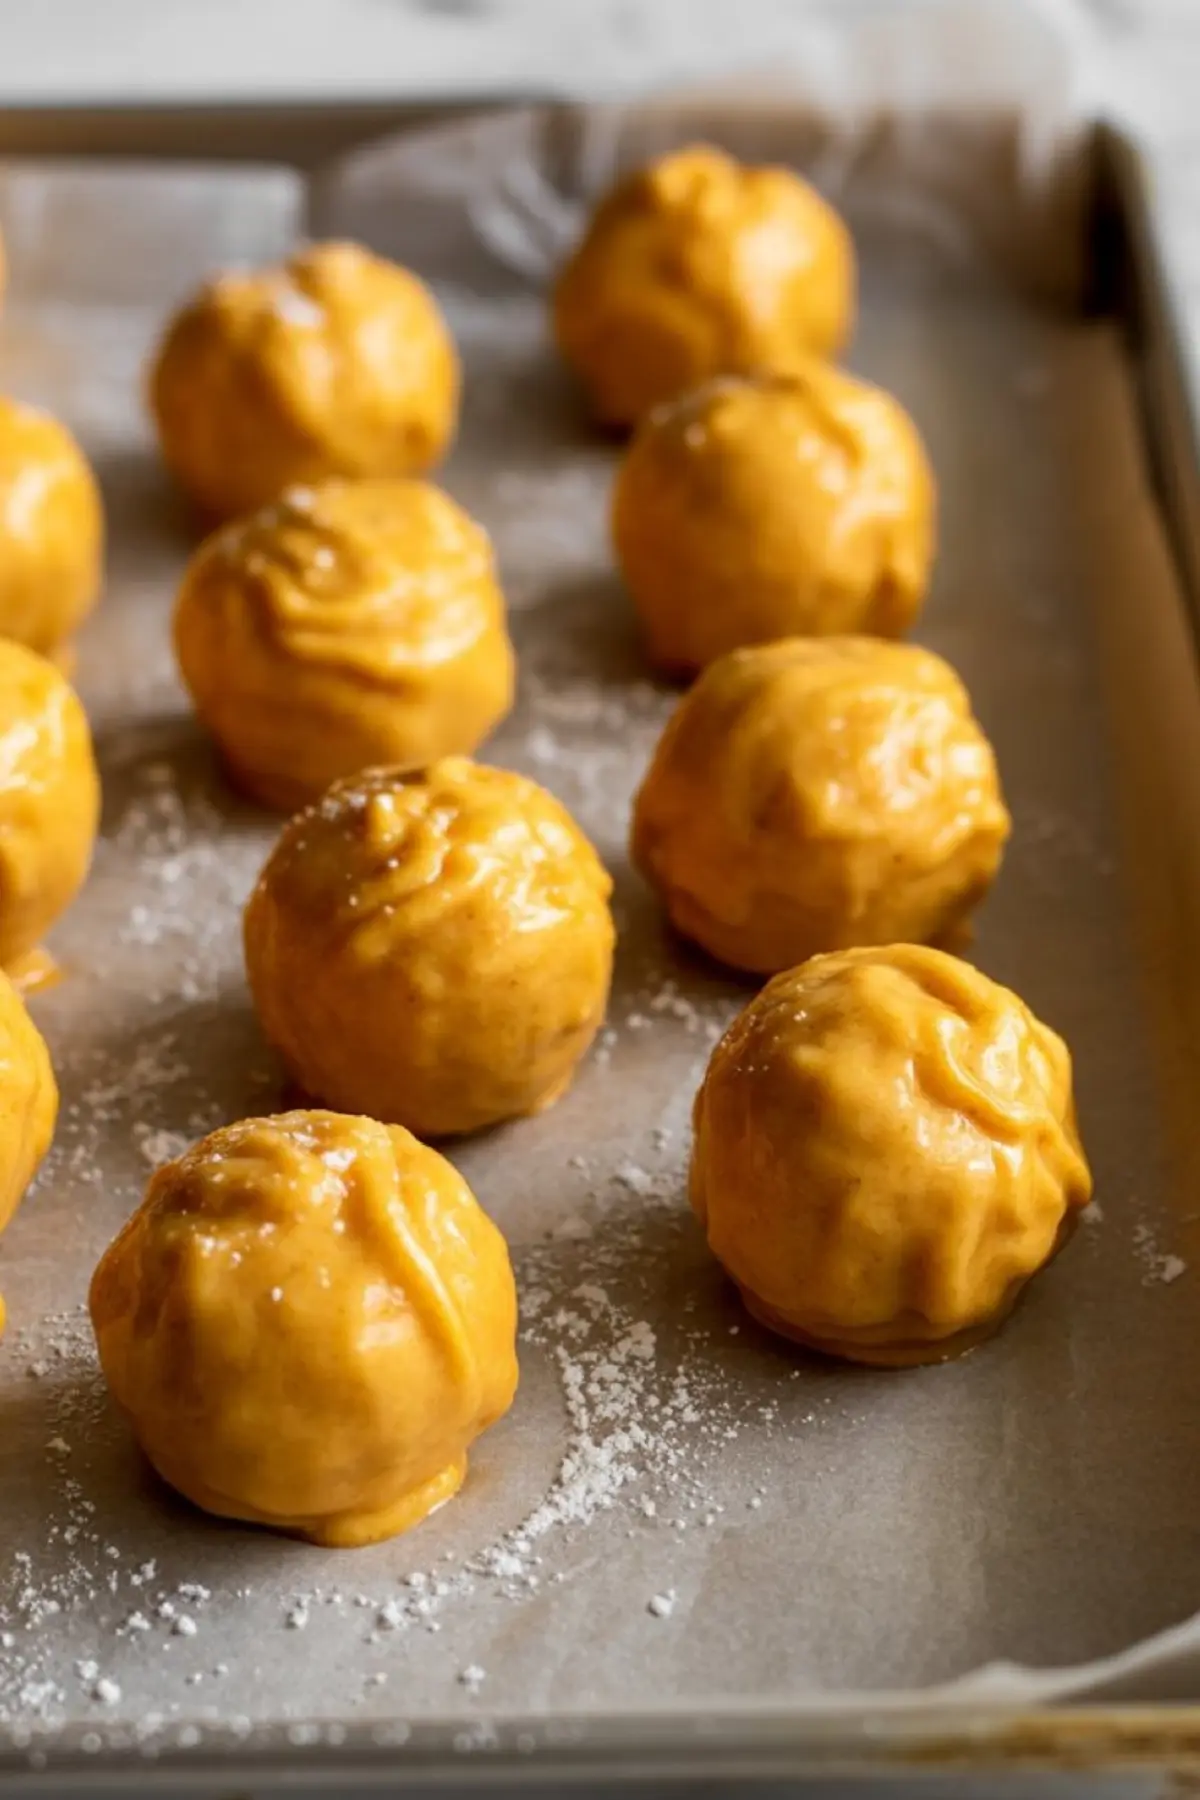
Once the balls are shaped, freeze them before dipping. This keeps the chocolate from softening the filling and helps it set in a smooth shell. I keep mine on a baking tray lined with parchment, spaced out so they don’t stick.
👉 For more easy no-bake snack ideas that store well, try these Peanut Butter Protein Balls. They’re ideal for weekday treats.
Garnish Ideas and Flavor Swaps
The classic topping is a sprinkle of crushed graham cracker. It keeps things simple and echoes the base.
But if you want to make them more festive or give each batch a twist:
- Cinnamon sugar adds a sparkle and sharper spice.
- A drizzle of dark chocolate works if you’re after contrast.
- Chopped pecans or crushed pretzels also hold up well and bring in texture.
You could even fold mini chocolate chips or toasted coconut into the base. I’ve done this when I had a little extra filling and wanted to stretch it into a second variation.
If you like tropical pairings, these Pineapple Coconut No Bake Balls follow a similar method, with totally different flavor.
Serving and Storing These Pumpkin Cheesecake Truffles
You can make these ahead and keep them cold. I usually store them in a single layer, covered in the fridge. They’ll hold for up to 5 days.
If you’re prepping for an event or holiday, they freeze well. Just freeze the balls on a tray first, then transfer to a freezer-safe container. This keeps them from sticking.
To serve, let them sit out at room temperature for 10–15 minutes so the coating softens slightly. They’re still chilled, but the filling becomes creamy again.
I’ve brought these out at casual dinners, Thanksgiving dessert tables, and even tucked a few into lunchboxes with a frozen ice pack.
What You’ll Get from This Recipe
These no bake pumpkin cheesecake bites work for people who want fall flavor without baking. They also check the boxes for:
- Fast prep with simple ingredients
- Freezer-friendly for batch making
- Easy portion control
- Seasonal without being fussy
You can dress them up or leave them plain. Either way, they deliver.
Whether you’re new to making pumpkin cheeseballs or just looking for a low-effort dessert that stores well, this is a recipe you’ll come back to.
Save This Recipe and Share Your Batch

Pin this now so you can find it when the pumpkins come back around.
If you try it, let me know in the comments how they turned out or if you made any swaps. I read every one.
And if you’ve made something similar before—maybe pumpkin cheesecake truffles or easy pumpkin cheesecake no bakerecipes I’d love to hear your take.
We all have our little tricks. Mine’s freezing the balls before dipping.
What’s yours?
No Bake Pumpkin Cheesecake Balls Recipe
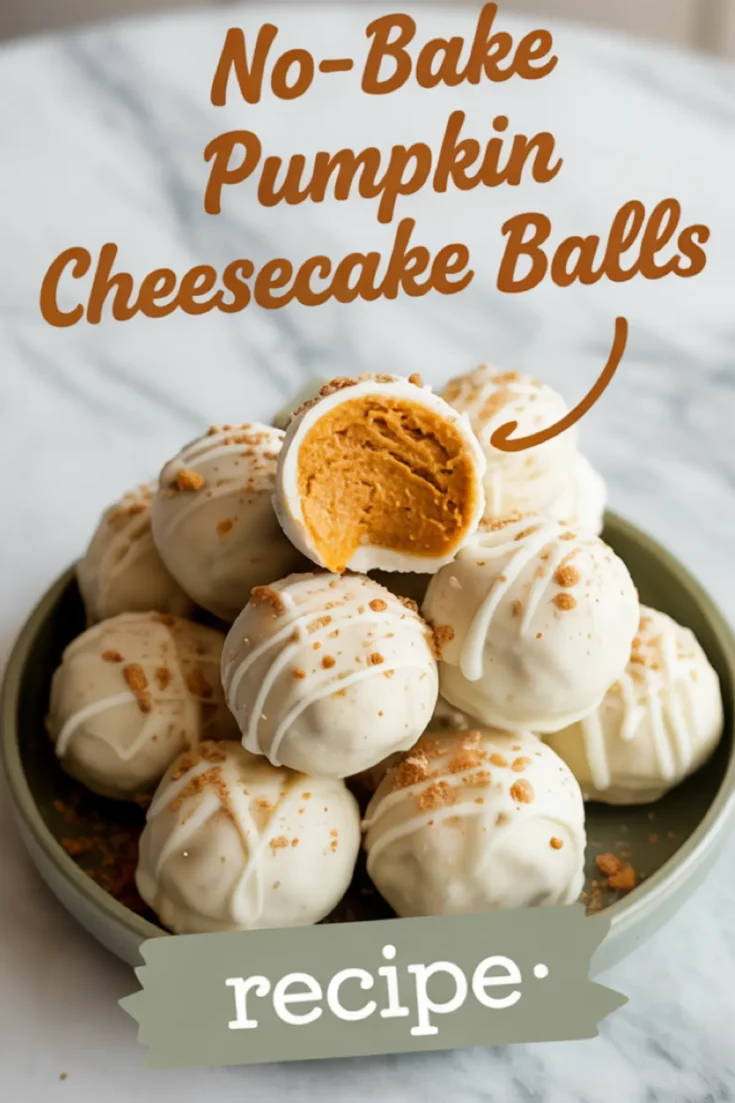
Cream cheese and pumpkin combine with warm spices and a graham cracker base to create an easy, no-bake fall treat coated in white chocolate. These bite-sized cheesecake balls are simple to prepare and perfect to keep on hand for quick seasonal desserts or casual gatherings.
Ingredients
- 8 oz cream cheese (softened to room temp)
- 1/2 cup pumpkin puree (not pumpkin pie filling)
- 1/2 cup powdered sugar
- 1 tsp vanilla extract
- 1/2 tsp pumpkin pie spice
- 1/4 tsp ground cinnamon
- 1 1/2 cups graham cracker crumbs
- 12 oz white chocolate or white candy melts
- Crushed graham crackers or cinnamon sugar, for garnish (optional)
Instructions
- MAKE THE FILLING: In a large bowl, beat the softened cream cheese until smooth. Add the pumpkin puree, powdered sugar, vanilla extract, pumpkin pie spice, and cinnamon. Mix until fully combined and creamy.
- ADD THE CRUMBS: Stir in the graham cracker crumbs until the mixture thickens and forms a soft dough that can hold its shape.
- CHILL THE MIXTURE: Cover the bowl and refrigerate for 1 to 2 hours to firm up the dough for easier rolling.
- ROLL INTO BALLS: Scoop about 1 tablespoon of the chilled mixture and roll it between your palms to form smooth balls. Place them on a parchment-lined baking sheet.
- FREEZE TO FIRM: Transfer the tray to the freezer for 30 to 45 minutes until the balls are very firm for dipping.
- DIP IN CHOCOLATE: Melt the white chocolate or candy melts in a microwave-safe bowl in 30-second intervals, stirring after each. Use a fork or dipping tool to coat each ball in the melted chocolate, then place it back on the tray.
- ADD GARNISH: While the coating is still wet, sprinkle each ball with crushed graham crackers, cinnamon sugar, or drizzle with extra melted chocolate if desired.
- LET SET: Allow the chocolate to fully set at room temperature or in the refrigerator before serving or storing.
Notes
Store in an airtight container in the refrigerator for up to 5 days. For longer storage, freeze in a single layer, then transfer to a freezer-safe bag or container. Let thaw slightly before serving.
Nutrition Information
Yield
24Serving Size
1Amount Per Serving Calories 177Total Fat 9gSaturated Fat 5gTrans Fat 0gUnsaturated Fat 3gCholesterol 13mgSodium 73mgCarbohydrates 24gFiber 1gSugar 19gProtein 2g