
These no-bake chocolate balls aren’t just cute—they’re reliable. I’ve made them through heatwaves, under tight prep windows, and even in a borrowed kitchen. They’re one of the few Fourth of July desserts that look festive without needing baking, frosting bags, or special molds.
You’ll get a no-fail treat with a fudgy center, quick decoration options, and the kind of nostalgic flavor kids and grown-ups both grab off the tray.
And today, I’ll walk you through what to expect, how to shape and decorate these smoothly, and which small decision makes the biggest difference in flavor.
If this is your first time shaping truffle-like desserts or you’re tired of recipes that melt under the sun, this one will rebuild your confidence.

Following a special diet?
Every recipe on this site can be converted to gluten-free, vegan, dairy-free, keto, nut-free or egg-free with adjusted ratios so nothing falls flat.
Try the Recipe Converter →The Dough Comes Together with Just Three Ingredients
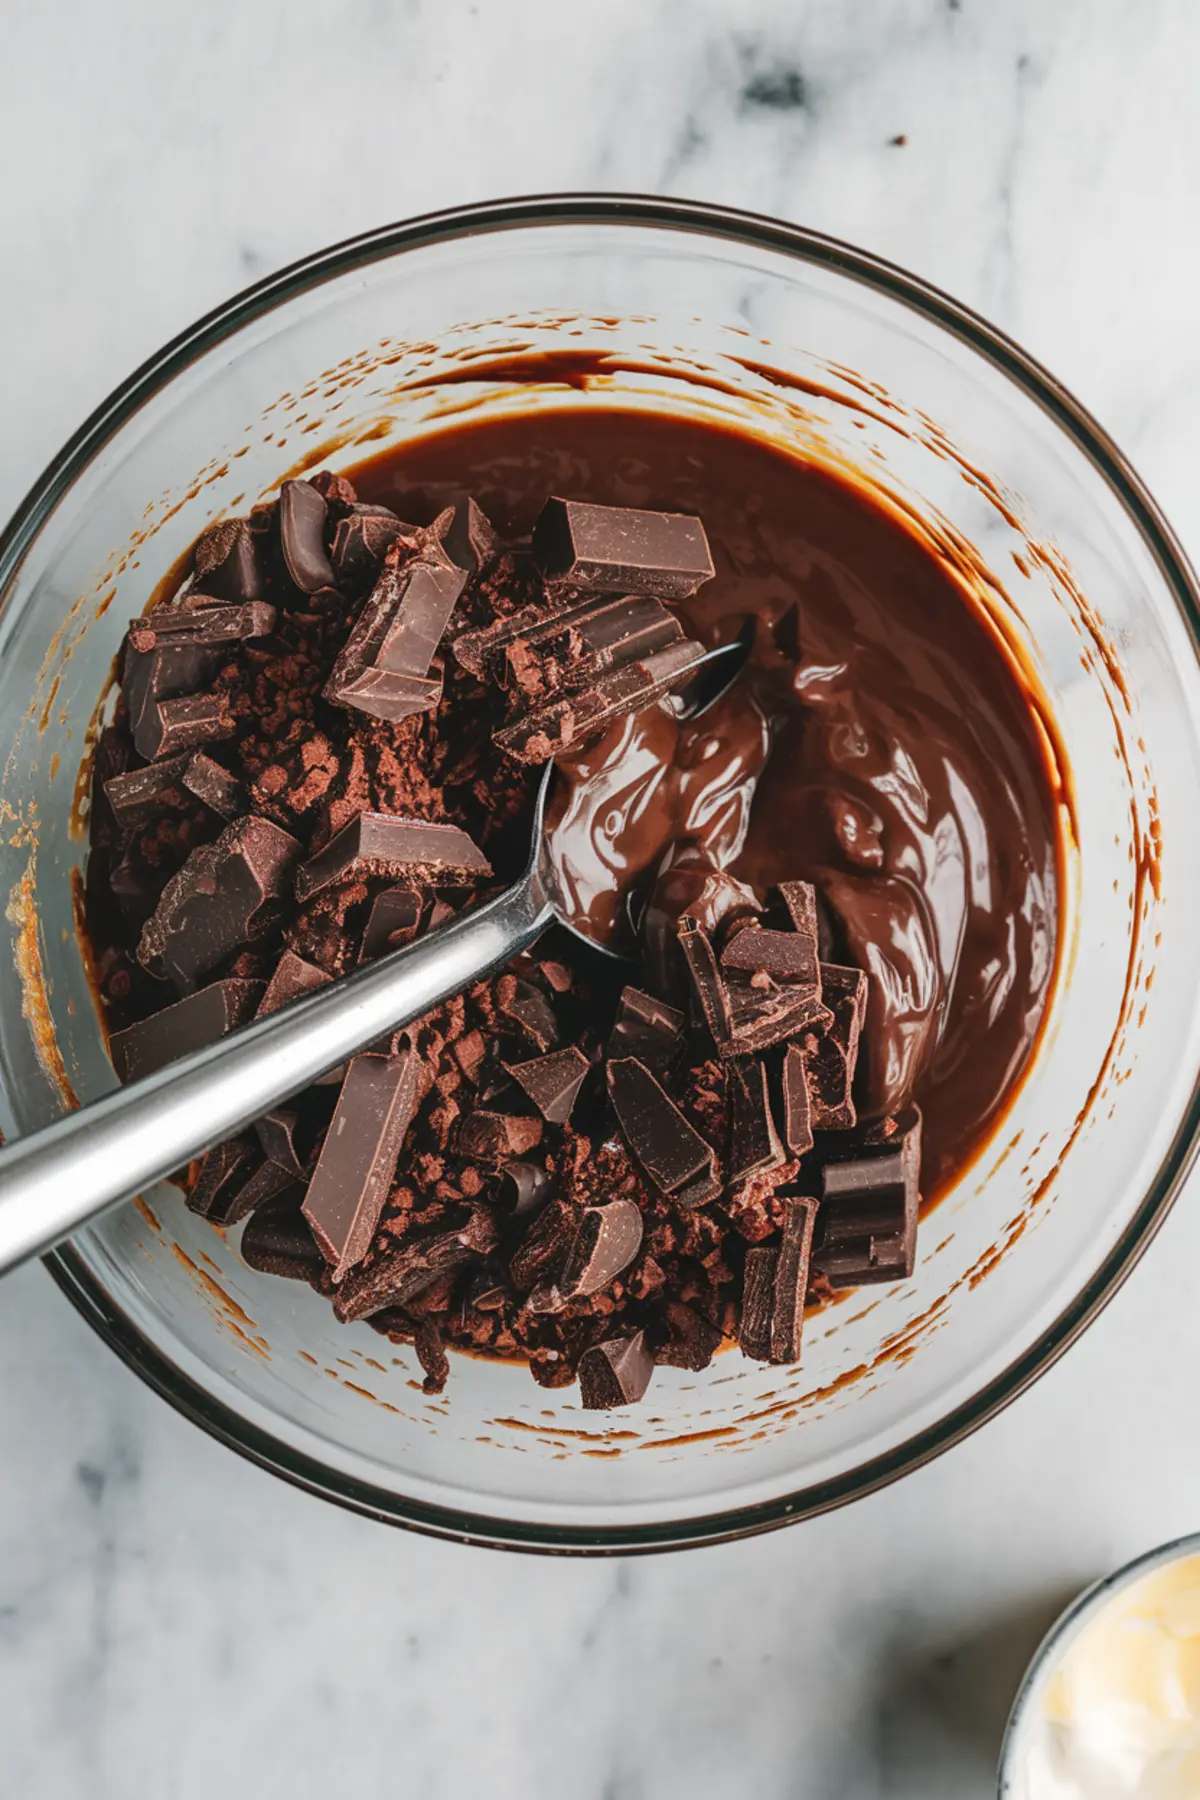
Start with crushed dark chocolate biscuits. I usually go with Oreo cookies without the filling, but I’ve also used plain cocoa graham crackers with good results.
To that, I add melted chocolate—either semi-sweet or dark, depending on what I’ve got open—and a spoon or two of sweetened condensed milk. The result feels like playdough but tastes like brownie batter.
If the dough feels too sticky, more crumbs help. Too dry? Add a few more drops of condensed milk. You don’t need a mixer, just a bowl and a sturdy spoon. Sometimes I use gloved hands, especially if I’m making these with kids.
Filling Options: To Stuff or Not to Stuff?
Here’s where I’ve gone both ways.
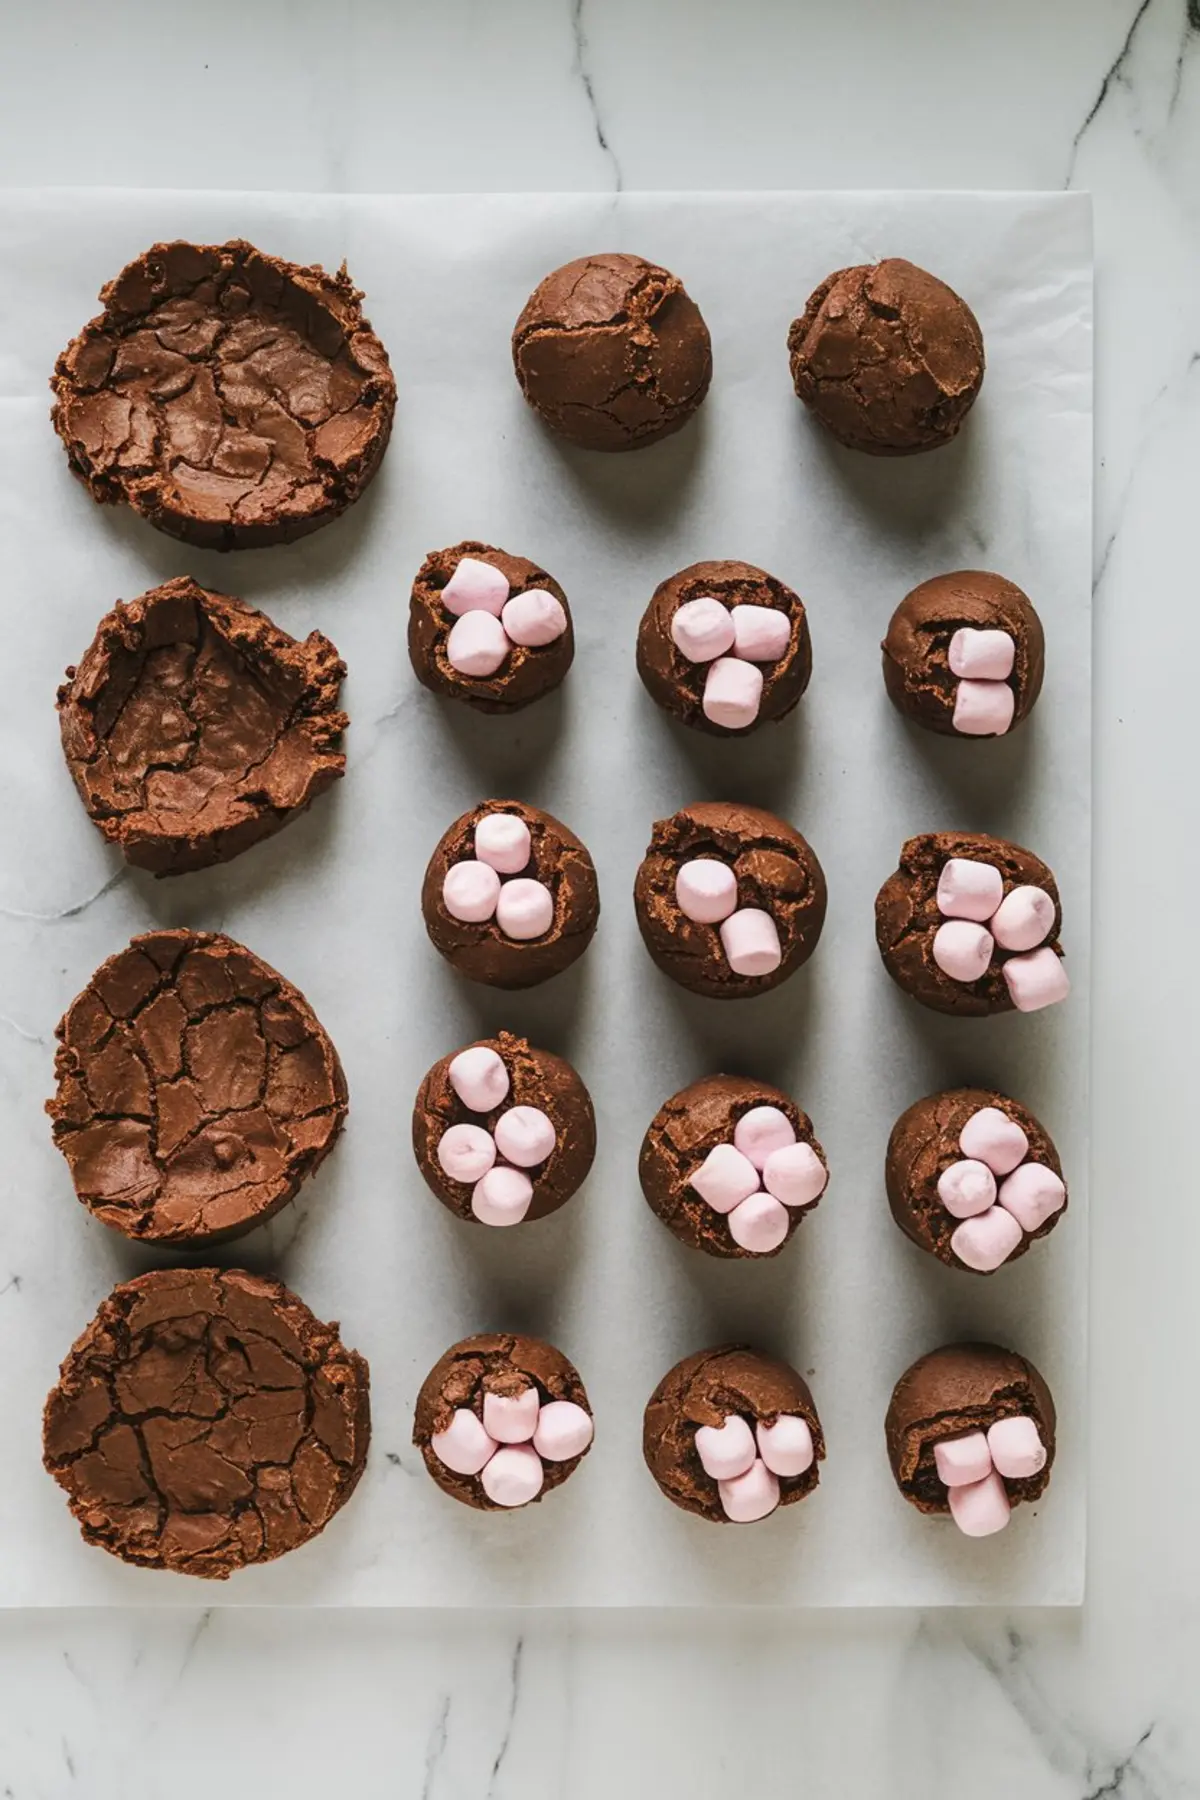
You can leave the bites plain. They hold shape, taste rich, and stay solid even at warm-weather gatherings. But when I have mini marshmallows on hand, I’ll flatten a dough piece, tuck one inside, and gently roll it closed.
The filled ones melt slightly in the center after sitting out for a while—almost like a soft truffle. It’s subtle, but that pillowy texture always gets comments.
If you’re prepping ahead, the plain ones chill faster and hold better during transport. That’s usually what I do if we’re driving out to fireworks or a BBQ.
Decorating These Chocolate Balls Without a Mess
Once shaped, they need about 30 minutes in the fridge. I put mine on parchment paper and slide them onto a tray.
Now comes the part that makes them look like they took three times the effort.
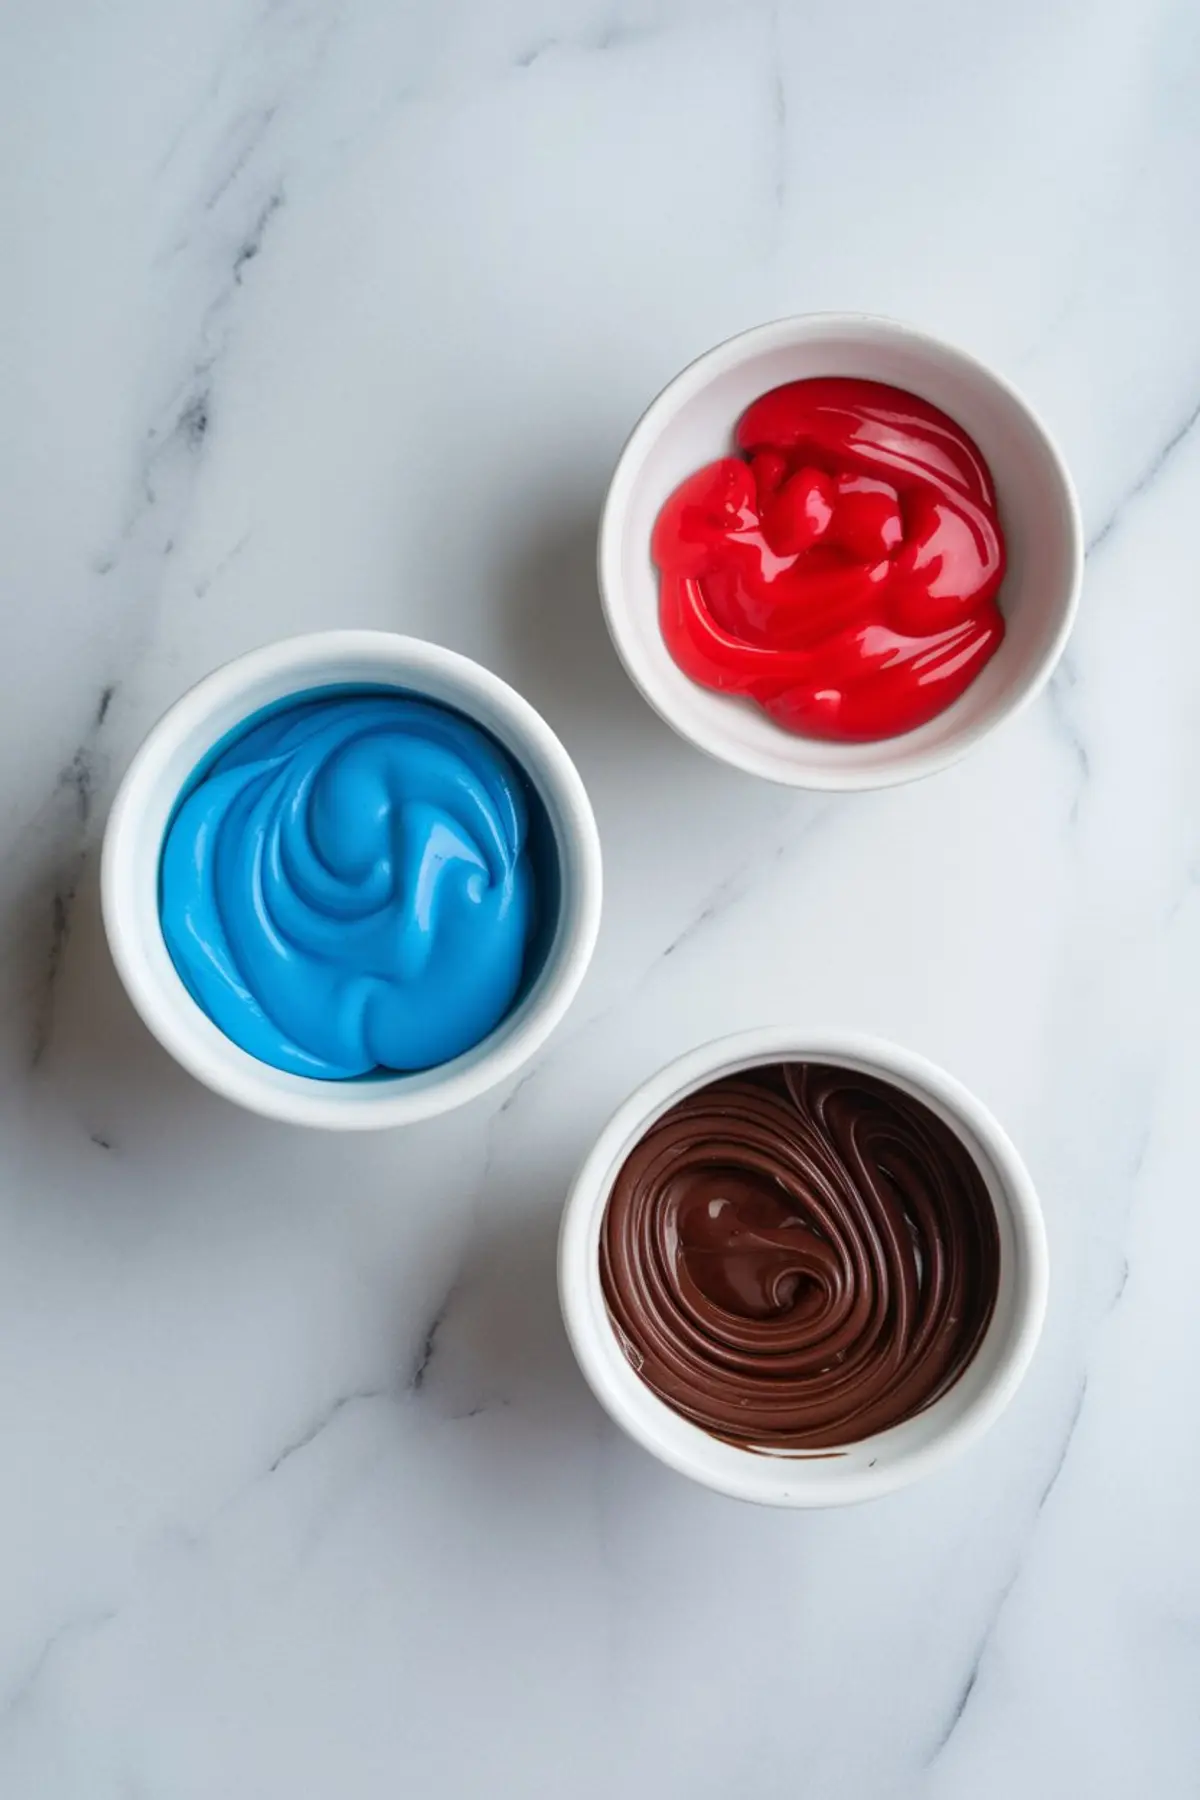
I melt white candy melts or white chocolate in one bowl. Red and blue candy melts go in two small bowls. Chocolate chips go in another.
I drizzle with a small spoon, not a piping bag. If you want sharper lines, a fork works better than you think. While the drizzle is still wet, sprinkle red sugar crystals or edible glitter.
The decorations set fast—5 minutes in the fridge is enough. Then they’re stackable, packable, and stay neat for hours.
One Ingredient Swap That Changes Flavor Completely
I’ve made these using both dark chocolate biscuits and milk chocolate graham crackers.
If you want that Oreo-like, deeper bite, dark biscuits are the way to go. They bring more contrast when you add sweet decorations.
But if you’re serving younger kids or someone who prefers milder sweets, the graham version makes the inside taste more like a cookie dough ball.
I’ve written both options into my notebook, but for summer parties with red, white, and blue themes, I stick with dark. The color holds better under the white drizzle, and the flavor balances against all that sugar.
Serving and Storage Advice from Someone Who’s Brought These to 5+ BBQs
You can serve these straight from the fridge, but I like to let them sit out for 10 minutes before arranging them on the tray. That way, they don’t sweat or feel too cold to bite.
They hold up at room temperature for a couple hours, which makes them perfect for picnics or outdoor parties. Just avoid direct sun or metal trays—opt for ceramic or plastic serving dishes instead.
Stored in a sealed container, they last five days in the fridge. They don’t get soggy, and the drizzle holds firm.
I don’t recommend freezing them with decorations. If you need to prep way ahead, freeze the rolled dough bites plain, then thaw and decorate the night before.
More Festive No-Bake Ideas to Add Variety to Your Dessert Table
If you’re planning a full red, white, and blue dessert spread, these Fourth of July Cheesecake Pops offer a creamy, dipped option with the same colors.
Want something lighter but still themed? Try these Patriotic Tartlets with fruit and a crisp shell.
And for a handheld classic that kids always recognize, these Fourth of July Chocolate-Dipped Pretzels take less than 10 minutes to make.
Final Notes from My Kitchen to Yours
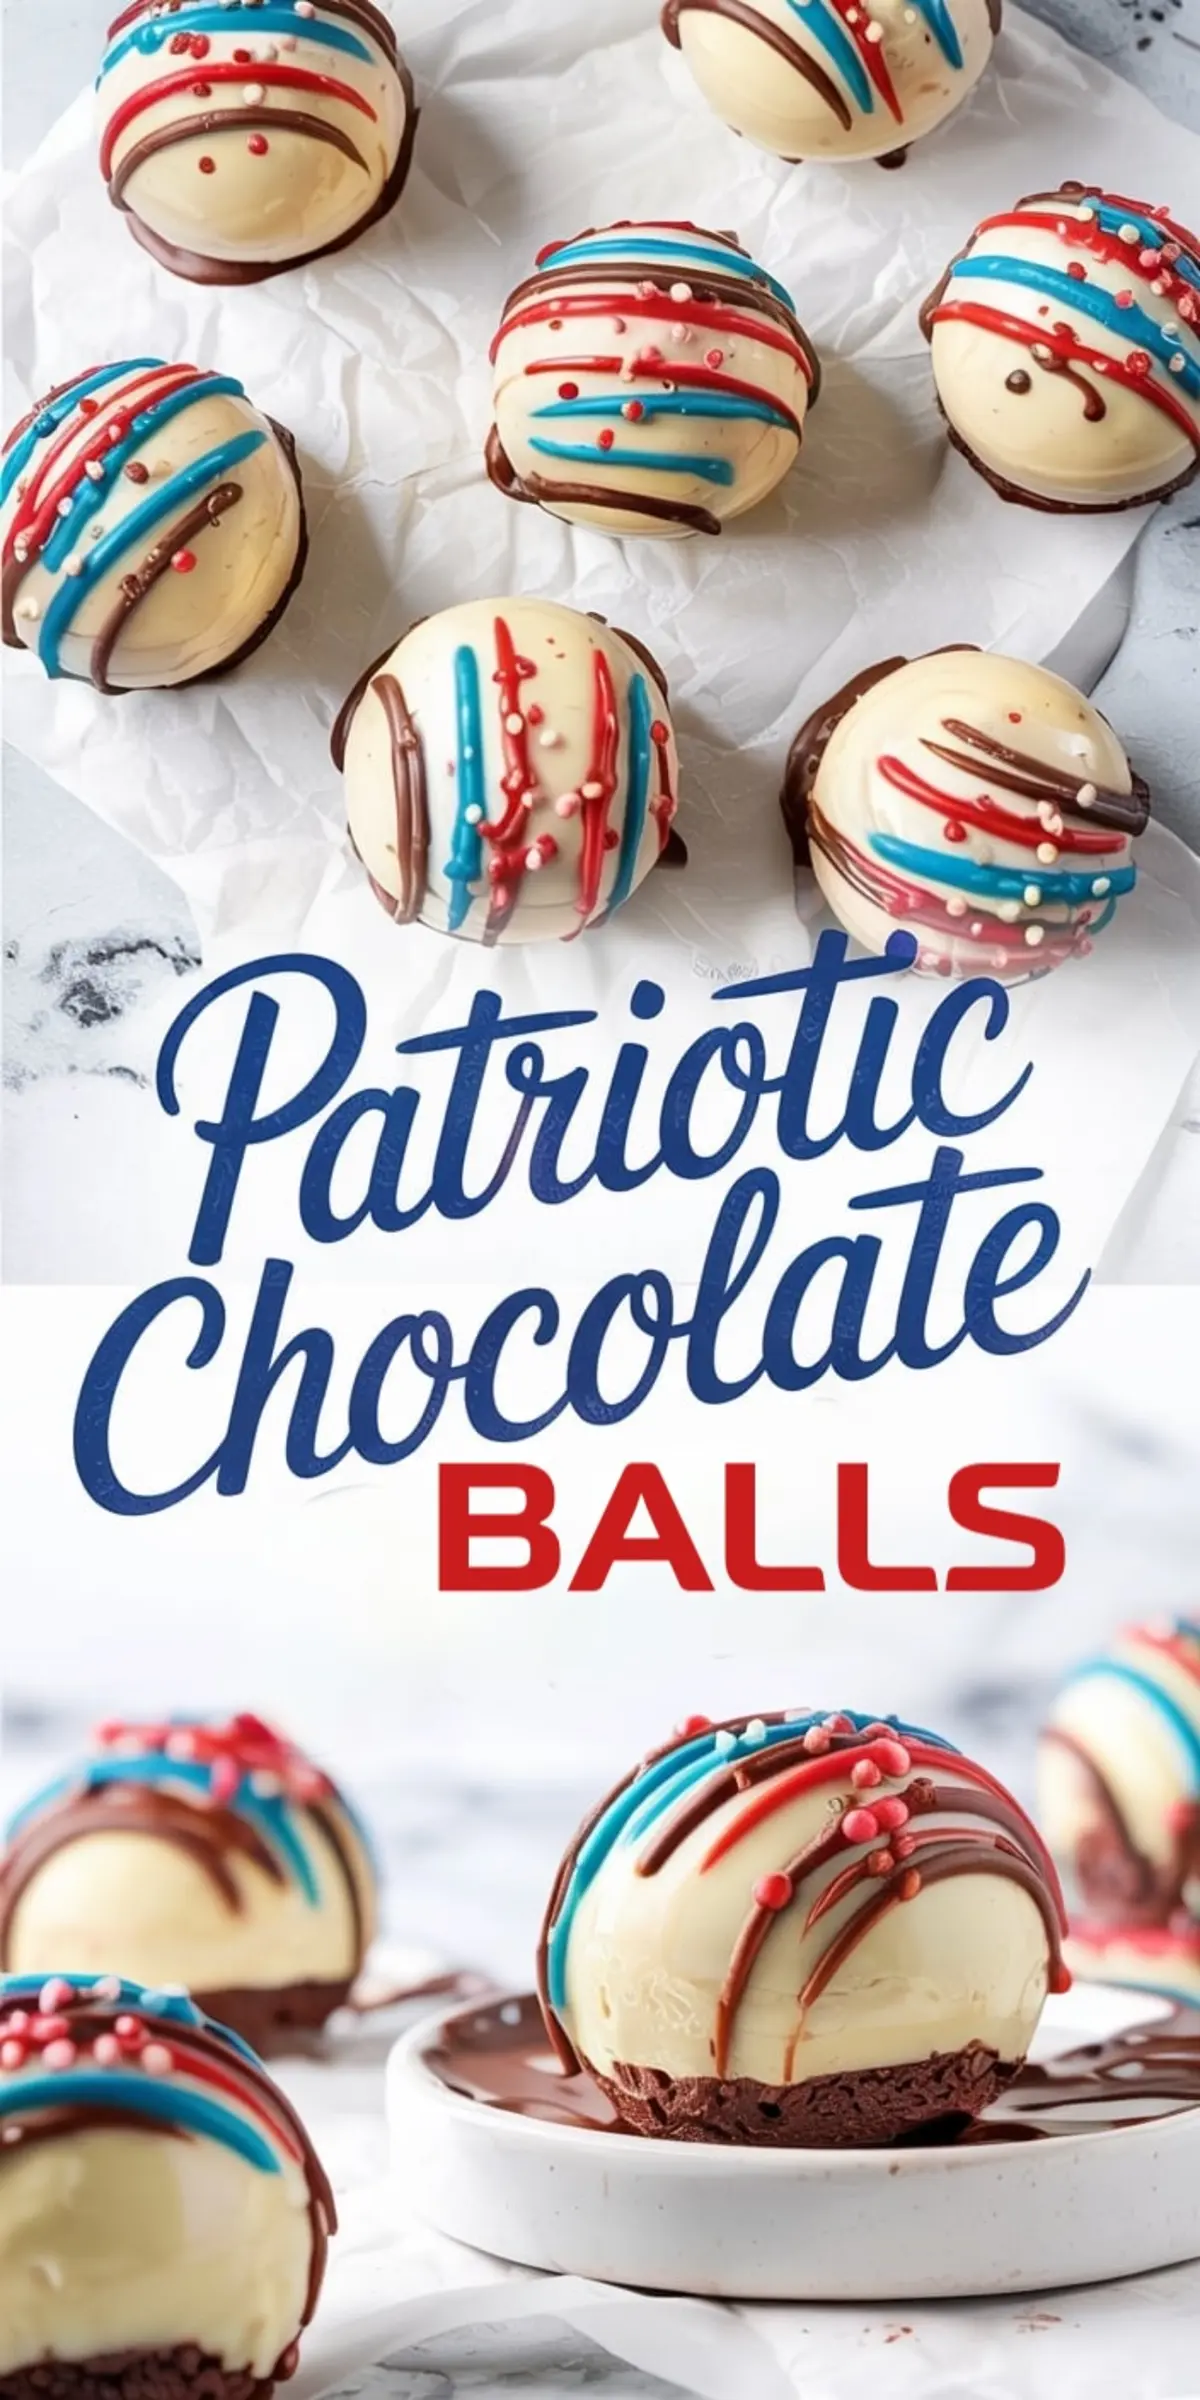
These patriotic chocolate balls are reliable. They don’t melt, they don’t crumble, and they give you enough creative wiggle room to make them your own. I’ve brought them to fireworks nights, school events, and neighbor potlucks. Someone always asks, “How did you get the drizzle to look like that?”
The answer is: it’s easier than it looks. And now you know how.
Save this recipe to your Pinterest board for July 4th dessert ideas, and share it with someone who could use an easy win in the kitchen.
And if you try it out, I’d love to hear in the comments how yours turned out. Did you fill them? Did you swap the drizzle colors? I check the comments daily and always enjoy the creative versions.
Patriotic Chocolate No-Bake Balls Recipe

These no-bake chocolate bites combine crushed chocolate biscuits, melted chocolate, and sweetened condensed milk to create a fudgy, truffle-like treat. Each bite can be shaped by hand and optionally filled with a mini marshmallow. After chilling, the bites are decorated with colorful drizzles and festive sprinkles, making them a fun and simple dessert for patriotic celebrations.
Ingredients
- FOR THE CHOCOLATE BISCUIT BASE
- 1 ½ cups dark chocolate biscuits, finely crushed (like Oreos without filling or cocoa graham crackers)
- 3 tablespoons melted dark or semi-sweet chocolate
- 2 tablespoons sweetened condensed milk
- OPTIONAL FILLING
- 8–10 mini marshmallows
- FOR DECORATION
- ¼ cup white chocolate or white candy melts
- 2 tablespoons red candy melts
- 2 tablespoons blue candy melts
- 1 tablespoon semi-sweet or milk chocolate chips
- Red sprinkles or edible glitter (optional)
Instructions
- MAKE THE CHOCOLATE DOUGH: In a medium bowl, mix the finely crushed chocolate biscuits, melted chocolate, and sweetened condensed milk until a soft, fudgy dough forms. Adjust texture if needed by adding a bit more condensed milk if too dry or more crumbs if too sticky. Chill the dough for 10 minutes to firm up.
- SHAPE THE BITES: Scoop about 1½ tablespoons of dough. For plain bites, roll into smooth balls or dome shapes. For filled bites, flatten the dough in your palm, place a mini marshmallow in the center, wrap the dough around it, and roll gently to seal. Place each bite on a parchment-lined tray.
- CHILL TO SET: Refrigerate the shaped bites for 20–30 minutes, or until firm enough for decorating.
- DECORATE: Melt the white chocolate in one bowl. In separate bowls, melt the red candy melts, blue candy melts, and chocolate chips. Use a spoon, fork, or piping bag to drizzle each bite with colorful stripes. While the drizzle is still wet, add red sprinkles or edible glitter. Chill for 5 minutes to set the decorations.
Notes
Use gloves or slightly damp hands when shaping to avoid sticking. Adjust decoration colors as desired for other holidays or events.
Nutrition Information
Yield
10Serving Size
1Amount Per Serving Calories 155Total Fat 7.5g