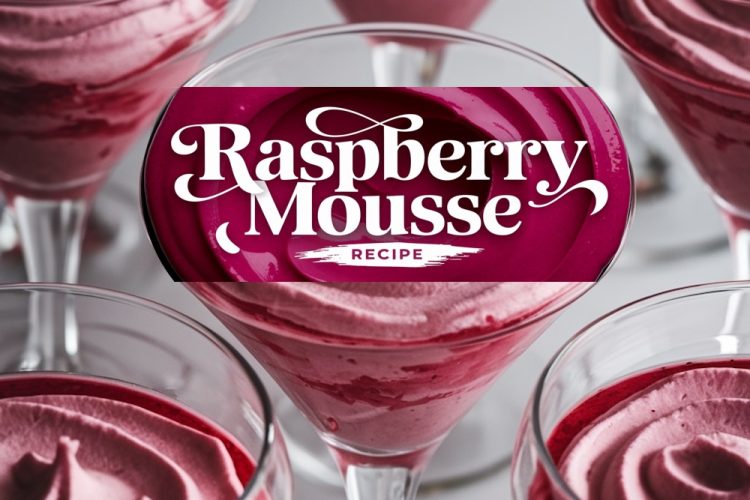
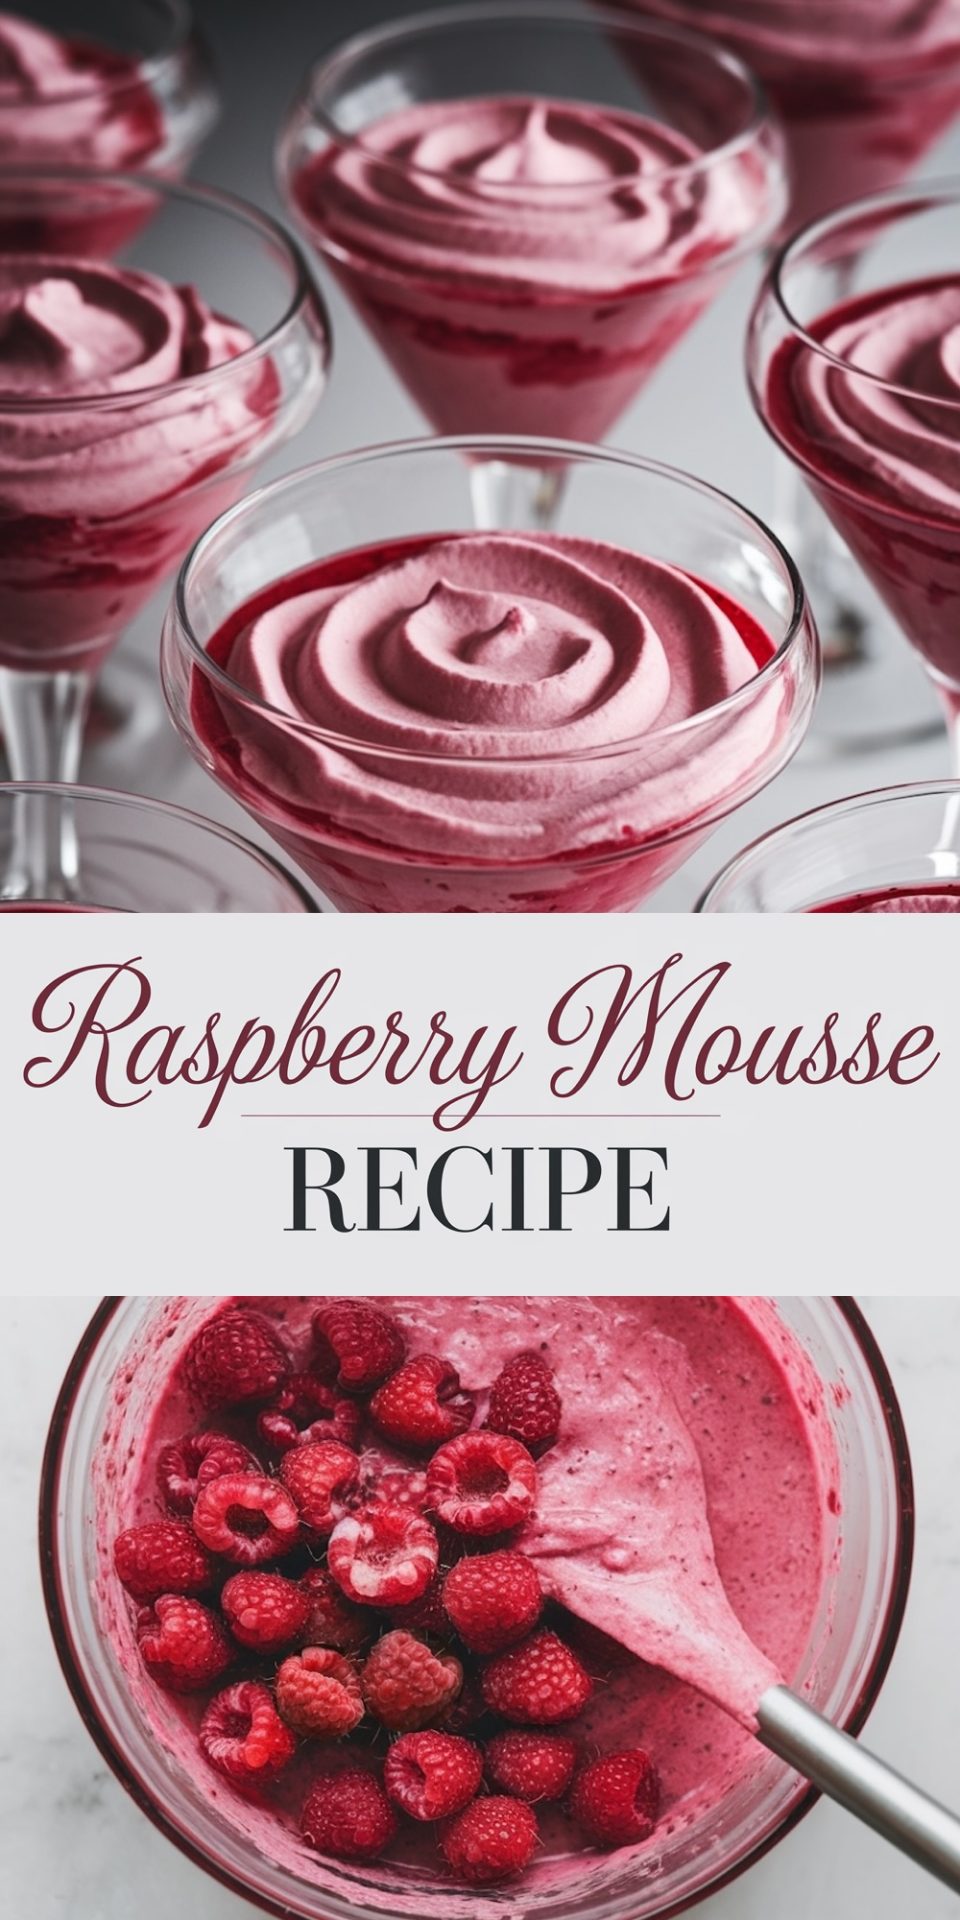
Raspberry mousse is one of those desserts that feels like a touch of magic—light, airy, and bursting with fresh berry flavor. There’s something so indulgent yet refreshing about a well-made mousse. Perfect for a light dessert after a meal or as a romantic dessert for two, this raspberry mousse recipe combines the lushness of whipped cream with the tangy sweetness of fresh raspberries.
With only a few simple steps, this treat comes together beautifully and delivers elegance without requiring elaborate techniques. In this post, I’ll guide you through creating a perfect raspberry mousse, discuss the ingredients and why they work so well, and give you some tips to make the process smooth and enjoyable.
Following a special diet?
Every recipe on this site can be converted to gluten-free, vegan, dairy-free, keto, nut-free or egg-free with adjusted ratios so nothing falls flat.
Try the Recipe Converter →Why I Love This Raspberry Mousse
My love for mousse goes back to my first culinary school dessert workshop, where I remember standing by a workstation, fascinated by how simple ingredients transformed into something ethereal. I tried it with different flavors—chocolate, strawberry, lemon—but raspberry mousse quickly became my favorite. It’s that balance of sweetness and tartness that brings the flavor to life, and the slight hint of vanilla just makes it all the more decadent. Whenever I serve this at home, there’s a sense of anticipation because everyone knows it’ll be as light as a cloud and as refreshing as a summer breeze. This mousse has become a go-to dessert in my household, especially for special occasions when I want to impress without spending hours in the kitchen.
The Essentials You’ll Need
The ingredients for raspberry mousse are simple, and you may already have most of them in your kitchen. Here’s a look at what makes each component essential:
- Fresh Raspberries: The star of the show, raspberries provide that beautiful pink color and tangy flavor. Fresh is best, but frozen can work in a pinch (just let them thaw first).
- Granulated Sugar: Balances the tartness of the raspberries, creating a balanced sweetness that lets the berry flavor shine through.
- Lemon Juice (optional): A touch of lemon juice can enhance the brightness of the raspberries, bringing a bit of tang to the overall profile.
- Heavy Whipping Cream: This is the base of your mousse, creating that light and fluffy texture that’s a signature of mousse desserts.
- Powdered Sugar: Adds a touch of sweetness to the whipped cream without the grittiness of granulated sugar.
- Vanilla Extract: A small amount of vanilla adds depth and warmth to the cream, enhancing the raspberry flavor.
- Unflavored Gelatin Powder (optional): This can give your mousse a slightly firmer, more structured consistency if you prefer a sturdier texture.
- Cold Water (for gelatin): Used to bloom the gelatin, ensuring it dissolves smoothly.
Creating the Raspberry Mousse
Making raspberry mousse has to do with a few simple processes: creation of a raspberry puree, whipping of cream to perfect peaks, and gentle folding to create that signature airy texture. Here’s how each step works and what you should keep in mind.
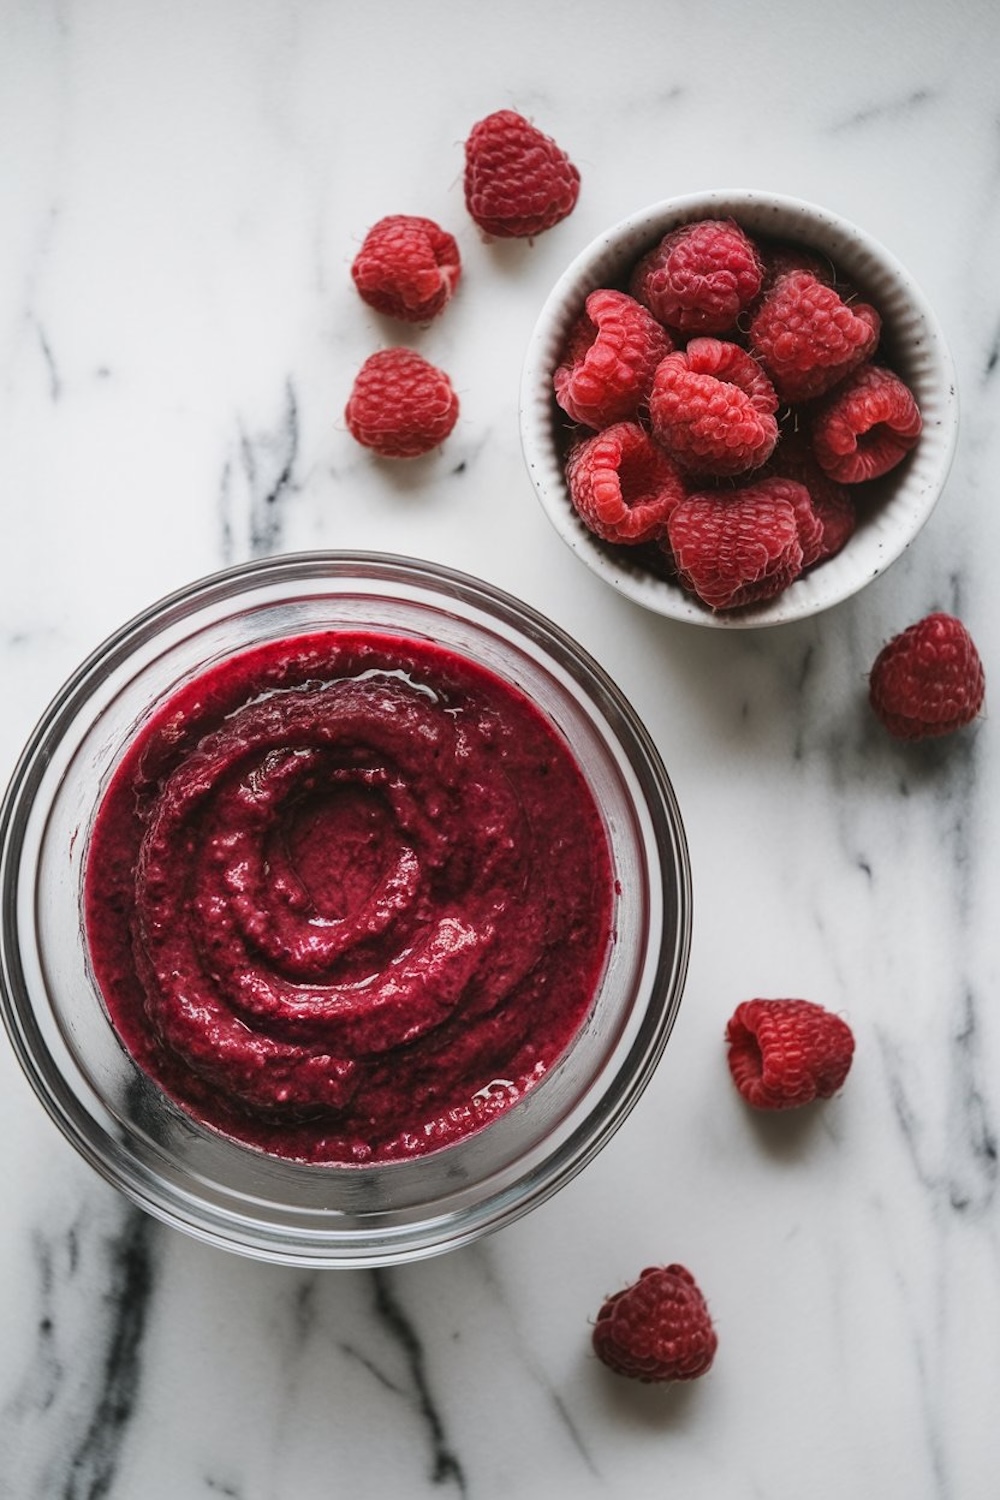
Step 1: Prepare the Raspberry Puree
Just lightly heat the raspberries with the added sugar until the berries collapse and release all the juices, getting soft; after a few minutes, you will get this bright-colored sweet syrup with soft fruits ready to be pureed and strained. Straining it discards the seeds and gives you a really smooth, velvety puree. Obviously, if you want to brighten things up, throw in a splash of lemon juice for that little tart kick in your mousse.
Step 2: Blooming the Gelatin (Optional)
If you want a mousse that really holds its shape, the addition of gelatin will work by adding it in. To prepare this, sprinkle the gelatin over cold water and let it sit for about five minutes.
Once it’s bloomed, just a burst of heat will melt the gelatin, and once the puree has cooled down to room temperature, it will mix right in with the raspberry puree. This way, you get a smooth texture with no lumps at all.
Step 3: Whipping the Cream

The secret of a light-as-air mousse is perfectly whipped cream.
First of all, make sure your cream is super cold before you whip-only helps in whipping quicker and holding better, too. Beat at medium until you go onto high, but just be really aware when it starts to thicken. You want to stop when you get the stiff peaks, that’s what they call it, because it means the cream stands up perpendicularly on the whisk without falling in. Just don’t over-whip it, because that makes it grainy, so keep an eye out for that!
Step 4: Folding in the Raspberry Puree
Now, in order to mix the whipped cream with the raspberry puree, you fold it in. You add the puree in three portions, being rather careful not to fold too strongly, deflating all the air. That way, the mousse still is airy and light combined with the raspberry flavor. And if you added gelatin, well, then the mousse sets a little by the time it cools down, and looks rather nice and structured.
Step 5: Chilling the Mousse
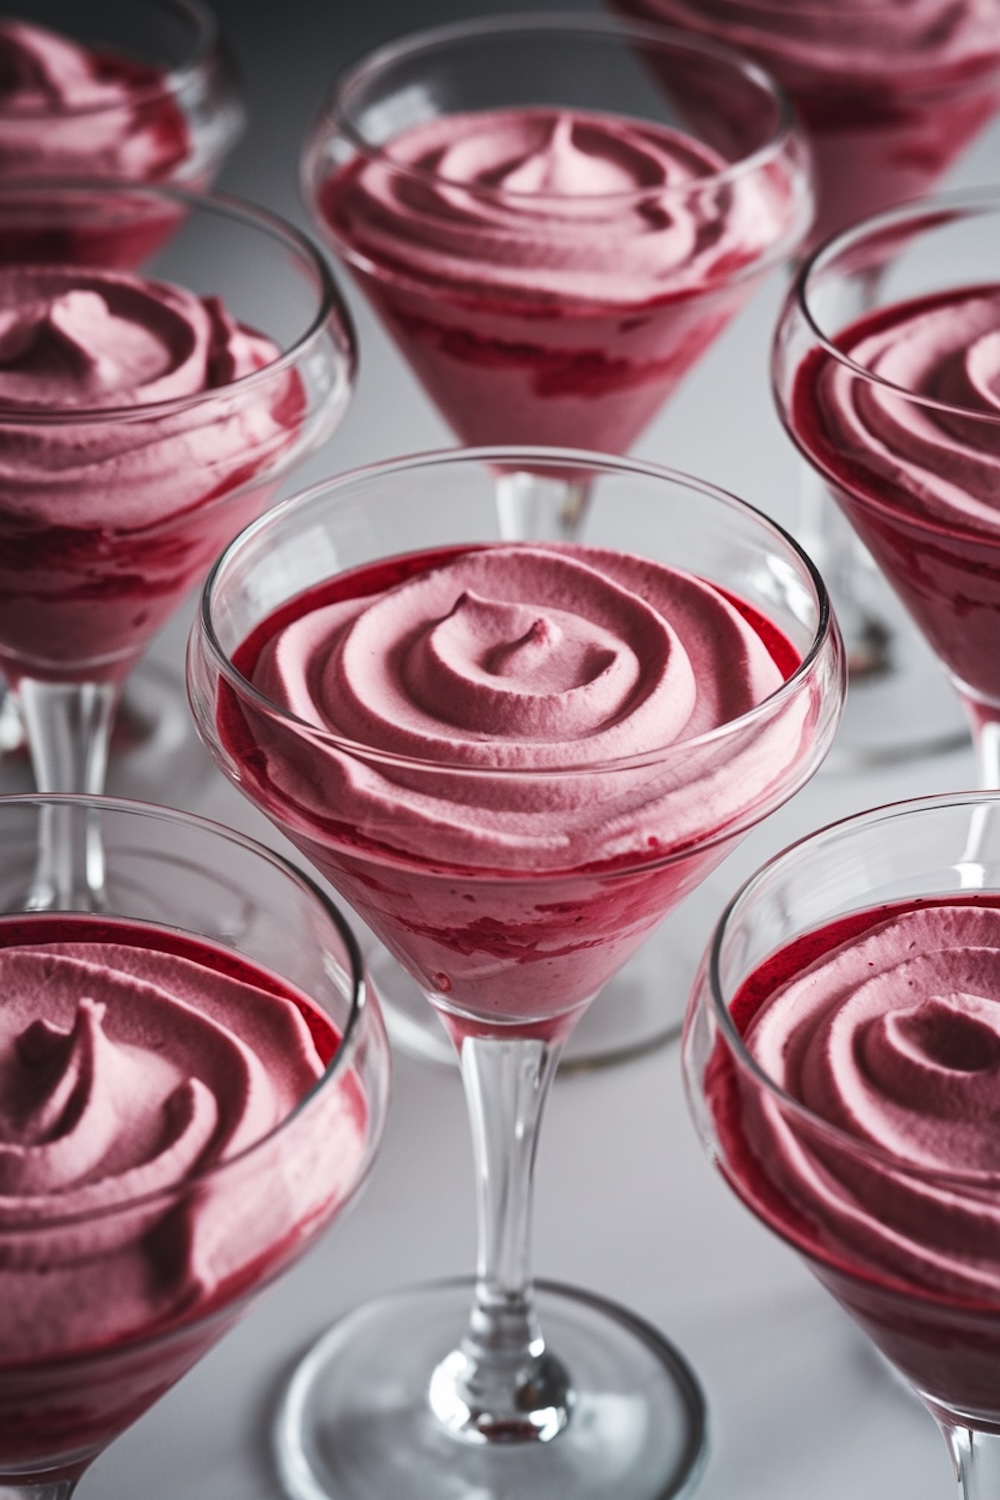
Spoon or pipe the mousse into individual serving glasses or dessert bowls once all ingredients have been combined. Chilling for at least two hours will help firm up a bit and all those flavors to come together nicely. At time of service, throw on some fresh raspberries for the perfect finish.
Expert Tips for the Perfect Mousse
- Temperature Matters: Make sure the raspberry puree is completely cool before folding it into the whipped cream. Warm puree will deflate the cream, resulting in a mousse that’s denser than desired.
- Gentle Folding: Fold gently but confidently. Avoid stirring or beating, as this can knock out the air you whipped into the cream.
- Serving Glasses: Clear glasses or stemmed dessert bowls highlight the mousse’s gorgeous pink color and add an elegant touch to your presentation.
- Alternative Flavors: This recipe is easily adaptable. Try swapping raspberries for strawberries or blackberries for a different berry twist.
Serving Suggestions for Your Raspberry Mousse
- Top with Whipped Cream: A small dollop of whipped cream on top of the mousse adds an extra layer of indulgence.
- Garnish with Fresh Mint Leaves: A sprig of mint brightens the presentation and adds a lovely aromatic contrast.
- Layer with Chocolate: For a decadent touch, try alternating layers of raspberry mousse with chocolate mousse in the same glass. The flavors complement each other beautifully and look stunning in a layered presentation.
- Sprinkle with Crumbled Shortbread: Add a sprinkle of crushed shortbread cookies on top for a bit of crunch and a buttery contrast to the light mousse.
Your Turn to Try It!
Raspberry mousse is one of those nice desserts; it’s not only super pretty, but it’s also super divine. It has this airy, light feel-just tangy and sweet enough. What this means, in simple terms, is that it’s perfect for any occasion, from romantic dinners to entertaining parties. For real, if you try it out, it just might find its place among your go-to desserts. If you do, don’t forget to take a pic and share it-your friends and family are gonna want that recipe!

Raspberry Mousse Recipe
Course: Cake Ideas4
servings20
minutes2
hours250
kcalIngredients
2 cups fresh raspberries (plus a few extra for garnish)1/4 cup granulated sugar
1 tbsp lemon juice (optional, to enhance tartness)
1 cup heavy whipping cream (chilled)
2 tbsp powdered sugar
1/2 tsp vanilla extract
1 tsp unflavored gelatin powder (optional, for a firmer texture)
2 tbsp cold water (if using gelatin)
Steps
Step 1: Prepare the Raspberry Puree- Place the fresh raspberries and granulated sugar in a small saucepan over medium heat.
- Stir occasionally, allowing the raspberries to break down and release their juices, about 5-7 minutes.
- Use a fine mesh strainer to press the raspberry mixture through, removing the seeds and leaving a smooth puree. Add the lemon juice if desired for a hint of tartness.
- Set the puree aside to cool completely.
- Step 2: Prepare the Gelatin (Optional)
- If you’d like a firmer mousse, measure exactly 1 teaspoon of unflavored gelatin powder. Dissolve it in 2 tablespoons of cold water in a small bowl and let it sit for 5 minutes to bloom.
- Once bloomed, microwave the gelatin for 5-10 seconds until it melts, then let it cool slightly.
- Stir the melted gelatin into the raspberry puree once it has cooled to room temperature.
- Step 3: Whip the Cream
- In a large mixing bowl, add the chilled heavy whipping cream, powdered sugar, and vanilla extract.
- Using an electric mixer, whip the cream until it forms stiff peaks. Be careful not to over-whip, or it will turn grainy.
- Step 4: Fold in the Raspberry Puree
- Gently fold the raspberry puree into the whipped cream, one-third at a time, until it’s fully combined. The mixture should be light pink and airy.
- If using gelatin, the mixture will start to set as it chills, giving the mousse a more structured texture.
- Step 5: Chill the Mousse
- Spoon or pipe the mousse into serving glasses or dessert bowls.
- Refrigerate for at least 2 hours to allow it to firm up and for the flavors to meld.
This raspberry mousse recipe looks so good. Would I be able to add a small amount of cornstarch to the raspberries instead of using gelatin? Thank you for your consideration.
Cornstarch thickens mixtures when heated, but it won’t give the same stability and airy texture as gelatin in a mousse. If you’re looking for a vegetarian alternative, agar-agar works well, but it sets more firmly, so you’d need to adjust the amount. Another option is to fold in whipped aquafaba (chickpea water) or whipped cream to help maintain the mousse’s light texture.
This sounds really good. Can you use raspberry jello instead of gelatin?
Hi Tonya,
Raspberry Jello can be used, but it will change the texture and sweetness of the mousse. Since Jello already contains sugar and flavoring, you may want to reduce the granulated sugar in the recipe to avoid it becoming too sweet. Also, Jello has a firmer set compared to plain gelatin, so the mousse will be less airy and more like a raspberry-flavored pudding. If you’re okay with that, dissolve the Jello in a small amount of hot water before adding it to the raspberry puree.
Can this recipe be made a day in advance?
Yes, you can definitely make this raspberry mousse a day in advance! In fact, chilling it overnight helps the flavors develop even more. Just be sure to cover it well to prevent it from absorbing any fridge odors. If you used gelatin, it will hold its shape nicely, but if not, you might want to give it a quick stir before serving to refresh the texture. Hope that helps! 😊
Yummy
Can you freeze it?
Yes, you can freeze it — just keep in mind the texture might change a bit once thawed. I’ve had good results freezing it in individual portions and letting them soften slowly in the fridge before serving. Still smooth and tasty, just slightly less airy.