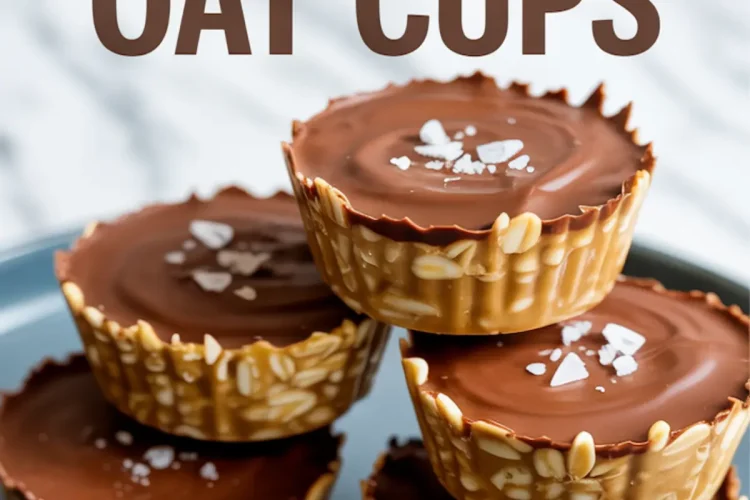
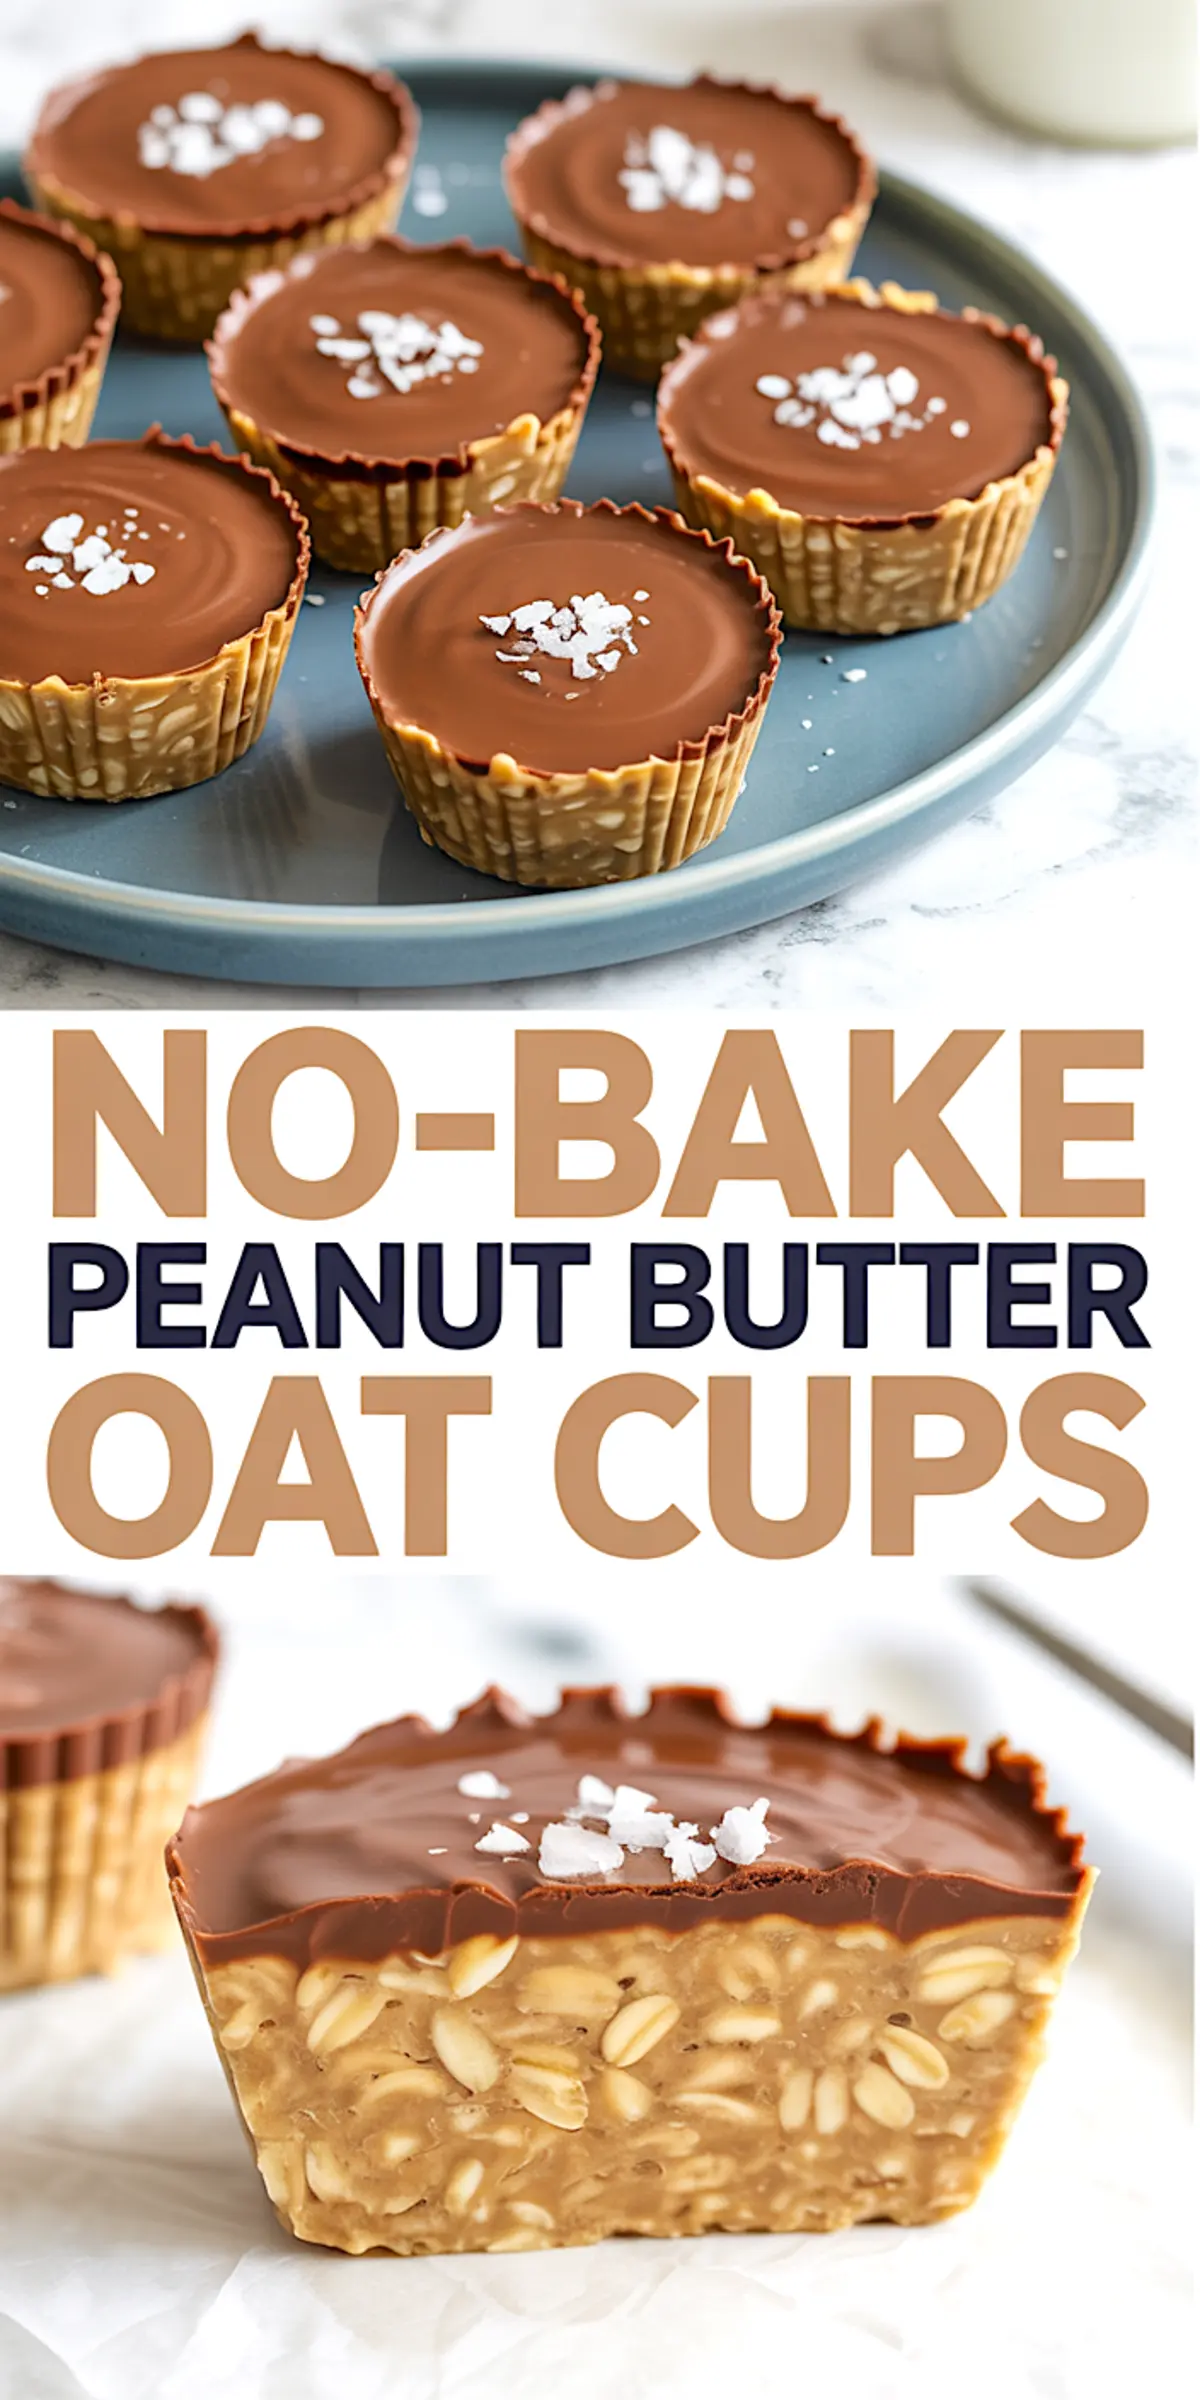
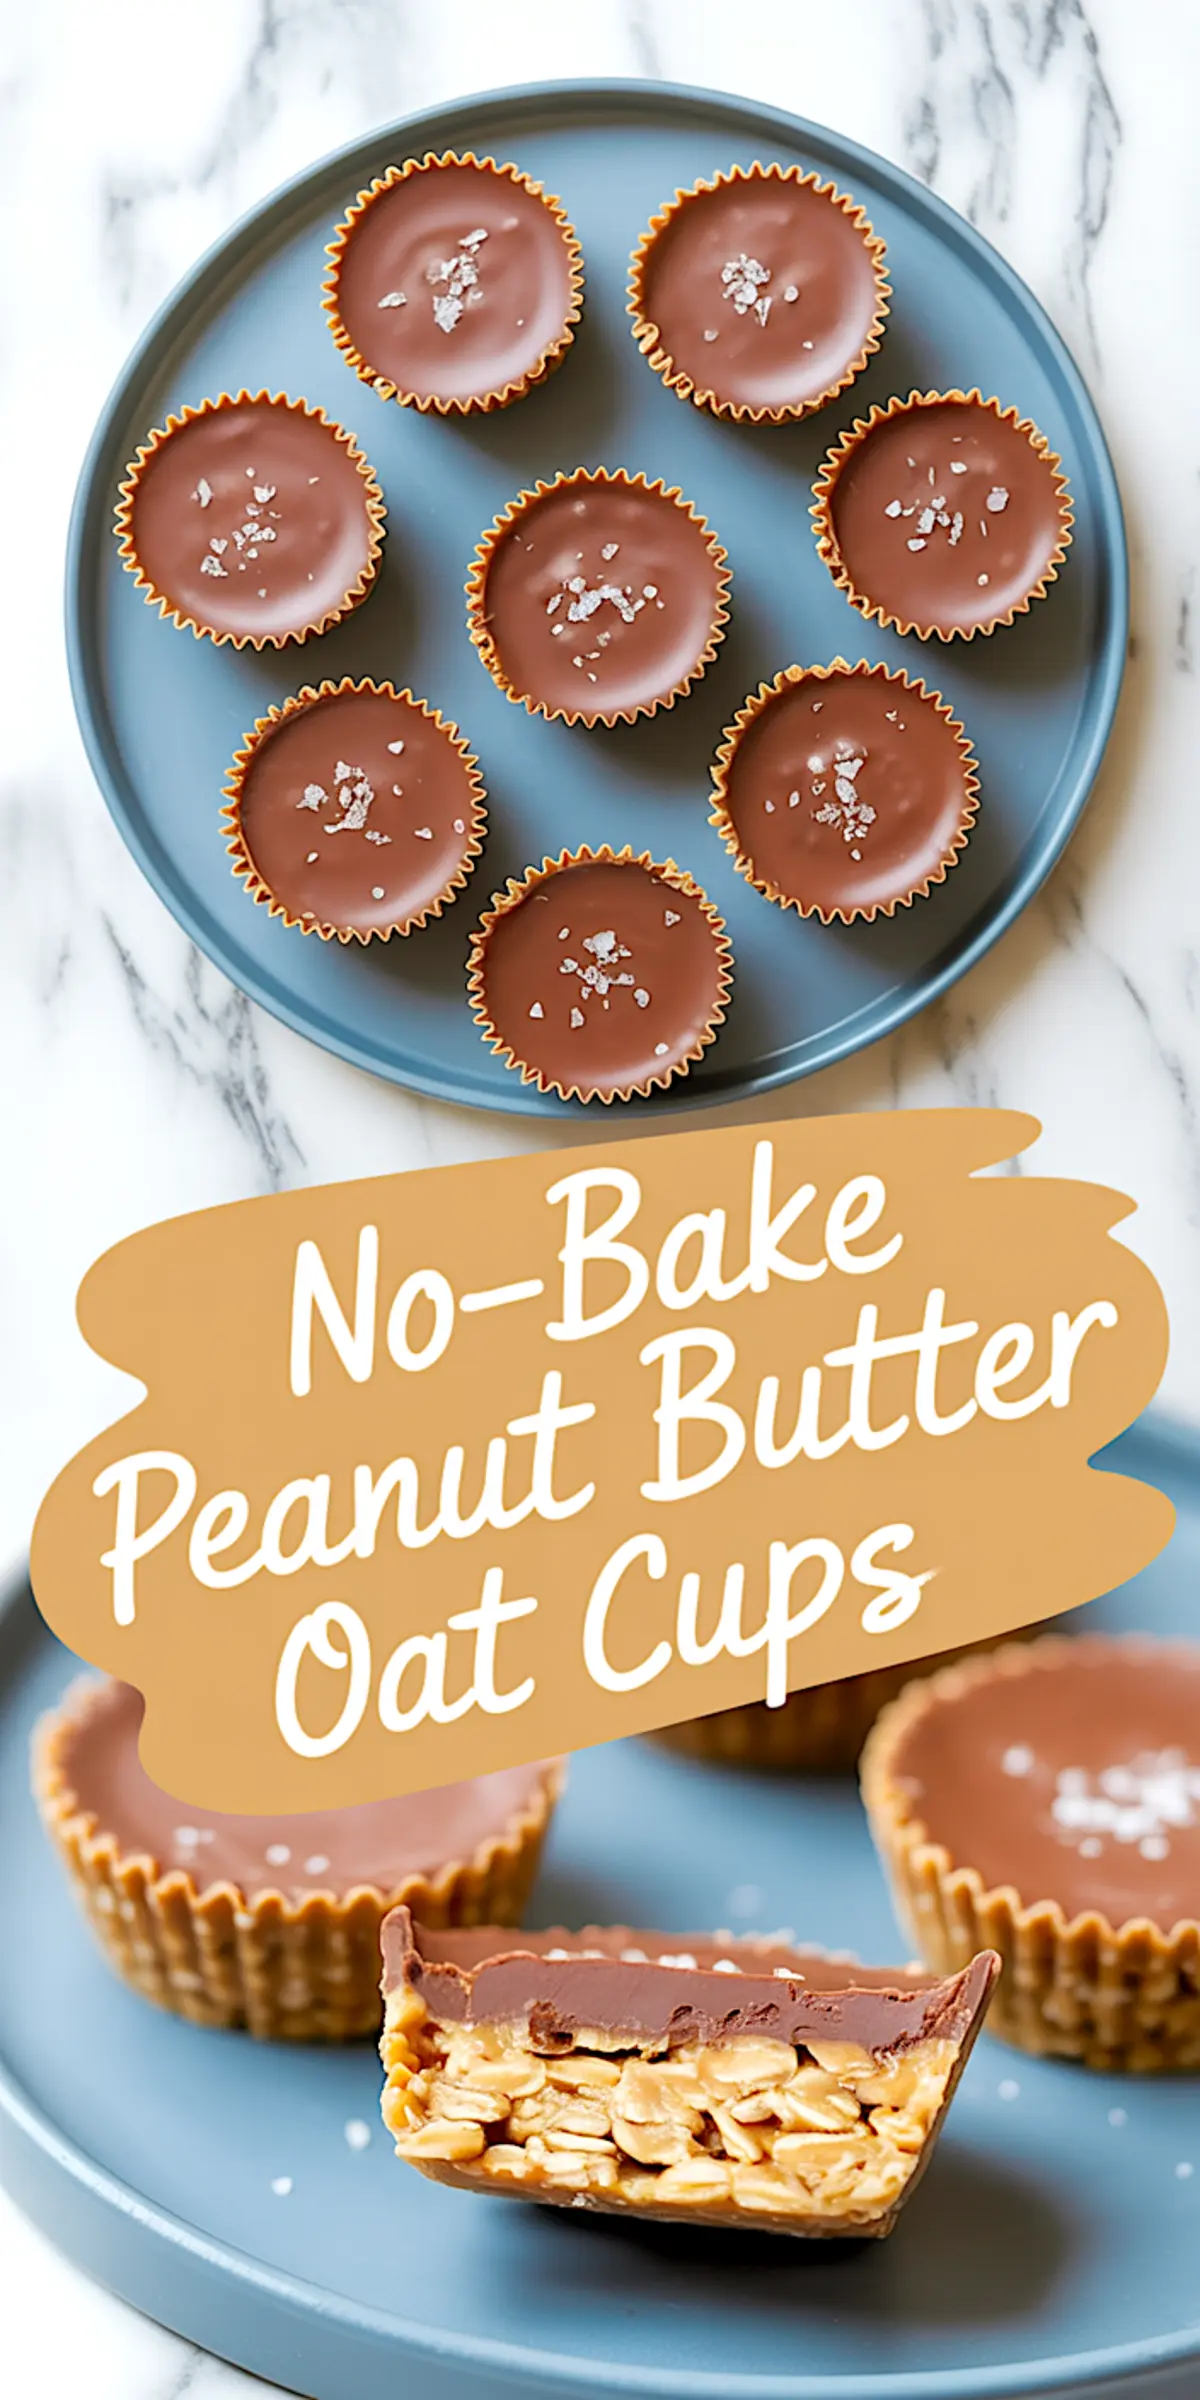
There are days when you crave something that hits all the marks: creamy, chewy, salty, and sweet. That’s what these no-bake peanut butter oat cups deliver. You won’t need an oven, and you won’t need a plan. Just a mixing bowl, a muffin tin, and a little space in your freezer. This is one of those DIY peanut butter cups that lives in my recipe binder under “emergency dessert.” Because sometimes, quick means everything.
You’ll learn how to make peanut butter oat cups with a thick chocolate top that snaps when you bite in. They taste like Reese peanut butter cups with a homemade edge. The kind of treat that makes you feel like you actually made something. And you did.
Following a special diet?
Every recipe on this site can be converted to gluten-free, vegan, dairy-free, keto, nut-free or egg-free with adjusted ratios so nothing falls flat.
Try the Recipe Converter →Why I Keep This Recipe on Repeat
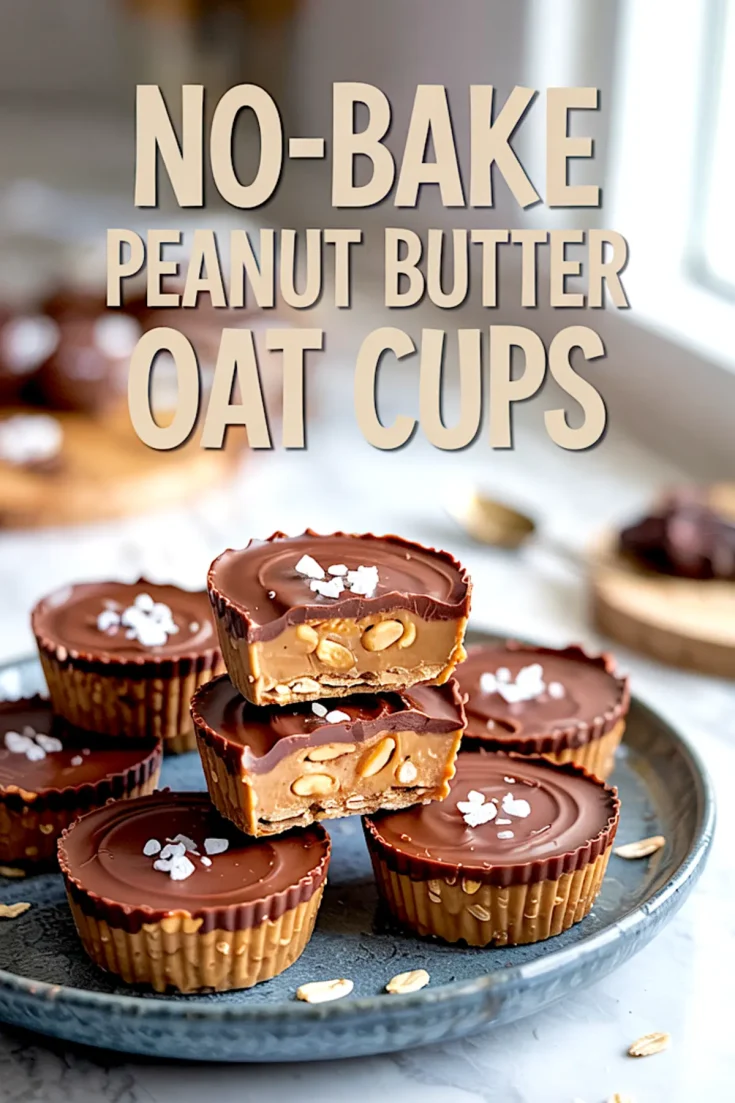
There’s something about the texture that keeps me coming back. The oats add body and chew. The peanut butter brings softness. The chocolate seals the deal. These are no bake PB oat cups that hold their shape, store beautifully, and disappear faster than I like to admit.
I make them when I’m short on time but want something that tastes like I tried. They travel well. They freeze well. And they work just as well for a post-workout snack as they do for an afternoon sugar dip.
Ingredients That Keep It Simple and Satisfying
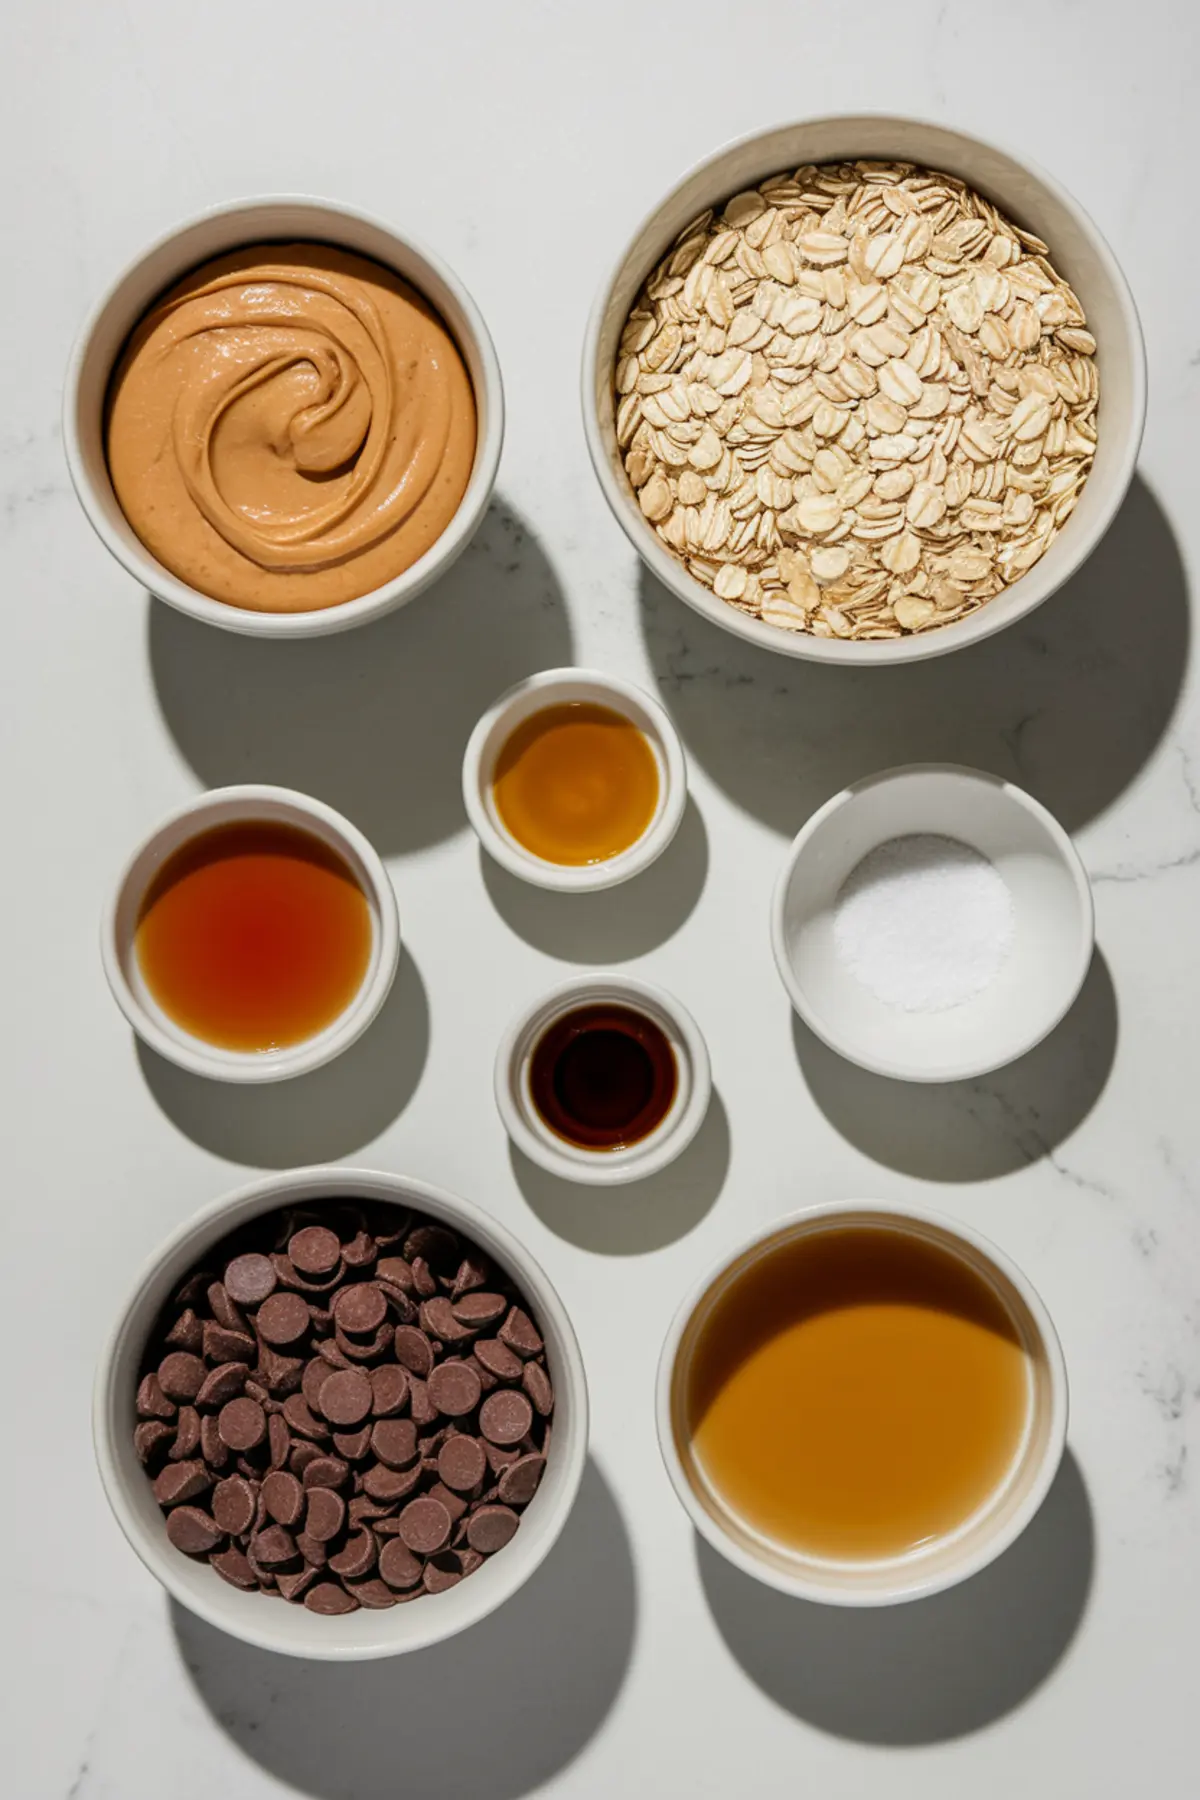
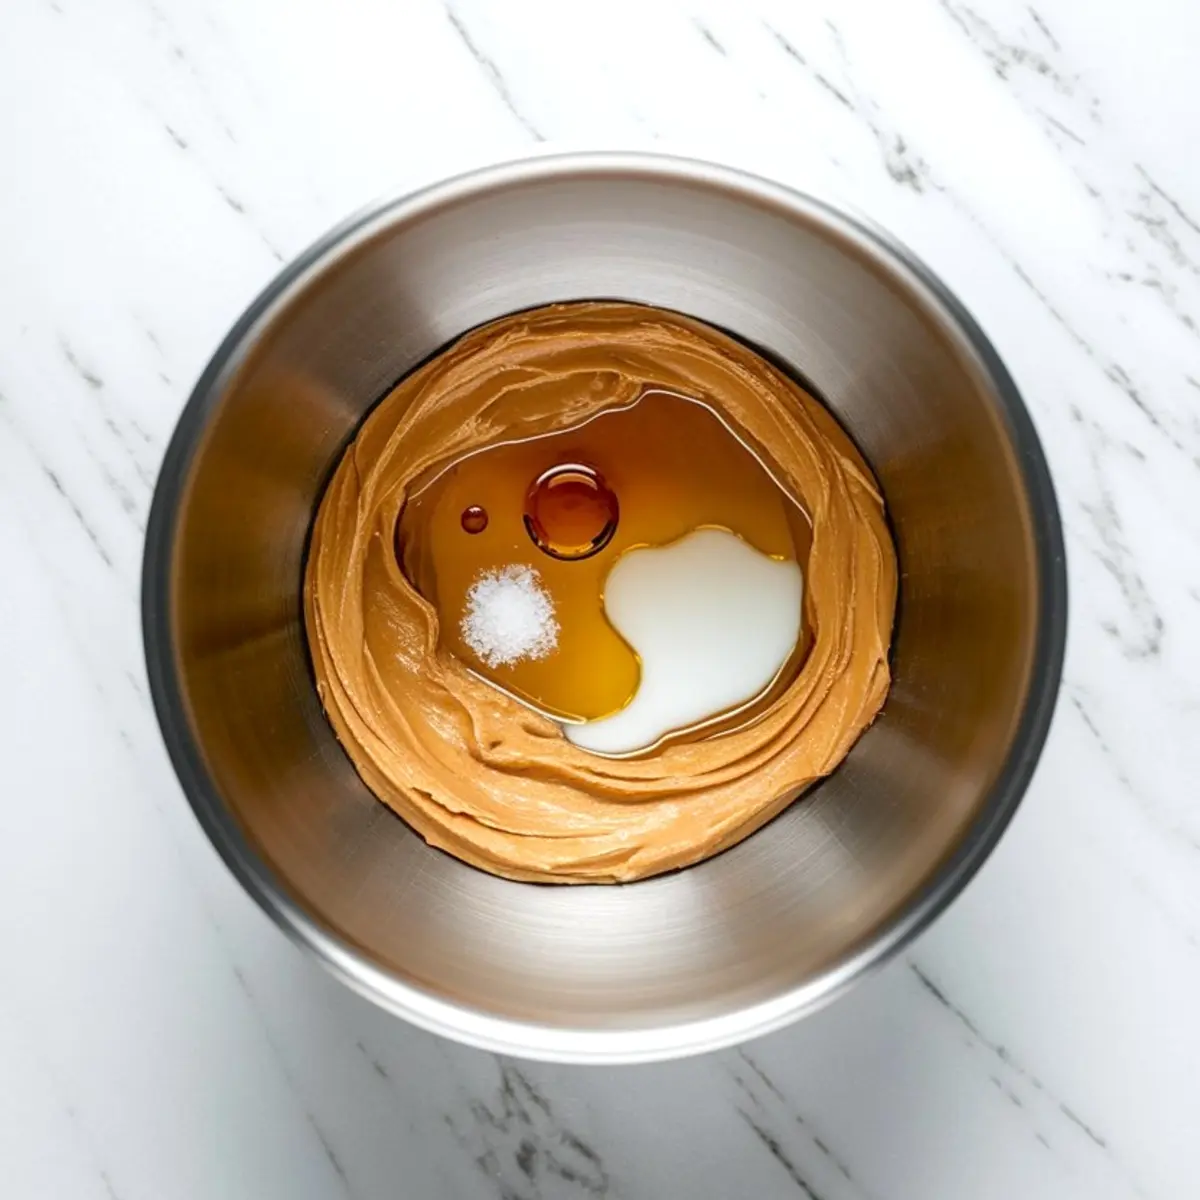
I use creamy peanut butter for this recipe. Natural peanut butter works fine, but I’ve found the regular kind holds together better if you’re serving these at room temperature. The base comes together with maple syrup, melted coconut oil, vanilla, and a pinch of salt. Rolled oats give it a sturdy texture without needing flour or binding agents.
If you want to swap honey for the maple syrup, it works — but expect a firmer, slightly stickier cup. In my notes, I’ve found honey gives a chewier texture that holds up better in lunchboxes. Maple syrup stays softer and adds a more neutral sweetness.
How the Chocolate Layer Transforms the Cup
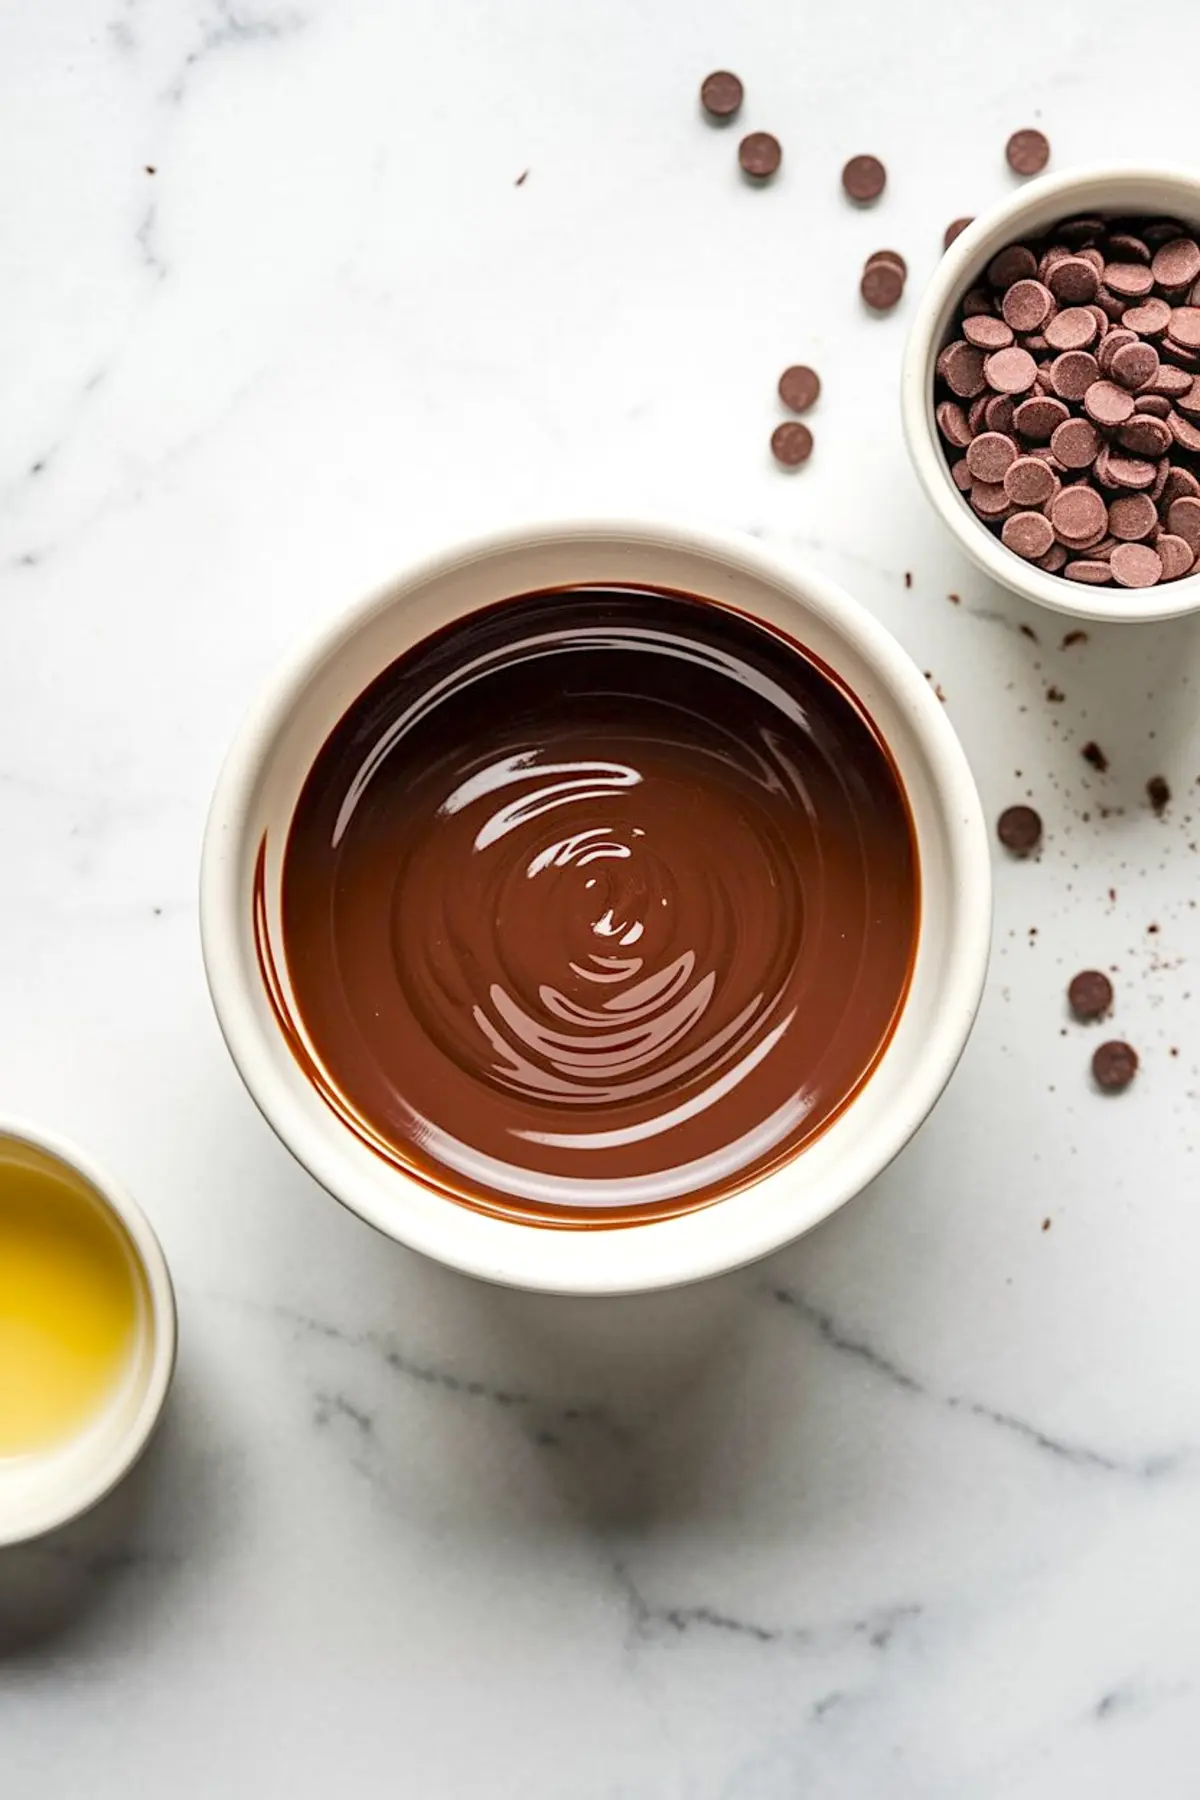
The topping is just chocolate chips and a bit of coconut oil. It spreads like a ganache, then firms into a thin shell that cracks just enough when chilled. You can use dark chocolate chips if you want a less sweet bite. I sometimes make a batch half with semi-sweet and half with 70% dark to please everyone.
A sprinkle of flaky sea salt before the chocolate sets gives these a grown-up edge. It’s optional, but it sharpens the sweetness and highlights the peanut flavor. If you’ve ever loved a chocolate peanut butter cupcake, this will feel like its chilled, snackable cousin.
Forming and Chilling: What Matters Most
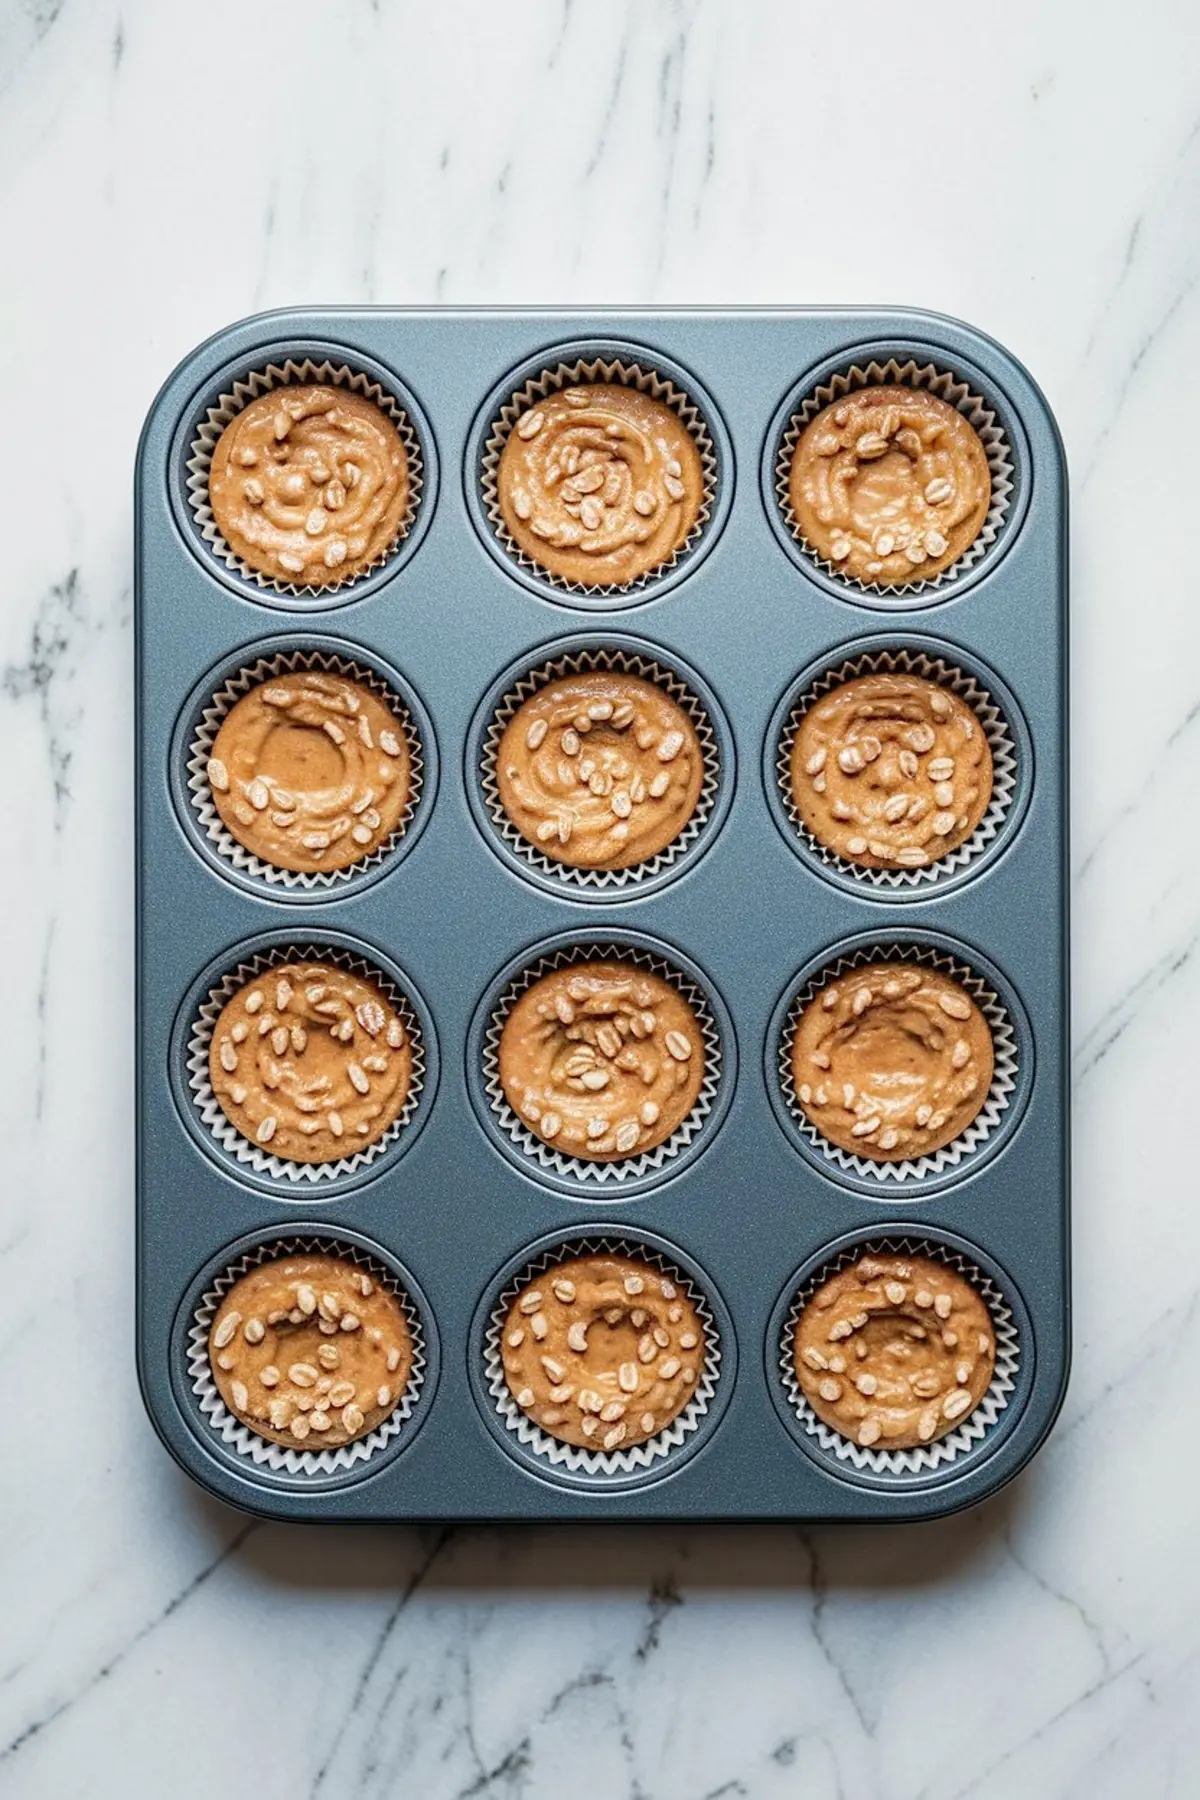
Use a standard muffin tin with paper or silicone liners. The liners make all the difference for lifting the cups out cleanly, especially after chilling. Press the oat mixture down firmly with the back of a spoon. If the base isn’t packed tightly, the cups will crumble when you peel off the liner.
Freeze the base layer while melting the chocolate. That quick chill helps set the shape and makes the chocolate spread more evenly. If you’re working in a warm kitchen, pop the tray back in the freezer between steps to keep everything tidy.
How to Store and Serve for the Best Texture
Once the cups are set, store them in an airtight container. I keep mine in the fridge if I’m eating them within a few days. For longer storage, the freezer works best. Let them sit at room temperature for a few minutes before eating if they’re frozen — that brings back the soft bite without turning them mushy.
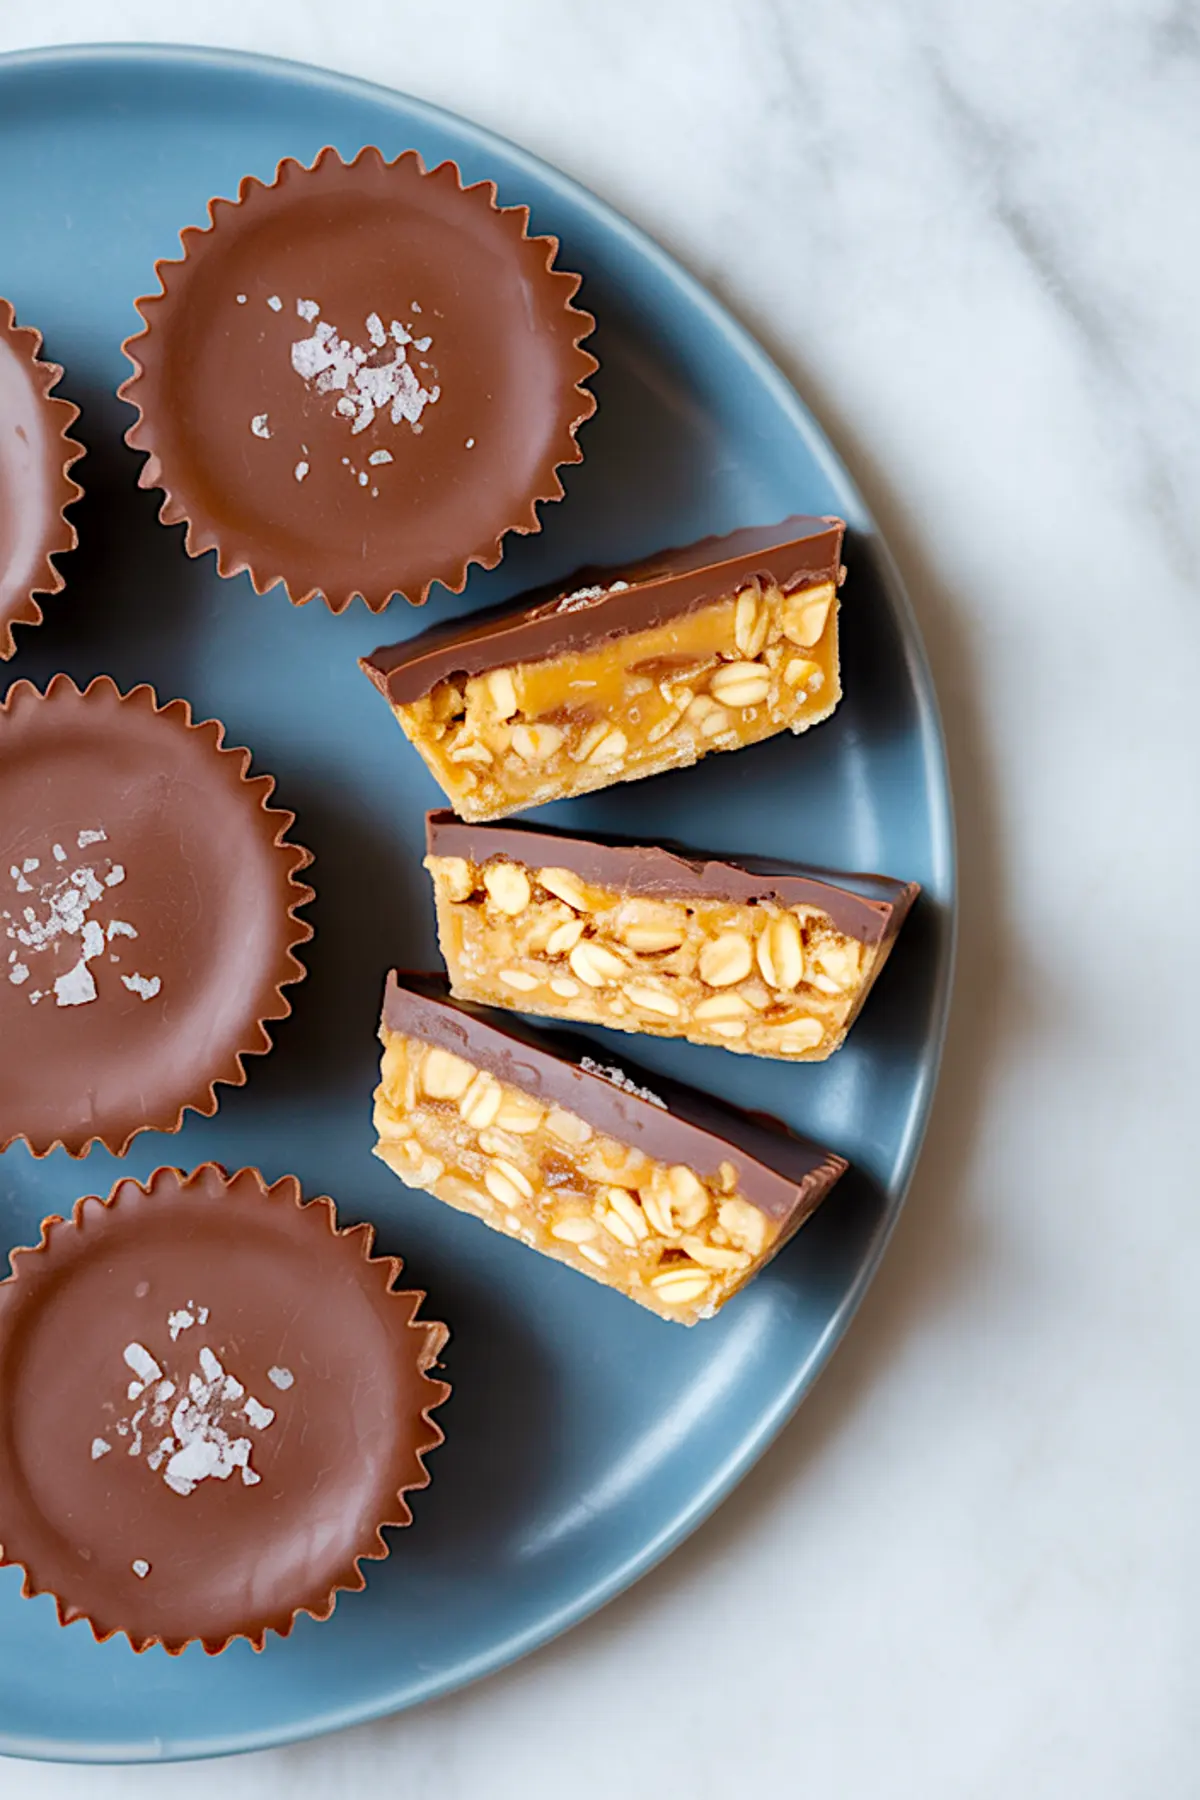
These cups hold up beautifully for potlucks, holiday platters, or snack prep. You can even crumble them over ice cream or tuck them into lunchboxes as a sweet protein-packed treat. If you love Peanut Butter Rice Krispie Treats, these hit a similar note with less sugar and more texture.
Try These Peanut Butter Treats Next
If you enjoy this kind of recipe, you might also like my Peanut Butter Cheesecake, which uses a no-bake crust and chilled filling for an easy make-ahead dessert.
These cups also pair well with Chocolate Peanut Butter Cupcakes if you’re building a themed dessert tray for guests. I sometimes make a tray with all three for birthdays or events. There’s always one that disappears first, and it’s usually these oat cups.
Comparison You’ll Want to Know
I’ve made these with both quick oats and old-fashioned rolled oats. Use rolled oats. The quick ones create a mushy base and don’t hold up to the chocolate topping. Rolled oats keep their shape and give the base that chewy bite that makes these satisfying.
If you’re craving something even easier, my Peanut Butter No Bake Cookies come together fast and skip the muffin tin. But these oat cups give you a neater presentation and more control over portions.
Save This One and Let Me Know If You Try It
These peanut butter oat cups have saved me on days I needed something quick, comforting, and sharable. They’ve made it into every bake sale, snack tray, and freezer batch session I’ve done this year.
Pin this recipe so you can come back to it anytime. And if you make a batch, I’d love to hear how it turned out. Did you try dark chocolate or add chopped peanuts on top? Share your twist in the comments.
No-Bake Peanut Butter Oat Cups Recipe
These no-bake peanut butter oat cups offer a quick and simple way to satisfy your sweet tooth without heating the oven. Creamy peanut butter and chewy oats form the base, while a smooth chocolate topping and flaky sea salt add contrast and richness. Perfectly portioned and easy to store, they’re made with everyday ingredients and come together in under 30 minutes.
Ingredients
- FOR THE BASE LAYER
- 1 cup creamy peanut butter (natural or regular both work)
- 1/4 cup pure maple syrup (or honey)
- 1/4 cup melted coconut oil
- 1 1/2 cups old-fashioned rolled oats
- 1/2 teaspoon vanilla extract
- Pinch of salt
- FOR THE CHOCOLATE TOPPING
- 1 cup semi-sweet chocolate chips (or dark chocolate, if preferred)
- 1 tablespoon coconut oil
- Flaky sea salt for topping (optional)
Instructions
- PREPARE THE MUFFIN TIN: Line a standard 12-cup muffin tin with paper or silicone liners and set aside.
- MIX THE BASE LAYER: In a medium bowl, stir together the peanut butter, maple syrup, melted coconut oil, vanilla extract, and a pinch of salt until smooth. Add the oats and mix until evenly coated and sticky.
- FORM THE CUPS: Scoop about 2 tablespoons of the oat mixture into each liner. Use the back of a spoon to press the mixture firmly and evenly into the bottom. Transfer the tin to the freezer to chill while you make the topping.
- MAKE THE CHOCOLATE TOPPING: In a microwave-safe bowl, combine the chocolate chips and coconut oil. Heat in 30-second intervals, stirring between each, until melted and smooth. Alternatively, melt the mixture using a double boiler.
- TOP THE CUPS: Remove the chilled oat cups from the freezer. Spoon about 1 tablespoon of the melted chocolate over each one, spreading it evenly to cover the surface.
- ADD SALT AND CHILL: If using, sprinkle a small pinch of flaky sea salt on top of each cup. Return the muffin tin to the freezer for 15 to 20 minutes, or until the chocolate is fully set.
Notes
To make the recipe vegan, use maple syrup instead of honey and ensure your chocolate chips are dairy-free. Store the cups in an airtight container in the refrigerator for up to one week or freeze for longer storage.
These tasted great and were very easy to make. The recipe was clear and accurate.
Valerie, that’s really nice to hear. I’m glad the recipe came through clearly for you. Appreciate you taking the time to share how it turned out 🍰