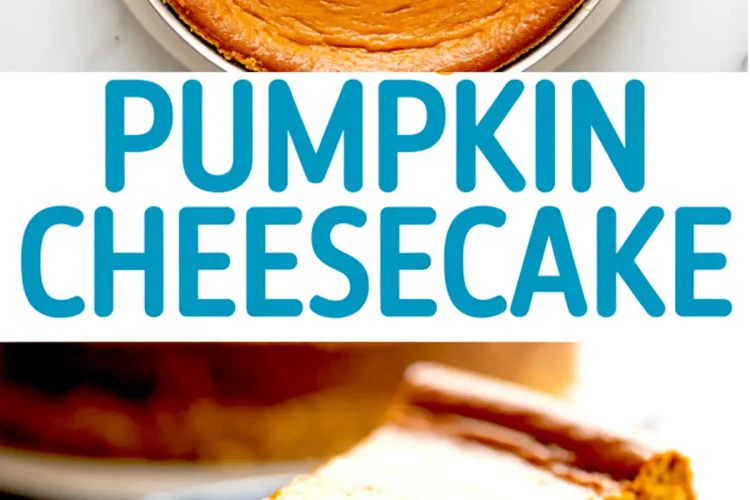
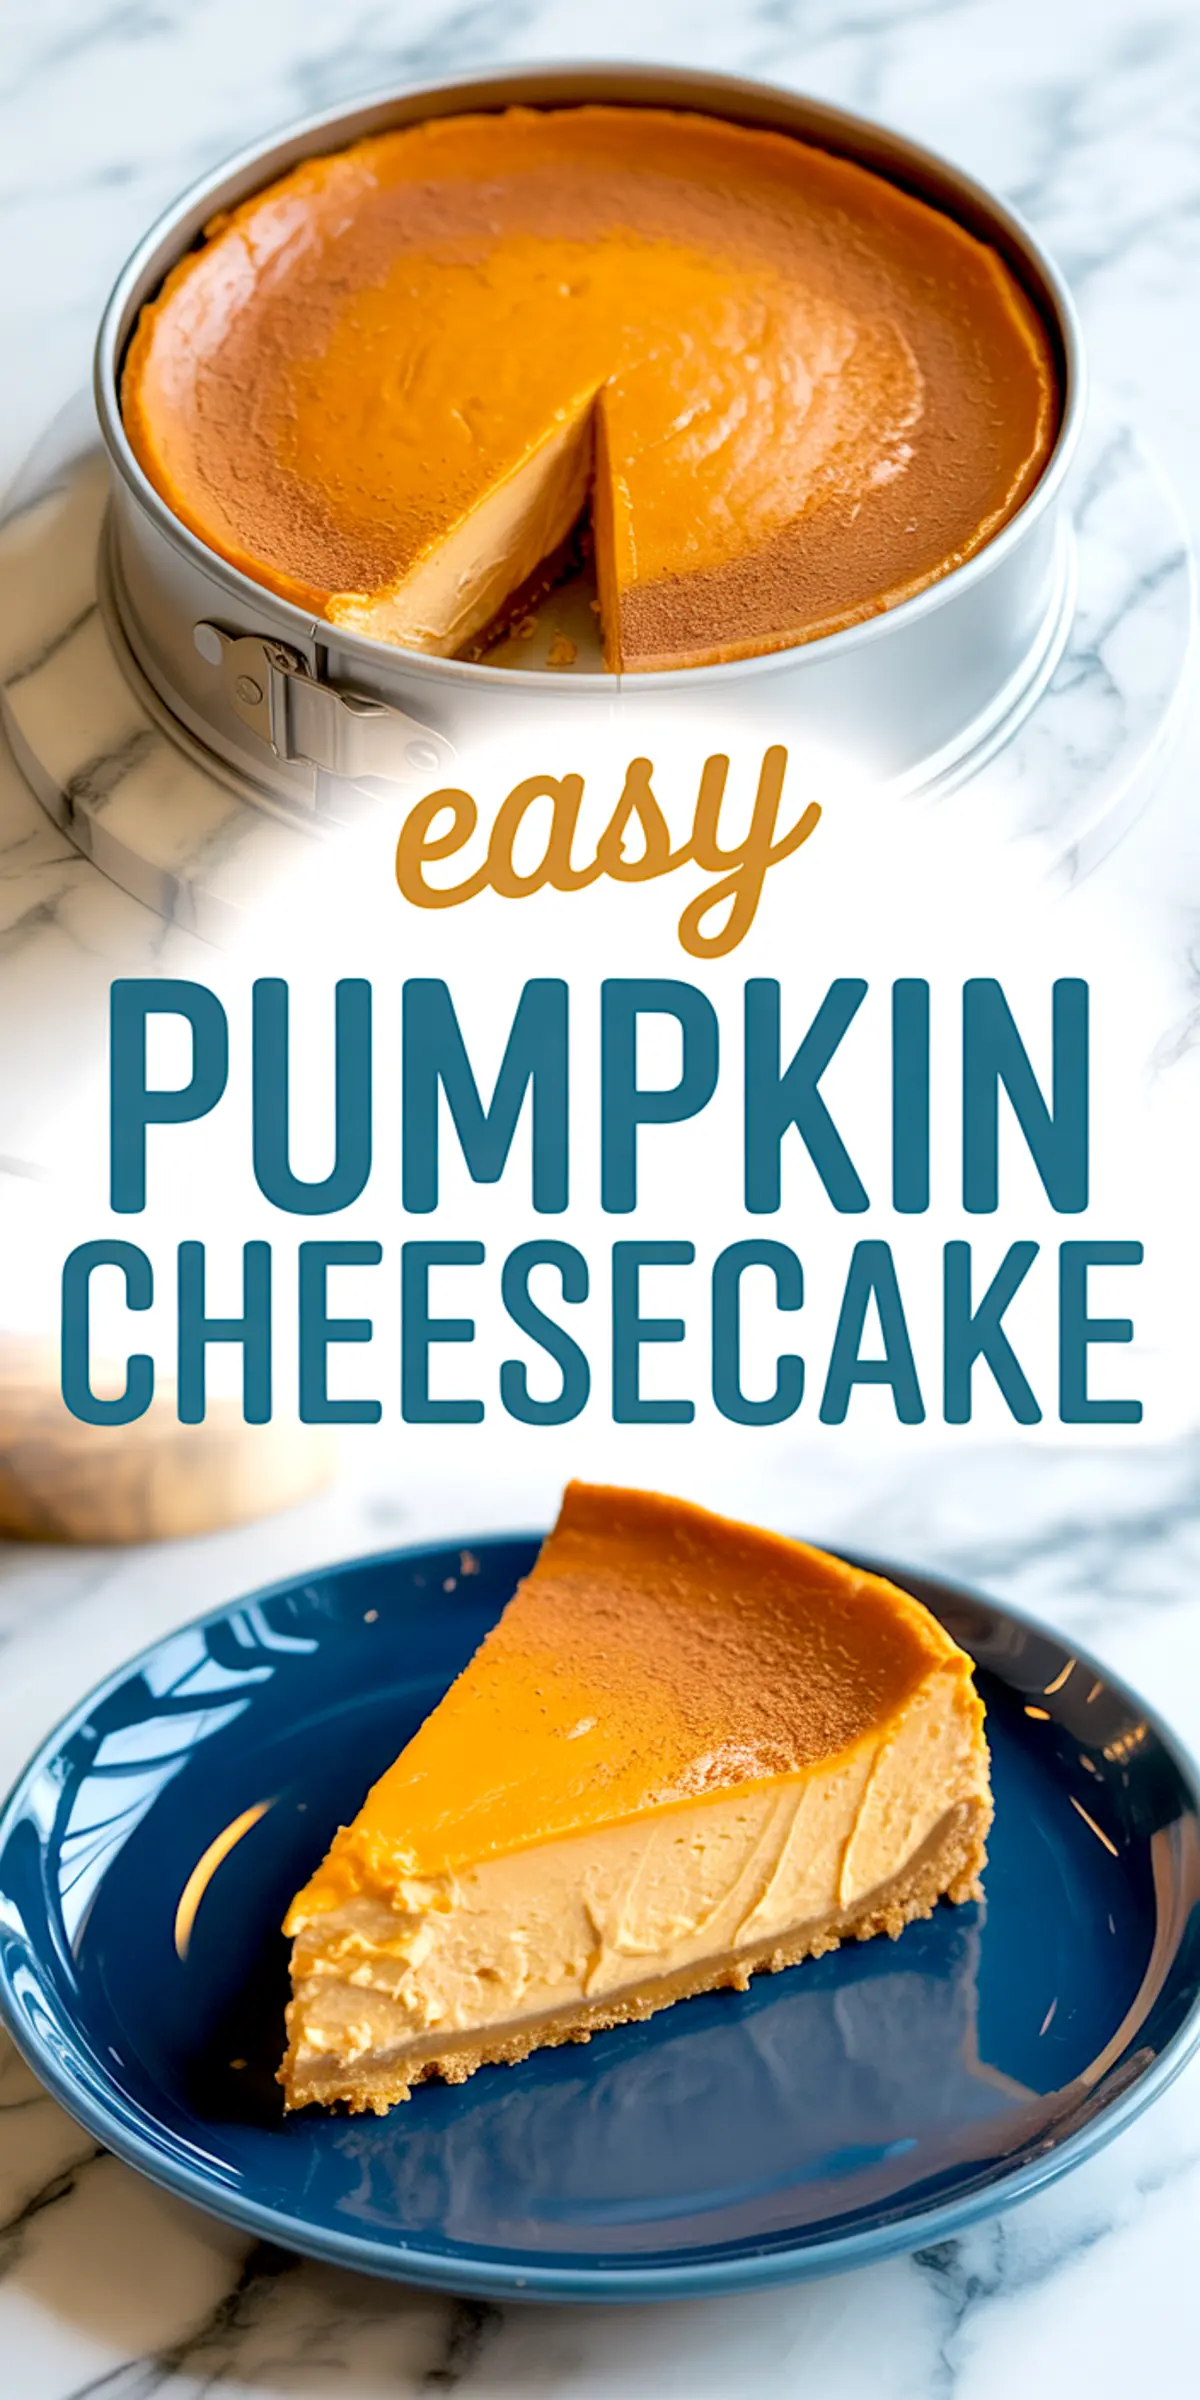
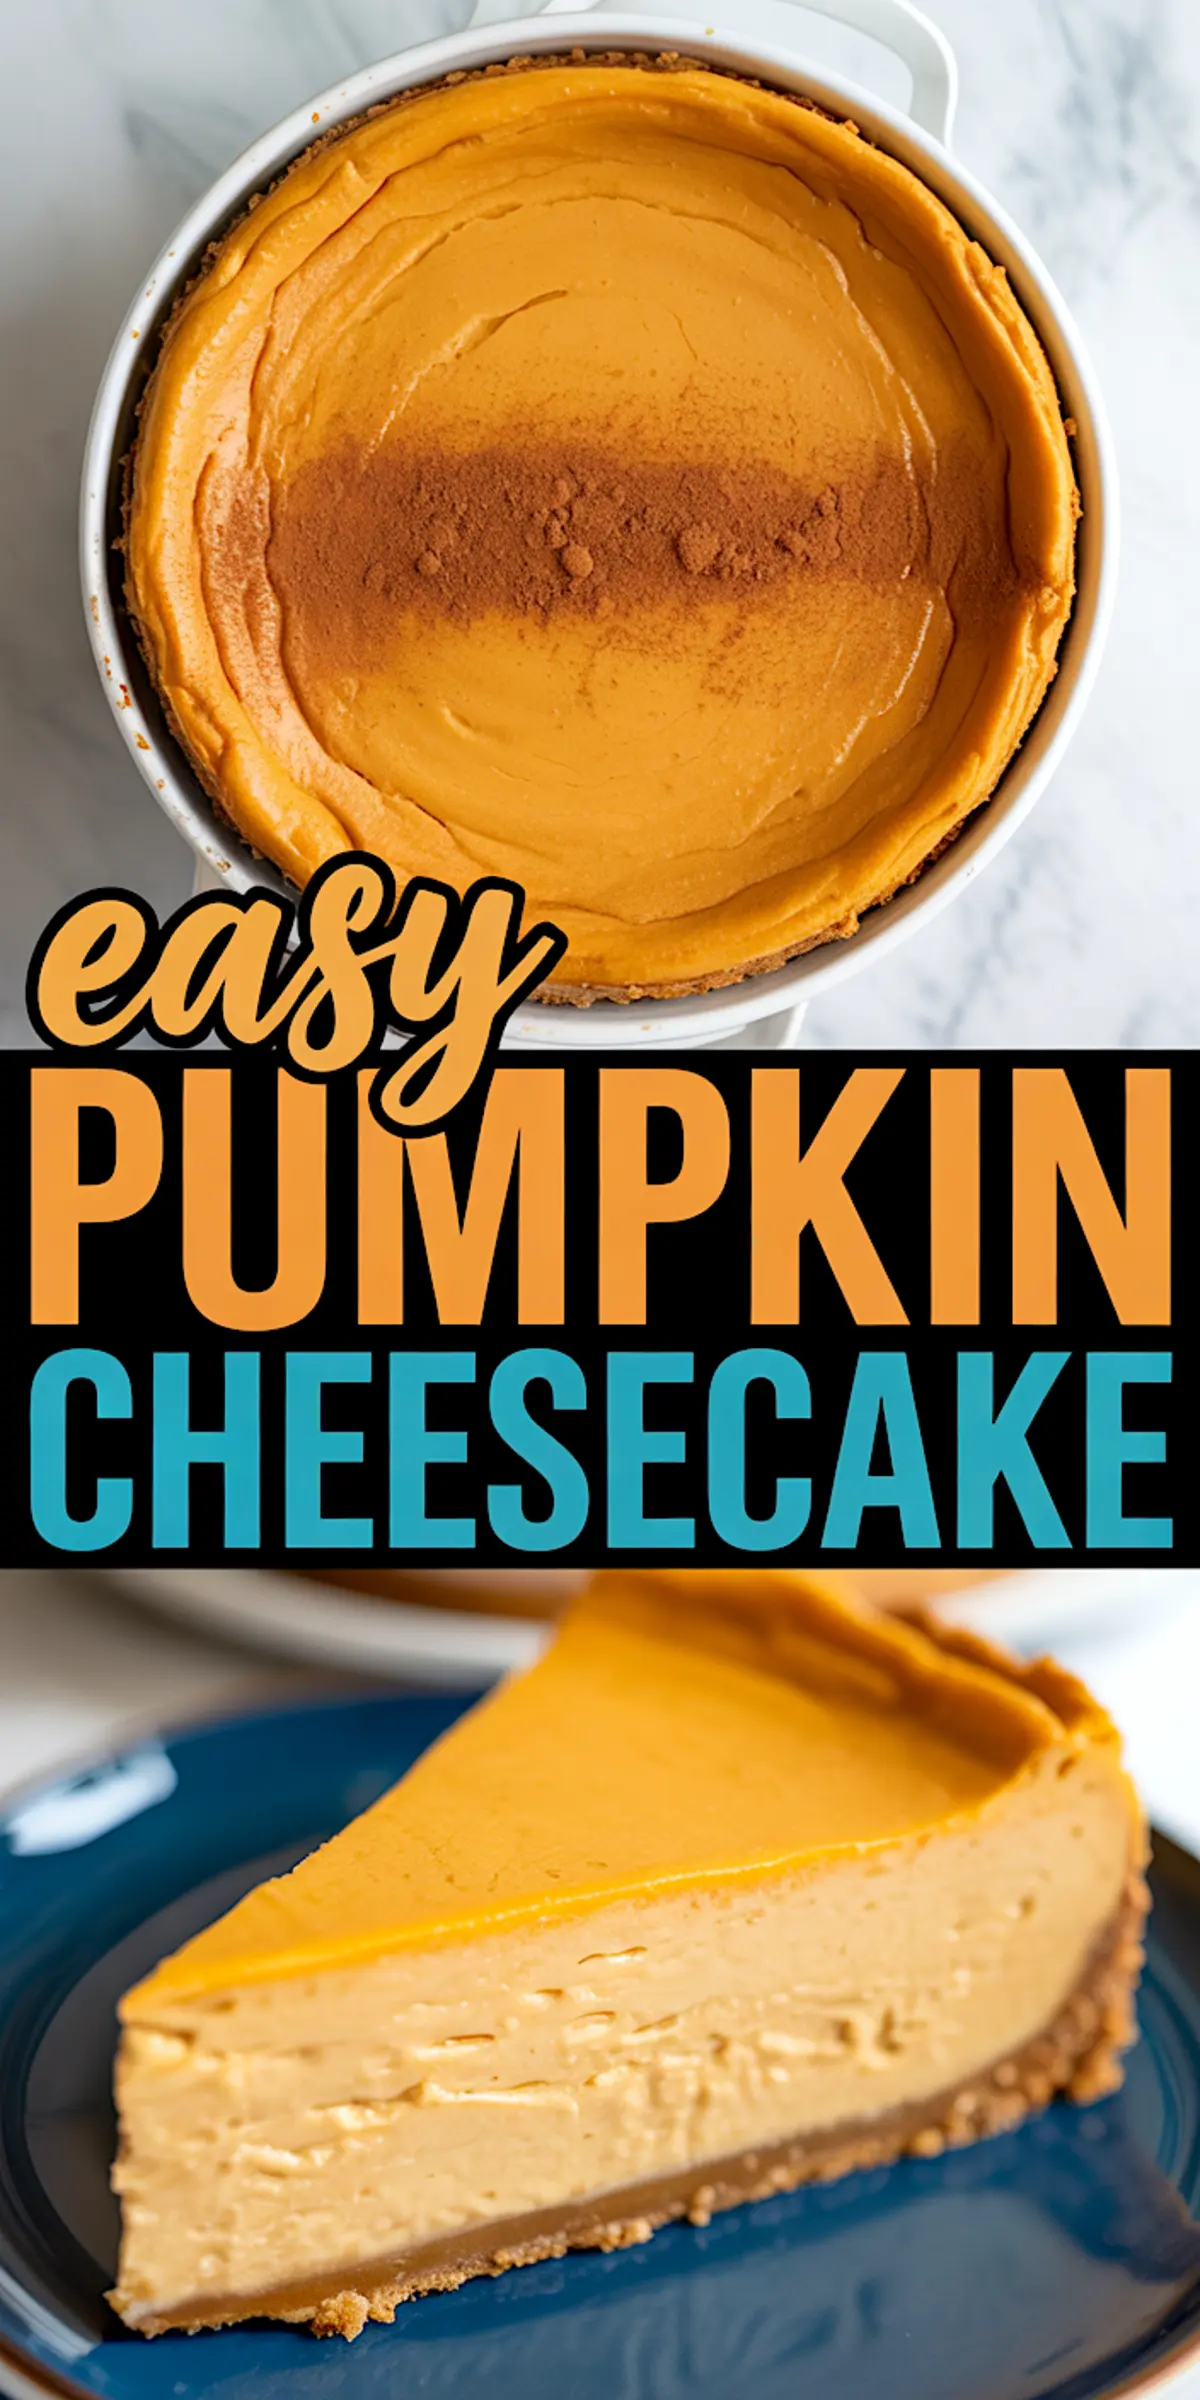
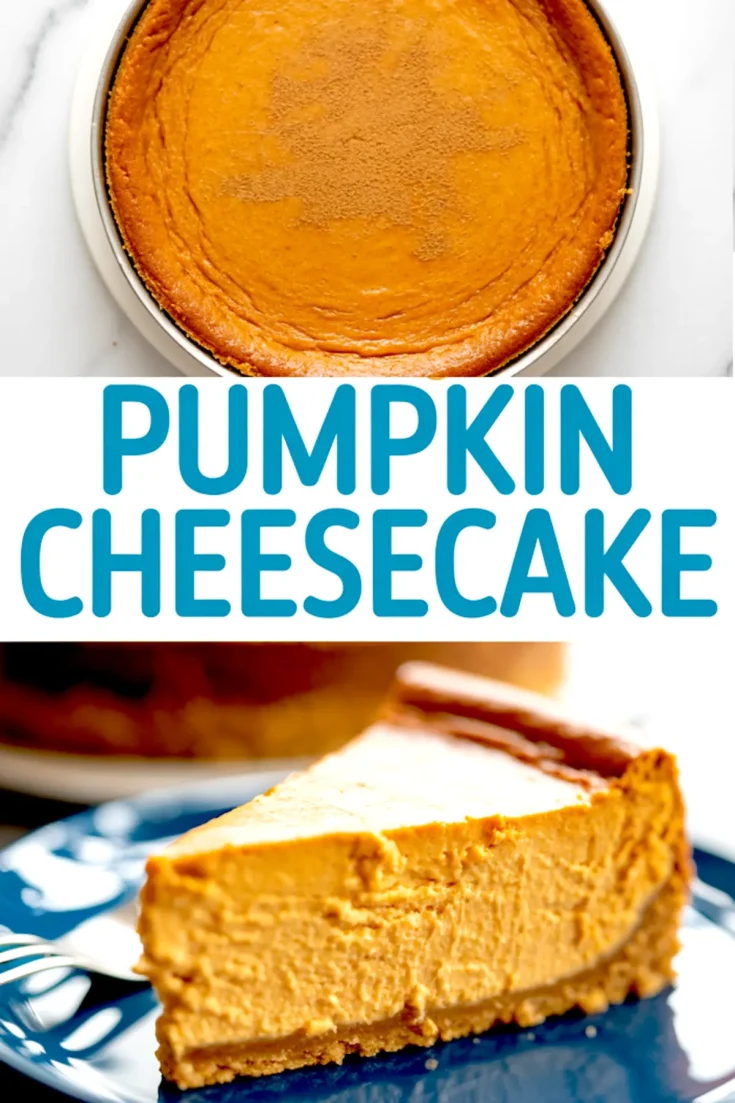
A dense, creamy pumpkin cheesecake can either steal the show or sink the whole dessert table. This one holds its shape, cuts clean, and bakes evenly from edge to center without the need for water baths, flourless trickery, or swirl drama.
What you’ll find here is a pumpkin cheesecake recipe that stays true to the basics. No cracks. No fuss. Just a grounded approach and a proven formula I’ve used year after year for Thanksgiving and fall gatherings.
You’ll learn exactly how to build structure into the batter, keep the texture from going grainy, and time the bake so the filling firms without turning rubbery.
This method gives you a cheesecake with the depth of pumpkin pie, the structure of a New York bake, and the clean finish of a chilled mousse. That’s the advantage of mixing cream cheese with sour cream, then setting it all gently in a graham base that holds its own.
Following a special diet?
Every recipe on this site can be converted to gluten-free, vegan, dairy-free, keto, nut-free or egg-free with adjusted ratios so nothing falls flat.
Try the Recipe Converter →Graham Cracker Crust Without Soggy Edges
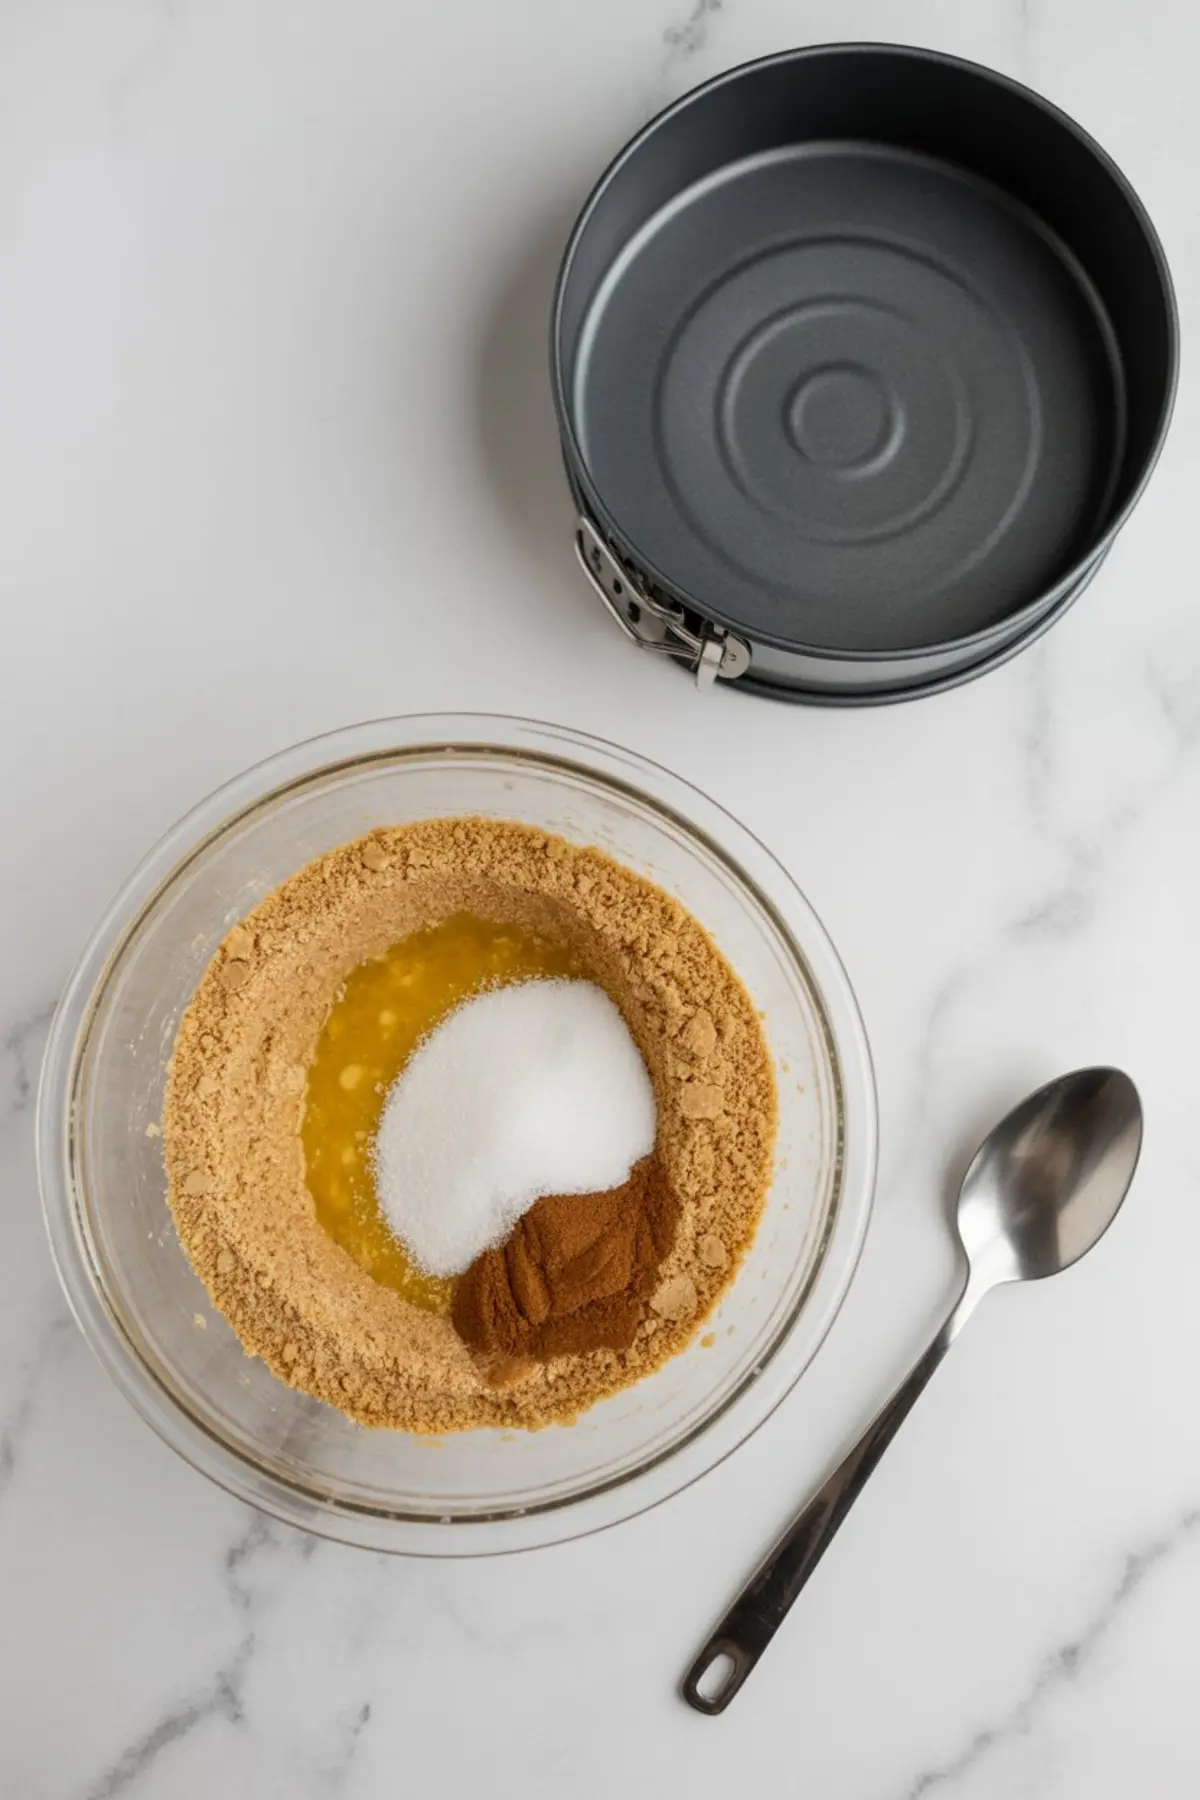
A good crust does more than hold the cheesecake. It balances the richness. I’ve found that using just a touch of cinnamon in the crust mix adds warmth without overwhelming the filling. You want the base to taste lightly toasted, not spiced.
If you’ve made my Pumpkin Coffee Cake, you’ll remember that same graham-butter combination—only this one sets firmer because of the shorter bake time before filling.
Use the bottom of a glass to pack it in evenly, especially at the edges. If it’s too loose, the cheesecake won’t lift cleanly later.
Filling That Stays Creamy, Never Gritty
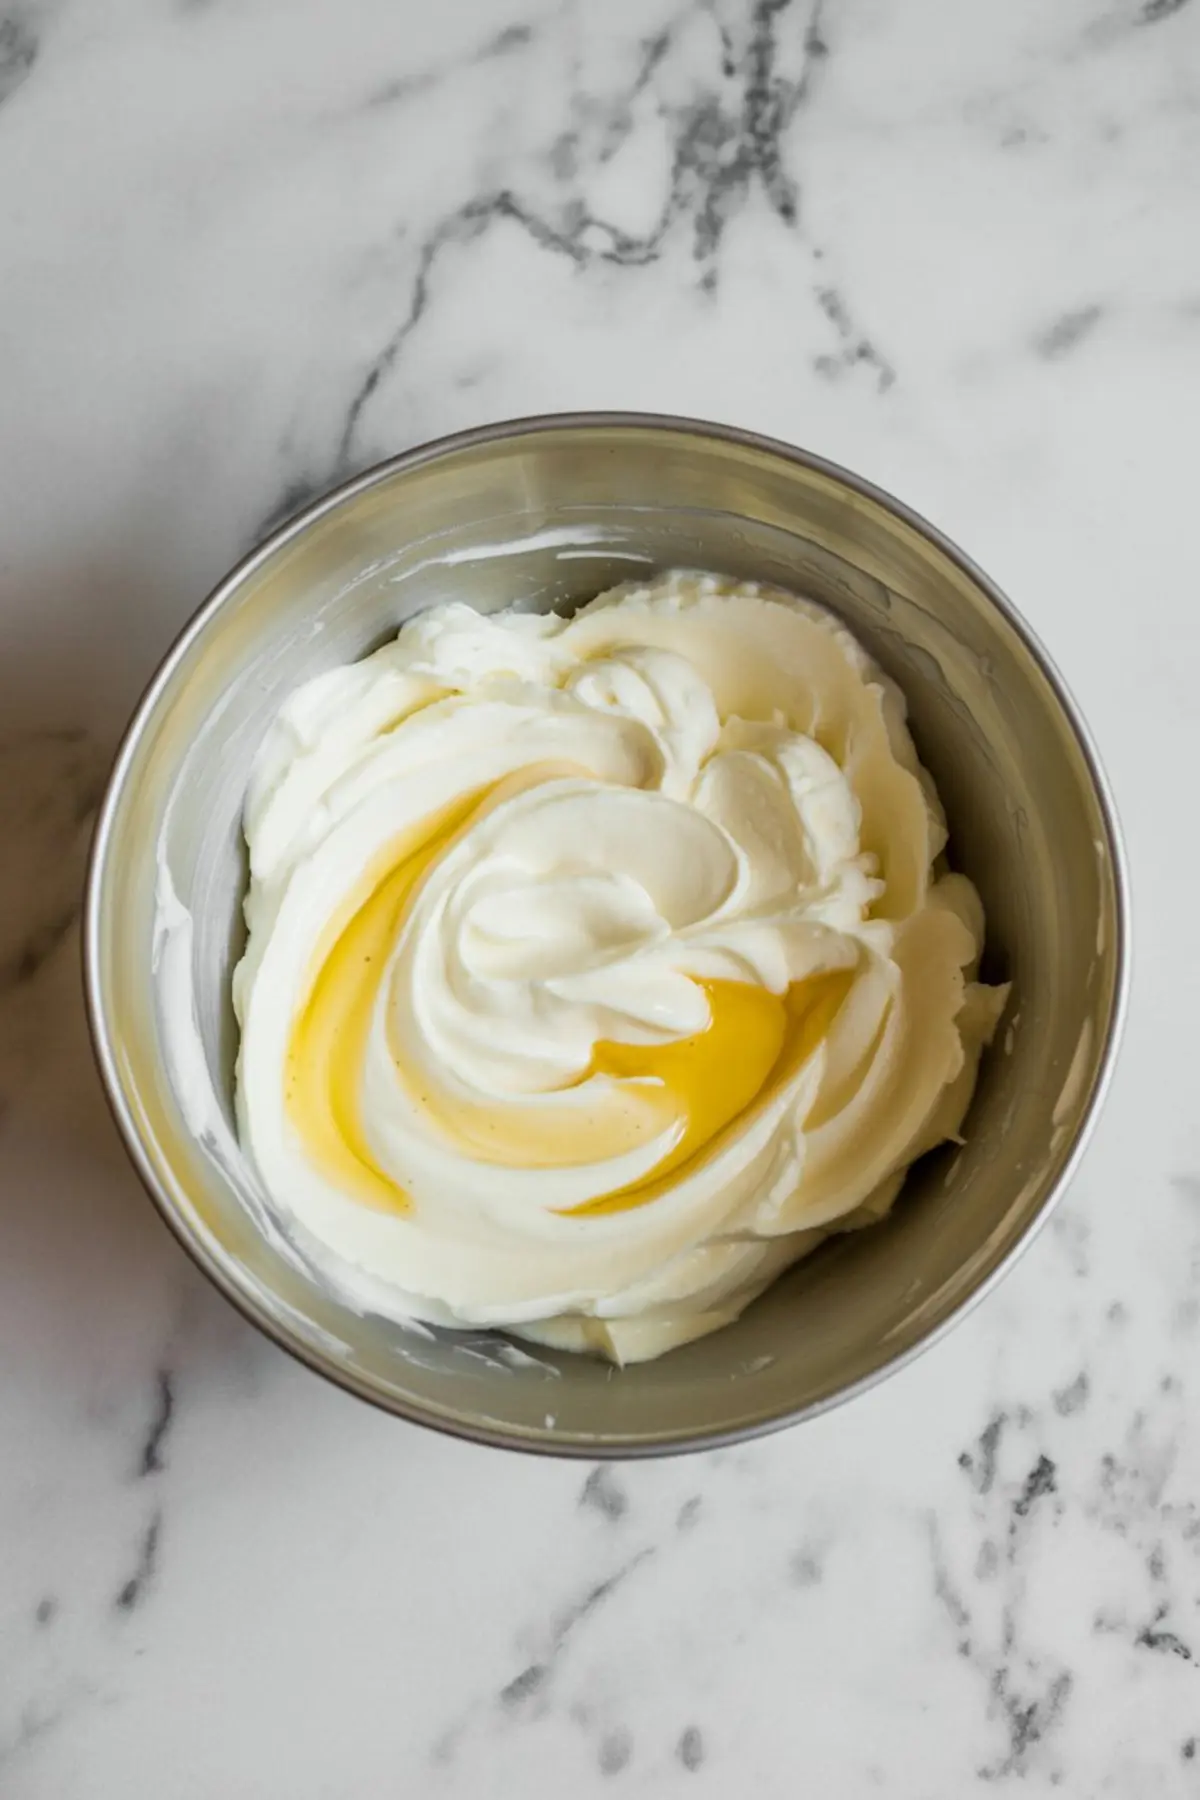
Three bricks of cream cheese give the body. The sour cream adds smoothness. And the canned pumpkin delivers moisture and flavor without overwhelming the structure. I never use fresh pumpkin here. The moisture levels vary too much, and the texture turns fibrous.
Between white and brown sugar, I lean toward a mix. Brown sugar brings the depth that echoes molasses in Pumpkin Bread, while granulated sugar lightens the base so it doesn’t weigh down the spices.
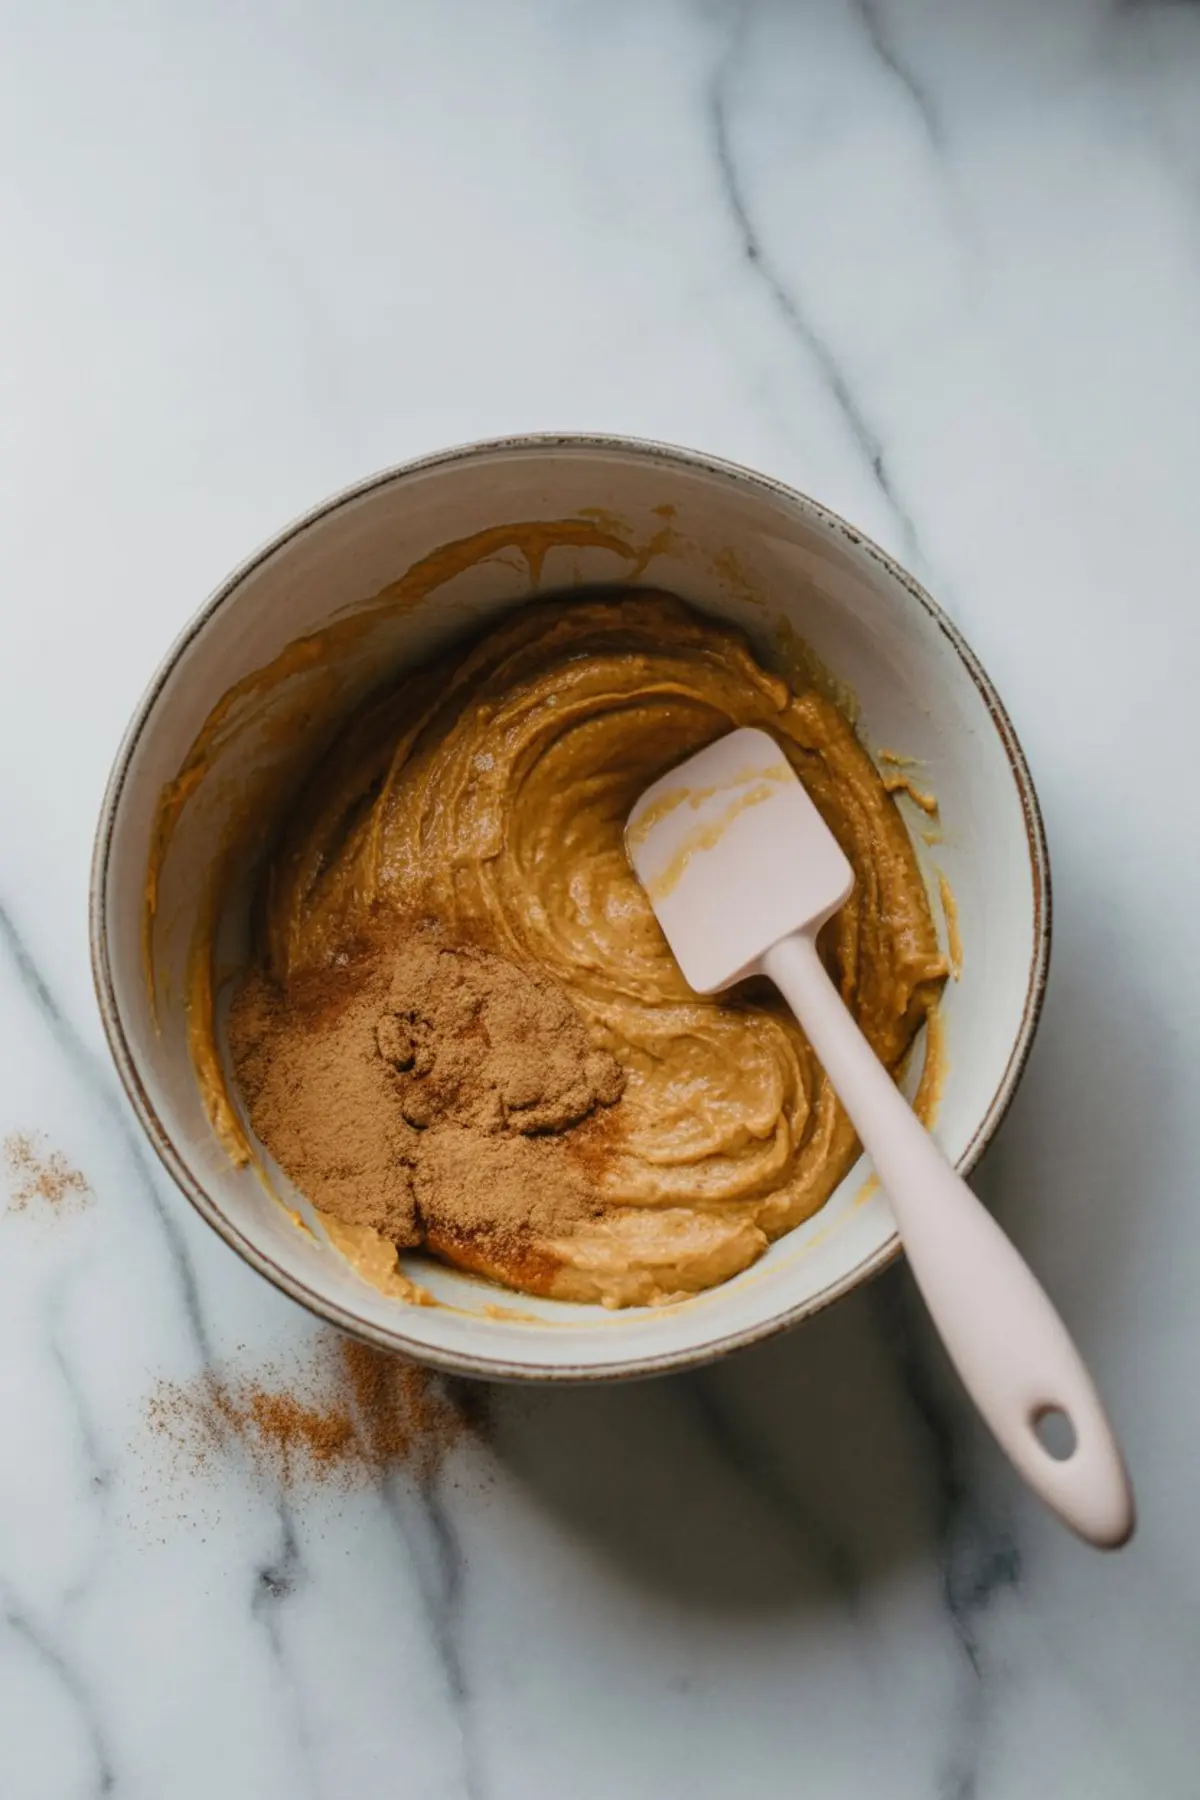
Vanilla and eggs get folded in slowly. Overmixing at this stage introduces air and leads to cracks later. I’ve learned to mix just until the batter loosens into a pourable consistency.
Cinnamon vs Pumpkin Spice in Cheesecake
Some recipes call for a full pumpkin pie spice blend, but I prefer to break it down. Cinnamon leads, but ginger, nutmeg, and cloves follow in quiet balance.
I’ve tested both approaches: using a premixed pumpkin spice blend and adjusting each spice by hand. When I used the blend, the flavor skewed heavy on clove and left a bitter finish.
When I measured individually, I could balance the heat of ginger with the softness of cinnamon. The result felt more rounded, like my Pumpkin Cupcakes—spiced, but not overdone.
Bake Low, Cool Slow, Chill Overnight
Cheesecake doesn’t like surprises. That’s why the bake happens at 325°F, and the cooling takes just as long as the baking.
Cracking often happens during the cooling stage. If the oven door stays closed too long, the cheesecake contracts too fast. I leave the door cracked open for 30 minutes to let it settle slowly before moving it to the counter.
Once cooled, the cheesecake must chill for at least 6 hours. I’ve had the cleanest results by chilling it overnight. The filling sets evenly, and the flavor develops fully by the next day.
If you’ve tried my Pumpkin Muffins, you’ll recognize that same rule: the waiting improves the texture tenfold.
Serving and Storage Tips from My Notes
Cheesecake slices cleaner with heat. Run a sharp knife under hot water, then dry it before each cut. This avoids dragging crumbs through the top.
I usually store mine in a cake keeper or loosely tented with foil. It holds well for up to five days chilled.
For a neater presentation, I’ll pipe whipped cream rosettes around the edges or sprinkle a light dusting of cinnamon across the surface. That works especially well if you’re serving it as a Thanksgiving Cheesecake centerpiece.
Related Recipes You Might Also Love
If this pumpkin cheesecake recipe hit the mark, you might also want to try these fall favorites:
- This Pumpkin Spice Cake carries similar spices in a layered format
- My go-to Pumpkin Bread stays soft for days and doubles well for gifts
- These Pumpkin Muffins freeze well and make excellent breakfast bakes
Each brings its own texture and spice balance, and works nicely alongside a dense cheesecake like this one.
Final Thoughts and Save for Later
I’ve tested this recipe every fall for years now. The smooth bake, the spice control, the clean slices—it delivers each time without extra fuss.
That’s what makes it one of the best pumpkin cheesecake recipes to keep on hand, especially for fall baking or Thanksgiving gatherings. You don’t need swirls, water baths, or tricks.
Just method, timing, and the right balance of ingredients.
📌 Save this pumpkin cheesecake recipe to your Fall Desserts or Thanksgiving board on Pinterest so it’s right there when you need it.
And if you try it, share your thoughts in the comments—I’d love to hear how it turned out for you, or what twist you gave it at home.
Pumpkin Cheesecake Recipe
This pumpkin cheesecake combines rich cream cheese and real pumpkin puree for a creamy, spiced dessert with a smooth texture and even bake. The graham cracker crust adds a buttery, crisp base. No swirling or layering—just one simple batter baked low and slow. It sets cleanly, slices easily, and delivers pumpkin flavor in every bite.
Ingredients
- FOR THE CRUST
- 1 ½ cups graham cracker crumbs
- ¼ cup granulated sugar
- 6 tablespoons melted unsalted butter
- ¼ teaspoon cinnamon (optional)
- FOR THE PUMPKIN CHEESECAKE FILLING
- 24 oz cream cheese, softened (3 blocks)
- 1 cup canned pumpkin puree
- ¾ cup granulated sugar
- ½ cup packed brown sugar
- ½ cup sour cream
- 3 large eggs, room temperature
- 1 teaspoon vanilla extract
- 1 tablespoon all-purpose flour
- 1 teaspoon ground cinnamon
- ½ teaspoon ground ginger
- ¼ teaspoon ground nutmeg
- ⅛ teaspoon ground cloves
Instructions
- PREHEAT AND PREPARE PAN: Preheat the oven to 325°F (163°C). Lightly grease a 9-inch springform pan and set aside.
- MAKE THE CRUST: In a medium bowl, stir together the graham cracker crumbs, granulated sugar, optional cinnamon, and melted butter until the texture resembles wet sand. Press the mixture evenly into the bottom of the prepared springform pan using the bottom of a measuring cup or glass. Bake for 8 to 10 minutes, then remove and set aside to cool slightly while preparing the filling.
- BEAT CREAM CHEESE: In a large mixing bowl, beat the softened cream cheese with a hand mixer or stand mixer on medium speed until completely smooth and creamy, about 2 to 3 minutes.
- ADD SUGARS AND VANILLA: Add the granulated sugar, brown sugar, and vanilla extract to the cream cheese. Beat on medium speed until fully combined and no lumps remain.
- ADD PUMPKIN AND SOUR CREAM: Mix in the pumpkin puree and sour cream, beating until the batter is smooth and evenly colored.
- INCORPORATE EGGS: Add the eggs one at a time, mixing just until each is incorporated. Avoid overmixing at this stage to prevent cracking.
- ADD DRY INGREDIENTS: Stir in the flour, cinnamon, ginger, nutmeg, and cloves. Scrape down the sides and bottom of the bowl with a spatula to ensure the batter is fully combined and smooth.
- ASSEMBLE THE CHEESECAKE: Pour the filling over the pre-baked crust and smooth the top with a spatula to level it out.
- BAKE: Place the pan in the center of the oven and bake for 60 to 70 minutes, or until the edges are set and the center is slightly jiggly but not wet.
- COOL IN OVEN: Turn off the oven, crack the oven door open, and let the cheesecake cool inside for 30 minutes. This helps prevent sudden temperature changes that can cause cracking.
- COOL TO ROOM TEMPERATURE: Remove the cheesecake from the oven and allow it to cool completely on the counter.
- CHILL: Once cooled, cover and refrigerate the cheesecake for at least 6 hours or overnight until fully set.
Notes
For the cleanest slices, run a knife under hot water and wipe dry between cuts. Cheesecake stores well covered in the refrigerator for up to 5 days.
Nutrition Information
Yield
12Serving Size
1Amount Per Serving Calories 470Total Fat 32gSaturated Fat 18gTrans Fat 0gUnsaturated Fat 11gCholesterol 134mgSodium 280mgCarbohydrates 41gFiber 1gSugar 31gProtein 7g
Will it make a difference if you cook it in a water pan
Using a water bath can make a difference, especially if you’re aiming for that ultra-smooth, no-crack top. It helps insulate the cheesecake, keeping the baking gentle and even, and it also adds moisture to the oven environment. That said, I purposely designed this recipe to bake well without one. If you follow the low oven temp and the gradual cooling instructions (cooling it inside the oven first), you can get a clean result without the hassle of wrapping your springform in foil.
But if you’re in a humid climate or your oven tends to run hot, a water bath could be a good insurance policy. Just be sure to tightly wrap the outside of your springform pan with foil so water doesn’t leak in.
I’ve done it both ways, and honestly, the difference is subtle if your oven behaves.