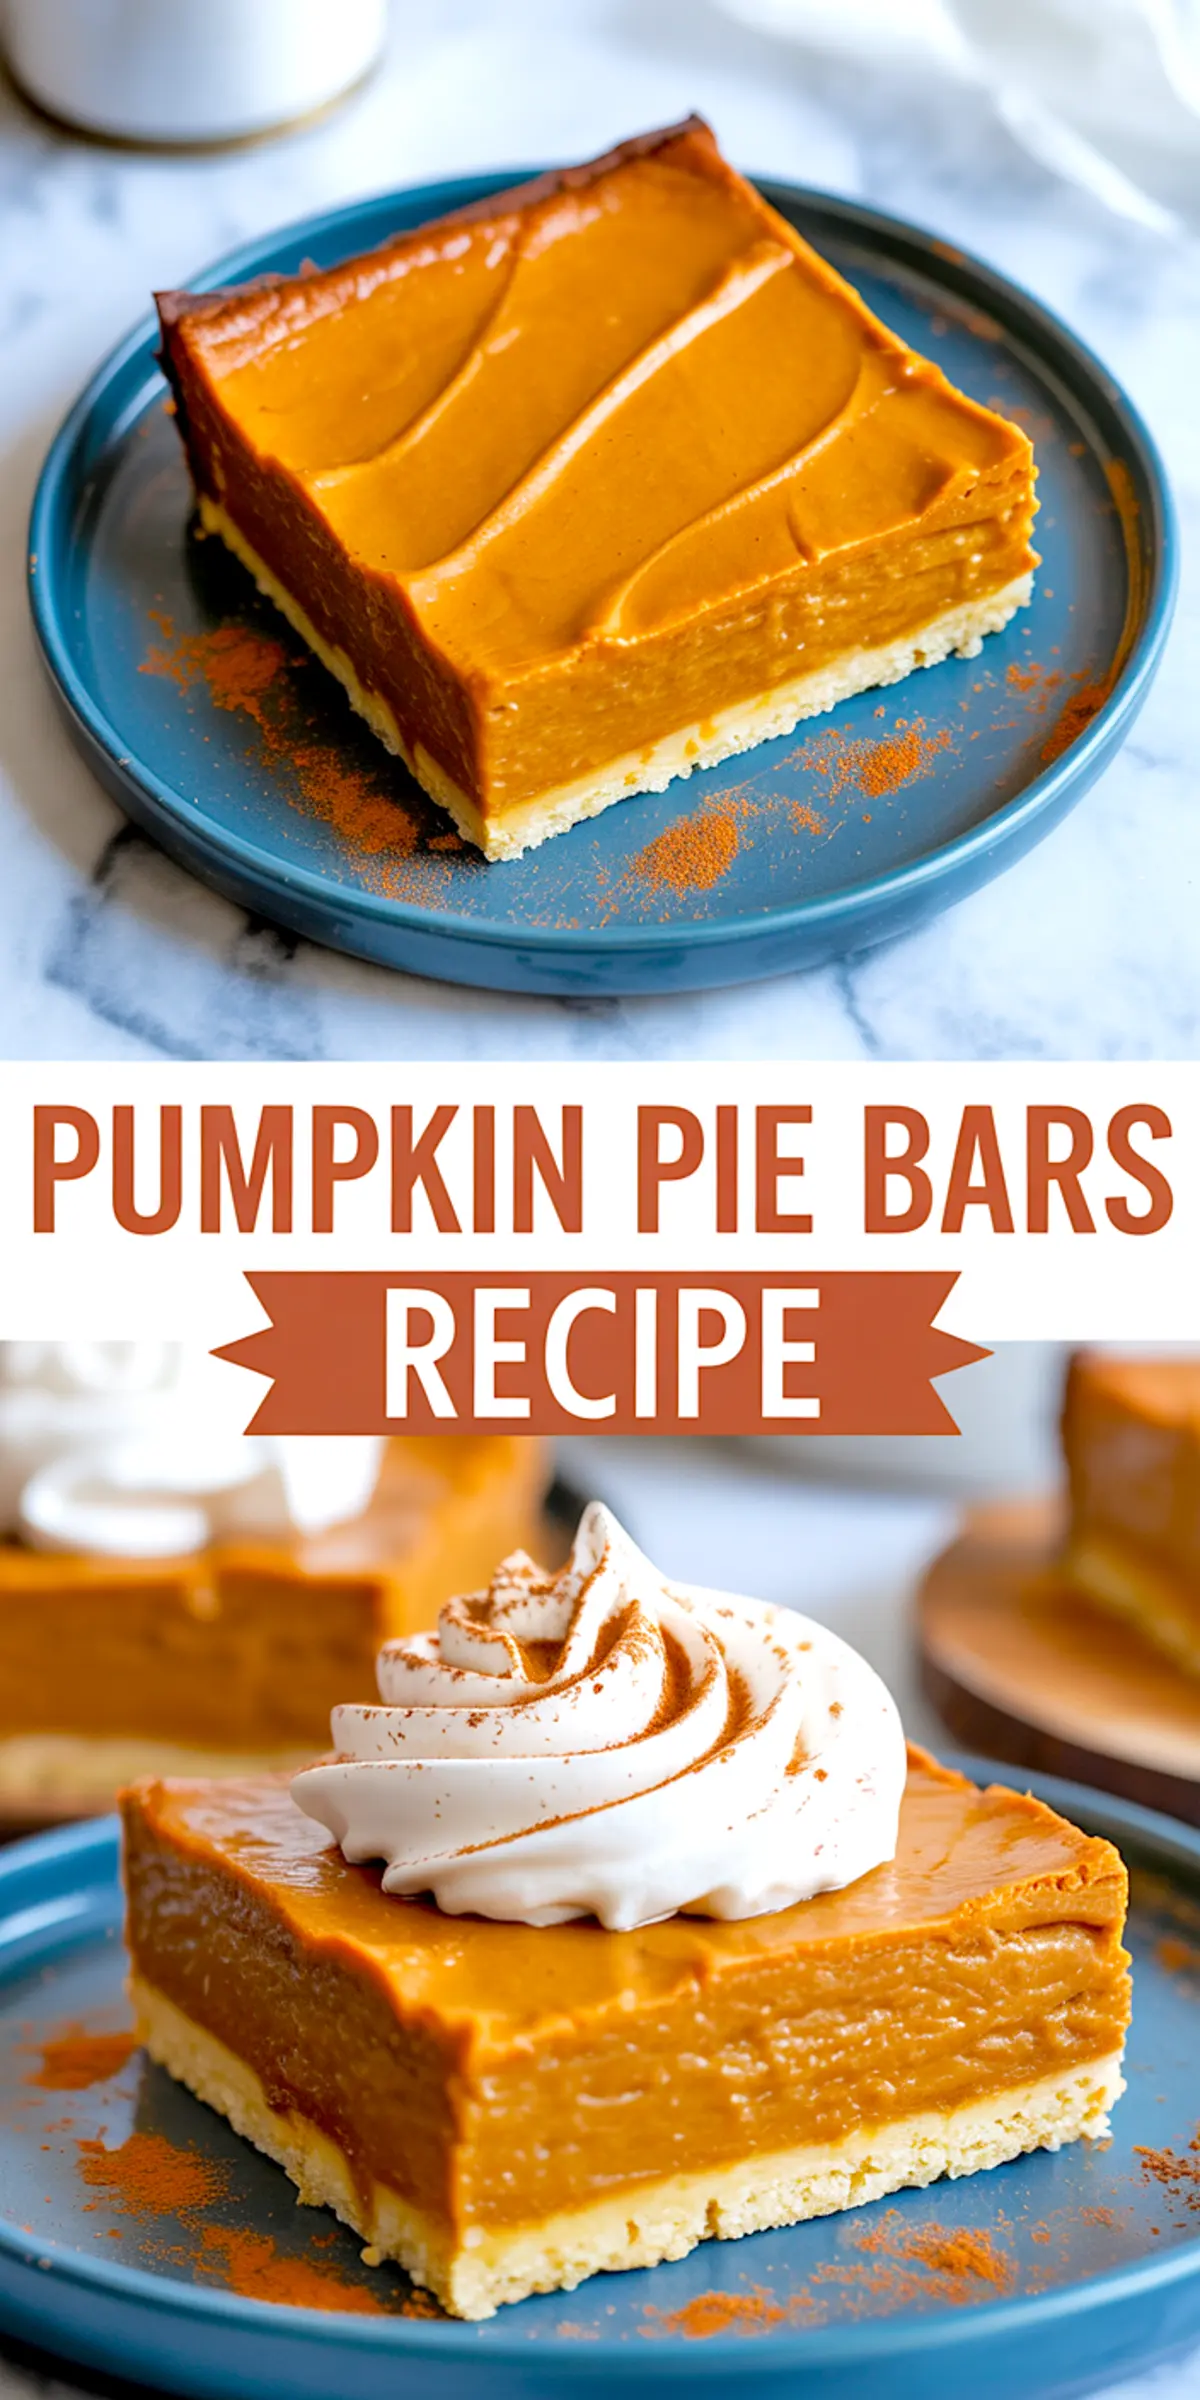
Creamy, spiced filling over a crisp base this is how I make pumpkin pie easier for a crowd without losing the rich texture and deep flavor of the classic version.
You’ll learn how to make pumpkin pie bars with a tender shortbread crust and smooth filling that slices clean and holds its shape. I’ll show you the difference between using heavy cream and evaporated milk, how to cool and cut clean bars, and why this method works better for gatherings than a traditional pie.
These bars are made for sharing, stacking, and serving without fuss.
Why I Prefer Bars Over Traditional Pumpkin Pie
Pumpkin pie is a staple, yes. But at any table, it’s usually the last slice left behind because it’s hard to cut, hard to plate, and harder still to store.
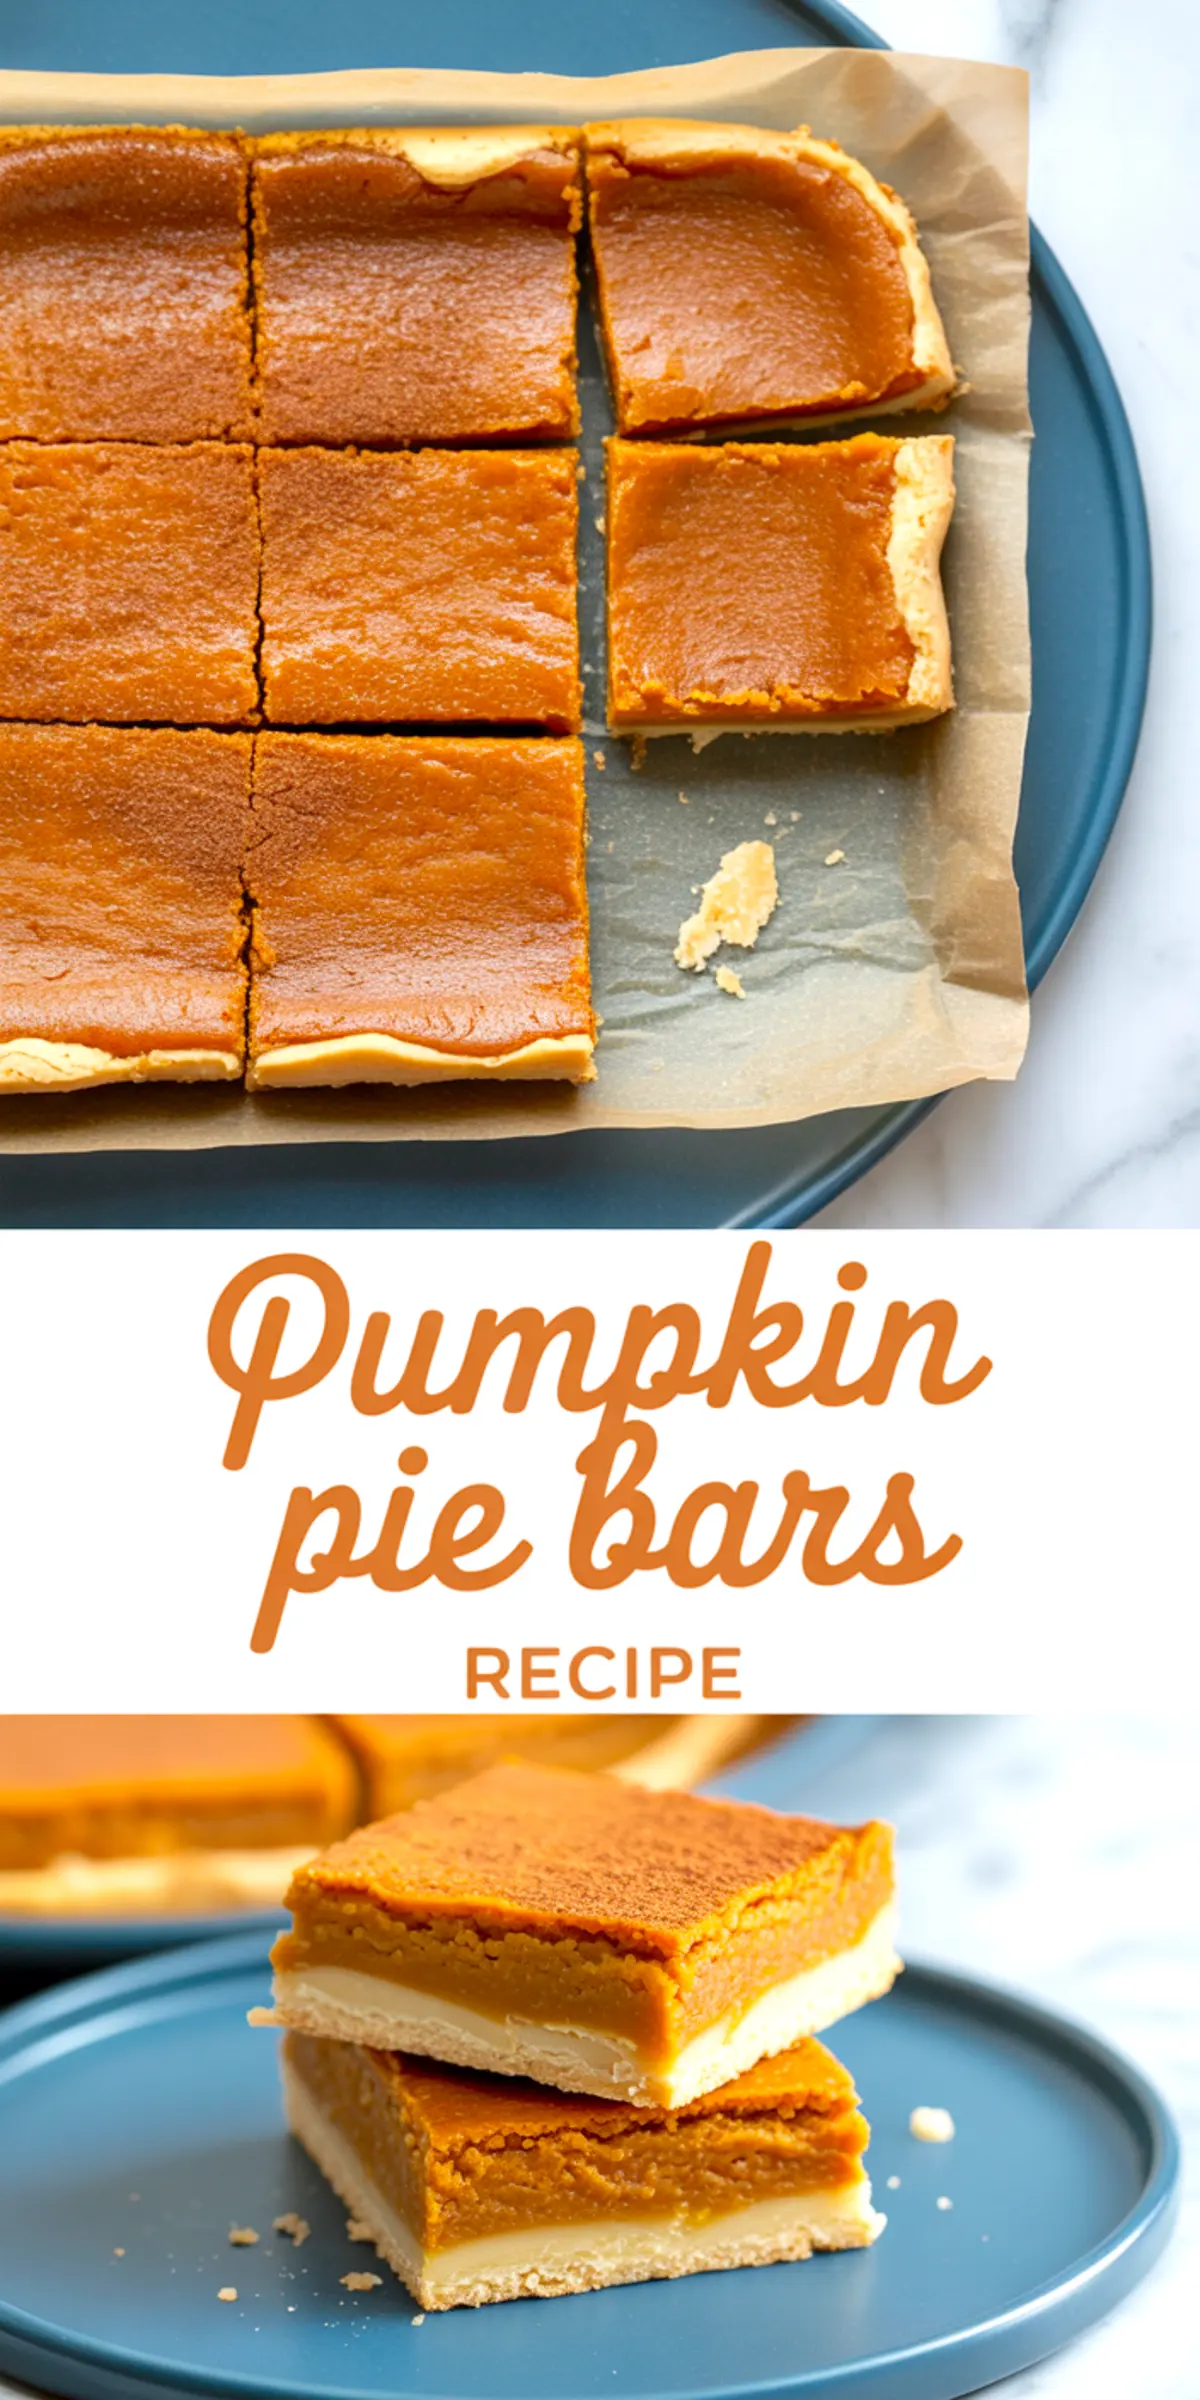
Pumpkin pie bars fix all of that. They chill firm, cut clean, and stack well for travel or storage. They also deliver consistent texture from edge to center. No soggy crust. No slouching slices.
I’ve used this method for bake sales, family dinners, and freezing ahead for guests. It holds up. The texture is dependable, the flavor deepens overnight, and the portioning makes sense when serving more than eight people.
You’ll get all the flavor of a classic pumpkin pie with far fewer issues.
How to Make the Buttery Shortbread Crust
Melted butter binds the crust ingredients without needing a mixer. Once stirred with sugar, vanilla, and salt, the dough presses evenly into the pan. I always use the bottom of a measuring cup for even compression.
During baking, this base firms without puffing. It stays stable under the creamy filling and delivers a clean bite. For reference, it’s the same texture I use in my Maple Glazed Apple Pie Bars.
The flavor leans buttery and mild to support the warmth of the spiced filling. Don’t skip the salt here—it balances the sweetness and sharpens the crust’s edge.
Preparing the Pumpkin Filling
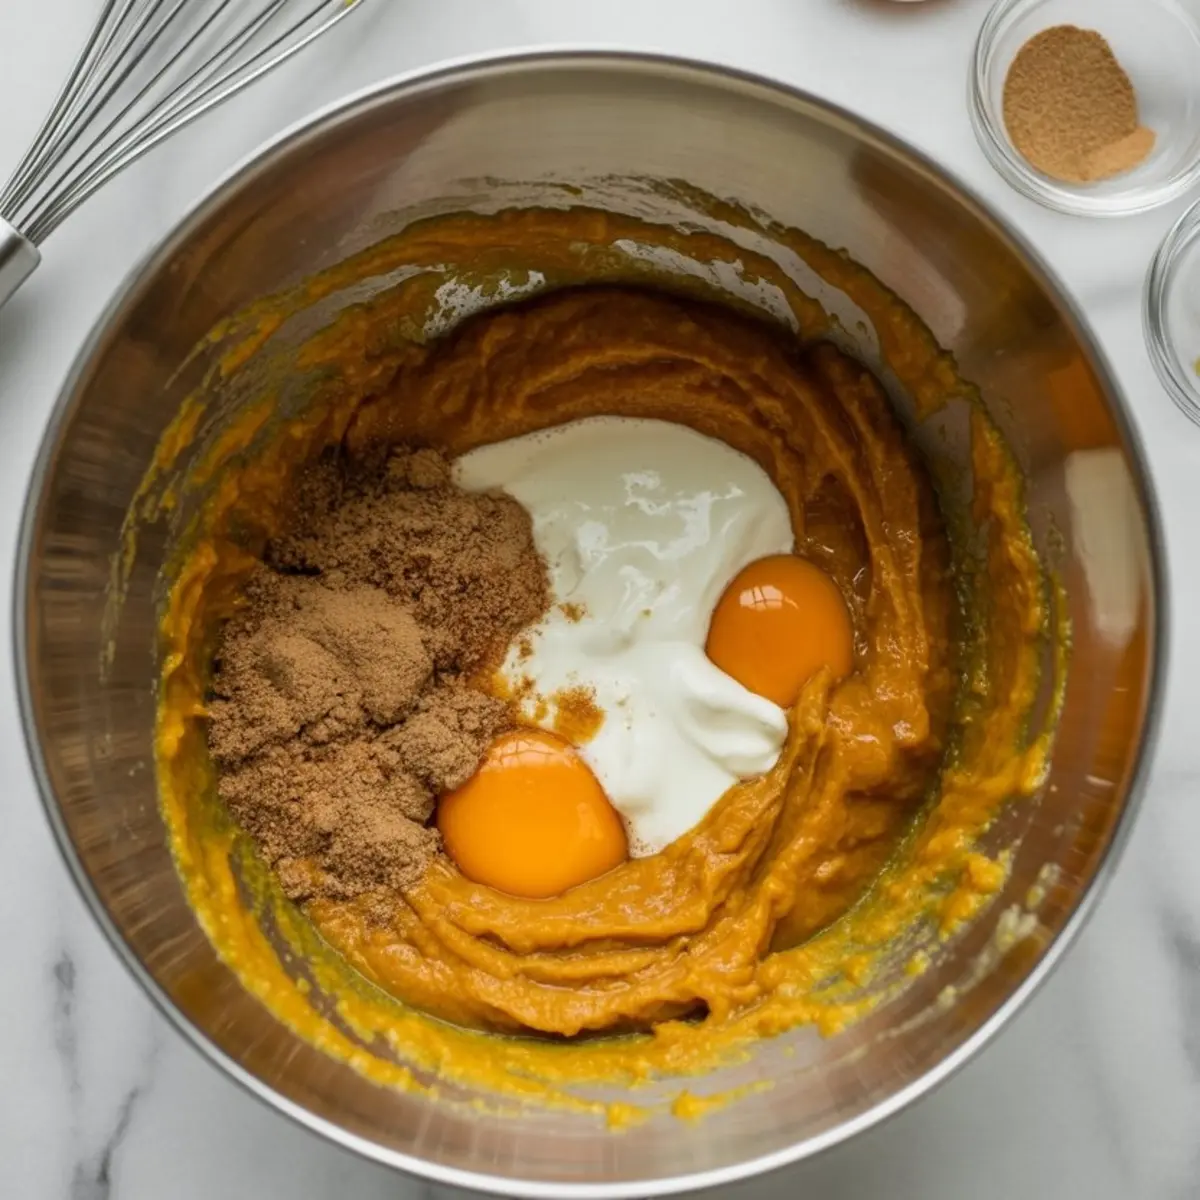
Use canned pure pumpkin, not pie filling. The texture matters here. I whisk the pumpkin and brown sugar together first. That breaks down the fibrous texture before adding eggs and dairy.
Spices go in after the wet ingredients. Cinnamon, ginger, nutmeg, and cloves—this combination gives depth without overwhelming the custard. The vanilla rounds it out. For a brighter finish, I’ve added a pinch of salt to cut through the sweetness.
Heavy cream or full-fat evaporated milk both work. I’ve tested both in these bars.
Ingredient Comparison: Heavy Cream vs. Evaporated Milk
Heavy cream yields a silkier, richer filling. Evaporated milk gives a slightly firmer set and a more nostalgic flavor—closer to old-school pumpkin pie. If you plan to serve chilled, use cream. For firm bars that travel well, I go with evaporated milk.
Baking and Cooling for the Best Texture
After pre-baking the crust, pour the filling directly over it while still warm. This helps the layers bond without separation. Bake just until the center stops jiggling. That’s key. Overbaking leads to cracks and a rubbery custard.
Cooling happens in two phases. First, at room temperature until fully cool. Then, into the fridge for at least two hours.
Don’t rush this part. Cooling allows the structure to firm up so each square slices neatly. I use a hot knife wiped clean between cuts for sharp edges. This method works for Pumpkin Cheesecake as well.
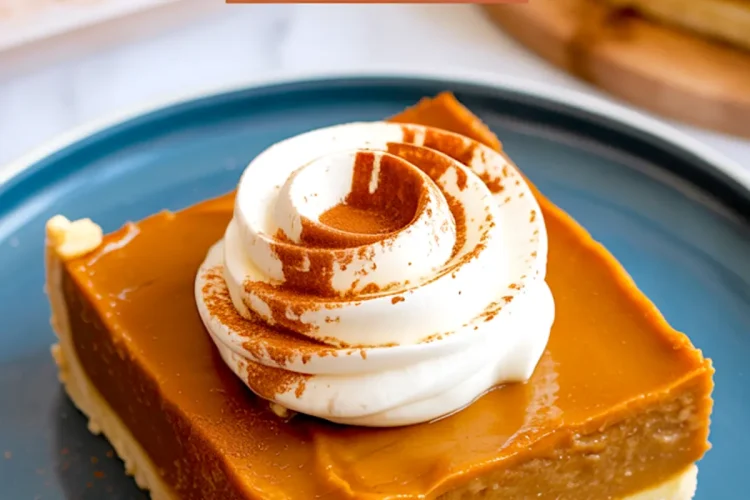
Serving Tips for a Clean Presentation
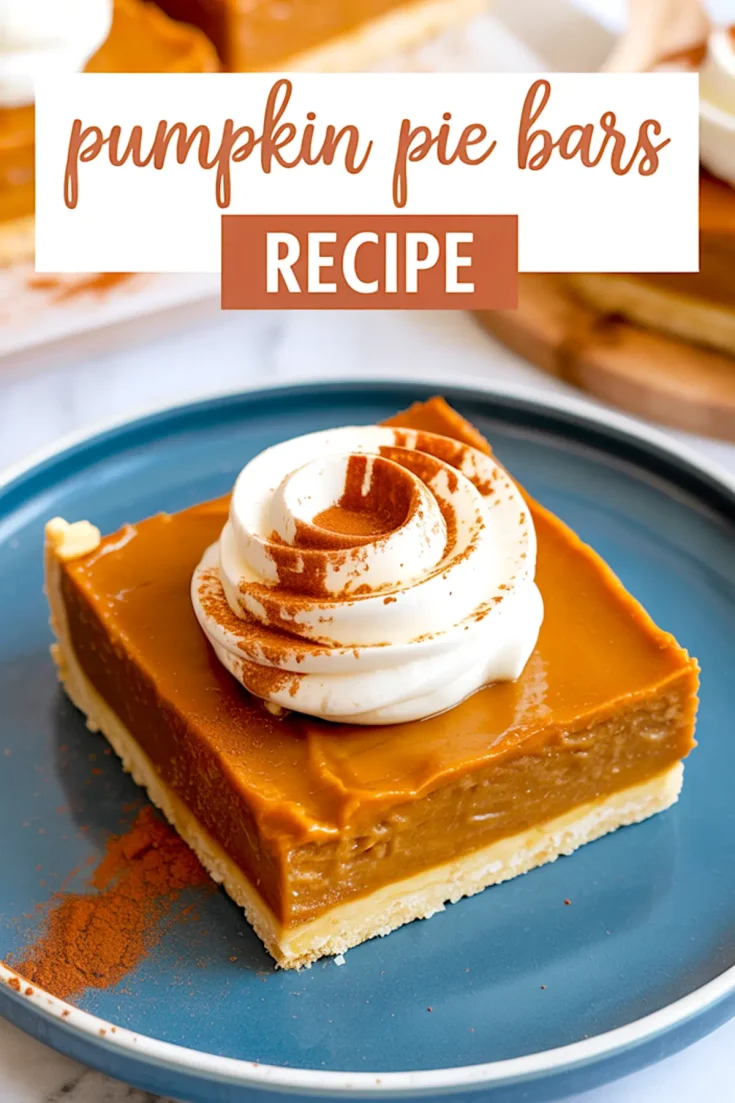
I serve these bars chilled with a dollop of whipped cream. They hold shape well even at room temperature for an hour or two. You can cut them into bite-size squares for dessert boards or keep them full-size for plated servings.
For fall gatherings, I’ve stacked them on cake stands with cinnamon sticks and pumpkin seeds scattered nearby. It brings out their color and texture. These bars also freeze well, which puts them ahead of most Pumpkin Desserts.
A sealed container in the fridge keeps them fresh for up to four days.
Related Recipes for Fall Baking
Looking to fill your dessert table with more than one pumpkin treat? You’ll also like my Pumpkin Cupcakes with cream cheese frosting. They’re lighter but pack strong flavor.
You can also check out more Easy Pumpkin Desserts to plan a full seasonal spread.
Why This Recipe Works Every Time
The structure holds. The texture stays creamy but sliceable. The flavor improves after resting. Most importantly, you skip pie crust stress and gain consistency across every square.
I’ve used this method in test kitchens and casual holiday kitchens. It adapts well to different pans and spice blends. The shortbread base pairs well with apple, sweet potato, and even chocolate variations.
If you’re searching for a bar recipe that delivers the flavor of traditional pumpkin pie in a more manageable format, this one belongs in your folder.
Save and Share Your Results
Save this Pumpkin Pie Bars recipe on Pinterest so you can find it during fall baking season. It’s one of those go-to desserts you’ll use again and again.
Tried it? Let me know in the comments how it turned out for you. If you added your own spin extra spice, a cream cheese swirl—I’d love to hear how it went. This space is for swapping notes and sharpening recipes.
Pumpkin Pie Bars Recipe
Creamy spiced filling baked over a buttery shortbread crust and cut into easy-to-serve squares. These bars offer the flavor of traditional pumpkin pie with a simplified method and crowd-friendly format.
Ingredients
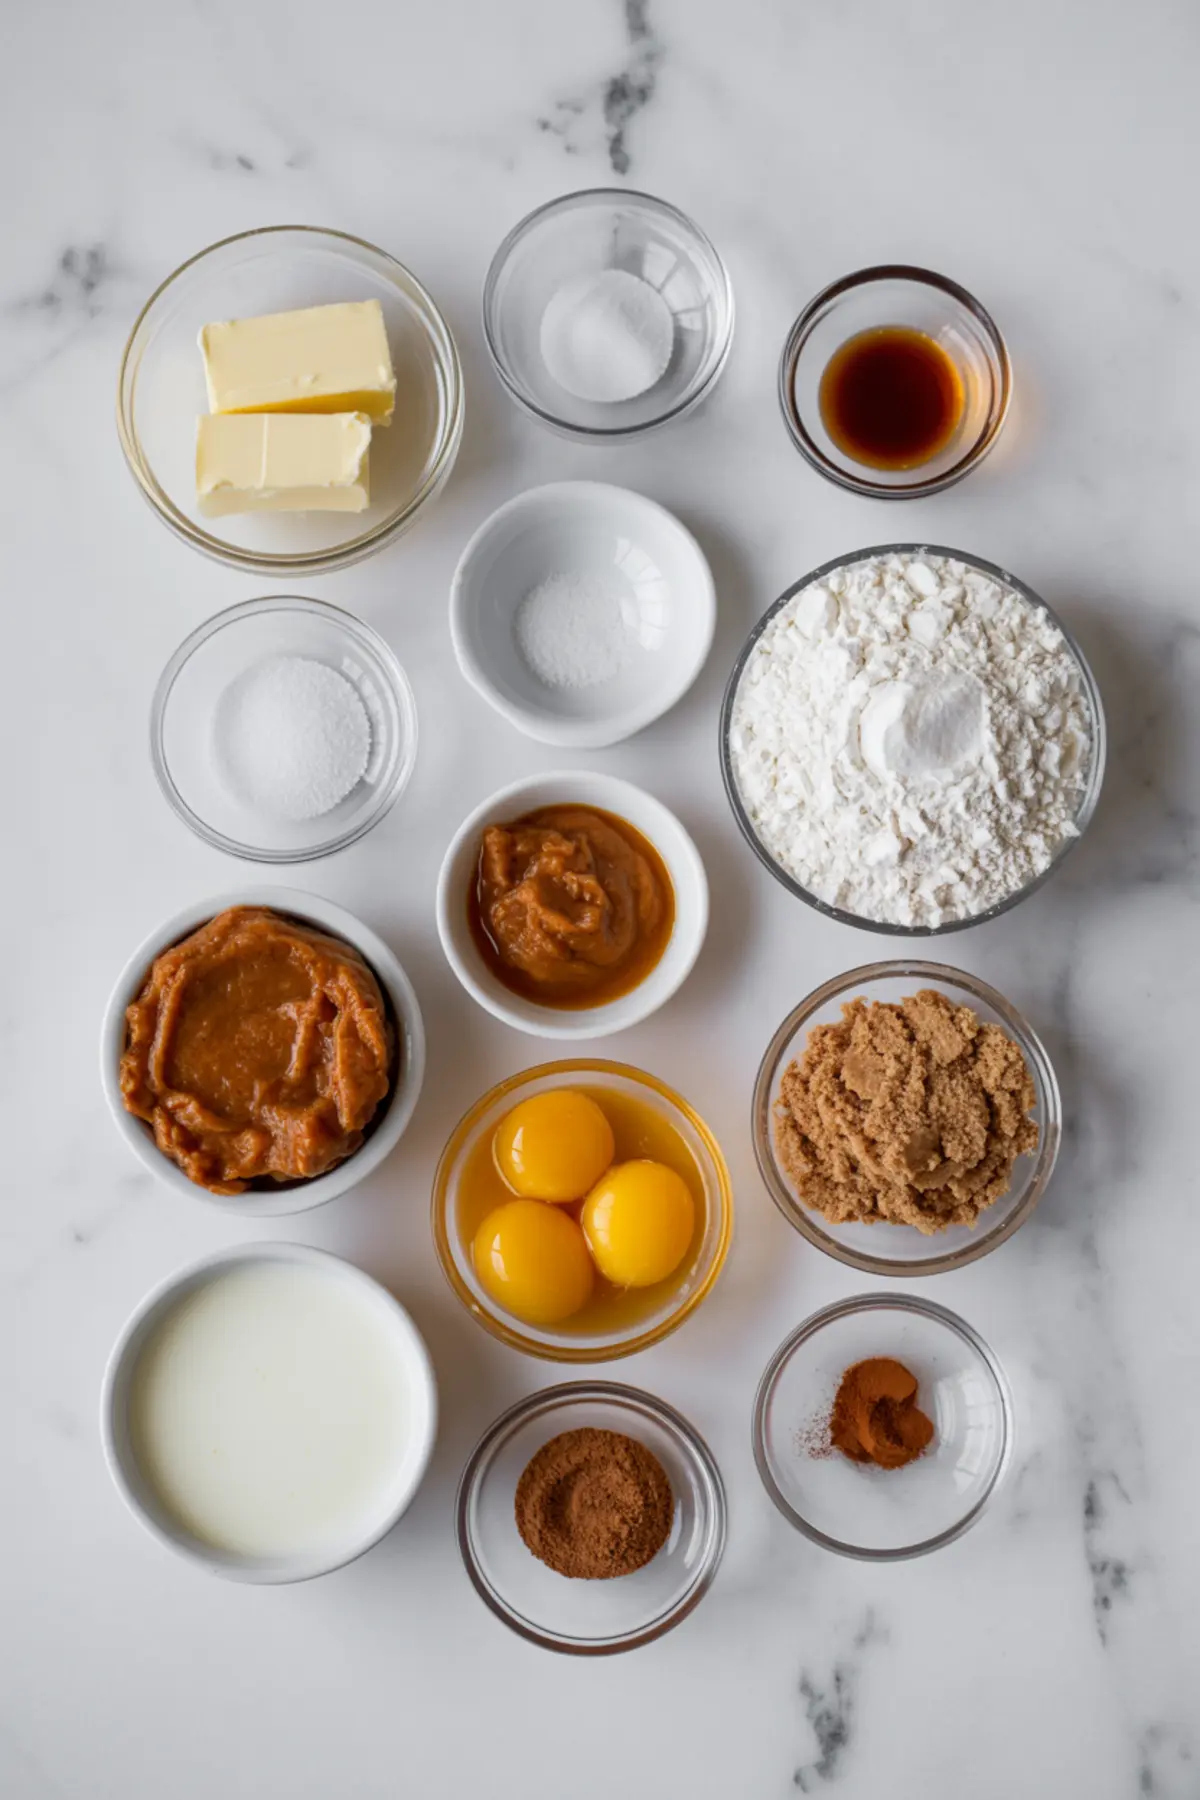
- FOR THE CRUST
- 1 cup (2 sticks) unsalted butter, melted
- 1/2 cup granulated sugar
- 2 teaspoons vanilla extract
- 1/2 teaspoon salt
- 2 cups all-purpose flour
- FOR THE PUMPKIN FILLING
- 1 (15-ounce) can pure pumpkin puree (not pumpkin pie filling)
- 3/4 cup packed brown sugar
- 3 large eggs
- 1 cup heavy cream (or full-fat evaporated milk)
- 1 teaspoon cinnamon
- 1/2 teaspoon ground ginger
- 1/4 teaspoon ground cloves
- 1/4 teaspoon nutmeg
- 1/4 teaspoon salt
- 1 teaspoon vanilla extract
Instructions
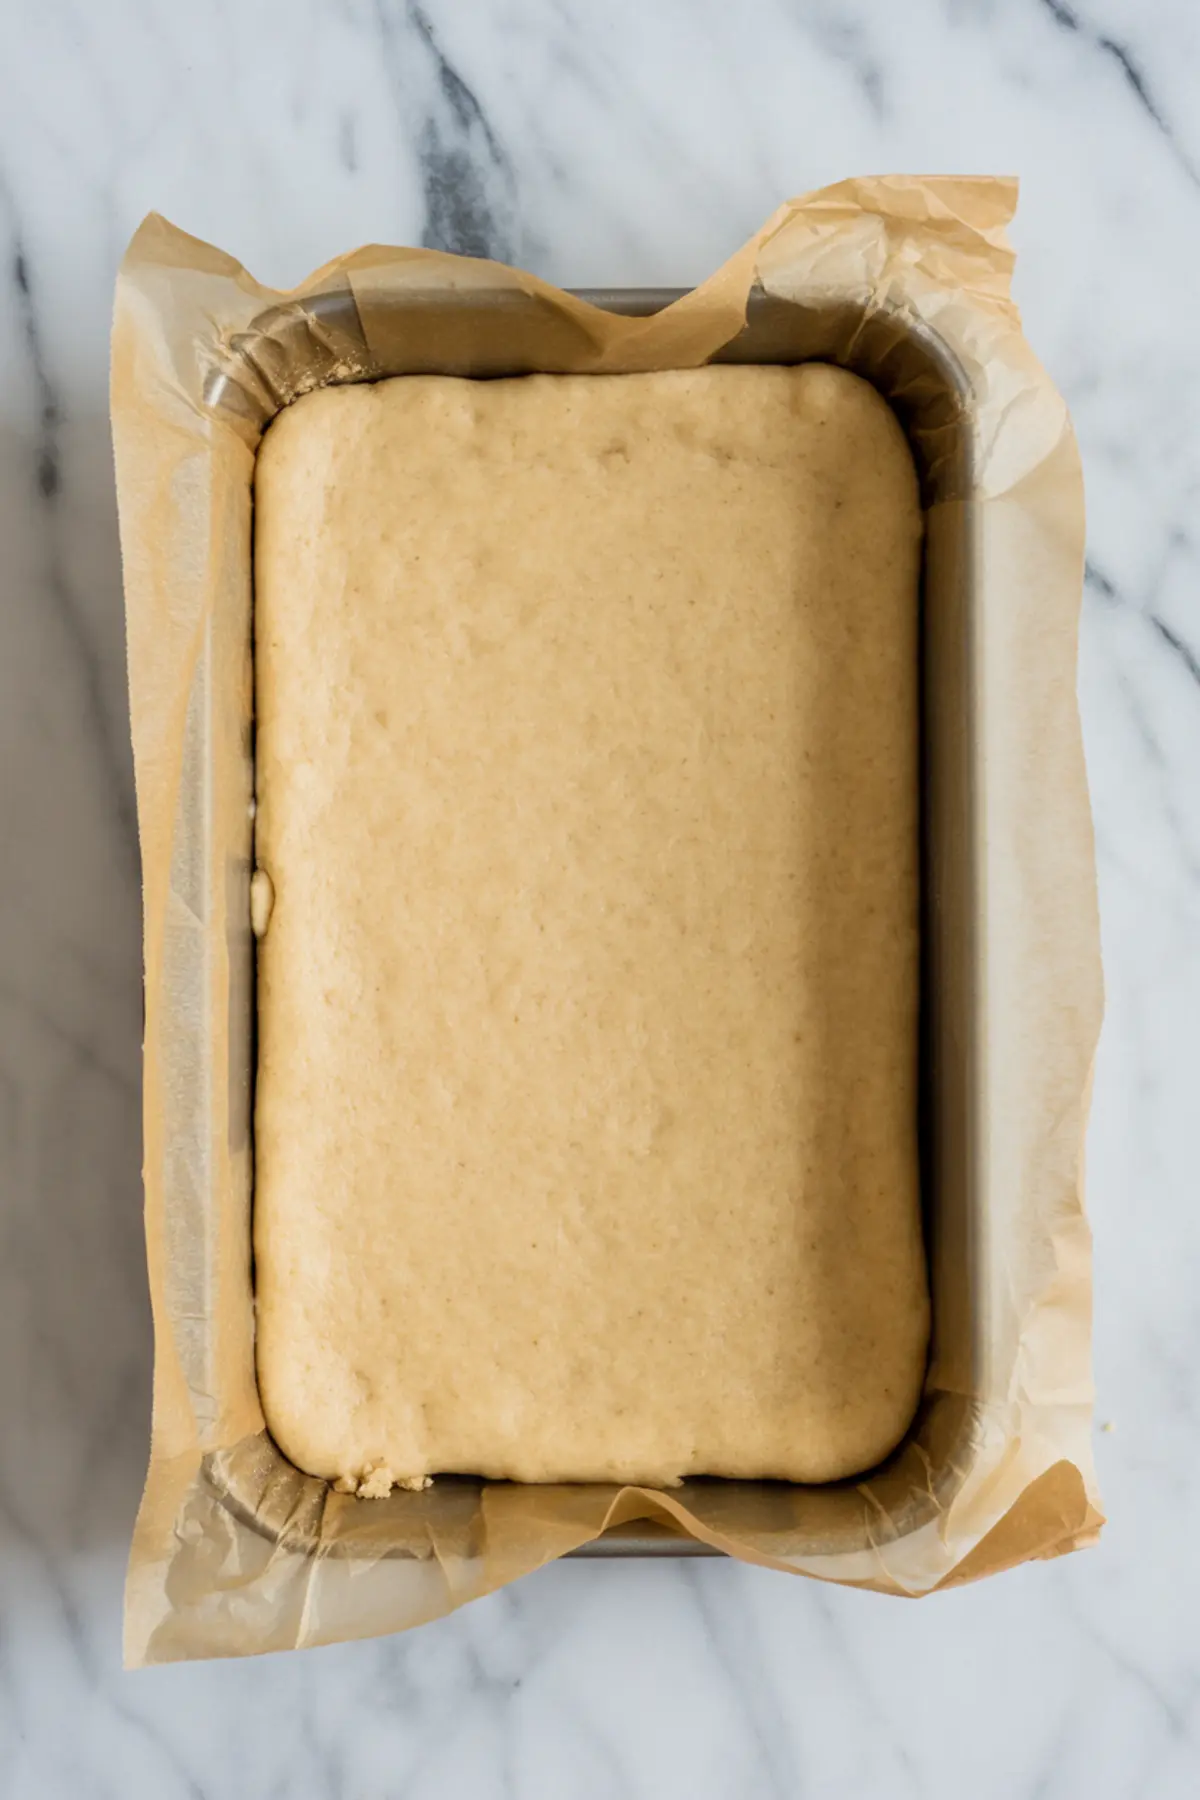
- PREHEAT AND PREP: Preheat the oven to 350°F (175°C). Line a 9x13-inch baking pan with parchment paper, leaving an overhang on the sides to make lifting the bars out easier after baking.
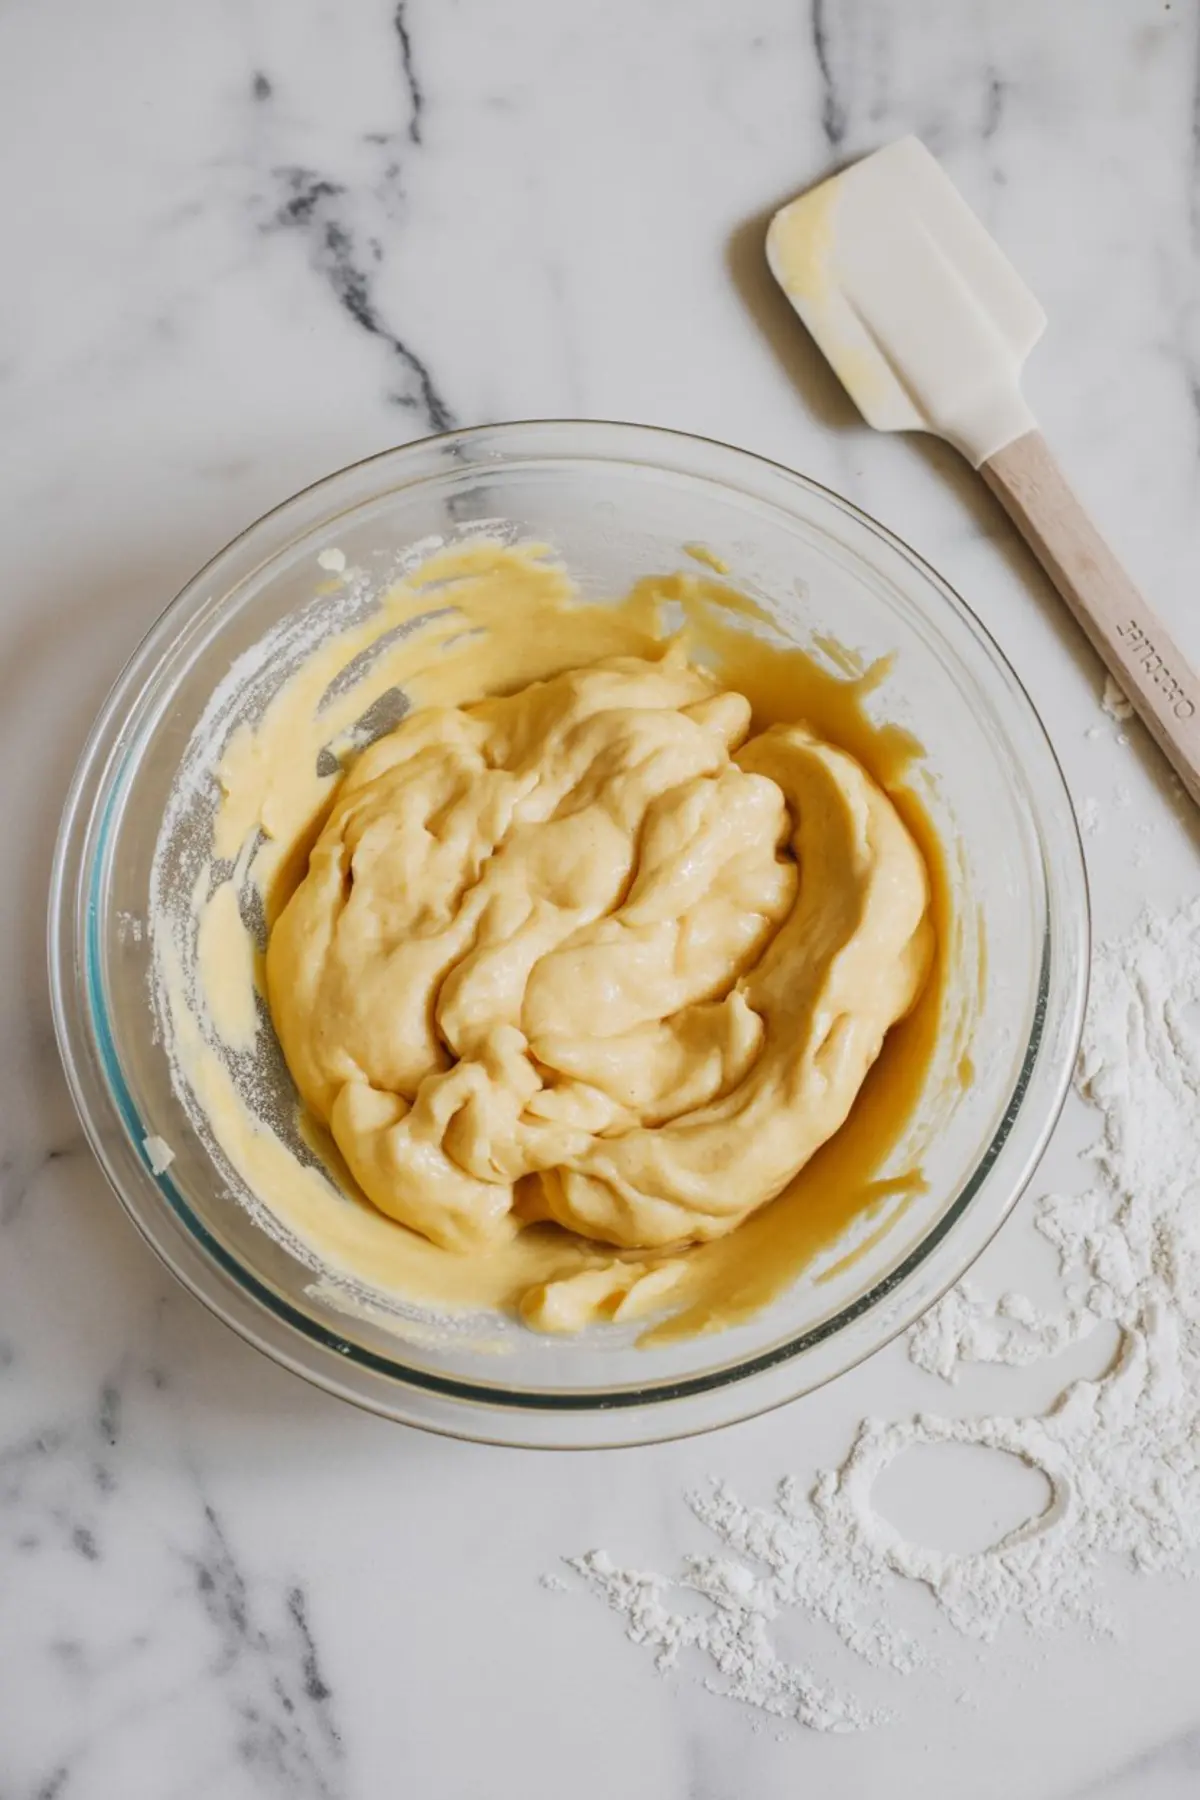
- MAKE THE CRUST: In a medium bowl, stir together the melted butter, sugar, vanilla extract, and salt until smooth. Add the flour and mix until a soft dough forms. Press the dough evenly into the bottom of the prepared pan using your hands or the bottom of a measuring cup. Bake for 15 to 18 minutes, or until the edges begin to turn golden. Remove from the oven and set aside.
- MAKE THE FILLING: In a large mixing bowl, whisk together the pumpkin puree and brown sugar until smooth. Add the eggs and whisk again until fully incorporated. Stir in the cream, cinnamon, ginger, cloves, nutmeg, salt, and vanilla extract until well blended.
- BAKE THE BARS: Pour the pumpkin filling over the warm crust and spread it evenly with a spatula. Return the pan to the oven and bake for 35 to 40 minutes, or until the center is set and does not jiggle when gently shaken. Remove from the oven and let cool completely at room temperature, then refrigerate for at least 2 hours to allow the filling to firm up.
- SLICE AND SERVE: Once fully chilled, use the parchment overhang to lift the bars out of the pan. Slice into squares using a sharp knife, wiping the blade clean between cuts for neat edges. Serve chilled or at room temperature.
Notes
Bars can be stored in the refrigerator for up to 4 days. For clean slices, use a hot knife and wipe it clean after each cut. Whipped cream is optional but complements the spiced filling well.
Nutrition Information
Yield
12Serving Size
1Amount Per Serving Calories 260Total Fat 10gSaturated Fat 6gTrans Fat 0gUnsaturated Fat 3gCholesterol 71mgSodium 168mgCarbohydrates 39gFiber 2gSugar 21gProtein 5g