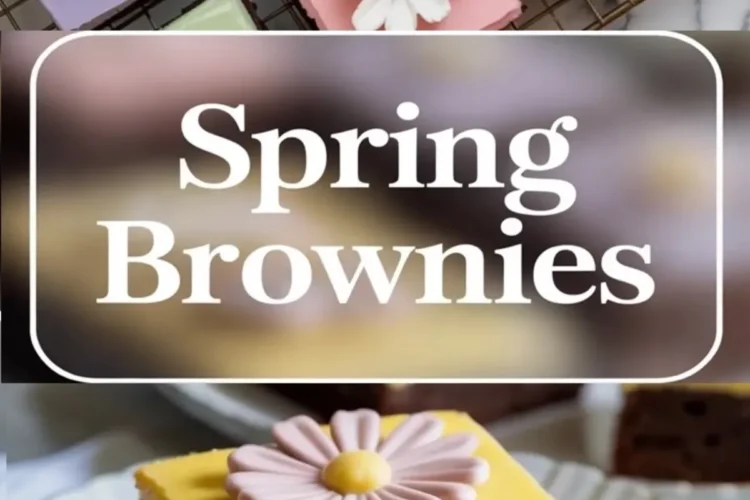
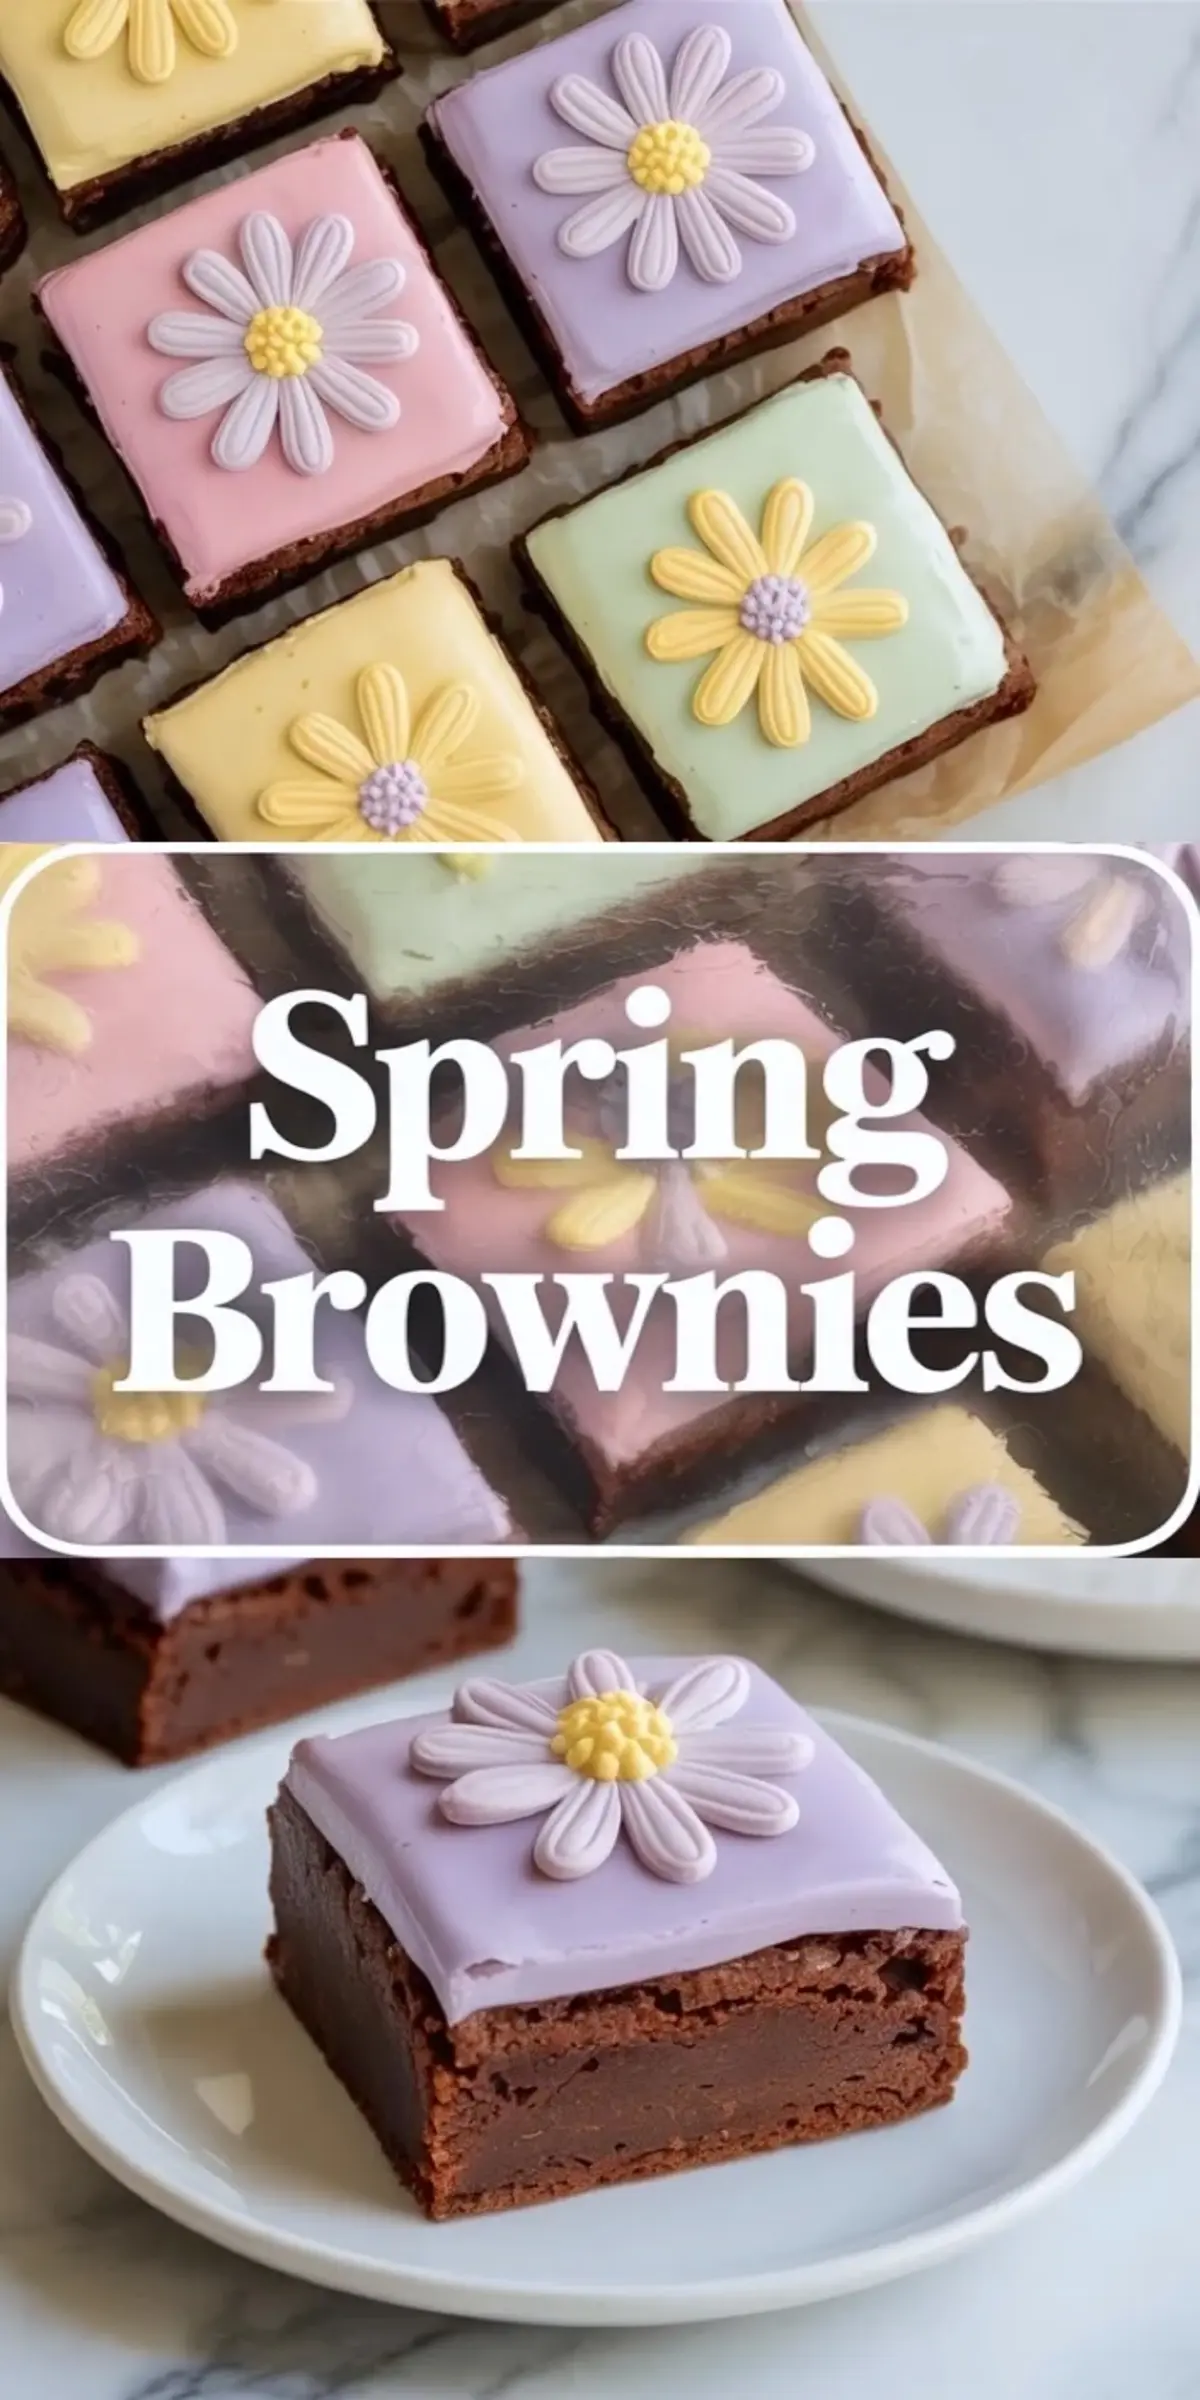
These spring brownies feature a dense fudgy base topped with a pastel glaze and simple daisy decorations, which makes them ideal for spring brownies, spring chocolate desserts, easter brownie ideas, and bake sale stuff. You get deep cocoa flavor under a soft colorful finish, which turns basic squares into decorated brownies that fit any brownie sale and any list of things to bake for friends.
The ratio of one cup melted butter to a blend of granulated and brown sugar creates a glossy batter and a dense crumb. I rely on this balance because fat coats the flour and limits gluten development, which keeps the texture rich and tight instead of airy, much like the structure I build in my Chocolate Mousse Brownies.
Three eggs bind the mixture and give gentle lift without turning the base into cake. I whisk each egg fully into the sugar mixture because that shine on top signals proper emulsification, and I look for that shine every time.
Ingredients That Shape Flavor
Unsalted butter delivers clean richness and allows me to control salt precisely. I choose a good cocoa powder because cocoa defines the entire brownie, and I apply the same standard I use in my Frosted Mini Egg Easter Brownies where chocolate must lead the flavor.
Brown sugar adds moisture and a soft caramel tone that supports spring desserts chocolate. Semi sweet chocolate chips melt into small pockets, and I fold them gently so they streak through the batter rather than sink to the bottom.
Step By Step From Bowl To Pan
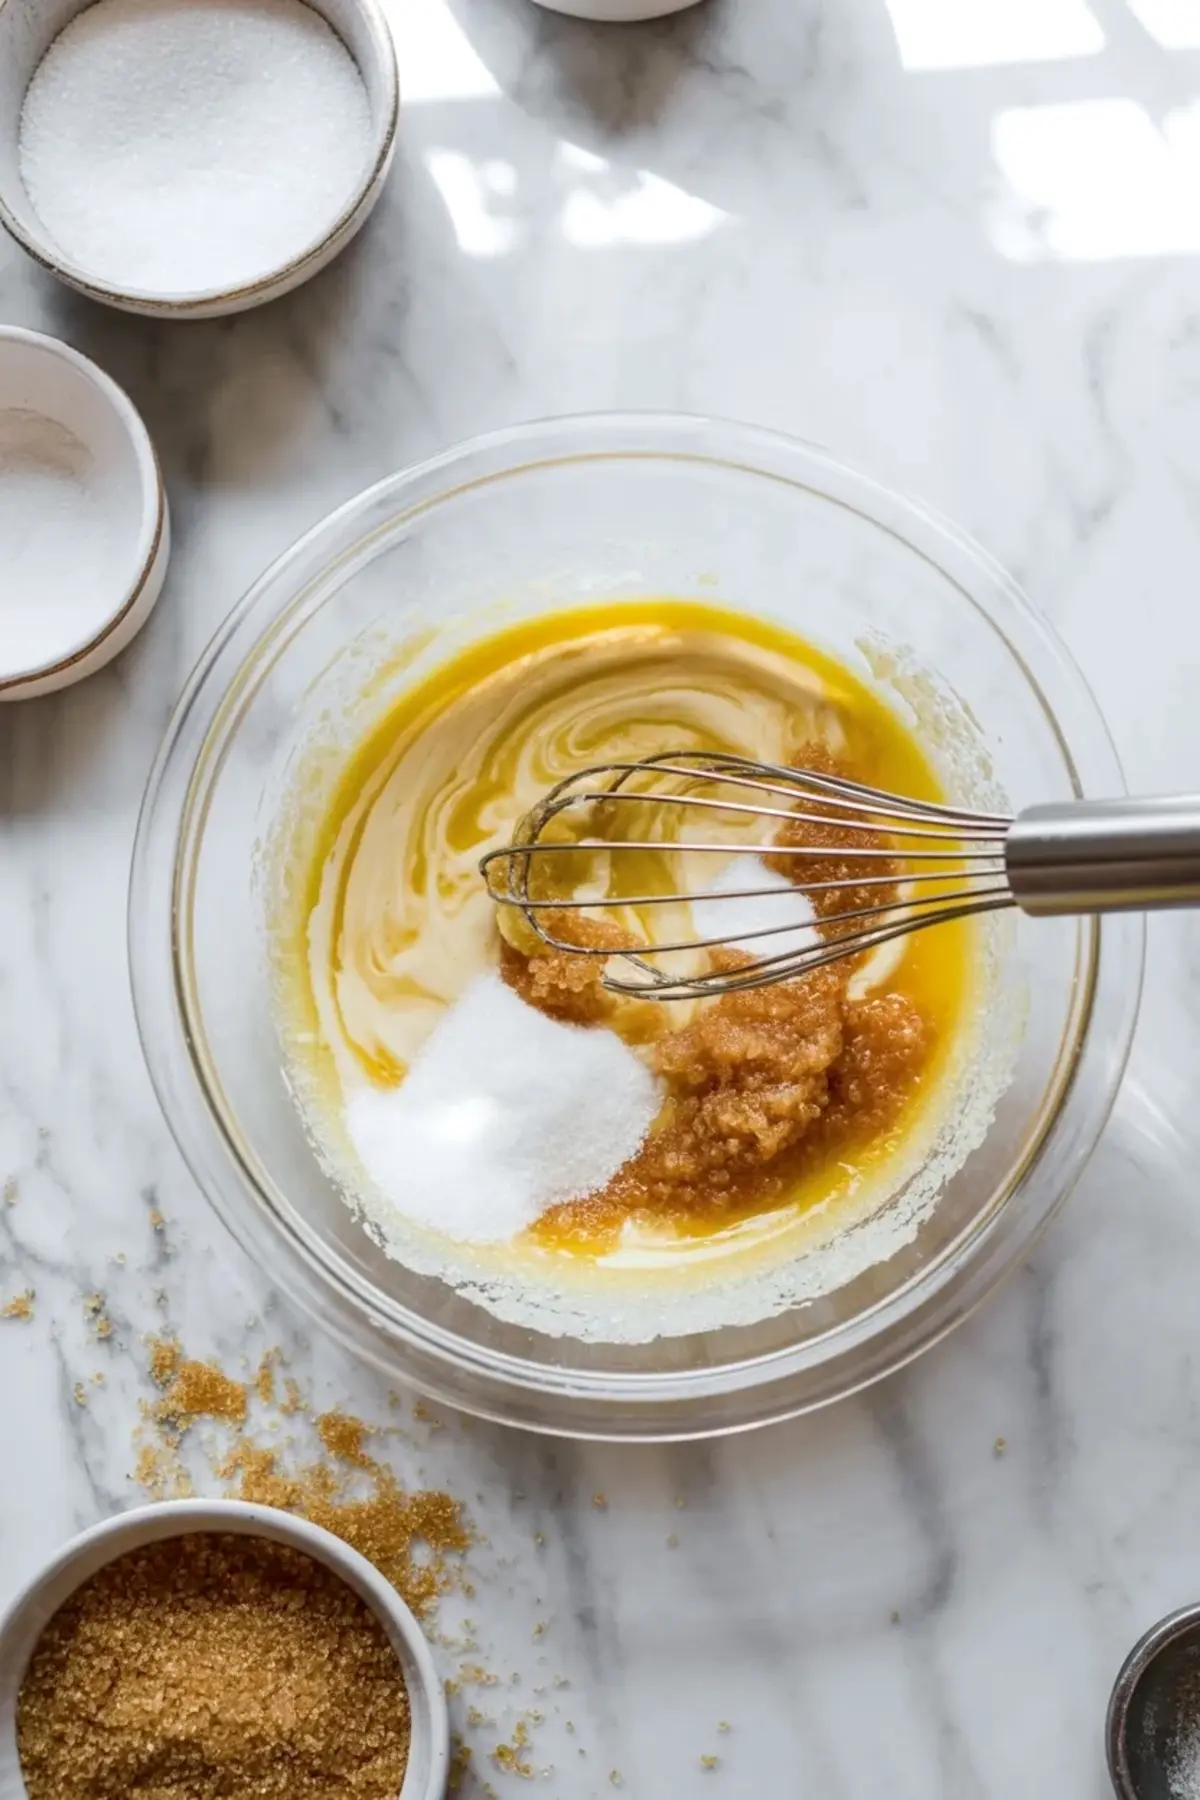
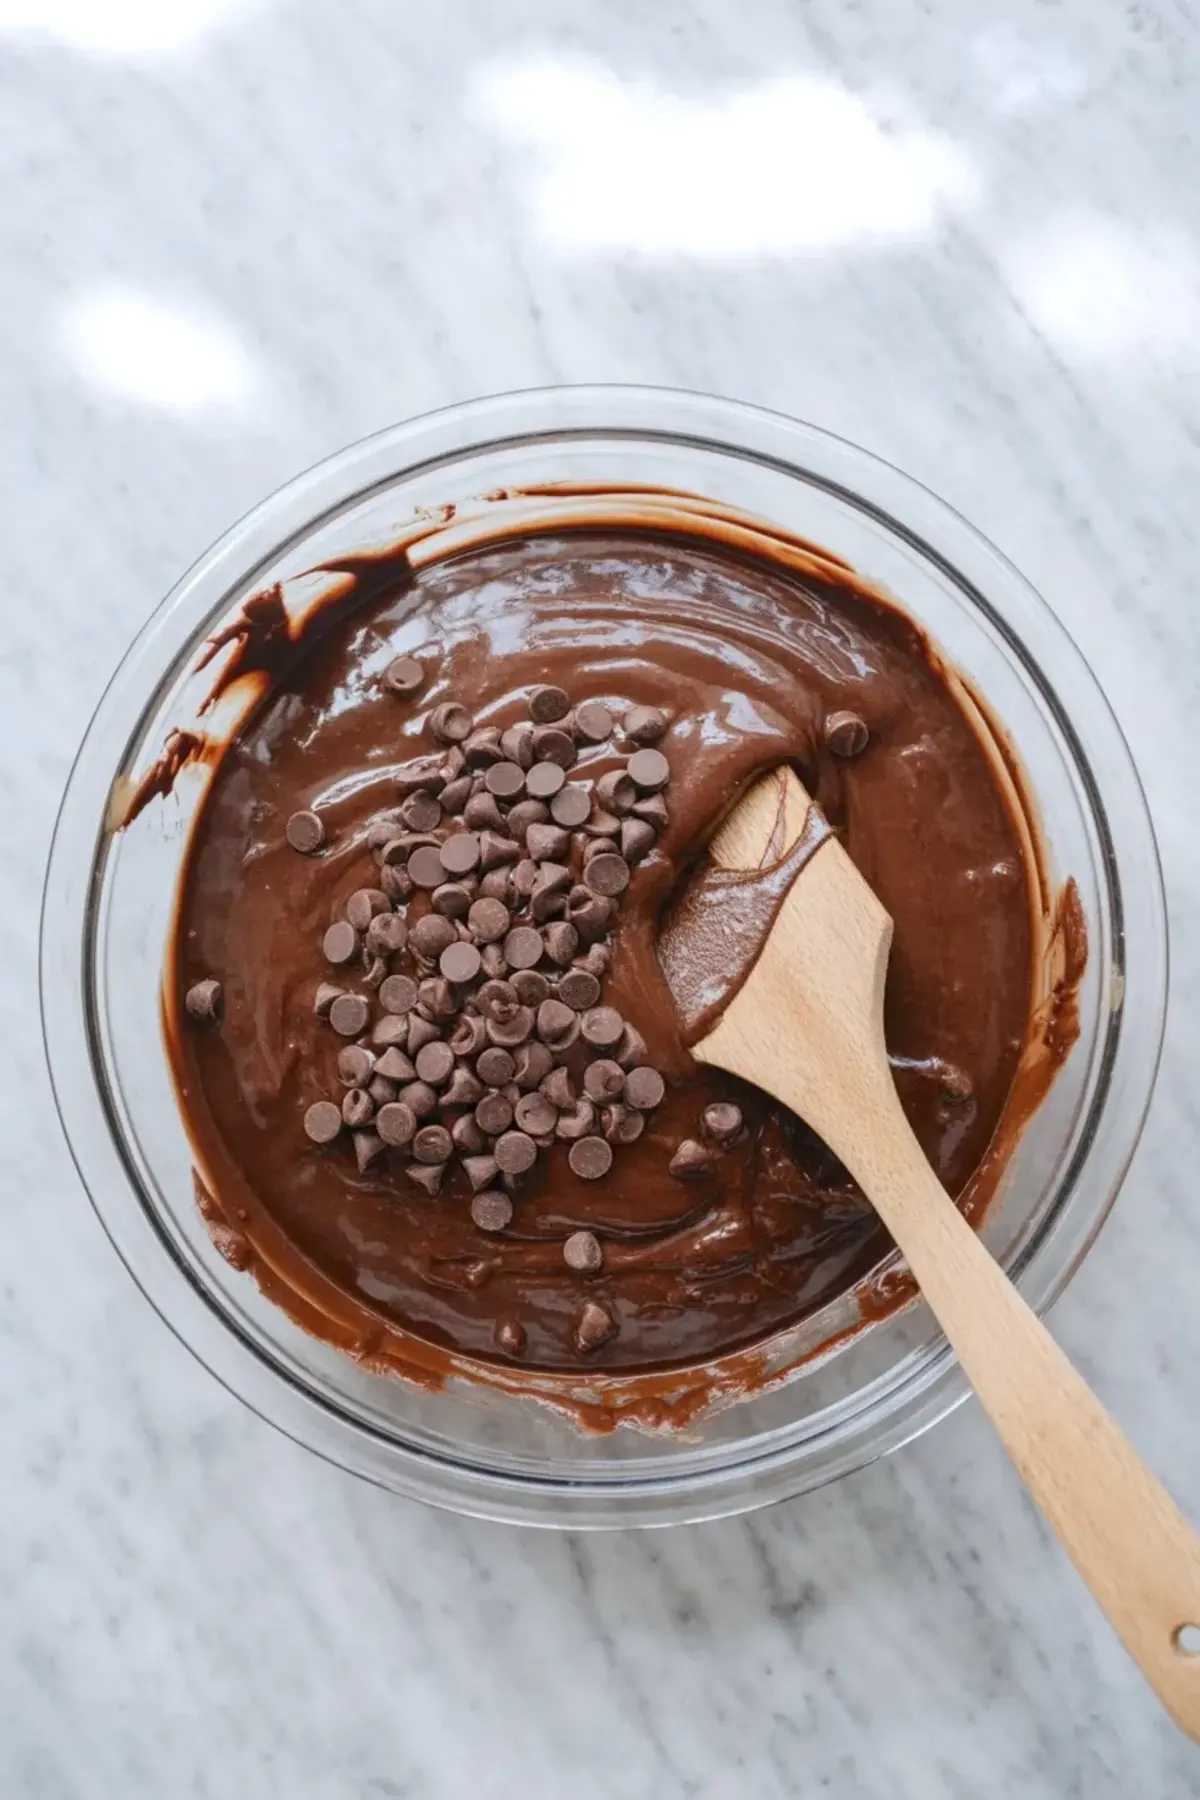
Whisk melted butter with both sugars until the mixture looks thick and glossy. Add the eggs one at a time and whisk well after each addition, then stir in vanilla so the batter smells warm and full.
Sift cocoa, flour, salt, and baking powder into the bowl and fold just until the flour disappears. Spread the batter evenly in a lined pan and bake around 30 minutes, until the center sets and a toothpick shows moist crumbs rather than wet batter.
The Cocoa Decision
Cocoa powder determines the depth of these spring baking ideas desserts. I sift it because even small lumps can create dry streaks, and that detail changes the final bite more than people expect.
Natural cocoa gives a brighter chocolate note that pairs well with pastel glaze. If you enjoyed the flavor contrast in my Fudgy Coconut Brownies, you will notice how cocoa choice shifts the tone of the whole tray.
Knowing When They Are Ready
The edges should look set and slightly pulled from the pan, while the center feels soft but stable. A toothpick should carry a few moist crumbs, and I trust that sign more than exact minutes on the timer.
If the center collapses deeply after cooling, the brownies needed more time. If the crumb feels dry and crumbly, the pan stayed in the oven too long, so watch that middle closely.
Fixing Common Issues
If the texture turns cakey, overmixing likely caused extra gluten development. Stir gently and stop as soon as the dry ingredients blend to maintain that dense structure.
If the glaze spreads too thin, add powdered sugar a spoon at a time until it thickens. If it feels stiff, add milk drop by drop so it flows slowly and coats the surface evenly for clean decorating brownies ideas.
Creative Variations For Spring
Swirl pastel shades together for bold brownie ideas decoration that stands out on a dessert table. Press candy eggs into the glaze for classic easter brownie ideas that attract attention at any brownie sale.
Add toasted coconut for light texture or chopped nuts for contrast. White chocolate drizzle brings extra sweetness, and many friends request that version during spring gatherings.
How I Store And Plan Ahead
Keep these spring brownies in an airtight container at room temperature for up to three days. The glaze firms gently and keeps the top soft, which helps when packing bake sale stuff.
Refrigerate for up to five days and allow them to return to room temperature before serving. Freeze the undecorated base for up to two months and glaze after thawing for fresh decorated brownies anytime.
Practical Notes From My Kitchen
Line the pan with parchment that hangs over two sides so you can lift the slab easily. Use gel food coloring because it keeps the glaze thick and bright without changing consistency.
Let the brownies cool completely before glazing so the colors stay defined. Wipe the knife between cuts to keep the edges neat, especially if you plan to gift them as things to bake for friends.
Serving Ideas For Spring Chocolate Desserts
Arrange squares on a pastel platter for spring chocolate desserts at brunch. Stack them in small boxes for thoughtful gifts or add them to a dessert board with fruit and whipped cream.
I often place them beside fresh berries for contrast. They also pair well with coffee during afternoon gatherings, and guests always comment on the bright decorated brownies.
Save These Spring Brownies For Later
Save this spring brownies recipe to your spring baking ideas desserts board so you can return to it for easter brownie ideas and seasonal celebrations. Share in the comments how you decorated your batch or ask any questions, because I love seeing your decorated brownies and hearing how they turned out.
Spring Brownies Recipe
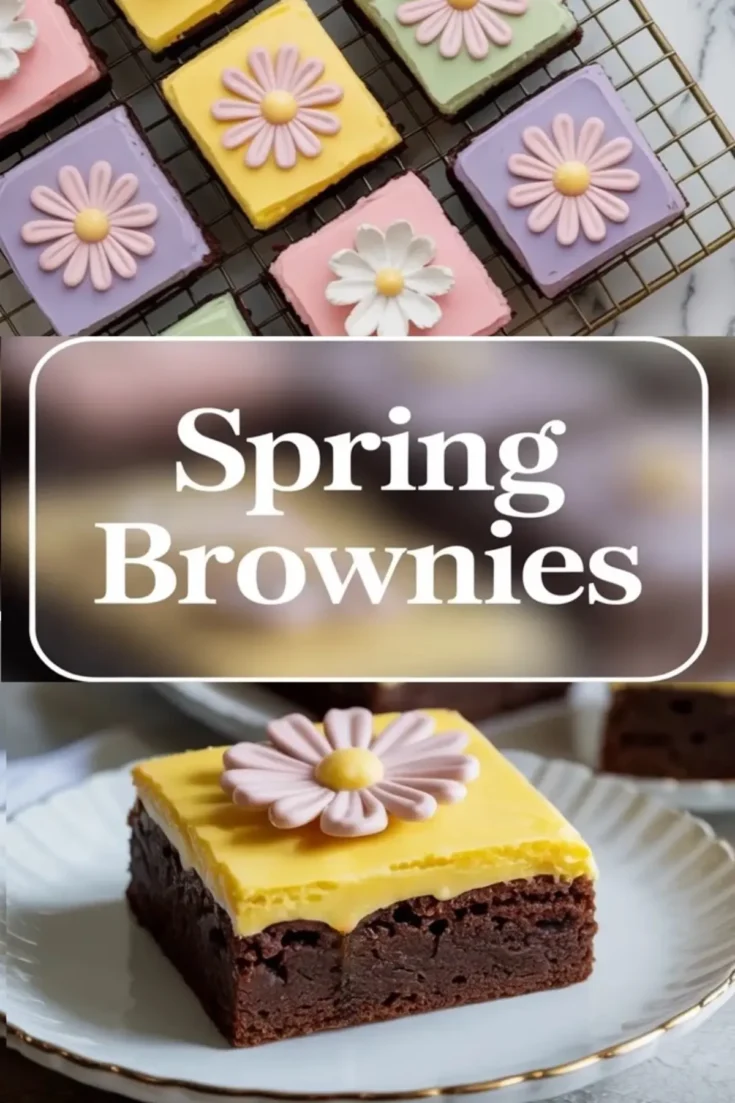
These colorful Spring Brownies bring fresh energy to classic chocolate treats. Topped with pastel candies and swirls of frosting, they stand out among festive Spring Chocolate Desserts and creative Spring Baking Ideas Desserts.
Use fun toppings inspired by Easter Brownie Ideas and playful Decorating Brownies Ideas to transform simple squares into bright Decorated Brownies. They are perfect Bake Sale Stuff, eye catching at any Brownie Sale, and thoughtful Things To Bake For Friends during spring gatherings.
Add these cheerful Spring Desserts Chocolate creations to your seasonal baking list for an easy way to refresh traditional brownies with fun Brownie Ideas Decoration.
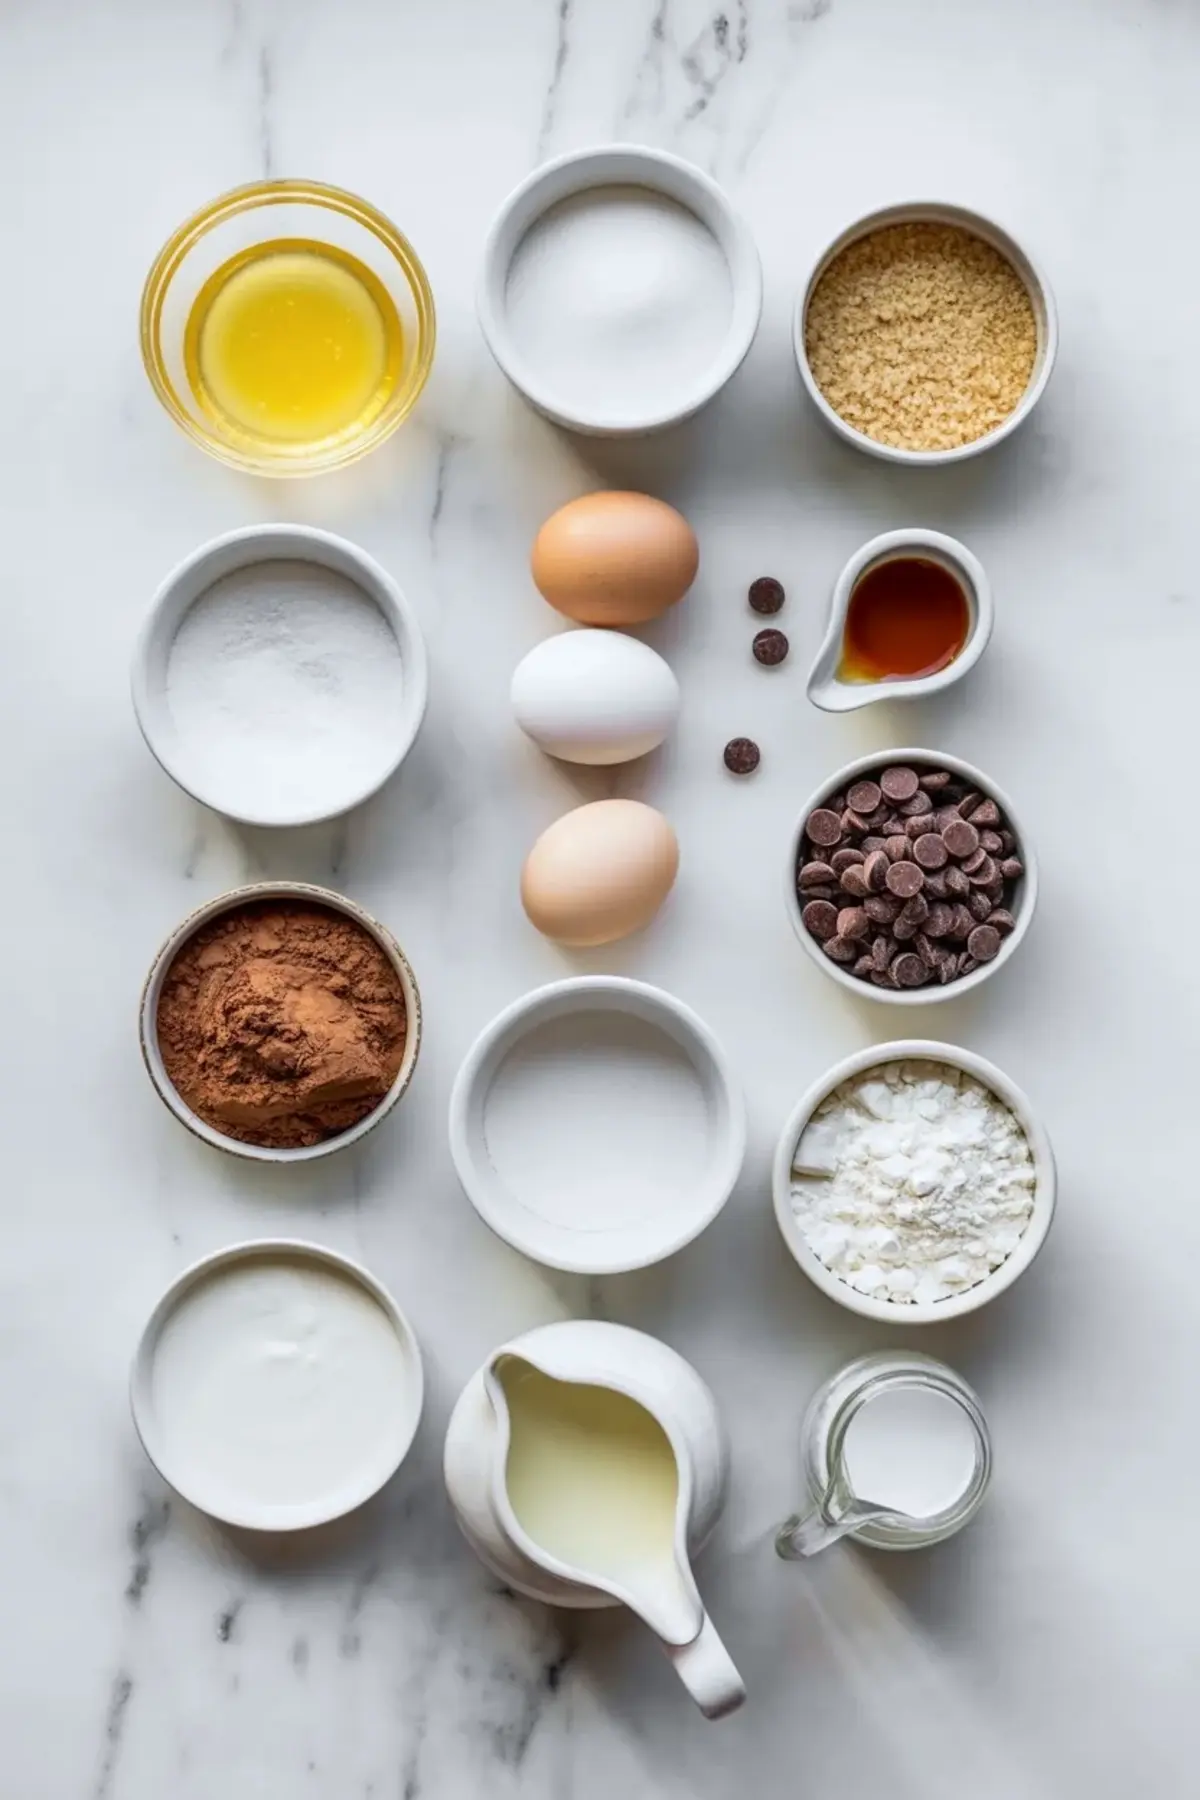
Ingredients
- FOR THE FUDGY BROWNIE BASE
- 1 cup (226 g) unsalted butter, melted
- 1 ¼ cups (250 g) granulated sugar
- ¾ cup (150 g) light brown sugar
- 3 large eggs, room temperature
- 1 tablespoon vanilla extract
- ¾ cup (75 g) unsweetened cocoa powder
- 1 cup (125 g) all-purpose flour
- ½ teaspoon salt
- ½ teaspoon baking powder
- ½ cup (90 g) semi-sweet chocolate chips (optional)
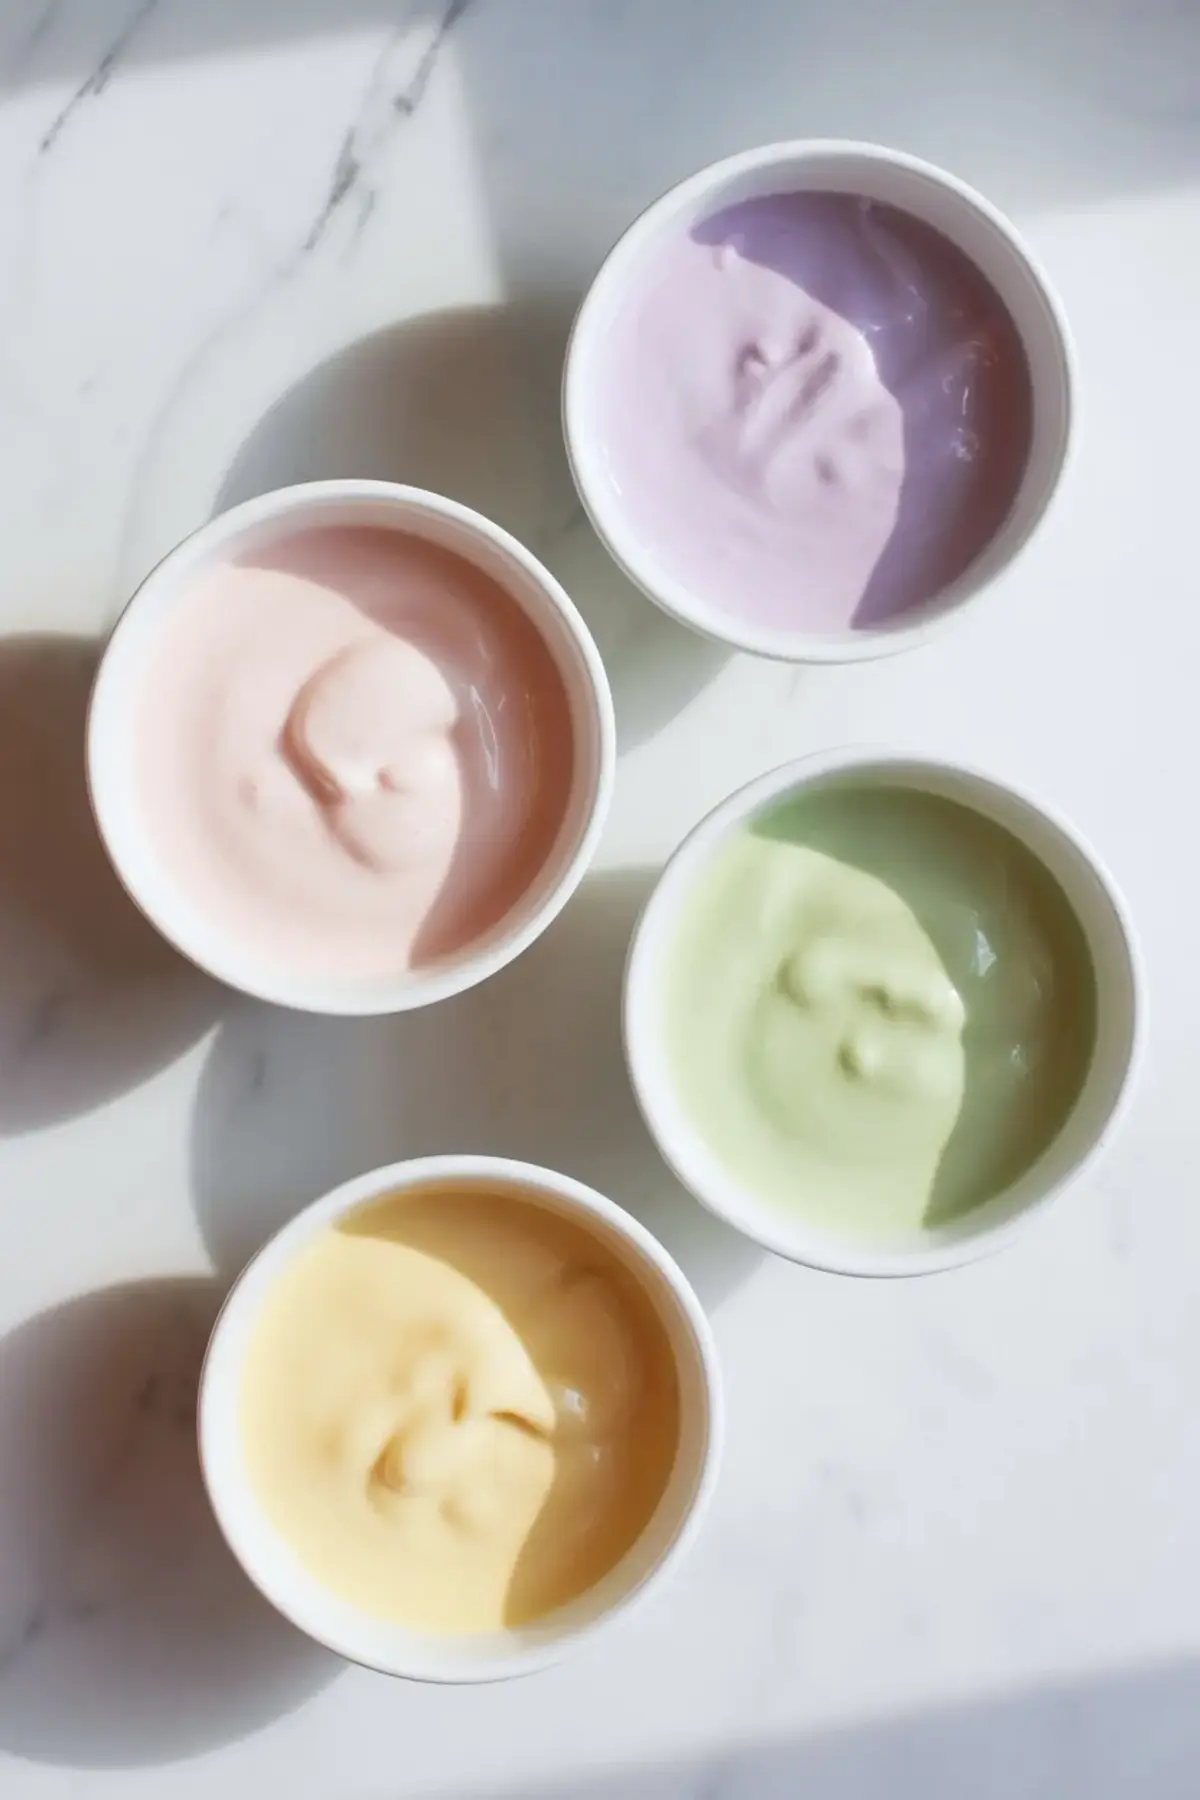
- FOR THE PASTEL GLAZE
- 2 cups (240 g) powdered sugar
- 3–4 tablespoons heavy cream or milk
- 1 teaspoon vanilla extract
- Gel food coloring (pink, lavender, yellow, mint, or preferred spring shades)
- FOR THE DAISY DECORATIONS (OPTIONAL)
- White fondant or royal icing
- Yellow candy pearls or piped yellow icing for flower centers
Instructions
PREPARE THE PAN: Preheat the oven to 350°F (175°C). Line an 8x8-inch baking pan with parchment paper, leaving an overhang on two sides to make lifting easier after baking. Lightly press the parchment into the corners so the batter spreads evenly.
MIX THE WET INGREDIENTS: In a large mixing bowl, whisk together the melted butter, granulated sugar, and brown sugar until smooth and glossy. Add the eggs one at a time, whisking thoroughly after each addition to create a thick, shiny mixture. Stir in the vanilla extract until fully incorporated.
ADD THE DRY INGREDIENTS: Sift in the cocoa powder, all-purpose flour, salt, and baking powder. Use a spatula to gently fold the mixture together just until the flour disappears. Avoid overmixing to maintain a dense, fudgy texture. Fold in the chocolate chips if using.
BAKE THE BROWNIES: Pour the batter into the prepared pan and spread it into an even layer. Bake for 28–32 minutes, until the center looks set and a toothpick inserted into the middle comes out with a few moist crumbs but no wet batter. Remove the pan from the oven and allow the brownies to cool completely in the pan before decorating.
PREPARE THE PASTEL GLAZE: In a medium bowl, whisk together the powdered sugar, vanilla extract, and 3 tablespoons of cream or milk until smooth. Add additional liquid one teaspoon at a time until the glaze reaches a thick but pourable consistency. Divide the glaze into separate bowls if using multiple colors. Add a small amount of gel food coloring to each bowl and stir until evenly tinted.
GLAZE AND DECORATE: Spread or pour the glaze evenly over the fully cooled brownies. Use an offset spatula to smooth the surface. Allow the glaze to set for 20–30 minutes. Arrange fondant or royal icing daisies on top and gently press them into the glaze so they adhere. Let the topping firm completely before slicing. For clean edges, wipe the knife between each cut.
Notes
Gel food coloring works best because it maintains a thick glaze consistency.
Store brownies in an airtight container at room temperature for up to 3 days.
Refrigerate for longer storage, then bring to room temperature before serving for the best texture.